

Page 1

Information is subject to change without notice. Nortel
Networks reserves the right to make changes in design or
components as progress in engineering and manufacturing may
warrant. This equipment complies with appropriate clauses of
CTR6, CTR10, CTR22 DECT specifications and meets the
requirements of the following EC Directives: Low Voltage
Directive (Safety) LVD 73/23/EEC, 93/68/EEC; and EMC
Directive 89/336/EEC, 92/31/EEC, 93/68/EEC. These limits
are designed to provide reasonable protection against harmful
inter-ference when the equipment is operated in a commercial
envi-ronment. This equipment generates, uses and can radiate
radio frequency energy, and if not installed and used in
accordance with the instruction manual, may cause harmful
interference to radio communications. Operation of this
equipment in a residential area is likely to cause harmful
interference in which case the user will be required to correct
the interference at their own expense.
Meridian 1, Companion and Mercator are trademarks of
Nortel Networks
Document Number: A0xxxxxx
xxxxxxxx
Document Release: Standard x.xx
Date: xxxx xxxx
Printed in Canada
USER GUIDE
C4010/4020 Cordless Handset
Page 2

2
Standard 2.00
Page 3

Table of contents
About this User Guide . . . . . . . . . . . . . . . . . . . . . . . . . . . . . . . . . . . . . . . 5
The C4010 handset .............................................................................................5
the C4010 Ex handset ......... .. ................................................ ........ .. ....................5
The C4020 handset .............................................................................................6
Safety . . . . . . . . . . . . . . . . . . . . . . . . . . . . . . . . . . . . . . . . . . . . . . . . . . . . 9
Explanat ion of header icons ...................................... ........ .. ........................ ......10
Terms you should know ..................................................................................... 10
Your cordless handset . . . . . . . . . . . . . . . . . . . . . . . . . . . . . . . . . . . . . 13
Your handset .................. ................. ................. ................. ................. ...............13
Displa y ic o ns .. ... ....... ....... ... ....... ....... ........ ....... ....... ....... ... ....... ....... ........ ....... .. 13
Hands e t fu n ct io n ke y ic o ns ..... .. ........ .. ........ ....... ....... ....... ........ ....... .. ........ ....... .. 14
Handset features . . . . . . . . . . . . . . . . . . . . . . . . . . . . . . . . . . . . . . . . . . 17
Turn the handset on ................... ........ .. ............... .. ............... .. ............... .. ...........17
Turn the handset off ................. .. ........ ............... .. ............... .. ............... .. .............17
Volume up/down ............................................................................................... 19
Pre-diali ng on hook ......... .. ................. ........ ......................................... ...............20
Last number redial . ....... ... ....... ....... ........ ....... ....... ........ ....... .. ........ ....... ....... ....... 20
Ending a c al l ... ....... ....... ........ ....... ....... ........ .. ....... ........ ....... ....... ....... ........ .. ....... 21
Dialing directory numbers/names ...................................................................... 23
Message waiti ng key ...... ......... ............... ......... ............... .. ...... .. ......... ............... .24
Meridian PBX features . . . . . . . . . . . . . . . . . . . . . . . . . . . . . . . . . . . . . 25
Succession Communication Server for
Enterprise (CSE 6500) fe atures . . . . . . . . . . . . . . . . . . . . . . . . . . . . . . 27
Business Communications Manager features . . . . . . . . . . . . . . . . . . 29
Answer a second cal l ............... ......... ........ .. ........................ ........ .. ........ ......... .29
Recov e ry of fi rs t pa r ty du ring a cal l .. ........ ....... ....... ... ....... ....... ....... ........ ....... .. 29
3-way con f e re n ce call duri ng a c al l .. ... ....... ....... ........ .. ....... ........ ....... ....... ....... 30
Toggle between two parties during a call ........................................................ 30
Transfer a call ................................................................................................. 30
Configuring the handset . . . . . . . . . . . . . . . . . . . . . . . . . . . . . . . . . . . . 31
Store nu m b e rs and na me s in the dir e ct o ry ... .. ... ....... ....... ........ ....... .. ........ ....... .. 31
Locate numbers and names in the directory ......................................................35
Change numbers and nam es in the directo ry ............ ............... ......... ........ ........36
Make a c al l fro m th e dir e ct o ry ... ... ....... ........ ....... ....... ....... ........ .. ....... ........ ....... .. 36
Ring volume ....................................................................................................... 37
Ring melody ....................................................................................................... 37
Hands e t na me on th e idl e di s pl a y .. ........ ....... .. ........ ....... ....... ........ ....... ....... ... .... 37
Key sound ..........................................................................................................38
Standard 2.00
3
Page 4

Table of contents
Auto answer .......................................................................................................38
Speed key ..........................................................................................................39
Range test ..........................................................................................................40
Envi ronment . .......... ....... .......... ......... ........ .......... ......... .......... ....... .......... .......... .. 40
Declare base ......................................................................................................41
Select language ........................................ ........................................................ .42
Lock and unlock the keypad ................................. ............................. ................42
Voice mail box one-touch access ................. .. ......... ...... .. ......... ...... .. ..................43
Useful information . . . . . . . . . . . . . . . . . . . . . . . . . . . . . . . . . . . . . . . . . 47
Batter ies .. ....... ..... ........ ....... ..... ....... ....... ........ ..... ....... ....... ..... ....... ........ ....... ..... ..47
Battery indic a to r ......... ....... ........ ....... ....... ........ .. ....... ........ ....... ....... ....... ........ .. 47
Low battery indi cators when the handset is in standby mode .............. ...........47
Low battery indicators when the handset is in use ..........................................47
How to cha rge the ba tt er y ........... ....... ........ ....... ....... ........ ....... .. ........ ....... .......47
Change batteries ......... .. ........ ........................ ........ .. ........ ......... .. ........ ......... ....48
Other b at te r y in fo r m a tio n ..... .. ....... ........ ....... ... ....... ....... ....... ........ ....... .. ........ .. 48
Belt cl ip ........ ....... ........ ....... .. ........ ....... ....... ........ ....... .. ........ ....... ....... ....... ........ ..48
Install the belt clip ............................................................................................48
Use the belt clip ............................................................................................... 49
Hands e t ad v ic e . ....... ....... ........ ....... .. ........ ....... ....... ........ ....... ....... ... ....... ....... .....49
Re-ini tiali zat ion .... .. ..... ..... ..... .. ..... ..... .. ..... ..... ..... .. ..... ..... ..... .. ..... ..... ... .... ..... ..... 49
Hands e t in te rf e re n c e .. .. ........ ....... ....... ... ....... ....... ........ ....... ....... ........ .. ....... .....49
Call disconnect ................................................................................................49
4
Standard 2.00
Page 5
About this User guide
About this User Guide
This guide includes user information for the C4010 handset, the C4010 Ex
handset, and the C4020 handset.
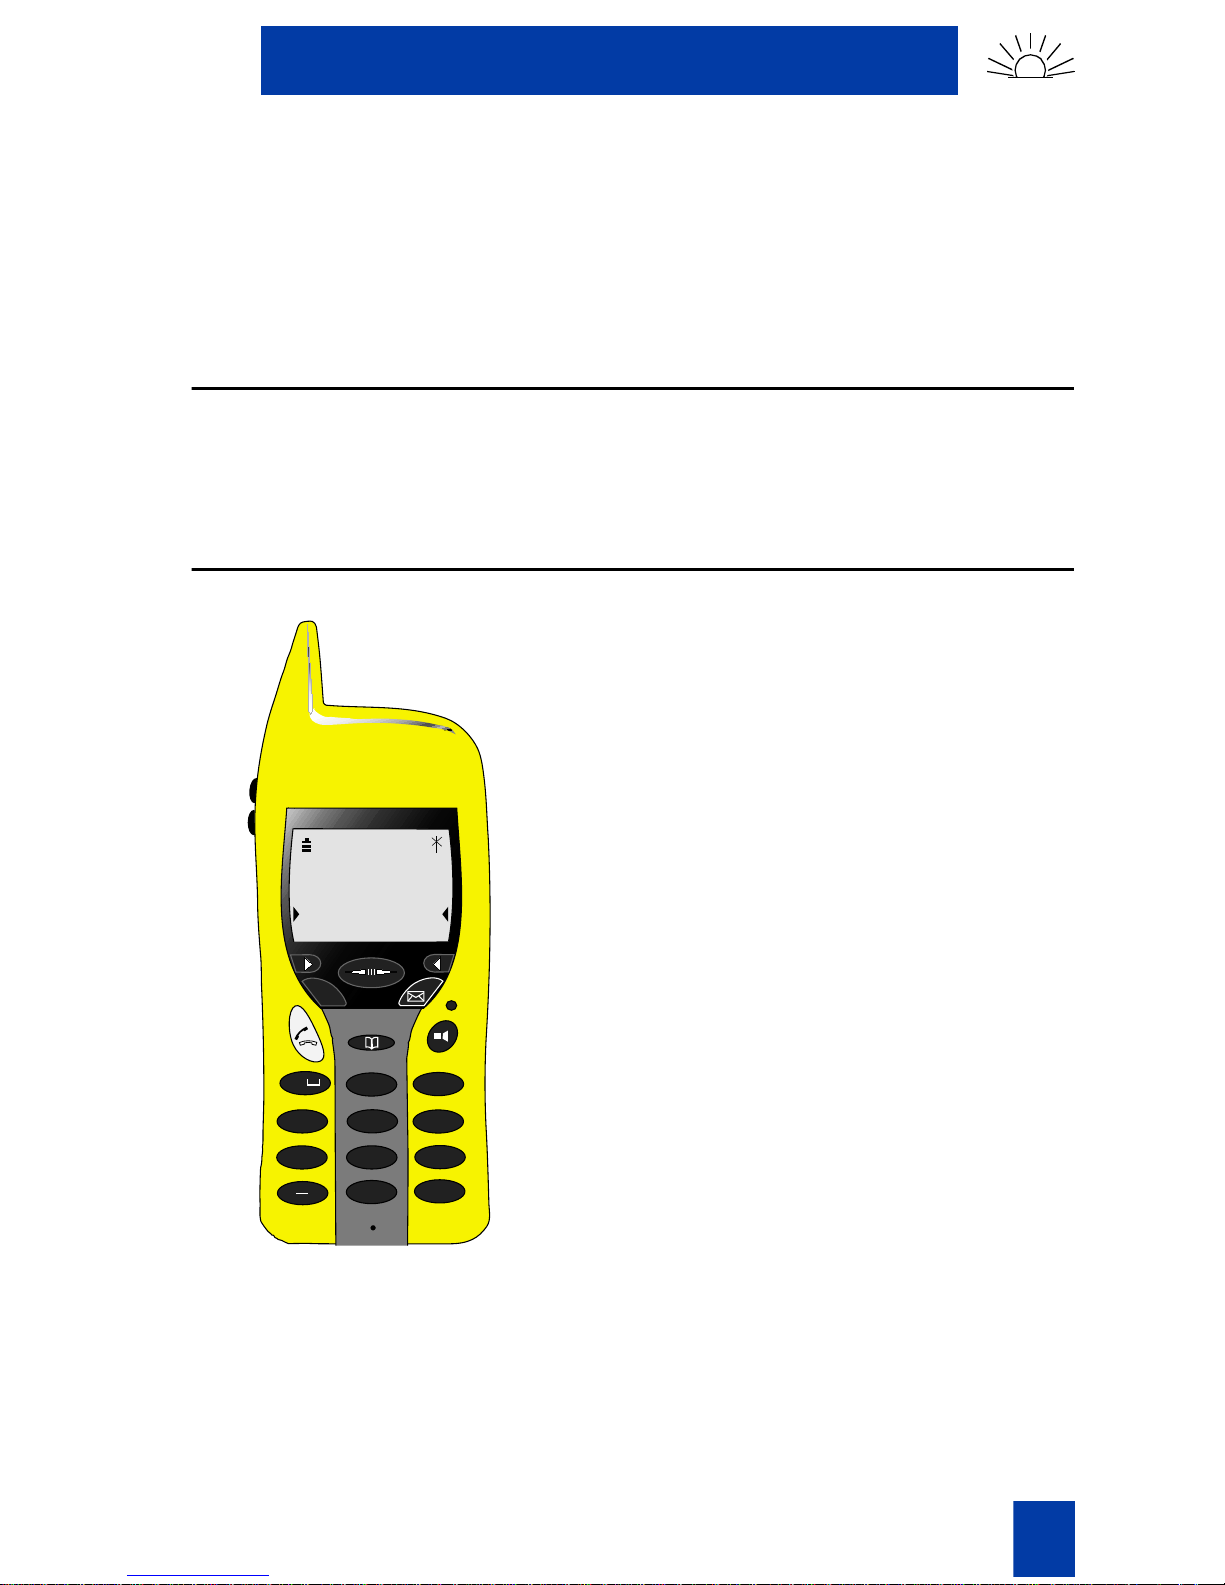
The C4010 handset
The C4010 is the basic model. The C4010 Ex and C4020 handsets have
additional features or features that are different from the C4010 model.
the C4010 Ex handset
•••••
•••••••
••••••
•••••••
•••••••
KENT WARD
LNR Menu
C
;
1
GHI
4
PQ
RS
7
X
ABC
2
JKL
5
TUV
8
0
•••••
••••••
DEF
3
MNO
6
9
#
The C4010 Ex functions identical to the
C4010. However, the C4010 Ex can
operate safely in an explosive atmosphere.
The C4010 Ex features include
hands free disabled and modified IExaa
approved battery.
To operate the C4010 Ex safely, you
must:
- Never tak e the C4010 Ex out of the
carry case in an explosive atmosphere.
- Never use accessories (for example,
do not use the belt clip).
- Never charge the battery in an explo-
WX
YZ
sive atmosphere.
- Never use anot her type of battery.
Note: Not all systems support the C4010Ex handset.
Standard 2.00
- Never use in min ing environments.
5
Page 6
About this User guide
The C4020 handset
•••••••
•••••
••••••
•••••••
•••••••
••••••
MEL BROOKS
Headset
port
LNR Menu
C
•••••
The C4020 functions identical to the
C4010. However, the C4020 can accept
a headset and has a vibrate alert feature.
;
1
GHI
4
PQ
RS
7
X
ABC
2
JKL
5
TUV
8
0
DEF
3
MNO
6
WX
YZ
9
#
6
Standard 2.00
Page 7
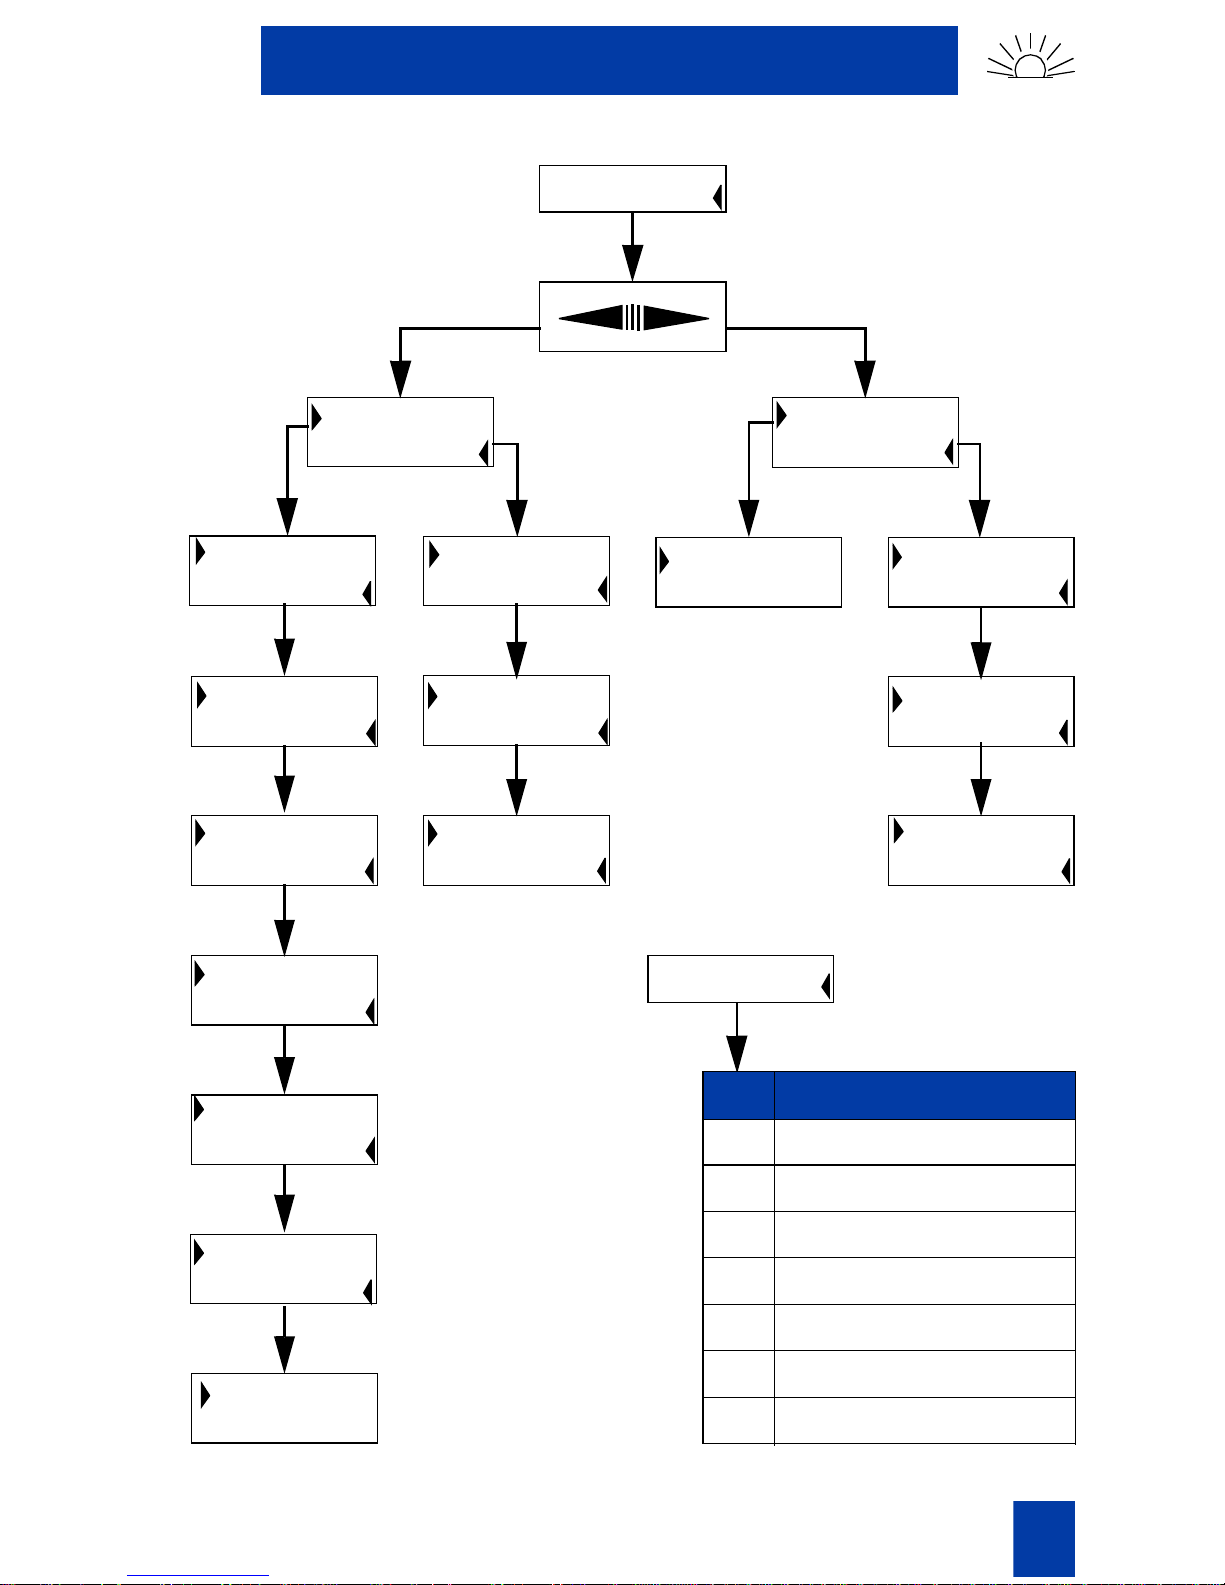
Navigating the menu
Method 1
Menu
Personalise
Ring volume
Melody
Handset name
Key sound
Headset
Auto answer
Vibrator
*
*
Backlight**
Last number
Delete
Last number
Last number 2
Last number 3
Last number 4
Last number 5
1
Select base
12345678
Method 2
Menu
Language
Francais
English
Deutsch
Espanol
Italiano
Nederlands
See Table 4 and
Table 5 for full
language list
Speed key
Range test
Environment
Declare base
Voice Mail
* Only on the C4020
** Not available
Standard 2.00
22
24
28
63
76
86
87
Menu itemDial
Select bas e
Last number
Key sound
Melody
Range test
Handset name
Ring volume
7
Page 8

Navigating th e menu
8
Standard 2.00
Page 9

Safety
Never use your cordless handset:
N441
Introduction
• in the area of electrical detonators
• in shielded rooms
• in areas where radio transmission is
forbidden
• in aircraft
Check f o r smal l metal obj ects in DECT
Handset earpiece/mouthpiece before
using the handset
Do not store or locate flammable liquids,
gases or explosive materials in the same
compart me nt or vicinity as the cordless
handset, its parts or accessor ies
Do not place a handset near:
Battery information:
Note: For C4010Ex safety precautions
see “the C4010 Ex handset” on page 5.
• water, moisture or damp areas
• heat sources, direct sunlight or
unventilated areas
• devices which generate strong
magnetic fields, appliances,
fluorescent lamps, computers,
radios, televisions or telefaxes
• areas where the unit can be
covered, its ventilation impeded,
liquid spilled on the unit or objects
inserted into the unit through any
openings
• areas with dust, vibration, shock or
temperature extremes
Standard 2.00
Note: Before using the handset for the
first time, charge the batter y for at least
12 hours.
• do not replace batteries in potentially
explosive environments, such as
9
Page 10

Introduction
rooms where inflammable liquids or
gases are present
• charge your batteries only with the
supplied battery charger
• disconnect the battery charger when
not in use for extended periods
• do not leave the battery connect ed
to the battery charger for longer than
one week
Explanation of header icons
The header icons, next to the banner at the top of each page indicate the
contents of each section as follows:
Explanation of the set's components
Description of features
Configuration
Information about different subjects
Information about distinct features
Terms you should know
Directory Number (DN) — a DN is any extension on a telephone.
10
Standard 2.00
Page 11

Introduction
Meridian PBX Flexible Feature Codes (FFC) — you can dial an FFC code
to access some of your handset’s features. As the FFC’s are distinct to your
system, a table on page 25 identifies the FFC or SPRE codes.
Meridian PBX Special Prefix Codes (SPRE) — you can dial a SPRE code
plus a one or two digit number to access some of your handset’s features.
The SPRE codes are distinct to your system. However, the digits following the
SPRE are fixed. For example, dial SPRE plus 74 to call forward all your calls
to another DN. A table on page 25 identifies FFC or SPRE codes.
Standard 2.00
11
Page 12

Introduction
12
Standard 2.00
Page 13
Your co rdless te lepho ne
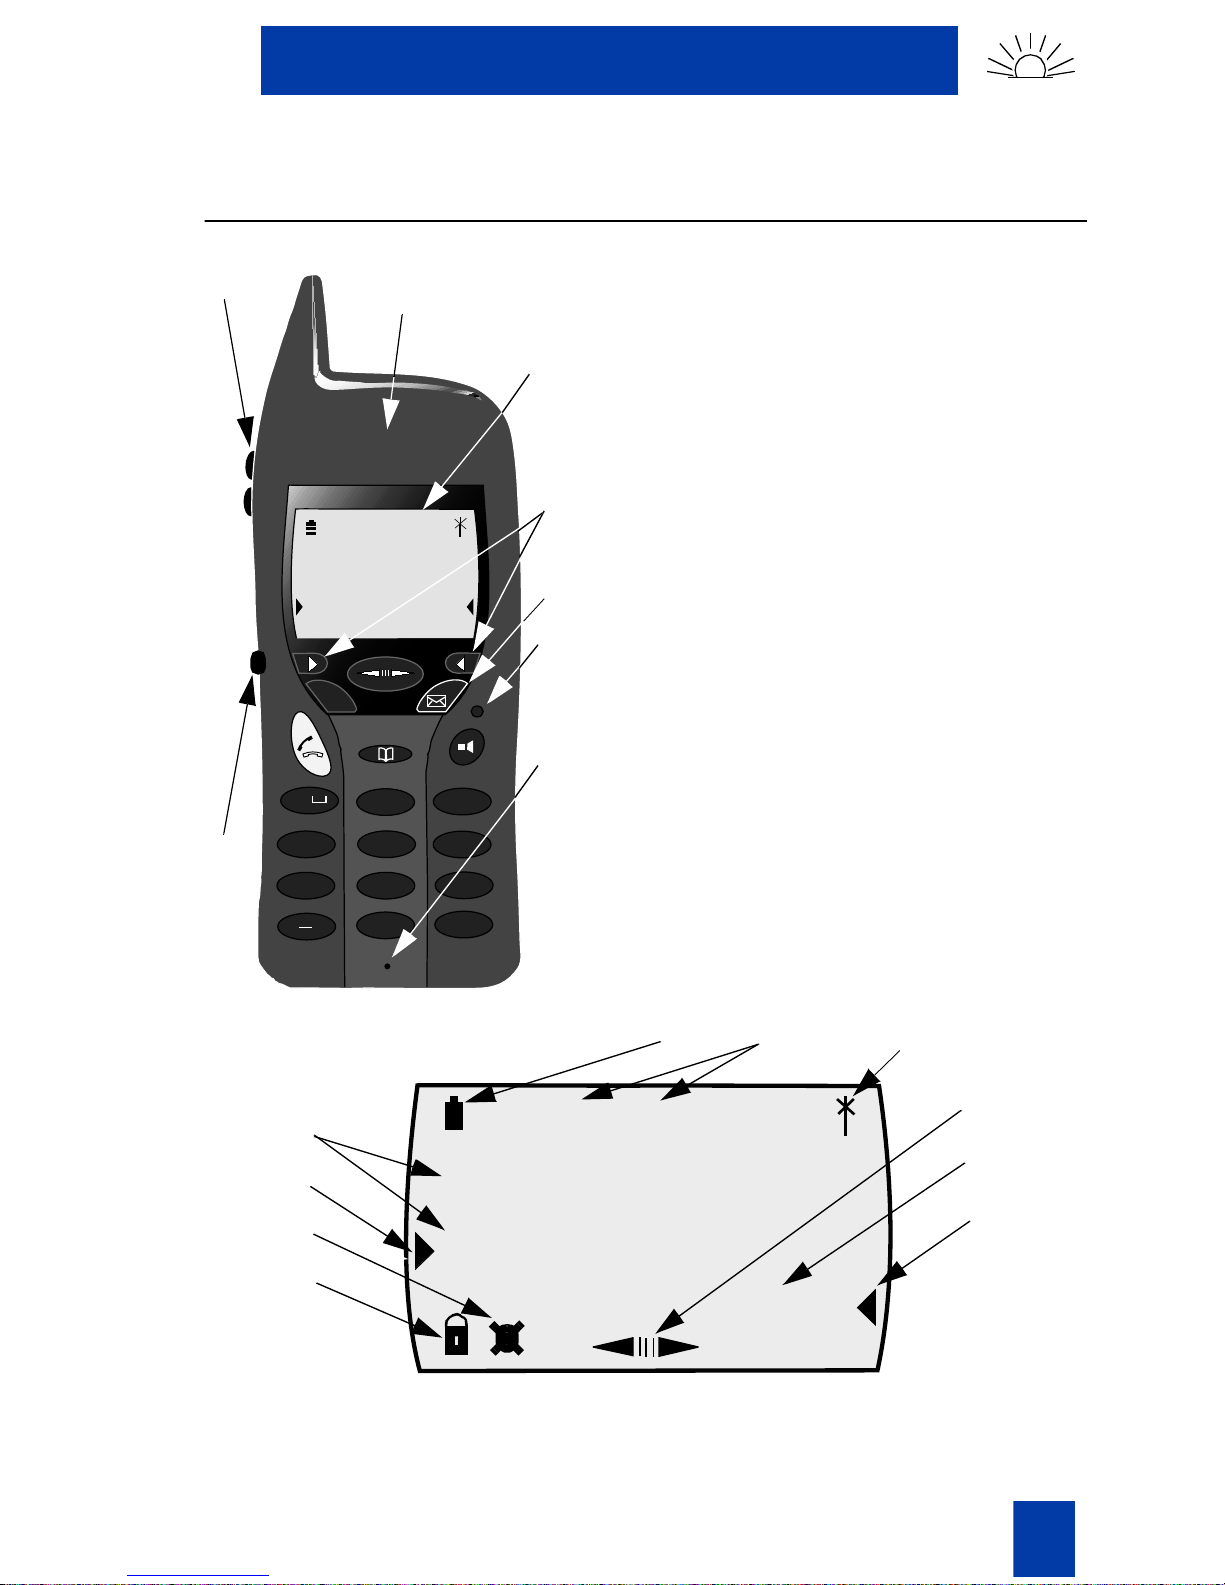
Your cordless handset
Your handset
1. Vol ume Up/Down (loudspeaker/ringing)
1
16
2
•••••
•••••••
••••••
•••••••
•••••••
KEN SPINK
LNR Menu
C
;
1
GHI
4
PQ
RS
7
X
ABC
2
JKL
5
TUV
8
0
•••••
••••••
DEF
3
MNO
6
9
#
2. Ear speaker
3
3. Display
4. Menu item selecti on
5. Message waiting
4
6. Initi a lize key
7. Microphone
8. Key pad locked
5
9. Ringer off
6
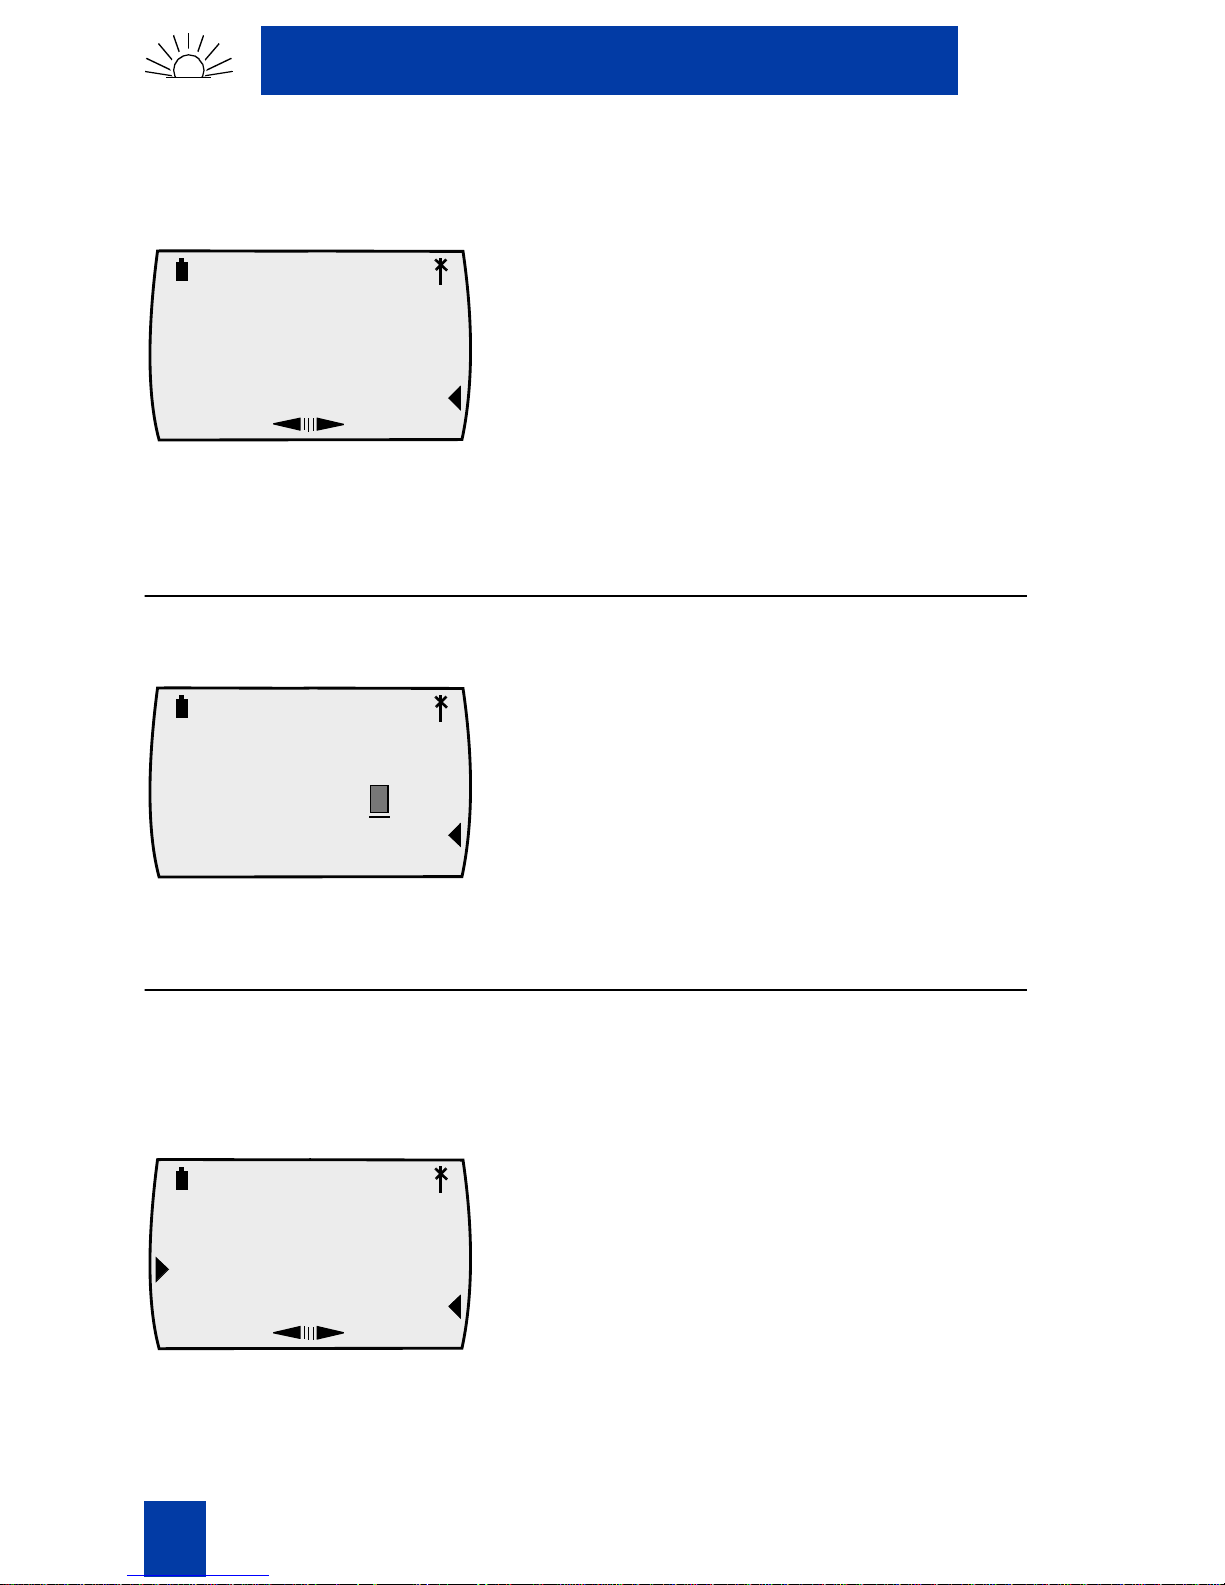
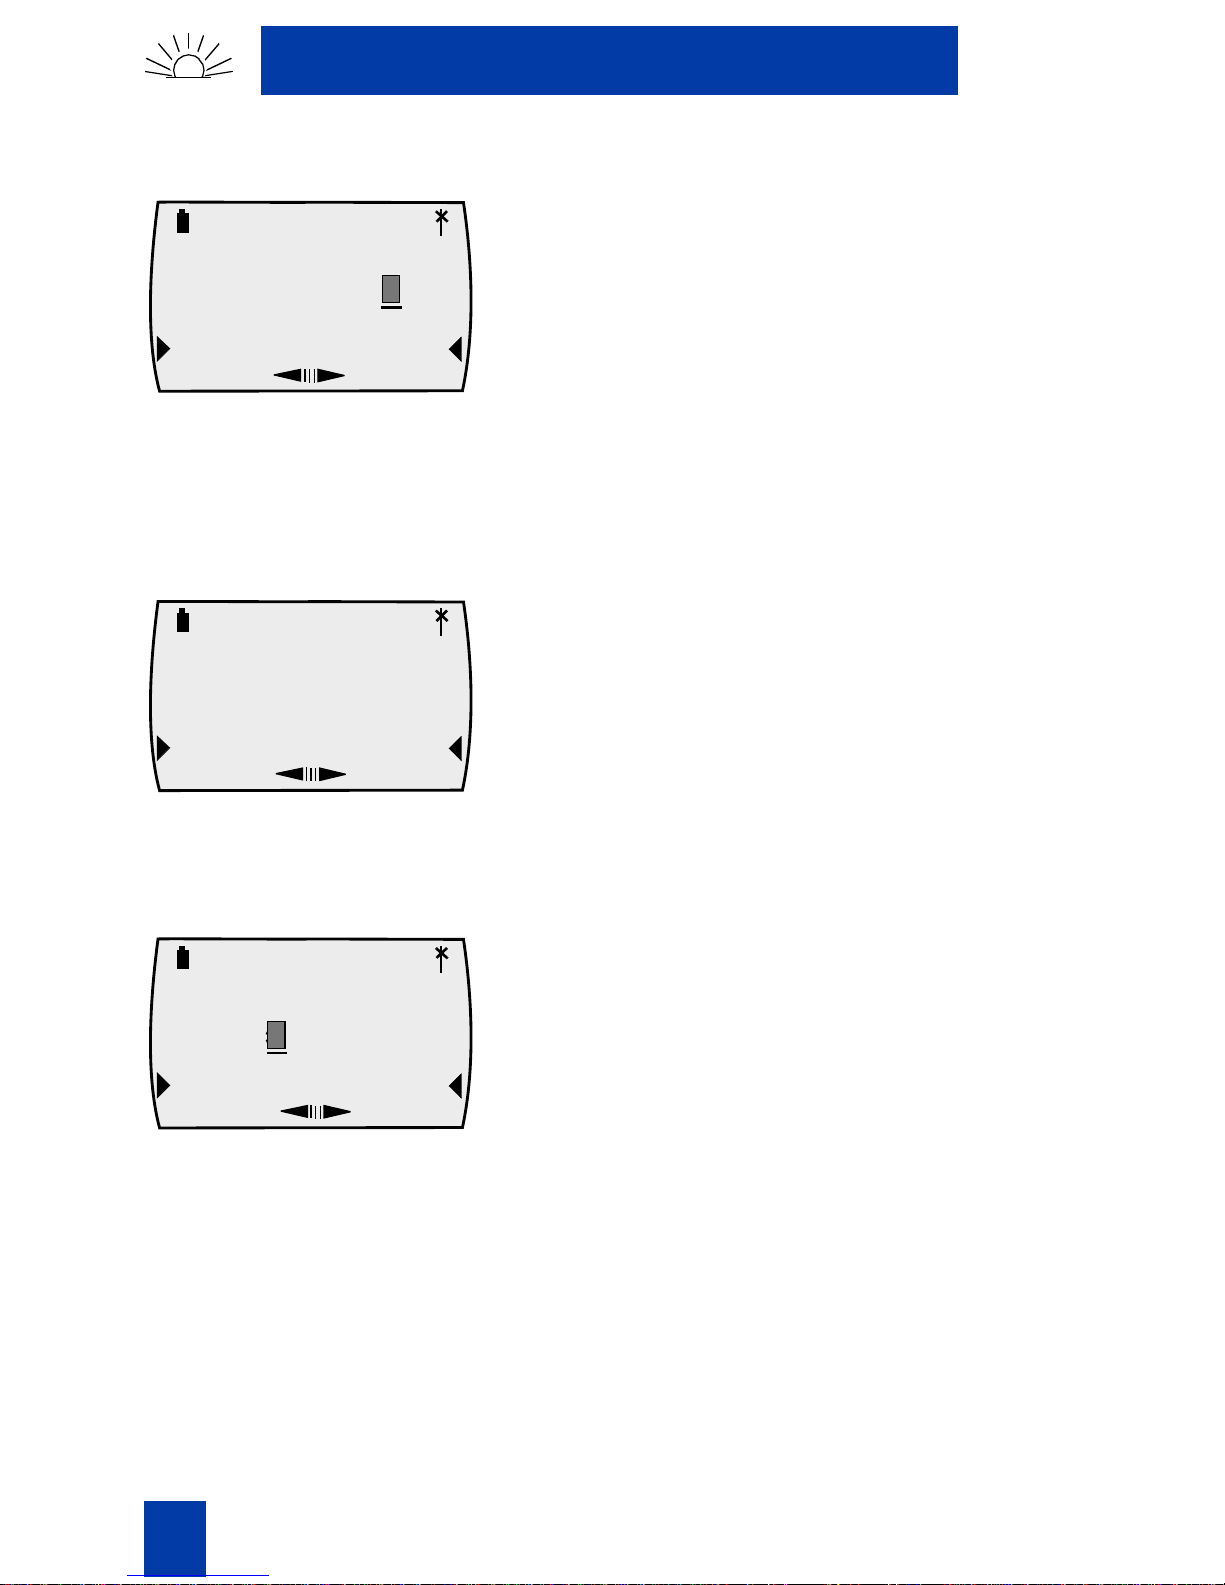
10 . D isplay functions
11. Three lines of text (
7
12. Battery c harge indication
each 12 character s)
13. Menu/Memory locator codes
14. Within radio range
WX
YZ
15. Menu scrolling available
16. Headset port for C4020 only
Display icons
11
10
9
8
Standard 2.00
12
Mem
Menu
99
TEXT or 12345
Prompt
Option
13
14
15
11
10
13
Page 14
Your cordless telephone
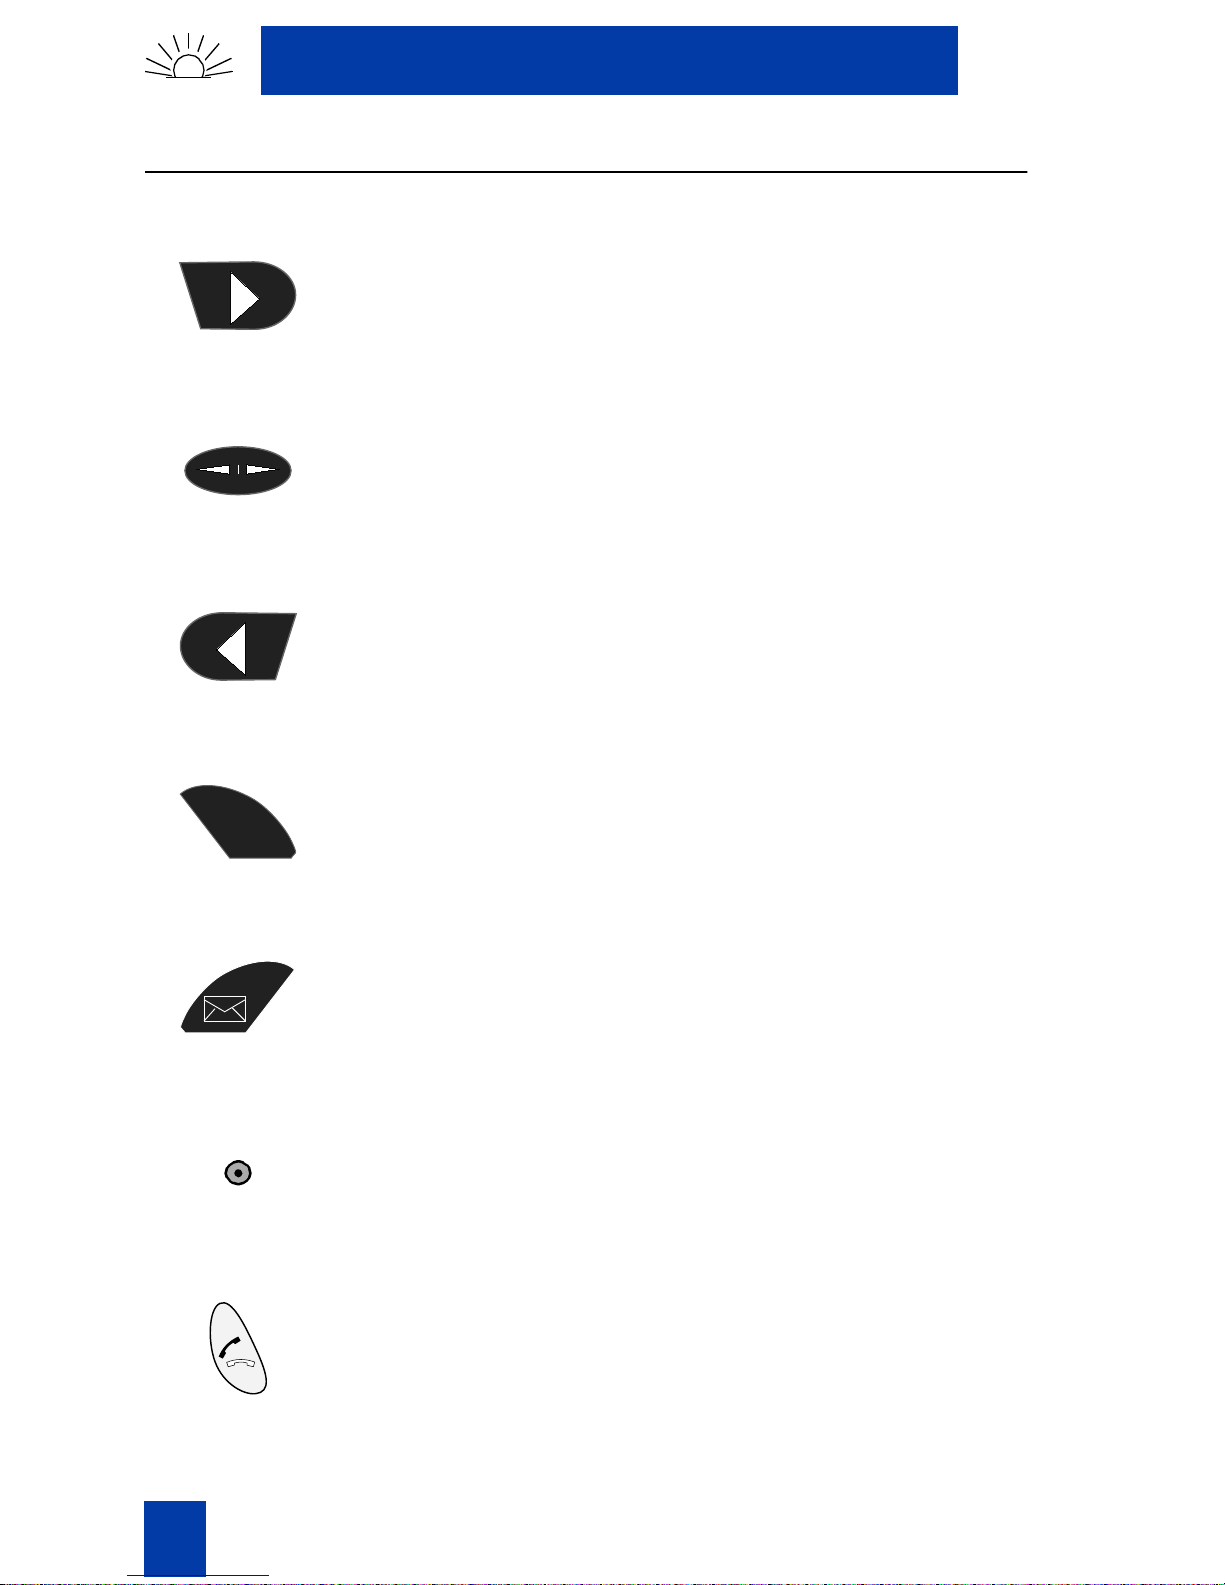
Handset function key icons
Menu item selection or
confirmation
Menu scroll
Menu item selection or
confirmation
C
Off/Standby/Can ce l
Message waiting lamp
Re-initialize key
Off hook/On hook
14
Standard 2.00
Page 15
Your co rdless te lepho ne
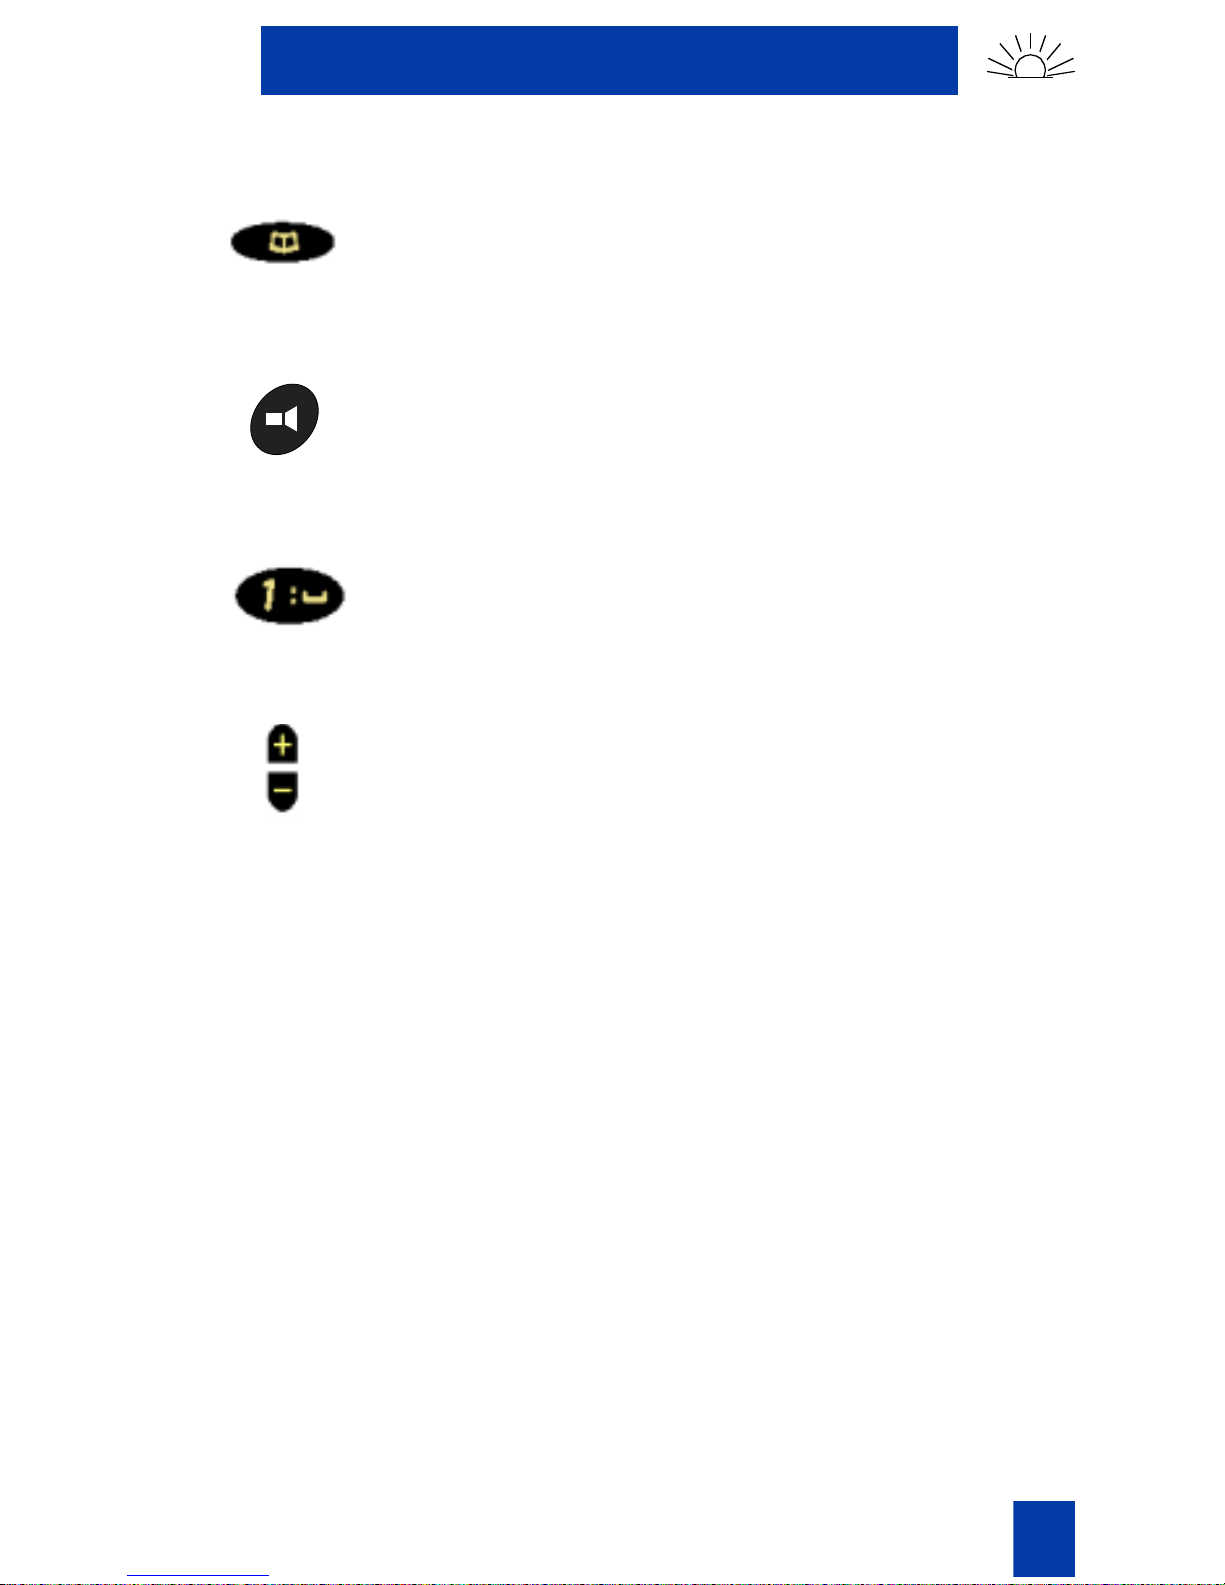
Phone book directory
Handsfree*
1/:/space
Volume Up/Down
*
For safety reasons, the Handsfree key does not operate on the C4010Ex handset.
Standard 2.00
15
Page 16

Your cordless telephone
16
Standard 2.00
Page 17

Handset features
Turn the handset on
Features
C
KENT 5409
LNR
Menu
Turn the handset off
Method 1
C
Method 1. Press the Standby key.
The handset displays the name and number
programmed when the handset was
subscribed.
Press the po wer off key for at least five
seconds.
Method 2
KENT 5409
Off
Locked
Standard 2.00
Press the Cancel key and press the Off key.
17
Page 18

Features
Answering a call
You can receive a call when the antenna icon is visible in the upper right
corner of the display.
You are out of radio range of a DECT system when the antenna
icon disappears.
Your display can show the caller name, up to
12 characters, or the caller number or both,
depending on the Meridian 1 PBX
5409
M Walsh
Calls
Method 1
feature setting.
On M6500 systems, the display show s the
caller name by default. If the name is not
available, the display shows the
caller number.
Method 2
5409
M Walsh
Mute
R
Press the off hook key.
Press the hands free key.
Note:
not operate on the C4010Ex handset.
The display shows the calling number, up to
12 digits, for 10 seconds.
For safety reasons, the handsf ree key does
00 Mn 35 s
M Walsh
Mute
18
The display tracks the call time in minutes and
seconds.
R
Standard 2.00
Page 19

Features
To stop handset ringing or vibrating without answering a
call
You can stop the handset from ringing or vibrating, if activated, by pressing
either the volume up key or volume down key. However, pressing these keys
does not answer the call. After stopping the ringing or vibrating you can
decide to answer the call or ignore it.
Volume up/down
The loudspeaker volume has two levels. The ear piece volume has five levels.
Turn the volume up by pressing the plus key.
Direct dialing off hook
Turn the volume down by pressing the
minus key.
Press the off hook key.
Enter a number on the keypad.
5477
Mute
Standard 2.00
The display shows the dialed number.
R
19
Page 20

Features
Pre-dialing on hook
This mode allows you to enter and edit a number before dialing.
Enter a DN on the keypad.
Press the Pause key to insert a three second
9-
Pause
Call
pause in the DN.
Pause changes to Erase two seconds after
you enter the digit.
To delete the last digit
9-1234567890
Erase
Call
Press Erase to delete the last number.
Press Call to place the call.
Last number redia l
LNR stores the last five numbers that you dialled.
Menu
Last numbers
Delete
24
Press LNR to display the last DN.
Press the arrow key opposite the displayed
DN to dial that DN.
8962
20
Standard 2.00
Page 21

Features
8962
Mute
01 Mn 42s
Mute
Ending a call
The called number is displayed for
10 seconds.
R
The display tracks the call time in minutes
and seconds.
R
Method 1. Press the on hook key.
Method 2. Place the handset in the
battery charger.
Duration
02 Mn 25 s
The display shows the call duration time for
10 seconds, then returns to the idle display.
Press the Ok key to clear the display quickly.
Ok
Conference
This mode allows you to conference a third party during a call.
Standard 2.00
21
Page 22

Features
02 Mn 45s
R Polanski
Mute
R
Mute
R
While talking to party A, you need to
conference party B into the conversation.
R
Press the Recall key.
Enter party B’s DN on the keypad.
You connect to party B.
R
Press the Recall key to conference.
Mute
R
Transfer a call
This mode allows you to transfer a call to a third party during a call.
01 Mn 43s
D Spragg
Mute
R
While talking to party A, you need to transfer
the call to party B.
22
Standard 2.00
Page 23

Features
R
Mute
R
Press the Recall key.
Enter party Bs DN on the keypad.
You can press the on hook key to transfer
the call before or after party B answers.
You receive ring-back from party A if party B
does not answer the call.
Dialing directory numbers/names
Press the directory key.
Method 1
Private dir.
Search
Method 2
Access the directory names.
Press the Search key and scroll through the
names listed in the directory.
Add
Access the directory names.
Dial the memory location number (0 to 9 and
*0 to*9) for the stored names.
Standard 2.00
23
Page 24

Features
Mem
3
THIBODEAU
Change
Call
Message waiting key
Press the Call key to place the call or press
the Change key to change the directory entry.
The message waiting key light flashes when
there is a message in the BCM voice mailbox,
Meridian Mail voice mailbox, or Call Pilot
voice mailbox.
To configure the speed key as a one-touch access to your voice mail, see
page 43.
Note: Not all Nortel Networks DECT systems support Message Waiting.
24
Standard 2.00
Page 25

Features
Meridian PBX features
Ask your system admi nistrator for the FFC of SPRE codes. Yo u can enter th e
access codes applicable to your system in the FFC or SPRE + column for
quick reference.
Table 1
Meridian PBX feature access codes (Part 1 of 2)
Feature FFC or SPRE +
Access to maintenance pr ograms by
maintenance telephones
Authorization code access
Automatic set relocation
Call forward, activate or cancel
Call park, to park a call
Call park, to retrieve a call
Cancel ring again
Centrex switch hook flash
Charge account for CDR
Cleaned
Cleaning in progress
Cleaning skipped
Cleaning required
Conference circuit testing
Disconnect trunk, conference 6
Failed inspection
Individual speed call, to program
Individual speed call, to use entry
Integrated messaging system
Last number re-dial
Malicious call trace
Standard 2.00
25
Page 26

Features
Table 1
Meridian PBX feature access codes (Part 2 of 2)
Feat ure FFC or SPRE +
Not for sale
Passed inspection
Permanent hold
Ring again
Ringing number pickup
Ringing number, DN pickup
Ringing number, group pickup
Room status
Stored number re-dial, to store
Stored number redeal, to re-dial
System speed call, to use
Trunk Answer F rom Any Station -TAFAS
Trunk verification from station
Unassigned (ACD activate/deactivate)
Unassigned (ACD login/log out)
26
Standard 2.00
Page 27

Features
Succession Communication Server for
Enterprise (CSE 6500) features
Note: The features in Table 2 also apply to the M6500 PBX.
Use the interactive keys to access features, or dial the access codes in the
following table. System features can vary, based on markets and customized
numbering plans. If the following feature access codes in Table 2 do not
operate as indicated, contact your system administrator.
Table 2
Mercator PBX feature access codes (Part 1 of 2)
Feature Dial access code
Automatic callback during a call R 5
Call the switch board 9
Cancellation of stored number # 7 9
Call second party during a call R internal or external number
Recovery of first party during a call R 1
Toggle between two parties during a call R 2
3-way conference call during a call R 3
Call pickup of any extension
Call pickup within extension group
Pickup calls to common bell
Receive and take calls from 2nd party
Call forwarding on busy
Call forwarding on no answer
Immediate call forwarding to another
X
0 2 external number
X
01
X 00
X
10
X
2 3 external number
X 2 2 external number
X 2 1 external number
extension
Call forwarding to a voice mailbox on
busy
Call forwarding to a voice mailbox on no
answer
Standard 2.00
X 2 7 voice mail number
X 2 6 voice mail number
27
Page 28

Features
Table 2
Mercator PBX feature access codes (Part 2 of 2)
Feature Dial access code
Cancellation of call forwarding # 2 0
Immediate call forwarding to a voice
X 2 5 voice mail number
mailbox
Override call forwarding and DND
X 2 8 external number
functions
Cancellation of abbreviated number # 5 1 from 0 to 9
Cancellation of all appointment
# 5 5 9999
reminders
Cancellation of appointment reminder # 5 5 hr hr mn mn
Program an abbreviated num ber
Record an appointment reminder
Record a personal password
X 5 1 from 0 to 9
X 5 5 hr hr mn mn
X 0 6 xxxx
Deactivate DND # 4 5
DND
Lock extension
Override DND
X 45
X 05
X 2 8 external number
Recover a parked call
Unlock extension # 0 5 xxxx
28
X 7 0 external number
Standard 2.00
Page 29

Features
Business Communications Manager features
Use the interactive keys to access features, or dial the access codes in the
following table. System features can vary, based on markets and customized
numbering plans. If the following feature access codes in Table 3 do not
operate as indicated, contact your system administrator.
Table 3
BCM feature access codes
Featur e Dial access code
Call second party during a call R internal or external number
Recovery of first party during a call R 1
Toggle between two parties during a call R 2
3-way conference call during a call R 3
Answer a second call R * 5
Call forwarding on busy
Cancel call forwarding on busy
Call forwarding on no answer
X
2 3 ext erna l num be r
#
23
X 2 2 extern a l num be r
Cancel call forwarding on no answer # 2 2
Immediate call forwarding to another
extension (including voice mail)
X 4 external number
Note 1
Cancel immediate diversion # 4
Cancel all types of diversions # 2 0
Note: Press the message waiting indicator to dial the Voice Mail DN. Enter
your password to access your voice messages.
Answer a second call
While on a call, if a second call is presented, press R*5 to put the first call on
hold and answer the second call.
Recovery of first party during a call
If you want to release the second call and re-connect to the original call, press
R1.
Standard 2.00
29
Page 30

Features
3-way conference call during a call
If you want to conference the calls together, press R. When the dial tone is
heard, call the third party. To conference the parties together, press R3.
Togg le between two parties du ring a call
If you want to put the second call on hold and re-connect to the original call,
press R2. If you press R2 again you can toggle between the original and
second calls.
Transfer a call
While in a conference, releasing the call transfers the original call to the
second call.
30
Standard 2.00
Page 31

Confi gur ing th e hand se t
Configuring the handset
You can configure some of the handset menu attributes to meet
your requirements.
Store numbers and names in the directory
You can store up to 20 names and numbers in the directory.
Press the Directory key.
Private dir.
Search
Choose mem.
0 to 9 :
Add
Ok
Press the Add key.
You can use the suggested memory location
number or select a different memory location
number (0 to 9) and (*0 to *9). Press the Ok
key after selecting a memory
location number.
Standard 2.00
31
Page 32

Configuring the handset
Press the Ok key. Enter up to 18 digits
Mem
10
for the DN.
Enter numbe r
ROk
Mem
10
Enter numbe r
1234567
• To store a Recall number, press
the R key.
• To store a pause in the number, press the
Pause key. T he Pause option expires after
two seconds.
To correct an error. Press the Erase key or
select the digit and enter another digit.
Erase Ok
Mem
10
Enter numbe r
123456789
Erase Ok
Mem
10
Enter name
Ok
Press the Ok key after entering the DN.
The name is optional.
Press the Ok key to enter a DN without
the name.
32
Standard 2.00
Page 33

Confi gur ing th e hand se t
Enter up to 10 characters for a name
on the keypad.
To enter a character, press a keypad key 0 to 9 as shown in Table 4. For
example, press the keypad key 3 twice to enter character E.
Table 4 Southern handset keypad alphabet equivalent for:
• English
• French
• German
• Dutch
• Spanish
• Italian
Key 1 2 3 4 5 6 7 8 9
00
1 – /space1
2ABC2ÁÀÄß
3DEF3ÉÈ
4GHI4íì
5JKL5
6MNO6ÑÖÓÔ
7PQRS7
8TUV8ÜÚÛ
9WXYZ9
,.:,
Standard 2.00
33
Page 34

Configuring the handset
Table 5 Northern hand set keypad alphabet equ ivalent for:
• English
• Portuguese
• Swedish
• Norwegian
• Finnish
• Danish
Key 1 2 3 4 5 6 7 8 9
00
1 – /space1
2ABC2ЕДГБЖ
3DEF3Ê
4GHI4
5JKL5
6MNO6ÖÓÔ
7PQRS7
8TUV8Ú
9WXYZ9
Mem
Enter name
HERNANDE
Erase
10
Three seconds after entering a character, the
cursor moves to the next position. Press the
OK key after entering the name.
Ok
,.:,
34
Standard 2.00
Page 35

Confi gur ing th e hand se t
Locate numbers and names in the directory
Press the directory key.
Private dir.
Press the Search key.
Search
Add
Private dir.
HERNANDZ
The handset displays the first two
directory entries.
Jones
Press the scroll keys to search for names
and numbers in the directory.
Standard 2.00
35
Page 36

Configuring the handset
Change numbers and names in the directory
To change a number
Mem
6
Change no.
5677
Erase
To change a name
Mem
6
Ok
Change name
FAWCETT
Erase
To delete a name and number
Ok
Locate the name in the directory.
Press the key next to the name.
Press the Change key.
Press the Erase key to erase the number.
Enter the new number.
Press the OK key after entering the number.
Locate the name in the directory.
Press the key next to the name.
Press the Change key.
Press the OK key.
Press the Erase key to erase the name.
Enter the ne w name.
Press the OK key after entering the number.
Mem
the memory?
No
6
Delete
Yes
Locate the name in the directory.
Press the key next to the name.
Press the Change key.
Press and hold the Erase ke y.
Press the Yes key.
Make a call from the directory
Mem
ROLF
Change
7
Call
Press the directory key.
Dial your mem numbe r.
Press the Call key.
You can search for a name using the
scroll keys .
36
Standard 2.00
Page 37

Confi gur ing th e hand se t
Ring volume
Adjust the ringing volume by two methods.
1. With the volume +/- keys when the handset is ringing.
2. From the menu as described below.
Press the Menu key.
Dial 87, or scroll through the menu options.
Menu
87
Ring volume
0 1 2 3 4
Ok
Select the number and press the OK key or
dial the number 0 to 4 to select the
volum e le v el.
Select the level 0 and press the OK key or
dial the number 0 to turn off the ringer.
Press the OK key after selecting the
volum e le v el.
Ring melody
Menu
63
Melody
1 2 3 4 5 6
Ok
Press the Menu key.
Dial 63, or scroll through the menu options.
Select the number and press the OK key or
dial the number 1 to 6 to select the melody.
Press the OK key after selecting the melody.
Handset name on the idle display
Menu
Handset name
K URQUHART
Erase
86
Ok
Press the Menu key.
Dial 86, or scroll through the menu options.
Enter the name on the keypad. See Table 4.
Press the OK key after entering the name.
Standard 2.00
37
Page 38

Configuring the handset
Key sound
Menu
Key sound
No
28
Yes
Press the Menu key.
Dial 28, or scroll through the menu options.
Press the No key to turn the key sound off.
Press the Yes key to turn the key sound on.
Auto answer
Note: Only use the auto answer feature with a headset connected to the
handset.
The handset will automatically answer 10 seconds after receiving a call.
Press the Menu key.
Press the Personalise key.
Auto. answer
No
Yes
Press the scroll keys to access
Auto. answer.
Press the Auto. answer key.
Press the No key to turn the auto answer off.
Press the Yes key to turn the auto answer on.
38
Standard 2.00
Page 39

Confi gur ing th e hand se t
Speed ke y
The speed key replaces the LNR (last number redial) key on the
handset display.
CAUTION: If you program the speed key as an emergency telephone
number, pressing this key by accident automatically dials the
emergency number.
Press the Menu key.
Speed key
SOS key
Direct menu
Press the Personalise key.
Press the scroll keys to access Speed key.
Press the Speed key.
Press the SOS key.
No. to dial
R
Title
Erase
Enter up to 18 digits for the
Speed key number.
Press the OK key after entering the number.
Ok
Enter up to five characters for the title to the
speed key.
Press the OK key after entering the title.
Ok
Standard 2.00
39
Page 40
Configuring the handset
Return the speed key to LNR
Direct Menu
Menu code: 24
Ok
Range test
Press the Menu key.
Press the Personalise key.
Press the scroll keys to access Speed key.
Press the Speed key.
Press the Direct Menu key.
Dial 24.
Press the OK key after entering 24.
Erase the speed key title.
Enter LNR.
Press the OK key after entering the title.
Menu
76
Range test
0 1 2 3 4
Ok
Press the Menu key.
Dial 76, or scroll through the menu options.
0 indicates the handset is outside radio range.
1 to 4 indicates the approxima te quality level
of r ece ption, with 4 being the best level.
Environment
The environment setting allows you to adapt the earpiece volume level for
background noise.
Press the Menu key.
Environment
Calm
Noisy
Press the Personalise key.
Press the Environment key.
Select Calm, Noisy or Mixed.
Press the scroll keys to access Mixed.
40
Standard 2.00
Page 41

Confi gur ing th e hand se t
Declare base
Declare base allows you to subscribe your handset to another DECT system.
Press the Menu key.
Press the Personalise key.
Declare base
number ?
12345678
Ok
Press the scroll keys to access
Declare base.
Press the Declare base keys.
Press the OK key after selecting the base.
Enter code
Please wait
working...
Declare base
Enter the PIN code.
Press the OK key after entering the code.
Ok
The display shows Please wait.
The display shows Declare base Ok for a
short time if the code is accepted. Then
returns to the idle display.
Ok
Standard 2.00
The display shows Failed Retry for a short
time if the code is rejected. Then returns to
Enter code again.
41
Page 42

Configuring the handset
Select language
Press the Menu key.
Press the scroll keys to access Language.
Language
Francais
English
Press the Language key.
Select the language.
Press the OK key after selecting the
language.
Lock and unlock the keypad
Locking the keypad prevents making calls in the standby mode. You can
receive calls with the keypad locked.
M KELLY
Off
M KELLY
Off
C
Press the Standby key.
Press the Locked key to lock the keys.
Locked
Press the Unlock key to unlock the keys.
Unlocked
42
Standard 2.00
Page 43

Confi gur ing th e hand se t
Voice mailbox one-touch access
For one-touch access to your voice mailbox you can program the Voice Mail
key.
Note 1: The early C4010 models do not have the Voice Mail feature.
Note 2: On BCM systems, press the Voice Mail key for automatic access to
BCM voicemail. Enter your password. No handset programming is necessary
for BCM v oic e mail acce ss .
On Meridia n Mail or Ca ll P ilo t voi c email
systems:
Press the Menu key.
Voice Mail
Press the Personalise key.
Press the scroll keys for Voice Mail Nr.
Enter the DN or extension number for
voicemail.
Press the Pause key once or twice depending
Voice Mail Nr
6245-#
Pause
Note: You can enter your password, followed by #. However, your mailbox is
not as secure and you need to edit the handset password when you change
mailbox passwords.
Ok
on how long the voicemail system needs to
answer. The display shows the Pause as a
dash.
Enter your mailbox number followed by #.
Press the OK key after entering the #.
Standard 2.00
43
Page 44
Configuring the handset
Access Nr
6245-#123456#
Erase
To change the password entry
When you change your voice mail password, you can change the handset
password entry to automatically access your mail box.
Ok
Access Nr
6245-#
******
#
Erase Ok
Enter your password followed by #.
Press the OK key after entering the password
and #.
Press the Menu key.
Press the Personalise key.
Press the scroll keys to access Voice Mail.
Press the Ok ke y to displa y Access Nr.
Note: The password displays as
Access Nr
6245-#
******
#
Select the character and enter another, or
press Erase and enter another character.
Press the Ok key after entering the password.
Erase Ok
******
.
44
Standard 2.00
Page 45

To delete the Voice Mail entry
Access Nr
6245#
******
#
Erase Ok
Confi gur ing th e hand se t
Press the Menu key.
Press the Personalise key.
Press the scroll keys to access Voice Mail.
Press the Ok key to display Access Nr.
Press and hold the Erase ke y t o display
Delete Voic e Mail.
Delete
Voice Mail
No
Press the Yes key to delete the Voice Mail
entry.
Yes
Standard 2.00
45
Page 46

Configuring the handset
46
Standard 2.00
Page 47

Useful information
Batteries
Batt ery in dicator
LAURIDSEN
LNR
Menu
Useful information
The battery icon, made up of three parts each
indicates approximately 1/3 of the
charge level.
The battery icon flashes when the handset is
placed in the battery charger.
Low batter y in di ca tors wh e n the handset is in standby mode
Recharge
the battery
Low batter y in di ca tors wh e n the ha n ds et is in use
Bat.
When discharged, the handset displays
Recharge the battery.
The handset displays Bat. and an empty
flashing battery icon to indicate the battery
requires charging.
How to charge the battery
Before using the handset for the first time, charge the battery for 12 hours.
To charge the battery, place the handset in the battery charger.
Standard 2.00
47
Page 48

Useful information
Cha nge batt erie s
1. Pull the battery cover towards the bottom of
the handset to open.
2. Carefully release the battery connector.
3. Remove the old battery.
4. Put the new battery into the handset.
5. Carefully connect the battery.
6. Close the cover.
Other battery information
Note: Do not remove the battery to re-initialize the handset. Use the reinitialize key.
To keep the battery completely charged, replace the handset in the battery
charger often.
When the battery charger is not in use for a extended period of time,
disconnect the battery charger from the power source.
A completely charged battery when not in use, discharges in about a week.
Note: Only change the C4010 Ex battery in designated areas. NEVER
change the C4010 Ex battery in an explosive atmosphere.
Belt clip
Install the belt clip
1. Clean the belt clip button attaching
location, above the loudspeaker, with
isopropyl alcohol.
2. Remove one of the protective strips from
the round piece of tape.
3. Press the tape to the handset
attaching spot.
4. Remove the other protective strip from
the tape.
Note: Do not attach a belt clip button if you use a carrying case.
48
5. Press the belt clip button to the tape.
6. Wait eight hours before using the belt clip.
Standard 2.00
Page 49

Useful information
Use the belt clip
To attach the belt clip, slide the belt clip into
the clip button on the handset and attach to
your belt.
To remove the belt clip, press the top of the
clip and slide it out of the clip button.
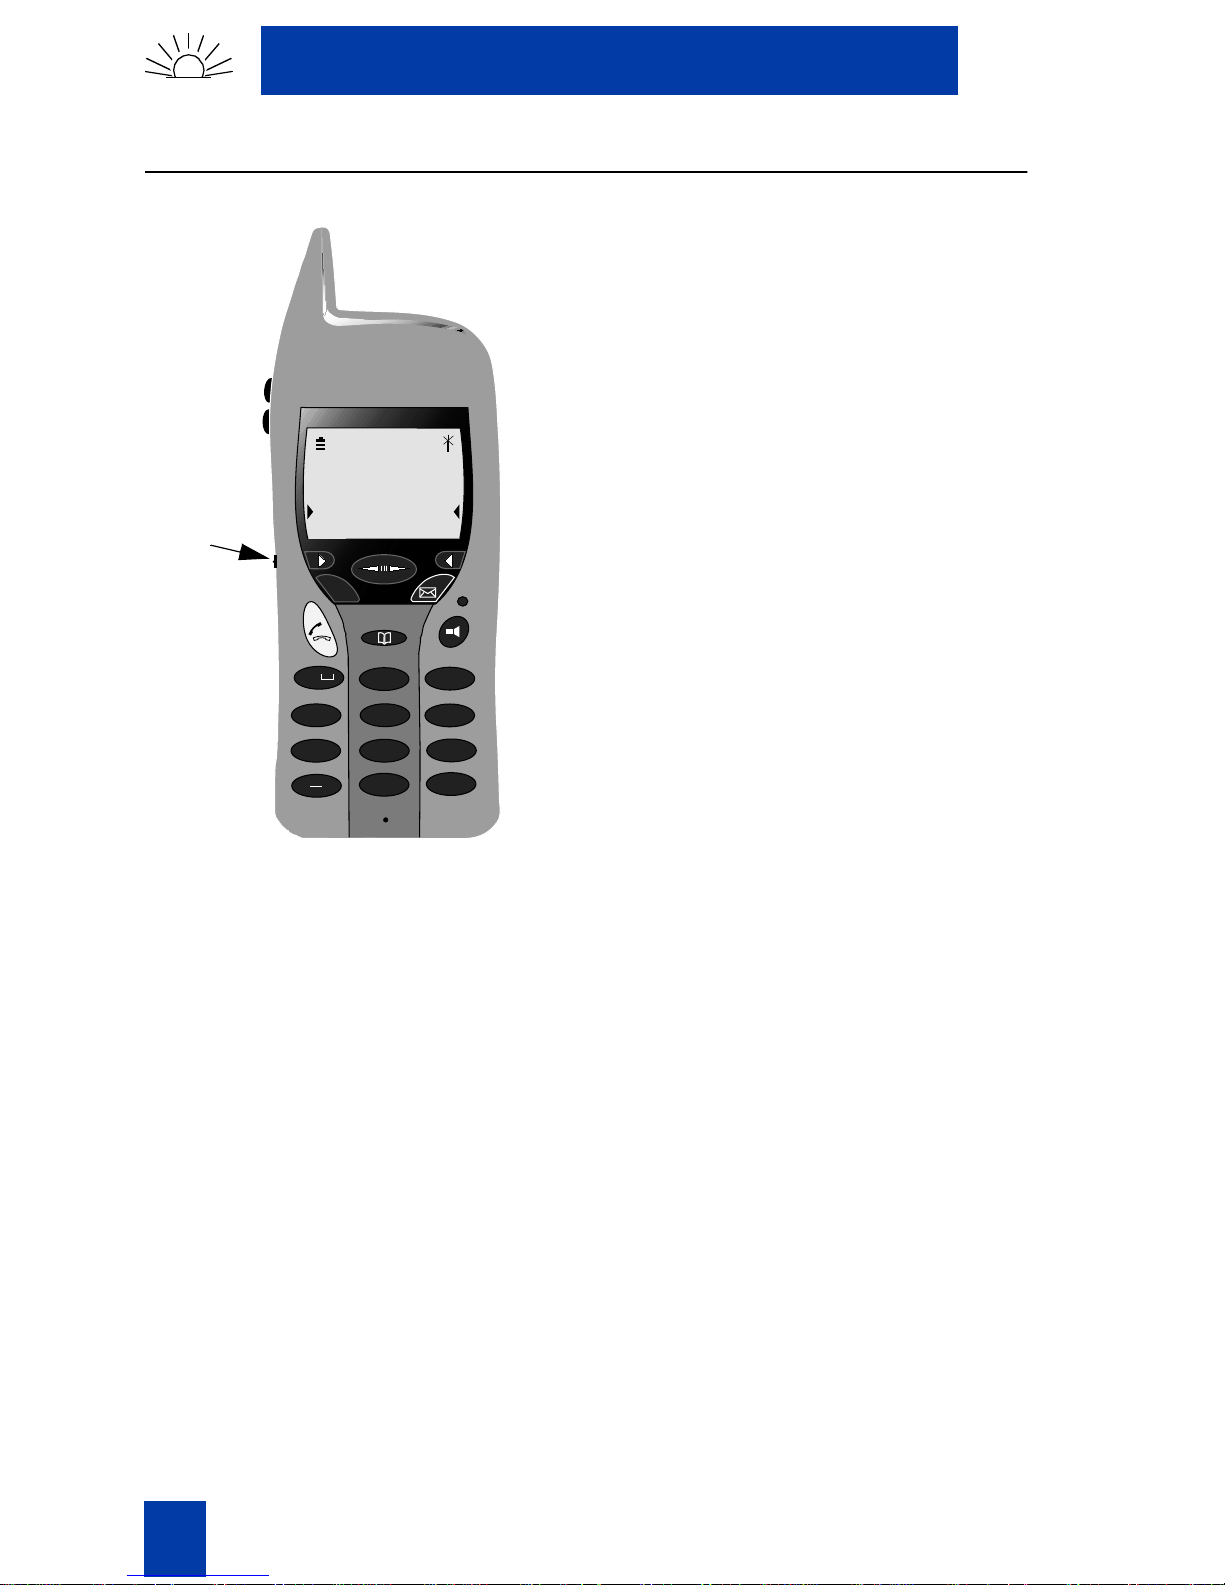
Handset advice
Re-initialization
If your handset display freezes or the handset does not operate correctly, reinitialize. The re-initialize key is located above the handsfree key.
Press the re-initialize key lightly w it h the ti p
of a pen or pencil until the handset
screen resets.
Handset interferen ce
The C4010, C4010Ex, and C4020 handsets meet all required EMC
standards. However, the handset can interfere with other electronic
equipment, such as older PCs and wired telephones. To prevent this
interference, try to keep the handset at least one half meter away from other
electronic equipment.
Call disconnect
If you place the handset in the battery charger while you are on a call, the
call disconnects.
Standard 2.00
49
Page 50

Useful information
50
Standard 2.00
Page 51

This temporary back cover is only used to track the issue number for internal
review. The Customer copy back cover is affixed by the print company.
51
Page 52

52
March 2002 Standard 2.00
 Loading...