


Part No. 313070-E Rev 00
May 2006
4401 Great America Parkway
Santa Clara, CA 95054
Installing a DC Power Supply in an Ethernet Routing Switch 8000 Series Chassis

2
Copyright © 2005-2006 Nortel Networks. All Rights Reserved.
The information in this document is subject to change without notice. The statements, configurations, technical data, and
recommendations in this document are believed to be accurate and reliable, but are presented without express or implied
warranty. Users must take full responsibility for their applications of any products specified in this document. The
information in this document is proprietary to Nortel Networks
Trademarks
*Nortel, Nortel Networks, the Nortel Networks logo, the Globemark, and Passport are trademarks of Nortel Networks.
Adobe and Acrobat Reader are trademarks of Adobe Systems Incorporated.
Statement of conditions
In the interest of improving internal design, operational function, and/or reliability, Nortel Networks Inc. reserves the
right to make changes to the products described in this document without notice.
Nortel Networks Inc. does not assume any liability that may occur due to the use or application of the product(s) or
circuit layout(s) described herein.
International Regulatory Statements of Conformity
This is to certify that the Nortel Networks 8000 Series chassis and components installed within the chassis were
evaluated to the international regulatory standards for electromagnetic compliance (EMC) and safety and were found to
have met the requirements for the following international standards:
• EMC - Electromagnetic Emissions – CISPR 22, Class A
• EMC - Electromagnetic Immunity – CISPR 24
• Electrical Safety – IEC 60950, with CB member national deviations
Further, the equipment has been certified as compliant with the national standards as detailed below.
National electromagnetic compliance (EMC) statements of compliance
FCC statement (USA only)
This equipment has been tested and found to comply with the limits for a Class A digital device, pursuant to Part 15 of
the Federal Communications Commission (FCC) rules. These limits are designed to provide reasonable protection
against harmful interference when the equipment is operated in a commercial environment. This equipment generates,
uses, and can radiate radio frequency energy. If it is not installed and used in accordance with the instruction manual, it
may cause harmful interference to radio communications. Operation of this equipment in a residential area is likely to
cause harmful interference, in which case users will be required to take whatever measures may be necessary to correct
the interference at their own expense.
ICES statement (Canada only)
Canadian Department of Communications Radio Interference Regulations
This digital apparatus (8000 Series chassis and installed components) does not exceed the Class A limits for radio-noise
emissions from digital apparatus as set out in the Radio Interference Regulations of the Canadian Department of
Communications.
313070-E Rev 00

Règlement sur le brouillage radioélectrique du ministère des Communications
Cet appareil numérique (8000 Series chassis) respecte les limites de bruits radioélectriques visant les appareils
numériques de classe A prescrites dans le Règlement sur le brouillage radioélectrique du ministère des Communications
du Canada.
CE marking statement (Europe only)
EN 55 022 statements
This is to certify that the Nortel Networks 8000 Series chassis and components installed within the chassis are shielded
against the generation of radio interference in accordance with the application of Council Directive 89/336/EEC.
Conformity is declared by the application of EN 55 022 Class A (CISPR 22).
War nin g: This is a Class A product. In a domestic environment, this product may cause radio interference, in which
case, the user may be required to take appropriate measures.
Achtung: Dieses ist ein Gerät der Funkstörgrenzwertklasse A. In Wohnbereichen können bei Betrieb dieses Gerätes
Rundfunkstörungen auftreten, in welchen Fällen der Benutzer für entsprechende Gegenmaßnahmen verantwortlich ist.
Attention: Ceci est un produit de Classe A. Dans un environnement domestique, ce produit risque de créer des
interférences radioélectriques, il appartiendra alors à l’utilisateur de prendre les mesures spécifiques appropriées.
EN 55 024 statement
This is to certify that the Nortel Networks 8000 Series chassis is shielded against the susceptibility to radio interference
in accordance with the application of Council Directive 89/336/EEC. Conformity is declared by the application of
EN 55 024 (CISPR 24).
3
EC Declaration of Conformity
This product conforms to the provisions of the R&TTE Directive 1999/5/EC.
VCCI statement (Japan/Nippon only)
This is a Class A product based on the standard of the Voluntary Control Council for Interference (VCCI) for
information technology equipment. If this equipment is used in a domestic environment, radio disturbance may arise.
When such trouble occurs, the user may be required to take corrective actions.
BSMI statement (Taiwan only)
This is a Class A product based on the standard of the Bureau of Standards, Metrology and Inspection (BSMI) CNS
13438, Class A.
Installing a DC Power Supply in an Ethernet Routing Switch 8000 Series Chassis
4
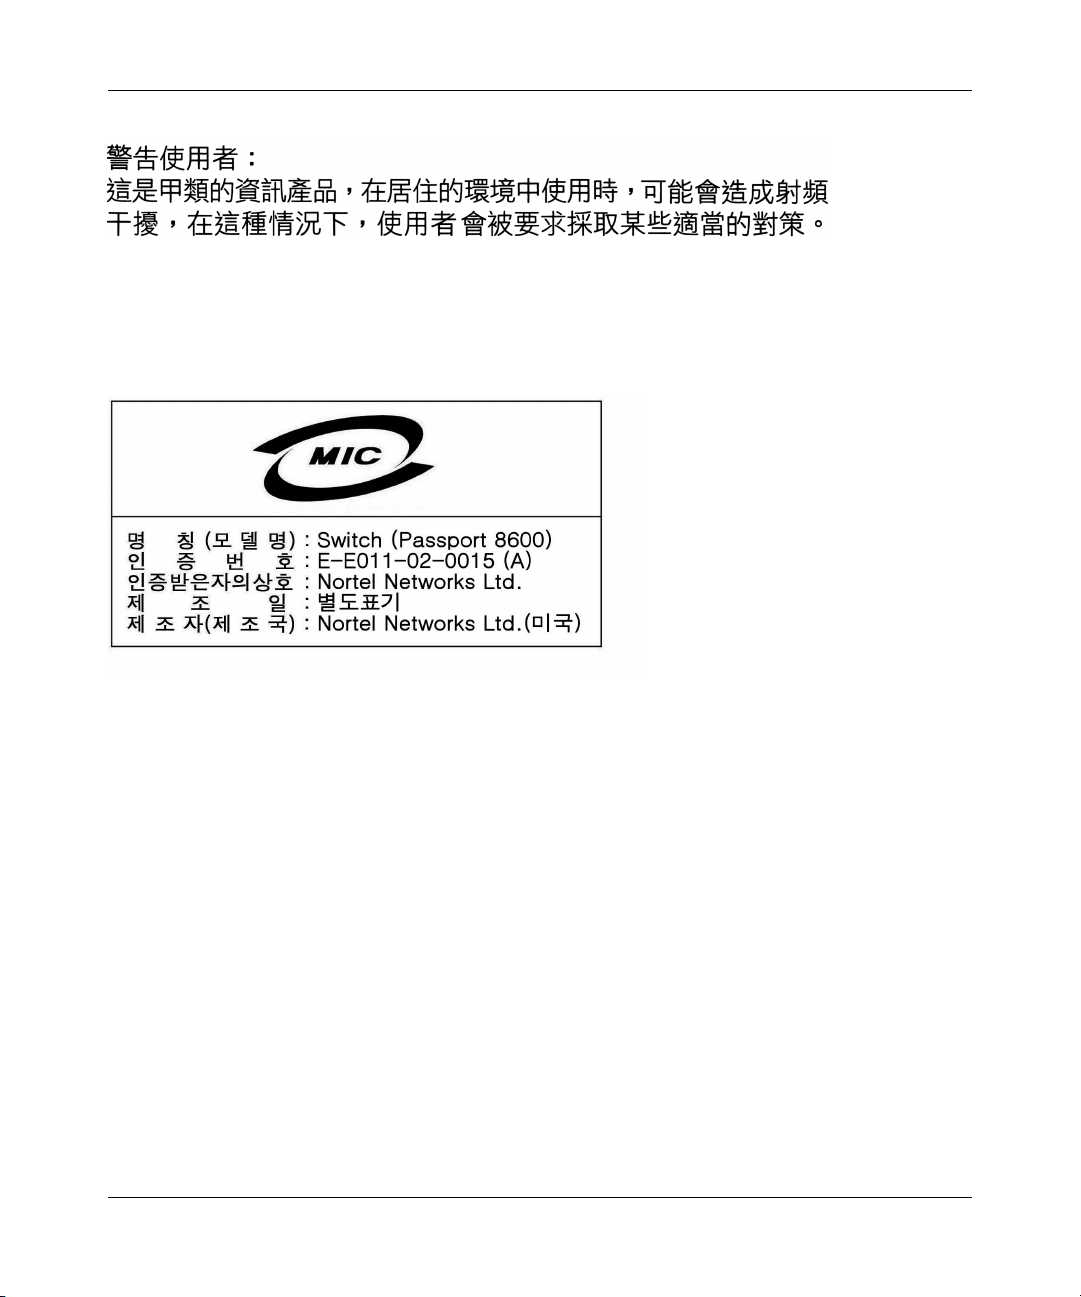
MIC notice (Republic of Korea only)
This device has been approved for use in Business applications only per the Class A requirements of the Republic of
Korea Ministry of Information and Communications (MIC). This device may not be sold for use in a non-business
application.
National safety statements of compliance
CE marking statement (Europe only)
EN 60 950 statement
This is to certify that the Nortel Networks 8000 Series chassis and components installed within the chassis are in
compliance with the requirements of EN 60 950 in accordance with the Low Voltage Directive. Additional national
differences for all European Union countries have been evaluated for compliance. Some components installed within the
8000 Series chassis may use a nickel-metal hydride (NiMH) and/or lithium-ion battery. The NiMH and lithium-ion
batteries are long-life batteries, and it is very possible that you will never need to replace them. However, should you
need to replace them, refer to the individual component manual for directions on replacement and disposal of the battery.
NOM statement (Mexico only)
The following information is provided on the devices described in this document in compliance with the safety
requirements of the Norma Oficial Méxicana (NOM):
Exporter: Nortel Networks, Inc.
Importer: Nortel Networks de México, S.A. de C.V.
313070-E Rev 00
4655 Great America Parkway
Santa Clara CA 95054 USA
Avenida Insurgentes Sur #1605

Piso 30, Oficina
Col. San Jose Insurgentes
Deleg-Benito Juarez
México D.F. 03900
Tel: 52 5 480 2100
Fax: 52 5 480 2199
Input: Model 8004DC:
-48 VDC, 29 A
single supply, single supply + one redundant supply, two supplies, or two + one redundant
supply configuration
Model 8005DC:
-48 VDC, 42 A
single supply, single supply + one redundant supply, two supplies, or two + one redundant
supply configuration
Información NOM (unicamente para México)
La información siguiente se proporciona en el dispositivo o en los dispositivos descritos en este documento, en
cumplimiento con los requisitos de la Norma Oficial Méxicana (NOM):
Exportador: Nortel Networks, Inc.
4655 Great America Parkway
Santa Clara, CA 95054 USA
Importador: Nortel Networks de México, S.A. de C.V.
Avenida Insurgentes Sur #1605
Piso 30, Oficina
Col. San Jose Insurgentes
Deleg-Benito Juarez
México D.F. 03900
Tel: 52 5 480 2100
Fax: 52 5 480 2199
5
Installing a DC Power Supply in an Ethernet Routing Switch 8000 Series Chassis

6
Embarcar a: Model 8004DC:
-48 VDC, 29 A
una fuente, una fuente + configuraciones de una fuente redundante, dos fuentes o dos +
configuraciones de una fuente redundante
Model 8005DC:
-48 VDC, 42 A
una fuente, una fuente + configuraciones de una fuente redundante, dos fuentes o dos +
configuraciones de una fuente redundante
Nortel Networks Inc. software license agreement
NOTICE: Please carefully read this license agreement before copying or using the accompanying software or installing
the hardware unit with pre-enabled software (each of which is referred to as “Software” in this Agreement). BY
COPYING OR USING THE SOFTWARE, YOU ACCEPT ALL OF THE TERMS AND CONDITIONS OF THIS
LICENSE AGREEMENT. THE TERMS EXPRESSED IN THIS AGREEMENT ARE THE ONLY TERMS UNDER
WHICH NORTEL NETWORKS WILL PERMIT YOU TO USE THE SOFTWARE. If you do not accept these terms
and conditions, return the product, unused and in the original shipping container, within 30 days of purchase to obtain a
credit for the full purchase price.
1. License grant. Nortel Networks Inc. (“Nortel Networks”) grants the end user of the Software (“Licensee”) a personal,
nonexclusive, nontransferable license: a) to use the Software either on a single computer or, if applicable, on a single
authorized device identified by host ID, for which it was originally acquired; b) to copy the Software solely for backup
purposes in support of authorized use of the Software; and c) to use and copy the associated user manual solely in
support of authorized use of the Software by Licensee. This license applies to the Software only and does not extend to
Nortel Networks Agent software or other Nortel Networks software products. Nortel Networks Agent software or other
Nortel Networks software products are licensed for use under the terms of the applicable Nortel Networks Inc. Software
License Agreement that accompanies such software and upon payment by the end user of the applicable license fees for
such software.
2. Restrictions on use; reservation of rights. The Software and user manuals are protected under copyright laws.
Nortel Networks and/or its licensors retain all title and ownership in both the Software and user manuals, including any
revisions made by Nortel Networks or its licensors. The copyright notice must be reproduced and included with any copy
of any portion of the Software or user manuals. Licensee may not modify, translate, decompile, disassemble, use for any
competitive analysis, reverse engineer, distribute, or create derivative works from the Software or user manuals or any
copy, in whole or in part. Except as expressly provided in this Agreement, Licensee may not copy or transfer the
Software or user manuals, in whole or in part. The Software and user manuals embody Nortel Networks’s and its
licensors’ confidential and proprietary intellectual property. Licensee shall not sublicense, assign, or otherwise disclose
to any third party the Software, or any information about the operation, design, performance, or implementation of the
Software and user manuals that is confidential to Nortel Networks and its licensors; however, Licensee may grant
permission to its consultants, subcontractors, and agents to use the Software at Licensee’s facility, provided they have
agreed to use the Software only in accordance with the terms of this license.
3. Limited warranty. Nortel Networks warrants each item of Software, as delivered by Nortel Networks and properly
installed and operated on Nortel Networks hardware or other equipment it is originally licensed for, to function
substantially as described in its accompanying user manual during its warranty period, which begins on the date
Software is first shipped to Licensee. If any item of Software fails to so function during its warranty period, as the sole
remedy Nortel Networks will at its discretion provide a suitable fix, patch, or workaround for the problem that may be
included in a future Software release. Nortel Networks further warrants to Licensee that the media on which the
Software is provided will be free from defects in materials and workmanship under normal use for a period of 90 days
from the date Software is first shipped to Licensee. Nortel Networks will replace defective media at no charge if it is
returned to Nortel Networks during the warranty period along with proof of the date of shipment. This warranty does not
apply if the media has been damaged as a result of accident, misuse, or abuse. The Licensee assumes all responsibility
313070-E Rev 00

for selection of the Software to achieve Licensee’s intended results and for the installation, use, and results obtained from
the Software. Nortel Networks does not warrant a) that the functions contained in the software will meet the Licensee’s
requirements, b) that the Software will operate in the hardware or software combinations that the Licensee may select, c)
that the operation of the Software will be uninterrupted or error free, or d) that all defects in the operation of the Software
will be corrected. Nortel Networks is not obligated to remedy any Software defect that cannot be reproduced with the
latest Software release. These warranties do not apply to the Software if it has been (i) altered, except by Nortel
Networks or in accordance with its instructions; (ii) used in conjunction with another vendor’s product, resulting in the
defect; or (iii) damaged by improper environment, abuse, misuse, accident, or negligence. THE FOREGOING
WARRANTIES AND LIMITATIONS ARE EXCLUSIVE REMEDIES AND ARE IN LIEU OF ALL OTHER
WARRANTIES EXPRESS OR IMPLIED, INCLUDING WITHOUT LIMITATION ANY WARRANTY OF
MERCHANTABILITY OR FITNESS FOR A PARTICULAR PURPOSE. Licensee is responsible for the security of its
own data and information and for maintaining adequate procedures apart from the Software to reconstruct lost or altered
files, data, or programs.
4. Limitation of liability. IN NO EVENT WILL NORTEL NETWORKS OR ITS LICENSORS BE LIABLE FOR
ANY COST OF SUBSTITUTE PROCUREMENT; SPECIAL, INDIRECT, INCIDENTAL, OR CONSEQUENTIAL
DAMAGES; OR ANY DAMAGES RESULTING FROM INACCURATE OR LOST DATA OR LOSS OF USE OR
PROFITS ARISING OUT OF OR IN CONNECTION WITH THE PERFORMANCE OF THE SOFTWARE, EVEN IF
NORTEL NETWORKS HAS BEEN ADVISED OF THE POSSIBILITY OF SUCH DAMAGES. IN NO EVENT
SHALL THE LIABILITY OF NORTEL NETWORKS RELATING TO THE SOFTWARE OR THIS AGREEMENT
EXCEED THE PRICE PAID TO NORTEL NETWORKS FOR THE SOFTWARE LICENSE.
5. Government licensees. This provision applies to all Software and documentation acquired directly or indirectly by or
on behalf of the United States Government. The Software and documentation are commercial products, licensed on the
open market at market prices, and were developed entirely at private expense and without the use of any U.S.
Government funds. The license to the U.S. Government is granted only with restricted rights, and use, duplication, or
disclosure by the U.S. Government is subject to the restrictions set forth in subparagraph (c)(1) of the Commercial
Computer Software––Restricted Rights clause of FAR 52.227-19 and the limitations set out in this license for civilian
agencies, and subparagraph (c)(1)(ii) of the Rights in Technical Data and Computer Software clause of DFARS
252.227-7013, for agencies of the Department of Defense or their successors, whichever is applicable.
6. Use of software in the European Community. This provision applies to all Software acquired for use within the
European Community. If Licensee uses the Software within a country in the European Community, the Software
Directive enacted by the Council of European Communities Directive dated 14 May, 1991, will apply to the examination
of the Software to facilitate interoperability. Licensee agrees to notify Nortel Networks of any such intended examination
of the Software and may procure support and assistance from Nortel Networks.
7. Term and termination. This license is effective until terminated; however, all of the restrictions with respect to
Nortel Networks’s copyright in the Software and user manuals will cease being effective at the date of expiration of the
Nortel Networks copyright; those restrictions relating to use and disclosure of Nortel Networks’s confidential
information shall continue in effect. Licensee may terminate this license at any time. The license will automatically
terminate if Licensee fails to comply with any of the terms and conditions of the license. Upon termination for any
reason, Licensee will immediately destroy or return to Nortel Networks the Software, user manuals, and all copies.
Nortel Networks is not liable to Licensee for damages in any form solely by reason of the termination of this license.
8. Export and re-export. Licensee agrees not to export, directly or indirectly, the Software or related technical data or
information without first obtaining any required export licenses or other governmental approvals. Without limiting the
foregoing, Licensee, on behalf of itself and its subsidiaries and affiliates, agrees that it will not, without first obtaining all
export licenses and approvals required by the U.S. Government: (i) export, re-export, transfer, or divert any such
Software or technical data, or any direct product thereof, to any country to which such exports or re-exports are restricted
or embargoed under United States export control laws and regulations, or to any national or resident of such restricted or
embargoed countries; or (ii) provide the Software or related technical data or information to any military end user or for
any military end use, including the design, development, or production of any chemical, nuclear, or biological weapons.
7
Installing a DC Power Supply in an Ethernet Routing Switch 8000 Series Chassis

8
9. General. If any provision of this Agreement is held to be invalid or unenforceable by a court of competent
jurisdiction, the remainder of the provisions of this Agreement shall remain in full force and effect. This Agreement will
be governed by the laws of the state of California.
Should you have any questions concerning this Agreement, contact Nortel Networks Inc., 2375 N. Glenville Dr.,
Richardson, TX 75082.
LICENSEE ACKNOWLEDGES THAT LICENSEE HAS READ THIS AGREEMENT, UNDERSTANDS IT, AND
AGREES TO BE BOUND BY ITS TERMS AND CONDITIONS. LICENSEE FURTHER AGREES THAT THIS
AGREEMENT IS THE ENTIRE AND EXCLUSIVE AGREEMENT BETWEEN NORTEL NETWORKS AND
LICENSEE, WHICH SUPERSEDES ALL PRIOR ORAL AND WRITTEN AGREEMENTS AND
COMMUNICATIONS BETWEEN THE PARTIES PERTAINING TO THE SUBJECT MATTER OF THIS
AGREEMENT. NO DIFFERENT OR ADDITIONAL TERMS WILL BE ENFORCEABLE AGAINST NORTEL
NETWORKS UNLESS NORTEL NETWORKS GIVES ITS EXPRESS WRITTEN CONSENT, INCLUDING AN
EXPRESS WAIVER OF THE TERMS OF THIS AGREEMENT.
313070-E Rev 00

Contents
Preface . . . . . . . . . . . . . . . . . . . . . . . . . . . . . . . . . . . . . . . . . . . . . . . . . . . . . . 15
Before you begin . . . . . . . . . . . . . . . . . . . . . . . . . . . . . . . . . . . . . . . . . . . . . . . . . . . . . 15
Text convention . . . . . . . . . . . . . . . . . . . . . . . . . . . . . . . . . . . . . . . . . . . . . . . . . . . . . . 15
How to get help . . . . . . . . . . . . . . . . . . . . . . . . . . . . . . . . . . . . . . . . . . . . . . . . . . . . . . 16
Finding the latest updates on the Nortel Web site . . . . . . . . . . . . . . . . . . . . . . . . . 16
Getting help from the Nortel Web site . . . . . . . . . . . . . . . . . . . . . . . . . . . . . . . . . . 16
Getting help over the phone from a Nortel Solutions Center . . . . . . . . . . . . . . . . . 16
Getting help from a specialist by using an Express Routing Code . . . . . . . . . . . . 17
Getting help through a Nortel distributor or reseller . . . . . . . . . . . . . . . . . . . . . . . . 17
Chapter 1
8000 Series DC power supplies . . . . . . . . . . . . . . . . . . . . . . . . . . . . . . . . . . 19
8004DC power supply . . . . . . . . . . . . . . . . . . . . . . . . . . . . . . . . . . . . . . . . . . . . . . . . . 21
Determining the minimum number of 8004DC power supplies to install . . . . . . . . 22
Redundant power configuration . . . . . . . . . . . . . . . . . . . . . . . . . . . . . . . . . . . . . . . 23
8005DC power supply . . . . . . . . . . . . . . . . . . . . . . . . . . . . . . . . . . . . . . . . . . . . . . . . . 24
Determining the minimum number of 8005DC power supplies to install . . . . . . . . 24
Redundant power configuration . . . . . . . . . . . . . . . . . . . . . . . . . . . . . . . . . . . . . . . 25
9
Chapter 2
Adding and replacing DC power supplies. . . . . . . . . . . . . . . . . . . . . . . . . . 27
Removing the bottom bezel (8010co chassis) . . . . . . . . . . . . . . . . . . . . . . . . . . . . . . . 28
Removing and installing a power filler panel . . . . . . . . . . . . . . . . . . . . . . . . . . . . . . . . 29
Installing the DC power supply . . . . . . . . . . . . . . . . . . . . . . . . . . . . . . . . . . . . . . . . . . 32
Preparing cables . . . . . . . . . . . . . . . . . . . . . . . . . . . . . . . . . . . . . . . . . . . . . . . . . . 34
Installing the power supply . . . . . . . . . . . . . . . . . . . . . . . . . . . . . . . . . . . . . . . . . . 36
Removing the DC power supply . . . . . . . . . . . . . . . . . . . . . . . . . . . . . . . . . . . . . . . . . . 45
Replacing the bottom bezel (8010co chassis) . . . . . . . . . . . . . . . . . . . . . . . . . . . . . . . 52
Installing a DC Power Supply in an Ethernet Routing Switch 8000 Series Chassis

10 Contents
Appendix A
Technical specifications for the DC Power Supply. . . . . . . . . . . . . . . . . . . 57
Model 8004DC power supply . . . . . . . . . . . . . . . . . . . . . . . . . . . . . . . . . . . . . . . . . . . . 57
Model 8005DC power supply . . . . . . . . . . . . . . . . . . . . . . . . . . . . . . . . . . . . . . . . . . . . 59
Replacing bezel model 312096-A . . . . . . . . . . . . . . . . . . . . . . . . . . . . . . . . . . . . . 52
Replacing bezel model 321325-A . . . . . . . . . . . . . . . . . . . . . . . . . . . . . . . . . . . . . 54
DC input power specifications . . . . . . . . . . . . . . . . . . . . . . . . . . . . . . . . . . . . . . . . 58
DC output power specifications . . . . . . . . . . . . . . . . . . . . . . . . . . . . . . . . . . . . . . . 58
DC input power specifications . . . . . . . . . . . . . . . . . . . . . . . . . . . . . . . . . . . . . . . . 59
DC output power specifications . . . . . . . . . . . . . . . . . . . . . . . . . . . . . . . . . . . . . . . 59
313070-E Rev 00

Figures
Figure 1 8004DC power supply . . . . . . . . . . . . . . . . . . . . . . . . . . . . . . . . . . . . . . . 22
Figure 2 8005DC power supply . . . . . . . . . . . . . . . . . . . . . . . . . . . . . . . . . . . . . . . 24
Figure 3 Removing the bottom front bezel from the 8010co chassis . . . . . . . . . . . 28
Figure 4 Removing a power filler panel: 8010co chassis . . . . . . . . . . . . . . . . . . . . 29
Figure 5 Removing a power filler panel: 8006 and 8010 chassis . . . . . . . . . . . . . . 30
Figure 6 Installing a power filler panel: 8010co chassis . . . . . . . . . . . . . . . . . . . . . 31
Figure 7 Installing a power filler panel: 8006 and 8010 chassis . . . . . . . . . . . . . . . 31
Figure 8 Cable stripping requirements for 8004DC . . . . . . . . . . . . . . . . . . . . . . . . 34
Figure 9 Cable stripping requirements for 8005DC . . . . . . . . . . . . . . . . . . . . . . . . 35
Figure 10 DC power supply power switch . . . . . . . . . . . . . . . . . . . . . . . . . . . . . . . . . 36
Figure 11 Inserting the DC power supply: 8010co chassis . . . . . . . . . . . . . . . . . . . . 37
Figure 12 Inserting the DC power supply: 8006 and 8010 chassis . . . . . . . . . . . . . 37
Figure 13 Removing the plastic safety cover from the DC power supply . . . . . . . . . 38
Figure 14 DC power supply input and ground stud location (8004) . . . . . . . . . . . . . 38
Figure 15 DC power supply input and ground stud location (8005) . . . . . . . . . . . . . 39
Figure 16 Attaching the earth ground lead to the ground stud (8004) . . . . . . . . . . . 40
Figure 17 Attaching the earth ground lead to the ground studs (8005) . . . . . . . . . . 41
Figure 18 Attaching the voltage leads to the power supply terminals . . . . . . . . . . . . 41
Figure 19 Tightening the retaining screws on the DC power supply: 8010co chassis 42
Figure 20 Tightening the retaining screws on the DC power supply: 8006 and 8010
Figure 21 Replacing the plastic safety cover on the DC power supply . . . . . . . . . . . 43
Figure 22 DC power supply power switch . . . . . . . . . . . . . . . . . . . . . . . . . . . . . . . . . 44
Figure 23 DC power supply power switch . . . . . . . . . . . . . . . . . . . . . . . . . . . . . . . . . 46
Figure 24 Removing the plastic safety cover from the DC power supply . . . . . . . . . 47
Figure 25 Loosening the retaining screws on the DC power supply: 8010co chassis 48
11
chassis . . . . . . . . . . . . . . . . . . . . . . . . . . . . . . . . . . . . . . . . . . . . . . . . . . . 42
Installing a DC Power Supply in an Ethernet Routing Switch 8000 Series Chassis

12 Figures
Figure 26 Loosening the retaining screws on the DC power supply: 8006 and 8010
Figure 27 Disconnecting the DC power supply from the backplane: 8010co chassis 49
Figure 28 Disconnecting the DC power supply from the backplane: 8006 and 8010
Figure 29 Disconnecting the positive and negative voltage leads . . . . . . . . . . . . . . 50
Figure 30 Disconnecting the earth ground lead from the DC power supply . . . . . . . 51
Figure 31 Removing the DC power supply from the 8010co chassis . . . . . . . . . . . . 51
Figure 32 Removing the DC power supply from the 8006 and 8010 chassis . . . . . . 52
Figure 33 Replacing the bottom front bezel on the 8010co chassis . . . . . . . . . . . . . 53
Figure 34 Replacing the front bezel on the 8010co chassis . . . . . . . . . . . . . . . . . . . 54
chassis . . . . . . . . . . . . . . . . . . . . . . . . . . . . . . . . . . . . . . . . . . . . . . . . . . . 48
chassis . . . . . . . . . . . . . . . . . . . . . . . . . . . . . . . . . . . . . . . . . . . . . . . . . . . 49
313070-E Rev 00

Tables
Table 1 Power supply model to install for your chassis . . . . . . . . . . . . . . . . . . . . . 19
Table 2 Power supply LED . . . . . . . . . . . . . . . . . . . . . . . . . . . . . . . . . . . . . . . . . . 20
Table 3 DC power supply shipping accessories: 8004DC . . . . . . . . . . . . . . . . . . . 32
Table 4 DC power supply shipping accessories: 8005DC . . . . . . . . . . . . . . . . . . . 33
13
Installing a DC Power Supply in an Ethernet Routing Switch 8000 Series Chassis

14 Tables
313070-E Rev 00

Preface
15
This guide provides information about the following power supplies:
• 8004DC
• 8005DC
It also includes instructions for adding and replacing these DC power supplies in
the following 8000 Series chassis models:
• 8006 Chassis
• 8010 Chassis
• 8010co Chassis
For a list of related publications, see the release notes that accompany your
software.
Before you begin
This guide is intended for qualified service personnel who need to add or replace a
DC power supply in a 8000 Series chassis. A qualified service person should have
appropriate technical training and experience and be aware of the hazards
involved in installing and replacing customer-replaceable units.
Text convention
This guide uses the following text convention:
italic text Indicates new terms and book titles.
Installing a DC Power Supply in an Ethernet Routing Switch 8000 Series Chassis

16 Preface
How to get help
This section explains how to get help for Nortel products and services.
Finding the latest updates on the Nortel Web site
The content of this documentation was current at the time the product was
released. To check for updates to the latest documentation and software for the
Ethernet Routing Switch, click one of the following links:
Link to Takes you directly to the
Latest software Nortel page for Ethernet Routing Switch software.
Latest documentation Nortel page for Ethernet Routing Switch documentation.
Getting help from the Nortel Web site
The best way to get technical support for Nortel products is from the Nortel
Technical Support Web site:
www.nortel.com/support
This site provides quick access to software, documentation, bulletins, and tools to
address issues with Nortel products. From this site, you can:
• download software, documentation, and product bulletins
• search the Technical Support Web site and the Nortel Knowledge Base for
answers to technical issues
• sign up for automatic notification of new software and documentation for
Nortel equipment
• open and manage technical support cases
Getting help over the phone from a Nortel Solutions Center
If you do not find the information you require on the Nortel Technical Support
Web site, and you have a Nortel support contract, you can also get help over the
phone from a Nortel Solutions Center.
313070-E Rev 00

Preface 17
In North America, call 1-800-4NORTEL (1-800-466-7835).
Outside North America, go to the following web site to obtain the phone number
for your region:
www.nortel.com/callus
Getting help from a specialist by using an Express Routing Code
To access some Nortel Technical Solutions Centers, you can use an Express
Routing Code (ERC) to quickly route your call to a specialist in your Nortel
product or service. To locate the ERC for your product or service, go to:
www.nortel.com/erc
Getting help through a Nortel distributor or reseller
If you purchased a service contract for your Nortel product from a distributor or
authorized reseller, contact the technical support staff for that distributor or
reseller.
Installing a DC Power Supply in an Ethernet Routing Switch 8000 Series Chassis

18 Preface
313070-E Rev 00

Chapter 1
8000 Series DC power supplies
This chapter describes the 8000 Series chassis DC power supplies. It includes the
following topics:
Topic Pa ge
8004DC power supply 21
8005DC power supply 24
The 8006, 8010, and 8010co chassis have three bays for power supplies. Use to
determine which power supply to install for your chassis.
Table 1 Power supply model to install for your chassis
Chassis DC power supply model
19
8006 8004DC or 8005DC
8010 8004DC or 8005DC
8010co 8004DC or 8005DC
Note: Software checks: If the total power provided by the power
supplies falls below the switch requirement, the polling software
displays the following message on the console: chCheckPowerUsage:
One or more cards running low on power.
The total power used by the switch and the total amount of power
provided by the power supplies can be seen by using the "show sys info"
command or by accessing the chassis/edit menu in Device Manager.
Installing a DC Power Supply in an Ethernet Routing Switch 8000 Series Chassis

20 8000 Series DC power supplies
Note: The 8010co equipment shelf load and 8004DC power rating shall
be limited to 732w per power supply when configured with the 8010co
BIP. The product configuration limitation is required to be in
compliance with the electrical code, because of the difference between
the 8010co BIP output circuit protection rating of 30A and the 8004DC
power supply input current rating of 29A at -48Vdc nominal operating
condition.
Note: The 8002DC power supply is discontinued. The 8004DC or
8005DC power supply replaces the 8002DC power supply.
Caution: The 8004DC and 8005DC power supplies have different
power ratings. Therefore, Nortel recommends that you do not operate the
Ethernet Routing Switch 8600 chassis with a mix of power supply
models.
313070-E Rev 00
If you are upgrading the Ethernet Routing Switch 8600, and have a
redundant power configuration, you can hot-swap the 8004DC power
supply with the 8005DC power supply while the Ethernet Routing
Switch 8600 system remains in operation. Do not operate the chassis
with a mix of power supply models for an extended period of time.
Upgrade power supplies before upgrading modules.
Tabl e 2 describes the power supply LED on the DC power supply.
Table 2 Power supply LED
State Meaning
Off No output is present.
On (green) Power supply output is normal.

The 8000 Series chassis ships with no installed power supplies. Install the first
power supply in the leftmost bay. Power supply bays are numbered 1, 2, and 3 left
to right as viewed from the front of the chassis for the 8006, 8010, and 8010co.
For instructions on how to install the power supplies, see “Installing the DC power
supply” on page 32.
The 8002DC power supply is discontinued. The 8004DC or 8005DC power
supply replaces the 8002DC power supply. For information on the 8002DC power
supply, see the Ethernet Routing Switch 8600 Software Release 4.1
documentation.
Note: The 8002DC power supply has not been tested with Ethernet
Routing Switch 8600 modules released since 8600 Release 3.7.
Therefore, Nortel recommends that you use the 8004DC or 8005DC
power supply with these modules.
8004DC power supply
8000 Series DC power supplies 21
Each 8004DC power supply provides 850 watts (W) of power to the switch.
Figure 1 shows the 8004DC power supply used in the 8006, 8010, and 8010co
chassis.
Installing a DC Power Supply in an Ethernet Routing Switch 8000 Series Chassis

22 8000 Series DC power supplies
Figure 1 8004DC power supply
C
D
+
C
-D
10220FA
Determining the minimum number of 8004DC power supplies to install
When configuring an Ethernet Routing Switch 8600 system, you should consider
total power consumption to ensure proper system performance.
313070-E Rev 00
The total input power-consumption of the components (modules and fan trays)
must not exceed the output power rating of the 8004DC power supply (850W).
To determine the minimum number of power supplies to install for the Ethernet
Routing Switch 8600 system:
1 Add the total (3.3 V and 12 V) input power consumption (wattage) for all
components (modules and fan tray assemblies). See “Technical specifications
for the Ethernet Routing Switch 8600 Chassis” in Installing and Maintaining
the Ethernet Routing Switch 8600 Chassis.
2 Refer to the output power rating of the 8004DC power supply. For the
8004DC power supply specifications, See Appendix A, “Technical
specifications for the DC Power Supply,” on page 57.

8000 Series DC power supplies 23
If either the individual or combined power for the components exceed the
output power rating of the power supply, you need to add at least one more
power supply to your configuration.
3 Consider your redundant power supply needs. If one power supply satisfies
your system power-consumption needs, a second power supply provides
redundancy. If two power supplies satisfy your system power consumption
needs, a third power supply provides redundancy.
Redundant power configuration
If a chassis has a redundant power configuration and one power supply fails, the
chassis continues to operate with no interruption of service. The chassis will
continue to supply the same module output power with the remaining power
supplies. A trap and syslog message will indicate that the configuration is
non-redundant. Nortel recommends that you operate the Ethernet Routing Switch
8600 system in a redundant configuration at all times to ensure maximum network
up time.
If a chassis has the minimum power supply configuration and one power supply
fails, the system loses power and network connectivity.
Note: Nortel recommends that you install each power supply on its own
dedicated branch circuit. This ensures that a fault on another branch
circuit doesn’t cascade onto other branch circuits.
A redundant power supply provides protection against the failure of
another power supply in the system.
Installing a DC Power Supply in an Ethernet Routing Switch 8000 Series Chassis

24 8000 Series DC power supplies
8005DC power supply
Each 8005DC power supply provides 1462 watts (W) of power to the switch.
Figure 2 shows the 8005DC power supply used in the 8006, 8010, and 8010co
chassis.
Figure 2 8005DC power supply
N
O
OFF
+DC
-DC
553-AAA2681
Determining the minimum number of 8005DC power supplies to install
When configuring an Ethernet Routing Switch 8600 system, you should consider
total power consumption to ensure proper system performance.
313070-E Rev 00
The total input power consumption of the components (modules and fan trays)
must not exceed the 8005DC power supply rating.
To determine the minimum number of power supplies to install for the Ethernet
Routing Switch 8600 system:
1 Add the total (3.3 V and 12 V) input power consumption (wattage) for all
components (modules and fan trays). See “Technical specifications for the

8000 Series DC power supplies 25
Ethernet Routing Switch 8600 Chassis” in Installing and Maintaining the
Ethernet Routing Switch 8600 Chassis.
2 Refer to the output power rating of the 8005DC power supply based on the
input connection. See Appendix A, “Technical specifications for the DC
Power Supply,” on page 57.
If either the individual or combined power requirements for the components
exceeds the power supply rating, you need to add at least one more power
supply to your configuration.
3 Consider your redundant power supply needs. If one power supply satisfies
your system power consumption needs, a second power supply provides
redundancy. If two power supplies satisfy your system power consumption
needs, a third power supply provides redundancy.
Redundant power configuration
If a chassis has a redundant power configuration and one power supply fails, the
chassis continues to operate with no interruption of service. The chassis will
continue to supply the same module output power with the remaining power
supplies. A trap and syslog message will indicate that the configuration is
non-redundant. Nortel recommends that you operate the Ethernet Routing Switch
8600 system in a redundant configuration at all times to ensure maximum network
up time.
Note: Nortel recommends that you install each power supply on its own
dedicated branch circuit. This ensures that a fault on another branch
circuit doesn’t cascade onto other branch circuits.
A redundant power supply provides protection against the failure of
another power supply in the system.
If a chassis has the minimum power supply configuration and one power supply
fails, the system loses power and network connectivity.
Installing a DC Power Supply in an Ethernet Routing Switch 8000 Series Chassis

26 8000 Series DC power supplies
313070-E Rev 00

Chapter 2
Adding and replacing DC power supplies
This chapter provides instructions for installing DC power supplies in the 8000
Series chassis. This chapter includes the following topics:
Topic Pa ge
Removing the bottom bezel (8010co chassis) 28
Removing and installing a power filler panel 29
Installing the DC power supply 32
Removing the DC power supply 45
Replacing the bottom bezel (8010co chassis) 52
27
Installing a DC Power Supply in an Ethernet Routing Switch 8000 Series Chassis

28 Adding and replacing DC power supplies
Removing the bottom bezel (8010co chassis)
To access the 8010co chassis power supplies, you must remove the bottom front
bezel.
To remove the bottom front bezel:
1 Using a Phillips screwdriver, loosen the two captive screws that secure the
bezel to the chassis (Figure 3).
2 Pull the top of the bezel forward and then lift the bezel from the two tabs on
the bottom of the chassis.
Figure 3 Removing the bottom front bezel from the 8010co chassis
313070-E Rev 00
il
a
F
s
s
a
il
a
F
s
s
a
P
P
Bottom bezel
10363FABIPnew

Adding and replacing DC power supplies 29
Removing and installing a power filler panel
A power filler panel maintains the proper cooling airflow in the 8000 Series
chassis. When you install a power supply in a bay for the first time, you must first
remove the power filler panel from the power bay. If you remove a power supply
from the chassis without replacing it, you must install a power filler panel.
To remove a power filler panel:
1 For the 8010co chassis, remove the bottom front bezel.
For instructions, see “Removing the bottom bezel (8010co chassis)” on
page 28.
2 Using a Phillips screwdriver, loosen the two captive screws that secure the
power filler panel to the chassis until the power filler panel disengages
(Figure 4 and Figure 5 on page 30).
Figure 4 Removing a power filler panel: 8010co chassis
10416FA
Installing a DC Power Supply in an Ethernet Routing Switch 8000 Series Chassis

30 Adding and replacing DC power supplies
Figure 5 Removing a power filler panel: 8006 and 8010 chassis
3 Pull the power filler panel out of the chassis.
8957FBO
313070-E Rev 00
Caution: Save the power filler panel in case you need to operate the
8000 Series chassis with a power supply removed.
To install a power filler panel:
1 For the 8010co chassis, remove the bottom front bezel.
For instructions, see “Removing the bottom bezel (8010co chassis)” on
page 28.
2 Place the power filler panel in the empty power supply bay (Figure 6 on
page 31 and Figure 7 on page 31).
3 Tighten the 2 captive screws until the power filler panel is seated firmly.

Adding and replacing DC power supplies 31
Figure 6 Installing a power filler panel: 8010co chassis
+DC
+DC
-DC
-DC
10415FA
Figure 7 Installing a power filler panel: 8006 and 8010 chassis
8957FBI
Installing a DC Power Supply in an Ethernet Routing Switch 8000 Series Chassis

32 Adding and replacing DC power supplies
Installing the DC power supply
Danger: Due to high-energy hazards, only qualified service personnel
are permitted to connect the 8000 Series chassis to the DC power source.
In addition to the DC power supply and the guide for installing it, your DC power
supply shipment contains several hardware accessories. Verify that the items in
the shipping container match those on the shipment packing list.
Use Table 3 as a checklist to verify the contents of the 8004DC shipping
container.
Table 3 DC power supply shipping accessories: 8004DC
Check Accessory Use to
2 two-hole crimp lug
terminals with
attached tubing
(8004)
1 one-hole crimp lug
terminal with attached
tubing
5 nuts Connect all leads.
5 lock washers Connect all leads.
1 washer Connect the ground stud.
Connect the positive and
negative power inputs.
Connect the ground stud.
Use Table 4 on page 33 as a checklist to verify the contents of the 8005DC
shipping container.
313070-E Rev 00

Adding and replacing DC power supplies 33
Table 4 DC power supply shipping accessories: 8005DC
Check Accessory Use to
3 two-hole crimp lug
terminals with
attached tubing
6 nuts Connect all leads.
6 lock washers Connect all leads.
2 washers Connect the ground stud.
Connect the positive and
negative power inputs.
Before you begin the installation, verify that you have these tools and materials:
•Cable
• Crimping tool for crimping the lugs onto the cable
• Heat gun to shrink the tubing around the cable (optional)
• 7/16-inch hex wrench
• Phillips screwdriver
Note: If you are installing a 8010co chassis and you ordered the
optional breaker interface panel (BIP), go to “Installing the power
supply” on page 36. The BIP does not support the 8005DC power supply
Installing a DC Power Supply in an Ethernet Routing Switch 8000 Series Chassis

34 Adding and replacing DC power supplies
Preparing cables
Nortel does not supply the cables for connecting the DC power supply to the DC
input power source. Select cables that comply with the electrical code of the
country where you will use the DC power supply.
Caution: You have the sole responsibility of ensuring that the
connection cable used with the DC power supply is appropriate for use
with the DC power source to which the power supply is connected.
Consider gauge, flammability, and mechanical serviceability when
determining which cables to use.
If you ordered the optional breaker interface panel (BIP), Nortel ships the cables
for connecting the BIP to the 8004DC power supply. Go to “Installing the power
supply” on page 36.
To prepare cables for connecting the power supply:
1 Strip 0.81 in. (2.1 cm) of insulation from the ends of the cables. See Figure 8
for 8004DC. See Figure 9 on page 35 for 8005DC.
Figure 8 Cable stripping requirements for 8004DC
1
2
1 = Single-hole crimp lug
2 = Two-hole crimp lug
>
0.81 in. (2.1 cm) 3 places
3 = Ground lead wire
4 = Positive lead wire
5 = Negative lead wire
3
4
5
10296EA
313070-E Rev 00

Adding and replacing DC power supplies 35
Figure 9 Cable stripping requirements for 8005DC
2
1
3
4
>
0.81 in. (2.1 cm) 3 places
1 = Two-hole crimp lug
2 = Ground lead wire
3 = Positive lead wire
4 = Negative lead wire
EA
2 Crimp the lugs onto the cables using a standard crimping tool.
Failure to properly crimp the lugs onto the cables constitutes a safety hazard.
3 If necessary, use a heat gun to shrink the tubing around the cable.
Installing a DC Power Supply in an Ethernet Routing Switch 8000 Series Chassis

36 Adding and replacing DC power supplies
Installing the power supply
To install a DC power supply:
1 Make sure that the power switch is turned off (Figure 10).
Figure 10 DC power supply power switch
+DC
-DC
1
2
313070-E Rev 00
1 = On
2 = Off
10298FA
2 For the 8010co chassis, remove the bottom front bezel.
For instructions, see “Removing the bottom bezel (8010co chassis)” on
page 28.
3 Remove the filler panel from the power bay if necessary.
For instructions, see “Removing and installing a power filler panel” on
page 29.
Caution: Save the power filler panel in case you need to operate the
8000 Series chassis with a power supply removed.
4 If you are replacing a failed power supply, remove the failed supply.
For instructions, see “Removing the DC power supply” on page 45.
5 Grasp the handle of the new power supply.

Adding and replacing DC power supplies 37
6 Push the new power supply partway into the bay, leaving the terminal block at
the side of the power supply exposed (Figure 11 and Figure 12).
Note: If you are installing the 8004DC power supply in a 8010co
Chassis and you have the optional breaker interface panel (BIP), go to
Installing the Breaker Interface Panel for the Ethernet Routing Switch
8010co Chassis.
Figure 11 Inserting the DC power supply: 8010co chassis
C
+D
C
-D
10340FA
Figure 12 Inserting the DC power supply: 8006 and 8010 chassis
9412FA
7 Using a Phillips screwdriver, remove the screw that secures the plastic safety
cover to the power supply, and then remove the cover (Figure 13 on page 38).
Set the cover aside; you will replace it later.
Installing a DC Power Supply in an Ethernet Routing Switch 8000 Series Chassis

38 Adding and replacing DC power supplies
Figure 13 Removing the plastic safety cover from the DC power supply
+DC
-DC
8 Note the positions of the ground stud and of the positive and negative power
inputs (Figure 14 and Figure 15 on page 39).
10412FA
The +VDC and -VDC inputs to the power supply are isolated from frame
ground. Either +VDC or -VDC may be referenced to frame ground for +48
VDC (nominal) or -48 VDC (nominal) applications.
Figure 14 DC power supply input and ground stud location (8004)
1
+DC
-DC
1 = Ground stud
2 = Positive power inputs
3 = Negative power inputs
2
3
10299FA
313070-E Rev 00

Adding and replacing DC power supplies 39
Figure 15 DC power supply input and ground stud location (8005)
1
+DC
-DC
1 = Ground studs
2 = Positive power inputs
3 = Negative power inputs
2
3
11400FA
9 Make sure that the +DC cable is always connected to the + terminal and that
the -DC cable is always connected to the - terminal.
Danger: Make sure that the DC power source is off by switching off the
circuit breaker or disconnected at the remote end before you connect the
terminal leads to the power supply.
Installing a DC Power Supply in an Ethernet Routing Switch 8000 Series Chassis

40 Adding and replacing DC power supplies
10 Attach the earth ground lead to the ground stud on the power supply
(Figure 16 and Figure 17 on page 41). Use the washers in this order:
a Flat washer
b Crimp lug
c Lock washer
d Hex nut
Figure 16 Attaching the earth ground lead to the ground stud (8004)
1
2
3
4
5
+DC
-DC
313070-E Rev 00
1 = Grounding stud
2 = Flat washer
3 = Crimp lug
6
4 = Lock washer
5 = Hex nut
6 = Earth ground lead
10297FA

A
Adding and replacing DC power supplies 41
Figure 17 Attaching the earth ground lead to the ground studs (8005)
1
2
3
4
5
+DC
-DC
6
1 = Grounding stud
2 = Flat washer
3 = Crimp lug
4 = Lock washer
5 = Hex nut
6 = Earth ground lead
11401F
11 Attach the positive voltage lead to the positive terminal on the power supply,
inserting a lock washer between the crimp lug and each hex nut (Figure 18).
Figure 18 Attaching the voltage leads to the power supply terminals
1
2
3
+DC
-DC
-DC
1 = Two-hole crimp lug
2 = Lock washer
3 = Hex nut
4 = Positive lead wire
5 = Negative lead wire
4
5
10300FA
Installing a DC Power Supply in an Ethernet Routing Switch 8000 Series Chassis

42 Adding and replacing DC power supplies
12 Attach the negative voltage lead to the negative terminal on the power supply
inserting a lock washer between the crimp lug and each hex nut Figure 18 on
page 41.
13 Using a 7/16 in. hex wrench, tighten the hex nut on each terminal.
14 Attach the earth ground cable to the system or rack ground for your DC input
power source.
15 Firmly slide the power supply all the way into the bay (Figure 19 and
Figure 20).
16 Tighten the retaining screws until the power supply is seated firmly.
Figure 19 Tightening the retaining screws on the DC power supply: 8010co
chassis
313070-E Rev 00
+DC
C
-D
10339FA
Figure 20 Tightening the retaining screws on the DC power supply: 8006 and
8010 chassis
9428FA
17 Attach the positive and negative terminal leads to the DC input power source
according to the proper safety and technical specifications for your 48 V
power distribution system.

Adding and replacing DC power supplies 43
18 Using a Phillips screwdriver, replace the plastic safety cover on the power
supply (Figure 21).
Figure 21 Replacing the plastic safety cover on the DC power supply
+DC
-DC
10413FA
19 For the 8010co chassis, replace the bottom front bezel.
For instructions, see “Replacing the bottom bezel (8010co chassis)” on
page 52.
20 Turn the DC input power source on, or reset the power source circuit breaker,
to provide power to the power supply.
Installing a DC Power Supply in an Ethernet Routing Switch 8000 Series Chassis

44 Adding and replacing DC power supplies
21 Turn the power supply switch to the on position (Figure 22).
Figure 22 DC power supply power switch
+DC
-DC
1 = On
2 = Off
1
2
10298FA
313070-E Rev 00
Note: Due to the N + 1 power sharing architecture, if your chassis
contains two or three non-redundant power supplies, Nortel recommends
that you turn on the power supplies simultaneously. If you wait longer to
turn on the supplies, the power supply(s) shut off within 7 seconds. To
correct this condition, turn off the power supplies for a short period of
time, and then turn on the power supplies again simultaneously.
If the LED on the power supply does not turn on, contact the Nortel Technical
Solutions Center.

Adding and replacing DC power supplies 45
Removing the DC power supply
You can remove a redundant power supply without affecting the operation of the
8600 Series switch. When you remove a power supply, the LED on the power
supply turns off, and the 8000 Series chassis automatically redistributes the load
to the remaining power supplies.
Caution: To maintain proper cooling, never operate the chassis with an
empty power supply bay. If you are replacing a failed power supply and
you do not have a power filler panel, leave the failed power supply
installed until a replacement power supply is available.
To remove a DC power supply:
1 For the 8010co chassis, remove the bottom front bezel.
For instructions, see “Removing the bottom bezel (8010co chassis)” on
page 28.
2 If you have a 8010co chassis and the optional breaker interface panel (BIP),
set the BIP circuit breakers to the off position.
For information, see Installing the Breaker Interface Panel for the Ethernet
Routing Switch 8010co Chassis.
Installing a DC Power Supply in an Ethernet Routing Switch 8000 Series Chassis

46 Adding and replacing DC power supplies
3 Turn the power supply switch to the off position (Figure 23).
Figure 23 DC power supply power switch
+DC
-DC
1 = On
2 = Off
1
2
10298FA
4 Disable the incoming power from the DC input power source. You may need
to switch a circuit breaker or turn off the DC input power source.
Danger: Make sure that the DC power source is off by switching off the
circuit breaker or disconnected at the remote end before you connect or
disconnect cables on the power supply.
313070-E Rev 00

Adding and replacing DC power supplies 47
5 Using a Phillips screwdriver, remove the screw that secures the plastic safety
cover to the power supply, and then remove the cover (Figure 24).
Set the cover aside; you will replace it later.
Figure 24 Removing the plastic safety cover from the DC power supply
+DC
-DC
10412FA
6 Disconnect the positive and negative terminal leads from the DC input power
source.
7 Disconnect the earth ground cable from the system or rack ground of your DC
input power source.
Installing a DC Power Supply in an Ethernet Routing Switch 8000 Series Chassis

48 Adding and replacing DC power supplies
8 Loosen the retaining screws on the power supply (Figure 25 and Figure 26).
Figure 25 Loosening the retaining screws on the DC power supply: 8010co
chassis
Figure 26 Loosening the retaining screws on the DC power supply: 8006 and
8010 chassis
+DC
C
-D
10338FA
313070-E Rev 00
9431FA

Adding and replacing DC power supplies 49
9 Lift the extractor lever to disconnect the power supply from the backplane
connector (Figure 27 and Figure 28).
Figure 27 Disconnecting the DC power supply from the backplane: 8010co
chassis
C
+D
C
-D
10337FA
Figure 28 Disconnecting the DC power supply from the backplane: 8006 and
8010 chassis
+DC
-D
C
9432FA
10 Slide the power supply partway out of the chassis.
Installing a DC Power Supply in an Ethernet Routing Switch 8000 Series Chassis

50 Adding and replacing DC power supplies
11 Disconnect the positive and negative voltage leads from the power supply
terminals (Figure 29).
Figure 29 Disconnecting the positive and negative voltage leads
+DC
-DC
-DC
1
2
3
1 = Two-hole crimp lug
2 = Lock washer
3 = Hex nut
4 = Positive lead wire
5 = Negative lead wire
4
5
10300FA
313070-E Rev 00

Adding and replacing DC power supplies 51
12 Disconnect the earth ground lead from the ground stud on the power supply
(Figure 30).
Figure 30 Disconnecting the earth ground lead from the DC power supply
1
2
3
4
5
+DC
-DC
6
1 = Grounding stud
2 = Flat washer
3 = Crimp lug
4 = Lock washer
5 = Hex nut
6 = Earth ground lead
10297FA
13 Slide the power supply all the way out of the chassis and set it aside
(Figure 31 and Figure 32 on page 52).
Figure 31 Removing the DC power supply from the 8010co chassis
C
+D
C
-D
10337FA
Installing a DC Power Supply in an Ethernet Routing Switch 8000 Series Chassis

52 Adding and replacing DC power supplies
Figure 32 Removing the DC power supply from the 8006 and 8010 chassis
+D
C
-D
C
9432FA
14 Install a new power supply (see “Installing the DC power supply” on page 32)
or install a power filler panel (see “Removing and installing a power filler
panel” on page 29).
Replacing the bottom bezel (8010co chassis)
Note: The 8005DC power supplies require a modified air intake bezel.
If you have installed Model 8005DC power supplies (1500 W) in the
8010co chassis and have air intake bezel imprinted with 312096-A, or if
you have difficulty installing the bezel over the 8005DC power supplies,
you can order modified bezel model 321325-A (Order Code
DS1411027).
Replacing bezel model 312096-A
313070-E Rev 00
Choose one of the following procedures for the specified bezel model:
To replace the bottom front bezel:
1 Hook the two bezel slots on the two chassis tabs (Figure 33 on page 53).

Adding and replacing DC power supplies 53
Figure 33 Replacing the bottom front bezel on the 8010co chassis
il
a
F
ss
a
Fail
ss
a
P
P
Bottom bezel
10363FABIPnew_1
2 Align the captive screws with the holes on the front of the chassis (Figure 33).
3 Push the sides of the bezel into place.
4 Using a Phillips screwdriver, tighten the two screws to secure the bezel to the
chassis (Figure 33).
Installing a DC Power Supply in an Ethernet Routing Switch 8000 Series Chassis

54 Adding and replacing DC power supplies
Replacing bezel model 321325-A
To replace the bottom front bezel:
1 Insert the three bottom bezel tabs behind the return flange on the power
module (Figure 34).
Figure 34 Replacing the front bezel on the 8010co chassis
il
a
F
s
as
il
a
F
ss
Pa
P
313070-E Rev 00
Bezel
Return flange
Bottom tab
2 Place the top of the bezel against the chassis.
3 Align the captive screws with the holes on the front of the chassis (Figure 34).
4 Using a Phillips screwdriver, tighten the two screws to secure the bezel to the
chassis (Figure 34).

Adding and replacing DC power supplies 55
Installing a DC Power Supply in an Ethernet Routing Switch 8000 Series Chassis

56 Adding and replacing DC power supplies
313070-E Rev 00

Appendix A
Technical specifications for the DC Power Supply
This appendix lists the electrical specifications for the 8004DC and 8005DC
power supplies
Topic Pa ge
Model 8004DC power supply 57
Model 8005DC power supply 59
Model 8004DC power supply
This section provides power ratings for the 8004DC power supply and includes
the following topics:
57
• DC input power specifications
• DC output power specifications
Installing a DC Power Supply in an Ethernet Routing Switch 8000 Series Chassis

58 Technical specifications for the DC Power Supply
DC input power specifications
Parameter Specifications
Input voltage -48 VDC
Input current 29 A
Input VA 1.4 kVA
Input power consumption 1392 W
Heat dissipation (thermal/output) 1850 Btu/hr
DC output power specifications
Parameter Specifications
Output power (maximum) 850 W maximum
Individual power ratings
Note:12 V power includes fan power
3.3 V @ 150 A
12 V @ 65 A
313070-E Rev 00

Technical specifications for the DC Power Supply 59
Model 8005DC power supply
This section provides power ratings for the 8005DC power supply and includes
the following topics:
• DC input power specifications
• DC output power specifications
DC input power specifications
Parameter Specifications
Input voltage -48 VDC/ -60 VDC
Input current 42/34 A
Input VA 1.95 kVA
Input power consumption 1950 W
Heat dissipation (thermal/output) 1666 Btu/hr
DC output power specifications
Parameter Specifications
Output power (maximum) 1462 W (1372 W + 90 W fans)
Modules
Fans
Installing a DC Power Supply in an Ethernet Routing Switch 8000 Series Chassis
3.3 V @ 150 A
12 V @ 72 A
12 VDC @ 7.5 A/24 A peak

60 Technical specifications for the DC Power Supply
313070-E Rev 00
 Loading...