

Page 1
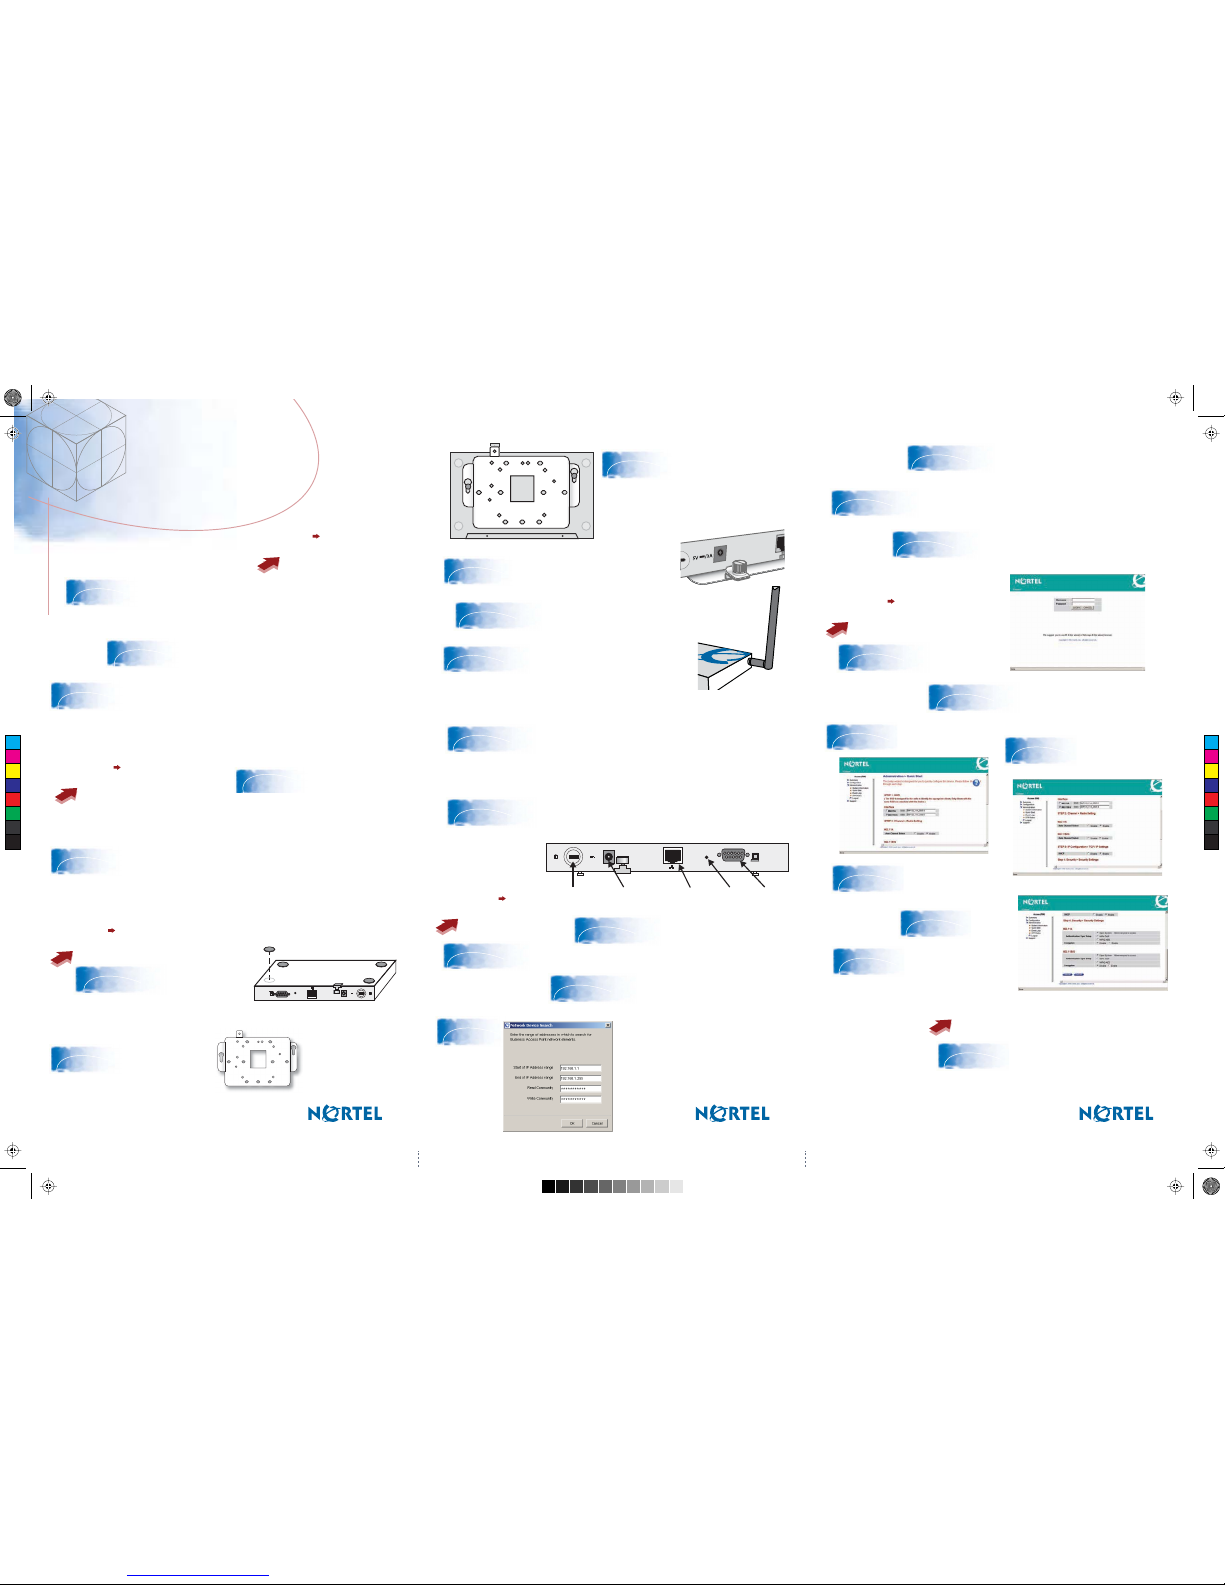
Steps 1 3
Before you start
Step 28
Restart the BAP120
Steps 21 27
Configure the BAP
Steps 14 20
Access the BAP
Steps 4 5
Prepare a location
Steps 6 13
Install the hardware
BAP120
Business Access Point 120
Quick Install Guide
Reset
5V /3A
Security Slot 5V DC
Power Socket
RJ-45 Port
PoE Connector
Reset Button ConsolePort
19
20
21
22
16
18
11
1
2
5
7
8
9
10
14
15
12
13
6
3
23
24
25
28
26
27
17
4
Reset
5V /3A
1. Inspect the BAP120 package contents: BAP120,
antennas (2), CAT5 network cable, mounting bracket,
rubber feet (4), Phillips screws (3), nylon anchors (3),
BAP120 Quick Install Guide.
AC power option: adapter, cord.
2. Download the Business Element Manager
1.0 Installer to a computer on your network. You
install the Element Manager in step 14.
3. Assemble the following tools and optional equipment.
a. Tools required: Phillips screwdriver
b. Additional equipment: Ethernet cable, AC power extension cord
(optional), Kensington Slim Microsaver security cable (optional)
c. Optional equipment for wall or ceiling mount: 0.5-inch (1 cm)
plywood base – 6 inch x 6 inch (15 cm x 15 cm), screws and
anchor bolts (optional) to mount plywood base
4. Because the BAP120 transmits radio signals optimally on
line-of-sight, the best location is one that is visible from all the
computers the BAP120 serves. Mount the BAP120 on a wall or
ceiling, or rest it on a high shelf.
6. If you are installing the BAP120 on a
shelf, stick the rubber feet onto the
embossed circles on the base of the unit.
You can download all software and
documents referenced in this Quick
Install Guide at www.nortel.com.
5. If you are hanging the BAP120 from a wall or ceiling, you must
have a gap of at least 0.5-inch (1 cm) between the base of the
BAP120 and an electrically conducting surface. Securely attach a
0.5-inch (1 cm) plywood base to the wall or ceiling to isolate the
BAP120 from the mounting surface. Leave enough space above
(wall mount) or behind (ceiling mount) to connect the power cord
and Ethernet cable.
9. Tighten the thumbscrew to secure the
BAP120 onto the mounting bracket.
8. Slide the pins on the base of the BAP120
into the keyhole slots on the mounting
bracket.
7. If you are mounting
the BAP120 on a wall
or ceiling, screw the
mounting plate to the
mounting surface with
the tab facing up (wall
mount) or behind
(ceiling mount). Use
the screws provided.
11. Protect the BAP120 from unauthorized
removal with a Kensington Slim Microsaver
security cable (optional).
12. Your BAP120 can use Power over Ethernet (PoE) and does
not need to be connected to an AC power source.
If a PoE connection is not available, connect the AC power
adapter to the BAP120, and then connect the AC power adapter
to an AC power source. Use only the supplied AC power
adapter.
13. Connect the Ethernet cable to the RJ-45 port, and then
connect the cable to an Ethernet or PoE port on your
Ethernet switch. The BAP120 automatically requests an IP
address from the DHCP server.
10. Attach the antennas to the BAP120. Rotate each
antenna so that it is perpendicular to the computers the
BAP120 serves.
14. To access the BAP120, first
install the Element Manager 1.0 on a
computer on the same network as
the BAP120.
15. Start the
Element Manager.
16. From the Element Manager menu,
select Network > Find Network
Elements > Business Access Point.
22. From the main menu, select
Administration > Quick Start.
21. Set the
Country Code.
23. Set the SSID.
Leave as is to accept
the default values.
24. Choose Enable to
set each Channel >
Radio Setting to Auto
Channel Select.
26. Set the
security
type, if
required.
27. To save your
configuration, click
Submit.
25. Choose Enable to set
DHCP for IP Configuration
> TCP/IP Settings.
28. From the main menu, select
Configuration> System >
Administration, and then click Reboot.
18. Select the BAP device from the list of
network elements on the Element
Manager tree.
19. Click the Web Page button on the Element
Manager menu to open the BAP120 Web User
Interface (WebUI).
20. Enter the default username (nnadmin)
and password (PlsChgMe!) to log on to the
BAP120.
17. Enter the range 192.168.1.1 to
192.168.1.255, and then click OK.
Note: By default the Read Community
is PlsChgMe!RO and the Write
Community is PlsChgMe!RW.
For more detailed installation instructions, see
Using the Nortel Business Access Point 120.
Troubleshooting note: When connecting a PC directly to the
BAP120, use the default IP address 192.168.1.136.
C
M
Y
CM
MY
CY
CMY
K
BAP120QuickInstallGuide_TriFold2Page 1 6/21/2006 12:04:57 PM
Page 2
C
OMPLIANCES
1
COMPLIANCES
Federal Communication Commission Interference Statement
This equipment has beentested and found to comply with the limits for a Class Bdigital device, pursuant to Part
15 of the FCC Rules. These limits aredesigned to provide reasonable protection against harmful interference in
a residential installation. This equipment generates,uses and can radiate radio frequency energy and, if not
installed and usedin accordance with the instructions, maycause harmful interference to radio communications.
However, thereis no guarantee that interference will not occur in a particular installation. If this equipment does
cause harmfulinterference to radio or televisionreception, which can be determinedby turning the equipment off
and on, the user is encouraged to try to correct the interference by one of the followingmeasures:
• Reorient or relocate the receiving antenna
• Increase the separation between the equipment and receiver
• Connect the equipment into an outlet on a circuit different from that to which the receiver is connected
• Consult the dealer or an experienced radio/TV technicianfor help
FCC Caution: Any changes or modifications not expresslyapproved by the party responsible for compliance
could void the user's authority to operate this equipment. This device complies with Part 15 of the FCC Rules.
Operation is subject to the followingtwo conditions: (1) This device may not cause harmful interference, and (2)
this device must accept any interferencereceived, including interference that may cause undesired operation.
IMPORTANT NOTE:
FCC Radiation Exposure Statement
This equipment complies with FCC radiation exposure limits set forth foran uncontrolled environment. This
equipment should be installed and operated with a minimum distance of 20 centimeters (8 inches) between the
radiator and your body.This transmitter must not be co-located or operating in conjunction with any other
antenna or transmitter.
Industry Canada - Class B
This digital apparatus does not exceed the Class B limits forradio noise emissions from digital apparatus as set
out in the interference-causing equipment standard entitled “Digital Apparatus,” ICES-003 of Industry Canada.
Cet appareil numérique respecte les limites de bruits radioélectriques applicables aux appareils numériques de
Classe B prescrites dans la norme sur le matérial brouilleur: “Appareils Numériques,”NMB-003 édictée par
l’Industrie.
Australia/New Zealand
Taiwan requirements
Bureau of Standards, Metrology and Inspection (BSMI) statement
•
Declaration of Conformity in Languages of the European
Community
Safety Compliance
Power C ord Safet y
Please read the following safety information carefully before installing the access point:
WARNING: Installation and removal of the unit must be carried out by qualified personnel only.
Important! Before making connections,make sure you have the correct cordset. Check it (read the label on the
cable) against the following:
Veuillez lire à fond l'information de la sécurité suivante avant d'installer
le access point:
AVERTISSEMENT: L’installation et la dépose de ce groupe doivent être confiés à un personnel
qualifié.
• Ne branchezpas votre appareil sur uneprise secteur (alimentation électrique)lorsqu'il n'y a pas de connexion
de mise à la terre (mise à la masse).
• Vous devez raccorder ce groupe à une sortie mise à la terre (mise à la masse) afin de respecter les normes
internationales de sécurité.
• Le coupleur d’appareil (le connecteur du groupeet non pas la prise murale) doit respecter une configuration
qui permet un branchement sur une entrée d’appareil EN 60320/IEC320.
• La prise secteur doit se trouver à proximité de l’appareil et son accès doit être facile.Vous ne pouvez mettre
l’appareil hors circuit qu’en débranchantson cordon électrique au niveau de cette prise.
• L’appareil fonctionne à une tension extrêmement basse de sécurité qui est conforme à la norme IEC 60950.
Ces conditions ne sont maintenues que si l’équipement auquel il est raccordé fonctionne dans les mêmes
conditions.
France et Pérou uniquement:
Ce groupe ne peut pas être alimenté par un dispositif à impédance à la terre. Si vos alimentations
sont du type impédanceà la terre, ce groupe doit être alimenté par une tensionde 230 V (2 P+T) par
le biais d’untransformateur d’isolement à rapport 1:1, avec unpoint secondaire de connexion portant
l’appellation Neutre et avec raccordement direct à la terre (masse).
Bitte unbedingt vor dem Einbauen des Access Point die folgenden
Sicherheitsanweisungen durchlesen
(Germany):
WARNUNG: Die Installation und der Ausbau des Geräts darf nur durch Fachpersonal erfolgen.
• Das Gerät sollte nicht an eine ungeerdete Wechselstromsteckdoseangeschlossen werden.
• Das Gerät muß an eine geerdete Steckdose angeschlossen werden, welche dieinternationalen
Sicherheitsnormen erfüllt.
• Der Gerätestecker (der Anschluß an das Gerät,nicht der Wandsteckdosenstecker) muß einen gemäß EN
60320/IEC 320 konfigurierten Geräteeinganghaben.
• Die Netzsteckdose muß inder Nähe des Geräts und leicht zugänglich sein. Die Stromversorgungdes Geräts
kann nur durch Herausziehen des Gerätenetzkabels aus der Netzsteckdoseunterbrochen werden.
• Der Betrieb dieses Geräts erfolgt unter den SELV-Bedingungen(Sicherheitskleinstspannung) gemäß IEC
60950. Diese Bedingungen sind nur gegeben, wenn auch diean das Gerät angeschlossenen Geräte unter
SELV-Bedingungen betrieben werden.
•
•
English Hereby, Nortel, declares that this Radio LAN device is in compliance with the essential
requirements and other relevant provisions of Directive 1999/5/EC.
Finnish Valmistaja Nortel vakuuttaa täten että Radio LAN device tyyppinen laite on direktiivin 1999/5/
EY oleellisten vaatimusten ja sitä koskevien direktiivin muiden ehtojenmukainen.
Dutch Hierbij verklaart Nortel dat het toestel Radio LAN device in overeenstemming is met de
essentiële eisen en de andere relevante bepalingen van richtlijn1999/5/EG
Bij deze Nortel datdeze Radio LAN device voldoet aan de essentiële eisen en aan de overige
relevante bepalingen van Richtlijn 1999/5/EC.
French Par la présente Nortel déclare que l'appareil Radio LAN device est conforme aux exigences
essentielles et aux autres dispositions pertinentes de la directive 1999/5/CE
Swedish Härmed intygarNortel att denna RadioLAN device står Iöverensstämmelse med de väsentliga
egenskapskrav och övriga relevanta bestämmelser som framgår av direktiv1999/5/EG.
Danish Undertegnede Nortel erklærer herved, at følgende udstyr Radio LAN device overholder de
væsentlige krav og øvrige relevante krav i direktiv 1999/5/EF
German Hiermit erklärt Nortel, dass sichdieser/die se/diesesRadio LAN device in Übereinstimmungmit
den grundlegenden Anforderungen und denanderen relevanten Vorschriften der Richtlinie
1999/5/EG befindet". (BMWi)
Hiermit erklärt Nortel die Übereinstimmung des Gerätes Radio LANdevice mit den
grundlegenden Anforderungen und den anderenrelevanten Festlegungen der Richtlinie 1999/
5/EG. (Wien)
Greek ΜΕ ΤΗΝ ΠΑΡΟΥΣΑ Nortel ΔΗΛΩΝΕΙ ΟΤΙ Radio LAN device ΣΥΜΜΟΡΦΩΝΕΤΑΙ ΠΡΟΣ ΤΙΣ
ΟΥΣΙΩΔΕΙΣ ΑΠΑΙΤΗΣΕΙΣ ΚΑΙ ΤΙΣ ΛΟΙΠΕΣ ΣΧΕΤΙΚΕΣ ΔΙΑΤΑΞΕΙΣ ΤΗΣ ΟΔΗΓΙΑΣ 1999/5/ ΕΚ
ACN N269
Italian Conla presente Nortel dichiarache questo Radio LAN deviceè conforme ai requisiti essenziali
ed alle altre disposizioni pertinenti stabilite dalla direttiva 1999/5/CE.
Spanish Por medio de la presente Manufacturer declara que el Radio LAN device cumple con los
requisitos esenciales y cualesquiera otras disposiciones aplicableso exigibles de la Directiva
1999/5/CE
Portuguese Manufacturer declara que este Radio LAN device está conforme comos requisitos essenciais
e outras disposições da Directiva 1999/5/CE.
NOM statement
(Mexico only)
Información NOM
(unicamente para México)
The followinginformation is provided on the devices
described in this document in compliance with the
safety requirements of the Norma Oficial Méxicana
(NOM):
Exporter: Nortel Networks, Inc. 4655 Great
America ParkwaySanta Clara CA 95054
USA
Importer: Nortel Networks deMéxico, S.A. de C.V.
Avenida Insurgentes Sur#1605 Piso 30,
Oficina Col. San Jose Insurgentes
Deleg-Benito Juarez México D.F. 03900
Tel: 52 5 480 2100 Fax: 52 5 480 2199
Input: 100 - 120 VAC 0.5 A 50 to 60 Hz
200 - 240 VAC 0.5 A 50 to 60 Hz
Output: 5VDC 2A
La información siguiente se proporciona en el
dispositivo o en los dispositivos descritos en este
documento, encumplimiento con losrequisitos de la
Norma Oficial Méxicana (NOM):
Exportador: Nortel Networks, Inc. 4655 Great
America Parkway Santa Clara, CA
95054 USA
Importador: Nortel Networks de México, S.A. de
C.V. Avenida Insurgentes Sur #1605
Piso 30, Oficina Col. San Jose
Insurgentes Deleg-Benito Juarez
México D.F. 03900
Tel: 52 5 480 2100 Fax: 52 5 480 2199
Embarcar a: 100 - 120 VAC 0.5 A 50 to 60 Hz
200 - 240 VAC 0.5 A 50 to 60 Hz
5VDC2A
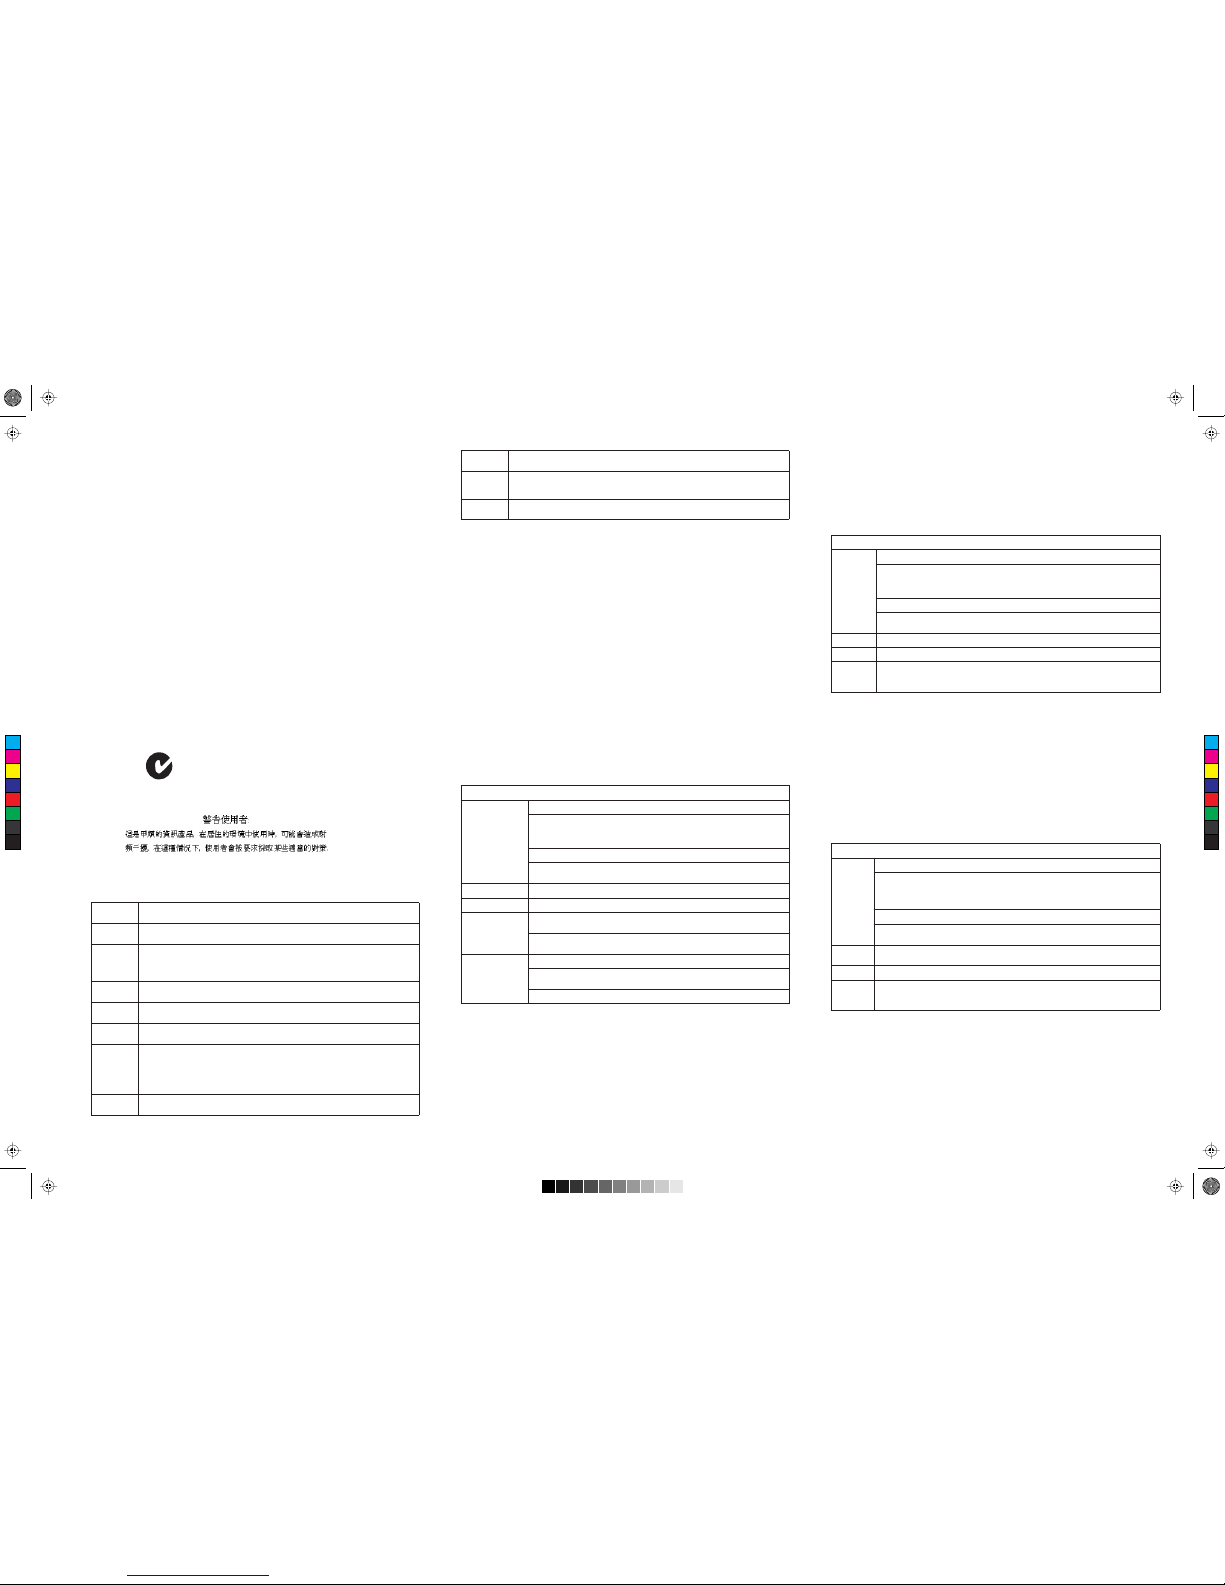
Power Cord Set
U.S.A. and
Canada
The cord set must be UL-approved and CSA certified.
The minimum specifications for the flexible cord are:
- No. 18 AWG - not longer than 2 meters,or 16 AWG.
- Type SV or SJ
- 3-conductor
The cord set must have a rated current capacity of at least 0.5 A
The attachmentplug must be anearth-grounding type with NEMA 5-15P(15 A, 125 V)
or NEMA 6-15P (15 A, 250 V) configuration.
Denmark The supply plug must comply with Section 107-2-D1,Standard DK2-1a or DK2-5a.
Switzerland The supply plug must comply with SEV/ASE 1011.
U.K. The supply plug must comply with BS1363 (3-pin 13 A) and be fitted with a 5 A fuse
which complies with BS1362.
The mainscord must be <HAR>or <BASEC> marked andbe of type HO3VVF3GO.75
(minimum).
Europe The supply plug must comply with CEE7/7 (“SCHUKO”).
The mainscord must be <HAR>or <BASEC> marked andbe of type HO3VVF3GO.75
(minimum).
IEC-320 receptacle.
Cordonélectrique- Il doit êtr e agréé dans le pays d’utilisation
Etats-Unis
et Canada:
Le cordon doit avoir reçu l’homologation de l’agence UL et un certificat de l’agence CSA.
Les spécificationsminimales pour un cable flexible sontAWG No. 18, ou AWGNo. 16 pour un
câble de longueur inférieure à 2mètres.
- type SV ou SJ
- 3 conducteurs
Le cordon doit être en mesure d’acheminer un courant nominal d’au moins 0.5 A.
La prise femelle de branchement doit être du type à mise à la terre (mise à la masse) et
respecter la configuration NEMA 5-15P (15A, 125 V) ou NEMA 6-15P (15 A, 250 V).
Danemark: La prisemâle d’alimentation doit respecterla section 107-2 D1de la norme DK2 1aou DK2 5a.
Suisse: La prise mâle d’alimentation doit respecter la norme SEV/ASE 1011.
Europe La prise secteur doit être conforme aux normes CEE 7/7 (“SCHUKO”)
LE cordon secteur doit porter la mention <HAR> ou <BASEC> et doit être de type
HO3VVF3GO.75 (minimum).
Stromkabel. Dies muss von dem Land, in dem es benutzt wird geprüft werden:
U.S.A und
Kanada
Der Cord muß das UL gepruft und war das CSA beglaubigt.
Das Minimum spezifikation fur der Cord sind:
- Nu. 18 AWG - nicht mehr als 2 meter, oder 16 AWG.
- Der typ SV oder SJ
- 3-Leiter
Der Cord muß haben eine strombelastbarkeit aus wenigstens 0.5 A
Dieser Stromstecker muß hat einer erdschluss mit der typ NEMA 5-15P (15A, 125V) oder
NEMA 6-15P (15A, 250V) konfiguration.
Danemark Dieser Stromstecker muß die ebene 107-2-D1, der standard DK2-1a oder DK2-5a
Bestimmungen einhalten.
Schweiz Dieser Stromstecker muß die SEV/ASE 1011Bestimmungen einhalten.
Europe DasNetzkabel muß vom Typ HO3VVF3GO.75 (Mindestanforderung) sein und die Aufschrift
<HAR> oder <BASEC> tragen.
Der Netzstecker muß die Norm CEE 7/7 erfüllen (”SCHUKO”).
C
M
Y
CM
MY
CY
CMY
K
BAP120 compliance June15.pdf 6/20/2006 8:06:11 PM
 Loading...