

Page 1

••••••••••••••••••••••••••••••••••••••••
SMDR6 System
Coordinator Guide
Page 2

Page 3

Contents
About this guide 1
Introduction 1
Guide conventions 1
Getting started 2
About Station Message Detail Recording 6 2
System Overview 3
Your Role as System Co ordinator 4
Programming SMDR6 Using M7310/M7324 telephones 4
Programming SMDR6 Using M7100/M7208 Telephones 4
Accessing the SMDR6 Main menu 5
Exiting From the SMDR6 Main menu 5
LED control 6
Special station set numbers 6
Administering SMDR6 7
Introduction 7
Printer speed 8
Setting the printer spee d 8
Record formats 9
SL-1 Record format 9
Selecting SL-1 Standard record format 9
Selecting SL-1 CLID records 10
Norstar record format 10
Selecting a Norstar record format 10
Report types 12
Setting the Report type 12
Report language 14
Setting the report language 14
Access codes 14
Setting up the Access code 15
P0907246 Issue 01 SMDR System Coordinator Guide
Page 4

2 Contents
Account feature code 15
Account code list 16
Using Account cod es 17
Programming an Account feature code memory button 18
Programming an Account code autodial button 18
SMDR6 Extended main menu 19
AT Commands 22
Introduction 22
System regi st e rs 22
Basic AT Command set 25
Extended AT command set 25
Configure Master/S la ve 27
SL-1 format 28
Introduction 28
SL-1 record format 28
SL-1 record field definitions 29
SL-1 Record types 30
SL-1 Standard record format 31
SL-1 CLID format records 31
SL-1 Target line/Physical lines 32
Norstar format 33
Introduction 33
Norstar record format 33
Norstar Standard record format 33
Norstar Call Information record format 34
Call Information record field definitions 34
Standard Hospitality record format 37
Norstar Real Time record format 38
Real Time Hospitality record format 40
Norstar All record form at 41
Target line/Physical lines 42
Busy Norstar reco rds 42
Direct Inward Dial (DID) busy 42
Target line busy 42
Bearer capability data 43
PRI Call-by-call service 44
Dialed number identification service 45
SMDR System Coordinator Guide P0907246 Issue 01
Page 5

Contents 3
Call connected digit separator 46
Norstar record field definitions 46
Standard and CLID record formats 47
Real Time record format 48
Norstar Standard and CLID record description 48
Printable line descr i pti ons 49
Norstar Real Time record description 52
Troubleshooting 54
Introduction 54
Printer problems 54
Ensuring Records are printed 54
Error messages 55
Glossary 1
Index 1
P0907246 Issue 01 SMDR System Coordinator Guide
Page 6

4 Contents
SMDR System Coordinator Guide P0907246 Issue 01
Page 7

About this guide
Introduction
This guide provides step-by-step instructions designed to assist you in
administering the Station Message Detail Recording 6 (SMDR6).
Guide conventions
As you work through this guide you will notice that certain conventions
are used to represent steps and procedures. Some numbers and words
appear in square boxes. These represent numbers and buttons on a
Norstar telephone dia l pad. For examp le:
1. Press
This means, press the
telephone dial pad.
Words appearing on the Norstar display are represented in a similar
display text. For example:
2. Press
This means press the corresponding display dial.
ƒ · •¤
ƒ
NEXT
.
.
dial, then press
· • ¤
on the
P0907246 Issue 01 SMDR6 System Coordinator Guide
Page 8

2 Getting started
Getting started
About Station Message Detail Recording 6
The Station Message Detail Recording 6 (SMDR6) is a unit that
connects to your Norstar Key System Unit (KSU) to record call activity.
Each time a telephone call is made to or from your company, the
information about the call is recorded. When the call is completed,
information about the call is printed out in Call Records. The SMDR6
can also p rovide i nformati on on inc oming cal ls as th e events occur. The
information reported is called Real Time Call Record.
The SMDR6 provides inf or mation about:
• date and time of the call, and digits dialed
• the originating and the terminating line or station set
• whether an incoming call was answered
• elapsed time between origin of a call and when it was answered
• whether a call was transferred or put on hold
• call duration
• calls associated with Account codes
• incoming call Calling Line Identification (CLID) information
• Bearer Capability of the line in the call
• Hospitality records for room occupancy status
• Real Time records for ringing, DNIS, answered, unanswered,
transferred, and released events for incoming calls with CLID
information and Hospitality room occupancy status
Note
: SMDR6 delivers Custom Local Area Signalling Services
(CLASS), Call Management Services (CMS), Automatic Number
Identification and Dialed Number Identification Services (DNIS) in the
form of Calling Line Identification (CLID) records. This information is
available only if the appropriate Norstar hardware is installed and the
service is available from your public telephone company. SMDR6 only
prints recor ds with CLID, Real Time records or cost of a ca ll informatio n
on Norstar CCUs with digital lines and Hospitality records. Contact your
Customer Service representative for more information.
SMDR6 System Coordinator Guide P0907246 Issue 01
Page 9
Getting started 3
The information collected by the SMDR6 can be used to:
• allocate telephone costs to departments or individuals
• charge back telephone costs to billable clients through Account
codes
• determine whether the telephone system is being used efficiently
• guard against abuse of the telephone system
• provide immediate call information to database applications
through Real Time call records
• track changes in room occupancy status
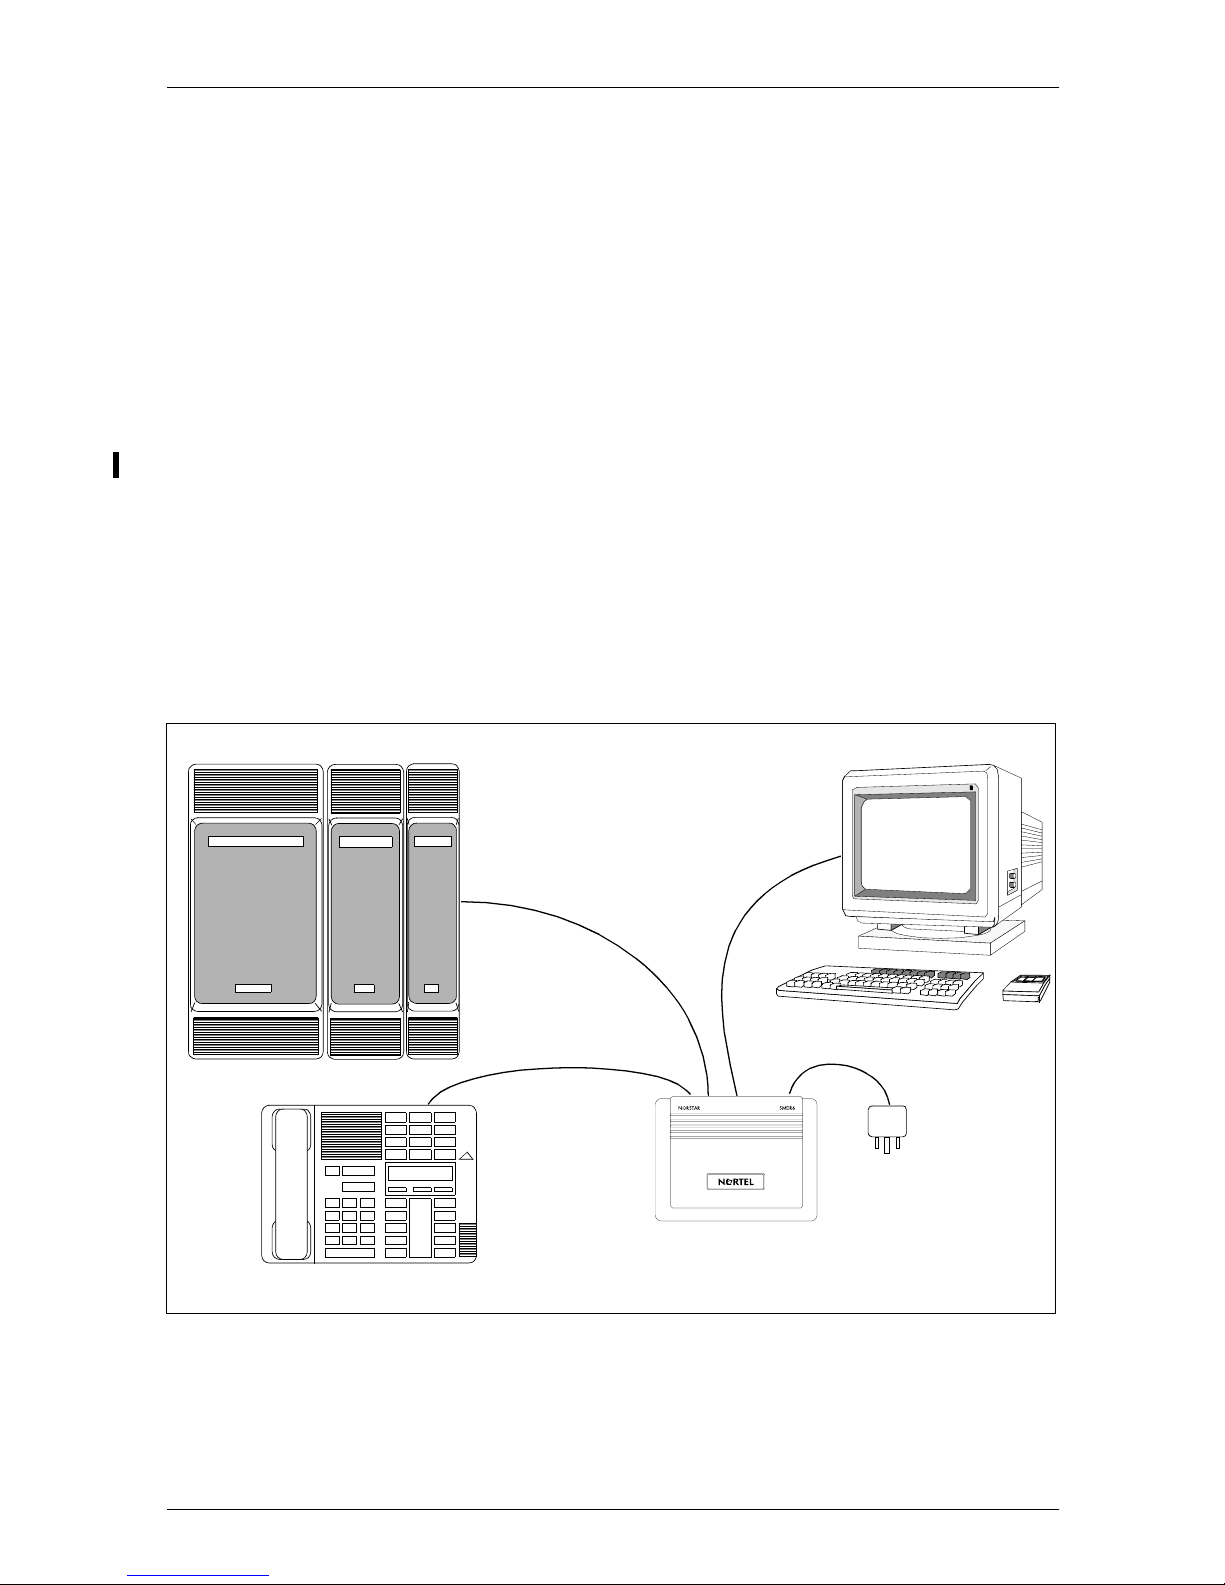
System Overview
The SMDR6 is a peripheral connected to the Norstar Key System Unit
(KSU). It connects to any data collection device to provide records
about telephone call activity. The following diagram illustrates a typical
SMDR6 configuration.
KSU
RS232
Data Collection Device
Power
Adapter
Telephone Set
P0907246 Issue 01 SMDR6 System Coordinator Guide
Page 10

4 Getting started
More than one SMDR6 unit can be installed per KSU. One and only one
of them can be configured as master SMDR6, others must be
configured as slave SMDR6s.
of SMDR
.
Do not mix SMDR6 with older versions
Your Role as System Coordinator
As System Coordinator, you perform the initial and ongoing
administration tasks. Your tasks include:
• administering the SMDR6
• determining Account codes used as references for tracking
telephone calls
• interpreting the SMDR6 reports
Programming SMDR6 Using M7310/M7324 telephones
When you use an M7310 or M7324 telephone, prompts and menu
selections appear in the first line of the telephone display.
Commands for the three display buttons appear in the second line of the
display. Pressing a display button performs the function specified on the
option line. An example of a two-line display is shown below.
SMDR6 Admin
NEXT QUIT
Programming SMDR6 Using M7100/M7208 Telephones
When you use M7100 or M7208 telephones, only prompts and menu
selections appear on the display. An example of the M7100/M7208
display is shown below.
SMDR6 Admin
The SMDR6 commands are selected from the M7100 or M7208 dial
pad. For example:
•Press • for
•Press Ø for
SMDR6 System Coordinator Guide P0907246 Issue 01
NEXT
SHOW
Page 11

Getting started 5
•Press £ for
CHANGE
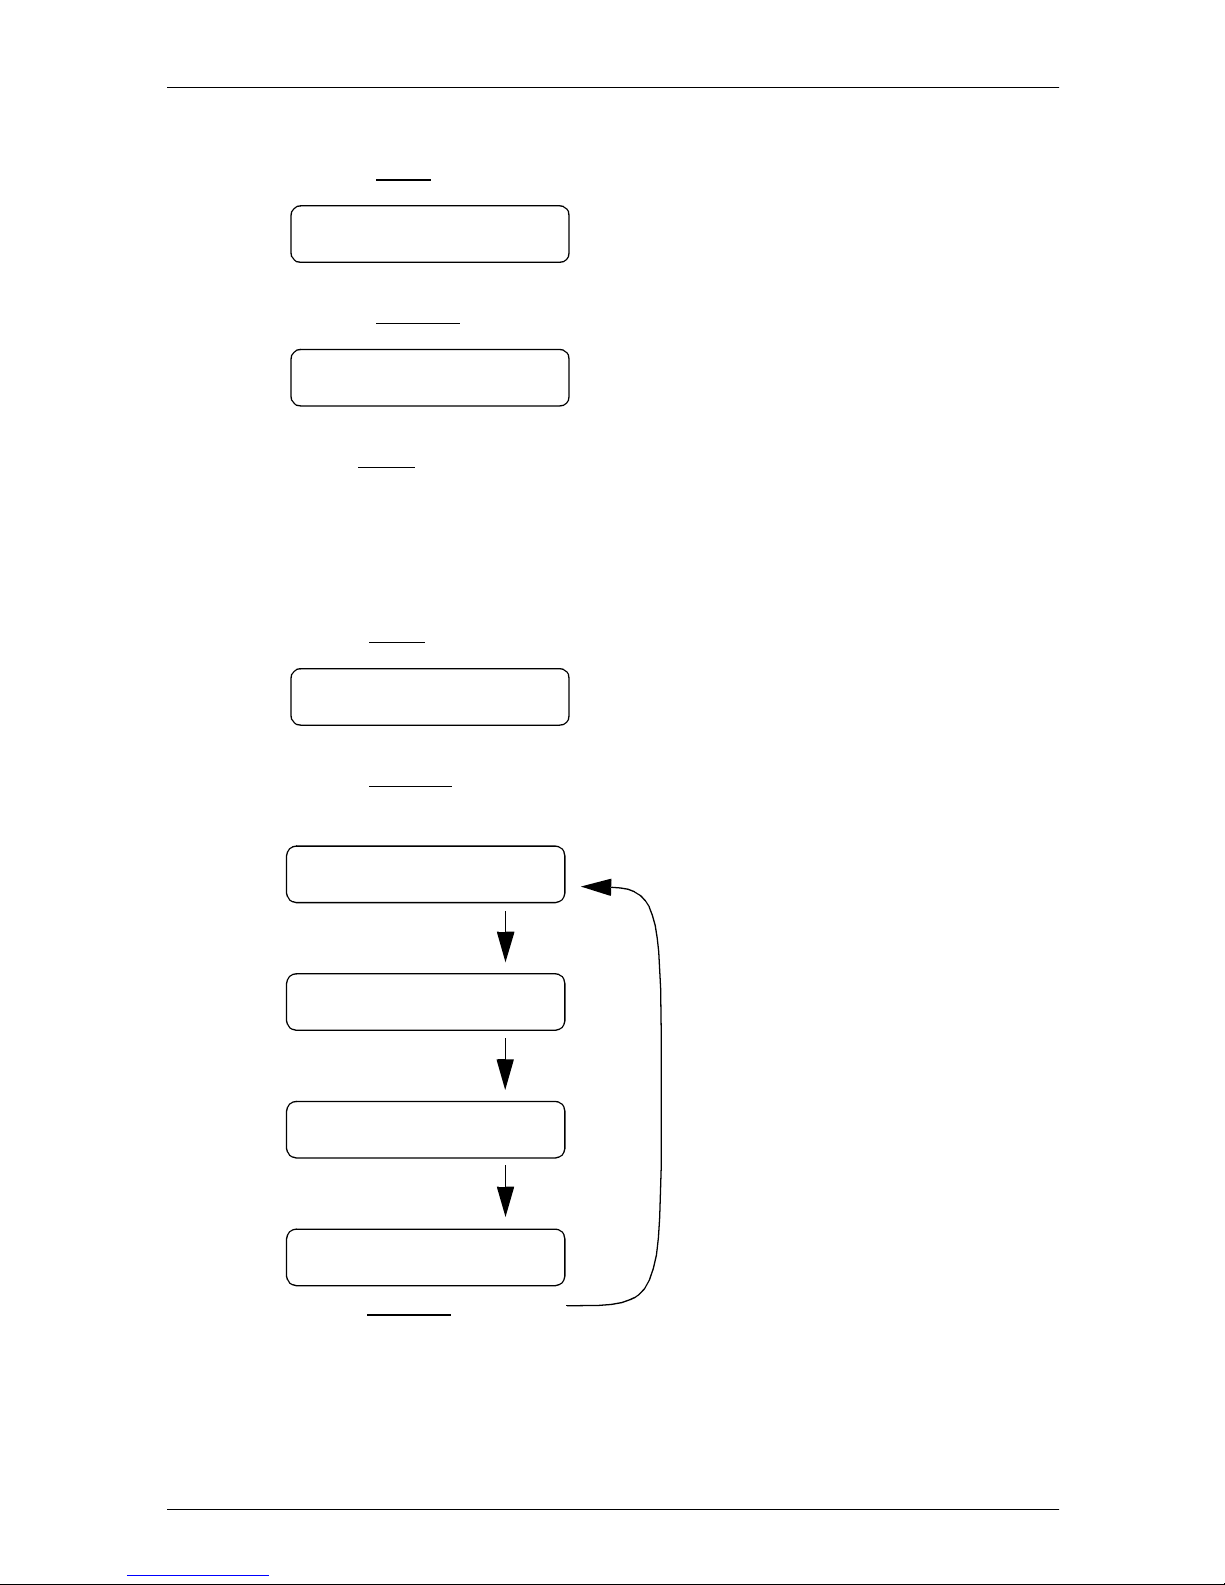
Accessing the SMDR6 Main menu
The SMDR6 menus are accessed by entering the Administration
Feature code on your telephone dial pad. As System Coordinator, you
should be the only person with access to Administration functions.
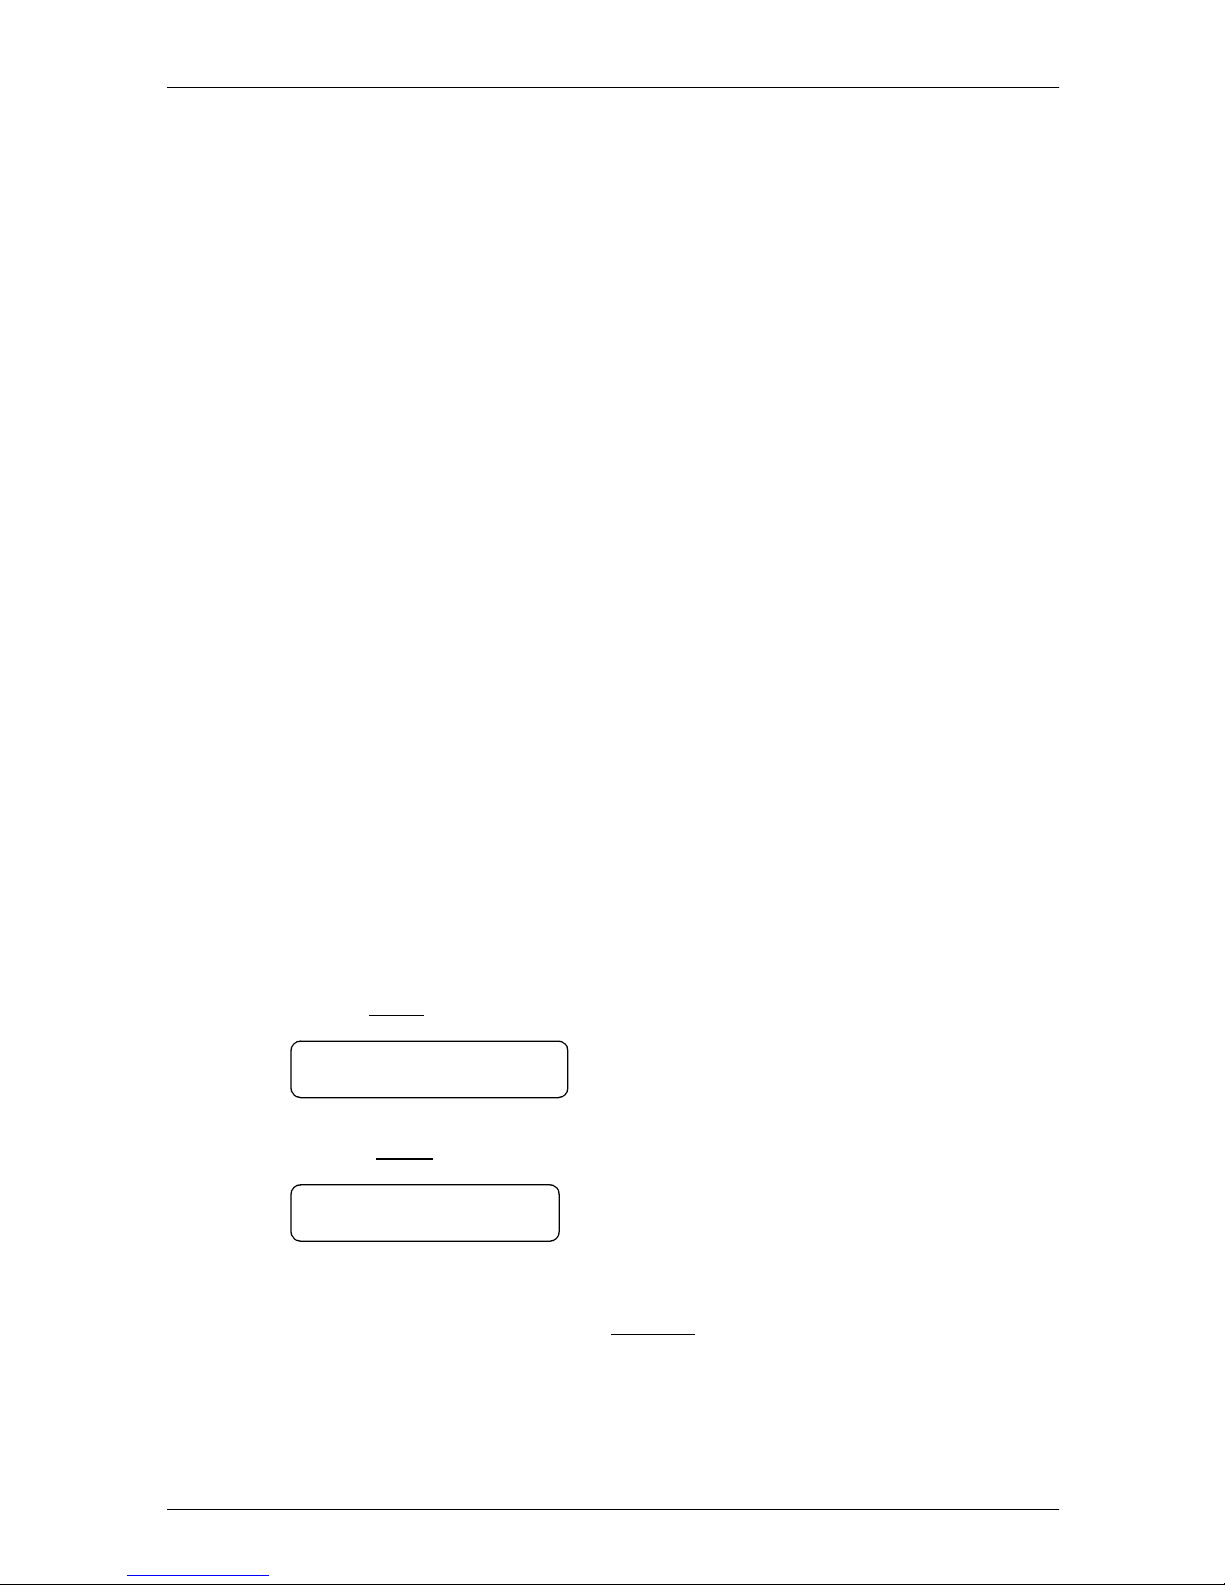
To access the SMDR6 Administration menu:
1. Press
SMDR6 Admin
NEXT QUIT
Note
: All changes in SMDR6 Administration parameters are
implemented immediately after they are selected, not after the SMDR6
Administration session is ended.
ƒ · • ¤
. The display shows:
Exiting From the SMDR6 Main menu
After you have selected your specific parameters and want to exit from
SMDR6 Administration, follow these steps:
1. Press
or
2. Press
or
3. Press
Any one of these commands returns you to the Norstar display.
®
.
QUIT
at the Main menu.
ƒ
twice.
P0907246 Issue 01 SMDR6 System Coordinator Guide
Page 12
6 Getting started
LED control
The green light emitting diode (LED) located on the back of the unit is
controlled by the SMDR6 software. It is used to indicate the five
possible states of the SMDR6.
SMDR6 state LED action Rates
Normal on steady On 100%
Record overflow very fast blink On 50ms Off 50ms
TCM Off-line error single blink on On 750ms Off 750ms
Waiting for firmware download fast blink On 250ms Off 250ms
Slave short blink On 750ms Off 150ms
Note
: The default for the LED is on steady.
Special station set numbers
Two special station set numbers are reserved by SMDR6 to represent
special ent ities in the KSU that ca n answer calls. It is important to know
these special entities to interpret the reports correctly.
The followings are the known station set entities defined:
• Auto Attendant
• Remote Pager
When the Auto Attendant answers incoming calls, the station set
number is reported as zero if the SMDR6 is connected to a Compact
ICS KSU.
When an incoming call is answered by Remote Pager, the station set
number is reported as 7.
SMDR6 System Coordinator Guide P0907246 Issue 01
Page 13

Administering SMDR6
Introduction
The SMDR6 uses programming parameters to specify the kinds of calls
to be reported and the report format. Each programming parameter has
a default setting (shown in bold below) that can be changed at any time.
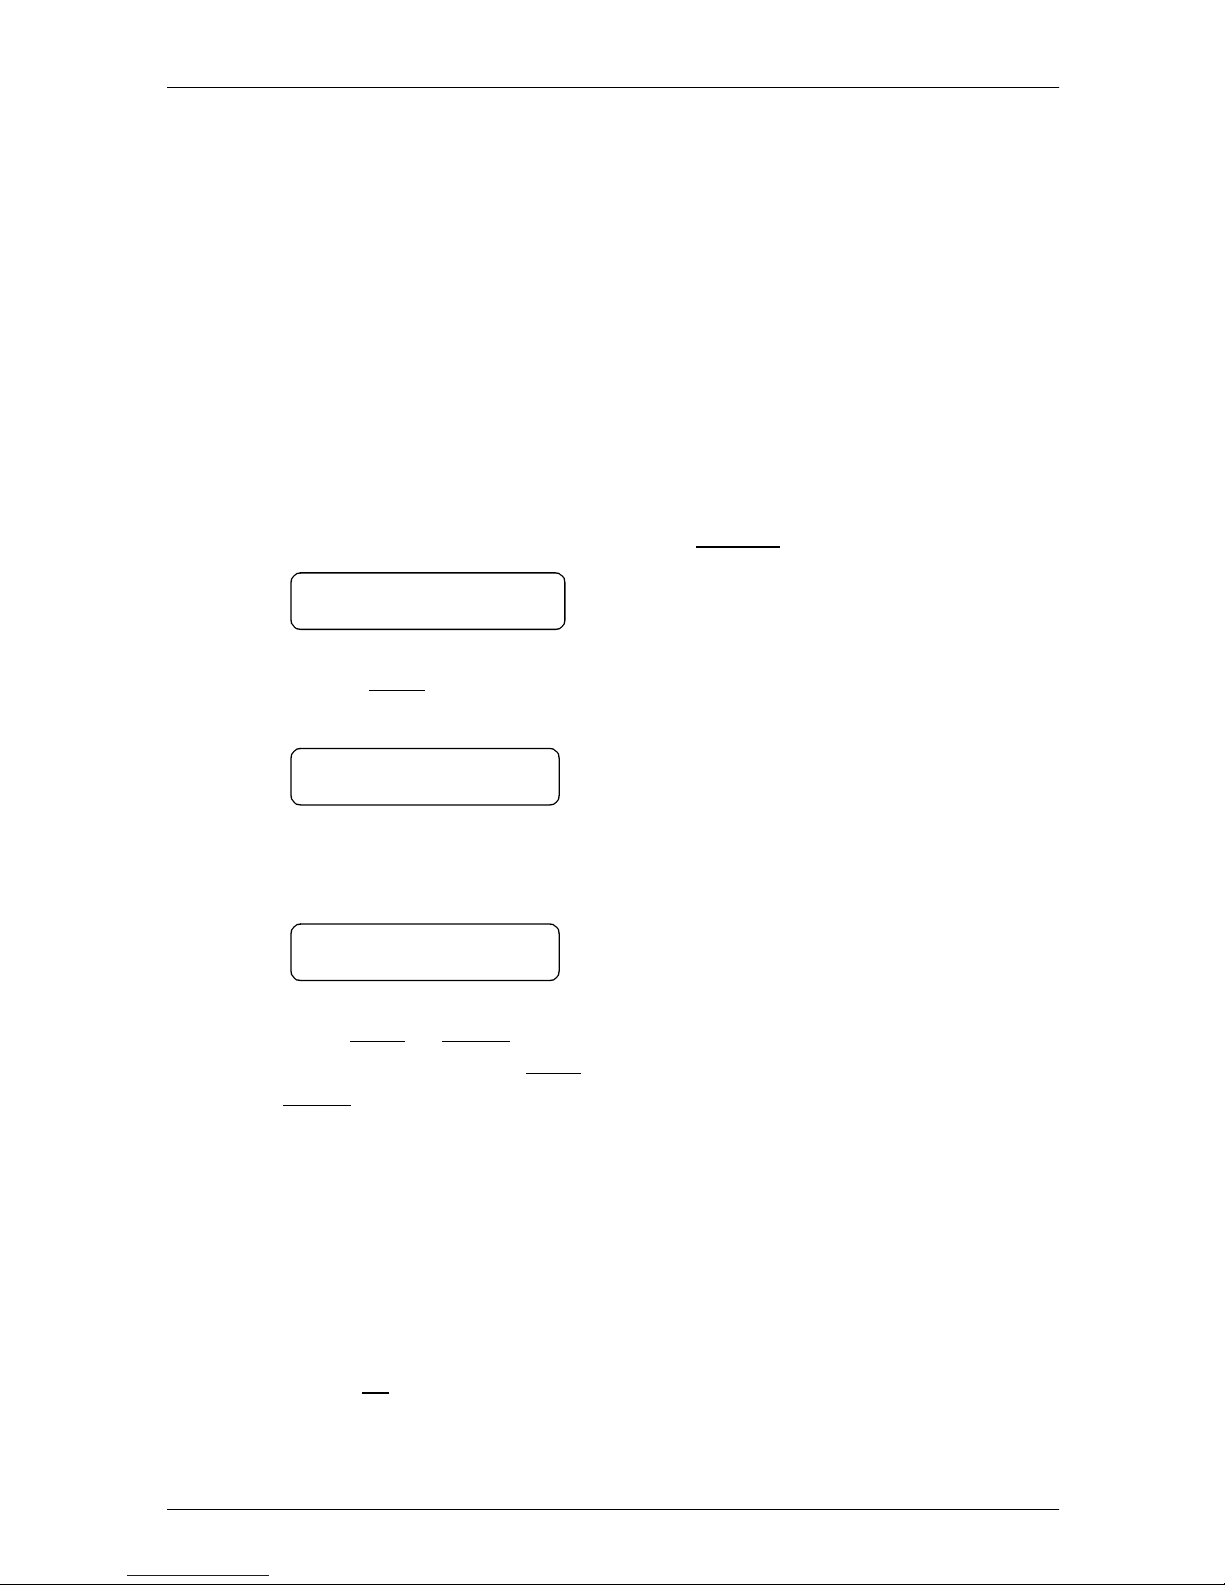
The displays used to assign SMDR6 programming parameters are
shown below.
SMDR6 Admin
NEXT QUIT
Printer: 1200
NEXT QUIT
Option choices
115200 57600
38400 19200
9600 4800
2400 1200
Administering SMDR6 7
Format: SL-1
NEXT QUIT
Report: All
NEXT QUIT
Language:English
NEXT QUIT
Access codes:
NEXT SHOW QUIT
Feature #: F9-NEXT QUIT
SL-1
Norstar
All
Outgoing
Accounts
Long dist
English
French
F9-F999
P0907246 Issue 01 SMDR6 System Coordinator Guide
Page 14

8 Administering SMDR6
Printer speed
Printers with a RS-232c serial port that supports 1200, 2400, 4800,
9600, 19200, 38400, 57600 or 115200 baud can be connected to the
SMDR6 to print the reports. The minimum printer speeds for different
KSUs are listed below:
• for the Compact KSU, the minimum is 1200 baud
• for the Modular KSU, the minimum is 2400 baud
Note
: The amount of data transmitted by the SMDR6 is dependent on
the call activity and the report format you select. Therefore, using higher
baud ensures the records are printed.
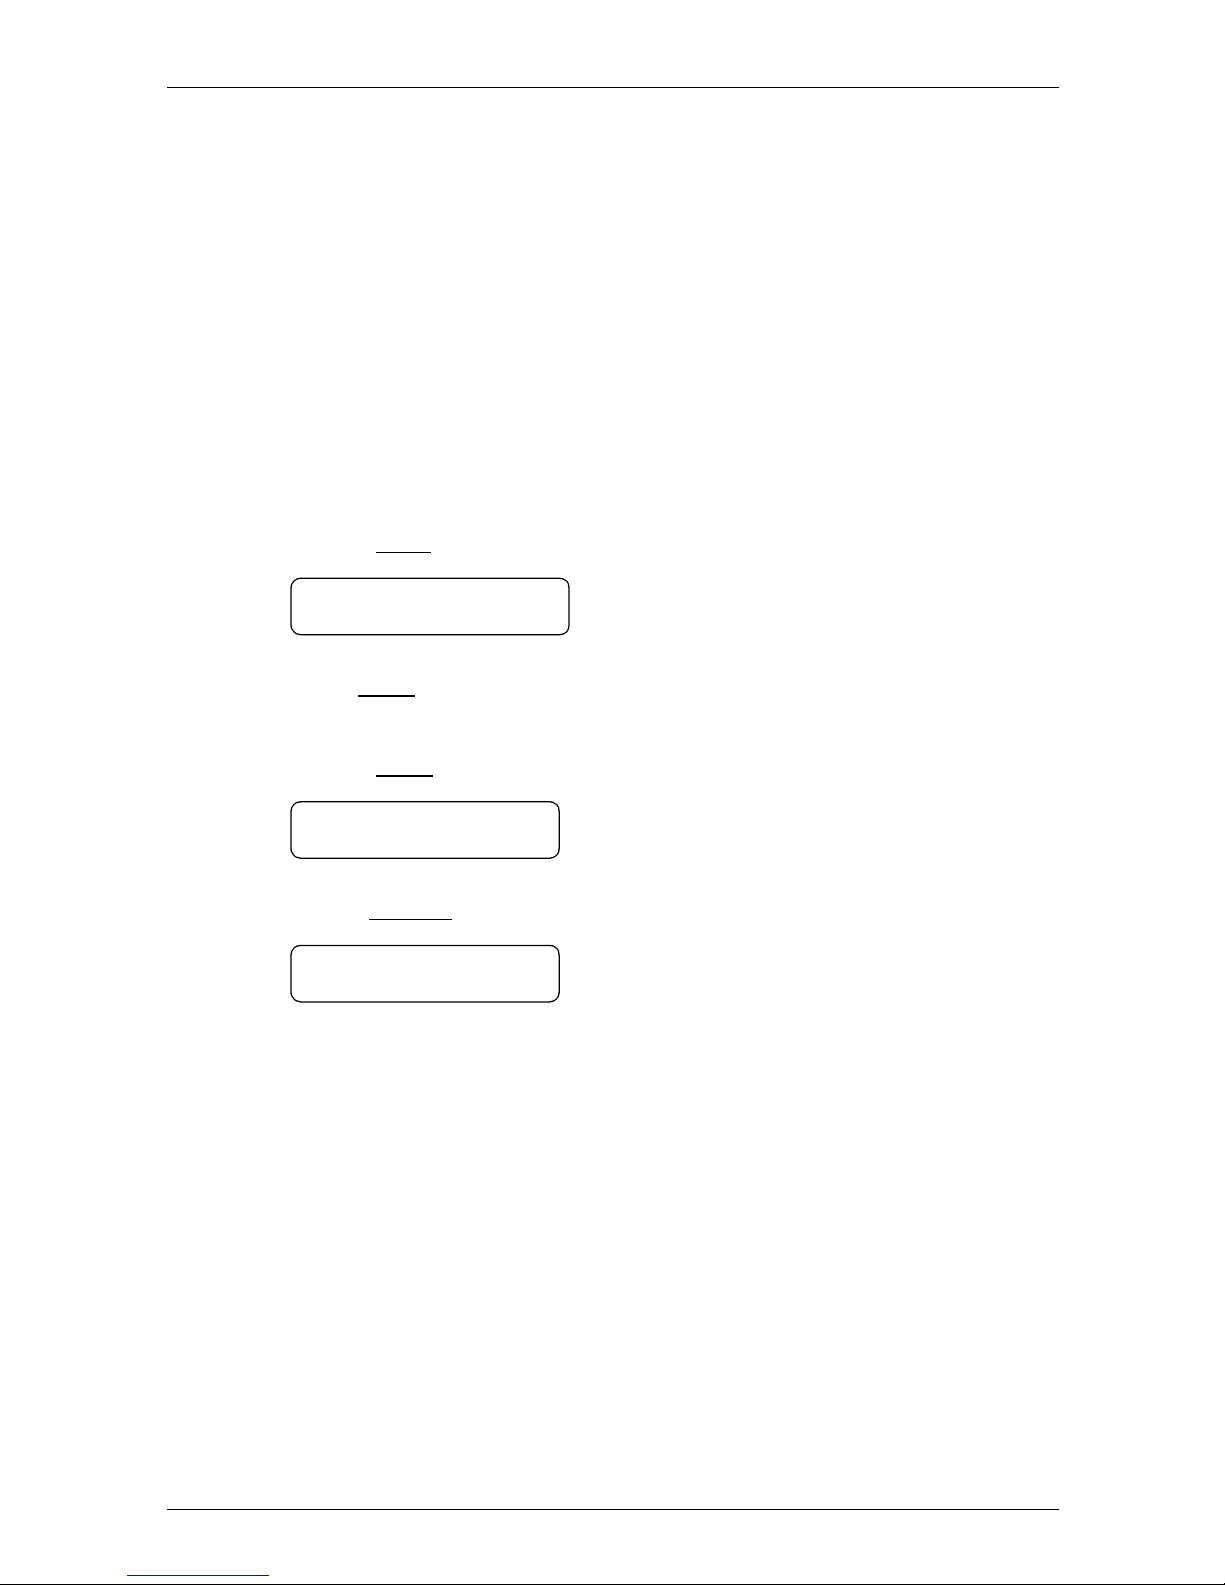
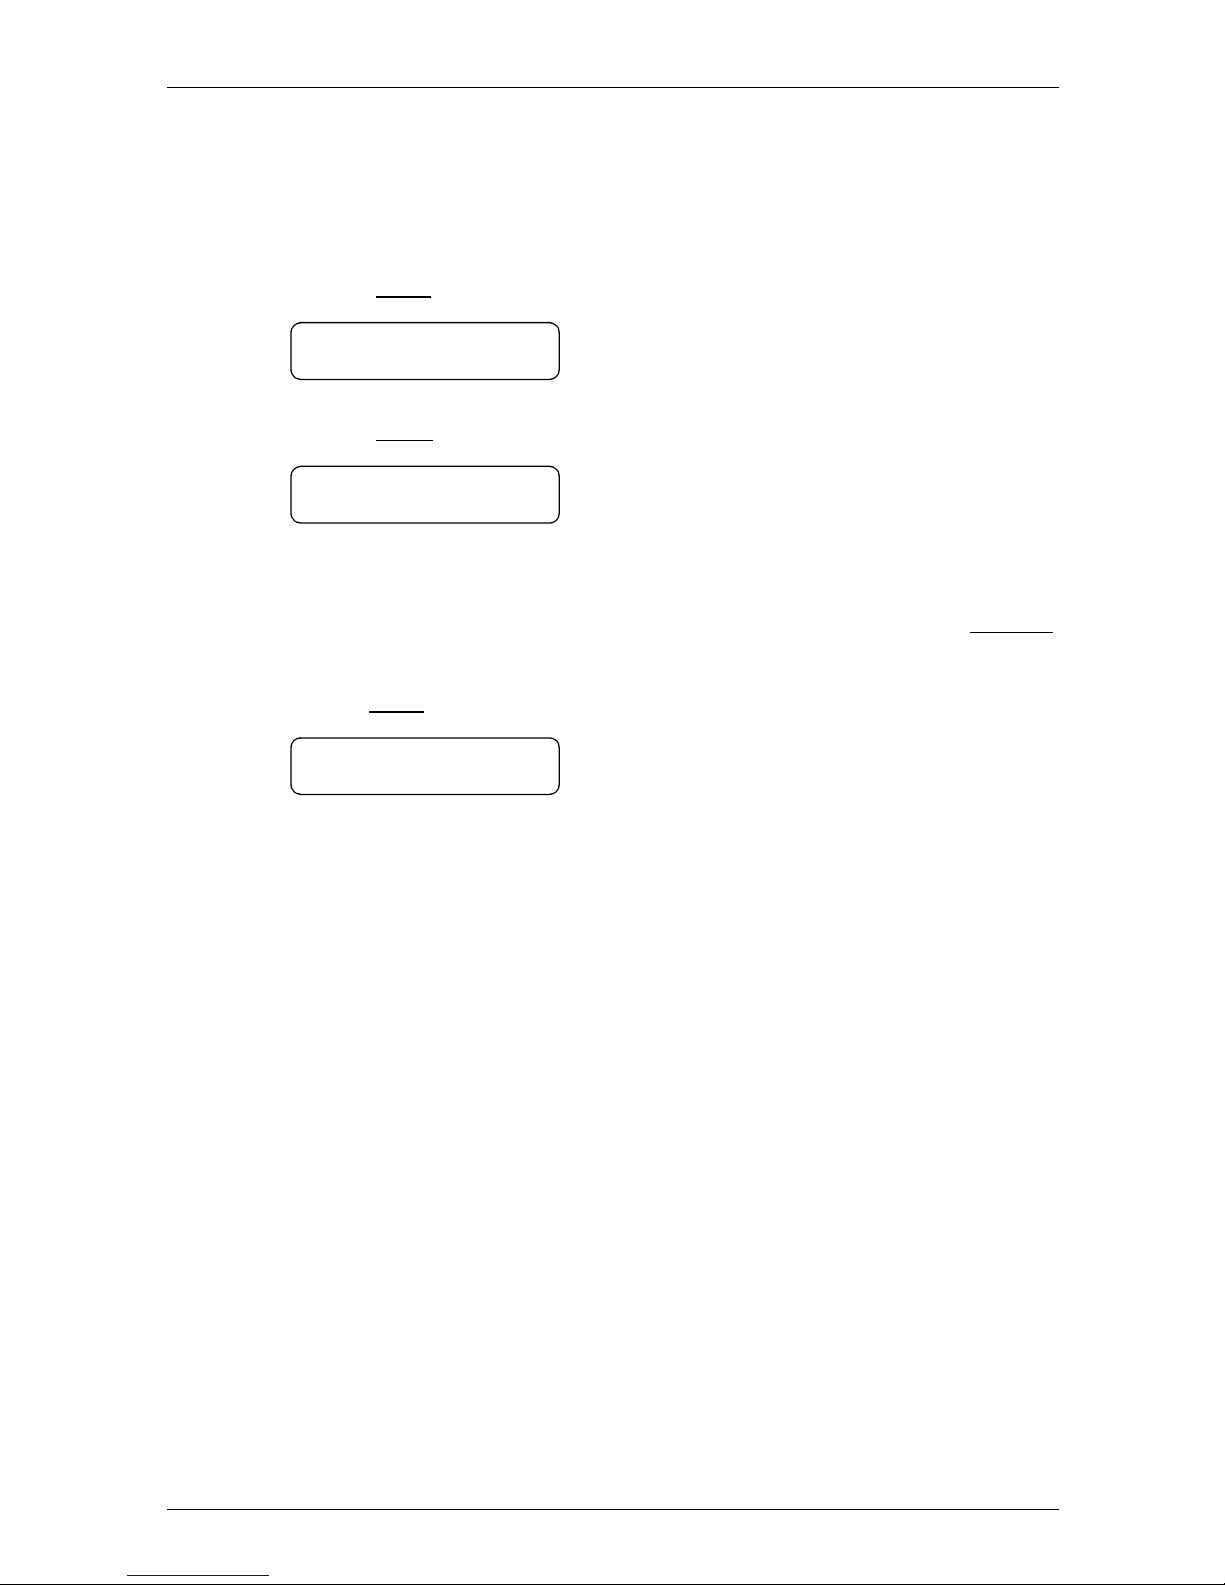
Setting the printer speed
To set the printer speed, you must access SMDR6 Main menu.
1. Press
2. Press
Printer: 1200
NEXT CHANGE
3. Press
display.
ƒ · • ¤
NEXT
until the display shows:
CHANGE
until the desired printer speed appears on the
.
SMDR6 System Coordinator Guide P0907246 Issue 01
Page 15
Record formats
SMDR6 generates records in both Norstar and SL-1 formats. SMDR6
defaults to the SL-1 format.
SL-1 Record fo rmat
The SL-1 record format is primarily used when the SMDR6 output is
being supplied to legacy commercial call accounting packages or
equipment.
The SL-1 record format supports reporting Standard record format as
well as Calling Line Identification (CLID) record format.
The SL-1 CLID record format prints the CLID information only if the
information is delivered. Otherwise, it reports the call in SL-1 Standard
record format.
Administering SMDR6 9
The SL-1 record format does not support the reporting of Bearer
Capability and DDI Busy records.
Selecting SL-1 Standard record format
To select the SL-1 Standard format through SMDR6 Main menu:
1. Press
2. Press
Format: SL-1
NEXT SHOW CHANGE
3. Press
SL-1 Standard
NEXT CHANGE
The SL-1 Standard format is the default report format. If the display
does not show Standard, press
appears on the display.
ƒ · • ¤
NEXT
until the display shows:
SHOW
. The display shows:
.
CHANGE
until the desired report format
P0907246 Issue 01 SMDR6 System Coordinator Guide
Page 16
10 Administering SMDR6
Selecting SL-1 CLID records
SL-1 record format sup ports reporting CLID information. It can be
selected through Administration.
Note
: The SMDR6 will only report the CLID Information for lines which
are capable of delivering CLID. Calls on non-CLID capable lines are
reported in SL-1 Standard Record Format.
To select the SL-1 CLID format you must access the SMDR6 Main
menu.
1. Press
2. Press
Format: SL-1
NEXT SHOW CHANGE
Note
tems and greater.
3. Press
SL-1 Standard
NEXT CHANGE
4. Press
SL-1 CLID
NEXT CHANGE
ƒ · • ¤
NEXT
until the display shows:
SHOW
:
only appears on the display if you are running DR5 sys-
SHOW
. The display shows:
CHANGE
. The display shows:
Norstar record format
.
Norstar records are used when the SMDR6 output is connected to a
printer. In this case, detailed and concise call records are generated.
There are four Norstar record formats available through the SMDR6
Main menu if you are running DR5 systems or greater.
Selecting a Norstar record format
To select the Norstar report format you must access the SMDR6 Main
menu.
SMDR6 System Coordinator Guide P0907246 Issue 01
Page 17
Adminis terin g SMDR6 11
1. Press
2. Press
ƒ · • ¤
NEXT
until the display shows:
.
Format: SL-1
NEXT SHOW CHANGE
3. Press
CHANGE
to change to use Norstar report format:
Format: Norstar
NEXT SHOW CHANGE
Note
SHOW
:
only appears on the display if you are running DR5 sys-
tems or greater.
The default for Norstar report format is Standard report format. To
change to use different Norstar report format:
4. Press
SHOW
for the current Norstar report format selected.
Norstar:Standard
NEXT CHANGE
5. Press
CHANGE
until the display shows the desired report format.
The different Norstar report type display screens are shown below.
Norstar:Standard
NEXT CHANGE
Norstar: CLID
NEXT CHANGE
Norstar:RealTime
NEXT CHANGE
Norstar: All
NEXT CHANGE
CHANGE
P0907246 Issue 01 SMDR6 System Coordinator Guide
Page 18

12 Administering SMDR6
Report types
The Call Report option allows you to specify the type of calls to be
collected. This option can be set to:
• All calls
• Outgoing calls only
• Calls with Account codes only
• Calls that match the prefix strings only
Only one of the above reports can be selected at one time. The report
type default is
All
SMDR6 reports all incoming and outgoing calls.
Outgoing
SMDR6 reports only outgoing calls.
All
and can be changed through the SMDR6 Main menu.
Accounts
SMDR6 reports only calls with account codes associated with them.
Prefix
SMDR6 reports only calls matching the pre-determined digit strings.
These calls are usually long distance calls.
Note
: Invalid Password attempts are reported regardless of the Report
Type selected. Real time call records are not affected, regardless of the
Report Type selected.
Setting the Report type
To set the Report type you must access the SMDR6 Main menu.
1. Press
2. Press
ƒ · • ¤
NEXT
until the display shows:
.
Report: All
NEXT CHANGE
3. Press
SMDR6 System Coordinator Guide P0907246 Issue 01
CHANGE
to select the desired Report Type.
Page 19
Adminis terin g SMDR6 13
If you select the Prefix report type, you must also specify the prefix
digits.
The purpose of the Prefix option is to record only long distance calls,
calls to certain area codes or calls to specific numbers.
If the first digits dialed match one or more of the programmable prefix
strings, the call is recorded, otherwise, the call will not be reported. You
can have a maximum of eight prefix strings assigned at one time. The
maximum length for each prefix string is eight digits.
To specify the long distance prefix digits:
1. When in Report Type menu, press
CHANGE
until the display shows:
Report: Prefix
NEXT SHOW CHANGE
SHOW
2. Press
to view or modify the prefix strings.
The display shows:
Prefix1 CLEAR OK
3. Using the dial pad, enter the long distance prefix digits. (In this
example 9293 is used). The display shows:
Prefix1 9293
BKSP CLEAR OK
Either the
BKSP
are entered in error. The
CLEAR
The
button erases all of the characters you have entered.
or
CLEAR
buttons can be used to correct characters that
BKSP
button erases one character at a time.
When you are programming SMDR6 from an M7310 orM7324
telephone, the asterisk (*) button is accepted as a wild card character
that represents any digit.
Note
: The defaults are 0, 1, 90, 91, 411 and 9411. A maximum of eight
digits are allowed.
4. Press
P0907246 Issue 01 SMDR6 System Coordinator Guide
OK
to continue to the next prefix string.
Page 20

14 Administering SMDR6
Report language
If your KSU supports both the English and French, you have the option
to select reporting the call records in English or French.
Setting the report language
To set the Report language you must access the SMDR6 Main menu.
1. Press
2. Press
3. Press
Note
: The report language selected affects only the reports. The
language used in SMDR6 Main menu and Account code entry remains
associated with the station set language.
ƒ · • ¤
NEXT
Language:English
NEXT CHANGE
CHANGE
Access codes
Access codes a re code s used to acce ss certa in lo ng dist ance ca rrie rs.
Personal Identification Numbers (PIN) can be associated with these
codes. The long distance user dials the Access code of the carrier (up
to five digits) followed by the PIN (0 to 16 digits), followed by the
telephone number to make long distance calls. The Access Code
feature provides security to the long distance user by suppressing the
printing of the PIN in the output records.
.
until the display shows:
to select the desired Report language.
You can have up to five Access codes assigned at any one time. Each
Access code can be a maximum of five digits and can be associated
with a suppression number equals to the length of the PIN. The first
digits dialed are compared to the Access Codes. If there is a match, the
next digits are suppressed. The number of digits suppressed equals to
the value in the suppress field for that Access code. Only the Access
code and the remaining digits (exclude the PIN) are printed in the output
record.
SMDR6 System Coordinator Guide P0907246 Issue 01
Page 21
Adminis terin g SMDR6 15
Setting up the Access code
To set up the Access codes, you must access the SMDR6 Main menu.
1. Press
2. Press
Access codes:
NEXT SHOW CHANGE
3. Press
Access1 _
NEXT CHANGE
4. Enter the Access code using the dial pad.
Note
to erase the digits.
5. Press
Suppress1 00
NEXT SHOW CHANGE
ƒ · • ¤
NEXT
until the display shows:
SHOW
. The display shows:
: This number can be a maximum of five digits. Press
NEXT
to enter the number of digits to suppress.
.
CHANGE
Note
: Up to 16 digits can be suppressed following the long dis-
tance Access Code.
Account feature code
Account codes allow you to cross-reference telephone calls from your
company to different clients or telephone activities.
Before Account codes can be entered by users, an Account feature
code must be established. The Feature code can be any number
between 900 and 999.
When the SMDR6 is connected to the KSU, a default Feature code is
requested from the KSU. To view or modify the Account feature code,
you must access SMDR6 Main menu. After the Feature code is entered,
users can enter the appropriate Account code to the call.
P0907246 Issue 01 SMDR6 System Coordinator Guide
Page 22

16 Administering SMDR6
To set the Account feature code:
1. Press
2. Press
ƒ · • ¤
NEXT
until the display shows:
Feature#: F9__
NEXT CHANGE
3. Press
CHANGE
. Enter the last two digits of the Account Feature
Code.
Feature#: F920
NEXT CHANGE
4. Press
Note
NEXT
to accept the Feature Code.
: If the display shows
code.
IMPORTANT
: Remember to provide your colleagues with the SMDR6
Account feature code.
.
Code in use
you must select another
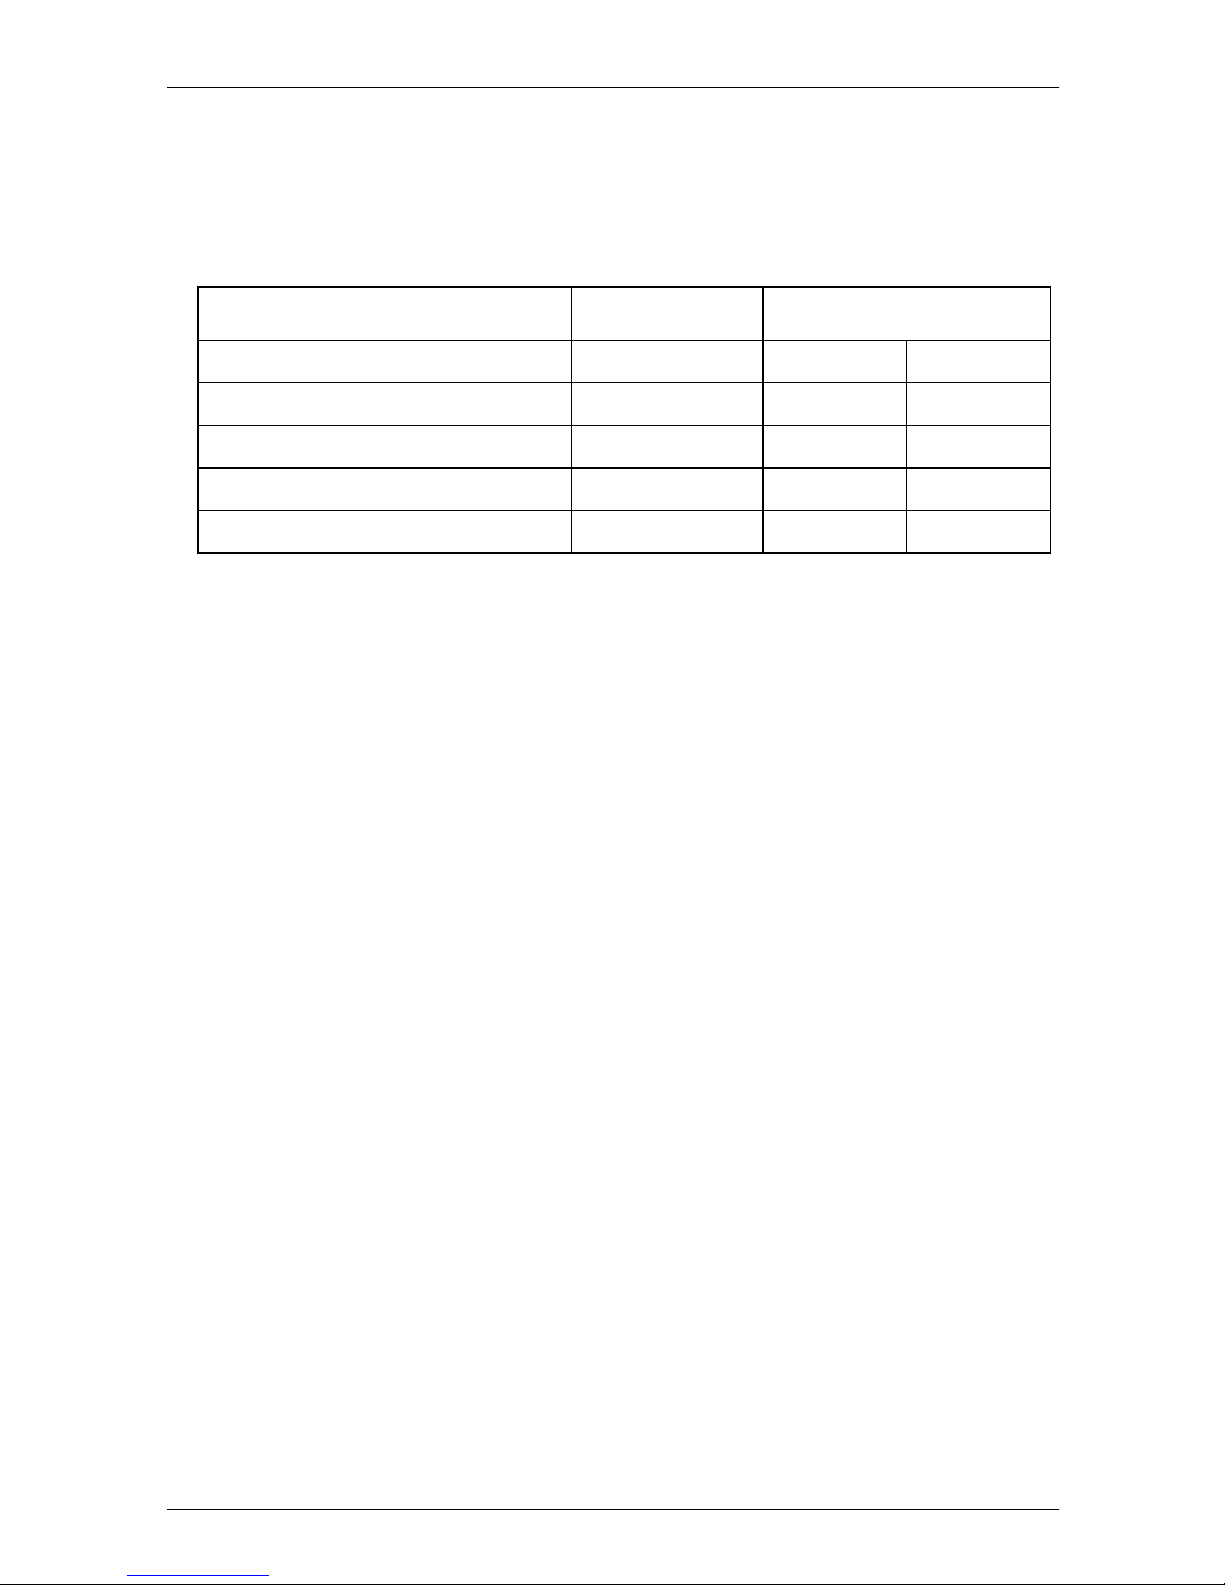
Account code list
Account codes create a reference for tracking telephone calls. For
example, someone contacting a billable client would enter an assigned
code each time a call was placed to that client.
Account codes are from one to 12 digits long. Account codes cannot
contain the • or £ symbols. An example of an Account code list is
shown below.
Account code Description
11127 Barry Rogers
37 Field Support
239 L.E. Steele
45 Monique Leblanc
1552 Dawn Smith
53 Modern Ways Limited
SMDR6 System Coordinator Guide P0907246 Issue 01
100 Long distance
Page 23

Adminis terin g SMDR6 17
Using Account codes
Account codes can be associated with any incoming or outgoing calls.
Account codes feature can be accessed from any Norstar station set by
first entering the Account feature code (F9_ _).
To use Account codes:
1. Select an outside line.
2. Press
ƒ
and enter the three digit SMDR6 Account feature
code. The display shows:
Enter account:
QUIT
3. Enter a one to 12 digit number. (In this example, the number 23 is
used). The display shows:
# = 23
BKSP OK QUIT
Note
: If an Account code is entered incorrectly, press
BKSP
and re-
enter the number.
4. Press
OK
. The display shows:
Recorded
Note
£
: When you are using an M7100 or an M7208 telephone, press
for
OK
and • for
BKSP
.
An Account code can be entered at any time during a call. However, you
cannot enter the account code when a call is on hold or when an
Administration sess ion is in progress.
P0907246 Issue 01 SMDR6 System Coordinator Guide
Page 24

18 Administering SMDR6
Programming an Account feature code memory button
You can program a memory button on your Norstar telephone to
activate the SMDR6 Account feature code. For more information about
memory buttons, refer to your
To program a memory button:
Norstar Telephone User Card
.
1. Press
ƒ •‹
.
2. Press a programmable Norstar button.
3. Press
ƒ
.
4. Enter the three digit SMDR6 Account feature code.
5. Using the paper labels supplied with the Norstar telephone, label
the button Account feature code.
Programming an Account code autodial button
Frequently dialed Account codes can be programmed on M7310 dual
memory buttons. These are called Account code buttons.
To program an Account code button:
1. Press
2. Press a dual memor y butt on.
ƒ•⁄
.
3. Using the dial pad enter the Account code.
4. Press
SMDR6 System Coordinator Guide P0907246 Issue 01
OK
.
Page 25

SMDR6 Extended main menu
To allow more flexibility in SMDR6 reports, the SMDR6 Main menu is
extended to include administering the market specific parameters. To
access the extended SMDR6 Main menu:
Adminis terin g SMDR6 19
1. Press
ƒ · • ¤
. The display shows:
SMDR6 Admin
NEXT QUIT
2. Press the password:
¤‹fl›fl
.
The above procedure enables the Extended menu which appears after
the original main menu.
The extended Main menu allows the configuration of the following
parameters:
N.A. Template/U.K.Template
•
: To select the appropriate default
market profile parameter values. Changing the template
automatically reset parameters below to their default value.
Date format:
•
To select printing the date in MM/DD/YY, DD/MM/YY,
or YY/MM/DD format.
Header format
•
: To select print the header line in LINE followed by
the STN or originator followed by terminator.
CLID Name
•
from the trunk.
Long CLID
•
15 digits.
Call Type
•
trunk.
Call Charge
•
the trunk.
Report DNIS
•
Connect Char
•
separator feature.
Hospitality
•
status feature.
Supervision
•
: To select if the CLID name information is available
: To select if the CLID number from the trunk has 11 or
: To select if Call Type information is available from the
: To select if call charge information is available from
: To enable or disable the DNIS report feature.
: To enable or disable the call connected digit
: To enable or disable the Hospitality room occupancy
: To select if the trunk supports answer supervision.
P0907246 Issue 01 SMDR6 System Coordinator Guide
Page 26

20 Administering SMDR6
Filter time
•
: If the trunks do not support answer supervision, select
the desired time interval to filter unanswered outgoing calls.
Access code
•
Language preference
•
America English or U.K. English and to enable or disable the
support of other languages in SMDR6 report.
Note
: Some of the above parameters are market specific. It the
parameter value doesn’t match the trunk property, the SMDR6 can
produce incorrect reports. If you are using a Call Accounting package
to process the SMDR6 report, consult your software vendor before you
make any changes.
: To enable or disable the access code feature.
: To select to print report using North
SMDR6 System Coordinator Guide P0907246 Issue 01
Page 27

Adminis terin g SMDR6 21
The Extended Main menu structure is shown below.
N.A. Template
NEXT CHANGE
Date Format: MDY
NEXT CHANGE
Header:Line-Stnx
NEXT CHANGE
Name CLID: Yes
NEXT CHANGE
Report DNIS: On
NEXT CHANGE
Connect Char:Off
NEXT CHANGE
Hospitality:Off
NEXT CHANGE
Supervision: No
NEXT CHANGE
Long CLID: No
NEXT CHANGE
Call Type: Yes
NEXT CHANGE
Call Charge: No
NEXT CHANGE
Filter time: 2
NEXT CHANGE
English: N.Amer
NEXT CHANGE
French : Yes
NEXT CHANGE
Spanish: No
NEXT CHANGE
Note
: SMDR6 does not support Spanish report.
P0907246 Issue 01 SMDR6 System Coordinator Guide
Page 28

22 AT Commands
AT Commands
Introduction
To facilitate the SMDR6 Administration and to support multiple
SMDR6s connected to the KSU, a set of ATtention (AT) Commands is
created to change the SMDR6 programmable parameters using a
personal computer (PC).
To use the AT commands, the SMDR6 must be connected to a PC
through the RS232 interface. The PC must have a terminal program
running to communicate with the SMDR6. The default communication
parameters of SMDR6 are:
• 1200 baud
• None parity
• 8 data bit
• 1 stop bit
• hardware flow control (CTS/RTS)
System registers
System parameters are represented using registers. There are four
different kinds of register.
Registers with prefix “R” are general registers representing system and
market-specific parameters. The following registers are defi ned in
SMDR6 (the default settings are shown in
AT Command Descript ion Values
bold
):
R00 Default template
R01 Printer speed
R02 Report format
SMDR6 System Coordinator Guide P0907246 Issue 01
1 = N.A. Template
2 = U.K. Template
2 = 1200
4 = 4800 5 = 9600
6 = 19200 7 = 38400
8 = 57600 9 = 115200
0 = SL-1
3 = 2400
1 = Norstar
Page 29

AT Commands 23
R03 Report type
R04 Report filter
R05 Report language
R06 Master/Slave mode
R07 Reser ved
R08 Date format
R09 Header format
R10 Answer supervision
R11 CLID Name
R12 Long CLID
R13 Call type
0 = Standard
2 = Real Time 3 = All
0 = All
2 = A/C Code 3 = Prefix.
0 = English
1 = French
0 = Master
1 = Slave
0 = MM/DD/ YY
1 = DD/MM/YY
2 = YY/MM/DD
0 = Line/Sta tion Set
1 = Originator/Terminator
0 = Not Supporte d
1 = Support
0 = Not Supported
1 = Supported
0 = Not Supporte d
1 = Supported
0 = Not Supported
1 = Supported
1 = CLID
1 = Outgoing
R14 Call charge
R15 Access co de
R16 Call duration filter
R17 DNIS
R18 Connected Character
R19
Hospitality
0 = Not Supporte d
1 = Supported
0 = Not Supported
1 = Supported
Outgoing call filter duration in
seconds (default = 2 s)
0 = Not Supported
1 = Supported
0 = Not Supporte d
1 = Supported
0 = Not Supporte d
1 = Supported
Register R0 is defaulted to use the North American Template with North
America market-specific parameters.
Register R1 to R5 are system parameters accessible also from the
SMDR6 Main menu using a Norstar station set.
Register R8 to R19 are market-specific parameters. The default values
of market-specific parameters are determined by the value of the
default template register (R0).
P0907246 Issue 01 SMDR6 System Coordinator Guide
Page 30

24 AT Commands
Note
: Be careful when you are changing the value of market-specific
parameters. It the parameter value doesn’t match the trunk property,
the SMDR6 can produce incorrect reports. If you are using a Call
Accounting package to process the SMDR6 report, consult your
software vendor before you make any changes.
Register R6 is used to change the operating mode (master/slave) of
SMDR6 to support multiple SMDR6s per KSU.
Registers for Long distance prefix strings are represented using the
prefix “P.” Eight Long distance prefix registers (P0 to P7) are allocated.
Registers for Access Codes and Suppress digits are represented using
the prefix “A” and “S” respectively. Five Access code registers (A0 to
A4) and five Suppress digit registers (S0 to S4) are allocated.
Registers for Languages supported are represented using the prefix “L”.
Five language registers (L0 to L4) are allocated. SMDR6 supports two
languages. L0 is used to define the type of English (North America
English or U.K. English) to be used for the reports if English is selected
as the report language. L1 is used to enable/disable French support of
SMDR6. If L1 is set to 0, the prompt to select the report language does
not appear in the SMDR6 Main menu.
SMDR6 System Coordinator Guide P0907246 Issue 01
Page 31

Basic AT Command set
Basic AT Command set contains commands to facilitate serial
communication between the SMDR6 and the connected PC. It also
provides information on the SMDR6 hardware and firmware. The
following basic AT Comman ds ar e availa ble:
AT command Description
AT Commands 25
AT Query system sanity. Return with
ATI Query firmware version. Return boot code
firmware ID, download code firmware ID and
hardware ID.
AT&P2=<baud> Set serial baud rate to <baud>.
ATY=<password> Command to start firmware upgrade.
AT&V Display system and market profile paramete rs.
AT&V0 Display system pa rameter values.
AT&V1 Display market profile values.
AT&V2 Display long distance prefix bin content.
AT&V3 Display access bin content.
AT&V4 Display language set up.
Extended AT command set
OK
.
Extended AT command set contains command to modify SMDR6
system parameters and market-specific parameters. To use the
extended AT command set, you must enter the command ‘AT**admin’
in the PC terminal. This command toggles the on/off of the extended AT
command set. The default for Extended AT command set is off.
To change the system parameters or the market specific parameters,
enter ‘AT** adm in’ in the PC te rmin al. The S MDR6 resp onses w it h ‘OK’
to the PC terminal.
To read a particular register value, enter ‘AT$<reg number>?’. The
SMDR6 responses with the value of the register.
To change a particular register value, enter ‘AT$<reg num>=<val>’. The
SMDR6 changes the register value to <val>.
P0907246 Issue 01 SMDR6 System Coordinator Guide
Page 32

26 AT Commands
Note
: The effect of changing the register value is temporary. It is not
saved unless the command ‘AT$W’ is entered to save the register
values to permanent memory.
Remember to enter ‘AT**admin’ again to turn off the Extended AT
Command Set after you complete the SMDR6 Administration function.
The following summarizes the extended AT Commands available:
AT command Description
AT**admin Toggle extended admin mode (turn on/off AT$
AT$Rnn? Read Register nn.
AT$Rnn=x Write Register nn with x.
AT$Pn? Read long distance prefix n.
commands).
AT$Pn=xxxx Write long distance prefix n=xxxx.
AT$An? Read acce ss bin n.
AT$An=xxx Write access bin n=xxx.
AT$Sn? Read suppression bin n.
AT$Sn=xx Write suppression bin n=xx.
AT$Ln? Read language n setting.
AT$Ln=x Write language n=x.
AT$W Save profile to permanent memory.
AT$Yn Change market profile template (with save).
AT$Z Reset profile to default using market template.
SMDR6 System Coordinator Guide P0907246 Issue 01
Page 33

Configure Master/Slave
To support multiple SMDR6s per KSU, one and only one of the
SMDR6s can be configured as the Master. The remaining SMDR6s
must be configured as Slaves.
The mode register (R06: Master or Slave mode) controls whether the
SMDR6 is a Master or Slave. A value of 0 implies the SMDR6 is the
Master. A value of 1 implies the SMDR6 is the Slave. The default value
of the mode register is 0 for Master. To change the SMDR6 to Slave,
use the Extended AT command to change the register (R06) value to 1.
The following illustrates a sample session to configure the SMDR6 in
Slave mode:
AT Commands 27
AT
OK
AT**admin
OK
AT$R06=1
OK
AT$W
OK
AT**admin
OK
Query sanity
Toggle Extended AT commands ON
Change SMDR6 to Slave mode
Write to permanent memory
Toggle Extended AT commands OFF
When in Slave mode, the SMDR6 will not be accessible using the
SMDR6 Main menu. The AT Command Set must be used to configure
Slave SMDR6s. Similar procedures should be used to change the
system parameter values of Slave SMDR6s.
Note
: Remember to clearly mark each SMDR6 as master or slave and
label the configured serial baud of all slave SMDR6 units. The system
parameters of slave SMDR6 can be modified only using the PC. It is
important for the slave SMDR6 to use the correct serial baud to
communicate properly with the PC.
P0907246 Issue 01 SMDR6 System Coordinator Guide
Page 34

28 SL-1 format
SL-1 format
Introduction
The SL-1 record is used when the output is supplied to legacy
commercial accounting package or equipment. SL-1 records are in the
form of one or two lines in ASCII characters.
This section describes the SL-1 record format. It explains how to
interpret the reports.
SL-1 record format
The SMDR6 supports two different SL-1 record format:
• SL-1 Standard record format
• SL-1 CLID record format
The SL-1 CLID format is similar to the SL-1 Standard format with the
addition of CLID information. For lines that do not support CLID or when
no CLID information is delivered from the KSU, calls are reported as an
SL-1 Standard record format.
SMDR6 System Coordinator Guide P0907246 Issue 01
Page 35

SL-1 record field definitions
The field definitions for lines 1 and 2 SL-1 Records are summarized
below:.
Line 1:
Column Name Format Definition
1 RecType Y Rec ord type
2 Blank Blank space
3-5 RecNo XXX Record seq number
6 Blank Blank space
7-8 CustNo 00 Customer number
9 Blank Blank space
10-16 OrigID TXXXXXX Line number
SL-1 format 29
DNXXXX STN number
CF00001 Conference number
17 Blank Blank space
18-24 TerID TXXXXXX Line number
DNXXXX STN number
25-37 Blank Blank space
38-48 TimeStamp MM/DD HH:MM Time stamp
49 Blank Blank space
50-57 Duration HH:MM:SS Call duration
58 Blank Blank space
59-90 Digits XXX...X Dialed digits
50-61 AccCode XXX...X Account code (C record)
Line 2:
Column Name Format Definition
3-18 CLID XXX...X CLID number
P0907246 Issue 01 SMDR6 System Coordinator Guide
Page 36

30 SL-1 format
SL-1 Record types
SMDR6 generates the following SL-1 record types:
Letter code Record type
I Initializati on Record
NNormal Record
S Start Record
EEnd Record
A Authorization Record
C Charge Record
M Conference Charge Record
The I record contains only the record type and time stamp. The S, E, M
and C records do not contain the duration field. The E records do not
contain any dialed digits.
Note
: The I record does not contain Call Information number; all other
record types will contain the Call Information number (if delivered).
SMDR6 System Coordinator Guide P0907246 Issue 01
Page 37

SL-1 format 31
SL-1 Standard record format
Using the field definition and record types describes above, an example
of an outgoing call on line 52 that is placed by station set 7425 is shown
below.
N 027 00 DN7425 T052000 04/04 14:03 00:01:32 5551212
An example of an incoming call on line 47 that is answered by station
set 2221 is shown below.
N 028 00 T047000 DN2221 04/04 14:22 00:12:04
An example o f an ou tg oing call on line 38 is pl ace d by sta tio n set 7447
and transferred to station set 2221 is shown below.
S 029 00 DN7447 T038000 04/04 15:02 8761344
E 030 00 T038000 DN2221 04/04 15:07
An example of a two line conference call with two outgoing calls is
shown below.
S 000 01 DN6545 T038000 04/04 12:23 9369552
E 001 01 CF0001 T038000 04/04 12:27
S 002 01 DN6789 T047000 04/04 12:23 8082635
E 003 01 CF0001 T047000 04/04 12:27
SL-1 CLID format records
The SL-1 CLID format record consists of two lines. The CLID
information, if available, is presented in the third character position of
the second line.
The CLID number is always 16 digits. Any missing numbers are
represented by an “x.” If there is no CLID Information available then no
CLID Information record is delivered.
Some examples of SL-1 CLID format records are shown below:
P0907246 Issue 01 SMDR6 System Coordinator Guide
Page 38

32 SL-1 format
An incoming call on line 38 is answered by station set 2221 with CLID
enabled and the CLID number available is 4032919000.
N 034 00 T038000 DN2221 04/04 15:32 00:10:24
4032919000xxxxxx
An incoming call on line 37 is answered by station set 2211 with Call
Information enabled, and the CLID number is not available.
N 035 00 T037000 DN2211 04/04 14:22 00:12:04
Note
: The record is the same as the SL-1 Standard format record.
An incoming call on line 38 is answered by station set 7447 and
transferred to station set 2223. Call Information is enabled and the Call
Information number available is 4032919001 as shown below.
S 029 00 T038000 DN7447 04/04 15:02
4032919001xxxxxx
E 030 00 T038000 DN2223 04/04 15:07
4032919001xxxxxx
If you need CLID information in slave SMDR6, the master SMDR6 must
be configured to receive CLID information. The master SMDR6 must be
configured to print SL-1 CLID record format or Norstar CLID record
format (or Norstar real time format or Norstar all format).
SL-1 Target line/Physical lines
When target lines are used on digital trunks, records show both the
target line number and the physical line number.
An example of an incoming call on target line 103 is shown below. The
physical line is 37 and is transferred to another station set.
S 029 00 T037103 DN7499 04/04 15:02
E 030 00 T037103 DN7370 04/04 15:07
SMDR6 System Coordinator Guide P0907246 Issue 01
Page 39

Norstar format
Introduction
The Norstar format records are used when the SMDR6 output is
connected to a printer or Call Accounting packages designed to use the
Norstar format.
This section describes the Norstar record format. It explains how to
interpret the reports.
Norstar record format
Norstar format 33
The SMDR6 supports four different Norstar record formats:
• Norstar Standard record format
• Norstar CLID record format
• Norstar Real Time record format
• Norstar All record format
Norstar Standard record format
Norstar Standard format records always start with a header line
indicating the date (MM/DD/YY) time (HH/MM/SS); LINE field and STN
field. The records have at least one event line showing an event and
time stamp.
An example of an Outgoing call in Standard format appears below.
-------- 04/04/98 11:39:43 LINE = 0003 STN = 7425
00:00:00 OUTGOING CALL
DIGITS DIALED 5551212
00:00:37 ACCOUNT CODE 87
00:12:59 CALL RELEASED
P0907246 Issue 01 SMDR6 System Coordinator Guide
Page 40

34 Norstar format
An example of an Incoming Call in Standard format appears below.
-------- 04/04/98 12:00:01 LINE = 0083 STN = 7726
00:00:00 INCOMING CALL RINGING 0:32
00:00:39 HOLD
00:01:12 UNHOLD
00:02:47 CALL RELEASED
Norstar Call Information record format
When this option is selected, CLID Information received from the KSU
for an incoming call prints between the record header and the event
lines. There is one occurrence of CLID Information per call. If no CLID
information is received, no CLID field appears in the record.
If you need CL ID informat ion in slave SMDR 6, the master SMDR6 must
be config ured to receiv e CLID infor mation. The m aster SMDR6 must be
configured to print SL-1 CLID record format or Norstar CLID record
format (or Norstar real time format or Norstar all format).
Note
: SMDR6 reports CLID information only for lines which are capable
of delivering CLID. The Norstar KSU must be properly configured to
enable delivering CLID Information.
Call Information record field definitions
The first Call Information line after the header line is the CALLING
NUMBER:
• maximum of 11 characters
• if the number is truncated, the 11 digits received are preceded by “/”
• if only partial CLID number was received, the digits are followed by
an “x”
• UNKNOWN (if no data is received in the number field)
The second Call Information line is the NAME:
• Name (maximum 15 characters)
• UNKNOWN (if no name is received in the name field)
SMDR6 System Coordinator Guide P0907246 Issue 01
Page 41

Norstar format 35
The third Call Information line is the call type indicating if the call is a
long distance call or otherwise:
• LONG DISTANCE
• UNKNOWN (if no call type information is received)
An example of an incoming call in the CLID format appears below.
-------- 04/04/98 11:12:01 LINE = 0013 STN = 7465
CALLING NUMBER 4032919123
NAME UNKNOWN
UNKNOWN
BC = SPEECH
00:00:00 INCOMING CALL RINGING 0:32
00:00:39 HOLD
00:01:12 UNHOLD
00:02:47 CALL RELEASED
An example of an abandoned (no answer) incoming call in CLID format
appears below.
-------- 04/04/98 20:30:00 LINE = 0035
CALLING NUMBER 4032919123
NAME UNKNOWN
UNKNOWN
BC = SPEECH
00:00:00 NO ANSWER RINGING 3:15
An example of a call record with CLID number truncated is shown
below.
-------- 04/04/98 11:12:01 LINE = 0013 STN = 7465
CALLING NUMBER /12345678901
NAME UNKNOWN
UNKNOWN
BC = SPEECH
00:00:00 INCOMING CALL RINGING 0:32
00:00:39 HOLD
00:01:12 UNHOLD
00:02:47 CALL RELEASED
P0907246 Issue 01 SMDR6 System Coordinator Guide
Page 42

36 Norstar format
An example of a call record with only partial CLID number is shown
below.
-------- 04/04/98 11:12:01 LINE = 0013 STN = 7465
CALLING NUMBER 1234567890x
NAME UNKNOWN
UNKNOWN
BC = SPEECH
00:00:00 INCOMING CALL RINGING 0:32
00:00:39 HOLD
00:01:12 UNHOLD
00:02:47 CALL RELEASED
SMDR6 System Coordinator Guide P0907246 Issue 01
Page 43

Norstar format 37
Standard Hospitality record format
This Hospitality record represents four states of room occupancy:
vacant, basic, mid and full. Room number lengths range from one to five
digits.
Note
: To print the Hospitality records this feature must be configured to
on. For more information, refer to
this guide.
An example of a Standard Hospitality record showing room 12345
status set to vacant appears below.
-------- 23/01/98 23:49:00 EXT = 12345
HOSPITALITY VACANT
An example of a Standard Hospitality record showing room 7324 status
set to vacant appears below.
CLI Extended main menu
, earlier in
-------- 23/01/98 23:49:00 EXT = 7324
HOSPITALITY VACANT
An example of a Standard Hospitality record showing room 732 status
set to basic appears below.
-------- 23/01/98 23:49:00 EXT = 732
HOSPITALITY BASIC
An example of a Standard Hospitality record showing room 73 status
set to mid appears below.
-------- 23/01/98 23:49:00 EXT = 73
HOSPITALITY MID
An example of a Standard Hospitality record showing room 7 status set
to full appears below.
-------- 23/01/98 23:49:00 EXT = 7
HOSPITALITY FULL
P0907246 Issue 01 SMDR6 System Coordinator Guide
Page 44

38 Norstar format
Norstar Real Time record format
Real Time call records are one line long. All Real Time records begin
with an asterisk (*) to differentiate them from non-Real Time call
records. Rea l Ti me r ec ords are gen erat ed onl y wh en C LID Inf orm ati on
is available. Records are generated only for the following five call states
and four Hospitality record types:
• Ringing is represented by the letter “G”
• Dialed Number Identification Service (DNIS) is represented by the
letter “D”
• Answered is represented by the letter “A”
• No Answer is represented by the letter “N”
• Transfer is represented by the letter “T”
• Released is represented by the letter “R”
• Hospitality vacant is represented by the letters “H V”
• Hospitality basic is represented by the letters “H B”
• Hospitality mid is represented by the letters “H M”
• Hospitality full is represented by the letters “H F”
The RINGING call state is unique to Real Time records because it
indicates a ringing line as soon as SMDR6 received the CLID
Information.
The Dialed Number Identification Service (DNIS) record is reported only
if the line delivers the DNIS information. If present, it follows right after
the RINGING record.
An example of a call, ringing with DNIS, answered and released
appears below.
*030198 154615 0019 6137635114 John Doe U G
*030198 154615 0019 6137635114 4037352000 U D
*030198 154623 0019 7832 6137635114 John Doe U A
*030198 154831 0019 7832 6137635114 John Doe U R
SMDR6 System Coordinator Guide P0907246 Issue 01
Page 45

Norstar format 39
An example of a transferred call appears below.
*041197 094105 0003 2919000 Alan Smith U G
*041197 094105 0003 2919000 7305432 U D
*041197 094111 0003 7344 2919000 Alan Smith U A
*041197 094156 0003 7440 2919000 Alan Smith U T
*041197 094414 0003 7440 2919000 Alan Smith U R
Real time records are printed when the events occur. The record
information can be used to drive external PC database applications.
One such application is to locate customer information stored in the
database by extracting the CLID information from the Real time records.
P0907246 Issue 01 SMDR6 System Coordinator Guide
Page 46

40 Norstar format
Real Time Hospitality record format
This Hospitality record represents four states of room occupancy:
vacant, basic, mid and full. Room number lengths range from one to five
digits.
Note
: To print the Hospitality records this feature must be configured to
on. For more information, refer to
this guide.
An example of a Real Time Hospitality record showing room 12345
status set to vacant appears below.
*012398 234900 12345 H V
An example of a Real Time Hospitality record showing room 7324
status set to vacant appears below.
CLI Extended main menu
, earlier in
*012398 234900 7324 H V
An example of a Real Time Hospitality record showing room 732 status
set to basic appears below.
*012398 234900 732 H B
An example of a Real Time Hospitality record showing room 73 status
set to mid appears below.
*012398 234900 73 H M
An example of a Real Time Hospitality record showing room 7 status set
to full appears below.
*012398 234900 7 H F
SMDR6 System Coordinator Guide P0907246 Issue 01
Page 47

Norstar All record format
When this option is selected, Standard, CLID Information and Real
Time records are provided.
Norstar format 41
An example of a call record when
All
is selected appears below. The
RINGING records show the time when the call is received with CLID
Information, not the time when it started alerting. The call is answered
15 seconds after the ringing began. It is transferred 25 seconds after it
is answered and is released two minutes after it was transferred.
*030298 154920 0022 4032919000 UNKNOWN D G
*030298 154920 0022 4032919000 8002349876 D D
*030298 154935 0022 7101 4032919000 UNKNOWN D A
*030298 155000 0022 7169 4032919000 UNKNOWN D T
*030298 155200 0022 7169 4032919000 UNKNOWN D R
-------- 03/02/98 15:49:20 LINE = 0022 STN = 7101
CALLING NUMBER 4032919000
NAME UNKNOWN
LONG DISTANCE
DNIS NUMBER 8002349876
BC = SPEECH
00:00:00 INCOMING CALL RINGING 0:15
00:00:20 HOLD
00:00:25 TRANSFERRED
-------- 03/02/98 15:50:00 LINE = 0022 STN = 7169
00:00:00 FROM TRANSFER
00:00:00 UNHOLD
00:02:00 CALL RELEASED
P0907246 Issue 01 SMDR6 System Coordinator Guide
Page 48

42 Norstar format
Target line/Physical lines
When targe t line s are be ing us ed on di gital trunks , the SM DR6 reco rds
show both the target line and the physical line number.
An example of an Incoming call on a target line appears below. The
target line number is 101 and the physical line number is 38. The call is
answered by station set 7468.
-------- 12/12/97 12:00:01 LINE = 0101 STN = 7468
00:00:00 INCOMING CALL
LINE = 0038
00:28:33 CALL RELEASED
Busy Norstar records
The SMDR6 reports busy for the following calls.
Direct Inward Dial (DID) busy
This happens when a digital line is set up as a DID line requiring receive
digits to route the call through the KSU via a target line. If all target line
destinations are busy, and the KSU is programmed to return busy
instead of routing the call to the prime station set, SMDR6 reports busy.
-------- 03/02/98 15:09:32 LINE = 0235
00:00:00 BUSY
LINE = 0035
Target line busy
This happens when a target line is involved with a call, and a second
incoming call tries to use the same line. SMDR6 reports busy, but does
not include the target line information.
-------- 03/02/98 14:36:02 LINE = 0035
00:00:00 BUSY
Note
: SMDR6 reports busy calls only if the KSU is programmed to
provide busy treatment.
SMDR6 System Coordinator Guide P0907246 Issue 01
Page 49

Bearer capability data
When the SMDR6 is set to report in Norstar CLID format, the SMDR6
supports the reporting of Bearer capability associated with the call as
part of the CLID format record. An example of an incoming call with
Bear capability data is shown below.
-------- 12/03/98 14:36:00 LINE = 0035
CALLING NUMBER 7355303
NAME UNKNOWN
UNKNOWN
BC = SPEECH
00:00:00 NO ANSWER RINGING 0:02
Note
: This is supported only if the KSU supports Bearer capabilities.
Norstar format 43
P0907246 Issue 01 SMDR6 System Coordinator Guide
Page 50

44 Norstar format
PRI Call-by-call servi ce
When the ISDN Primary Rate Interface (PRI) trunks is installed in the
KSU, the SMDR6 supports the reporting of PRI Call-by-call service as
part of the CLID call records in Norstar CLID format. Both the service
type and service ID for incoming and outgoing calls are reported in the
SMDR6 records. The following example illustrates an incoming call
using the TIE service with service ID 0 and the corresponding outgoing
call using the PUBLIC service
-------- 01/01/98 01:38:00 LINE = 0001 STN = 221
CALLING NUMBER 6135551212
NAME UNKNOWN
UNKNOWN
DNIS NUMBER 9772210
BC = SPEECH
PRI SERVICE TIE 0
00:00:00 INCOMING CALL RINGING 0:00
00:01:35 CALL RELEASED
-------- 01/01/98 01:38:00 LINE = 0023 STN = 223
BC = SPEECH
PRI SERVICE PUBLIC
00:00:00 OUTGOING CALL
DIGITS DIALED 9772210
00:01:35 CALL RELEASED
Note
: This is supported only if the necessary Norstar hardware is
installed and the PRI trunks are configured properly to deliver PRI callby-call service information.
SMDR6 System Coordinator Guide P0907246 Issue 01
Page 51

Norstar format 45
Dialed number identification service
Certain trunk types (including ISDN PRI trunks) support the delivery of
Dialed number identification service (DNIS). SMDR6 supports the
reporti ng of DN IS as pa rt of the CLID ca ll rec ords wh en the in form ation
is delivered. DNIS reporting is supported in both Norstar CLID format
and Norstar Real Time format. An example of an incoming call with
DNIS information is shown below
-------- 01/01/98 01:38:00 LINE = 0001 STN = 221
CALLING NUMBER 6135551212
NAME UNKNOWN
UNKNOWN
DNIS NUMBER 9772210
BC = SPEECH
PRI SERVICE TIE 0
00:00:00 INCOMING CALL RINGING 0:00
00:01:35 CALL RELEASED
Note
: This is supported only if the necessary Norstar hardware is
installed and the trunks supporting DNIS are configured properly to
deliver DNIS information.
P0907246 Issue 01 SMDR6 System Coordinator Guide
Page 52

46 Norstar format
Call connected digit separator
Normally, SMDR6 reports all the digits the user dialed to connect the
call. The digits may include digits responding to prompts from the Autoattendants, extension transfer or voice mail service. To facilitate the
identification of digits dialed to connect the call and digits dialed after
the call is connected, an option is available to insert an “!” between
them. An example of an outgoing call with call connected digit separator
is shown below
-------- 01/01/98 01:38:00 LINE = 0023 STN = 223
BC = SPEECH
00:00:00 OUTGOING CALL
DIGITS DIALED 9772210!0132
00:01:35 CALL RELEASED
This option can be enabled using the AT command or the SMDR6
Extended main menu. The default of this option is disabled.
Note
: The SMDR6 cannot differentiate between required digits to
connect the call and extra digits dialed before the call is connected. Not
all KSUs support the delivery of call connected signal and this feature
may not be available for some KSUs.
Norstar record field definitions
The following list shows all of the lines that can be printed by SMDR6 in
the Norstar format.
SMDR6 System Coordinator Guide P0907246 Issue 01
Page 53

Norstar format 47
Standard and CLID record formats
0 1 2 3 4 5 6 7
1234567890123456789012345678901234567890123456789012345678901234567890
-------- MM/DD/YY HH:MM:SS LINE = XXXX STN = XXXXXXX
-------- MM/DD/YY HH:MM:SS LINE = XXXX LINE = XXXX
-------- MM/DD/YY HH:MM:SS LINE = XXXX
-------- MM/DD/DY HH:MM:SS
SMDR6 RESTART
00:00:00 INCOMING CALL RINGING 0:00
00:00:00 OUTGOING CALL
00:00:00 NO ANSWER RINGING 0:00
00:00:00 FROM TRANSFER
00:00:00 INVALID PASSWORD
00:00:00 HOLD
00:00:00 UNHOLD
00:00:00 ACCOUNT CODE 123
00:00:00 BUSY
DIGITS DIALED 9369552
00:00:00 CONFERENCE STN2 = 7425
00:00:00 CONFERENCE LINE2 = 0052
00:00:00 CONFERENCE END
00:00:00 RESTRICTI0N PASSWORD 99
00:00:00 CALL RELEASED
00:00:00 TRANSFERRED
00:00:00 FROM TRANSFER
RECORDS LOST
LINE = 0015
BC = SPEECH
BC = UNRESTRICTED DIGITAL
BC = RESTRICTED DIGITAL
BC = 3.1 kHZ AUDIO
BC = 7 kHZ AUDIO
BC = VIDEO
CALLING NUMBER 4032919123
CALLING NUMBER /12345678901
CALLING NUMBER 4032919123x
NAME Peter Pan
LONG DISTANCE
UNKNOWN
DNIS NUMBER 4032652300
PRI SERVICE PUBLIC
PRI SERVICE PRIVATE
PRI SERVICE TIE
PRI SERVICE FX
PRI SERVICE OUTWATS
PRI SERVICE SWITCHED DIGITAL
PRI SERVICE INWATS
PRI SERVICE INTL INWATS
PRI SERVICE 900
HOSPITALITY VACANT
HOSPITALITY BASIC
HOSPITALITY MID
HOSPITALITY FULL
P0907246 Issue 01 SMDR6 System Coordinator Guide
Page 54

48 Norstar format
Real Time record format
0 1 2 3 4 5 6 7
1234567890123456789012345678901234567890123456789012345678901234567890
*MMDDYY HHMMSS LINE STATION CLID NUMBER NAME/DNIS TYPE EVENT
*030193 154615 0019 6137635122 Alan Smith U G
*030193 154615 0019 6137635122 4032632300 U D
*030193 154615 0019 7343 6137635122 Alan Smith U A
*030193 154615 0019 7343 6137635114 Alan Smith U N
*030193 154615 0019 7343 6137635122 Alan Smith U T
*030193 154615 0019 7343 6137635114 Alan Smith U
*012398 234900 12345 H V
*012398 234900 12345 H B
*012398 234900 12345 H M
*012398 234900 12345 H F
Norstar Standard and CLID record description
For non-Real Time records, each line has a maximum of three fields
(except for the header line).
R
The header line has a maximum of five fields:
• the first field is always eight dashes
• the second field is the date the call originated
• the third field is the time the call originated
• the fourth field is the line being used
• the fifth field is either the line or station that is using the line in
the fourth field
The SMDR6 reports calls based on events (change of call states). The
first field is the time the associated event occurred. The time is an offset
from the start time of the call indicated in the header. The second field
describes the event associated with that call. Events can be either a call
state like hold or transfer, or a user action like account code entry. The
third field is data which further describes the action indicated in the
second field.
SMDR6 System Coordinator Guide P0907246 Issue 01
Page 55

Norstar format 49
Printable line descriptions
The line below is the Header line indicating the start of a call record, or
the continuation of a call record after a transfer. This record can have
three, four or five fields. The date and time reflects the date and time the
call started. For incoming calls, this is when the call is answered. For
outgoing calls it is the time the line is seized. The LINE field is fixed at
four digits. The STN directory number (DN) can be from two to seven
digits in length. For Outgoing tandem calls, both the fourth and the fifth
field will be LINE.
-------- MM/DD/YY HH:MM:SS LINE = XXXX STN = XXXXXX
The line below is printed after the header line when SMDR6 or the KSU
is restarted.
SMDR6 RESTART
The line below is printed after the header line (with all five fields) or after
the CLID Information. The time in the header line is when the call was
actually answered. This time minus the ringing duration (the third field)
is when the call actually started ringing.
00:00:00 INCOMING CALL RINGING 0:04
The line below is printed after the header line (with all five fields). The
time in the header line field indicates when the call was initiated.
00:00:00 OUTGOING CALL
The line below is printed after the header line when an incoming call is
not answered.
00:00:00 NO ANSWER RINGING 0:22
The line below is printed when an incoming call receives busy
treatment.
00:00:00 BUSY
P0907246 Issue 01 SMDR6 System Coordinator Guide
Page 56

50 Norstar format
The lines below indicate when the call was put on hold or taken off hold.
00:00:04 HOLD
00:00:06 UNHOLD
The lines below are printed at the start and the end of a conference. The
third party in the conference could be a second station set or a second
line as indicated in the third field.
00:10:32 CONFERENCE STN2 = 7425
00:12:12 CONFERENCE LINE2 = 0052
00:12:45 CONFERENCE END
The line below is printed when a call has been transferred.
00:00:00 TRANSFERRED
The line below is printed after the header line when a call is transferred.
It indicates the start of the call at the new station set that receives the
transfer.
00:00:00 FROM TRANSFER
The line below is printed after the last state of a call. It is followed by a
carriage return and two line feeds so that there is a blank line before the
start of the next call record.
00:00:00 CALL RELEASED
The line below is printed when digits dialed are displayed in Outgoing
call records. A maximum of 32 digits/characters may appear. If the call
connected digit separator option is enabled, an “!” is inserted between
digits dialed before and after the call is connected.
DIGITS DIALED XXXXXXXXXXXXXXXXXXXXXXXXXXXXXXXX
DIGITS DIALED 123456789!1234
The line below is printed when the user or caller enters an invalid
password.
00:00:00 INVALID PASSWORD
SMDR6 System Coordinator Guide P0907246 Issue 01
Page 57

Norstar format 51
The line below is printed when an account code is entered. Account
codes can be a maximum of 12 digits.
00:00:00 ACCOUNT CODE XXXXXXXXXXXX
The line below is printed when a password is entered. The password ID
can be a maximum of two digits (00-99). The record indicates the
password override ID and not the password itself.
00:00:00 RESTRICTION PASSWORD XX
The line below is printed as the last line of a call record if the call states
were missed or if a call was missed altogether. It is followed by a
carriage return and two line feeds so that there is a blank line before the
start of the next call record.
RECORDS LOST
The line below is printed identifying the physical line of an incoming call
on a target line. The line number is fixed at four digits (with leading
zeros).
LINE = XXXX
The lines below are printed when CLID information is available. The
calling number shown can be a maximum of 12 characters of which a
maximum of eleven can be digits. If a number received by the KSU is
longer than eleven digits, then a “/” is the first character, followed by the
eleven least significant digits. The name can be a maximum of 15
characters. Each of the number and name can show “UNKNOWN”. The
third line is the call type. It shows either “LONG DISTANCE” or
“UNKNOWN” if call type information is not available. The DNIS number,
if available, appears after the call type. It is followed by the Bearer
Capability. The last line is the PRI Call-by-call service. It appears only if
the PRI service information is available.:
CALLING NUMBER XXXXXXXXXXX
NAME XXXXXXXXXXXXXXX
UNKNOWN
DNIS NUMBER XXXXXXXXXX
BC = SPEECH
PRI SERVICE TIE XXXXX
P0907246 Issue 01 SMDR6 System Coordinator Guide
Page 58

52 Norstar format
The lines below are printed when the room occupancy status of room
12345 changes to vacant.
-------- 23/01/98 23:49:00 EXT = 12345
HOSPITALITY VACANT
Norstar Real Time record description
The Real Time records are one line long begin with an asterisk (*) to
differentiate them from other Norstar records. It contains eight fields:
• Date in MMDDYY format
• Time in HHMMSS format
• Line number associated with the call
• Station Set number associated with the call
• CLID number
• CLID name or DNIS number
•Call type
•Call state
The first field is the date field and is a fixed length of six digits
(MMDDYY). The month, day or year may be preceded with a leading 0
to keep the field length fixed. For example, 010598 is January 5, 1998.
The second field is the time which is also a fixed field with six digits
(HHMMSS). There are no separators between hour, minute and
second.
The third field is the line which is associated with the call being tracked.
The line is fixed at four digits and may have leading zeros. For example,
0019 is line 19. Because the Real Time Hospitality record does not use
the third field it does not contain any characters and appears blank.
The fourth field is the station set number of the station set associated
with the call. Station Set numbers can be from two to seven digits long.
If the number is less than seven digits there are no leading zeros
because this field is not fixed. In the Real Time Hospitality record the
fourth field shows the room number. Room numbers are one to five
digits long.
SMDR6 System Coordinator Guide P0907246 Issue 01
Page 59

Norstar format 53
The fifth field is the CLID Information field indicating the calling number.
The number can be a maximum of 12 characters (11 digits maximum
and the “/” and “x” character). There is always information in this field. If
no number is available, either UNKNOWN or PRIVATE appears in this
field. Because the Real Time Hospitality record does not use the fifth
field it does not contain any characters and appears blank.
The sixth field is the CLID name or DNIS information. The name can
have a maximum of 15 characters. If no name is available, UNKNOWN
appears in this field. This field is replaced by the DNIS information in “D”
records. The DNIS can have a maximum of 10 digits. In the Real Time
Hospitality record the sixth field shows the room occupancy status
indicator.
The seventh field is the CLID call type which is either long distance (D)
or unknown (U).
The eight field indicates the call state of the Real Time record. This field
always contains a call state indicator and is followed immediately by a
carriage return and two line feeds.
P0907246 Issue 01 SMDR6 System Coordinator Guide
Page 60

54 Troubleshooting
Troubleshooting
Introduction
This section provides solutions to problems you might encounter while
programming and maintaining the SMDR6 unit.
Problems are grouped into two categories: Printer Problems and Error
Messages.
Printer problems
Problem
Solution
• is connected to the SMDR6 unit
•is on-line
• is properly loaded with paper
: Records are not printing.
: Ensure the printer:
Ensuring Records are printed
If the printer is off-line from SMDR6, the following message appears on
the display for three seconds when you access SMDR6 Administration:
Printer Problem
If there is nothing wrong with the printer set up, then ensure SMDR6 is
configured to the same speed as your printer. For more information
about printer set up, refer to
guide.
Administering SMDR6
, earlier in this
Problem
Solution
SMDR6 System Coordinator Guide P0907246 Issue 01
: Only certain calls are being printed.
: When a record is not printed, follow the steps below:
Page 61

Troubleshooting 55
The Call Reporting option might be screening out calls that you want
recorded. For example, if the Call Report is set for outgoing calls, then
only outgoing calls are printed. For more information on Call Reports,
refer to
Administering SMDR6
, earlier in this guide.
A user must press
OK
or £ after entering an Account code for the
record to be printed. For more information on Account codes refer to,
Administering SMDR6
for user training information.
The SMDR6 might have been restarted. It takes up to 60 seconds after
the system is restarted before any calls are recorded. Calls made during
this time are not recorded. The SMDR6 will start printing records after
this 60 second period.
Error messages
The SMDR6 shows error messages on the telephone display, or on
printed records.
Message:
This message appears if an unassigned Feature Code is entered.
Inactive feature
Access the SMDR6 Administration to determine the correct Feature
Code. Fore more information on SMDR6 Administration, refer to
Administering SMDR6
Message:
, earlier in this guide.
Code in use
This message appears during SMDR6 Administration. The Account
code Feature number entered already exists within the Norstar system.
Message:
Feature in use
This message appears when two users try to access SMDR6
Administration simultaneously.
Message:
No active line
This message is caused by inputting the Account feature code when an
exchange line has not been selected, or is on hold.
P0907246 Issue 01 SMDR6 System Coordinator Guide
Page 62

56 Troubleshooting
Use an Account code on active outside lines.
Message:
System in use
This message means the Feature code for another application is being
administered at this time.
The SMDR6 has internal event buffers that store all information relating
to call records. If the system becomes overloaded because of
excessively high call activity, records can be lost. This message
appears in the printed call records:
RECORDS LOST
You might require a higher speed printer or an external print buffer
device.
SMDR6 System Coordinator Guide P0907246 Issue 01
Page 63

Glossary
Account feature code
A three-digit number that enables users to enter an SMDR6 account
code from a Norstar telephone.
Baud
A variable unit of data transmission speed equal to one bit per second.
Call Accounting
An optional software program that can be used to analyze the data
collected by SMDR6 and to organize it according to a company’s needs.
Call record
A type of record created by SMDR6. This record includes information
about a call's duration and number dialed.
Call report
A report that uses call record information collected by SMDR6 to itemize
telephone activity.
CLASS
Custom Local Area Signalling Services is a collection of services from
the local telephone company.
CLID
If available from the local telephone company, Calling Line Identification
is when the calling number is shown on the Norstar display.
CMS
Call Management Services is a collection of services from the local
telephone company. CMS is a part of CLASS.
Default
A value that SMDR6 assumes unless another one is specified.
ISDN
Integrated Services Digital Network is a worldwide digital
communications network.
P0907246 Issue 01 SMDR6 System Coordinator Guide
Page 64

2 Glossary
Hospitality record
A type of record created by SMDR 6 that provides the room occupancy
status whether vacant, basic, mid or full.
KSU
Key Service Unit. The central hardware component in the Norstar
system. The KSU has its own processor and memory, and provides a
physical point for connection of various types of data terminals,
telephones and expansion modules.
Norstar record format
An English language syntax organization of call records.
Physical line
The physical connection between the Norstar system and the outside
world.
Prompt
A message appearing on the Norstar display instructing the user to
perform a specific task.
Record
A unit of info rmat ion cons isti ng of se vera l rela te d data item s per taini ng
to a call.
SL-1 record format
The organization of information that SMDR6 data must be translated
into before the data it contains can be read by an SL-1 call accounting
program.
SMDR6
Station Message Detail Recording 6 is a unit that is connected to your
Norstar Key Service Unit to record call activity.
System Coordinator
The person responsible for installing, administrating and maintaining
SMDR6 for a particular company.
Target line
A Target line is a virtual line, not a physical line. It is dedicated to
receiving and routing incoming calls on DID or auto-answer trunks to a
specific destination.
SMDR6 System Coordinator Guide P0907246 Issue 01
Page 65

Index
A
Account code list
creating 16
Account codes 14
Account feature code 15
AT Commands 22
Basic 25
Extended 25
B
Baud 8
Busy
Direct Inward Dial 42
Target line 42
C
Call information 34
Configuration
Master/Slave 27
Connection
devices 3
Conventions
guide 1
D
Descriptions
Norstar Standard and CLID
record 48
Printable line 49
Real Time record 52
Digit separator 46
Direct Inward Dial 42
E
Extended main menu 19
Access code 20
Call charge 19
Call type 19
CLID digits 19
CLID name 19
Date format 19
DNIS 19
Filter time 20
Header format 19
Language 20
Market profile 19
room occupancy status feature
19
Separator feature 19
structure 21
Supervision 19
F
Field definitions
Call Information record 34
Norstar record 46
H
Hospitality record 2, 3, 19
Real Time 40
Standard 37
I
Identification service 45
L
LED control 6
M
Main menu 5
accessing 5
exiting 5
P0907246 Issue 01 SMDR6 System Coordinator Guide
Page 66

2 Index
P
Pager 6
Physical line
Norstar 42
SL-1 32
Primary Rate Interface 44
Programming
Account code autodial button 18
Account feature code memory
button 18
SMDR6 parameters 7
using M7100/M7208
telephones 4
using M7310/M7324
telephones 4
R
Record format
Bearer capability 43
Busy 42
Norstar 10, 33, 34
Norstar All 41
Norstar Call Information 3 4
Norstar Real Time 38
Norstar Standard 33
selecting 10
SL-1 CLID 10, 31
SL-1 field definitions 29
SL-1 record format 28
SL-1 Record types 30
SL-1 Standard 9, 31
Record types 12
T
Troubleshooting
Error messages 55
printer problems 54
printing records 54
S
Setting
Access codes 15
Account feature code 16
language 14
printer speed 8
Report type 12
Special station set numbers 6
Station Message Detail Recording,
about 2
System registers 22
SMDR6 System Coordinator Guide P0907246 Issue 01
Page 67

Page 68

Norsta r is a trademark of Nortel Networks.
Printed in Canada
P0907246 Issue 01
••••••••••••••••••••••••••••••••••••••••
 Loading...