

Norge N3472SRA, N3472SRW Owner's Manual
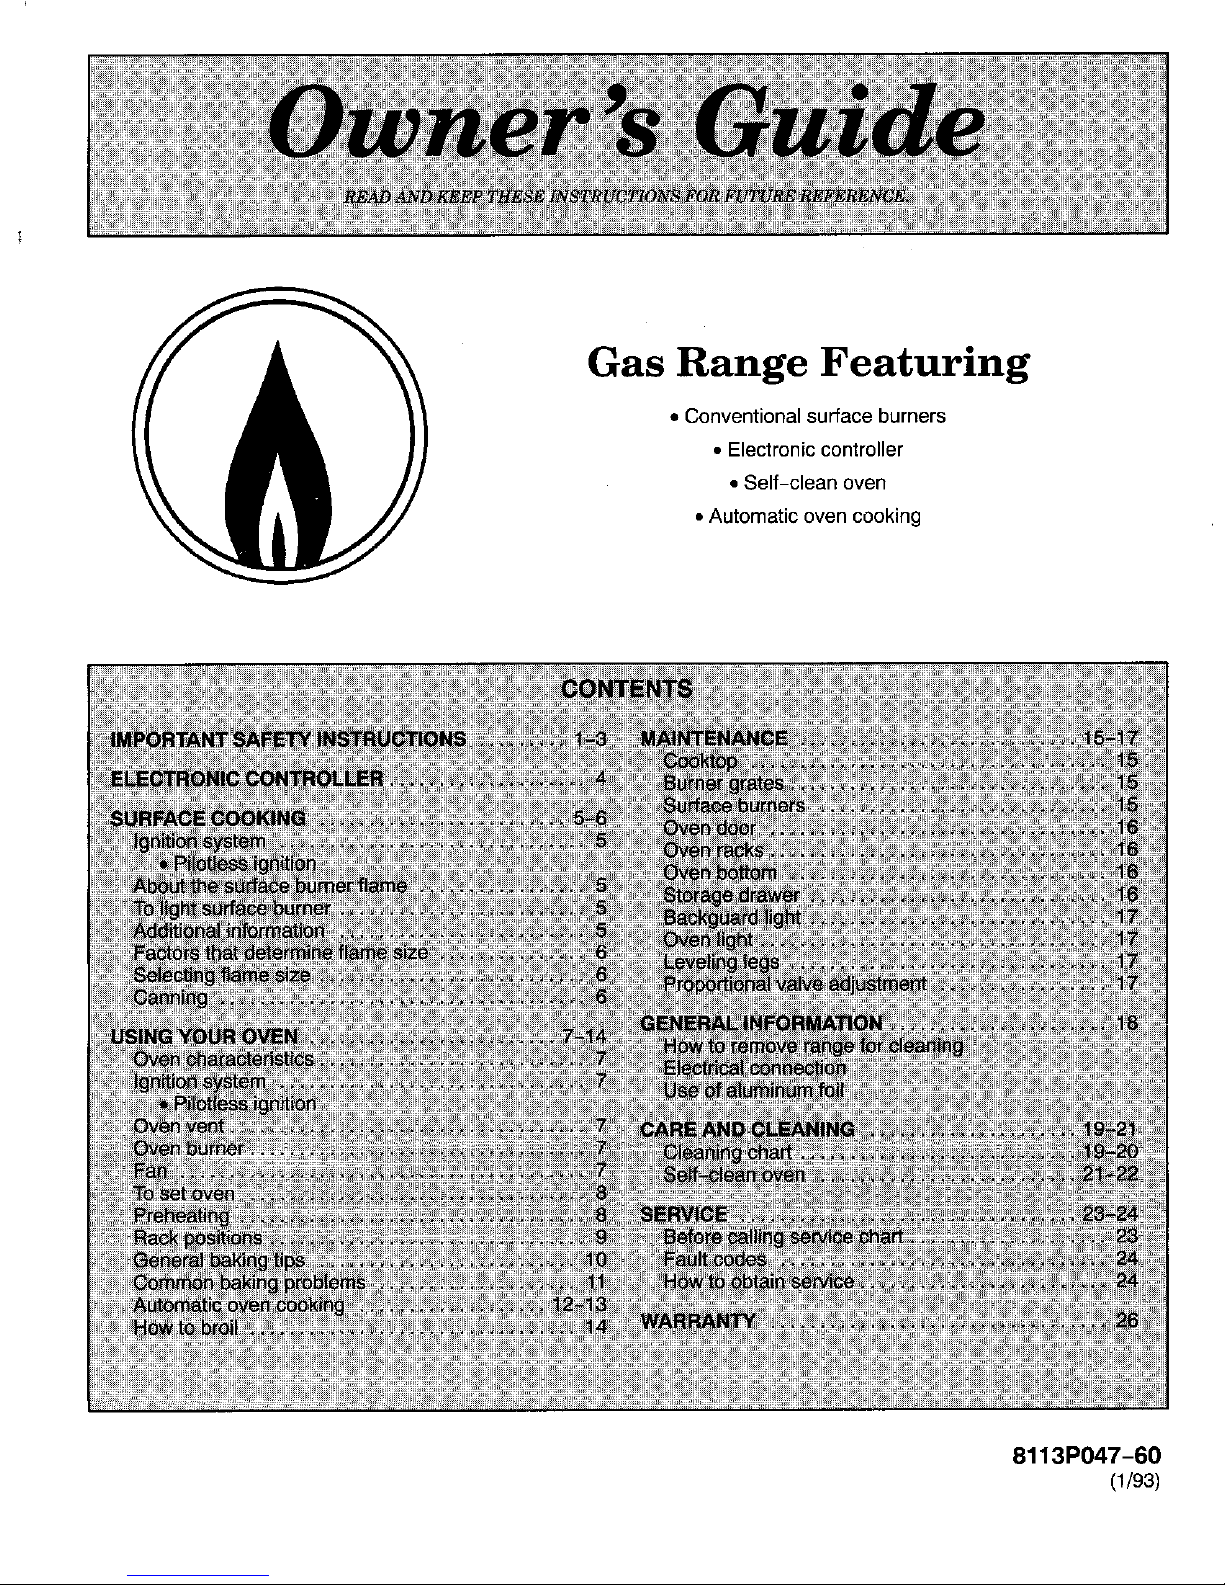
Gas Range Featuring
• Conventionalsurface burners
• Electroniccontroller
• Self-clean oven
• Automatic even cooking
8113P047-60
(1/93)
IMPORTANTSAFETY
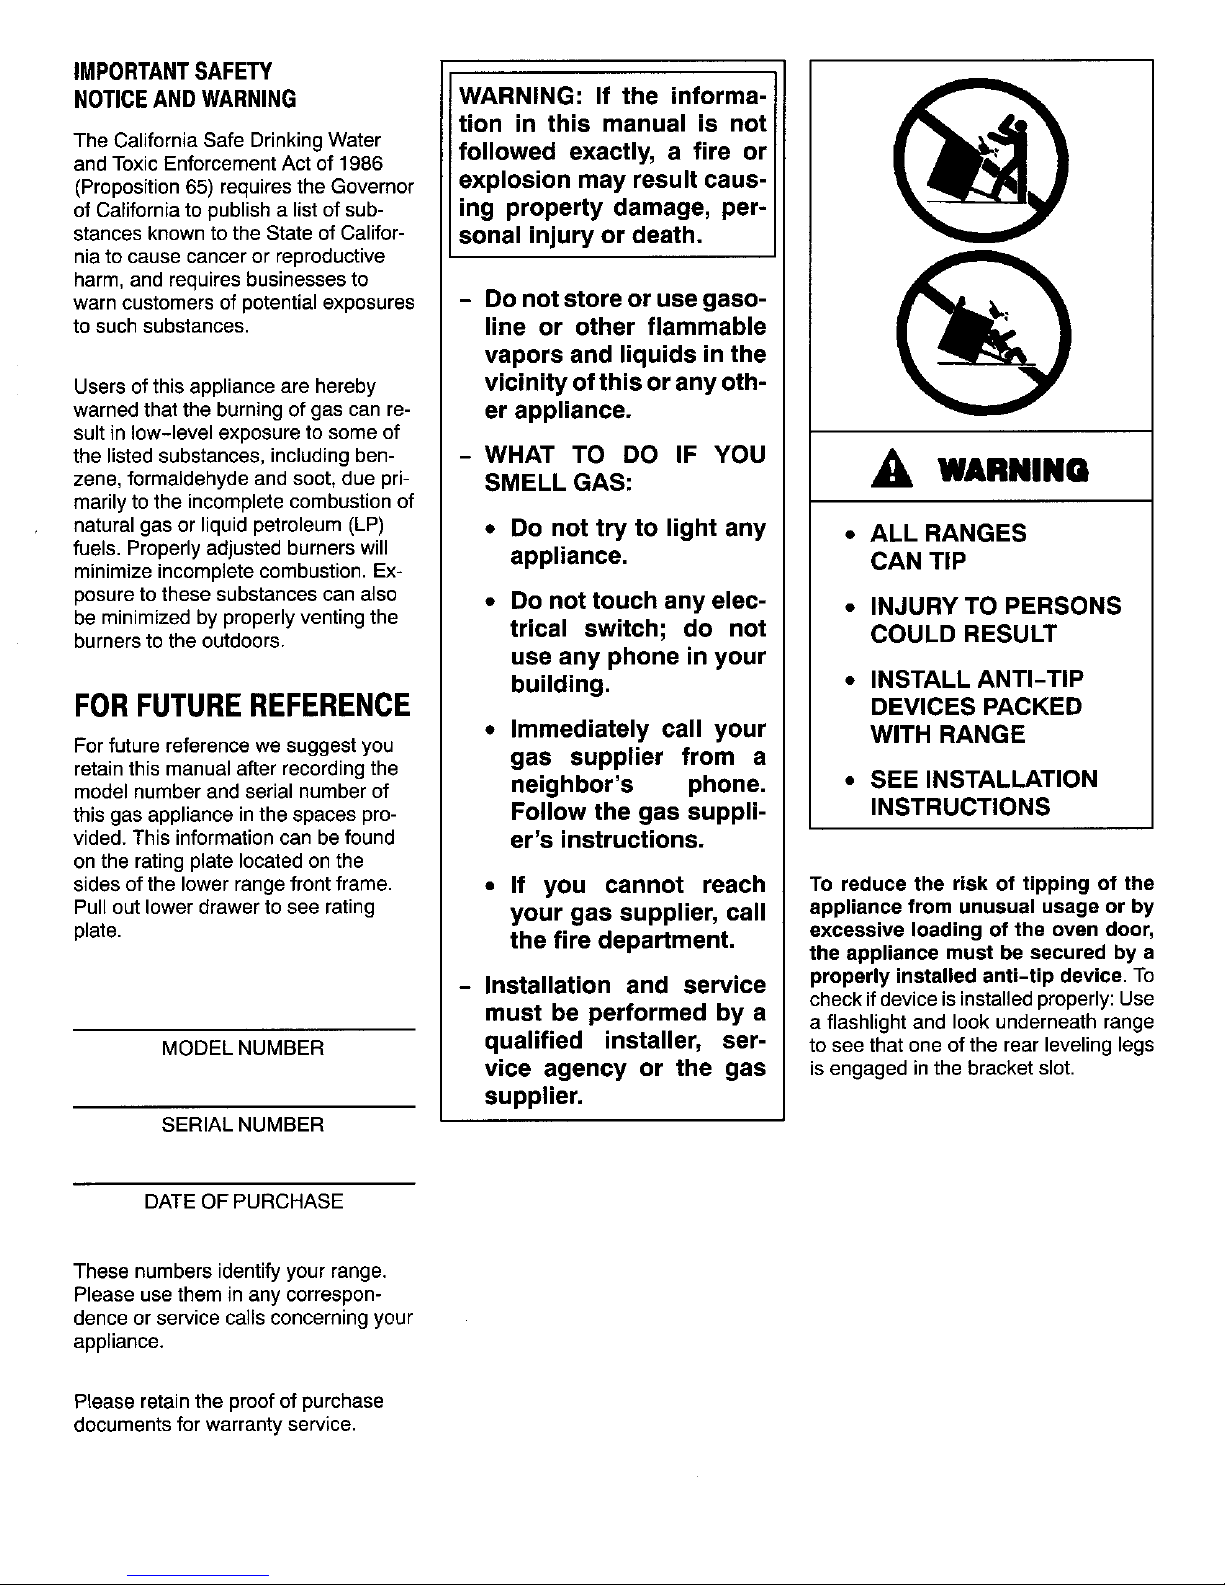
NOTICEAND WARNING WARNING: If the informa-
tion in this manual is not
The CaliforniaSafe DrinkingWater
andToxicEnforcementActof1986 followed exactly, a fire or
(Proposition65) requiresthe Governor explosion may result caus-
ofCaliforniatopublisha listofsub- inn property damage, per-
stances known to the StateofCalifor- sonal injury or death.
niato cause cancer or reproductive
harm, and requires businessesto
warn customers of potential exposures - Do not store or use gaso-
tosuchsubstances, line or other flammable
vapors and liquids in the
Usersof thisapplianceare hereby vicinity of this or any Oth-
warnedthatthe burningof gas canre- er appliance.
suit in low-level exposureto someof
the listedsubstances, includingben- - WHAT TO DO IF YOU _i,
zene,formaldehyde and soot, due pri- SMELL GAS: =.= WARN|NQ
marilytothe incompletecombustionof
naturalgasor liquidpetroleum(LP) • DO not try to light any • ALL RANGES
fuels. Properlyadjustedburnerswill appliance. CAN TIP
minimizeincompletecombustion.Ex-
posureto these substances can also
• Do not touch any elec- • INJURY TO PERSONS
be minimizedby properly ventingthe trical switch; do not COULD RESULT
burnerstothe outdoors.
use any phone in your
building. • INSTALL ANTI-TIP
FORFUTUREREFERENCE DEVICES PACKED
• Immediately call your WITH RANGE
Forfuturereferencewe suggestyou gas supplier from a
retainthismanualafterrecordingthe
modelnumberand serialnumberof neighbor's phone. • SEE INSTALLATION
this gas applianceinthespaces pro- Follow the gas suppli- INSTRUCTIONS
vided. Thisinformationcan be found er's instructions.
onthe ratingplatelocatedonthe
sidesofthe lowerrangefrontframe. • If you cannot reach To reduce the risk of tipping of the
Pullout lowerdrawertosee rating your gas supplier, call appliance from unusual usage or by
plate, the fire department, excessive loading of the oven door,
the appliance must be secured by a
- Installation and service properly installed anti-tip device. To
checkifdeviceisinstalledproperly:Use
must be performed by a a flashlightand lookunderneathrange
MODELNUMBER qualified installer, ser- to seethat one ofthe rearlevelinglegs
vice agency or the gas is engagedinthe bracketslot.
supplier.
SERIAL NUMBER
DATEOF PURCHASE
These numbers identify your range.
Please usethem in any correspon-
denceor service calls concerning your
appliance.
Pleaseretainthe proofof purchase
documentsfor warranty service.
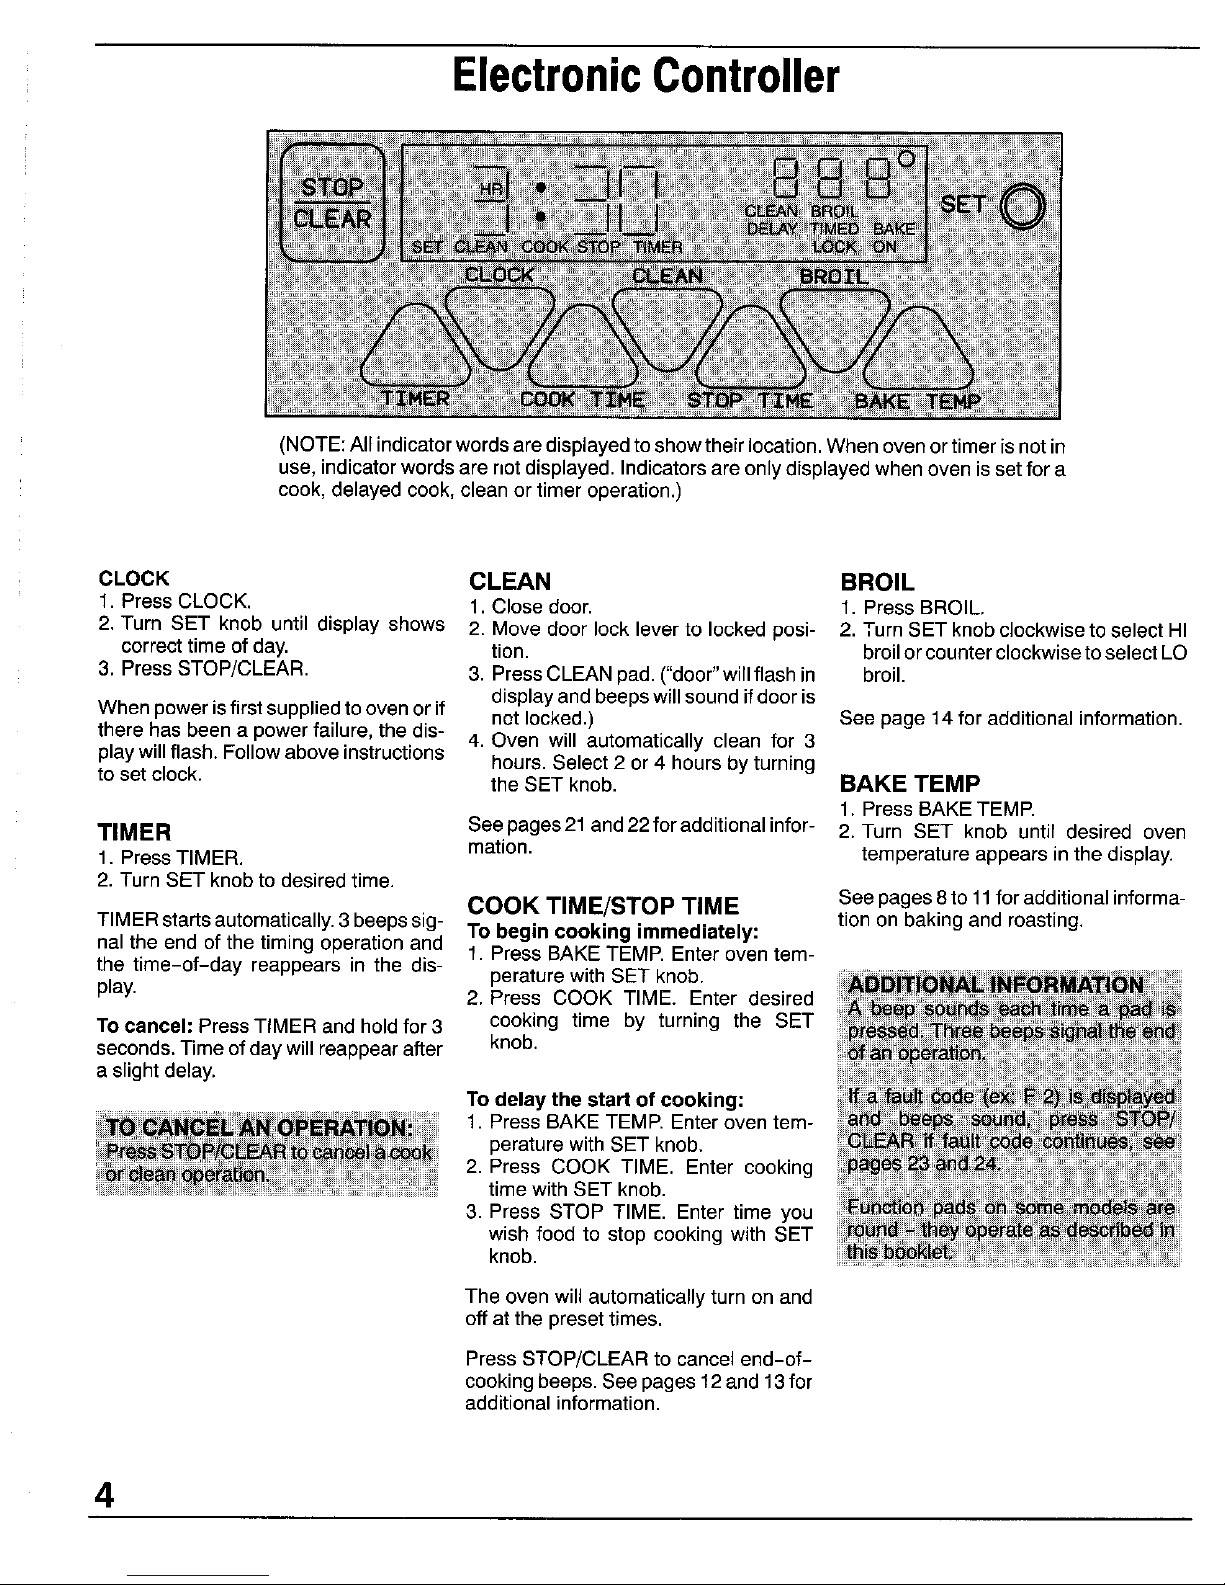
ElectronicController
(NOTE:All indicatorwordsare displayedtoshowtheirlocation. Whenoven ortimer isnot in
use,indicator words are not displayed. Indicatorsare only displayedwhenoven is setfor a
cook,delayed cook, clean or timer operation.)
CLOCK CLEAN BROIL
1. PressCLOCK. 1. Closedoor. 1. PressBROIL,
2. Turn SET knob untildisplayshows 2. Movedoor lockleverto lockedposi- 2. TurnSET knobclockwisetoselectHI
correcttimeofday. tion. broilorcounterclockwisetoselectLO
3. PressSTOP/CLEAR. 3. PressCLEANpad. ("door"willflashin broil.
displayandbeepswillsoundifdooris
Whenpowerisfirstsuppliedtoovenorif notlocked.) See page 14foradditionalinformation.
therehas beena powerfailure,the dis- 4. Oven will automaticallyclean for 3
playwillflash.Followaboveinstructions hours.Select2 or 4 hoursbyturning
to setclock, the SET knob. BAKE TEMP
1, Press BAKETEMP.
TIMER Seepages21 and22foradditionalinfor- 2, Turn SET knob until desired oven
1. Press TIMER. mation, temperatureappearsin thedisplay.
2. TurnSET knobtodesiredtime.
COOK TIME/STOP TIME Seepages8to11foradditionalinforma-
TIMERstartsautomatically.3 beepssig- To begin cooking immediately: tionon bakingand roasting,
halthe end of the timingoperationand 1. Press BAKETEMP. Enteroventern-
the time-of-day reappears in the dis- peraturewithSET knob.
play.
2. Press COOK TIME. Enter desired
Tocancel: Press TIMER andholdfor3 cooking time by turning the SET
seconds,Timeofdaywillreappearafter knob,
a slightdelay,
Todelay the start of cooking:
1. Press BAKETEMP. Enter oventem-
peraturewithSET knob.
2. Press COOK TIME. Enter cooking
timewithSET knob.
3. Press STOP TIME. Enter time you
wish food to stop cookingwith SET
knob.
The ovenwillautomaticallyturnonand
offat thepresettimes.
PressSTOP/CLEAR tocancel end-of-
cookingbeeps.See pages12 and13for
additionalinformation.
4
SurfaceCooking
IGNITION SYSTEM TO LIGHT SURFACE BURNER ADDITIONAL INFORMATION
Yourrangefeatures pilotless ignition.A 1. Placeutensil on burner grate. • Whenthe range is first installed,the
spark from the ignitorwill light the burn- pilotsmay be difficult to light due toair
er. 2. Push in and turn knob to the LITE inthegasline. Tobleedoffairfromthe
ABOUT THE SURFACE position. After the burner lights, turn line, hold a lighted match next to the
the knobto thedesired flame size. burner and turn knob on. When the
BURNER FLAME burner lights, turn the knob off and
• A properlyadjustedburnerwithclean )roceedas directed.
ports will lightwithin a few seconds. __3 _ • Be sure all surface controls are set
• On natural gas, the flame will be blue in the OFF position prior to supplying
with a deeper blue core;there should be gas to the appliance.
notrace of yellow in the flame, o
• CAUTION: If flame should go out
A yellow flame indicates an improper during a cooking operation, turn the
mixture of air/gas. This wastes fuel, so burner off. If gas has accumulated
have a serviceman adjust the mixlure if and a strong gas odor is detected,
a yellow flame occurs, wait 5 minutes for the gas to dissi-
NOTE: The knob on your appliance pate before relighting burner.
• On LP gas, some yellow tipping is ac- may not look like the knob in this il- • You may hear a "popping"sound on,
ceptable.This is normal and adjustment lustration, but it will operate as de- LP gas when the surface burner
isnot necessary, scribed in this booklet, turned off. This is a normal,
sound of the burner.
• If a knob is turned very quickly fron
HIto LOsetting,theflame may go out,
)articularly ifthe burner is cold.
+ooperatesu,aoeburnerdur,nga .
power failure: __V_<__
1. Hold a lighted match to the desired
surface burner head.
2. Push in and turn knob to the LITE
position.The burner will then light.
3. Adjust knob to obtain the desired Ifthisoccurs, turntheknobtotheOFF
flame size. position. Wait several seconds, then
light the burner again.
(continuednextpage)
5
SurfaceCooking(continued)
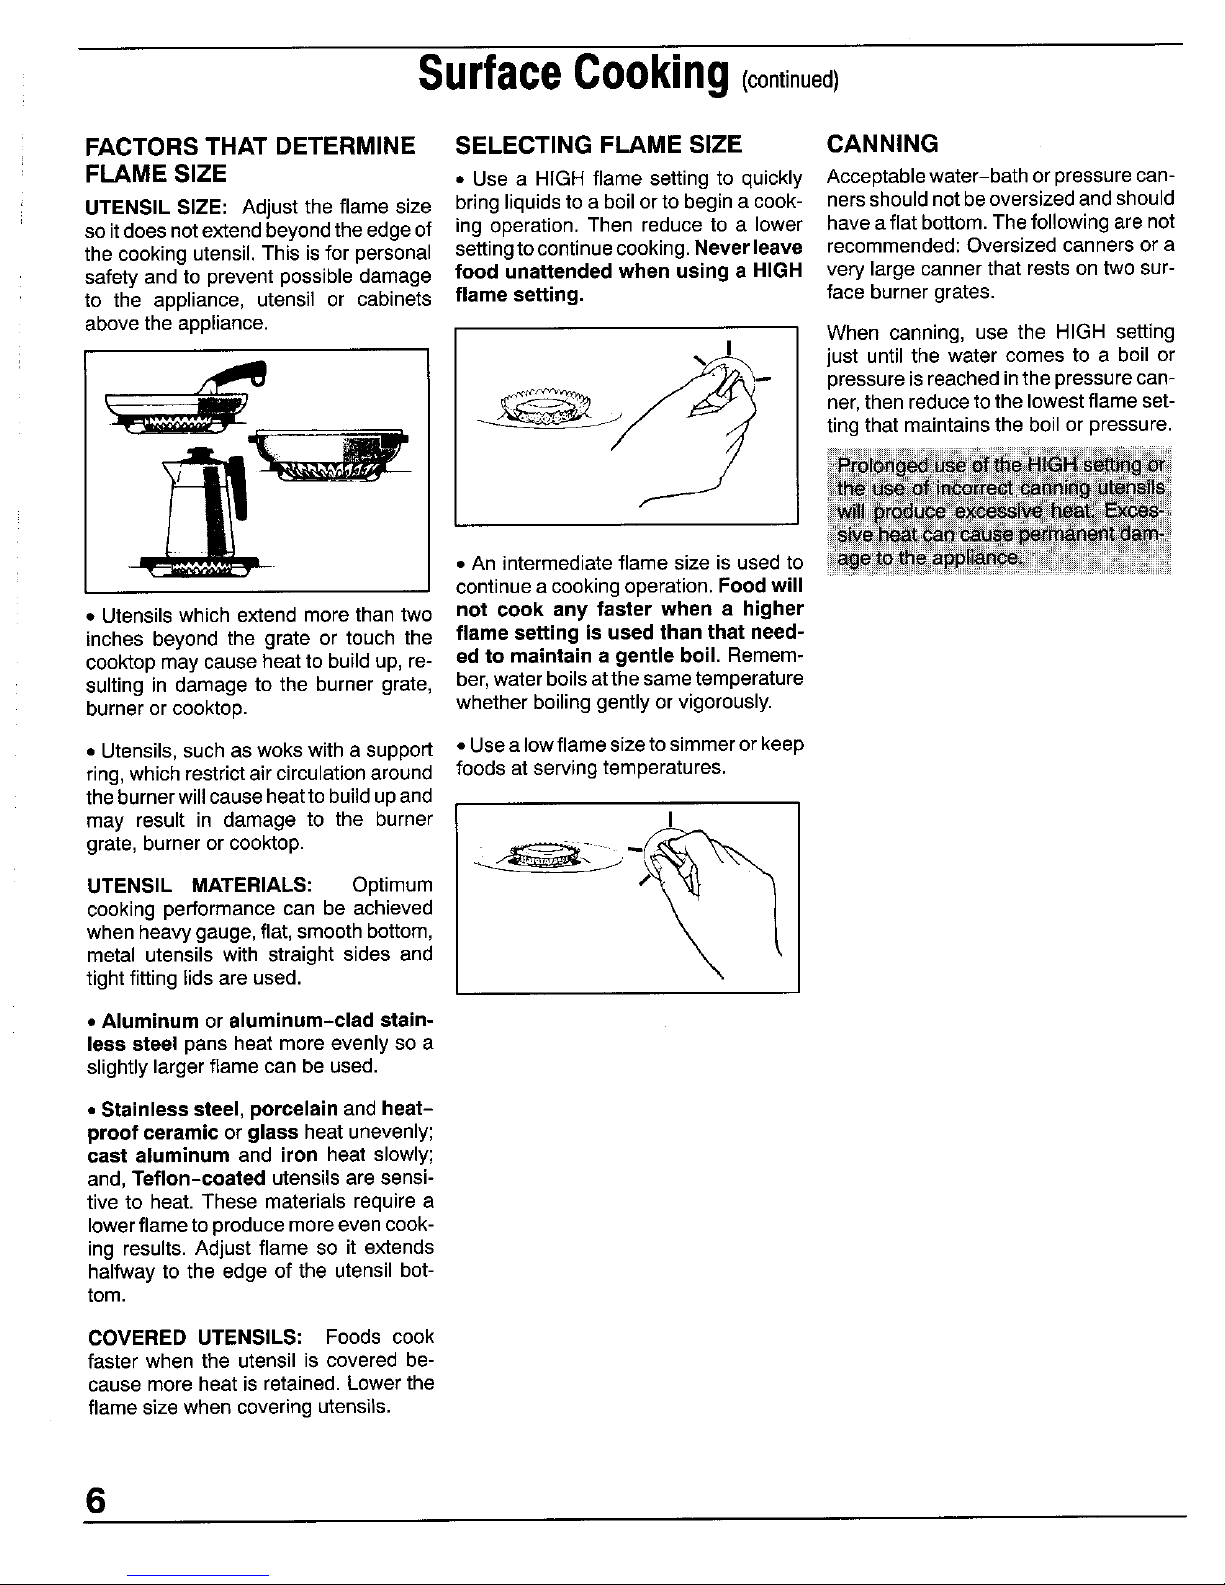
FACTORS THAT DETERMINE SELECTING FLAME SIZE CANNING
FLAME SIZE • Use a HIGH flame settingto quickly Acceptablewater-bathorpressurecan-
UTENSIL SIZE: Adjustthe flame size bringliquidsto a boilor tobegina cook- nersshouldnotbeoversizedandshould
soitdoesnotextendbeyondtheedgeof ing operation.Then reduceto a lower haveaflat bottom.Thefollowingare not
thecookingutensil.This isforpersonal settingtocontinuecooking.Neverleave recommended:Oversizedcannersor a
safetyandto preventpossibledamage food unattended when using a HIGH verylargecannerthat restsontwosur-
to the appliance, utensil or cabinets flame setting, faceburnergrates.
abovetheappliance. When canning, use the HIGH setting
I just untilthe water comes to a boilor
"_/_"'_/-_,_ _ pressureisreached inthe pressure can-
her,then reduce tothe lowestflame set-
ting that maintains the boil or pressure.
• An intermediate flame size is used to
continuea cookingoperation.Foodwill
• Utensils which extend morethan two not cook any faster when a higher
inches beyond the grate or touch the flame setting is used than that need-
cooktopmay cause heatto buildup, re- ed to maintain a gentle boil. Remem-
suiting in damage to the burner grate, ber,water boilsat the sametemperature
burneror cooktop, whether boiling gently or vigorously.
• Utensils,such as woks with a support * Usea lowflame sizeto simmeror keep
ring,which restrictair circulationaround foods at serving temperatures.
theburnerwillcauseheattobuildup and
may result in damage to the burner I
grate,burner or cooktop. - .
UTENSIL MATERIALS: Optimum _'_-J_ /_
cookingperformancecan be achieved
whenheavygauge,flat,smoothbottom,
metal utensilswith straight sides and
tightfittinglidsare used.
• Aluminum or aluminum-clad stain-
less steel pans heat more evenlyso a
slightlylargerflame can be used.
• Stainless steel, porcelain andheat-
proof ceramic or glass heatunevenly;
cast aluminum and iron heat slowly;
and,Teflon-coated utensilsare sensi-
tiveto heat. These materialsrequirea
lowerflametoproducemoreevencook-
ing results. Adjust flame so it extends
halfway to the edge of the utensil bot-
tom.
COVERED UTENSILS: Foods cook
faster when the utensil is covered be-
cause more heat is retained.Lower the
flame size when covering utensils.
6
UsingYourOven
OVEN VENT
The oven vent is located at the base of
the backguard. When the oven is in use,
this area may feel warm or hot to the
touch. To prevent problems do not:
Block the vent opening, touch the area
near the opening or place utensils near
the vent opening.
FAN
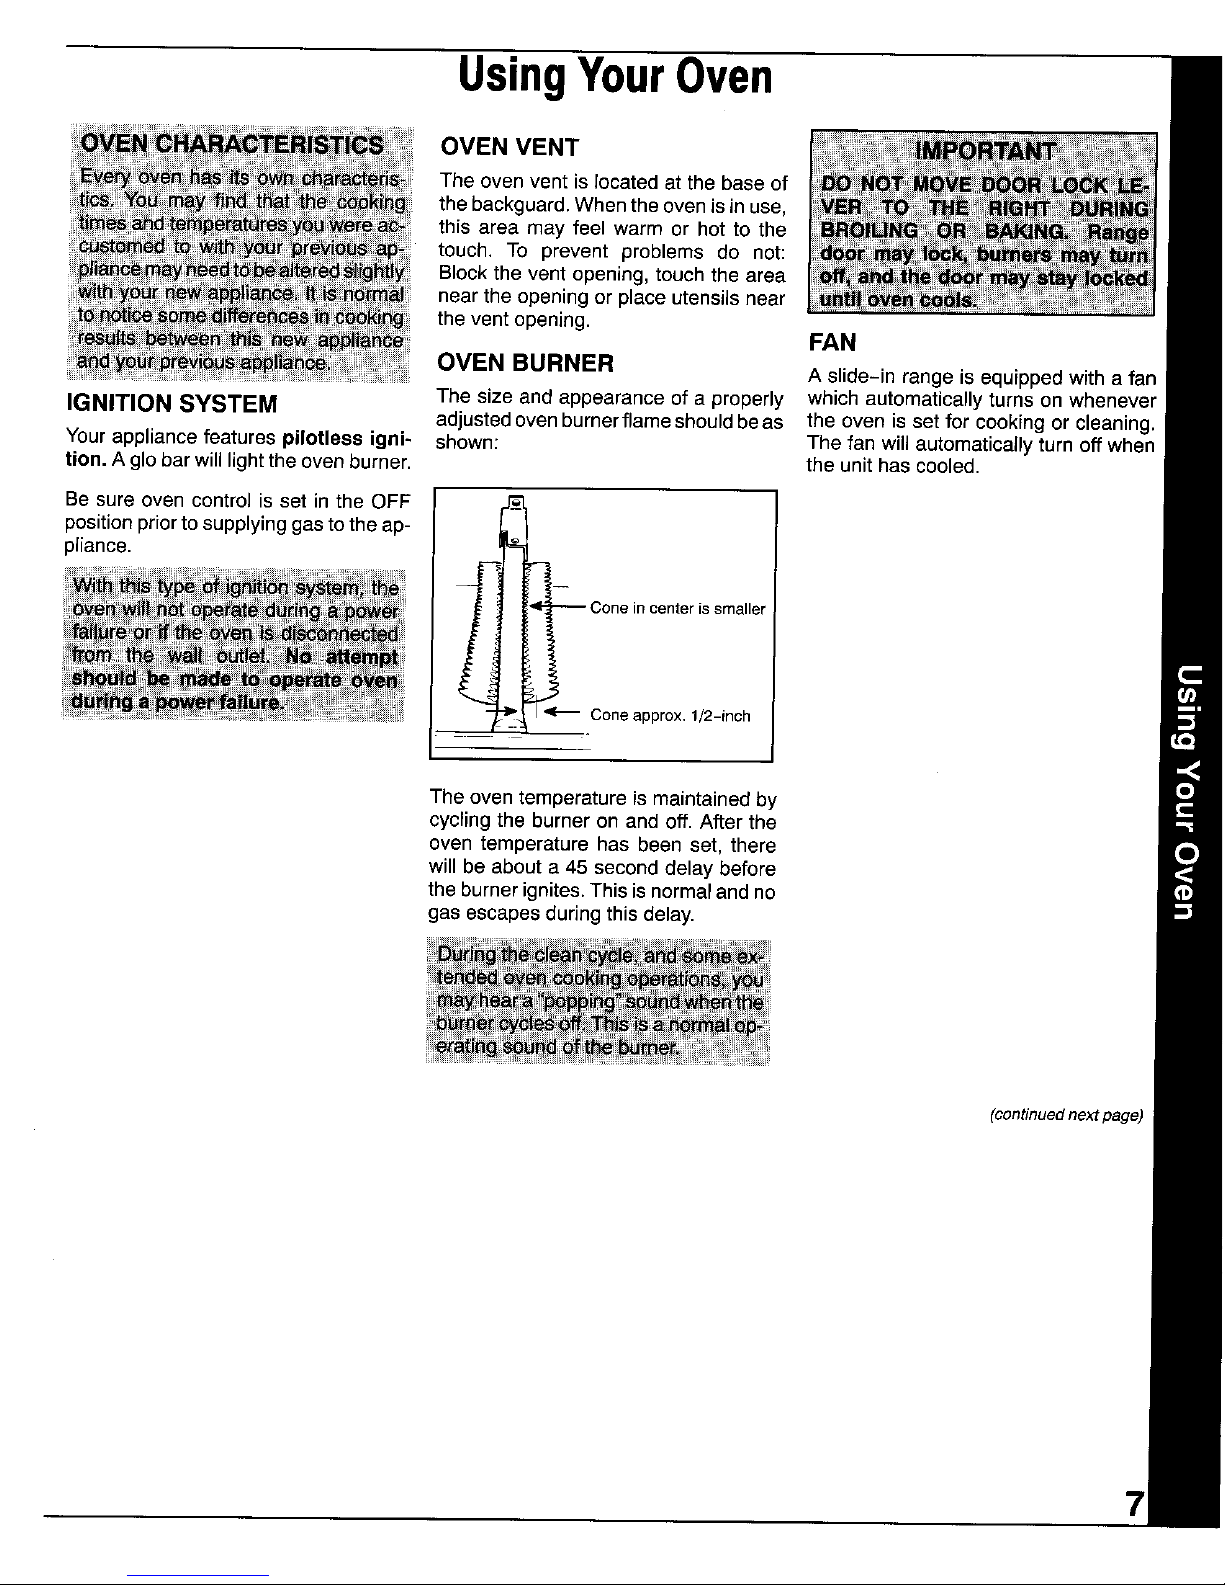
OVEN BURNER
A slide-in range is equipped with a fan
IGNITION SYSTEM The size and appearance of a properly which automatically turns on whenever
adjusted oven burnerflame should be as the oven is set for cooking or cleaning.
Your appliance features pilotless igni- shown: The fan will automatically turn off when
tion. A glo bar will light the oven burner, the unit has cooled.
Be sure oven control is set in the OFF J'Ei,
position prior to supplying gas to the ap-
pliance. '_
Coneincanterissmaller
L
, _ _ Coneapprox.1/2-inch
The oven temperature is maintained by
cycling the burner on and off. After the
oven temperature has been set, there
will be about a 45 second delay before
the burner ignites. This is normal and no
gas escapes during this delay.
(continuednextpage)
 Loading...