

Page 1
ENG
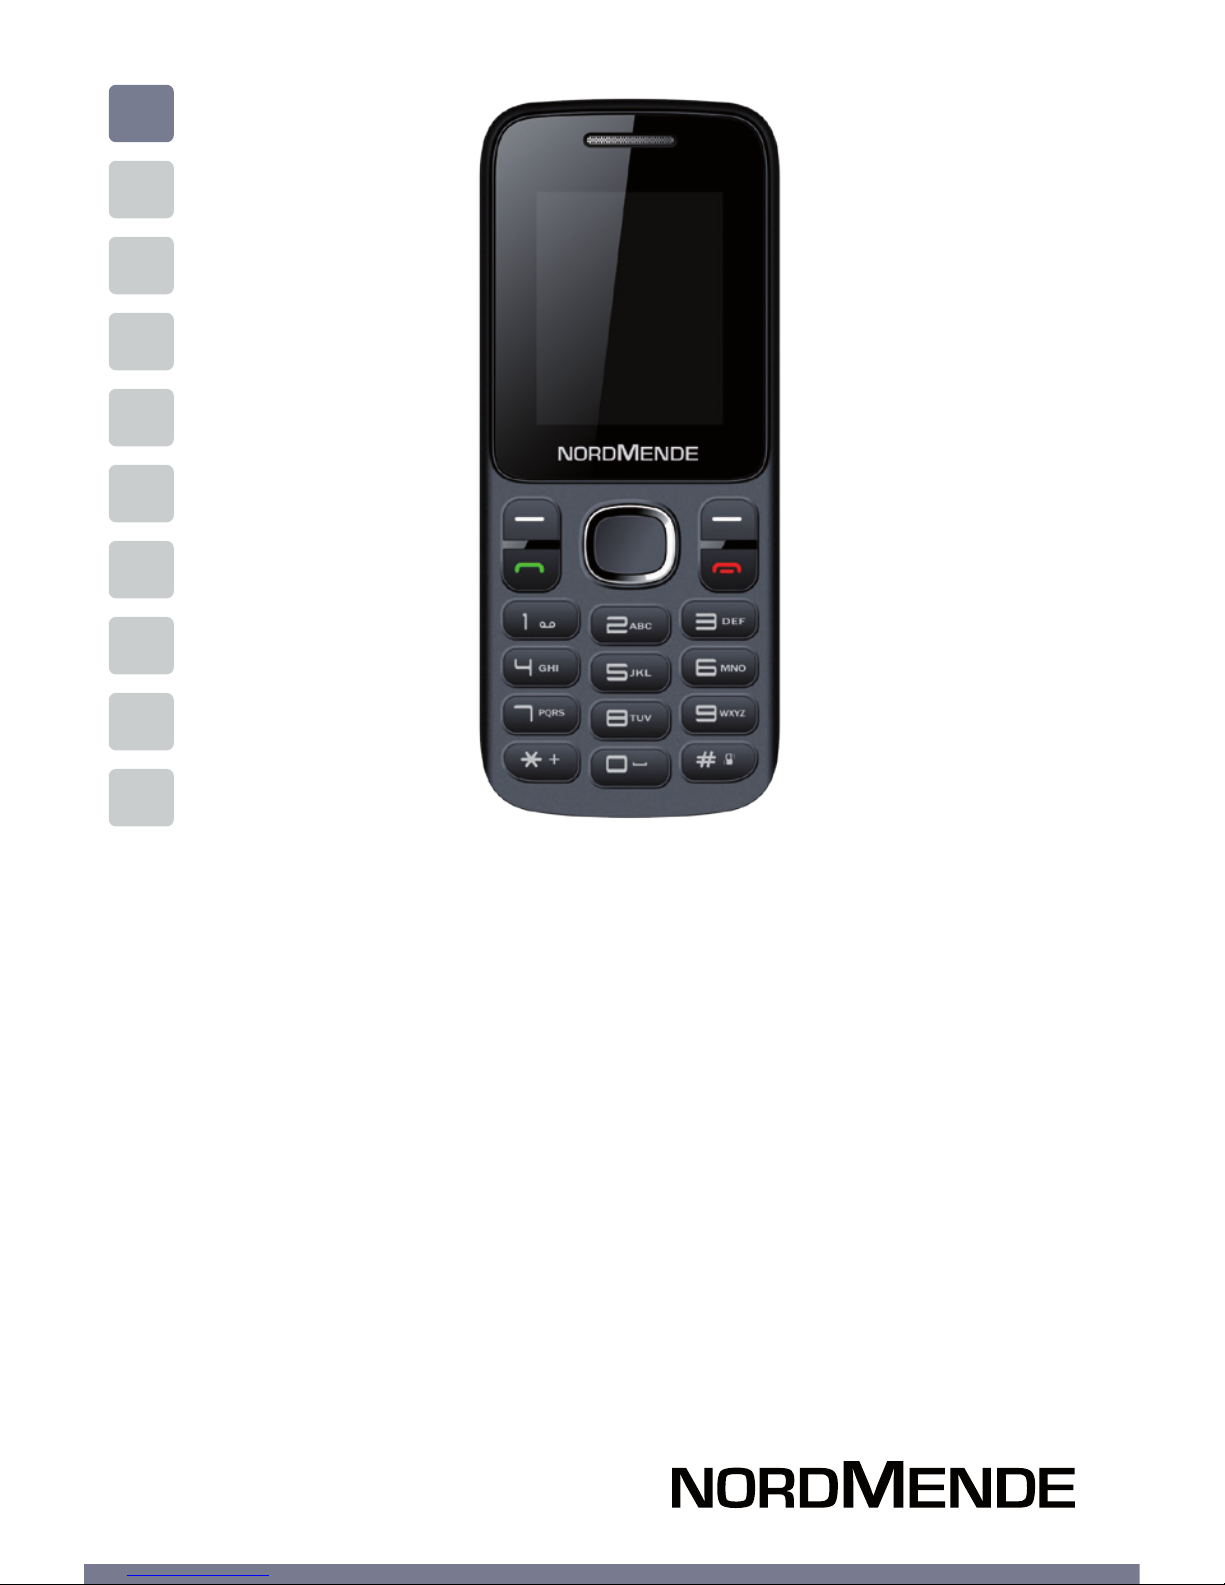
DUAL SIM GSM MOBILE PHONE
USER GUIDE
LITE110B
Page 2

Section 1 GENERAL INFORMATION ..................................4
Introduction ....................................................................5
Phone and data protection ......................................... 5
Safety information.........................................................6
Section 2 THE PHONE ......................................................8
Basic information .......................................................... 9
Function of keys .............................................................10
Section 3 GETTING STARTED ...........................................11
SIM card and battery installation ............................... 12
SD card installation ....................................................... 12
Charging the battery ..................................................... 13
Battery usage .................................................................14
Powering On/O the Mobile Phone ........................... 15
Connecting to the Network .........................................15
Dialing calls .....................................................................16
Section 4 CONTACTS ........................................................18
Section 5 MESSAGE .........................................................20
Section 6 CALL LOGS .......................................................22
Section 7 SETTINGS.........................................................24
Call settings ....................................................................25
Phone settings ...............................................................26
Display ............................................................................. 26
Security ............................................................................27
Profile ...............................................................................28
Connections ...................................................................28
Contents
USER GUIDE | page 2
Page 3

Section 8 MULTIMEDIA ...................................................30
Image .............................................................................31
FM Radio ........................................................................31
Section 9 APPLICATION .................................................. 32
Calendar ........................................................................ 33
Calculator ......................................................................33
Torc h .............................................................................33
World clock .................................................................33
Section 10 INTERNET .........................................................34
Section 11 MY FILES ...........................................................35
Section 12 PROFILES .........................................................36
Section 13 BLUETOOTH .....................................................37
Section 14 ALARM ..............................................................38
Section 15 GAMES ..............................................................39
Section 16 TECHNICAL SPECIFICATIONS ............................ 40
Section 17 WARNINGS .......................................................42
USER GUIDE | page 3
Page 4

SECTION 1
General information
Introduction, phone and data protection,
safety information
USER GUIDE | page 4
Page 5
USER GUIDE | page 5
1 INTRODUCTION
Thank you for choosing LITE110B, the easy phone that with its
simplicity will keep you near to all your contacts.
Please read this manual carefully in order to use your phone as
well as possible, and keep it for future use.
Note: Due to the soware and network systems of dierent
operators, the phone’s menu may be slightly dierent from
those described in this guide.
2 PHONE AND DATA PROTECTION
If your phone has been lost or stolen, notify the telecom company that the SIM card must be disabled.
This can avoid economic loss caused by unauthorized use.
Please take measures as following to avoid your phone being
unauthorized use:
■ Set PIN code of SIM card
■ Set phone password
NOTE ON MEMORY CONFIGURATION
The phone internal memory (flash memory) is totally dedicated
to the device management.
For this reason, the free memory must not be used as it should
be kept free for possible soware updates, or the warranty will
be lost.
To store and play multimedia files, it is therefore necessary to
insert a Micro SD card in the device ( Micro SD card not included).
Page 6

3 SAFETY INFORMATION
CAUTION: Please pay attention to these guidelines, because
the manufacturer does not assume any responsibility if the
user does not follow these recommendations or use the
phone improperly.
To use your phone safely, please read the following
instructions:
1. Pay attention near chemical plants, gas stations and
other potential explosive places. Also in the main screen,
the phone emits radio signals, so you should turn o the
phone.
2. When you are driving, do not use the phone. If you must use
it, please park your car before starting the conversation.
3. Do not use the phone in the hospital, not to disrupt the
functioning of medical devices such as cardiac pacemakers,
hearing aids, etc. Before turning on the phone, check the
rules for the area in which you want to use the device.
4. On a plane, turn o your mobile phone before the plane
takes o not to disturb the flight. It is generally dangerous
and illegal to use the phone on board of an aircra.
5. Place the phone and all accessories in areas not accessible
to children.
6. Accessories and battery: please use the accessories and
battery supplied with the phone, otherwise the phone may
be damaged and cause danger to others.
Please do not shortcut, trim or repair the battery.
If the phone warms up excessively, the battery may swell or
leak; when you experience these unusual phenomena, you
USER GUIDE | page 6
SECTION 1
GENERAL INFORMATION
Page 7

USER GUIDE | page 7
must stop using the phone and immediately change the
battery, not to compromise the device safety.
7. Do not recharge the phone without the battery installed.
Before removing the battery, it is advisable to switch your
phone o not to damage the data on your phone.
8. The phone is not waterproof. Please keep it dry.
9. Avoid using the phone at a too high or too low temperature.
10. Do not throw, drop or hit the phone, not to cause damage to
the inside or outside of the device.
11. Authorized Service: The phone may only be repaired by
professionals. Therefore, please do not disassemble or
repair the phone by yourself.
Page 8

SECTION 2
The phone
Basic information, function of keys
USER GUIDE | page 8
Page 9
USER GUIDE | page 9
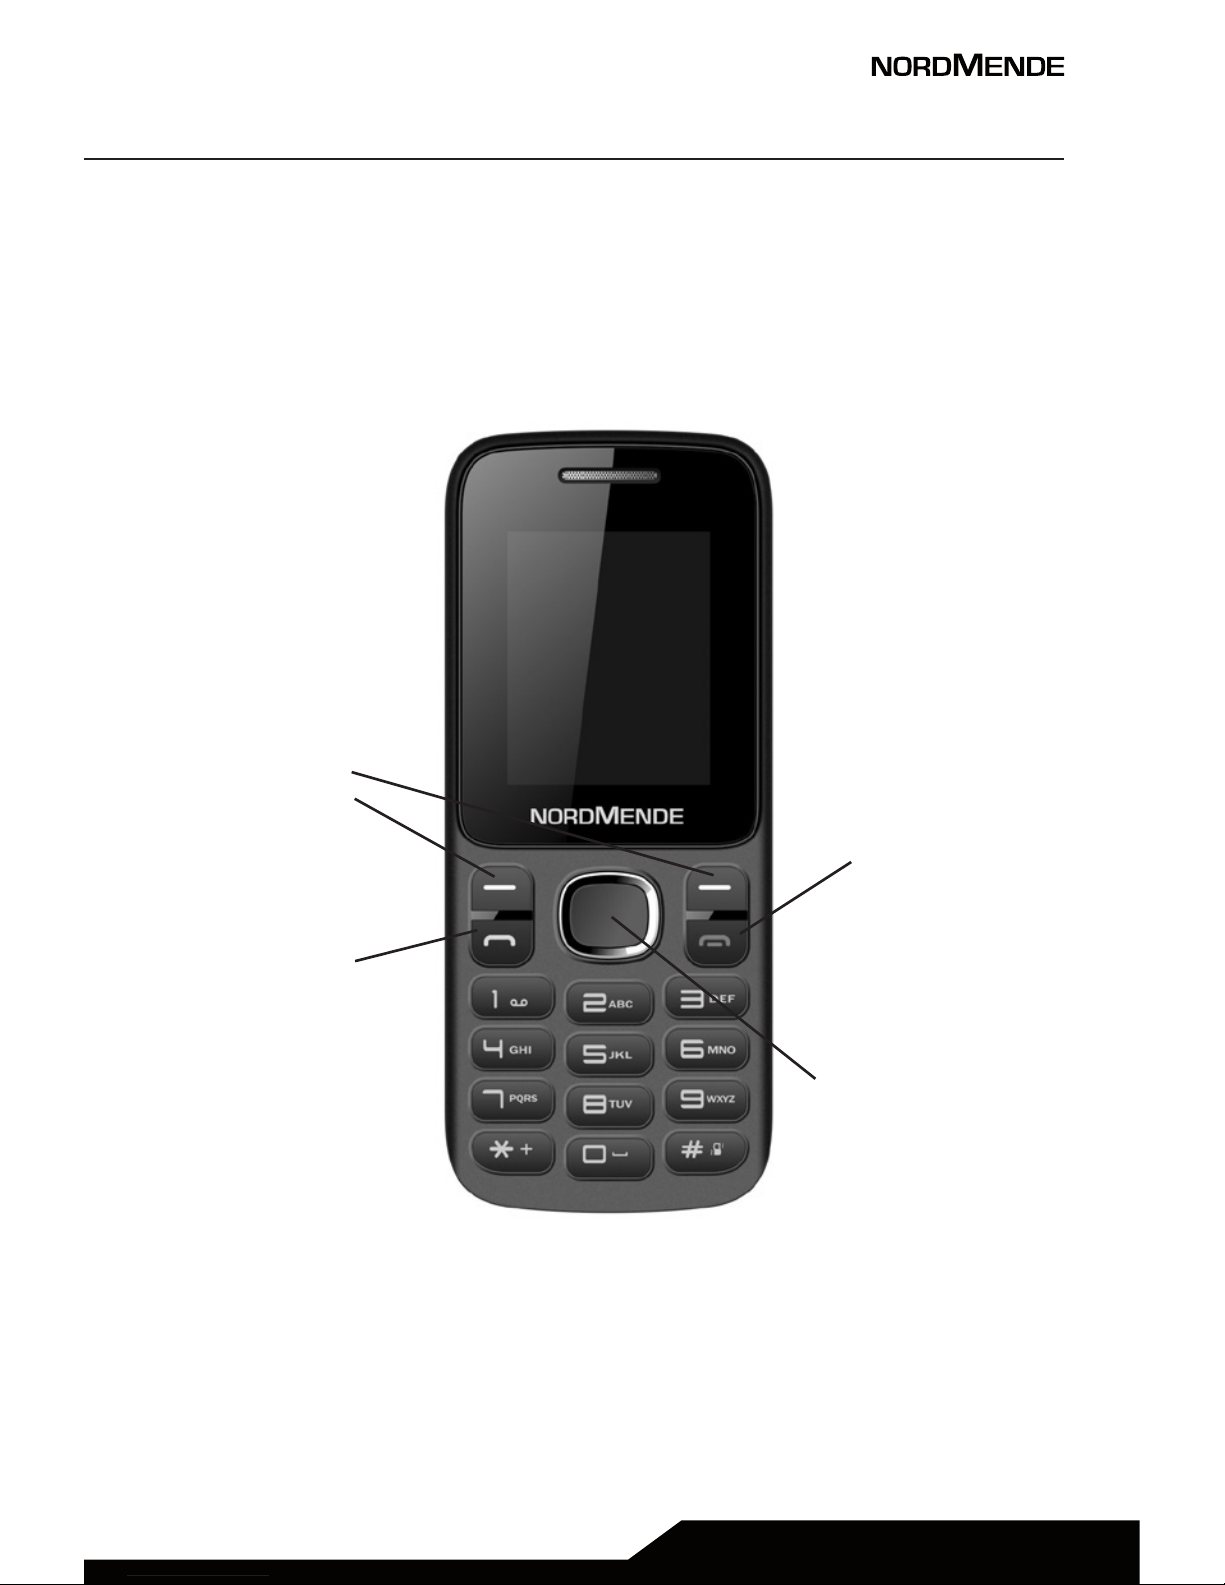
1 BASIC INFORMATION
Le and right
key
Call
button
End call
button
Direction and
OK key
Page 10

2 FUNCTION OF KEYS
■ Le and right key
The bottom line on the screen displays the functions of the
Le and Right so key.
■ Dial key
Press it to originate a call by entering the called number
or selecting a contact from the phonebook; or press it to
receive an incoming call; or press it in standby state to
show the latest call records.
■ End key
Press it to end a call being dialed or end an ongoing call; or
press it to exit the menu and return to the standby state.
■ Direction key
Press them to scroll the options when browsing a function
list. In conversation status, you can press up or down the
direction key to change the volume.
■ OK key
Press it to confirm a selection.
■ Number keys, * key and # key
Press number keys 0 through 9 to input or edit state to
input numbers and characters
USER GUIDE | page 10
SECTION 2
THE PHONE
Page 11

USER GUIDE | page 11
SECTION 5
SECTION 3
Getting started
SIM Card and battery installation,SD card
installation, charging the battery, battery
usage, powering On/O the Mobile Phone,
connecting to the Network, dialing calls
Page 12

USER GUIDE | page 12
SECTION 3
GETTING STARTED
1 SIM CARD AND BATTERY INSTALLATION
A SIM card carries useful information, including your mobile
phone number, PIN (Personal Identification Number), PIN2,
PUK (PIN Unlocking Key), PUK2 (PIN2 Unlocking Key), IMSI (International Mobile Subscriber Identity), network information,
contacts data, and short messages data.
Note: Aer powering o your mobile phone, wait for a few
seconds before removing or inserting A SIM card.
Exercise caution when operating A SIM card, as friction or
bending will damage the SIM card.
Properly keep the mobile phone and its fittings such as the
SIM cards beyond children’s reach.
■ Hold the End key for a while to power o the mobile phone.
■ Push the back cover above the battery and remove it.
■ Pull the le battery buckle outward and then li the battery
away.
■ Insert the SIM card into the SIM card slot lightly with the
corner cutting of the card aligning to the notch of the slot
and the gold plate of the card facing download, till the SIM
card cannot be further pushed in.
■ With the metallic contacts of the battery facing the metallic
contacts in the battery slot, press the battery down until it
locks into place.
2 SD CARD INSTALLATION
The T-Flash card is a pluggable mobile storage card inside the
mobile phone. To install the T-Flash card, open its latch, place
its indented side downward, insert the card into the card slot,
and then close the latch.
Page 13

USER GUIDE | page 13
To remove the T-flash card, open its latch and slightly take the
card out. And then close the latch.
3 CHARGING THE BATTERY
The lithium battery delivered with the mobile phone can be
put into use immediately aer being unpacked.
Battery level indication:
■ Your mobile phone can monitor and display the battery status.
■ Normally the remaining energy of the battery is indicated
by the battery level icon at the upper right corner of the
display screen.
■ When the battery energy is insuicient, the mobile phone
prompts “Battery low”. If you have set an alert tone, an
alert tone will be given o when the battery level is too low.
■ A charging animation appears when the battery is being
charged. When the charging is complete, the animation
disappears.
Using a travel adapter:
■ Install the battery into the mobile phone before charging
the battery.
■ Connect the adapter of the travel charger with the charging slot
in the mobile phone. Ensure that the adapter is fully inserted.
■ Insert the plug of the travel charger to an appropriate power
outlet.
■ During the charging, the battery level grids in the battery
icon keep flickering till the battery is fully charged.
■ It is normal that the battery becomes hot during the
charging period.
■ The battery icon does no longer flicker when the charging
process ends di carica si conclude.
Page 14

USER GUIDE | page 14
SECTION 3
GETTING STARTED
NOTE: Ensure that the plug of the charger and the plug of the USB
cable are inserted in the right direction.
nserting them in a wrong direction may cause charging failure or
other problems.
Before the charging, ensure that the standard voltage and
frequency of the local main supply match the rated voltage and
power of the travel charger.
4 BATTERY USAGE
The performance of a battery is subject to multiple factors:
radio network configuration, signal strength, ambient
temperature, chosen functions or settings, phone fittings, and
the voice, data or other application mode you choose to use.
To guarantee the optimal performance of your battery, please
stick to the following rules:
■ Use only the battery provided by the vendor. Otherwise,
damages or even injuries could be caused during the charging.
■ Power o the mobile phone before removing the battery.
■ The charging process lasts a longer time for a new battery or
a battery not in use for long. If the battery voltage is too low
to enable the mobile phone to be powered on, charge the
battery for a longer time. In this case, the battery icon does
not flicker until a long time aer the battery enters the charge
status.
■ During the charging, ensure the battery is placed in a room
temperature environment or in an environment close to room
temperature.
■ Immediately stop using the battery if the battery produces
odor, overheats, cracks, distorts or has other damage, or if the
electrolyte leaks
Page 15

USER GUIDE | page 15
■ The battery wears out with use. A longer charging time is
required as the battery is put into use for a long time.
If the total conversation duration decreases but the charging
time increases even though the battery is properly charged,
purchase a standard battery from the OEM or use a battery
approved by our company. Using any poor-quality fittings will
cause harm to your mobile phone or even incur danger!
5 POWERING ON/OFF THE MOBILE PHONE
Hold the End key for a while to power on the mobile phone.
A power-on animation appears on the display screen.
Input the phone lock code and press the OK key if the mobile
phone prompts you to input the phone lock code.
The original code is 1234.
Input the PIN and press the OK key if the mobile phone
prompts you to input the PIN. The PIN is provided by the
network operator for new opening SIM card.
Enter the standby interface. To power o the mobile phone,
hold the End key for a while.
6 CONNECTING TO THE NETWORK
Aer the SIM card and the mobile phone are successfully
unlocked, the mobile phone automatically searches for an
available network.
Aer finding a network, the mobile phone enters the standby
state. When the mobile phone is registered in the network, the
name of the network operator is displayed on the screen.
Then you can dial or receive a call.
Page 16

USER GUIDE | page 16
SECTION 3
PER INIZIARE
7 DIALING CALLS
In the standby interface, press number keys to input the area
code and the telephone number, and then press the Dial key to
dial a call. To end the call, press the End key.
Dialing an international call
Press the * key twice can input “+”. Then input the country
code, the area code and the telephone number.
Finally, press the Dial key.
Dialing a call to a number in the phonebook
Enter the phonebook and use the up or down direction keys to
find the telephone number you want to call.
Press the Dial key. The mobile phone automatically dials the
chosen telephone number.
Redialing the last number
In the standby interface, press the dial key to show the dialed
calls.
Press the up or down direction keys to select a number you
want to dial and then press the Dial key.
Adapting volume
During a conversation, you can press the Up or Down direction
keys to tune the sound volume.
Answering incoming calls
Press the Dial key or the Le so key to answer an incoming call.
Press the End key to end the current conversation.
To reject an incoming call, press the End key or the Right so key.
Page 17

USER GUIDE | page 17
Note: If the caller can be identified, the mobile phone will present
the calling number.
If the calling number exists in the phonebook, the mobile phone
will present both the name and the phone number of the caller.
If the caller cannot be identified, the mobile phone will present
the calling number only.
Page 18

SECTION 5
SECTION 4
Contacts
Storing and managing contacts in the
phonebook
USER GUIDE | page 18
Page 19

The mobile phone can store up to 100 telephone numbers.
The telephone numbers that a SIM card can store depends on
the storage capacity of the SIM card.
The telephone numbers stored in the mobile phone and in the
SIM cards form a phonebook.
The phonebook search function enables you to view contacts.
You can search a contact as required from the phonebook.
■ Select this option, in the edit interface, input the name of
the contact you want to search or the first letter(s) of the
name.
■ All the contacts meeting the search condition are listed.
■ Press the Up and Down direction keys to browse the contacts and select contact.
■ Press le or right direction key to view other groups: family,
friends, business, classmates and so on.
USER GUIDE | page 19
Page 20

SECTION 5
SECTION 5
Message
Write and read messages, dras and
templates
USER GUIDE | page 20
Page 21

If the short message memory is full, a blinking message icon
appears on the top of the screen.
To normally receive short messages, you need to delete some
of the existing short messages.
Write message
Through this function, you can create a new text message.
You can type a message, and you’re also able to insert a predefined message from “Templates”.
Inbox
Received messages are listed in this menu.
Outbox
Messages sent failed are stored in this item.
Dras
Dra messages are listed in this item.
Sent box
The messages which are sent successfully are stored in this menu.
Templates
You can create pre-defined messages in this interface.
NOTE ON MMS: the phone supports the sending of MMS; to be
able to properly manage this function, the relevant APNs must be
correctly set up on your phone.
The APN can be changed in the Menu > Message > Options > Settings, and then scroll with the right arrow key to change the MMS
accounts for both SIMs.
To know how to properly set up your APN, please contact your
network operator.
USER GUIDE | page 21
Page 22

SECTION 5
SECTION 6
Call logs
Missed calls, dialed calls, received calls,
delete all, call timers
USER GUIDE | page 22
Page 23

Missed calls
You can view a list of the latest missed calls.
Note: When the mobile phone indicates that some calls are
missed, you can select Details to enter the missed calls list.
Navigate to a missed call and then press the Dial key to dial the
number that originated that call.
Dialed calls
You can view the latest dialed calls. Choose Dialed calls and
then select a dialed call to call, delete or delete all (or send
SMS to it) etc.
Received calls
You can view the latest received calls. Choose Received calls
and then select a received call to call, delete or delete all (or
send SMS to it) etc.
Delete all
You can delete the latest call records. Choose Delete all and
confirm to delete all the numbers in the call logs.
Call timers
You can view the call time of last call, total received calls and
dialed calls.
USER GUIDE | page 23
Page 24

SECTION 5
SECTION 7
Settings
Call settings, phone settings, display,
security, profiles, connections
USER GUIDE | page 24
Page 25

1 CALL SETTINGS
Call divert: This network function enables you to forward in-
coming calls to another number you have previously specified.
Call waiting: Aer you choose Activate, the mobile phone will
contact the network. A moment later, the network will make a
response and send a message to acknowledge your operation.
If the call waiting function is activated, the network will alert
you and the mobile phone screen will display the incoming
call number if others are calling you while you are already in a
conversation..
Call barring: The call barring function enables you to bar
calls as needed. When setting this function, you need to use
a network barring code, which can be obtained from the
network operator. If the code is wrong, an error message
will be prompted on the screen. Aer selecting a call barring
option, continue to select Activate or Deactivate. The mobile
phone will prompt you to input the call barring code and then
contact the network. A moment later, the network will make a
response and send the operation results to the mobile phone.
Hide ID: You can select hide ID, display own ID or display ID
by networ.
Others: You can set IP prefix, call time minute reminder, auto
redial and vibration when connect call through this function.
USER GUIDE | page 25
Page 26

2 PHONE SETTINGS
Date & time: set the date format, the time format, and detail
time of the location.
Language settings: Select display language for the mobile
phone.
Shortcut settings: Customize the shortcut functions of the Up,
Down, Le, and Right direction keys. In the standby interface,
you can press a direction key to directly enter the function
menu corresponding to that direction key.
Auto power on/o: Set the time when the mobile phone will
be automatically powered on or o.
Alert: Before entering an area where the use of mobile
phones is forbidden, make sure that the scheduled poweron function is deactivated to avoid accidents.
Restore factory settings: Use this function to restore factory
settings. The initial password is 1234.
3 DISPLAY
You can access this item to set wallpaper, contrast, backlight
and keypad backlight time etc.
SECTION 7
SETTINGS
USER GUIDE | page 26
Page 27

4 SECURITY
This function provides you with related settings about safety
use.
PIN: You can set PIN status and modify PIN through this function. The PIN (Personal identification number, 4 to 8 digits)
code prevents your SIM card from being used by unauthorized
people. In general, the PIN is supplied with SIM card by the network operator. If PIN check is enabled, you need to input the
PIN each time when you power on your mobile phone. The SIM
card will be locked if you input wrong PIN code for three times.
Modify PIN2: You are able to modify PIN2 through this function. The PIN2 code (4 to 8 digits), supplied with SIM card,
is required to access some functions such as “fixed dialing
number”. Please contact the network operator to verify
whether your SIM card supports these functions. If you input
wrong PIN2 for three times, the PIN2 will be locked.
Phone locked: The function enables you to lock/unlock the
phone. Once this function is enabled, correct password is required when the phone is locked. The initial password is 1234.
Modify the cell phone password: You can change the phone
lock through this function.
Privacy: The initial password is 1234. Aer accessing this function, you can select some items. Once an item is selected, you
need to input correct password whenever you want to enter
this item to perform further operations.
USER GUIDE | page 27
Page 28

Auto keypad lock: The function enables you to lock/unlock the
keypad. Set the auto locking time, 5s, 15s, 30s, 1min and 5mins
are available.
Lock screen by end-key: You can select to turn on/o this
function.
5 PROFILES
The mobile phone provides multiple user profiles, so that you
can customize some settings to adapt to the specific events
and environments.
Customize the user profiles according to your preference and
then activate the user profiles. The user profiles fall into five
scenarios: Normal, Silent, Meeting, Indoor and Outdoor.
Press OK key to activate the scenario. Select Options and you
can perform the following operations: add, delete, settings.
6 CONNECTIONS
Network account: You can manage network account through
this function. Contact your network operator to obtain the
correct information on APNs settings.
GPRS Service: You can select to turn on/o this function.
Data connection settings: You can select connect when
needed or always connect.
SECTION 7
GETTING STARTED
USER GUIDE | page 28
Page 29

USER GUIDE | page 29
Network selection: Set Network selection mode to Automatic
or Manual. Automatic is recommended. When Network selection mode is set to Automatic, the mobile phone will prefer the
network where the SIM card is registered. When Network selection mode is set to Manual, you need to select the network
operator’s network where the SIM card is registered.
Page 30

SECTION 8
Multimedia
Images, FM radio
USER GUIDE | page 30
Page 31

USER GUIDE | page 31
1 IMAGE
You can view images stored in phone or SD card using this
function.
The images available on both memories can be used as wallpaper or shared externally via MMS or Bluetooth
Menu> Multimedia> Picture> (press the central button on the
highlight of the chosen image)> press the upper le button>
Choose action to perform
2 FM RADIO
You can use the application as a traditional FM radio with
automatic tuning and saved channels. In FM radio interface,
you can press le or right direction key to search channels
manually; you can press up and down direction key to tune
volume. Press right so key to enter Options.
Page 32

SECTION 9
Application
Calendar, Calculator, Torch, World clock
USER GUIDE | page 32
Page 33

USER GUIDE | page 33
1 CALENDAR
Once you enter this menu, there is a monthly-view calendar for
you to keep track of important appointments, etc. Days with
events entered will be marked.
2 CALCULATOR
The calculator can add, subtract, multiply and divide.
To use the calculator:
■ Press the up, down, le and right key to select +, -, ×, ÷
respectively.
■ Press right so key to delete the figure.
3 TORCH
You can turn on/o torch through this function.
4 WORLD CLOCK
This menu is available a clock containing the time zones of the
world’s major cities
Page 34

SECTION 10
Internet
This feature lets you use your internet
browser for surfing the web.
The phone has already stored the connection data (APN) to navigate, however
in case of problems the same can be set
manually:
Main Menu> Setup> connect> Internet
accounts> Options> Change, and / or Add
Account
then properly set the APN for navigation,
by consulting your operator if necessary.
USER GUIDE | page 34
Page 35

SECTION 11
My files
The phone provides a certain space for
users to manage files and supports the
T-Flash card. The capacity of the T-Flash
card is selectable. You can use the file
manager to conveniently manage various
directories and files on the phone and the
T-Flash card. You can use this function to
format all the data in the memory.
The system will re-create a default folder.
The formatted data cannot be recovered.
Therefore, think twice before using the
formatting function.
USER GUIDE | page 35
Page 36

SECTION 12
Profiles
The phone oers more user profiles ringtones, so you can customize some settings
to adapt to specific environments.
Customize user profiles ringtones according to your preferences and then turn
them on.
User profiles are divided into five options:
Normal, Silent, Meeting, internal and
external.
Press the OK button to activate the profile.
Selecting Options, you can perform the
following operations: add, delete, and
enter in the advanced profile settings, and
manage ringtones and volume.
USER GUIDE | page 36
Page 37

SECTION 13
Bluetooth
With Bluetooth, you can connect wirelessly with other compatible devices, such
as mobile phones, computers, headsets,
and car kits.
You can use Bluetooth to send photos,
video clips, music and sound clips, and
notes, and transfer files from your PC (if
compatible).
USER GUIDE | page 37
Page 38

SECTION 14
Alarm
Three alarms can be set, and are disabled
by default. You can activate one, two or all
of them, if necessary. For each alarm, you
can set the date and time and the ringer.
To access the Alarm menu:
Main Menu> Alarm
USER GUIDE | page 38
Page 39

SECTION 15
Games
The game Snake, Sokoban, Tetris
are present in this version of the phone.
To access the games:
Main menu> Games> followi list> choose
game and press OK button
USER GUIDE | page 39
Page 40

Technical
specifications
SECTION 5
SECTION 16
USER GUIDE | page 40
Page 41

USER GUIDE | page 41
TECHNICAL SPECS
Panel Dimensions 1,8”
Main features TFT color display
Various Dimensions 108mm*45mm*13mm
Back cover Black
Camera NO
Battery Lithium Polymer 600 mAh,
3,7 V
Included Accessories Charger Input: 100-240V~ 50-
60 Hz, Output: 5V DC 500 mA
User Manual
Battery
Note: The phone use GSM band to connect to network.
Please check with your carrier the phone compatibility with
your SIM card.
Page 42

Warnings
SECTION 5
SECTION 17
USER GUIDE | page 42
Page 43

USER GUIDE | page 43
SAR Certification information (Specific Absorption Rate)
The device is compliant to European Union (EU) standards that
limit human exposure to radio frequency (RF) energy emitted
by radio and telecommunications equipment.
These standards prohibit the sale of mobile devices that
exceed a maximum exposure level (known as SAR) of 2.0 W/kg.
During testing, the maximum SAR recorded for this model was
equal to 0,737 W / kg.
During normal use, the actual SAR level can be much lower,
as the device has been designed to emit only the RF energy
necessary to transmit a signal to the nearest base station.
By automatically emitting lower levels when possible, your
device reduces your overall exposure to RF energy.
To avoid damage to your hearing, please do not
listen at high volume for a long time.
Page 44

USER GUIDE | page 44
INFORMATION ON DISPOSAL OF UNITS
This product bears the selective sorting symbol
for waste electrical and electronic equipment
(WEEE).
This means that this product must be handled to
the local collecting points or given back to retailer
when you buy a new product, in a ratio of one to
one (or one to zero if the external dimension is
less than 25 cm) pursuant to European Directive
2012/19/EC in order to be recycled or dismantled
to minimize its impact on the environment.
For further information, please contact your local or regional
authorities.
Electronic products not included in the selective sorting process are
potentially dangerous for the environment and human health due to
the presence of hazardous substances.
The unlawful disposal of the product carries a fine according to the
legislation currently in force.
This product contains batteries covered by
the European Directive 2006/66/EC, which
must not be put in the household waste.
Please be informed about local regulations
regarding the collection of batteries, as their
correct disposal helps to prevent negative consequences for the environment and human health.
SECTION 17
WARNINGS
Page 45

Hereby, Aldinet S.p.A, declares that this type of LITE110B,
Brand Nordmende is in compliance with the essential
requirements and other relevant provisions of Directive
R&TTE 1999/5/EC.
The Declaration of Conformity is available at:
Aldinet S.p.A.
Viale Colombo, 8 - 20090 Trezzano S/N (MI) Italy
MADE IN CHINA BY
Aldinet S.p.A.
Viale Colombo, 8 - 20090 Trezzano S/N (MI) Italy
NORDMENDE is a trademark of Technicolor or its ailiates
used under license to ALDINET S.p.A.
DUAL SIM GSM MOBILE PHONE
LITE110B
 Loading...