

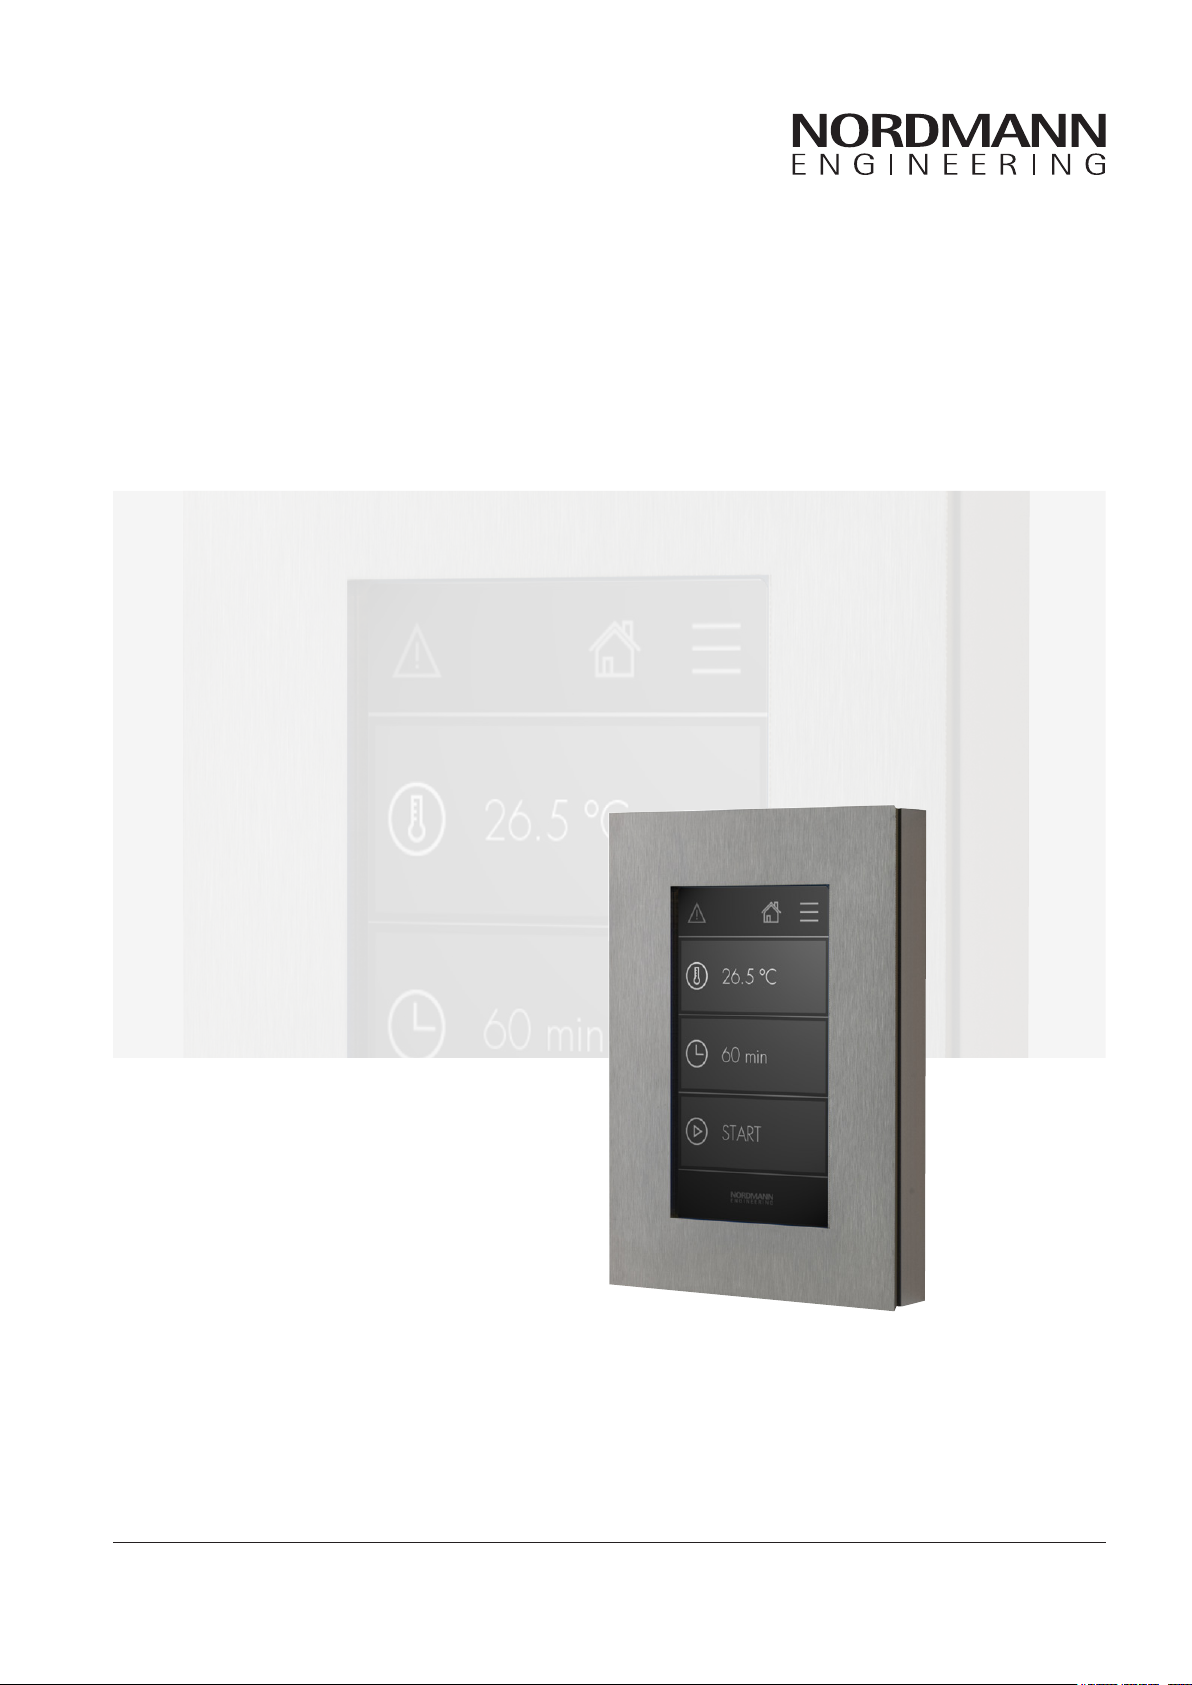
Nordmann Omega SPA Display
INSTALLATION AND OPERATION MANUAL
2591871 EN 1710

Thank you for choosing Nordmann
Installation date (MM/DD/YYYY):
Commissioning date (MM/DD/YYYY):
Site:
Model:
Serial number:
Proprietary Notice
This document and the information disclosed herein are proprietary data of Nordmann Engineering AG. Neither
this document, nor the information contained herein shall be reproduced, used, or disclosed to others without the
written authorisation of Nordmann Engineering AG, except to the extent required for installation or maintenance
of recipient's equipment.
Liability Notice
Nordmann Engineering AG does not accept any liability due to incorrect installation or operation of the equipment
or due to the use of parts/components/equipment that are not authorised by Nordmann Engineering AG.
Copyright Notice
© Nordmann Engineering AG, All rights reserved.
Technical modications reserved.

Contents
1 Introduction 4
1.1 To the very beginning 4
1.2 Notes on the installation and operation manual 4
2 For your safety 6
3 Product Overview 8
4 Installation 9
4.1 Unpacking and checking the scope of delivery 9
4.2 Storing the unit 9
4.3 Notes on positioning the Nordmann Omega SPA Displays 10
4.4 Mounting the Nordmann Omega SPA Display 10
4.4.1 In-wall mounting 11
4.4.2 On-wall mounting 15
4.5 Connecting the SPA Display to the Nordmann Omega 18
5 CongurationandoperationoftheNordmannOmegaSPADisplay 23
5.1 CongurationoftheNordmannOmegaSPADisplay 23
5.2 Operation of the Nordmann Omega SPA Display 23
6 Troubleshooting 24
6.1 Fault indications / warning and fault list 24
6.2 Malfunctions during operation of the Nordmann Omega SPA Display 24
7 Takingoutofservice/Disposal 25
7.1 Taking out of service 25
7.2 Disposal/Recycling 25
8 Technicaldata 26
9 Spareparts 27
3

1 Introduction
1.1 Totheverybeginning
We thank you for having purchased the Nordmann Omega SPA Display with touch-sensitive display.
The Nordmann Omega SPA Display incorporates the latest technical ad van ces and meets all recognized
safety standards. Nevertheless, improper use of the Nordmann Omega SPA Display may result in danger
to the user or third parties and/or impairment of material assets.
To ensure a safe, proper, and economical operation of the Nordmann Omega SPA Display, please observe and comply with all information and safety instructions contained in the present installation and
operation manual.
If you have questions after reading this manual, please contact your Nordmann representative. They
will be glad to assist you.
1.2 Notesontheinstallationandoperationmanual
Limitation
The subject of this installation and operation manual is the external Nordmann Omega SPA Display.
This installation and operation manual is restricted to the installation, commissioning, operation, and
trouble shooting of the Nordmann Omega SPA Display and is meant for well trained personnel being
sufciently qualied for their respective work.
This installation and operation manual is supplemented by the operation manual for the steam generator
Nordmann Omega. Where necessary, appropriate cross-references are made to this publication in this
installation and operation manual.
Symbols used in this manual
CAUTION!
The catchword "CAUTION" designates notes in this installation and operation manual that, if neglected,
may cause damage and/or malfunction of the unit or other material assets.
WARNING!
The catchword "WARNING" used in conjunction with the general caution symbol designates safety
and danger notes in this installation and operation manual that, if neglected, may cause to injury to
persons.
DANGER!
The catchword "DANGER" used in conjunction with the general caution symbol designates safety and
danger notes in this installation and operation manual that, if neglected, may lead to severe injury
or even death of persons.
4

Safekeeping
Please safeguard this installation and operation manual in a safe place, where it can be immediately
accessed. If the steam generator with which the Nordmann Omega SPA Display is used changes hands,
the documentation should be passed on to the new operator.
If the documentation gets mislaid, please contact your Nordmann representative.
Language versions
This installation and operation manual is available in various languages. Please contact your Nordmann
representative for information.
5

2 For your safety
General
Every person working with the Nordmann Omega SPA Display must have read and understood the
present installation and operation manual before carrying out any work.
Knowing and understanding the contents of the Installation and operation manual is a basic requirement
for protecting the personnel against any kind of danger, to prevent faulty operation, and to operate the
unit safely and correctly.
All ideograms, signs and markings applied to the Nordmann Omega SPA Display must be observed
and kept in readable state.
Qualication of personnel
All actions described in the present Installation and operation manual (installation, operation, etc.) must
be carried out only by well trained and sufciently qualied personnel authorised by the owner.
For safety and warranty reasons any action beyond the scope of this manuals must be carried out only
by qualied technical personnel authorised by your Nordmann representative.
It is assumed that all persons working with the Nordmann Omega SPA Display are familiar and comply
with the appropriate regulations on work safety and the prevention of accidents.
This unit may not be used by persons (including children) with reduced physical, sensory or mental
abilities or persons with lacking experience and/or knowledge, unless they are supervised by a person
responsible for their safety or they received instructions on how to operate the unit.
Children must be supervised to make sure that they do not play with unit.
Intended use
The Nordmann Omega SPA Display is intended exclusively for the control of the steam genera-
tor Nordmann Omega within the specied operating conditions (see
of application without the express written consent of the manufacturer is considered as not conforming
with the intended purpose and may lead to the system becoming dangerous.
Operation of the equipment in the intended manner requires that all the information in these instruc-
tions are observed (in particular the safety instructions).
chapter8). Any other type
6

Behaviour in case of danger
If it is suspected that safe operation is no longer possible, then the Nordmann Omega should immediately be set out of operation, disconnected from the mains and secured against accidental
power-up (see Nordmann Omega operation manual). This can be the case under the following
circumstances:
– if the Nordmann Omega SPA Display is damaged
– if the Nordmann Omega SPA Display is no longer operating correctly
– if the connecting cable is damaged
All persons working with the Nordmann Omega SPA Display must report any alterations to the unit that
may affect safety to the owner without delay.
Prohibited modications to the unit
No modications must be undertaken on the Nordmann Omega SPA Display without the express
written consent of the manufacturer.
For the replacement of defective components use exclusively original accessories and spare parts
available from your Nordmann representative.
7

3 Product Overview
Nordmann Omega SPA Display
in-wall mounting
2a
5
7
1
4
Nordmann Omega SPA Display
on-wall mounting
2b
5
7
1
4
Fig. 1: Front view Fig. 2: Front view
6
3
2a
7
2b
3
Fig. 3: Back view Fig. 4: Back view
6
7
1 Touch-sensitive display
2a In-wall housing
2b On-wall housing
3 Connecting terminals (CAN BUS)
5 Magnets for the attachment of the decorative
cover
6 Magnetic centring framework with sealing
7 Cable entries
4 Decorative cover
8

4 Installation
4.1 Unpackingandcheckingthescopeofdelivery
Unpacking the unit
Open the packing and check the delivery for completeness. Please contact your Nordmann representative in case something is lacking, they will be glad to send you the missing part without delay. The
standard delivery includes:
– Nordmann Omega SPA Display for in-wall mounting
– Nordmann Omega SPA Display control PCB
– In-wall housing with pre-mounted display mounting supports, fastening claws and 3 magnets
– Plastic bag containing mounting material
– Nordmann Omega SPA Display on-wall mounting
– Nordmann Omega SPA Display control PCB
– On-wall housing
– Plastic bag containing mounting material
– Decoration cover with pre-mounted centring framework and sealing (if ordered)
Please check the equipment for damage. Please report any damage to your Nordmann representative
and to the carriers, as required.
Packaging
The original packaging of the Nordmann Omega SPA Display was designed for optimum safety during
transportation. Please preserve the original packing material in case you once have to return the unit
for some reason.
In case you wish to dispose of the packaging, observe the local regulations on waste disposal. Never
dispose of the packaging to the environment.
4.2 Storingtheunit
If the external steam bath control must be stored, store it in a protected area (best in the original packaging) meeting the following requirements:
– room temperature: 1 ... 40 °C
– room humidity: 10 ... 80 %rh (non condensing)
9

4.3 NotesonpositioningtheNordmannOmegaSPADisplays
Please observe the following notes for the correct positioning of the Nordmann Omega SPA Display(s):
– The Nordmann Omega SPA Display(s) must not be installed in hazardous locations and in rooms
where water splashes may occur.
– Do not mount the Nordmann Omega SPA Display(s) inside the steam bath cabin, sauna, bio sauna,
etc..
– If possible mount the Nordmann Omega SPA Display(s) at eye level.
– Do not mount the Nordmann Omega SPA Display(s) in exposed places.
– Do not mount the Nordmann Omega SPA Display(s) on vibrating components.
– Place the Nordmann Omega SPA Display(s) in such a way, that the total length of 50 m of the CAN
BUS cables with which the Nordmann Omega and the Nordmann Omega SPA Display(s) are interconnected is not exceeded.
4.4 MountingtheNordmannOmegaSPADisplay
CAUTION!
The electronic components of the Nordmann Omega SPA Display are very sensitive to electrostatic
discharge. For all installation work on equipment appropriate measures must be taken to protect these
components against damage caused by electrostatic discharge (ESD protection).
Note: the Nordmann Omega and the Nordmann Omega SPA Display(s) (up to a max. of 8 SPA Displays)
are interconnected via a so-called CAN BUS. Use only a shielded four-wire cable with a cross section
of 0.34 mm
not exceed 50 m.
2
per wire to establish the CAN BUS connections. The total length of the CAN BUS must
10

4.4.1 In-wallmounting
8.5 mm
8.5 mm
1. At the desired location, mark mounting opening according to the size of the in-wall housing with the
help of a spirit level, then ream out the mounting opening.
Important: the mounting opening must be reamed out exactly since the decoration cover (broken
line in Fig. 5) overlaps the mounting opening on the right side only 4 mm, on the left side only 9 mm
and on the top and bottom side only 8.5 mm.
4 mm
Massive wall
T
Tmin: 35 mm
9 mm
141 mm
124 mm
100 mm
87 mm
4 mm
100 mm
87 mm
9 mm
Cavity wall
T
Tmin: 15 mm
124 mm
141 mm
Fig. 5: Making the mounting opening for the in-wall housing
2. Knock out the desired cable entry of the in-wall housing and insert the CAN BUS cable (shielded
four-wire cable, 0.34 mm2 per wire) into the in-wall housing. Then, lead the cable through the wall
opening to the steam generator.
Fig. 6: Inserting the CAN BUS cable
11

3. Insert the in-wall housing into the wall opening, align it with the help of a spirit level, then x it with
the four fastening claws attached to the in-wall housing (only necessary with cavity walls).
Note: in massive walls the in-wall housing must be xed either with the screws and dowels supplied
or by using PU mounting adhesive or mortar.
Fig. 7: Mounting the in-wall housing to the wall opening
4. Connect the CAN BUS cable (shielded four-wire cable, 0.34 mm2 per wire) from the Nordmann Omega or from another Nordmann Omega SPA Display to terminals "X2" or "X3" of the control board of
the Nordmann Omega SPA Display according to the gure below. For this purpose, the individual
wires have to be stripped 6 mm and appropriate wire end ferrules have to be crimped. Then, push
individual wires into the correct connection opening of the corresponding terminal until they come
to a stop.
Note: The CAN BUS cable to an additional Nordmann Omega SPA Display is to be connected either
to terminal "X2" or "X3" (see notes in chapter 4.5).
strip 6 mm
Attach wire end ferrule
and crimp
X3
1 4
L
H
24V
GND
X2
1 4
L
H
24V
GND
12
Fig. 8: Connecting the CAN BUS cable(s) to the Nordmann Omega SPA Display

5. Connect the CAN BUS cable according to the specications in chapter 4.5 to the Nordmann Omega,
then perform the function tests.
6. After function tests have been passed carefully place the Nordmann Omega SPA Display onto the
in-wall housing. Make sure the supply cable is not getting pinched and the that the magnets in the
housing t into the openings of the control board. Then, x the Nordmann Omega SPA Display to
corresponding supports of the in-wall housing using the four screws supplied.
Magnets
Fig. 9: Mounting the Nordmann Omega SPA Display
openings for
the magnets
13

7. If necessary loosen the screws of the display supports and adjust the display.
Fig. 10: Adjusting the supports
8. Finally attach the decoration cover. The decoration cover is held by the magnets in the in-wall housing.
Fig. 11: Attaching the decoration cover
14

4.4.2 On-wallmounting
1. Using the aluminum on-wall housing as template mark the two xing holes at the desired location,
with the help of a spirit level. Then proceed as follows:
– for the mounting on a stonework wall:
• Drill 2 holes ø6 mm, depth 35 mm.
• Insert the supplied dowels.
• Fix on-wall housing to the wall using the screws supplied, align housing with the help of a
spirit level and fasten den screws.
– for the mounting on a wooden wall:
• Drill 2 holes ø3 mm, depth 35 mm
• Fix on-wall housing to the wall using the countersunk screws supplied, align housing with
the help of a spirit level and fasten den screws.
Note: If the mounting location does not permit bolt mounting (e.g. on a glass wall) the aluminum
on-wall housing can also be glued over its entire surface to the underground.
75 mm
Fig. 12: Mountingtheon-wallhousing(gureshowsmountingonastoneworkwall)
15

2. Drill the hole for the cable entry at the desired location into the wall (for in-wall cable routing) or use
one of the existing cable entry on the housing (for on-wall cable routing).
Cable entries on
the on-wall housing
Fig. 13: Cable entries
3. Connect the CAN BUS cable (shielded four-wire cable, 0.34 mm2 per wire) from the Nordmann Omega or from another Nordmann Omega SPA Display to terminals "X2" or "X3" of the control board of
the Nordmann Omega SPA Display according to the gure below. For this purpose, the individual
wires have to be stripped 6 mm and appropriate wire end ferrules have to be crimped. Then, push
individual wires into the correct connection opening of the corresponding terminal until they come
to a stop.
Note: The CAN BUS cable to an additional Nordmann Omega SPA Display is to be connected either
to terminal "X2" or "X3" (see notes in chapter 4.5).
Attach wire end ferrule
strip 6 mm
and crimp
X3
1 4
L
H
24V
GND
X2
1 4
L
H
24V
GND
16
Fig. 14: Connecting the CAN BUS cable(s) to the Nordmann Omega SPA Display

4. Connect the CAN BUS cable according to the specications in chapter 4.5 to the Nordmann Omega,
then perform the function tests.
5. After function tests have been passed carefully place the Nordmann Omega SPA Display onto the
on-wall housing (make sure the supply cable is not getting pinched). Then, x the Nordmann Omega
SPA Display to the on-wall housing using the four screws supplied. Seal the cable entry at the bottom
of the on-wall housing splash-proof using silicone sealant.
Seal cable entry from below
with slicone sealant
Fig. 15: Mounting the Nordmann Omega SPA Display
6. Finally attach the decoration cover. The decoration cover is held by the magnets in the on-wall
housing.
Fig. 16: Attaching the decoration cover
17

4.5 ConnectingtheSPADisplaytotheNordmannOmega
Observe and comply with the notes in the installation and operation manual of the Nordmann
Omega steam generator and the local regulation regarding electrical installation when connecting
the Nordmann Omega SPA Display(s) to the Nordmann Omega steam generator!
DANGER!
Danger of electric hazard!
Before connecting the Nordmann Omega SPA Display(s) to the Nordmann Omega steam generator set the steam generator out of operation and disconnect it from the mains!
CAUTION!
The electronic components inside the Nordmann Omega are very sensitive to electrostatic discharge.
When the unit is open for installation work, appropriate measures must be taken to protect these components against damage caused by electrostatic discharge (ESD protection).
1. Remove front panel of the Nordmann Omega.
2. Insert the CAN BUS cable(s) (shielded four-wire cable, 0.34 mm2 per wire) from the bottom via cable
glands into the control compartment.
3. Cut CAN BUS cable(s) to length. Prepare cable end(s) as shown in Fig. 17 and connect plug(s) to
the CAN BUS cable(s).
6 mm
30 mm
Attach wire end
ferrules
L
H
Conneting plug
24V
GND
Fig. 17: Preparing the CAN BUS cable for the connection on the control board
4. Connect the CAN BUS cable(s) according to the appropriate wiring diagram (see Fig. 18, Fig. 19 or
Fig. 20) to socket "X23" and/or "X24" on the control board of the Nordmann Omega.
18

X3 X2
J1
X1
11 41 4 5
Nordmann Omega SPA Display
L
H
24V
GND
GND
24V
H
L
X23
X24
X11
Nordmann Omega
CAN BUS cable (shielded four-
wire cable, 0.34 mm2 per wire)
Maximum admissible length
of the CAN BUS cable: 50 m
Fig. 18: Wiring diagram variant 1 with one Nordmann Omega SPA Display
19

Nordmann Omega
X11
Nordmann Omega SPA Display 1
J1
X3 X2
GND
X23
24V
H
L
X24
CAN BUS cables
(shielded four-wire
cable, 0.34
mm2
per wire)
Maximum
admissible length
of all CAN BUS
cables: 50 m
L
H
24V
GND
L
H
24V
GND
X1
11 41 4 5
Nordmann Omega SPA Display 2
J1
X3 X2
L
H
24V
GND
20
L
H
24V
GND
X1
11 41 4 5
Further Nordmann
Omega SPA Displays
(max. 8 Displays)
Fig. 19: Wiring diagram variant 2 with two or more Nordmann Omega SPA Displays

X11
Nordmann Omega
Nordmann Omega SPA Display 1
J1
X3 X2
GND
X23
24V
H
L
X24
CAN BUS cables
(shielded four-wire
cable, 0.34
mm2
per wire)
Maximum
admissible length
of all CAN BUS
cables: 50 m
L
H
24V
GND
L
H
24V
GND
X1
11 41 4 5
Nordmann Omega SPA Display 2
J1
X3 X2
L
H
24V
GND
L
H
24V
GND
X1
11 41 4 5
Further Nordmann
Omega SPA Displays
(max. 8 Displays)
Fig. 20: Wiring diagram variant 3 with two or more Nordmann Omega SPA Displays
21

5. Free the shielding of the CAN BUS cable(s) by removing the insulation at the appropriate position.
Then, pinch the freed shielding of the CAN BUS cable(s) into the clamp holder at the bottom in the
housing of the Nordmann Omega.
Fig. 21: Cable shielding
4. Remount front panel of the Nordmann Omega.
5. Put the Nordmann Omega into operation.
Assumed the cabling is correct the home screen is shown on the Nordmann Omega SPA Display
after start-up of the Nordmann Omega.
22

5 CongurationandoperationoftheNordmannOmega
SPADisplay
5.1 CongurationoftheNordmannOmegaSPADisplay
In principle, the SPA display is ready for operation after the connection and requires no additional con-
guration.
However, if more than one SPA display is used in the system, a unique display address must be assigned
to each connected SPA display.
For each connected SPA display, go to the menu "Menu > Engineering > Communication> Server Settings" and assign an individual address to the SPA display via the parameter "Server ID Display".
5.2 OperationoftheNordmannOmegaSPADisplay
For the operation of the Nordmann Omega SPA Display, please refer to the instructions in chapter 6 of
the Nordmann Omega operation manual.
23

6 Troubleshooting
6.1 Faultindications/warningandfaultlist
Detailed information on the fault indication on the Nordmann Omega SPA display as well as a list of the
warning and fault messages which can occur during operation of the Nordmann Omega can be found
in chapter 8 of the Nordmann Omega operation manual.
6.2 MalfunctionsduringoperationoftheNordmannOmegaSPADisplay
Malfunction Cause Remedy
Message "Time Out" appears
in the Nordmann Omega SPA
Display.
Keystroke is not detected in the
correct location.
Display remains dark. Nordmann Omega steam gen-
No data connection Check connections "L" and "H"
on the SPA display and on the
Nordmann Omega control board.
Display is not calibrated correctly. If possible, access the calibration
function (Path: Menu> Engineering> Administration> Display) and
start the calibration function by
pressing "Start". Otherwise, the
display must be replaced.
Switch on the Nordmann Omega.
erator is not switched on.
No supply voltage present:
No reaction when taping on a key
on the display.
– Supply cable not or not cor-
rectly connected.
– Control board of the Nord-
mann Omega defective.
SPA display defective. Replace SPA display.
Control board of the SPA display
defective.
– Connect cable correctly.
– Check/replace control board
of the Nordmann Omega.
Replace control board.
24

7 Takingoutofservice/Disposal
7.1 Takingoutofservice
If the Nordmann Omega SPA Display must be replaced or if the Nordmann Omega SPA Display is not
needed any more, proceed as follows:
1. Switch off the Nordmann Omega steam generator, separate it from the mains and secure it against
inadvertent power-up.
2. Have the Nordmann Omega SPA Display (and any other system components, if necessary) un-
mounted by a qualied service technician.
7.2 Disposal/Recycling
Components not used any more must not be disposed of in the domestic waste. Please dispose of the
unit or the individual components in accordance with local regulations at the authorised collecting point.
If you have any questions, please contact the responsible authority or your local Nordmann representative.
Thank you for your contribution to environmental protection.
25

8 Technicaldata
Touch Panel Resistive Touch Panel with 95 x 54 mm active screen
Display 4,3" LCD, 272 x 480 Pixel
Interface CAN BUS
Supply voltage 24 VDC
Max. rated power 2 W
Admissible ambient temperature -20…70°C
Admissible ambient humidity 10... 80 %rh, non condensing
Type of protection IP44 IP44 (IP33
Conformity CE
Control ARM Cortex M4 high-performance microcontroller
Dimensions (L x B x T) 141,5 mm x 100,2 mm x 40,2 mm 141,5 mm x 100,2 mm x 19,0 mm
1)
If cable entry is not sealed by the customer, see chapter 4.4.2
Nordmann Omega SPA Display
In-wall version On-wall version
1)
16 MB DRAM, 16 MB Flash for program & data
)
26

9 Spareparts
2 1
4
3
Pos. Description Spare part No.
1 In-wall housing (incl. mounting material) 2590178
2 On-wall housing (incl. mounting material) 2590179
3 Decorative cover steel 2590183
Decorative cover glass white 2590185
Decorative cover glass black 2590186
4 PCB Omega SPA Display 2590964
––– Plug for CAN BUS cable (5 pcs.) 2591662
––– CAN BUS cable shielded (50 m) 2591666
––– Clamp holder for shielding (5 pcs.) 2591667
If you would like to use other materials for the decorative cover, the magnetic centering frame including
the seal and the appropriate glueing device can be ordered separately in consultation with your Nordmann representative:
4
3
Pos. Description Spare part No.
––– Centering frame & sealing 2590188
––– Glueing device 2590197
27

Notes

Notes

Notes


CH94/0002.01
Nordmann Engineering AG
Lindenhofstrasse 28, 4052 Basel, Switzerland
Phone +41 61 404 46 50, Fax +41 61 404 46 79
www.nordmann-engineering.com,
info@nordmann-engineering.com
 Loading...