

norbar Handtorque HT 12, Handtorque HT 7, Handtorque HT 13, Handtorque HT 30, Handtorque HT 60 Operator's Manual
...Page 1

OPERATOR’S MANUAL
HANDTORQUETM MULTIPLIERS
Part Number 34269 | Issue 9 | Original Instructions (English/Deutsch)
Page 2

1
CONTENTS
Part Numbers Covered by This Manual 2
Standard Series 2
Small Diameter Series 2
HT4 Series 2
Compact Series 2
Optional Extras 2
Safety 3
Introduction 3
Operating Instructions 4
Torque Reaction 5
Setting Torque for Bolt Tightening (Non-Calibrated) 8
Setting Torque for Bolt Tightening (Calibrated) 8
Setting Torque for Bolt Loosening 9
Operating the Multiplier 9
Anti Wind-Up Ratchet 10
Purpose of the Anti Wind-Up Ratchet 10
Operation of the Anti Wind-Up Ratchet 10
Maintenance 12
Output Square Drive 12
Cleaning 12
Specifications 13
Standard Series 13
Small Diameter Series 13
HT4 Series 14
Compact Series 14
Trouble Shooting 15
Page 3

2
PART NUMBERS COVERED BY THIS MANUAL
This manual covers the setup and use of Norbar Handtorque
TM
multipliers.
Standard Series
Model
Maximum
Torque
Part Number
Without AWUR
With AWUR
HT 1 & HT 2
1700 N·m
16010, 16012, 16034
16089
HT 5 & HT 6
3400 N·m
16014, 16028, 16016, 16024
16090, 16092, 16093
HT 7
6000 N·m
16067, 16094, 16018
16065, 16095, 16068, 16096
HT 9
9500 N·m
16059
16070, 16071
HT 11
20000 N·m
16082
16049
HT 12
34000 N·m - 18082
HT 13
47500 N·m - 16053
Small Diameter Series
Model
Maximum
Torque
Part Number
Without AWUR
With AWUR
HT 30
3000 N·m
18003
18002, 18004, 18006
HT 60
6000 N·m
-
18008, 18010, 18012
HT4 Series
Model
Maximum
Torque
Part Number
Without AWUR
With AWUR
HT 4
3000 N·m
17022
-
HT 4
4500 N·m
17021
-
Compact Series
Model
Maximum
Torque
Part Number
Without AWUR
With AWUR
HT-52 & HT-72
1000 N·m
18087, 18051, 18052, 180200,
180201, 180202, 18014, 180207,
18018, 180211
18083, 18084, 180203,
180204, 18081, 18093,
18094, 180205, 180206
HT-72
1500 N·m
18015, 18016, 180208, 180209
-
HT-72
2000 N·m
18017, 18019, 180210, 180212
18082, 18095, 18096,
180213, 180214
HT-92
4000 N·m - 18092
HT-119
7000 N·m - 18091
HT-52 (HandtorqueTM Kit)
1000 N·m - 18196
HT-52 (HandtorqueTM Kit)
1000 N∙m - 18197
HT-72 (HandtorqueTM Kit)
2000 N·m - 18198
HT-92 (HandtorqueTM Kit)
4000 N·m - 18199
AWUR = Anti Wind Up Ratchet.
NOTE: For more information on HandtorqueTM Kits, see page 9.
Optional Extras
A range of Sockets, Nose Extensions and Annular Torque Transducers are available to suit the
HandtorqueTM range.
Page 4

3
SAFETY
IMPORTANT: DO NOT OPERATE THE TOOL BEFORE READING THESE INSTRUCTIONS.
FAILURE TO DO SO MAY RESULT IN PERSONAL INJURY OR DAMAGE TO THE TOOL.
This tool is intended for use with threaded fasteners. Any other use is not recommended.
These tools require a reaction bar. See section on torque reaction.
There is a risk of crushing between the reaction bar and work piece.
Keep hands away from reaction bar.
Keep hands away from tool output.
INTRODUCTION
The HandtorqueTM multiplier is a precision tool that will multiply the input torque by the specified ratio.
The HandtorqueTM multiplier is a planetary gear system. The outer case of the multiplier, known as the
annulus, will rotate in the opposite direction to the input torque unless a reaction arm is fitted to the annulus.
Without the reaction arm no torque is applied through the square drive. See section on torque reaction (Page
5) for more details.
HandtorqueTM multipliers with a high ratio gearbox (25:1 or more) require a certain amount of windup
(backlash) to be taken up before any useful tightening work is applied to the nut. In this instance an Anti
Wind-Up Ratchet (AWUR) is fitted to retain all of the wind up forces. See section on AWUR (Page 10 – 11)
for more details.
Page 5

4
REACTION PLATE
REACTION PLATE
REACTION PLATE
REACTION PLATE
OPERATING INSTRUCTIONS
To operate the HandtorqueTM multiplier you will need the following:-
Power Drive or Impact Quality Sockets.
Reaction Arm.
Norbar or other quality torque wrench.
Standard Series Small Diameter Series
HT4 Series Compact Series
FIGURE 1
INPUT SQUARE DRIVE
INPUT SQUARE
DRIVE
INPUT SQUARE DRIVE
INPUT SQUARE DRIVE
ANTI WIND-UP
RATCHET
ANTI WIND-UP
RATCHET
ANTI WIND-UP
RATCHET
ANTI WIND-UP
RATCHET
OUTPUT SQUARE DRIVE
OUTPUT SQUARE DRIVE
OUTPUT SQUARE DRIVE
OUTPUT SQUARE DRIVE
SLAVE SQUARE
Page 6
5
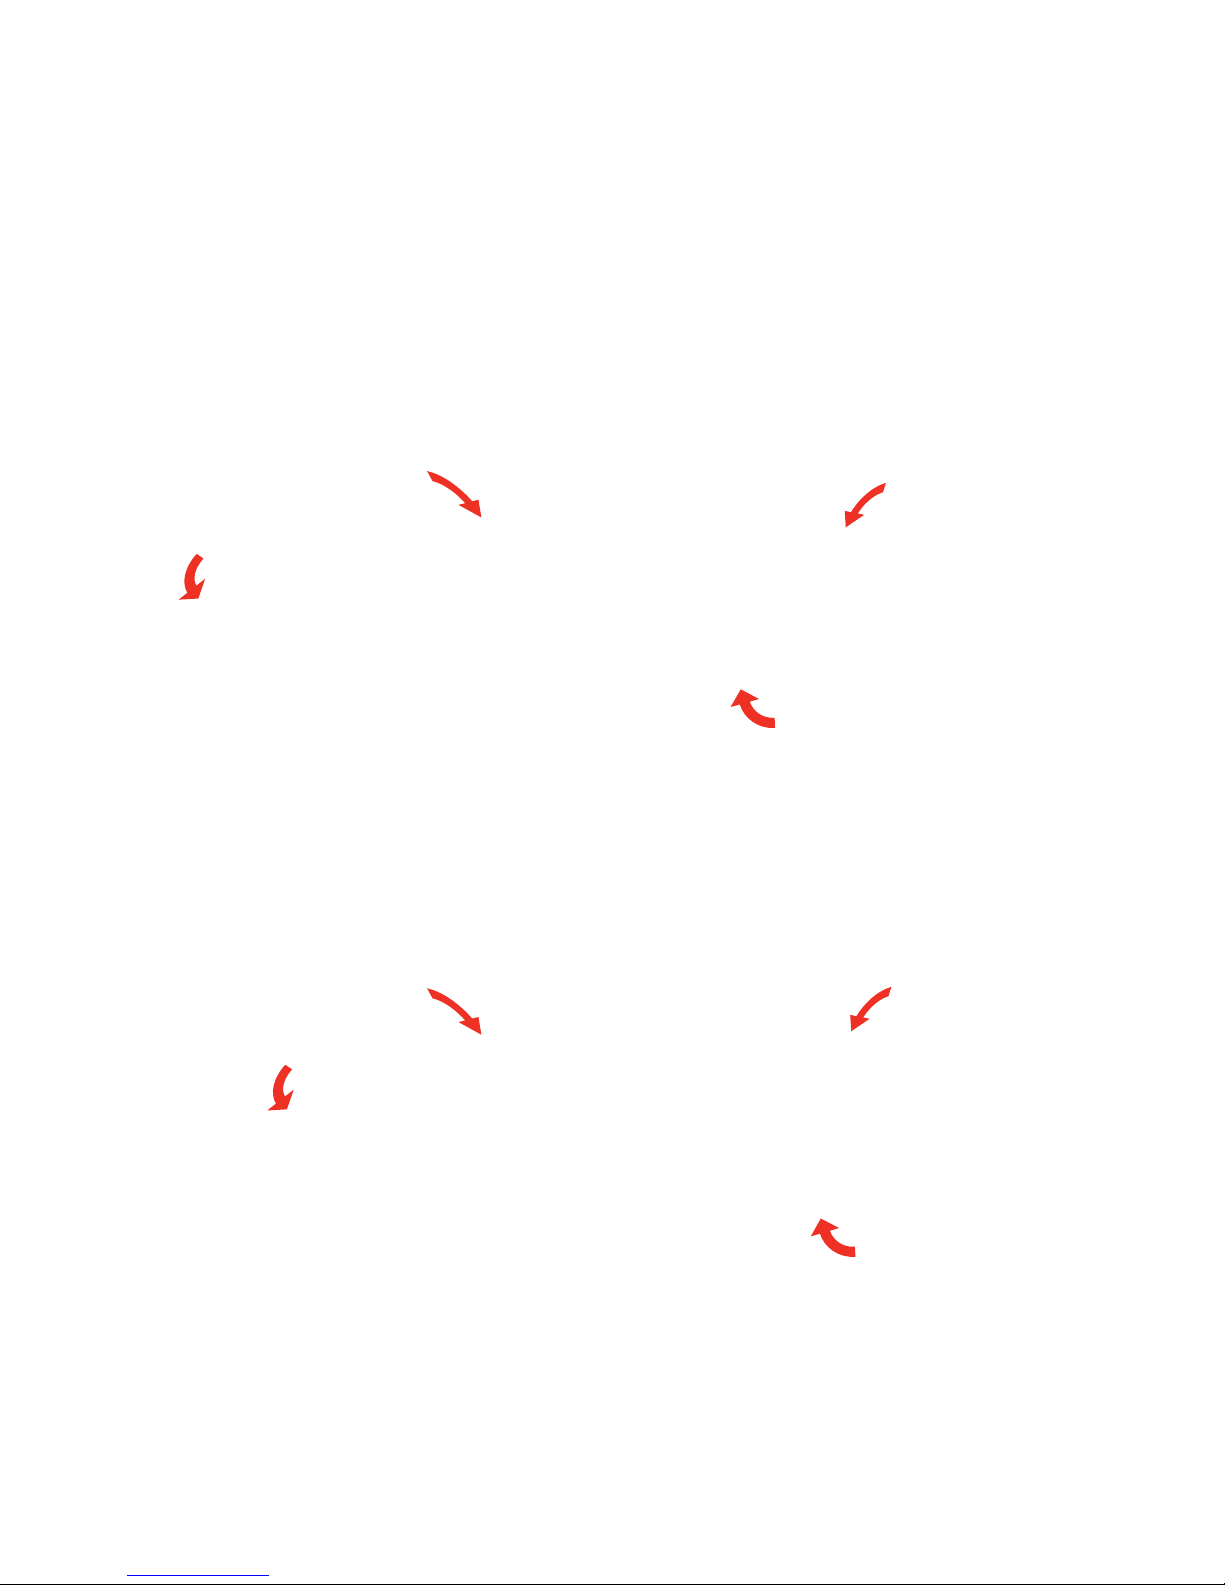
Torque Reaction
When the HandtorqueTM is in operation, the Reaction Plate rotates in the opposite direction to the Output
Square Drive and must be allowed to rest squarely against a solid object or surface adjacent to the bolt to be
tightened (see Figure 2).
Where the standard reaction plate is not suitable, it may be possible to adapt it. Refer to your Norbar
distributor for advice.
Clockwise Operation Anti-Clockwise Operation
Clockwise Operation Anti-Clockwise Operation
FIGURE 2
Reaction
Reaction
Reaction
Reaction
Torque
Torque
Torque
Torque
Page 7

6
IMPORTANT: CARE MUST BE TAKEN TO ENSURE THAT THE REACTION PLATE IS ONLY USED
WITHIN THE LIMITATIONS SHOWN IN FIGURES 3, 4, 5 AND 6.
For special applications or where extra deep sockets must be used the standard arm may be extended but
only within the limitations shown in Figures 3, 4, 5 and 6.
WARNING: FAILURE TO OBSERVE THE LIMITATIONS SHOWN IN FIGURES 3, 4, 5
AND 6 WHEN MODIFYING STANDARD REACTION PLATES OR MAKING
SPECIALS MAY RESULT IN PREMATURE WEAR OR DAMAGE TO THE
MULTIPLIER OUTPUT DRIVE.
Standard square drive extensions MUST NOT be used as these will cause serious damage to the wrench
output drive. Norbar manufacture a range of nose extensions for applications where access is restricted and
these are designed to support the final drive correctly.
It is essential the reaction bar rests squarely against a solid object or surface adjacent to the fastener to be
tightened, with reaction taken at the end of the reaction bar.
The supplied reaction bar has been designed to give an ideal reaction point when used with a standard
length socket. If an extra long socket is used it may move the reaction bar outside the safe reaction window,
as shown in figures 3, 4, 5 and 6. The standard reaction bar may need to be extended to ensure it remains
wholly within the shaded area.
FIGURE 3 – Standard Series Safe Reaction Window
Torque Reaction should be
taken in the shaded areas only
Standard Length Socket
Extra Length Socket
FIGURE 4 – Small Diameter Series Safe Reaction Window
Torque Reaction should be
taken in the shaded areas only
Standard Length Socket
Extra Length Socket
Page 8

7
FIGURE 5 – HT 4 Series Safe Reaction Window
Standard length Socket
Extra length Socket
Torque Reaction should be
taken in the shaded areas only
FIGURE 6 – Compact Series Safe Reaction Window
Standard Length Socket
Extra Length Socket
Torque Reaction should be
taken in the shaded areas only
Page 9

8
FIGURE 7 – Certificate of Calibration
Supplied with Compact Series (see above
for applicable models).
24.21:1
Setting Torque for Bolt Tightening (Non-Calibrated)
1. Establish the correct torque figure for the bolt from manufacturer’s instructions or by calculation. A
torque tension calculator is available on the Norbar website (www.norbar.com), which can be used as a
guide to help calculate the tension generated in a bolt for a given thread size, torque and friction value.
NOTE: Many factors have an effect on the torque/induced load relationship and care should be
taken to consider factors such as surface finish and amount/type of lubrication. In critical
applications, the relationship between torque and induced load should be determined by
experimentation with the actual components and lubrication used.
2. Divide the required torque by the ‘Multiplication factor’ of the multiplier (See Specifications section, page
13). This gives the input torque.
Example: A HandtorqueTM HT 1 has a ‘Multiplication ratio of 5:1, so for an input torque of 1 N∙m there
is an output torque of 5 N∙m, with a +/- 4% tolerance.
To reach the HandtorqueTM HT 1 maximum output torque of 1,700 N∙m the below
calculation is made:
1,700 (Required Torque)
=
340 N∙m (Input Torque)
5 (Multiplication Factor)
3. Select a suitable torque wrench for the input torque. The wrench should be of high quality and regularly
calibrated.
Setting Torque for Bolt Tightening (Calibrated)
This section only applies to Handtorque’s that are supplied with a Certificate of Calibration (see Figure 7).
The following part numbers come with a Certificate of Calibration; 18091, 18092, 18196, 18197, 18198,
18199, 180200, 180201, 180202, 180203, 180204, 180205, 180206, 180207, 180208, 180209,180210,
180211, 180212, 180213 and 180214.
1. Establish the correct torque figure for the bolt from manufacturer’s instructions or by calculation. A
torque tension calculator is available on the Norbar website (www.norbar.com), which can be used as a
guide to help calculate the tension generated in a bolt for a given thread size, torque and friction value.
NOTE: Many factors have an effect on the torque/induced load relationship and care should be
taken to consider factors such as surface finish and amount/type of lubrication. In critical
applications, the relationship between torque and induced load should be determined by
experimentation with the actual components and lubrication used.
2. Divide the required torque by the ‘Multiplication factor’ of the
multiplier as stated on the Calibration Certificate included with
the HandtorqueTM. This gives the input torque.
NOTE: Calibrated Handtorque’s come with a unique
Calibration Certificate which highlights the
Handtorque’s unique ‘Multiplication Ratio. These
Handtorque’s will have a slight variation in the
gearbox ratio, so for more accurate results the ratio
on the Calibration Certificate will need to be used.
Norbar multipliers are engineered such that each gear stage has a
specific velocity ratio. For example; a 25:1 gearbox has 2 stages
each with a velocity ratio of 5.45:1, giving an overall velocity ratio of
29.75:1. Taking the gearbox efficiency into account the
multiplication factor will give a ratio of around 25:1.
Torque output calculations are therefore a matter of
simple arithmetic with little risk of incorrect bolt loading due to
conversion errors. Other manufacturer’s multipliers often require
graphs or formulae to calculate the input torque to achieve a
particular output.
Page 10

9
Example: The HandtorqueTM HT-92 Certificate of Calibration in Figure 7 displays a multiplication ratio of
24.21:1, meaning that for every 1 N∙m of input, 24.21 N∙m are output, with a +/- 4% tolerance.
To reach the HandtorqueTM HT-92 maximum output torque of 4,000 N∙m, the below calculation
is made:
4,000 (Required Torque)
=
165 N∙m (Input Torque)
24.21 (Multiplication Factor)
3. Select a suitable torque wrench for the input torque. The wrench should be of high quality and regularly
calibrated.
The HT 52, 72 and 92 Compact Series models can also come as part of a kit which includes a Norbar TTi
Torque Wrench and Carry Case. The table below details the range of HandtorqueTM Kits available:
Kit Part
Number
Kit Contents
HandtorqueTM Multiplier
Torque Wrench
18184
HT-52 (18196)
TTi 45 lbf∙ft ONLY (13684)
18185
HT-52 (18196)
TTi 60 N∙m ONLY (13682)
18186
HT-52 (18196)
TTi 60 Dual Scale (13680)
18187
HT-52 (18197)
TTi 45 lbf∙ft ONLY (13684)
18188
HT-52 (18197)
TTi 60 N∙m ONLY (13682)
18189
HT-52 (18197)
TTi 60 Dual Scale (13680)
18190
HT-72 (18198)
TTi 75 lbf∙ft ONLY (13461)
18191
HT-72 (18198)
TTi 100 N∙m ONLY (13451)
18192
HT-72 (18198)
TTi 100 Dual Scale (13441)
18193
HT-92 (18199)
TTi 150 lbf∙ft ONLY (13463)
18194
HT-92 (18199)
TTi 200 N∙m ONLY (13453)
18195
HT-92 (18199)
TTi 200 Dual Scale (13443)
The HandtorqueTM Kit has a combined accuracy of +/- 6.5%. This is taken from a combination of the +/- 3%
TTi Torque Wrench tolerance and the working variation of the HandtorqueTM gearbox.
NOTE: The accuracy of +/- 6.5% is only valid provided the multiplication ratio on the Calibration
Certificate is used and reaction is taken within the parameters demonstrated in Figure 6.
Setting Torque for Bolt Loosening
1. To ensure that the multiplier is not overloaded, it is desirable to use a torque wrench even for bolt
loosening.
2. Divide the multiplier maximum output by the ‘Multiplication factor’. This gives the maximum input torque.
3. Select a suitable torque wrench for the input torque.
NOTE: Some torque wrenches will not be active (‘click’ or 'break') when used in the anti-clockwise
direction.
Operating the Multiplier
1. Fit the multiplier with the correct size of power drive or impact quality socket to suit the bolt to be tightened.
2. Fit the multiplier to the bolt with the reaction plate adjacent to the reaction point. See Figure 2.
3. Fit the torque wrench to the multiplier, set as in 'Setting Torque for Bolt Tightening'.
4. Operate the torque wrench in the normal manner until it 'clicks' or 'breaks'. Smooth and even use of the
torque wrench will give more accurate results.
TIP: For extra accuracy a torque transducer can be used to measure the input or output torque.
Page 11

10
ANTI WIND-UP RATCHET
Purpose of the Anti Wind-Up Ratchet (AWUR)
Most multipliers with ratios of 25:1 and over are fitted with an anti wind-up ratchet. The multiplier can be
thought of as a spring which must be fully wound before any tightening/untightening work can be applied to
the bolt.
The AWUR ensures that the 'spring' stays wound and that any further torque input to the multiplier is applied
directly to the bolt.
Familiarise yourself with the tool by initially applying low torques and removing wind-up.
There are two different types of AWUR that your HandtorqueTM may be equipped with as demonstrated
below in Figure 8. The AWUR shown on the left side of the page requires a hexagon key to lock in to the
neutral position. The AWUR on the right side of the page will automatically lock into the neutral position
without the need for a hexagon key.
Operation of the Anti Wind-Up Ratchet
Please Read Carefully
1. Position the ‘ratchet direction selector’ for the appropriate direction of operation:
Test direction of rotation and ensure that the ratchet operates freely.
Or CW = Clockwise
Or CCW = Anti-Clockwise
Or N = Neutral
WARNING: DO NOT USE TOOL IF RATCHET DOES NOT OPERATE FREELY.
Clockwise Operation / Bolt Tightening
Neutral Position:
Centralise the ‘ratchet direction selector’.
Depending on model type this may need locking
into position using a hexagon key. Check that the
input square rotates freely in both directions before
operation.
Anti-Clockwise Operation / Bolt Loosening
FIGURE 8
Page 12

11
2. To apply torque, follow the instructions given earlier for setting and operating of the multiplier. Set the
direction of operation for the Anti Wind-Up ratchet as shown in Figure 8.
3. To remove the multiplier, carefully load the gearbox until the ‘ratchet direction selector’ can be moved
towards the neutral position. Allow the wrench to rotate slowly anti-clockwise until the multiplier
becomes free.
3.1 Load the torque wrench.
FIGURE 9
3.2 With the wrench still loaded, move the ‘ratchet direction selector’ to anti-clockwise:
FIGURE 10
3.3 Allow the torque wrench to rotate slowly until the multiplier becomes free.
FIGURE 11
If wind-up cannot be released with one sweep of the wrench, re-engage the ratchet by pushing the ‘ratchet
direction selector’ back to the clockwise position. Reposition the wrench and follow procedure 3 until the
wind-up is fully released.
4. The tool may now be removed from the fastener.
5. Familiarise yourself with this tool by initially applying low torques and removing wind-up.
We recommend that the Anti Wind up assembly input gear and ratchet teeth are inspected annually
by your Norbar approved distributor for wear or damage.
Page 13

12
MAINTENANCE
Output Square Drive
The only user maintenance required on HandtorqueTM multipliers is the replacement of drive squares, should
they become damaged. To avoid internal damage (especially due to torque overload), the output drive
square / shaft have been designed to shear first. This saves major internal damage and allows easy square
removal.
In some instances the square drive will not be removable without disassembling the gearbox. In these cases
the HandtorqueTM multiplier should be returned to Norbar or a Norbar approved agent for repair.
However, in many cases the square drive can be replaced without disassembling the gearbox.
In these cases remove the bolt holding the drive square in position (bolt will be either M4 or M5).
Then remove the broken / damaged drive square.
Fit the new drive square.
Fit the new bolt and tighten (4.7 N·m for M4 bolts and 9 N·m for M5 bolts)
FIGURE 12
Any other maintenance or repairs should be carried out by Norbar or a Norbar approved agent and should
form part of a service. Service intervals will depend on the type of usage of the tools and the environment in
which they are being used.
Cleaning
Keep the tool in a clean condition to aid safety. Do not use abrasives or solvent based cleaners.
Page 14

13
SPECIFICATIONS
Standard Series
Small Diameter Series
Model
Part
Number
Maximum Torque
Output
Ratio
Input
Square
Output
Square
N·m
lbf·ft
in
in
HT 30/5 AWUR
18002
3000
2200
5:1
¾”
1”
HT 30/5
18003
3000
2200
5:1
¾”
1”
HT 30/15 AWUR
18004
3000
2200
15:1
½”
1”
HT 30/25 AWUR
18006
3000
2200
25:1
½”
1”
HT 60/25 AWUR
18008
6000
4425
25:1
½”
1 ½”
HT 60/75 AWUR
18010
6000
4425
75:1
½”
1 ½”
HT 60/125 AWUR
18012
6000
4425
125:1
½”
1 ½”
Model
Part
Number
Maximum Torque
Output
Ratio
Input
Square
Output
Square
N·m
lbf·ft
In
in
HT 1/5
16010
1700
1250
5:1
½”
¾”
HT 2/5
16012
1700
1250
5:1
¾”
1”
HT 2/25
16034
1700
1250
25:1
¾”
1”
HT 2/25 AWUR
16089
1700
1250
25:1
¾”
1”
HT 5/5
16014
3400
2500
5:1
¾”
1”
HT 5/25
16028
3400
2500
25:1
½”
1”
HT 5/25 AWUR
16090
3400
2500
25:1
½”
1”
HT 6/5
16016
3400
2500
5:1
¾”
1 ½”
HT 6/25
16024
3400
2500
25:1
½”
1 ½”
HT 6/25 AWUR
16092
3400
2500
25:1
½”
1 ½”
HT 6/125 AWUR
16093
3400
2500
125:1
½”
1 ½”
HT 7/5
16067
6000
4425
5:1
¾”
1 ½”
HT 7/5
16094
6000
4425
5:1
½”
1 ½”
HT 7/25
16018
6000
4425
25:1
½”
1 ½”
HT 7/25 AWUR
16065
6000
4425
25:1
½”
1 ½”
HT 7/25 Small
Diameter AWUR
16095
6000
4425
25:1
½”
1 ½”
HT 7/125
16068
6000
4425
125:1
½”
1 ½”
HT 7/125 Small
Diameter AWUR
16096
6000
4425
125:1
½”
1 ½”
HT 9/25
16059
9500
7000
25:1
¾”
1 ½”
HT 9/25 AWUR
16070
9500
7000
25:1
¾”
1 ½”
HT 9/125 AWUR
16071
9500
7000
125:1
½”
1 ½”
HT 11/25
16082
20000
14700
25:1
¾”
2 ½”
HT 11/125 AWUR
16049
20000
14700
125:1
½”
2 ½”
HT 12/87.5 AWUR
18085
34000
25000
87.5:1
¾”
2 ½”
HT 13/125 AWUR
16053
47500
35000
125:1
¾”
2 ½”
Page 15

14
HT4 Series
Model
Part
Number
Maximum Torque Output
Ratio
Input Square
Output Square
N·m
lbf·ft
in
in
HT4/15.5
17022
3000
2200
15.5:1
½”
1”
HT4/26
17021
4500
3300
26:1
½”
1”
Compact Series
Model
Part
Number
Maximum Torque Output
Ratio
Input Square
Output Square
N·m
lbf·ft
in
In
HT-52/4.5
18087
1000
740
4.5:1
½”
¾”
HT-52/4.5
180200
1000
740
4.5:1
½”
¾”
HT-52/22
18051
1000
740
22:1
⅜”
¾”
HT-52/22
180201
1000
740
22:1
⅜”
¾”
HT-52/22
18052
1000
740
22:1
½”
¾”
HT-52/22
180202
1000
740
22:1
½”
¾”
HT-52/22 AWUR
18083
1000
740
22:1
⅜”
¾”
HT-52/22 AWUR
180203
1000
740
22:1
⅜”
¾”
HT-52/22 AWUR
18084
1000
740
22:1
½”
¾”
HT-52/22 AWUR
180204
1000
740
22:1
½”
¾”
HT-52/22 AWUR
18093
1000
740
22:1
⅜”
1”
HT-52/22 AWUR
180205
1000
740
22:1
⅜”
1”
HT-52/22 AWUR
18094
1000
740
22:1
½”
1”
HT-52/22 AWUR
180206
1000
740
22:1
½”
1”
HT-72/5
18014
1000
740
5:1
½”
¾”
HT-72/5
180207
1000
740
5:1
½”
¾”
HT-72/5
18015
1500
1100
5:1
½”
1”
HT-72/5
180208
1500
1100
5:1
½”
1”
HT-72/5
18016
1500
1100
5:1
¾”
¾”
HT-72/5
180209
1500
1100
5:1
¾”
¾”
HT-72/5
18017
2000
1450
5:1
¾”
1”
HT-72/5
180210
2000
1450
5:1
¾”
1”
HT-72/25
18018
1000
740
25:1
½”
¾”
HT-72/27
180211
1000
740
27:1
½”
¾”
HT-72/25
18019
2000
1450
25:1
½”
1”
HT-72/27
180212
2000
1450
27:1
½”
1”
HT-72/25 AWUR
18081
1000
740
25:1
½”
¾”
HT-72/25 AWUR
18082
2000
1450
25:1
½”
1”
HT-72/27 AWUR
180213
2000
1450
27:1
½”
¾”
HT-72/27 AWUR
180214
2000
1450
27:1
½”
1”
HT-92/25 AWUR
18092
4000
2950
25:1
½”
1”
HT-119/25 AWUR
18091
7000
5100
25:1
½”
1 ½”
HT-52 (HandtorqueTM Kit)
18196
1000
740
22:1
½”
¾”
HT-52 (HandtorqueTM Kit)
18197
1000
740
22:1
½”
1”
HT-72 (HandtorqueTM Kit)
18198
2000
1450
27:1
½”
1”
HT-92 (HandtorqueTM Kit)
18199
4000
2950
25:1
½”
1”
NOTE: Some of the ratios in the above table are a rough guide only, for more accurate results
please refer to the multiplication ratio on your Certificate of Calibration provided with your
HandtorqueTM (see page 8).
Page 16

15
TROUBLE SHOOTING
The following is only a guide, for more complex faults please contact your local Norbar agent or Norbar
directly.
Problem
Likely Solutions
Drive square sheared
See maintenance section.
Input drive rotates but output will not
Serious damage to internal gears, return to Norbar or agent for
repair (Check AWUR change lever is not in neutral position).
Input drive will not rotate
Check AWUR change lever is in the correct position.
Page 17

OPERATOR’S MANUAL
HANDTORQUETM MULTIPLIERS
Part Number 34269 | Issue 9 | Original Instructions (English/Deutsch)
NORBAR TORQUE TOOLS LTD
Beaumont Road, Banbury,
Oxfordshire, OX16 1XJ
UNITED KINGDOM
Tel + 44 (0)1295 270333
Email [email protected]
NORBAR TORQUE TOOLS PTY LTD
45–47 Raglan Avenue, Edwardstown,
SA 5039
AUSTRALIA
Tel + 61 (0)8 8292 9777
Email [email protected]
NORBAR TORQUE TOOLS INC
36400 Biltmore Place, Willoughby,
Ohio, 44094
USA
Tel + 1 866 667 2279
Email [email protected]
NORBAR TORQUE TOOLS (NZ) LTD
B3/269A Mt Smart Road
Onehunga, Auckland 1061
NEW ZEALAND
Tel + 64 9579 8653
Email [email protected]
NORBAR TORQUE TOOLS PTE LTD
194 Pandan Loop
#07-20 Pantech Business Hub
SINGAPORE 128383
Tel + 65 6841 1371
Email [email protected]
NORBAR TORQUE TOOLS (SHANGHAI) LTD
E Building–5F, no. 1618 Yishan Road,
Minhang District, Shanghai
CHINA 201103
Tel + 86 21 6145 0368
Email [email protected]
NORBAR TORQUE TOOLS INDIA PVT. LTD
Plot No A-168, Khairne Industrial Area,
Thane Belapur Road, Mahape,
Navi Mumbai – 400 709
INDIA
Tel + 91 22 2778 8480
Email [email protected]
www.norbar.com
© Norbar Torque Tools Ltd 2014
 Loading...