

Page 1
Nokia PC Suite 4.75
User Guide
and
PC/PDA Connectivity Guide for
the Nokia 6340 and 6340i phones
Page 2

The Nokia 6340 phone described in this guide is approved for use in GSM 1900 MHz, TDMA 800/1900 MHz, and AMPS 800 MHz
networks.
The Nokia 6340i phone described in this guide is approved for use in GSM 850/1900 MHz, TDMA 800/1900 MHz, and
AMPS 800 MHz networks.
Legal notices
Part No. 9353631, Issue No. 2
Copyright © 2002 Nokia. All rights reserved.
Nokia, Nokia 6340, Nokia 6340i, Nokia Connecting People, and Nokia Original accessories logos are trademarks or registered
trademarks of Nokia Corporation. Electronic document created in United States January 6, 2004.
Reproduction, transfer, distribution, or storage of part or all of the contents in this document in any form without the prior written
permission of Nokia is prohibited.
Nokia operates a policy of on-going development. Nokia reserves the right to make changes and improvements to any of the
products described in this document without prior notice.
Under no circumstances shall Nokia be responsible for any loss of data or income or any special, incidental, consequential, or
indirect damages howsoever caused.
THE CONTENTS OF THIS DOCUMENT ARE PROVIDED “AS IS.” EXCEPT AS REQUIRED BY APPLICABLE LAW, NO WARRANTIES OF ANY
KIND, EITHER EXPRESS OR IMPLIED, INCLUDING, BUT NOT LIMITED TO, THE IMPLIED WARRANTIES OF MERCHANTABILITY AND
FITNESS FOR A PARTICULAR PURPOSE, ARE MADE IN RELATION TO THE ACCURACY, RELIABILITY OR CONTENTS OF THIS DOCUMENT.
NOKIA RESERVES THE RIGHT TO REVISE THIS DOCUMENT OR WITHDRAW IT AT ANY TIME WITHOUT PRIOR NOTICE.
Trademarks
Product names and/or brands mentioned herein are trademarks or registered trademarks of their respective holders.
Export Controls
This product contains commodities, technology or software exported from the United States in accordance with the Export
Administration regulations. Diversion contrary to U.S. law is prohibited.
FCC/Industry Canada Notice
Your phone may cause TV or radio interference (for example, when using a telephone in close proximity to receiving equipment).
The FCC or Industry Canada can require you to stop using your telephone if such interference cannot be eliminated. If you require
assistance, contact your local service facility. This device complies with part 15 of the FCC rules. Operation is subject to the
condition that this device does not cause harmful interference.
Page 3

Table of Contents
1 Introduction. . . . . . . . . . . . . . . . . . . . . . . . . . . . . . . . . . . . . . . . . . . . . . . . . . . . . . . . . . . . . . . . . . . . . . . . . . . . . . . . . 1
Observe system requirements . . . . . . . . . . . . . . . . . . . . . . . . . . . . . . . . . . . . . . . . . . . . . . . . . . . . . . . . . . . . . . . . . . . . . . . . . . . . . . . . . .1
Learn about compatible applications . . . . . . . . . . . . . . . . . . . . . . . . . . . . . . . . . . . . . . . . . . . . . . . . . . . . . . . . . . . . . . . . . . . . . . . . . . . .1
Observe requirements for digital data calls . . . . . . . . . . . . . . . . . . . . . . . . . . . . . . . . . . . . . . . . . . . . . . . . . . . . . . . . . . . . . . . . . . . . . . .1
Printing this guide . . . . . . . . . . . . . . . . . . . . . . . . . . . . . . . . . . . . . . . . . . . . . . . . . . . . . . . . . . . . . . . . . . . . . . . . . . . . . . . . . . . . . . . . . . .1
Understand abbreviations . . . . . . . . . . . . . . . . . . . . . . . . . . . . . . . . . . . . . . . . . . . . . . . . . . . . . . . . . . . . . . . . . . . . . . . . . . . . . . . . . . . . .2
Observe safety notes . . . . . . . . . . . . . . . . . . . . . . . . . . . . . . . . . . . . . . . . . . . . . . . . . . . . . . . . . . . . . . . . . . . . . . . . . . . . . . . . . . . . . . . . .2
Learn about infrared communications . . . . . . . . . . . . . . . . . . . . . . . . . . . . . . . . . . . . . . . . . . . . . . . . . . . . . . . . . . . . . . . . . . . . . . . . . . .2
2 Install Nokia PC Suite 4.75. . . . . . . . . . . . . . . . . . . . . . . . . . . . . . . . . . . . . . . . . . . . . . . . . . . . . . . . . . . . . . . . . . . . . 3
Important note about IR for Windows Me and XP operating system users. . . . . . . . . . . . . . . . . . . . . . . . . . . . . . . . . . . . . . . . . . . . . .3
Installing PC Suite . . . . . . . . . . . . . . . . . . . . . . . . . . . . . . . . . . . . . . . . . . . . . . . . . . . . . . . . . . . . . . . . . . . . . . . . . . . . . . . . . . . . . . . . . . .3
Remove PC Suite. . . . . . . . . . . . . . . . . . . . . . . . . . . . . . . . . . . . . . . . . . . . . . . . . . . . . . . . . . . . . . . . . . . . . . . . . . . . . . . . . . . . . . . . . . . . .4
3 Nokia Connection Manager . . . . . . . . . . . . . . . . . . . . . . . . . . . . . . . . . . . . . . . . . . . . . . . . . . . . . . . . . . . . . . . . . . . . 5
Learn about Nokia Connection Manager . . . . . . . . . . . . . . . . . . . . . . . . . . . . . . . . . . . . . . . . . . . . . . . . . . . . . . . . . . . . . . . . . . . . . . . . .5
Update your installation . . . . . . . . . . . . . . . . . . . . . . . . . . . . . . . . . . . . . . . . . . . . . . . . . . . . . . . . . . . . . . . . . . . . . . . . . . . . . . . . . . . . . .5
4 Nokia Content Copier . . . . . . . . . . . . . . . . . . . . . . . . . . . . . . . . . . . . . . . . . . . . . . . . . . . . . . . . . . . . . . . . . . . . . . . . . 6
Learn about compatible phones . . . . . . . . . . . . . . . . . . . . . . . . . . . . . . . . . . . . . . . . . . . . . . . . . . . . . . . . . . . . . . . . . . . . . . . . . . . . . . . .6
Understand Content Copier basics . . . . . . . . . . . . . . . . . . . . . . . . . . . . . . . . . . . . . . . . . . . . . . . . . . . . . . . . . . . . . . . . . . . . . . . . . . . . . .6
Learn about other phones . . . . . . . . . . . . . . . . . . . . . . . . . . . . . . . . . . . . . . . . . . . . . . . . . . . . . . . . . . . . . . . . . . . . . . . . . . . . . . . . . . . . .8
5 Nokia PC Composer. . . . . . . . . . . . . . . . . . . . . . . . . . . . . . . . . . . . . . . . . . . . . . . . . . . . . . . . . . . . . . . . . . . . . . . . . . . 9
Tour PC Composer. . . . . . . . . . . . . . . . . . . . . . . . . . . . . . . . . . . . . . . . . . . . . . . . . . . . . . . . . . . . . . . . . . . . . . . . . . . . . . . . . . . . . . . . . . . .9
Learn about other views. . . . . . . . . . . . . . . . . . . . . . . . . . . . . . . . . . . . . . . . . . . . . . . . . . . . . . . . . . . . . . . . . . . . . . . . . . . . . . . . . . . . . .10
Compose a new ringing tone. . . . . . . . . . . . . . . . . . . . . . . . . . . . . . . . . . . . . . . . . . . . . . . . . . . . . . . . . . . . . . . . . . . . . . . . . . . . . . . . . .10
Save your new ringing tone. . . . . . . . . . . . . . . . . . . . . . . . . . . . . . . . . . . . . . . . . . . . . . . . . . . . . . . . . . . . . . . . . . . . . . . . . . . . . . . . . . . 11
Transfer a ringing tone to your phone . . . . . . . . . . . . . . . . . . . . . . . . . . . . . . . . . . . . . . . . . . . . . . . . . . . . . . . . . . . . . . . . . . . . . . . . . .11
Send a ringing tone to another phone . . . . . . . . . . . . . . . . . . . . . . . . . . . . . . . . . . . . . . . . . . . . . . . . . . . . . . . . . . . . . . . . . . . . . . . . . .12
Create ringing tones from MIDI files . . . . . . . . . . . . . . . . . . . . . . . . . . . . . . . . . . . . . . . . . . . . . . . . . . . . . . . . . . . . . . . . . . . . . . . . . . .12
Work with RTTTL ringing tone files . . . . . . . . . . . . . . . . . . . . . . . . . . . . . . . . . . . . . . . . . . . . . . . . . . . . . . . . . . . . . . . . . . . . . . . . . . . . .13
6 Nokia PC Sync . . . . . . . . . . . . . . . . . . . . . . . . . . . . . . . . . . . . . . . . . . . . . . . . . . . . . . . . . . . . . . . . . . . . . . . . . . . . . . 14
Configure PC Sync . . . . . . . . . . . . . . . . . . . . . . . . . . . . . . . . . . . . . . . . . . . . . . . . . . . . . . . . . . . . . . . . . . . . . . . . . . . . . . . . . . . . . . . . . .14
Understand the basics of synchronization . . . . . . . . . . . . . . . . . . . . . . . . . . . . . . . . . . . . . . . . . . . . . . . . . . . . . . . . . . . . . . . . . . . . . . .15
Initiate synchronization . . . . . . . . . . . . . . . . . . . . . . . . . . . . . . . . . . . . . . . . . . . . . . . . . . . . . . . . . . . . . . . . . . . . . . . . . . . . . . . . . . . . .16
Use the New Synchronization command . . . . . . . . . . . . . . . . . . . . . . . . . . . . . . . . . . . . . . . . . . . . . . . . . . . . . . . . . . . . . . . . . . . . . . . .16
Create a custom contact list . . . . . . . . . . . . . . . . . . . . . . . . . . . . . . . . . . . . . . . . . . . . . . . . . . . . . . . . . . . . . . . . . . . . . . . . . . . . . . . . . .16
7 Nokia PC Graphics. . . . . . . . . . . . . . . . . . . . . . . . . . . . . . . . . . . . . . . . . . . . . . . . . . . . . . . . . . . . . . . . . . . . . . . . . . . 19
Tour PC Graphics. . . . . . . . . . . . . . . . . . . . . . . . . . . . . . . . . . . . . . . . . . . . . . . . . . . . . . . . . . . . . . . . . . . . . . . . . . . . . . . . . . . . . . . . . . . .19
Create a new graphic . . . . . . . . . . . . . . . . . . . . . . . . . . . . . . . . . . . . . . . . . . . . . . . . . . . . . . . . . . . . . . . . . . . . . . . . . . . . . . . . . . . . . . . .19
Transfer a graphic to your phone . . . . . . . . . . . . . . . . . . . . . . . . . . . . . . . . . . . . . . . . . . . . . . . . . . . . . . . . . . . . . . . . . . . . . . . . . . . . . .20
Send graphic to another phone as a text message . . . . . . . . . . . . . . . . . . . . . . . . . . . . . . . . . . . . . . . . . . . . . . . . . . . . . . . . . . . . . . . .20
Work with an existing graphic . . . . . . . . . . . . . . . . . . . . . . . . . . . . . . . . . . . . . . . . . . . . . . . . . . . . . . . . . . . . . . . . . . . . . . . . . . . . . . . .21
Open other bitmap files . . . . . . . . . . . . . . . . . . . . . . . . . . . . . . . . . . . . . . . . . . . . . . . . . . . . . . . . . . . . . . . . . . . . . . . . . . . . . . . . . . . . . .21
8 Nokia Phone Editor . . . . . . . . . . . . . . . . . . . . . . . . . . . . . . . . . . . . . . . . . . . . . . . . . . . . . . . . . . . . . . . . . . . . . . . . . . 23
[ i ]
Page 4

Before you begin. . . . . . . . . . . . . . . . . . . . . . . . . . . . . . . . . . . . . . . . . . . . . . . . . . . . . . . . . . . . . . . . . . . . . . . . . . . . . . . . . . . . . . . . . . . .23
Phone memory and PC storage locations . . . . . . . . . . . . . . . . . . . . . . . . . . . . . . . . . . . . . . . . . . . . . . . . . . . . . . . . . . . . . . . . . . . . . . . .23
Tour Nokia Phone Editor and Contacts window. . . . . . . . . . . . . . . . . . . . . . . . . . . . . . . . . . . . . . . . . . . . . . . . . . . . . . . . . . . . . . . . . . .23
Manage contacts using Phone Editor . . . . . . . . . . . . . . . . . . . . . . . . . . . . . . . . . . . . . . . . . . . . . . . . . . . . . . . . . . . . . . . . . . . . . . . . . . .24
Tour the Messages window . . . . . . . . . . . . . . . . . . . . . . . . . . . . . . . . . . . . . . . . . . . . . . . . . . . . . . . . . . . . . . . . . . . . . . . . . . . . . . . . . . .25
Send and manage SMS Messages. . . . . . . . . . . . . . . . . . . . . . . . . . . . . . . . . . . . . . . . . . . . . . . . . . . . . . . . . . . . . . . . . . . . . . . . . . . . . .26
Edit Profiles and Caller groups . . . . . . . . . . . . . . . . . . . . . . . . . . . . . . . . . . . . . . . . . . . . . . . . . . . . . . . . . . . . . . . . . . . . . . . . . . . . . . . .27
Edit Settings . . . . . . . . . . . . . . . . . . . . . . . . . . . . . . . . . . . . . . . . . . . . . . . . . . . . . . . . . . . . . . . . . . . . . . . . . . . . . . . . . . . . . . . . . . . . . . .28
Launch other PC suite applications. . . . . . . . . . . . . . . . . . . . . . . . . . . . . . . . . . . . . . . . . . . . . . . . . . . . . . . . . . . . . . . . . . . . . . . . . . . . .28
9 Wireless modem setup . . . . . . . . . . . . . . . . . . . . . . . . . . . . . . . . . . . . . . . . . . . . . . . . . . . . . . . . . . . . . . . . . . . . . . . 29
Download modem software. . . . . . . . . . . . . . . . . . . . . . . . . . . . . . . . . . . . . . . . . . . . . . . . . . . . . . . . . . . . . . . . . . . . . . . . . . . . . . . . . . .29
Getting connected for the first time: DLR-3P data cable (all Windows versions). . . . . . . . . . . . . . . . . . . . . . . . . . . . . . . . . . . . . . . .29
Connect for the first time: IR (Windows 98/Me) . . . . . . . . . . . . . . . . . . . . . . . . . . . . . . . . . . . . . . . . . . . . . . . . . . . . . . . . . . . . . . . . . .30
Learn about IR and Windows 2000 Professional operating system . . . . . . . . . . . . . . . . . . . . . . . . . . . . . . . . . . . . . . . . . . . . . . . . . . .31
Getting connected for the first time: IR (Windows XP Home and Professional operating system). . . . . . . . . . . . . . . . . . . . . . . . . .31
Learn about IR and Windows NT Workstation 4.0 operating system. . . . . . . . . . . . . . . . . . . . . . . . . . . . . . . . . . . . . . . . . . . . . . . . . .32
10 Configure your data and fax software . . . . . . . . . . . . . . . . . . . . . . . . . . . . . . . . . . . . . . . . . . . . . . . . . . . . . . . . . . 33
Observe the following . . . . . . . . . . . . . . . . . . . . . . . . . . . . . . . . . . . . . . . . . . . . . . . . . . . . . . . . . . . . . . . . . . . . . . . . . . . . . . . . . . . . . . .33
Configure your data software . . . . . . . . . . . . . . . . . . . . . . . . . . . . . . . . . . . . . . . . . . . . . . . . . . . . . . . . . . . . . . . . . . . . . . . . . . . . . . . . .33
Use Microsoft Dial-up Networking . . . . . . . . . . . . . . . . . . . . . . . . . . . . . . . . . . . . . . . . . . . . . . . . . . . . . . . . . . . . . . . . . . . . . . . . . . . . .33
Learn about other data applications. . . . . . . . . . . . . . . . . . . . . . . . . . . . . . . . . . . . . . . . . . . . . . . . . . . . . . . . . . . . . . . . . . . . . . . . . . . .35
For America Online (AOL) users. . . . . . . . . . . . . . . . . . . . . . . . . . . . . . . . . . . . . . . . . . . . . . . . . . . . . . . . . . . . . . . . . . . . . . . . . . . . . . . .35
Configure your fax software . . . . . . . . . . . . . . . . . . . . . . . . . . . . . . . . . . . . . . . . . . . . . . . . . . . . . . . . . . . . . . . . . . . . . . . . . . . . . . . . . .36
11 Connect to PalmOS devices . . . . . . . . . . . . . . . . . . . . . . . . . . . . . . . . . . . . . . . . . . . . . . . . . . . . . . . . . . . . . . . . . . . 37
Learn about your phone as a wireless modem . . . . . . . . . . . . . . . . . . . . . . . . . . . . . . . . . . . . . . . . . . . . . . . . . . . . . . . . . . . . . . . . . . . .37
Learn about connection options . . . . . . . . . . . . . . . . . . . . . . . . . . . . . . . . . . . . . . . . . . . . . . . . . . . . . . . . . . . . . . . . . . . . . . . . . . . . . . .37
Modify connections preferences . . . . . . . . . . . . . . . . . . . . . . . . . . . . . . . . . . . . . . . . . . . . . . . . . . . . . . . . . . . . . . . . . . . . . . . . . . . . . . .38
Make a dial-up connection . . . . . . . . . . . . . . . . . . . . . . . . . . . . . . . . . . . . . . . . . . . . . . . . . . . . . . . . . . . . . . . . . . . . . . . . . . . . . . . . . . .38
12 Connect to Microsoft PocketPC OS devices . . . . . . . . . . . . . . . . . . . . . . . . . . . . . . . . . . . . . . . . . . . . . . . . . . . . . . 39
Learn about your phone as a wireless modem . . . . . . . . . . . . . . . . . . . . . . . . . . . . . . . . . . . . . . . . . . . . . . . . . . . . . . . . . . . . . . . . . . . .39
Learn about connection options . . . . . . . . . . . . . . . . . . . . . . . . . . . . . . . . . . . . . . . . . . . . . . . . . . . . . . . . . . . . . . . . . . . . . . . . . . . . . . .39
Configure a modem connection . . . . . . . . . . . . . . . . . . . . . . . . . . . . . . . . . . . . . . . . . . . . . . . . . . . . . . . . . . . . . . . . . . . . . . . . . . . . . . .40
13 Connecting to the Macintosh . . . . . . . . . . . . . . . . . . . . . . . . . . . . . . . . . . . . . . . . . . . . . . . . . . . . . . . . . . . . . . . . . 42
Learn about special hardware needs. . . . . . . . . . . . . . . . . . . . . . . . . . . . . . . . . . . . . . . . . . . . . . . . . . . . . . . . . . . . . . . . . . . . . . . . . . . .42
Configuring the Macintosh OS . . . . . . . . . . . . . . . . . . . . . . . . . . . . . . . . . . . . . . . . . . . . . . . . . . . . . . . . . . . . . . . . . . . . . . . . . . . . . . . .42
Learn about other applications . . . . . . . . . . . . . . . . . . . . . . . . . . . . . . . . . . . . . . . . . . . . . . . . . . . . . . . . . . . . . . . . . . . . . . . . . . . . . . . .44
14 Index . . . . . . . . . . . . . . . . . . . . . . . . . . . . . . . . . . . . . . . . . . . . . . . . . . . . . . . . . . . . . . . . . . . . . . . . . . . . . . . . . . . . . 45
[ ii ]
Page 5

Introduction
1 Introduction
This guide provides you with the following information:
• installation instructions for Nokia PC Suite 4.75
• instructions for using Nokia PC Suite 4.75
• instructions for using your phone as a wireless modem
• OBSERVE SYSTEM REQUIREMENTS
To install and run Nokia PC Suite 4.75, you need:
• Nokia 6340 or 6340i phone
• an Intel-compatible PC running Windows 98 (First or Second Edition), Windows Millennium Edition (ME), Windows 2000
Professional, Windows XP (Home or Professional), or Windows NT Workstation 4.0 (SP 5 or greater) operating systems (cable
only)
• at least 50 MB of free disk space
• an infrared port on your desktop PC or laptop computer and/or the optional DLR-3P data cable
• a compatible PC Personal Information Manager (PIM) application for use with Nokia PC Sync
Note: Nokia Content Copier (a component of Nokia PC Suite) supports a variety of Nokia phones, some of which make their
connection to a PC using a serial cable. For a list of compatible phones and connection methods, please see “Learn about
compatible phones” on page 6.
• LEARN ABOUT COMPATIBLE APPLICATIONS
1
Nokia PC Sync is compatible with the following Personal Information Manager (PIM) applications:
Manufacturer Application name/version
Microsoft Schedule+ 7.0, 7.5
Outlook 97, 98, 2000, 2002
Outlook Express (Windows Address Book)
IBM Lotus Notes 4.5, 4.6, 5.0
Lotus Organizer 97, GS, 5.0, 6.0
• OBSERVE REQUIREMENTS FOR DIGITAL DATA CALLS
Before you can make digital data calls using your Nokia phone as a wireless modem:
• You must subscribe to digital data services with your service provider.
• Your phone must be powered up, and digital service must be available. Digital data calls are not available when outside of the
digital network.
• Your phone must be connected to your PC or handheld device using an infrared or the DLR-3P data cable.
• Your data software must be running and must be configured to recognize your Nokia phone as the active modem (please see
“Wireless modem setup” on page 29).
Note: This feature is available only if your service provider’s network supports digital data and fax calls. Please check with
your service provider for the capabilities of their services.
• PRINTING THIS GUIDE
You may find it helpful to print this guide for future reference. No other applications should be running during installation of PC
Suite and the modem setup. Therefore, reading this guide using Adobe Acrobat reader during installation is not recommended.
Printing a copy of this guide provides you access to the instructions during the installation process.
[ 1 ]
Page 6

Introduction
• UNDERSTAND ABBREVIATIONS
For the purposes of this user guide, the following abbreviations are used:
Abbreviation Description
PC Refers to both desktop and laptop computers
IR Infrared
PIM Personal Information Manager (PC-based software program)
CSD Circuit Switched Data
• OBSERVE SAFETY NOTES
• Please refer to the user guide of the product for instructions on operation, care and maintenance, including important safety
information.
• Do not switch on your phone when wireless phone use is prohibited, or when it may cause interference or danger.
• Please make backup copies of all important data to protect against possible loss or alteration.
• To avoid any potential loss of data, you should not make or receive calls while synchronizing data between the phone and a PC.
• Do not point the IR beam at anyone’s eyes or allow it to interfere with other IR devices.
• To disconnect the cable from the phone, hold the connector and remove the cable.
• LEARN ABOUT INFRARED COMMUNICATIONS
1
Infrared (IR) is one of two available options for connecting your phone and PC. If you choose IR for your connection, please note
that the preferable distance between two devices in an IR connection is a range of three inches to three feet maximum. There must
be no obstructions between the two devices and the IR ports of the two devices have to be pointing at each other.
Your Nokia phone is a Class 1 Laser Product.
Enable IR communications
Windows Millennium Edition (ME), Windows 2000, and Windows XP (Home or Professional) users do not need to enable IR
communications on their PC prior to using this feature. The IR port is always active.
If you use Windows 98, you can use the IR control panel to activate or deactivate IR communications. For more information on
enabling IR communications on your phone, please refer to the IR section in your phone’s user guide.
Interruptions to IR communications
Your Windows operating system provides visual and audible
notification when it senses an interruption to IR communications
between your phone and PC. Windows allows you to re-establish IR
communications between the two devices so it can resend the data that
was being transferred when the interruption occurred.
LEARN ABOUT IR TIME-OUT
If the IR connection between your phone and PC has not been re-established within 15 seconds, a time-out occurs, meaning
Windows no longer searches for your phone and terminates the IR connection.
[ 2 ]
Page 7
Install Nokia PC Suite 4.75
2 Install Nokia PC Suite 4.75
Nokia PC Suite 4.75 is a collection of powerful tools that you can use to manage phone features and data. PC Suite consists of the
following components:
• Nokia Content Copier allows you to copy data between two Nokia phones, to back up phone data to your PC (then restore the
data back to your phone), and erase data from your phone.
• Nokia Connection Manager allows you to monitor the serial connection between your phone and PC and switch to a different
type of connection (cable, IR) when copying data from one phone to another.
• Nokia PC Composer allows you to create new ringing tones for your phone.
• Nokia PC Sync allows you to synchronize contacts, calendar, and to-do list items between your phone and PIM applications
such as Microsoft Outlook and Lotus Organizer.
• Nokia PC Graphics allows you to create new caller group logos and picture messages or allows you to edit pictures (or picture
messages) already in your phone.
• Nokia Phone Editor allows you to edit your phone book and settings from your PC.
• IMPORTANT NOTE ABOUT IR FOR WINDOWS ME AND XP OPERATING SYSTEM USERS
Your phone also functions as a wireless modem and is designed to be detected by Windows Plug and Play. During the PC Suite
installation process, you are asked to choose how you want to connect your phone and PC-either using IR or the DLR-3P data cable.
If you select IR, you are prompted to enable IR communications on your phone, then align the IR ports of the 2 devices.
2
Plug and Play detection
Because IR is always active on PCs running ME or XP (including automatic software installation for Plug and Play devices), the
Windows Add New Hardware Wizard detects your phone as a new hardware device during the PC Suite installation. This interferes
with the PC Suite software installation process.
Before installing PC Suite
Nokia recommends that Windows ME and XP operating system users perform the modem installation prior to installing PC Suite.
Please see
the modem installation, you may continue with the installation instructions below.
“Wireless modem setup” on page 29, and perform this task prior to installing Nokia PC Suite. Once you have performed
• INSTALLING PC SUITE
Please download the setup application to a location on your hard drive. If you downloaded the application in segments, please
double-click the .exe file, and follow the instructions to extract the installer application from the segments.
Important: If you use Windows 98 (First or Second Edition) and plan on using IR to connect to your PC, please enable IR
communications on your PC now.
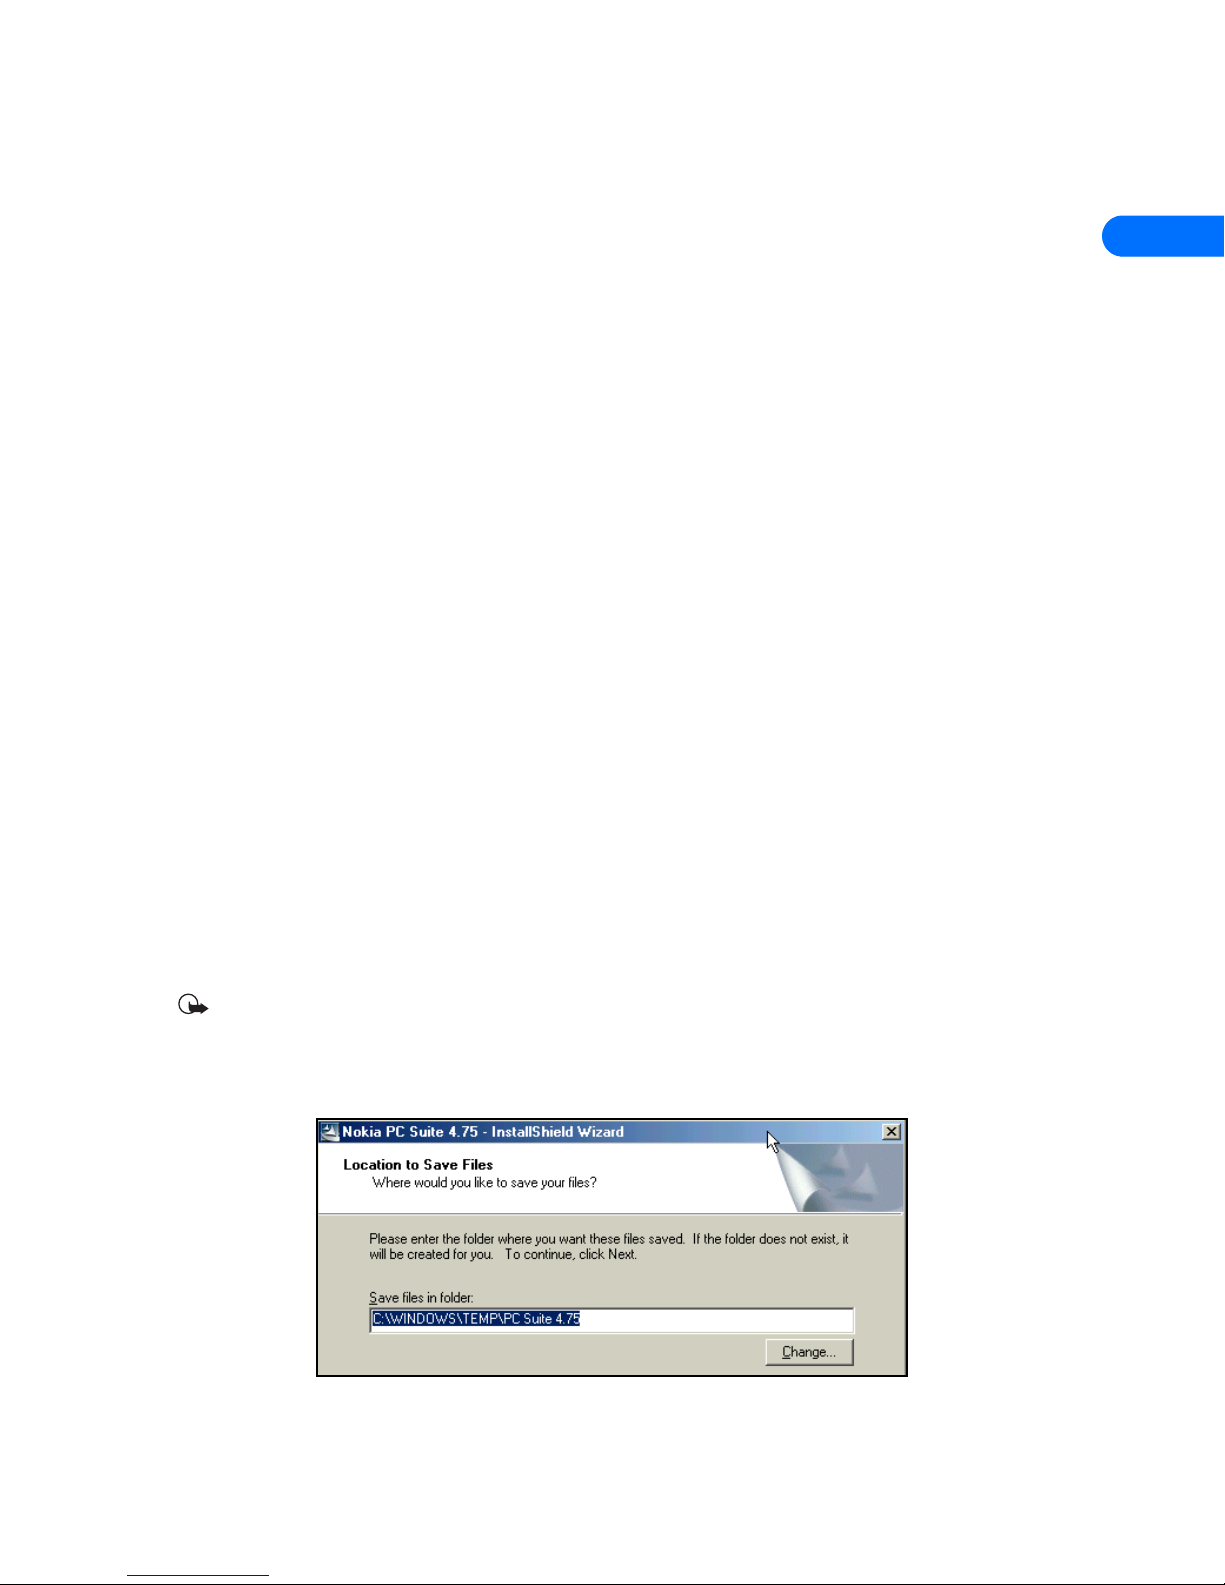
Once the software download is complete and/or the segments have been rejoined:
1 Double-click the installation file Nokia PC Suite 4.75.exe that you downloaded to your hard drive.
2 Click Next to accept the location of the temporary installation files, or click Change to select a different location.
3 Click Next to begin the software installation.
4 Read the end-user license agreement, then click Yes to accept its terms.
[ 3 ]
Page 8

Install Nokia PC Suite 4.75
5 Review the safety notes, then click Next.
6 Click Next to install all PC Suite components (or clear the check boxes of the components you do not want to install).
7 Select the language you wish to use with PC Suite, then click Next.
Note: If you have a PIM application installed on your PC (Outlook, Lotus Organizer, etc.) and you want to use it with Nokia
PC Sync, it is recommended that you select the same language used by your PIM.
Select your connection method
During the installation process, you are asked to select how you
plan on making a connection to your PC (either IR or the DLR-3P
data cable).
You can only use one method at a time. However, you may want to
select both options during installation if you want both connection
options available at a later time.
1 Select the type of connection you want, then click Next.
2 Follow the instructions provided on either the Infrared
connection or Cable connection screen, then click Next.
3 Continue through the installation wizard, then click Finish to
restart your PC.
Change language
The language chosen during installation for PC Suite applies to all of the PC Suite components and Help applications. If you need
to change PC Suite to a different language, you must reinstall PC Suite.
2
• REMOVE PC SUITE
If you need to remove PC Suite (including all components), please use Add/Remove Programs (located in Control Panel). Remember
to close any PC Suite applications that are running before you begin.
TO REMOVE PC SUITE 4.75:
1 Click Start, point to Settings, then click Control Panel.
2 Double-click Add/Remove Programs.
3 Scroll through the list of installed applications, then click Nokia PC Suite 4.75.
4 Click the Add/Remove (Windows 98/ME) or Change/Remove (Windows 2000/XP).
5 Click Remove from the Nokia PC Suite Setup window, then click Next.
6 Follow the on-screen instructions until the setup wizard has completed removing the program.
7 Restart your computer to complete the removal process.
[ 4 ]
Page 9
Nokia Connection Manager
3 Nokia Connection Manager
• LEARN ABOUT NOKIA CONNECTION MANAGER
Nokia Connection Manager is a utility that allows you to select or change the type of connection between your phone and PC. You
may need to use Connection Manager when (for example):
• you need to select an IR connection because your DLR-3P data cable is not readily available
• the compatible phone containing the data you want to copy with Content Copier supports a cable or Bluetooth connection
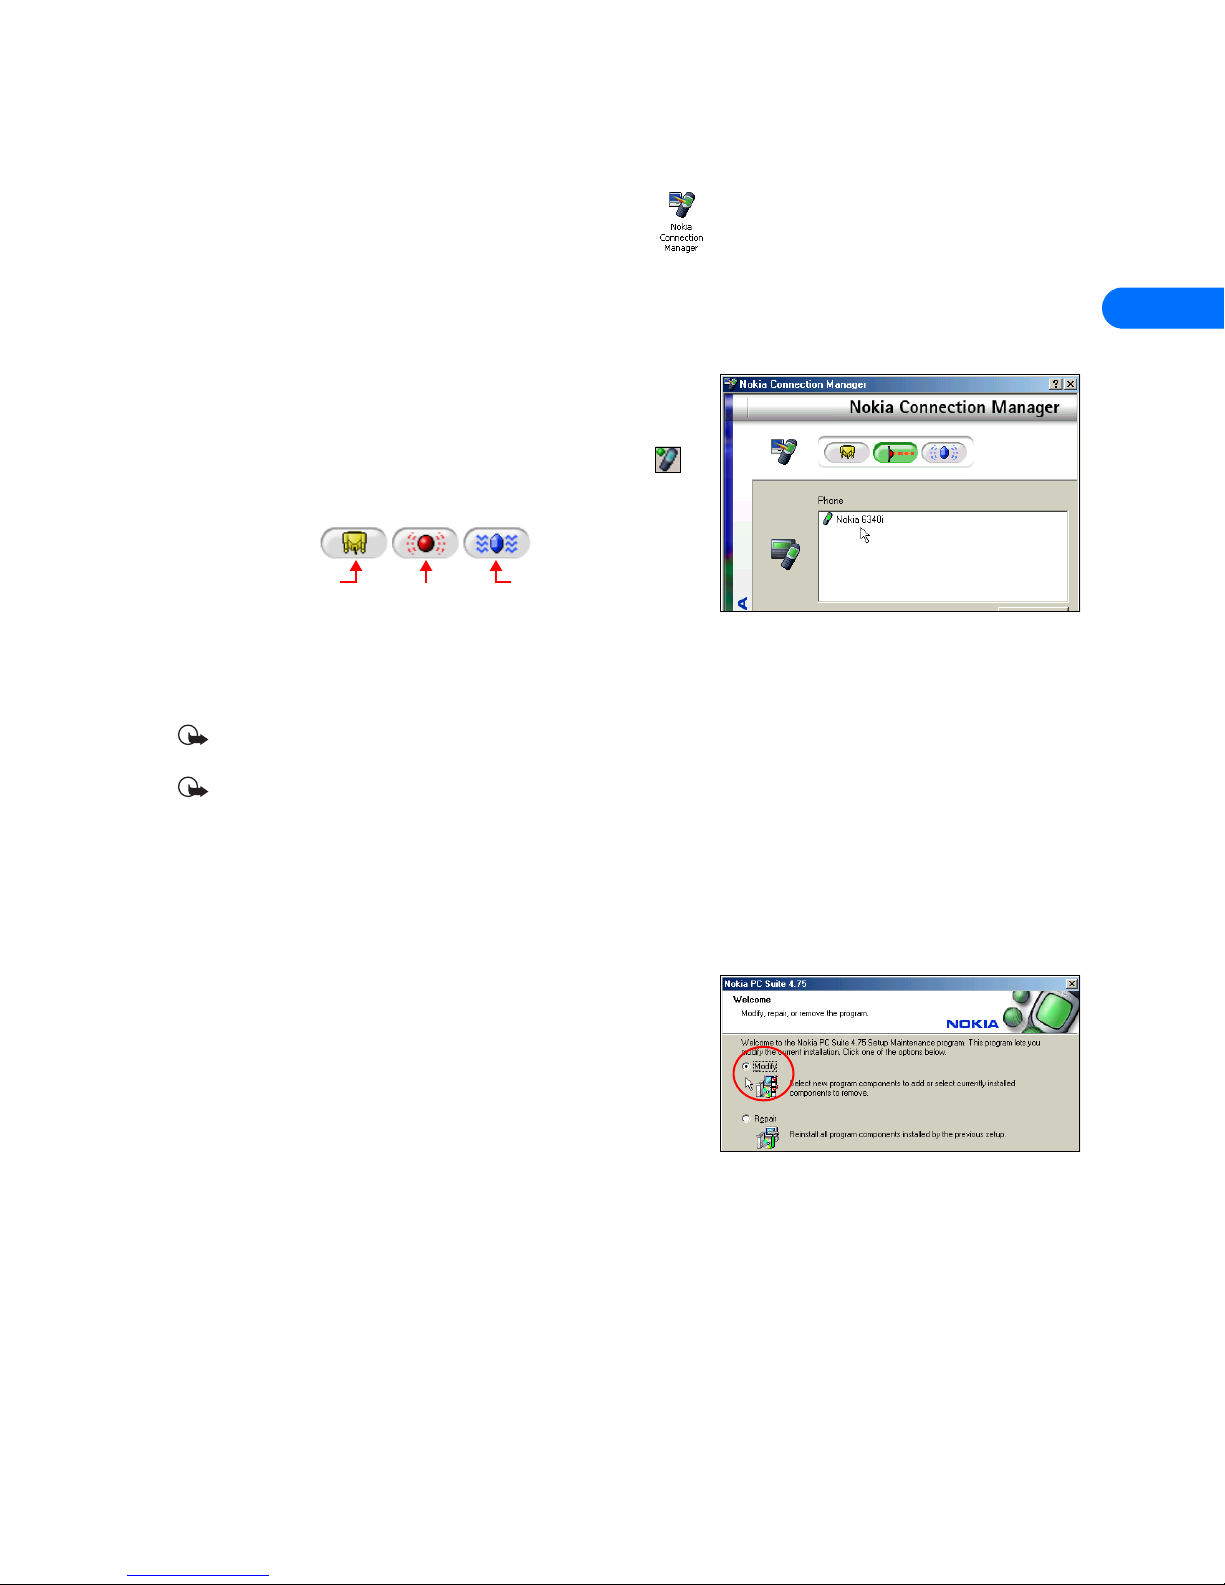
Select the connection type
You can have multiple connection types selected simultaneously.
1 Establish the appropriate connection between your phone and PC (using
IR or cable), then double-click the Connection Manager tray icon (or
select the Connection menu option from any PC Suite application).
2 Click the button that corresponds to the desired connection type:
3
Serial cable
Selected/enabled buttons are indicated by their green color.
3 Allow Nokia Connection Manager to detect your phone, then click OK to return to Nokia PC Suite or the desktop.
If your phone is not detected within 10 seconds, switch the connection type off, then on again. This action forces Connection
Manager to redetect your phone.
Important: An error message may be displayed when selecting IR if IR communications is not enabled (or not installed) on
your PC. Please make sure IR communications is enabled on your PC prior to selecting IR in Connection Manager.
Important: Even though your Nokia 6340/6340i does not support Bluetooth, Nokia PC Suite includes Bluetooth services
for compatibility with other Nokia phones.
Infrared
Bluetooth
Disable detection for wireless modem use
When you close one of the PC Suite applications, Connection Manager may not always release the COM port assigned to your cable
or IR connection. Before Dial-up Networking or other data/fax software can communicate with your phone using the DLR-3P data
cable or IR, you may need to launch Connection Manager and click the cable and/or IR buttons. This disables detection of your
phone and releases the COM ports for use by other Windows applications.
• UPDATE YOUR INSTALLATION
If you are currently using IR as your serial connection but decide to purchase
and use the DLR-3P data cable, you need to modify the program installation.
Nokia Connection Manager may not be able to recognize your phone unless
the cable support software is also installed. To add cable support:
1 Connect your phone to your PC using the DLR-3P data cable.
2 From the Windows Control Panel, double-click Add/Remove Programs.
3 Click Nokia PC Suite 4.75 in the list of installed programs, then select Add/Remove (Windows 98/ME) or Change/Remove
(Windows 2000/XP).
4 Select the Modify option from the PC Suite installation wizard, then click Next.
5 Proceed through the wizard until the Connection Method Selection screen appears.
6 Click the Cable connection option, then click Next.
7 Continue the cable installation process by clicking Next.
The installation wizard tries to detect the COM port where your phone is connected.
8 Click Finish to complete the setup.
9 Restart your computer.
[ 5 ]
Page 10
Nokia Content Copier
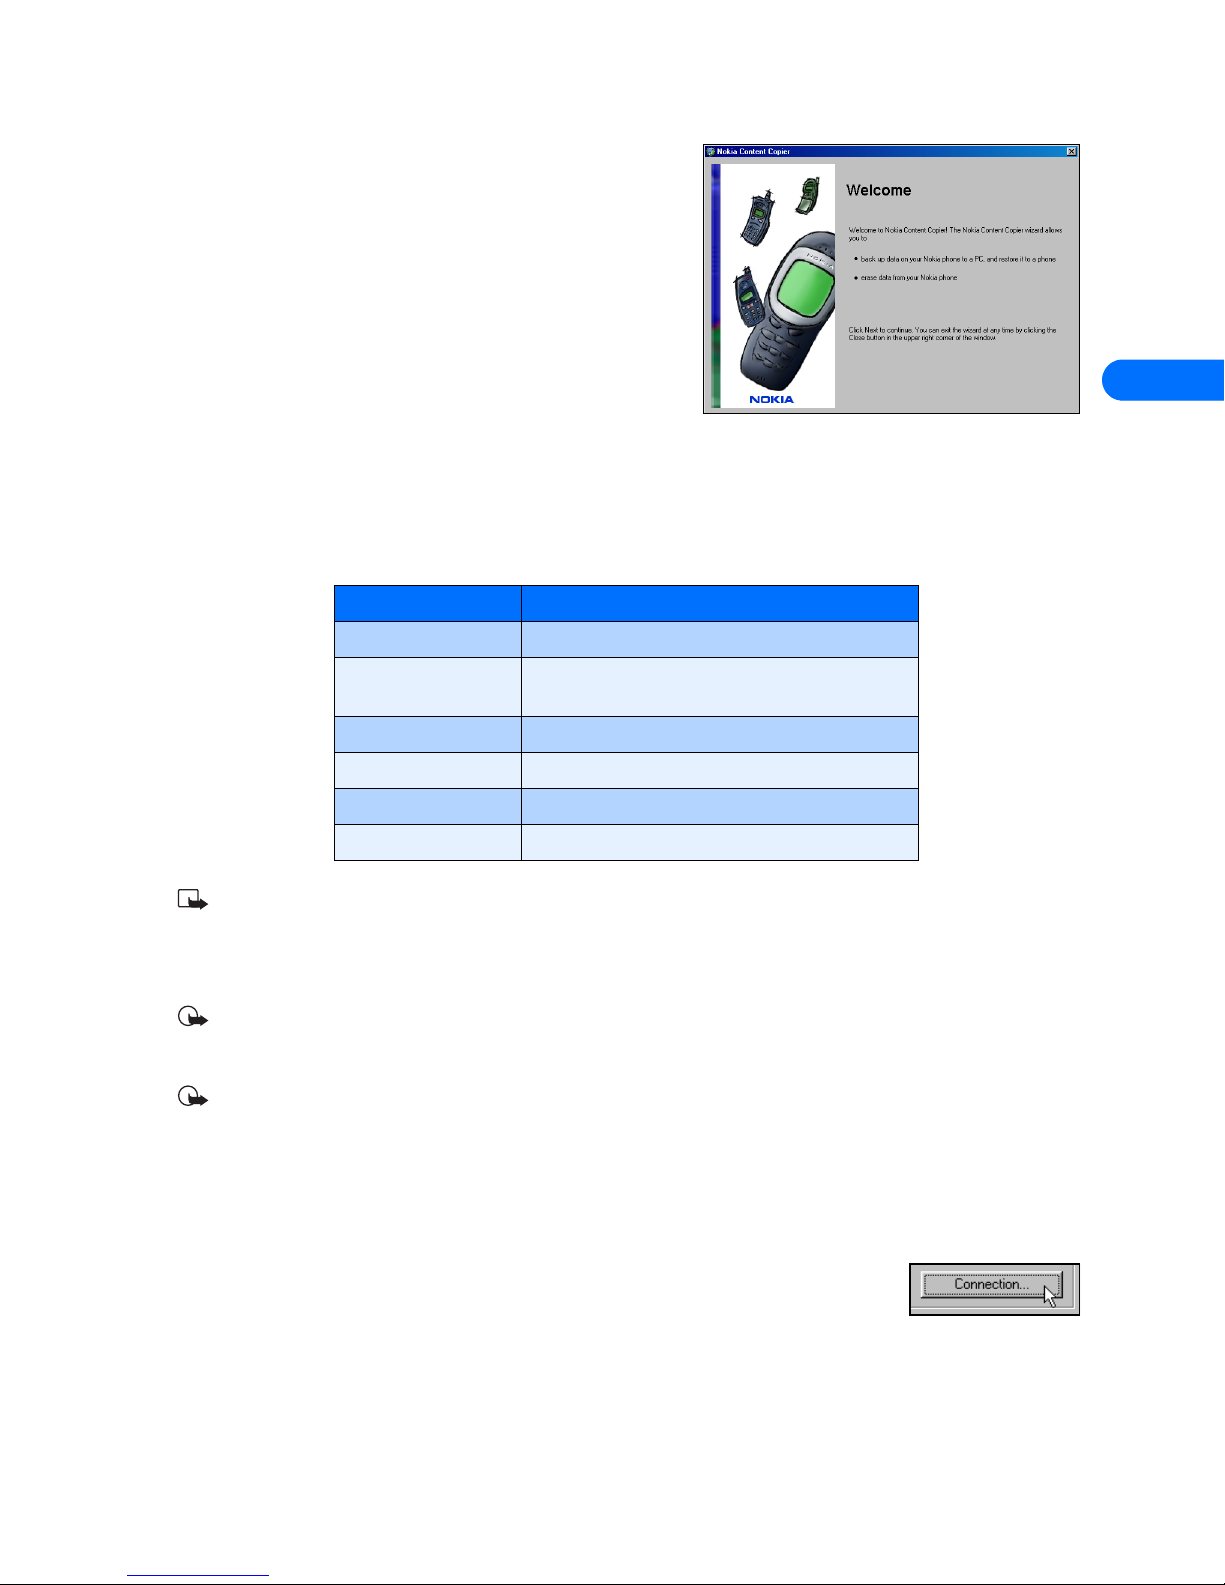
4 Nokia Content Copier
Nokia Content Copier is a powerful application that allows you to perform
the following tasks:
• Copy data from a compatible phone to your Nokia 6340 or 6340i
phone (or between two Nokia 6340/6340i phones).
• Back up phone data to your PC, then restore the data back to your
phone.
• Erase data from your phone.
• LEARN ABOUT COMPATIBLE PHONES
One of the most powerful features of this application is that it supports other compatible Nokia phones. This capability is especially
useful if you are upgrading to a new handset and want to transfer data from your old phone to your new one. You can also use
this application to transfer information between other 6340 or 6340i phones in your family.
The following table shows a list of phones compatible with Nokia Content Copier (other than your Nokia 6340 or 6340i phone), as
well as the method of connection to the PC:
Nokia model: Method of connection:
3320/3360 IR (infrared)
4
6340/6340i, 6360
6370/6385
7160 DLR-3P data cable and IR (infrared)
7190 DLR-3P data cable and IR (infrared)
8290, 8890 IR (infrared)
8390 IR (infrared)
Note: Nokia Content Copier does not support all Nokia phones. For more information on specific models of incompatible
phones, please see “Learn about other phones” on page 8.
DLR-3P data cable and IR (infrared)
• UNDERSTAND CONTENT COPIER BASICS
Important: If the Add New Hardware Wizard launches when you establish an IR connection between your PC and one of
the compatible phones as listed above, click the wizard Cancel button, then proceed to copy the phone data to your PC.
Important: If the Add New Hardware Wizard launches when you establish an IR connection between your PC and your
Nokia 6340/6340i phone, close Content Copier, then proceed to “Wireless modem setup” on page 29 and follow the
instructions. You can return to Content Copier once the modem setup has been completed.
Use Content Copier
Nokia Content Copier uses a wizard-style interface to help you perform the tasks listed above. Launch Content Copier from the
Start Menu (Start > Programs > Nokia PC Suite 4 > Content Copier), then select the task you want to perform. Follow the onscreen instructions to complete the selected task.
You may need to use Nokia Connection Manager to select the type of connection you want Content
Copier to use during various stages of the process. For example, if you are trying to copy data from one
phone to another and the phone containing the data you want to copy requires a serial cable, click the
Content Copier Connection button to launch Connection Manager. Then select the correct connection
option for the source phone.
[ 6 ]
Page 11
Copy information from the source phone
When you select Copy data from a phone to a PC, Content Copier
transfers all compatible data types (phone book, calendar, to-do, caller
groups, etc.) from the phone containing the data you want to back up or
transfer. This phone is called the “source phone” and can be one of the
phones listed on the previous page, or another Nokia 6340/6340i phone.
• If you are backing up phone data to your PC, Nokia Content Copier
guides you through the process of saving the information to your PC
hard drive.
• If you are copying data from a different source to your Nokia 6340 or
6340i phone, the data must first be saved to your PC. Once you
connect your Nokia 6340/6340i phone (“target” phone), follow the
instructions,
“Copy information to the target phone” below.
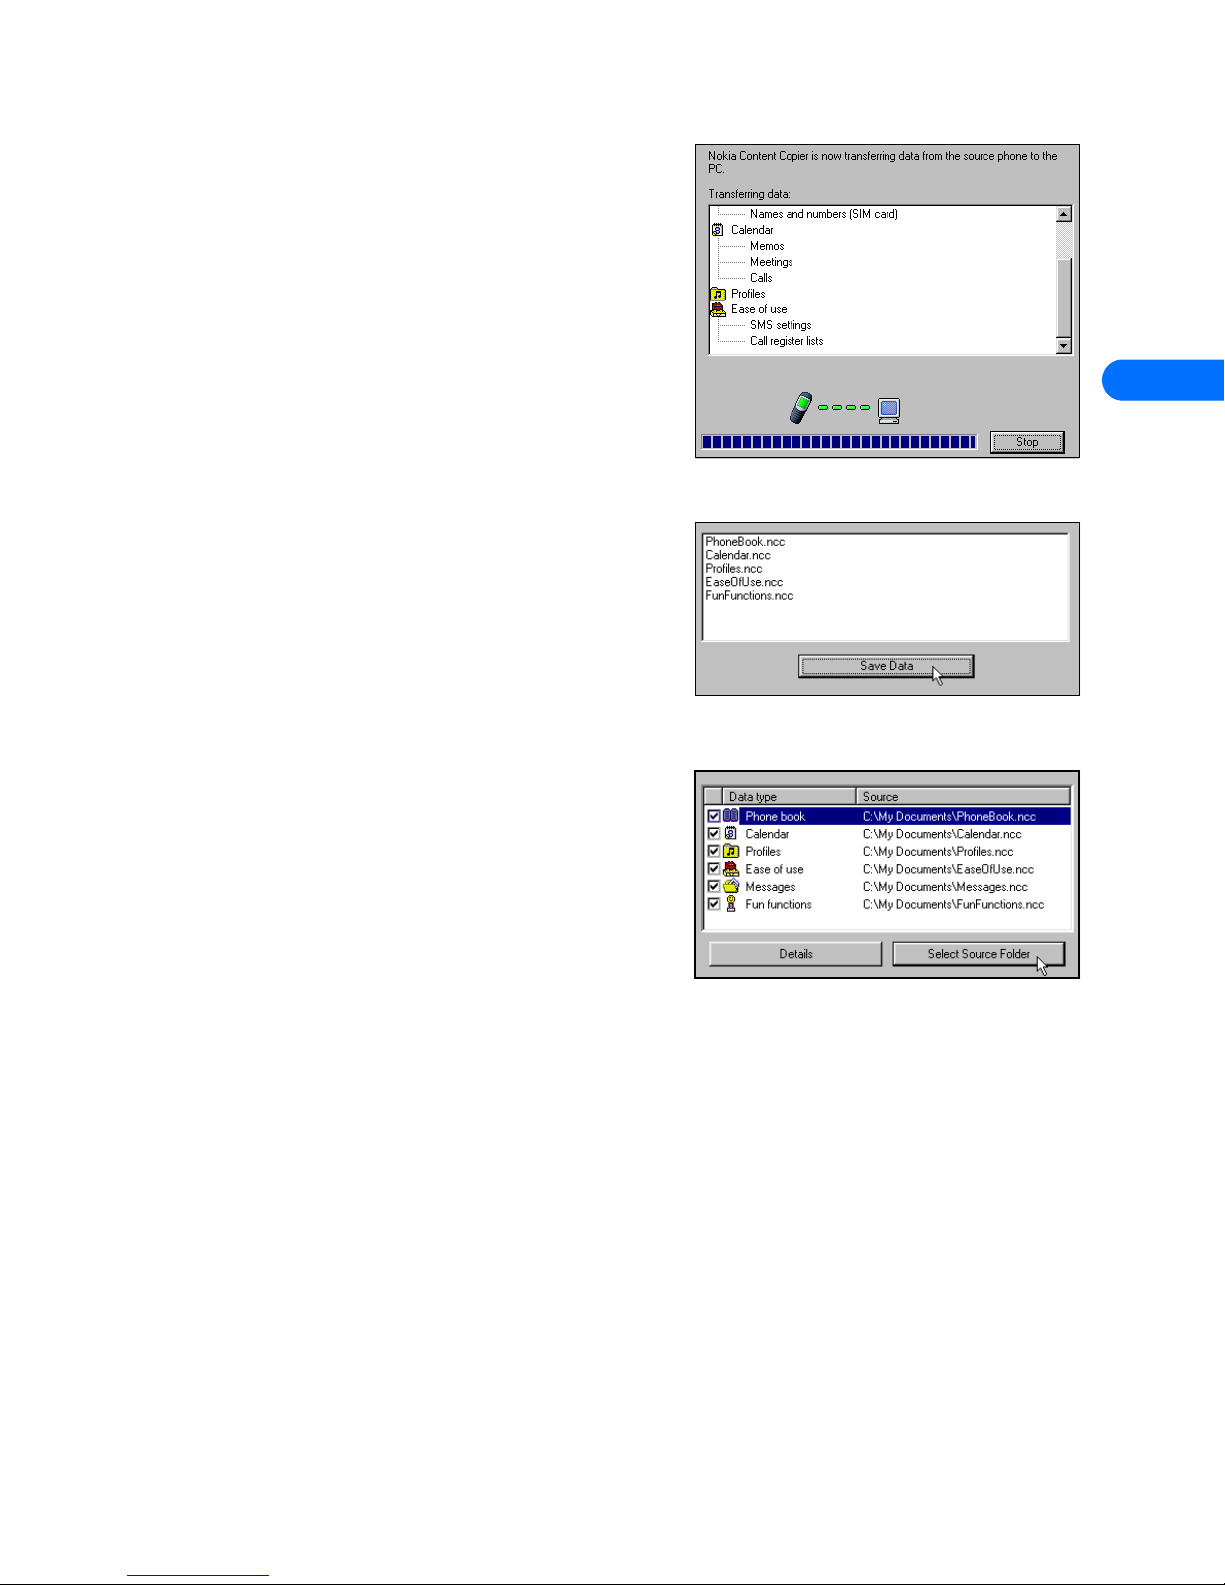
Save the source phone data
Once the source phone data has been read, save the information to your PC’s hard drive.
1 Click the Save Data button.
2 Navigate to the location on your hard drive where you want the
information stored.
Nokia Content Copier automatically names the files for you, based on
the type of data that is read from the source phone.
3 Click Next to complete this process.
4 Click New Action to return to the beginning of the Content Copier
wizard and perform a different task, or click Finish to close Content Copier.
Nokia Content Copier
4
Copy information to the target phone
Before you can copy information to the target phone, you need to load
the information into the memory of your PC. You should have already
saved the source phone data to your PC using the Copy data from a
phone to a PC option.
1 Launch Nokia Content Copier, then click Next.
2 Click Copy data from a PC to a phone, then click Next.
3 Click the Select Source Folder button. Locate the directory
containing the information you want to use.
4 Click Next to begin copying data from your PC to your phone.
Once the source phone information has been loaded from your PC hard drive, you are asked to determine the types of information
you want copied into your phone. The compatible data types are displayed along with the ability to select the types of data you
wish to transfer.
Use the check boxes next to the data types to select or deselect the information you want to copy to your phone. Click Next to
begin copying the data to your phone.
IR connection time-out
If you are copying data from one phone to another and you are using IR for both the source and destination phones, stop the IR
connection between source phone and PC. Allow the Windows warning message regarding interrupted IR communications to timeout completely before aligning the target phone with the PC IR port. By doing so, you allow Connection Manager to detect your
phone quicker.
View Content Copier log
When you have successfully completed one of the Nokia Content Copier tasks, the Finish screen is displayed along with a log of
the tasks that were just performed. At the Finish screen, you have the following options:
• Click Save to save the log (.LOG) file to your PC hard drive.
• Click New Action to return to the beginning of the Nokia Content Copier wizard.
• Click Finish to exit Nokia Content Copier.
[ 7 ]
Page 12

Nokia Content Copier
• LEARN ABOUT OTHER PHONES
Due to software and hardware differences between generations of phone technology, the following phones are not compatible with
Content Copier:
Protocol Nokia model number
TDMA 5120, 5125, 5160, 5165
6120/6120i, 6160/6160i/6160m
6161/6161i, 6162/6162i/6162m, 8260
CDMA 3280, 3285
5170/5170i, 5180/5180i, 5185
6180/6180i, 6185/6185i
GSM1900 3390, 3395
4
[ 8 ]
Page 13
Nokia PC Composer
5 Nokia PC Composer
Nokia PC Composer allows you to create new monophonic ringing tones. Once you create a new ringing tone, you can send it as
an SMS message to another compatible phone.
PC Composer also allows you to open Standard MIDI files (type I), edit them, and convert them to monophonic ringing tones. You
can save your ringing tones as either .mid (MIDI) or .ott (ringing tone) file formats on your PC hard drive. Once saved to the hard
drive, you can also share your new ringing tones through e-mail with friend or family who also use a compatible version of PC Suite.
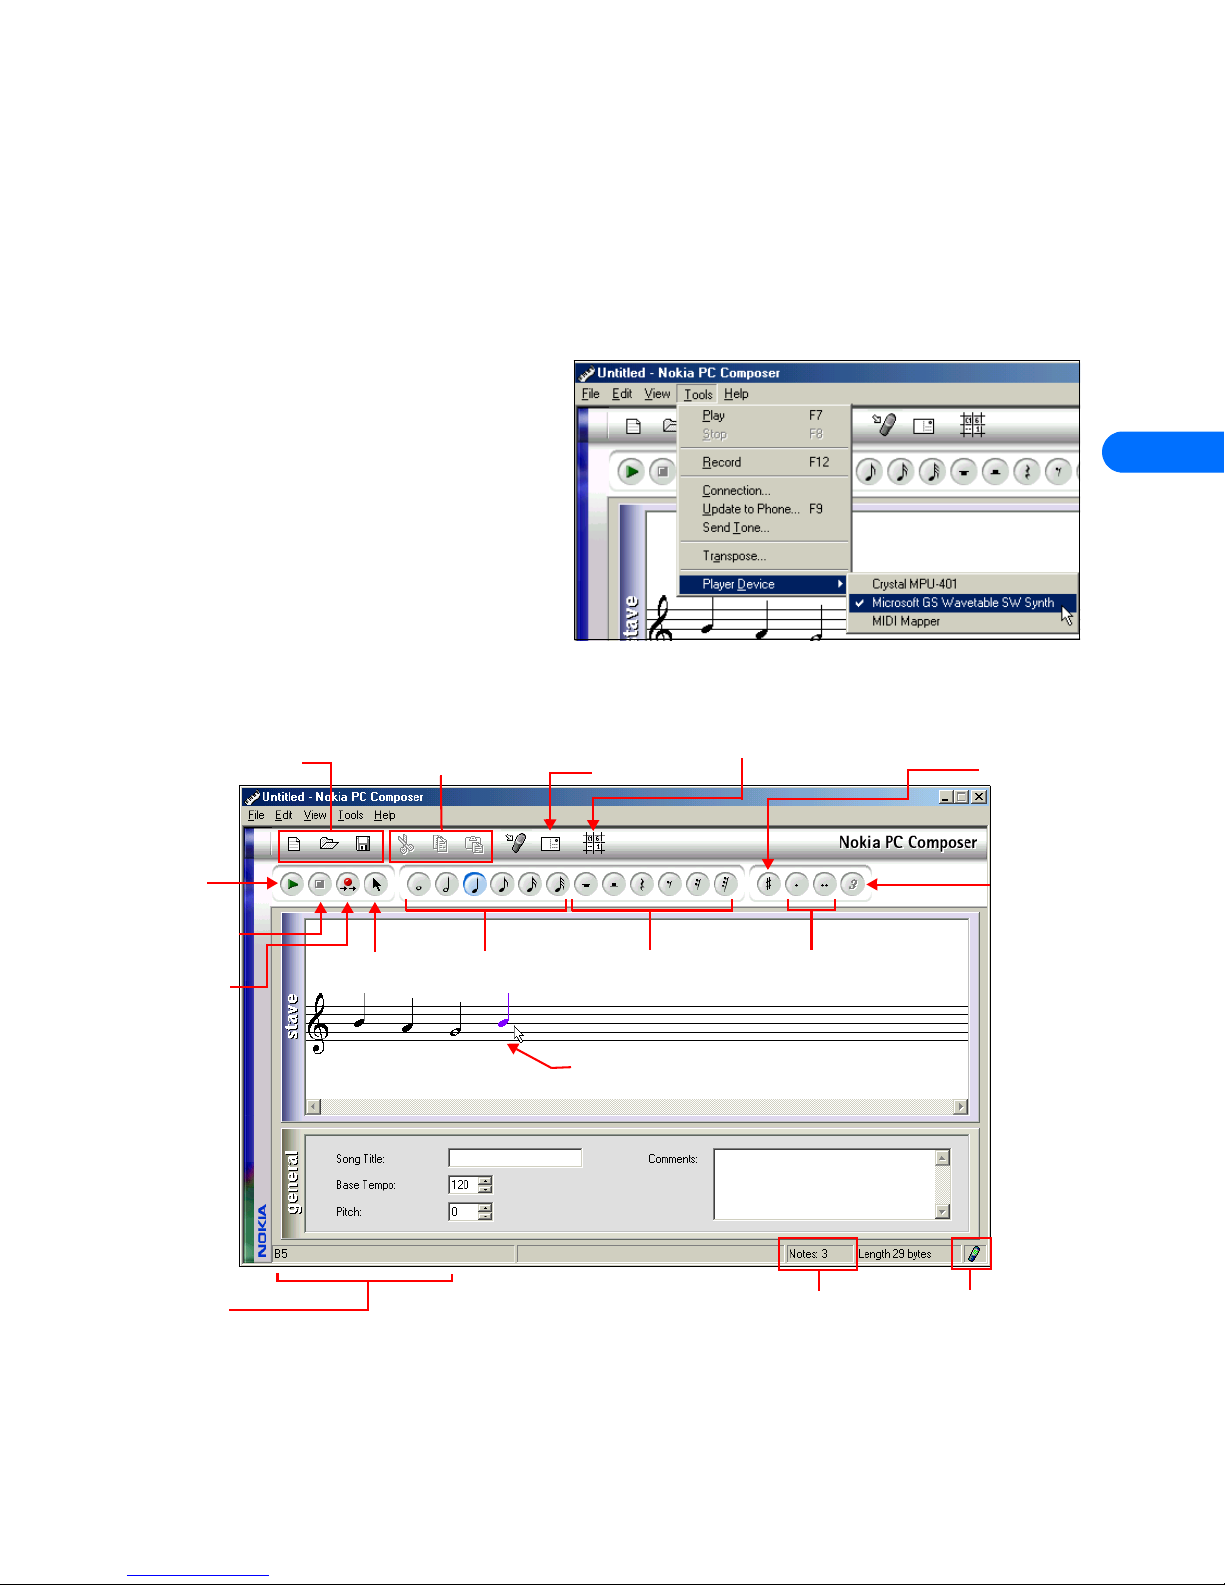
PC hardware setup
PC Composer plays the notes as they are written to the
music staff. You can also play back the entire
composition. Before you begin writing, you may need to
select your PC sound card MIDI playback device.
1 Click Start, point to Programs, point to Nokia PC
Suite, then click Nokia PC Composer.
2 Click Tools, point to Player Device, then click the
option for your PC sound card.
Once your MIDI playback device is set, you can hear
each note as it is added to the staff or listen to the
entire ringing tone (when you click the Play button).
5
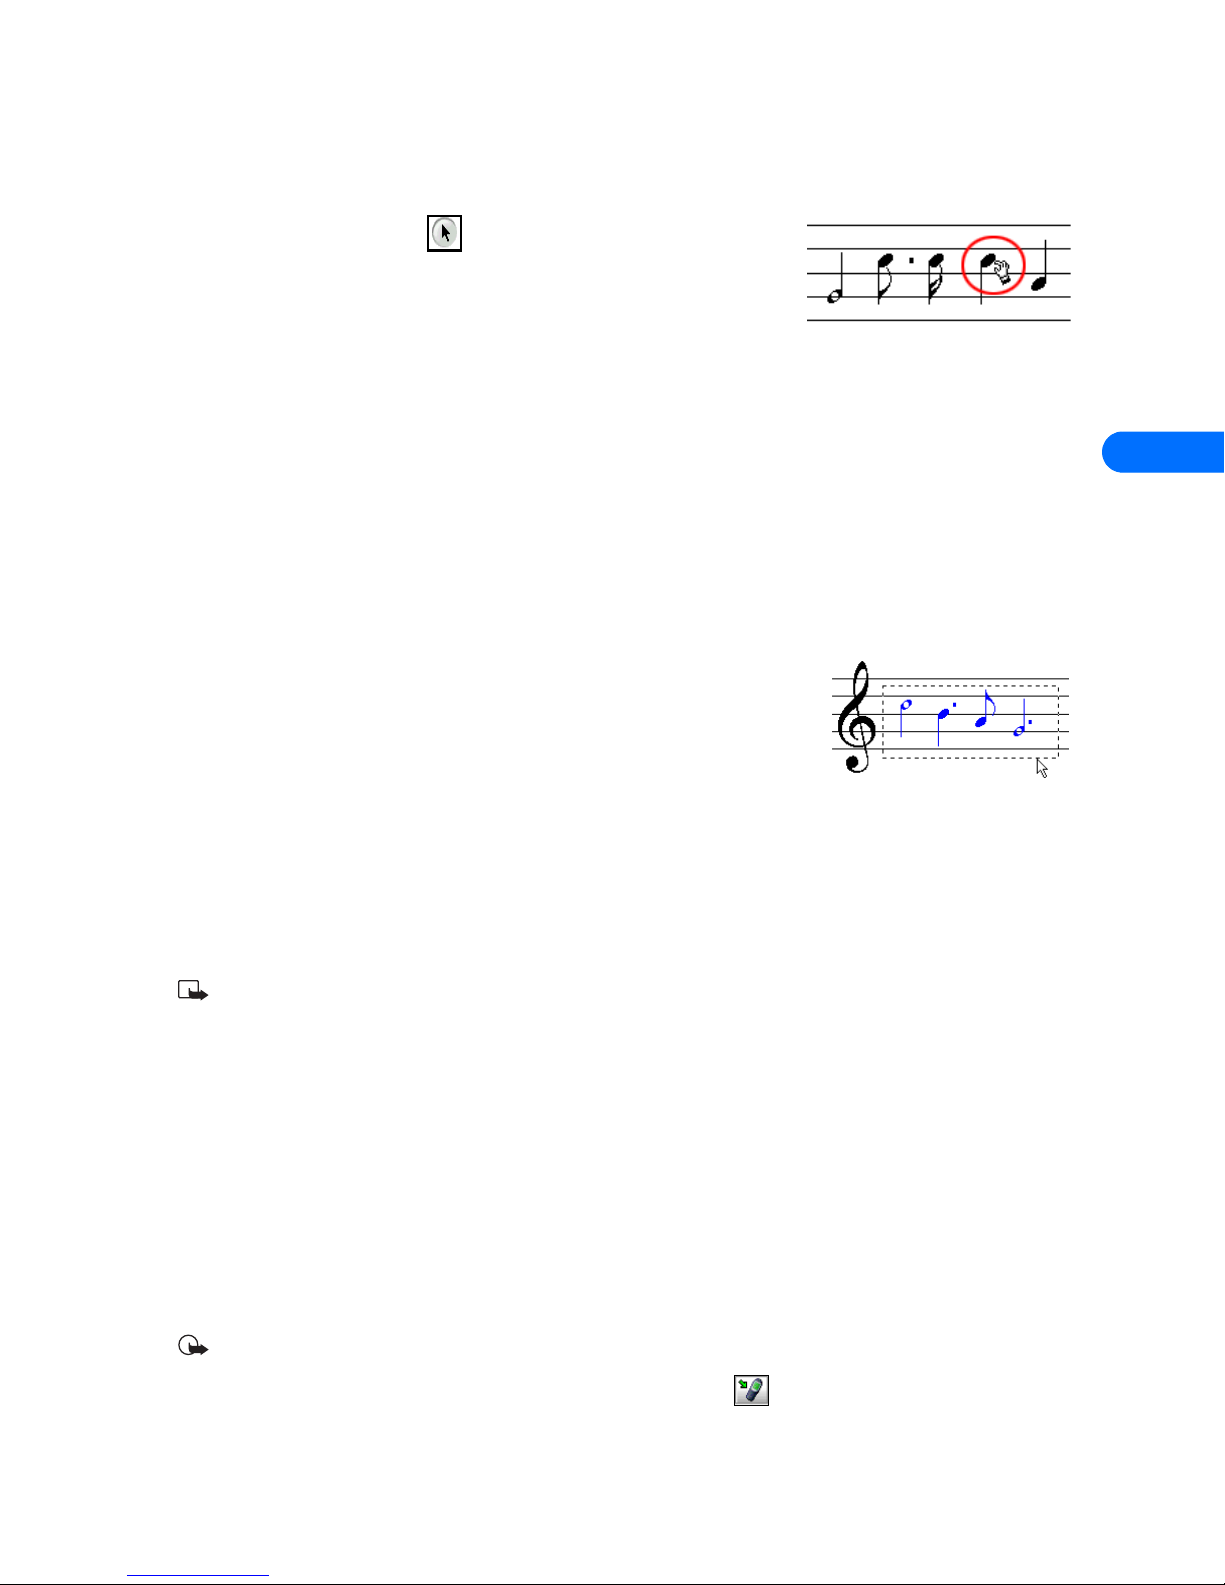
• TOUR PC COMPOSER
The illustration below introduces you to PC Composer tools and commands:
File management
(new, open, save)
Play ring
tone
Stops playback
Record mode
(displays
recording
keyboard)
Editing tools
(cut, copy, paste)
Selection tool
Note values
Send tone as SMS
Rest values
Insert point
Switch view (displays event tracker window)
Adds dot or double
dot to selected note
Raises a note’s
pitch 1/2 step
Triplet
(use to create
triplets with
selected notes)
Status bar
displays help
texts and
toolbar tips
You can launch PC Composer without having a connection between the phone and your PC. The connection status indicator
displays the status of the connection between your phone and PC.
[ 9 ]
Note counter
Connection status
Page 14

• LEARN ABOUT OTHER VIEWS
In addition to using the standard music staff to compose new ringing tones, the following options are available:
• Tracker is used to display notes as events on a time line as well as other MIDI and tempo data.
• General is used to set Song Title, overall tempo, and adjust overall pitch up or down.
Use to set name of
ringing tone as it
appears in phone
Set overall tempo
of ringing tone
Raise or lower
overall pitch of
ringing tone
Nokia PC Composer
Use to add notes,
adjust note pitch
or value, and
modify tempo
Use to create text
note to be saved
as a part of the
.ott or MIDI file
5
Click the Switch view button to cycle through the various view options.To view the General information pane, click Tools,
then click General.
• COMPOSE A NEW RINGING TONE
Your new ringing tone can consist of up to approximately 70 notes and rests. The
phone discards any notes or rests beyond 70. Use the note counter to the right of
the status bar to monitor the length of your new ringing tone.
Create a new ringing tone
1 Launch Nokia PC Composer (Start > Programs > Nokia PC Suite > Nokia PC
Composer).
Insert point
2 Click the appropriate note or rest button.
3 Using the insert point, click the desired line or space on the staff
The result is that the note is placed on the staff, and is played by your PC’s sound card.
4 Enter any additional notes and rests until you have completed your new ringing tone.
5 Click the Play button to play the ringing tone from the beginning.
Enter notes using the keyboard
In addition to placing the notes on the staff using the mouse, you can also enter
the pitches from your computer keyboard. The Recording Keyboard is displayed and
identifies the computer keyboard equivalents to notes on a piano or MIDI
keyboard.
1 Click the Record button to display the recording keyboard.
2 Click the desired note value button on the toolbar.
3 Press the key on your computer keyboard associated with the desired note.
Tip: If you want a longer or shorter note, select the desired note value from the toolbar, then enter the desired pitch from
your keyboard. Note values cannot be selected from your computer keyboard.
[ 10 ]
Page 15
Edit a ringing tone
You can edit the pitch or duration of the notes already entered on the music staff.
CHANGE THE PITCH OF A NOTE
1 Click the Selection tool button on the toolbar.
2 Move the cursor over the note you wish to change
The arrow cursor changes to a hand.
3 Drag the note up or down on the staff to the correct location.
CHANGE THE DURATION OF A NOTE OR REST
1 Click the desired note button (or rest button) on the toolbar.
2 Move the cursor over the note or rest you wish to change.
The insert point appears.
3 Click the note or rest to replace it with the new note value.
Delete notes and rests
You can delete a wrong note, rest, or group of wrong notes or rests at any time.
DELETE A SINGLE NOTE OR REST
1 Click the Selection tool button on the toolbar.
2 Click the note or rest you want to delete, then press the PC keyboard Delete (DEL) key.
DELETE MULTIPLE NOTES OR RESTS
1 Click the Selection tool button on the toolbar.
2 Draw a bounding outline (marquee) with the mouse around the group of notes or
rests you want to delete.
The group of notes are highlighted in blue.
3 Press the PC keyboard Delete (DEL) key.
Nokia PC Composer
5
• SAVE YOUR NEW RINGING TONE
When you are ready to save your new ringing tone, click the Save button on the toolbar. Use the Save as dialog box to set file name
and location to save the new file. The default file type for your new ringing tone is .mid (MIDI). However, you need to save your
work as ringing tone format (.ott) before sending your new ringing tone to the phone. Use the Save as type drop down box to
select the desired file type.
Note: You can create and save as many new ringing tones as you have space on your hard drive. However, your phone can
only hold up to five new ringing tones at any given time.
• TRANSFER A RINGING TONE TO YOUR PHONE
Once you have created a new ringing tone and have saved it to your PC, you can transfer the tone to your phone. When your phone
receives the new ringing tone, it will display the message New ringing tone received. Press the Options key and scroll to the
following options:
• Playback plays the new ringing tone.
• Save tone saves the ringing tone to your phone.
• Discard discards the new tone and returns you to the Start screen.
Transfer using IR or cable
Before transferring the ringing tone to your phone, make sure you have established a connection between your phone and PC.
Check the status indicator in the lower right corner of the PC Composer window to verify the status of your connection.
Important: Make sure to display the General pane and enter a name for your new ringing tone. If you fail to do so, your
new ringing tone may not be named properly.
To transfer your ringing tone, click the Update to Phone button on the toolbar , or select Update to Phone from the Tools
menu.
[ 11 ]
Page 16
Nokia PC Composer
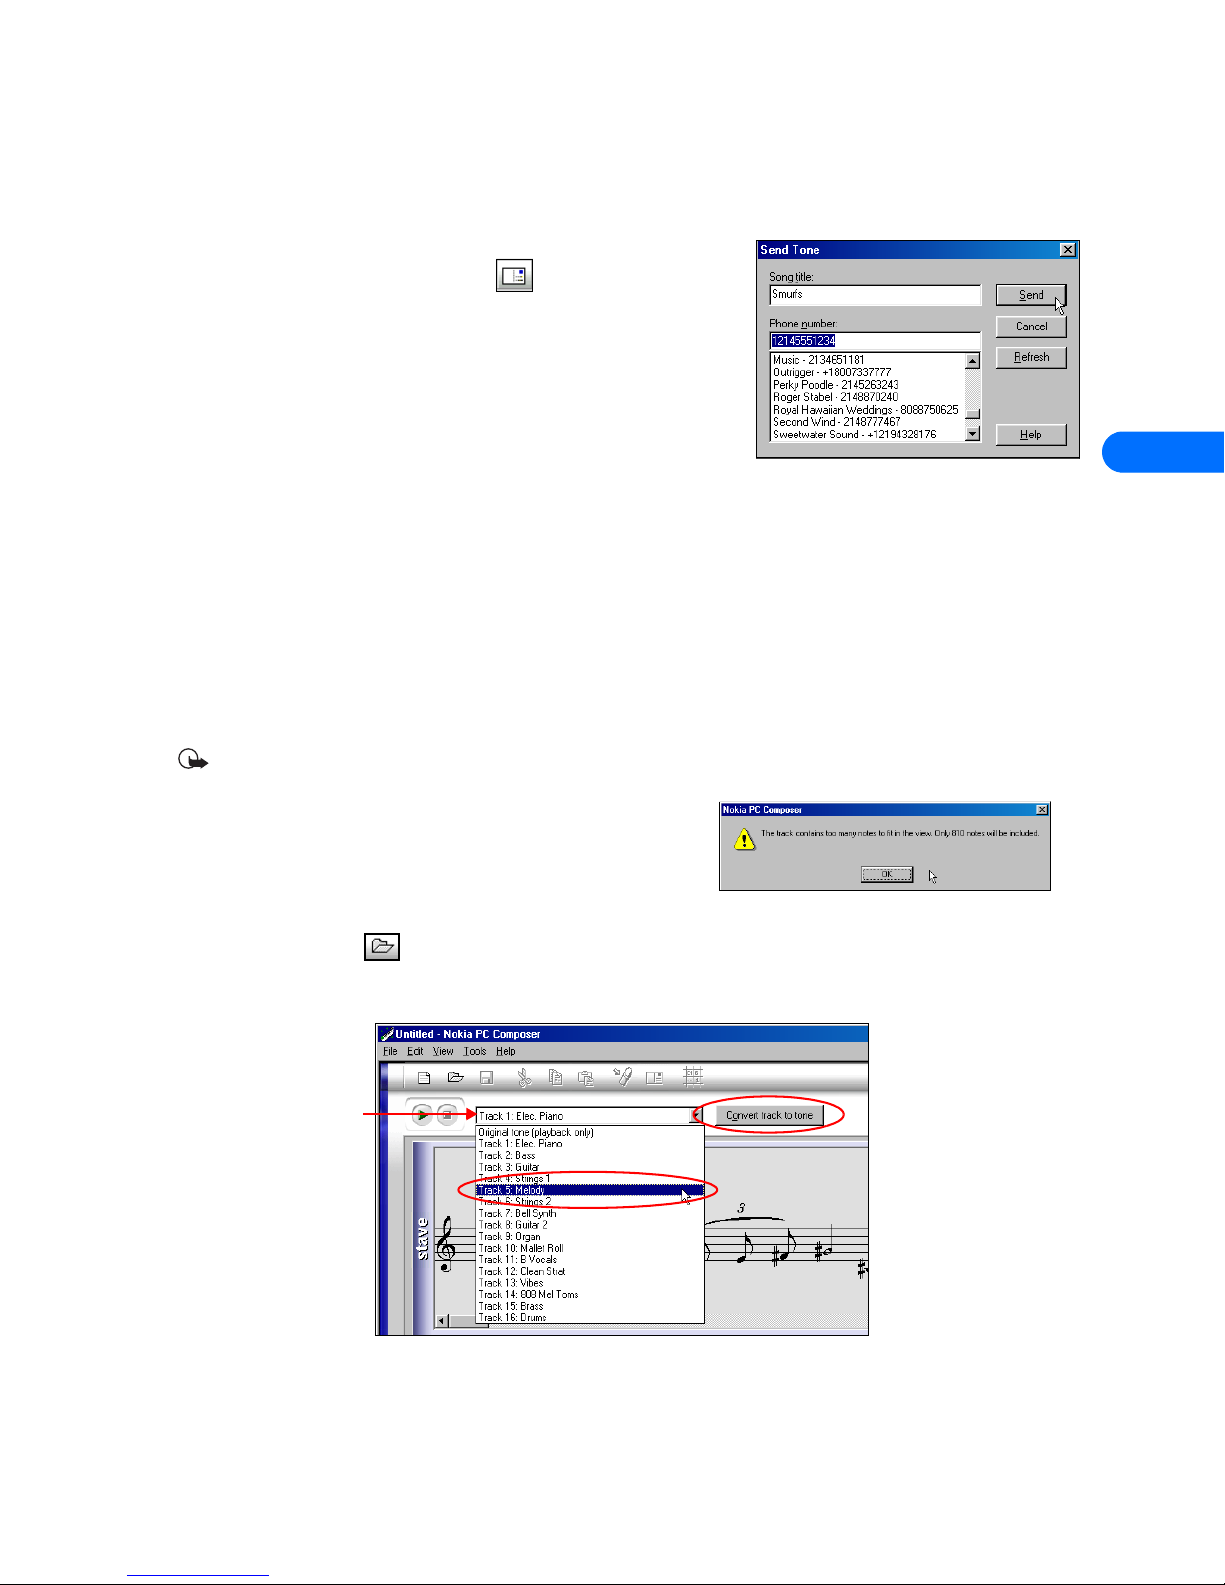
• SEND A RINGING TONE TO ANOTHER PHONE
You can also send the ringing tone to another phone supporting downloadable ringing tones. PC Composer converts the ringing
tone to SMS text message format, then instructs your phone to send the text message to another phone.
Send using SMS
1 Click the Send Tone button on the toolbar , or select Send Tone from the
Tools menu.
2 Enter the name of the ringing tone, then press TAB.
3 Enter the phone number for the phone receiving the ringing tone (or select it
from the list of phone book entries), then press Send.
The ringing tone is transferred to your phone, then sent as an SMS to the recipient.
• CREATE RINGING TONES FROM MIDI FILES
Nokia PC Composer allows you to open Standard MIDI files, then convert the data to ringing tone format. Now you can carry your
favorite PC MIDI file as a ringing tone in your phone.
Learn about Standard MIDI files
Standard MIDI files of popular music frequently consist of multiple instruments (bass, drums, organ, etc.). Typically, there is also a
track dedicated to the melody of a song. There are two types of Standard MIDI files:
• Type 0 files: 1 track of MIDI data containing all the various instruments; each instrument assigned to different MIDI channel.
• Type 1 files: each instrument has its own dedicated track and MIDI channel. Track/instrument names are embedded in the file
as text information.
PC Composer interprets the multiple track information and allows you to choose the correct track or instrument.
Important: PC Suite supports Type 1 MIDI files only. PC Suite cannot display the necessary note and instrument data when
opening Type 0 MIDI files. If you try to open a Type 0 file, no data is displayed.
Before you begin
If the MIDI sequence you want to use contains too many notes, an alert
message is displayed when trying to transfer the ringing tone to your phone.
OPEN A STANDARD MIDI FILE
To open a MIDI file:
1 Click the Open button (or select Open from the File menu).
2 Locate the MIDI file you want to use as a ringing tone, then click Open.
3 Use the Track list box drop-down arrow and locate the desired track.
5
Track list box
4 Click the Convert to Tone button to convert MIDI information to ringing tone format.
[ 12 ]
Page 17

Nokia PC Composer
Edit and save
You may need to edit the converted MIDI information (adjust note lengths, remove extra rests, etc.) so that the tune plays correctly.
For more information on editing a ringing tone, please refer to “Edit a ringing tone” on page 11 .
When you have completed editing the ringing tone, you can save your work in ringing tone (.ott) format, then send the new tone
to your phone. For more information on saving, please refer to
sending a ringing tone to your phone, please refer to “Transfer using IR or cable” on page 11 .
“Save your new ringing tone” on page 11 . For more information on
• WORK WITH RTTTL RINGING TONE FILES
Ringing Tones Text Transfer Language (RTTTL) files are text files that contain various types of information that make up a ringing
tone. When your phone receives a ringing tone over the air, your phone is actually receiving the information in RTTTL format. The
RTTTL file includes song title, scale and tempo indications, and the actual note information.
An RTTTL formatted ringing tone may appear as follows:
babbino:d=4,o=5,b=140:g#,g#,g#,2c6,g,2f,8p,2d#,g#,a#,c6,2g#,g#6,2d#6
5
song title
scale and tempo data note data
Use RTTTL data from the Internet
The Internet has become a popular source for sharing ringing tones in RTTTL format. If you find a ringing tone Web site displaying
the RTTTL data, you can create your own RTTTL files by pasting the data into a text editor program (for example, Notepad), then
save the file using the .txt file extension.
PC Composer can open and save ringing tones in RTTTL format. Songs you compose in PC Composer can be saved as RTTTL files,
then shared with family and friends via e-mail (for example).
Open an RTTTL file
1 Click the Open button (or select Open from the File menu).
2 Click the File of type drop down arrow, then select RTTTL files (*.txt) from the list of available file types.
3 Locate the RTTTL file on your hard drive or other removable disk drive, then double-click the file name to open.
4 Click the Convert track to tone button and convert file to ringing tone format.
You can now send the ringing tone to your phone, edit the ringing tone (as needed), or save the ringing tone as .ott (ringing tone)
format on your hard drive.
[ 13 ]
Page 18

Nokia PC Sync
6 Nokia PC Sync
Nokia PC Suite allows you to synchronize the contact and calendar information in your PC’s Personal Information Manager (PIM)
software and your Nokia mobile phone. You can use Nokia PC Sync to keep information up-to-date in both locations.
PC Sync supports a variety of PIM applications, including Microsoft Outlook, Outlook Express (using Windows Address Book), and
Lotus Organizer. PC Sync also offers a wide variety of synchronization options so that you can personalize the way you want your
information managed.
Warning: To avoid any potential loss of data, you should not make or receive calls while synchronizing data between the
phone and your PC. Nokia PC Sync cannot be used while a data call is in progress. Likewise, you cannot initiate a data call
while synchronizing data with PC Sync.
Important: Remember to make backup copies of all important data to protect against possible loss or alteration.
• CONFIGURE PC SYNC
The first time you run Nokia PC Sync, you must configure PC Sync to
work with your PIM application. Once you have customized PC Sync, you
can proceed with synchronizing your PIM data with your phone.
1 Establish a connection between your phone and PC.
2 Launch Nokia PC Sync (Start > Programs > Nokia PC Suite 4 >
Nokia PC Sync).
3 Select your PIM application from the drop-down list, then click OK.
4 Click the More button to view a summary of current or default
settings.
6
Set General synchronization properties
1 Click the General tab, then select the information you want to
synchronize.
2 Click the desired option for automatic synchronization, for example,
Every connection.
3 Click the Advanced button to specify additional options, including
resolving synchronization conflicts.
SYNCHRONIZATION CONFLICTS
A synchronization conflict occurs when you change or edit a contact,
calendar, or to-do list note in both your phone and PIM between
synchronization sessions. By default, PC Sync resolves the conflict by
treating your phone as the correct information source.
To change conflict resolution properties, click the option associated
with your PIM application.
Set Calendar/To-do and Contacts properties
Your PIM application’s storage capabilities are much more extensive
than those of your phone. Use the Calendar/To-do and Contacts tabs to
define the kinds and amount of information synchronized.
For more information about the capacity of the phone book, calendar,
and to-do list in your phone, please refer to the technical specifications
section of the phone user guide.
1 Click the Calendar/To-do tab.
2 Use the drop-down lists to define the range of time PC Sync uses
during synchronization.
[ 14 ]
Page 19

Nokia PC Sync
3 Click the Contacts tab.
4 Select the details you want synchronized with your phone.
CONTACT DELETIONS
By default, contacts deleted from your phone are not deleted from your
PIM when you synchronize. If you accidentally delete a contact from
your phone, you can restore it by synchronizing again.
Deselecting the Ignore contact deletions option instructs PC Sync to
permanently delete the corresponding contact in your PIM. Choose this
option only when you are certain you want PC Sync to delete the PIM
contact (and all details) associated with the deleted phone book entry.
Deleting phone book entries cannot be undone!
Set PIM properties
The last properties tab is labeled with the name of your PIM application. Use this properties tab to modify how PC Sync
communicates with your PIM resources. For example: If your PC is configured for multiple users, the default location of your PIM
databases may be stored in a user profile directory, instead of the default location for single-user PCs. PC Sync returns an error
message if it cannot find your PIM’s data.
Use the PIM properties tab to select the correct location of your PIM databases containing current contacts, calendar, and to-do
list information.
Synchronizing for the first time
Once you have customized PC Sync for your uses, you are ready to
synchronize your phone and PIM.
1 Click the Summary tab.
2 Click the Synchronize Now button.
3 Observe the synchronization status indicator.
4 Click the OK button when synchronization is complete.
Important: Please refer to the Troubleshooting document in the event synchronization is not successful or if PC Suite
notifies you of errors. A link to this document can be found in the Nokia PC Suite 4 Program Group.
6
• UNDERSTAND THE BASICS OF SYNCHRONIZATION
Important: Synchronization occurs between numbers in your PIM application and phone book memory only. Numbers
stored on the SIM card are not synchronized with your PIM application.
Nokia PC Sync remains running in the background after you synchronize for the first time. PC Sync places an icon in the Task Bar
tray to indicate that the application is running. The colors of the icon change, depending on the status of the IR connection
between your phone and PC. Please refer to the examples below:
Blue and green
indicate connection
present between
phone and PC.
Yellow and gray
indicate no connection
present between phone
and PC.
Exit PC Sync
Once you have completed setup and have synchronized for the first time, you can either leave the program running in the
background, or exit PC Sync.
To exit PC Sync, right-click the PC Sync tray icon , then click Exit.
Start PC Sync
You have two options for launching Nokia PC Sync:
• on an as-needed basis from the Start menu
• automatically upon startup
[ 15 ]
Page 20

Nokia PC Sync
TO ENABLE PC SYNC ON STARTUP
1 Establish a connection between your phone and PC.
2 Launch PC Sync from the Start menu.
3 Right-click the PC Sync tray icon, then click Enable on startup
View other PC Sync options
There are several other options available from the PC Sync options menu
(from the tray icon). With the phone connected to your PC, right-click on the
tray icon, then click any of the following options:
• About is used to view information about the PC Sync program.
• Connection is used to check the status of the connection between phone
and PC.
• Properties is used to modify current PC Sync settings (change frequency of synchronization, types of data synchronized, etc.).
• Synchronize is used to begin the data synchronization process.
• View Last Report is used to view information about the last synchronization attempt.
• Help is used to launch the on-line Help files
• Exit is used to close the PC Sync program
To disable the auto start features, right-click on the PC Sync icon, then click Enable On Startup again.
6
• INITIATE SYNCHRONIZATION
PC Sync initiates synchronization between your phone and PC when you start the program from the Start menu. To resynchronize
your data while the program is still running, right-click the PC Sync tray icon, then click Synchronize.
• USE THE NEW SYNCHRONIZATION COMMAND
If you upgrade to a newer version or change PIM applications, you must configure PC Sync to work with the new application. Select
New Synchronization from the Nokia PC Suite program group, then follow the instructions, “Configure PC Sync” on page 14.
Important: New Synchronization is not the command to use when you want to start PC Sync and initiate synchronization
between your phone and PC.
• CREATE A CUSTOM CONTACT LIST
If you have more contacts in your PIM than your phone book memory can
hold, synchronizing may overload your phone book memory.
Nokia suggests you create a custom contact list or subset of your master
contact list containing only the information you want in your phone.
Depending on the PIM application you use, you may need to create a new
contact database file or create a new folder to store the custom contact list.
Configure for Outlook users
Outlook users can create folders and subfolders in their Outlook database
files. To create a custom contact list, first create a new folder to store
contacts. Then copy the desired contact information from your main contacts
folder to the new folder. PC Sync allows you to synchronize your phone with
the Outlook contacts folder of your choosing.
[ 16 ]
Page 21

Nokia PC Sync
CREATE A NEW FOLDER FOR PHONE CONTACTS
To create a new subfolder for a custom contact list:
1 Click File, point to Folder, then click New Folder.
2 Type the name of your new folder (for example, Phone list).
3 Click the Folder contains drop-down arrow, then click Contact Items.
4 Select a location for your new folder (for example, click Contacts to make
Phone list a subfolder of your Contacts folder).
5 Click OK to confirm your selection.
COPY CONTACTS TO CUSTOM PHONE LIST
1 Click the Contacts button on your Outlook bar .
2 Select the contacts you want to appear in your custom list by holding the CTRL key while clicking on multiple contacts that
may not be adjacent to each other.
3 Click Edit, then click Copy (or press CTRL + C).
4 Select your custom folder from the Folder List (for example, Phone list), or press CTRL + Y to display Go to Folder dialog box.
5 Click Edit, then click Paste (or press CTRL + V) to paste copies of the selected contacts into the new folder.
Important: If you decide to drag-and-drop contacts between your main Contacts folder and the new custom folder, you
must hold the CTRL key while dragging, then release the mouse button first. Holding the CTRL key during drag-and-drop
allows you to make a copy of all selected contacts in the new folder.
UPDATE PC SYNC OUTLOOK SETTINGS
To update PC Sync’s settings to synchronize with your custom list:
1 Establish a connection between your phone and PC.
2 Launch Nokia PC Sync from your PC Start menu (unless you have PC Sync configured to launch on startup).
3 Right-click the PC Sync tray icon, then click Properties.
4 Click the Microsoft Outlook tab.
5 Click the Contacts browse button , then select your custom folder.
Click OK to confirm your selection.
6 Click the Summary tab, then click Synchronize Now to synchronize your
phone and custom phone list.
6
Configure other PIM applications
Some PIM applications (such as Lotus Organizer) require a new database file for your custom contacts list. Once you create a new
database file, copy the desired contact information from your main database to the new contacts database file. Use PC Sync
settings to choose the database file containing only the information you want to use in your phone.
CREATE A LOTUS ORGANIZER DATABASE FILE
1 With Lotus Organizer running, click File, then click New.
2 Click File, then click Save As.
3 Enter a name for your custom phone list (for example, Phone list).
COPY CONTACTS TO CUSTOM PHONE LIST
1 From File Manager, open your default Organizer database
(c:\lotus\work\organize\<filename>)
2 Click the Contacts tab, then click the desired alphabet tab.
3 Select the contacts you want to appear in your custom list by
holding the CTRL key while clicking on multiple contacts that
may not be adjacent to each other.
4 Continue by clicking subsequent alphabet tabs and selecting the
desired contacts.
5 Click the Copy button (or press CTRL + C).
6 Use the Windows Task Bar to switch back to your new contacts
[ 17 ]
Selected
records
Page 22

list, then click the Contacts tab.
7 Click the Paste button (or press CTRL + V) to paste copies of the selected contacts into the new list.
UPDATE PC SYNC’S LOTUS ORGANIZER SETTINGS
1 Establish a connection between your phone and PC.
2 Launch Nokia PC Sync from your PC Start menu (unless you have PC Sync configured to launch on startup).
3 Right-click the PC Sync tray icon, then click Properties.
4 Click the Lotus Organizer tab.
5 Click the Contacts browse button , then select your custom
folder. Click OK to confirm your selection.
6 Click the Summary tab, then click Synchronize Now to synchronize
your phone and custom phone list.
Nokia PC Sync
6
[ 18 ]
Page 23

Nokia PC Graphics
7 Nokia PC Graphics
Nokia PC Graphics is a program that allows you to create and edit picture messages, as well as graphics that can be used for picture
messaging. You can also create and edit new caller group logos.
Once you create or modify a graphic, you can transfer it to your phone (IR or DLR-3P data cable). You can also save your work to
disk to use later, or to share using e-mail with others who also use a compatible version of PC Suite. You can also send the picture
messages and caller group logos using SMS to other compatible Nokia phones that support these features.
• TOUR PC GRAPHICS
The illustration below introduces you to PC Composer tools and commands:
Send logo or picture
message as SMS
Connection status
Drawing area
Drawing tool
Preview of picture
message or caller
group logo
File management
(new, save, open)
Click to change
graphic type (caller
group logo or
picture message)
Enter text for picture
message here
Status bar
displays help
texts and
toolbar tips
Read logo or picture
message from phone
Transfer logo or picture
message to phone
Displays graphic type and size
• CREATE A NEW GRAPHIC
Nokia PC Graphics provides easy to use drawing tools to create unique caller group logos or picture messages. Before you begin
drawing, select the type of graphic you want to create.
Important: You do not need to establish a connection (IR or cable) between your phone and PC to create a new graphic.
You only need to establish a connection when preparing to send the new logo or picture message to your phone. (or as an
SMS to another user)
7
Choose a picture type
1 Click Start, point to Programs, point to Nokia PC Suite 4, then click PC Graphics.
2 Click Tools, point to Picture type, then click one of the following options:
• Group logo is used to create new caller group logos
• Picture message is used to create picture messages
If you select Picture message, use the Size option from the Tools menu to select the size of the picture used in the picture message.
Tip: Selecting the larger picture size reduces the number of characters that accompany the picture message (maximum of
121 characters).
[ 19 ]
Page 24

Nokia PC Graphics
Draw a new picture
The type of picture you select determines the size and overall dimensions of the drawing area. The drawing
area is divided into blocks that can be filled in to create the new picture.
Your cursor becomes a pencil that you can use to fill in each block. Use the left mouse button to fill each
block with black. If you make a mistake, use the right mouse button to erase (or fill the block with white).
Save a picture
PC Graphics allows you to save your work as a file on your PC hard drive. Saving your logos and picture messages to your hard drive
creates a backup copy of your work. You can also save your work, then open the file at a later time for further edits or to send the
picture message or logo to your phone or other compatible phone.
Tip: PC Graphics automatically selects the correct file type based on the picture type you selected. File types supported are
Picture message files (*.gms), OTA Bitmap Files (*.otb), and Bitmap files (*.bmp).
1 Click the Save button on the toolbar (or click Save on the File menu).
2 Select a location to save your work, then enter a name for your picture.
3 Click Save to complete the task.
• TRANSFER A GRAPHIC TO YOUR PHONE
Once you create a new caller group logo or picture message on your PC, you can transfer the information to your phone using
either IR or cable. Make sure you establish a connection between your PC and phone before you begin.
Transfer a group logo to your phone
1 Click the Update to phone button on the toolbar (or select the Update to
phone command from the Tools menu).
2 Click the name of the caller group from the list of logos (for example, Other).
The logo you created replaces the existing logo for the selected caller group.
3 On your phone, press Names, scroll to Caller groups, then press Select.
4 Scroll to the caller group you selected in step 2, then press Select.
5 Scroll to Group logo, then press Select.
6 Scroll to View, then press Select to confirm the transfer of the logo to your phone.
Transfer a picture message to your phone
1 Click the Update to phone button on the toolbar (or select the Update
to phone command from the Tools menu).
2 Click one of the existing picture message locations from the list (or select First
empty location).
The picture message you created in PC Graphics replaces the existing message
in the location you selected.
3 Press Menu 01-5 (Messages > Archive), then press Open. The new picture
message appears in your phone Archive folder for use at a later time.
Note: For more information on saving pictures in your phone, please refer to the user guide for your phone.
7
• SEND GRAPHIC TO ANOTHER PHONE AS A TEXT MESSAGE
Once you create a new caller group logo or picture message on your PC, you can send the graphics to another compatible phone
as an SMS text message.
[ 20 ]
Page 25

Nokia PC Graphics
Send a caller group logo or picture message using SMS
With either the desired caller group logo or picture message displayed in PC
Graphics:
1 Click the Send picture button on the toolbar (or click the Send picture
command on the Tools menu).
2 Enter the recipient’s phone number (or select it from the list of phone book
entries), then click Send.
The Send dialog box also keeps track of the last ten numbers you entered manually.
You can also select one of these numbers from this list, then click Send.
• WORK WITH AN EXISTING GRAPHIC
PC Graphics allows you to edit any of the picture messages already in your phone. You can also open and modify logos and picture
messages that you’ve saved on your PC. Make sure you establish a connection between your PC and phone before you begin.
Edit a picture message stored in your phone
With the Nokia PC Graphics application running:
1 Establish a connection between your phone and PC.
2 Click Tools, point to Picture type, then click Picture message.
3 Click OK (as needed) to confirm any change in picture size required by Nokia
PC Graphics.
4 Click the Read from phone button (or select the Read from phone
command from the Tools menu).
5 Select the picture message or picture you want to edit from the list, then click
Read.
Once the picture message has been loaded into your PC from your phone, use the pencil tool to edit the image. Click the Update
to phone button on the toolbar to transfer the logo back to your phone.
7
Open a graphic you created
You may want to save picture messages or caller group logos on your PC so you can send them to other users at a later time. Click
the Open button on the toolbar (or select Open from the File menu) to locate a graphic previously saved. You can then edit
the graphic (as necessary), transfer the graphic to your phone, or send it to another user using SMS.
• OPEN OTHER BITMAP FILES
Nokia PC Graphics has the ability to open and convert
Windows RGB-coded bitmap images for use with picture
messaging and caller group logos.
Nokia PC Editor provides tools to select or capture the
portion of the image you want to use, and to adjust the
image and convert it to black and white for use in your
phone.
UNSUPPORTED FILE FORMATS
If the image you want to use is not Windows bitmap
format (.bmp), you need to use another graphics
application and convert the image to bitmap format.
Edit button
Capture area
Halftone
adjustment
Capture an image
Because of the size and dimension requirements of picture messages and caller group logos, you may only be able to use a portion
of your image. Using the cursor, you can outline or capture that portion of the image you want to use.
PC Graphics captures your image at the correct height and width, based on your selection of Group logo or Picture message from
the Tools menu.
[ 21 ]
Page 26

Nokia PC Graphics
With the Nokia PC Graphics application running, complete these steps:
1 Click Tools, point to Picture type, then select the type of graphic you want to create (Group logo or Picture message).
2 Click OK (as needed) to confirm any picture size change required by PC Graphics.
3 Click the Open button on the toolbar (or select the Open command from
the File menu).
4 Click the File of type drop-down arrow at the bottom of the Open dialog box,
then click Bitmap Files (*.bmp).
5 Locate and select the image you want to use, then click Open.
6 Move the mouse pointer over the drawing area until the pointer changes to a crosshair.
7 Click and hold the left mouse button, then drag your mouse to draw a rectangle around the area you want to capture.
Tip: Once you define the capture area, you can still adjust the height and width using standard Windows resizing
techniques. Move the cursor over the border of the capture area until the cursor shape changes, then drag to resize.
Adjust and edit image
A half-tone (black and white) preview of your selection appears in the lower right corner of the PC
Graphics window. Use the slider to adjust the image for clarity and quality, observing how PC Graphics
converts the color information to black and white.
Once you are satisfied with the quality of the captured image, click the Edit button. You can now make
further edits to the image, or transfer the graphic to your phone.
7
[ 22 ]
Page 27

Nokia Phone Editor
8 Nokia Phone Editor
The Nokia Phone Editor program allows you to edit and manage many phone from your PC. Phone Editor consists of the following
components:
• Contacts is used to manage phone book entries in your SIM card and in the phone’s memory. Also used to store contact
information on your PC.
• Messages is used to read, write, send, and organize your SMS messages from your PC. Also used to store and organize SMS
messages on your PC.
• Profiles is used to edit profile and caller group settings from your PC.
• Settings is used to view and modify various system and message settings. Also used to store configure your personal business
card information.
• BEFORE YOU BEGIN
Make sure you establish a connection between your phone and PC before using Phone Editor. If your phone is not connected to
your PC, you cannot edit and manage the s information and settings.
Important: Phone Editor cannot be used during active digital data or fax calls. Do not try to use these features
simultaneously.
• PHONE MEMORY AND PC STORAGE LOCATIONS
Phone Editor uses three different storage locations for your data and settings: phone memory, SIM card memory, and your PC (RAM
memory and hard drive storage)
Each time you launch Phone Editor, phone numbers, text messages and various phone settings (in both phone and SIM card) are
read into the memory of Phone Editor. When you terminate the IR connection or exit the program, the information in your phone
is stored on your PC. The next time you use Phone Editor, the information stored on your PC is updated.
• TOUR NOKIA PHONE EDITOR AND CONTACTS WINDOW
New contact
PC Editor
navigation bar
Send message
Send business card
Editing tools (cut, copy, paste, delete)
Indicates primary
number
Contact card viewer
Click to add
additional phone
numbers or other
information
8
Contacts directory
(list of folders or
locations where
contacts are stored)
Status bar displays
help texts and toolbar
tips
Memory status
(SIM card and
phone book
memory)
[ 23 ]
List of phone book
entries for the
selected folder.
Connection status
Page 28

• MANAGE CONTACTS USING PHONE EDITOR
Once you launch Nokia Phone Editor, click the Phone folder in the contacts
directory. A list of all phone book entries is displayed in the pane to the right of the contacts
directory.
Many of the Phone Editor commands are available from the program’s shortcut menu.
Select a phone book entry to edit, then right-click to display a list of the menu options
available from the shortcut menu. Select the command you wish to perform from the list.
You can also find the same commands in the program’s Contact and Edit menus, or you can
use the available toolbar buttons.
Add a new contact
1 Click the New Contact button on the toolbar (or select New Contact from the shortcut menu).
2 Enter the name of the new contact, then press TAB.
3 Enter the phone number, then press ENTER to save your entry
Add additional information to a contact card
Your phone’s memory can store up to five phone numbers per name and up to
four text fields (e-mail address, postal address, etc.). Once you create the
initial contact card, click the Add entry button on the contact card. The Add
Entry to Contact Card appears.
1 Click the Type drop-down arrow, then select the type of data you want to
add from the list.
2 Press TAB, then enter the information in the Data field.
3 Click Add and Create to save the data.
4 Repeat steps 1-3 to add additional data.
5 Click OK only when you have completed editing the selected contact.
Important: If you enter data then click OK, the information you entered is not saved. You must click Add and Create for
the new information to be added to the contact card. Click OK only when you want to return to the contact card viewer.
ADD NUMBERS OR INFORMATION TO AN EXISTING CARD
To add additional numbers or other information to an existing contact card:
1 Select the contact to edit from the list.
2 Click the Add entry button, then follow the instructions above to add new
information to the selected contact card.
Nokia Phone Editor
8
Edit contact information
To edit information in an existing contact card:
1 Select the contact to edit from the list.
2 Click the contact’s name, number, or the field you want to edit in the contact card viewer.
3 Make the necessary changes, then press ENTER to save your changes.
Delete a contact
• Click the contact you want to delete from the list, then click the Delete button on the toolbar. -OR-
• Right-click the contact you want to delete, then click Delete from the shortcut menu.
Change a contact’s memory location
You can use Phone Editor to change a contact’s storage location (for example, from SIM card to phone memory).
1 Click the contact you want to change.
2 Click Contacts, point to Change Memory, then click either Phone or SIM.
Note: Your SIM card does not support multiple numbers per name (or other information such as e-mail addresses). For more
information on how your phone processes the copying of phone book entries with multiple numbers per name to your SIM
card, please see your phone’s user guide.
[ 24 ]
Page 29

Nokia Phone Editor
Copy and move contacts
Your PC hard drive offers you substantially more storage space for names and numbers than your phone memory. You can copy
phone book entries to the Phone Editor PC folder to back up your data, or move entries to the PC folder, (freeing memory
for other entries).
1 Click the folder containing the contacts you want to copy or move (for example, Phone folder ).
2 Click the contact you wish to copy or move (or hold CTRL, then click to select multiple contacts).
3 Click the Copy button to copy (or click the Cut button to move).
4 Click the folder where you want the contacts stored (for example, PC folder ).
Add a contact to a caller group
You can use Phone Editor to assign phone book entries to one of the available caller groups. If you are unfamiliar with the caller
group feature, please see the user guide for your phone.
1 Right-click the contact you wish to assign to a caller group, then click Caller Group.
2 Click the drop-down arrow, then click the desired caller group.
3 Click OK to change the caller group assignment.
Create a contact group
You can create a contact group that functions as a distribution list when you use Phone Editor
to send SMS messages (see page 25). Contact groups are stored in the Contact Groups folder.
1 Click the + next to the PC folder, then click the Contact Groups folder.
2 Click Contact, point to New, then click Contact Group (or right-click the Contact Groups
folder, then select Create Contact Group).
3 Type the name of the new contact group folder, then press ENTER.
4 Add members to the contact group by copying or moving contacts into this folder (see the section, “Copy and move contacts”).
8
• TOUR THE MESSAGES WINDOW
New message
Reply and Forward
message
Message directory
(list of folders or
locations where
messages are stored)
Print message
Editing tools (cut, copy, paste, delete)
Memory status (SIM card and
phone message memory)
Message viewer
List of text
messages for the
selected folder
(read and unread)
[ 25 ]
Page 30

Nokia Phone Editor
• SEND AND MANAGE SMS MESSAGES
You can use the Messages application in Nokia Phone Editor to send and manage SMS messages from your PC. When you launch
the Phone Editor application, the contents of the message folders in your phone are read into Phone Editor. The messages are
organized into the following folders on your PC:
Folder name Description
Inbox Shows all SMS messages you have received.
A green message icon indicates an unread message.
Outbox Stores messages that are being sent or waiting to be sent (in the event the network is
unavailable or signal strength is weak).
Your own
Messages
Sent Messages Stores a copy of all messages you send using Phone Editor.
Drafts Stores a draft of unsent messages you create using Phone Editor.
PC Stores messages on your PC hard drive.
Deleted Items Stores all of the messages you delete using Phone Editor. To permanently delete a message,
Stores a draft of unsent messages you write from your phone, regardless of the folder on
your phone in which it was saved.
Drafts of unsent messages created in Phone Editor are saved in the Drafts folder.
Enable this option from the Phone Editor Settings menu (Messages tab).
Drafts of unsent messages created in your phone are saved in the Own Messages folder.
select the message from the Deleted Items folder, then press the DEL (Delete) key on your
PC keyboard.
Write and send a text message
1 Click the Write Message button
2 Enter your message in the Message field.
Observe the character counter above the message field.
3 Enter the recipient’s phone number in the Recipient field.
Tip: You can also enter the first few letters of the recipient’s name (as
stored in your phone book), then click the Check Names button .
4 Click the Send button on the toolbar (or click File, then click Send).
8
Work with text messages
To view the messages that you have received, click the Inbox folder in the Messages directory. Once you receive a text message,
you can act on the message in a variety of ways:
Action Instructions
Read Double-click the message header in the Inbox to view the message.
Use the Next or Previous buttons to view additional messages.
Reply Click the Reply button. Enter your reply message.
Verify that recipient’s contact information is correct, then click the Send button.
Forward Click the Forward button. Enter any additional information.
Enter the recipient’s name or number, then click the Send button.
Print While viewing the message, press the Print button.
Delete While viewing the message, press the Delete button.
[ 26 ]
Page 31

Nokia Phone Editor
Copying and moving messages
Your PC hard drive offers you virtually unlimited storage space for text messages. You can copy messages to the Phone Editor’s PC
folder to back up your data. Or you can move messages to the PC folder, making more memory available for other entries.
1 Click the folder containing the messages you want to copy or move (for example, Inbox ).
2 Click the message you wish to copy or move (or hold CTRL, then click to select multiple messages).
3 Click the Copy button to copy (or click the Cut button to move).
4 Click the folder where you want the messages stored (for example, PC folder ).
Create a new folder
You can create additional folders on your PC for message storage. Use these custom folders to help you organize your saved text
messages.
1 Click the PC folder .
2 Click Message, then click New Folder
3 Type the name for your new folder, then press ENTER to complete the process.
Saving a messages as a text file
You can also save text messages to your PC as text (.txt) files for use with other program (for example, word processing programs).
While reading a message, select the Save As command from the Message menu.
• EDIT PROFILES AND CALLER GROUPS
You can use the Profiles application in Nokia Phone Editor to view your
profiles and caller groups settings at a glance. You can edit profile and
caller group settings quickly and easily from your PC’s keyboard.
Edit a profile
1 Click the Profiles button on the Phone Editor’s navigation bar.
2 Click the name of the profile you want to edit from the list.
3 Use the drop-down arrows to modify the various profile settings.
4 Click Apply to apply the changes you make to your phone memory.
If you change the Alert for settings to one of the caller groups listed,
your phone uses the profile you are editing to notify you of callers
assigned to that caller group.
RENAME THE SELECTED PROFILE
1 Click Edit, then click Rename.
2 Type the new name, then press ENTER to save your changes.
Edit caller groups
1 Click the Caller group tab (or click the Caller Groups folder).
2 Click the name of the caller group you want to edit from the list.
3 Use the drop-down arrow to select a new ringing tone for the
selected caller group.
ADD/CHANGE GROUP GRAPHIC
1 Click the Location button, then navigate to the location of the
graphic you want to use.
2 Select the caller group logo file, then click Open.
3 Click Apply to send the updated settings to the phone.
8
[ 27 ]
Page 32

Nokia Phone Editor
RENAME THE SELECTED CALLER GROUP
1 Click Edit, then click Rename.
2 Type the new name, then press ENTER to save your changes.
• EDIT SETTINGS
You can use the Settings application in Nokia Phone Editor to view and
edit a variety of phone settings, as well as configure how Phone Editor
handles items you delete. The Settings application divides all of the
settings into three properties tabs, as described below:
• General is used to specify how you want Phone Editor to process
deleted items.
• Messages is used to edit or add message settings group. Also used
to enable/disable saving a copy of your sent messages.
• Accessories is used to modify how the various accessories work in
conjunction with your phone’s profiles.
• User is used to edit and store your user information.
• LAUNCH OTHER PC SUITE APPLICATIONS
The Phone Editor navigation bar contains buttons that can be used to launch the other PC Suite applications. Use these buttons
while in Phone Editor to launch PC Composer, PC Graphics, PC Sync, or Content Copier.
8
[ 28 ]
Page 33

Wireless modem setup
9 Wireless modem setup
Important: This feature is available only if your service provider’s network supports digital data and fax services using
circuit-switched data (CSD). A subscription to these services may also be necessary. Please check with your service provider
for more details.
Your phone can function as a wireless modem when connected to your PC (using IR or cable). Once your phone is installed and
configured properly, your phone works in conjunction with your PC data or fax software, allowing you to connect to a corporate
network, the Internet, or check e-mail wherever you are.
Important: If you wish to connect your phone and PC using IR, make sure that your PC IR port is functioning properly and
that there are no device conflicts. Windows cannot detect your phone if the IR port is not functioning properly or conflicting
with another device.
• DOWNLOAD MODEM SOFTWARE
During the modem installation process, Windows looks for software specific to the new device being installed. The modem software
for your phone can be found in the software downloads section of the Nokia Web site:
http://www.nokia.com/us
Since the Add New Hardware Wizard for all Windows operating systems searches the A:\ drive for device drivers first, Nokia
recommends that you download this file and save it to a floppy diskette.
Note: If you choose to save the file to your hard drive, please make note of the path to the file as this information is
required to complete the installation successfully. Depending on your operating system, locating this file on your hard drive
may add additional steps to the installation process.
Choose the correct file
The software downloads section of the Nokia Web site contains the following modem software drivers for your phone:
n6340iCable.inf - used for a cable connection
n6340iIrDA.inf - used for an infrared connection
Important: Windows 2000 Professional operating system users who wish to connect to a PC using IR, see “Learn about IR
and Windows 2000 Professional operating system” on page 31 for more information on modem setup for your operating
system.
Perform multiple modem installations
To provide yourself with the option of using either a DLR-3P data cable or IR to make your connection, you must perform the
modem installation process twice (once for each connection method).
Example: You have chosen IR as your connection method, yet you cannot find a flat work surface so you can align the IR ports of
your phone and PC. You decide to connect using the data cable instead. Before you can use the cable, you must already have an
additional modem installation using the driver for the data cable.
• GETTING CONNECTED FOR THE FIRST TIME: DLR-3P DATA CABLE (ALL WINDOWS
VERSIONS)
1 Connect the data cable to the serial port on the back of your laptop or desktop computer.
Note: If you are using a serial mouse, you need to purchase a RS232-to-PS/2 adapter and move your mouse to an existing
PS/2 port, or purchase a PS/2 mouse. Check with your local computer dealer for these accessories.
2 Connect the DLR-3P data cable to your Nokia phone. Your phone displays a message
indicating you have connected the data cable successfully, then returns to the Start
screen.
3 Click Start, point to Settings, then click Control Panel.
4 Double click the Modems or Phone and Modem Options control panel icon.
5 Click Add.
Windows 2000 users, please click the Modems tab, then click Add.
9
[ 29 ]
Page 34

6 Select the Do not detect my modem... option, then click Next.
7 Click Other if asked about a PCMCIA modem (this screen may not
appear on all systems), then click Next.
8 Insert the floppy diskette containing the .inf file in your drive now.
Click the Have Disk button.
9 Confirm that A:\ is the location of the n6340iCable.inf file, then click
OK.
10 Select Nokia 6340 via Cable from the list of available choices, then
click Next.
11 Select the COM port where the cable is attached (typically COM1), then click Next.
The Wizard indicates it has located the correct software for your phone.
12 Click Yes to continue the installation if Windows presents the Digital Signature Not Found message.
13 Click Finish when Windows informs you that the device is installed
successfully.
14 Verify that your Nokia phone connected using the DLR-3P data cable
appears in the list of modems.
Complete the process by configuring your data software to work with the
new IR modem configuration. For more information, refer to “Configure
your data and fax software” on page 33.
Wireless modem setup
• CONNECT FOR THE FIRST TIME: IR (WINDOWS 98/ME)
The preferable distance between the two devices making an IR connection is a range of three inches (7.6 cm) to
three feet (.9 m) maximum. There must be no obstructions between the two devices, and the IR ports of the two
devices must be pointing at each other.
ENABLE IR COMMUNICATIONS ON YOUR PC AND PHONE
1 Double-click the Infrared icon in the Control Panel (Windows 98 only).
Windows ME users, please go to step 4).
Tip: Windows 98 users can also launch the Infrared Monitor by double-clicking
the Infrared Monitor icon in the system tray.
2 Click the Options tab, then select Enable infrared communication.
3 Verify that the install software option for Plug and Play devices is selected.
4 Click Apply, then click the Status tab.
5 On your phone, press Menu, scroll to Infrared, then press Select.
6 Align the IR ports of both devices.
When a successful IR connection has been made, the IR monitor
indicates that your phone has been found.
Complete modem installation
The Windows Add New Hardware Wizard launches immediately after
Infrared Monitor displays the connection status.
To complete modem installation:
1 Insert the floppy diskette containing the n6340iIrDA.inf modem
driver file when the Add New Hardware Wizard screen appears.
2 Click Next as necessary until Windows asks you for the location of
the n6340iIrDA.inf modem driver file.
3 Select A:\ or the floppy drive option (as necessary), then click Next.
The Wizard indicates it has located the correct software for your
phone.
4 Click Next (as needed) to finalize the installation.
9
[ 30 ]
Page 35

Wireless modem setup
5 Click Finish when Windows informs you that it has installed the
device successfully.
6 Verify that your Nokia phone connected using IR appears in the list of
modems.
Complete the process by configuring your data software to work with the
new IR modem configuration. For more information, refer to
your data and fax software” on page 33.
“Configure
• LEARN ABOUT IR AND WINDOWS 2000 PROFESSIONAL OPERATING SYSTEM
Microsoft redesigned its implementation of IR services with the release of Windows 2000 Professional. To make an IR serial
connection between IR-equipped Nokia phones and IR-equipped PCs running Windows 2000, you must download and install the
following Microsoft software update: Security Update, August 19, 2001
Although the Security Update, August 19, 2001 software appears to be incorporated into Windows 2000 Security Rollup
Package 1, Nokia has determined that the Security Update, August 19, 2001 software is still required in addition to SRP1.
Locate Security Update, August 19, 2001
To locate the necessary software:
1 Point your Web browser to: http://www.microsoft.com/windows2000/downloads/
2 Using the site search utility, locate the Microsoft Knowledge Base article: Q252795.
3 Click the link to access Security Update, August 19, 2001, located in the list of
search results.
4 Follow the instructions for downloading the software to your PC hard drive.
Observe Windows 2000 Modem Setup instructions
1 Download and install the security update from Microsoft’s web site, then reboot your PC.
2 When your PC has completed the reboot process, enable IR communications on your phone.
3 Align the IR ports of your phone and PC.
When a successful IR connection has been made, the IR monitor indicates that your phone has been found. Windows 2000
operating system installs your Nokia phone as Standard Modem over IR link.
Confirm successful installation of your phone using the Phone and Modem Options Control Panel. Use this new device with your
data application (for example, Dial-up Networking).
• GETTING CONNECTED FOR THE FIRST TIME: IR (WINDOWS XP HOME AND PROFESSIONAL
OPERATING SYSTEM)
9
Wireless modem setup for Windows XP is similar to that of the Windows 2000 operating system (once the security update has been
applied). To install your phone as a wireless modem using IR for Windows XP, please
instructions” on page 31, but begin with step 2.
see “Observe Windows 2000 Modem Setup
[ 31 ]
Page 36

Wireless modem setup
• LEARN ABOUT IR AND WINDOWS NT WORKSTATION 4.0 OPERATING SYSTEM
Microsoft does not support IR for Windows NT Workstation 4.0. However, the manufacturer of your laptop or desktop PC may offer
their own support of IR for the Windows NT operating system. Check with the manufacturer of your hardware for more information.
9
[ 32 ]
Page 37

Configure your data and fax software
10 Configure your data and fax software
Before you can use your phone to send and receive digital data and fax calls, you must configure your data software so that it uses
your phone rather than your existing modem. You may consider creating a separate set of dialing properties to use when your phone
is connected to your computer, rather than changing any existing settings.
The following pages are designed to help you configure some of the more popular applications to be used with your Nokia phone.
• OBSERVE THE FOLLOWING
Before making or receiving digital data or fax calls:
• You must subscribe to digital data and fax services with your service provider.
• Your phone must be powered up, and you must be in a digital network. Do not switch the phone on when wireless phone use
is prohibited or when it may cause interference or danger.
• Your PC IR port or COM port must be working properly
• You must establish a connection between your PC
• You must already have installed your Nokia phone as a modem.
• CONFIGURE YOUR DATA SOFTWARE
Before you can use your phone as a wireless modem, you must configure your data software so that it uses your phone as the active
modem (rather than your existing modem). The following pages are designed to help you configure some of the more popular
applications for digital data and fax calls.
• USE MICROSOFT DIAL-UP NETWORKING
You may be using Microsoft’s Dial-up Networking feature to connect to your Internet service provider, or to make a remote
connection to your corporate network (including corporate e-mail server using Microsoft Outlook, or Lotus cc:Mail).
Rather than altering the existing configurations you use when dialing with your existing modem, consider creating a new
connection exclusively for use with your Nokia phone (as detailed below).
GATHER CONFIGURATION INFORMATION
You need the phone number for your Internet service provider or for your company’s remote access server. When testing the new
connection, you also need your user name and password.
Create a new connection (Windows 98/ME)
1 Double-click the My Computer icon, then double-click the Dial-up Networking folder.
Windows ME operating system users: Click Start, point to Settings, then click Dial-up Networking.
2 Double-click the Make New Connection icon.
3 Type a name for your new connection (for example, Internet-Nokia phone).
4 Click the drop-down arrow and select your Nokia phone as the
modem to use, then click Next.
5 Enter the area code, telephone number, and country code (if
necessary), then click Next.
6 Click Finish to save the new configuration in your Dial-up
Networking folder.
7 Make sure to configure any necessary network parameters for
this connection prior to dialing (IP address of DNS or WINS,
etc.).
Note: For more information on configuring your network connection, consult your Internet service provider or your
company’s help desk.
10
[ 33 ]
Page 38

Configure your data and fax software
Create a new connection (Windows 2000)
1 Click Start, point to Settings, then click Network and Dial-up Connections.
2 Double-click Make New Connection, then click Next to begin the Network Connection Wizard.
3 Verify that Dial-up to private network is selected, then click Next.
4 Select only your Nokia phone as the active modem, then click Next.
5 Enter the area code, telephone number, and country code (if necessary), then click Next.
6 Select the connection availability, then click Next.
7 Type a name for your new connection (for example, Internet-Nokia phone), then click Finish.
Your new Dial-up Networking connection is now ready for use. Make sure to configure any necessary network parameters for this
connection prior to dialing (IP address of DNS or WINS, etc.).
Create a new connection (Windows XP)
1 Click Start, then click Control Panel.
2 Double-click Network Connections.
3 Click Create a new connection in the Network Tasks pane, then click Next to begin the New Connection Wizard.
4 Verify that the Connect to the Internet option is selected, then click Next.
5 Click the Set up my connection manually option, then click Next.
6 Click the Connect using a dial-up modem option, then click Next.
7 Select only your Nokia phone as the active modem, then click Next.
8 Type a name for your new connection (for example, Internet-Nokia phone), then click Next.
9 Enter the area code, telephone number, and country code (if necessary), then click Next.
10 Enter the username and/or password as supplied by your wireless service provider (if required).
11 Cancel any of the options on the Internet Account Information screen that you do not want or need, then click Next.
12 Click Finish to complete the Wizard.
Your new Dial-up Networking connection is now ready for use. Make sure to configure any necessary network parameters for this
connection prior to dialing (IP address of DNS or WINS, etc.).
Connect to the network
Make sure you establish a connection between your phone and PC (using the DLR-3P data cable or IR) before making a digital data
call.
1 Double-click the new connection (for example, Internet-Nokia phone).
2 Enter your user name and password, then click Connect.
10
[ 34 ]
Page 39

Configure your data and fax software
3 Your phone displays Connecting... while establishing a connection.
Once a successful connection has been made, Data call appears on the phone’s screen.
Note: Your wireless service provider must support digital data for this feature to work. Contact your service provider to
verify that this service is available in your area.
Notes about data calls
• Avoid terminating a digital data/fax calls by pressing the key. This action may cause your data application to lock up
temporarily and could cause loss of data.
• Digital data/fax calls cannot be initiated using the phone keypad. All calls must be initiated using the data or fax software.
• Any touch tones (DTMF tones) needed for calling cards, special long-distance access numbers, etc. must be programmed into
the dialing string.
• LEARN ABOUT OTHER DATA APPLICATIONS
There are several other types of telecommunications applications that can be used with your Nokia phone and your computer. Some
of these include:
• Terminal Programs are used to connect to BBS services (bulletin board system) and mainframe or mini-mainframe
computers. Quarterdeck’s Procomm Plus, Microsoft HyperTerminal, Microsoft Works (Communications Module), R-Link,
and P-Term are just a few examples of this type of program.
• Remote Administration Programs are used to remotely access your home or office computer for file sharing or remote
control. Symantec’s PCAnywhere, McAfee’s Remote Desktop and Reach Out, Farallon’s Timbuktu, Claris’ Apple Remote
Access, and Attachmate’s EXTRA! are a few examples of this type of program.
• On-line Services are used to access the Internet, or discussion and information forums within the service. On-line services
provide their own proprietary software interface for accessing their service. America Online, CompuServe, MSN (Microsoft
Network), and Prodigy are just a few on-line service providers that use their own proprietary software.
Important: These examples are provided for your information only. Nokia does not endorse or provide support for any of
the above applications or services.
REMINDERS!
Before you can use your Nokia phone with ANY data program, you must first do the following:
• Establish a connection between your phone and PC.
• Use the setup menu from your data program to set your Nokia phone as the active modem. Consult the User Guide or Help
menu for more information.
• Review the information, “Observe requirements for digital data calls” on page 1.
10
• FOR AMERICA ONLINE (AOL) USERS
Your America Online software can be configured to use your Nokia
phone as a wireless modem.
MODEM SETUP
To add your Nokia phone as a new modem to AOL’s connection
setup:
1 From the Sign On screen, click SETUP.
2 Click Expert Setup, then click the Devices tab.
3 Click the Expert Add button.
4 Verify that Modem (telephone line connection) is selected as
the type of connection device you want to add, then click Next.
5 Select the generic modem option (for example, Standard
(Hayes Compatible)) from the list of modems.
6 Select the COM port assigned to your PC IR COM port, or the hardware COM port where the DLR-3P is connected.
7 Set the port speed to 14400 bps, then click OK.
[ 35 ]
Page 40

Configure your data and fax software
Modify Locations
Now that your Nokia phone is configured for use by the AOL software, you need to modify
your Locations settings to use your Nokia phone as the active modem.
LOCATIONS SETUP
To modify an existing location:
1 From the Connection Setup screen, click the Locations tab.
2 Double-click the number for the location you wish to use with your Nokia phone.
3 Click the Connect using drop-down arrow, then click Modem: Standard (Hayes compatible) on COMn (where n is the COM
port for your PC).
4 Click the Speed drop-down arrow, then click 14400 bps.
5 Click OK to confirm your changes, then click Close to return to the Sign On screen.
• CONFIGURE YOUR FAX SOFTWARE
Before you can use your phone to send and receive fax calls, you must configure your fax software so that it uses your phone as
the active modem (rather than your existing modem).
Many of the most popular fax programs should support multiple modems connected to a PC or laptop computer, including
Symantec WinFax Pro, Smith Micro Software HotFax (version 3.02 or newer), Castelle FaxPress, etc.
Note: Data or fax calls using your Nokia phone are possible only if your service provider supports digital data and fax service.
You may be required to subscribe to these services. Check with your service provider before attempting to send or receive faxes.
Select the correct modem
Each fax application typically has a setup menu that can be used to alter
the settings for your modem, as well as define how and when calls are to
be received (for for example, immediately, on the third ring, etc.). This menu
may also provide you with a list of available modems that you can use when
sending and receiving fax calls.
Use your fax program settings menu to select your Nokia phone as the
active fax modem.
Observe hardware settings
Use the modem properties dialog box of your fax software to confirm the
following settings:
• Communications port: COMn (where n= the COM port number
assigned to your phone)
• Initialization: 19200 bps
• Modem type: Class 2.0
• Flow control: Hardware
10
[ 36 ]
Page 41

Connect to PalmOS devices
11 Connect to PalmOS devices
Important: The following instructions are based on PalmOS (operating system) software 3.3 and those devices that can run
this version (or newer versions) of the operating system. For more information, please visit:
http://www.palmos.com/
• LEARN ABOUT YOUR PHONE AS A WIRELESS MODEM
Important: This feature is available only if your service provider’s network supports circuit-switched data (CSD) digital data
and fax services. A subscription to these services may also be necessary. Please check with your service provider for more
details.
It is possible to make a serial connection between your phone and your PalmOS device and use it as a wireless modem to perform
HotSync operations with your PC.
In addition, third-party software is also available that allows you to browse the Web, send and receive faxes, and send or receive
e-mail directly to your PalmOS device. Check your owners manual or the PalmOS web site for more information on third-party
software.
Important: To access the Internet from your handheld device, you must have an existing dial-up account with a full-service
Internet provider or dial-up access to a corporate network. Connection to online services such as CompuServe or Prodigy was
not available at the time this guide was prepared.
• LEARN ABOUT CONNECTION OPTIONS
You can create a connection between your PalmOS device and your phone using either the DLR-3P data cable or IR.
Use a DLR-3P data cable connection
Most PalmOS devices come with a serial cable used to connect your device with a desktop PC or laptop computer. This cable has
either a USB male or an RS-232C female connection at one end and a special connector that plugs into the handheld device (either
directly or using a docking cradle).
• If the serial cable for your PalmOS device has the standard RS-232C connector, you need only the DAN-1 (null modem adapter
with RS-232C connectors on each end) supplied in the DLR-3P accessory sales package.
• If the serial cable for your PalmOS device has a USB connector, you need to purchase an additional serial cable with the
standard RS-232C connector. The manufacturer of your PalmOS device sells this cable as an accessory. You also need the DAN1 (null modem adapter with RS-232C connectors on each end) supplied in this sales package.
DAN-1
This adapter is used to join the serial cable to the DLR-3P data cable (as shown in the figure below).
DAN-1
null modem adapter
DLR-3P
cable
Note: Macintosh PalmOS device users do not need to use the RS-232 to DB9 adapter.
Important: If you are unable to order the RS-232C serial cable as an accessory, you may be able to purchase a USB-to-RS-
232C adapter. This device may be available at your local computer retailer, or using the Internet. Or you may consider using
IR as your connection method.
Palm
device’s
cable
11
Use an IR connection
Your PalmOS device should be equipped with an IR port. You may find it more convenient to connect your phone and PalmOS device
using IR, especially if you prefer to leave your serial cable or docking cradle attached to your PC.
Before dialing, make sure you enable IR communications on your PalmOS device, then align the IR ports of the two devices. The
preferable distance between the two devices in an IR connection is a range of three inches to three feet maximum. There must be
no obstructions between the two devices and the IR ports of the two devices have to be pointing at each other.
[ 37 ]
Page 42

Connect to PalmOS devices
Your Nokia phone is a Class 1 Laser Product.
• MODIFY CONNECTIONS PREFERENCES
Before you can make data calls using your PalmOS device and your Nokia phone as a wireless
modem, you need to create a new connection device in the Connections preferences folder.
1 Tap the Applications icon, then tap Prefs
2 Tap the Categories drop-down menu, then tap Connection.
3 Tap New. Enter the name of the new connection device (for example, Nokia Phone).
4 Click the Connection Method drop-down arrow, then click either Serial to Modem (for
DLR-3P data cable connection) or IrCOMM to Modem (for IR connection).
5 Click Details.
6 Set speed to 19,200 bps and flow control to Automatic.
7 Click OK when finished, then click OK to close the Edit window.
8 Your new Nokia phone configuration should now appear in the list of Connection options, and is available to all applications
that support a modem connection.
• MAKE A DIAL-UP CONNECTION
Once you have a modem configuration for your Nokia phone, you can use that configuration with any existing TCP/IP or network
preferences, as well as any e-mail, Web browser, or fax programs from other manufacturers.
Modify data connection settings
Now that your Nokia phone is configured as a wireless modem for use with your PalmOS device, you need to modify your existing
Windows RAS configuration to use your phone as the active modem.
1 Tap the Applications icon, then tap Prefs.
2 Tap the Categories drop-down menu, then tap Network.
3 Tap the Services drop-down arrow, then tap Windows RAS.
4 Tap the Connection drop-down arrow, then tap the name of the connection device (for example, Nokia Phone).
Your existing Windows RAS connection is now configured to dial using your Nokia phone as a wireless modem.
Before you make a digital data call
Before initiating the data call from your PalmOS device, make sure you enable IR communications on your phone, then align the
IR ports of the two devices. If you are using the DLR-3P data cable for the connection, make sure the cable is connected properly
to both the phone and computer COM port.
Also see “Observe requirements for digital data calls” on page 1.
11
[ 38 ]
Page 43

Connect to Microsoft PocketPC OS devices
12 Connect to Microsoft PocketPC OS devices
• LEARN ABOUT YOUR PHONE AS A WIRELESS MODEM
Important: This feature is available only if your service provider’s network supports circuit-switched data (CSD) digital data
and fax services. A subscription to these services may also be necessary. Please check with your service provider for more
details.
You can use your Nokia phone as a wireless modem with Pocket PC devices, then use these devices to check e-mail or browse the
Web.
You may also be able to send and receive faxes from your Pocket PC device. However, this may require additional software from
another manufacturer. Check the user guide or Web site for your device, or the Microsoft Pocket PC Web site for more information on
available software:
http://www.microsoft.com/mobile
Important: To access the Internet from your handheld device, you must have an existing dial-up account with a full-service
Internet provider or dial-up access to a corporate network. Connection to online services such as CompuServe or Prodigy was
not available at the time this guide was prepared.
• LEARN ABOUT CONNECTION OPTIONS
You can create a connection between your PocketPC device and phone using either the DLR-3P data cable or IR.
Use a DLR-3P data cable connection
Most PocketPC devices come with a serial cable used to connect your device with a desktop PC or laptop computer. This cable has
either a USB male connection or an RS-232C female connection at one end, and a special connector that plugs into the handheld
device (either directly or via a docking cradle).
• If the serial cable for your PocketPC device has the standard RS-232C connector, you need only the DAN-1 (null modem adapter
with RS-232C connectors on each end) supplied in the DLR-3P data cable accessory sales package.
• If the serial cable for your PocketPC device has a USB connector, you need to purchase an additional serial cable with the
standard RS-232C connector. The manufacturer of your PocketPC device sells this cable as an accessory. You also need the
DAN-1 (null modem adapter with RS-232C connectors on each end) supplied in this sales package.
DAN-1
This adapter is used to join the serial cable to the DLR-3P data cable (as shown in the figure below).
DAN-1
null modem adapter
DLR-3P
cable
Important: If you are unable to order the RS-232C serial cable as an accessory, you may be able to purchase a USB-to-RS232C adapter. This device may be available at your local computer retailer, or using the Internet. Or you may consider using
IR as your connection method.
Pocket PC’s
serial cable
Use an IR connection
Your PocketPC device should be equipped with an IR port. You may find it more convenient to connect your phone and PocketPC
device using IR, especially if you prefer to leave your serial cable or docking cradle attached to your PC.
Before dialing, make sure you enable IR communications on your PocketPC device, then align the IR ports of the two devices. The
preferable distance between the two devices in an IR connection is a range of three inches to three feet maximum. There must be
no obstructions between the two devices and the IR ports of the two devices have to be pointing at each other.
Your Nokia phone is a Class 1 Laser Product.
12
[ 39 ]
Page 44

Connect to Microsoft PocketPC OS devices
• CONFIGURE A MODEM CONNECTION
The procedure for creating a new modem connection for use with your Nokia phone is similar to that found in the various Windows
desktop operating systems.
Important: You may need to first disable the option for your Pocket PC device that automatically begins synchronization
when a connection is detected. For more information on this task, please consult the user guide for your device.
Creating a modem connection
To create a new modem connection to your Internet service provider or corporate network:
1 Tap the Start icon , then tap Settings.
2 Tap the Connections tab, then tap Modem.
3 Tap New Connection, then enter a name for the connection (for example, Internet-Nokia phone).
4 Click the modem selection drop-down arrow, then select the IrCOMM or Generic IrDA option for IR connections, or select
Hayes Compatible on COM1 when using the DLR-3P data cable for the connection.
5 Tap Advanced to access additional configuration properties for Port Settings, TCP/IP, and Name Servers (if required by your
corporate network or ISP).
6 Tap OK to close the Advanced properties window, then tap Next.
7 Enter the area code (if necessary) and phone number, then click Next.
8 Tap Wait for dialtone to deselect this option, then tap Finish.
12
Your new dialing configuration is now visible in the Modem Connections list.
[ 40 ]
Page 45

Connect to Microsoft PocketPC OS devices
You may need to click the Dialing tab and modify the way a PocketPC device dials local, long distance, and international numbers.
For more information on dialing patterns, consult your handheld device’s documentation.
Use your new modem connection
To connect to your Internet service provider or corporate network:
1 Tap the Start icon , then tap Programs.
2 Tap Connections, then tap your new modem connection (for example, Internet-Nokia phone).
3 Enter your user name, password, and domain (if necessary).
4 Click Connect.
When you have successfully logged on to the network, the status screen of your PocketPC device displays the message Device
Connected.
5 Launch your browser or e-mail application.
Before you make a digital data call
Before initiating the data call from your PocketPC device, make sure you establish a connection between your phone and the device.
Also see “Observe requirements for digital data calls” on page 1.
12
[ 41 ]
Page 46

Connecting to the Macintosh
13 Connecting to the Macintosh
It is possible to connect your phone to some Macintosh computers (PowerPC, G3, G4, PowerBook iMac and iBook computers) and
use these devices to send and receive faxes, check e-mail or browse the Web. Your phone acts as an external modem, and works
in conjunction with your existing data and fax applications.
• LEARN ABOUT SPECIAL HARDWARE NEEDS
Before you can make such a connection, special hardware is required to connect the DLR-3P data cable to the Macintosh serial port.
PalmPilot adapter (required)
This adapter is readily available from 3Com, and is a part of the MacPac connection kit. This kit was originally designed to connect
a PalmPilot to your Macintosh computer. The adapter (pictured below) is used to connect your DLR-3P data cable to the Macintosh
serial port.
Connect this end
to the DLR-3P data
cable
Connect this end to the
Macintosh serial port
(modem or printer).
USB (Universal Serial Bus) adapter
The new generation of Macintosh computers no longer have the traditional Macintosh serial ports used to connect printers and
modems. If your Macintosh is only equipped with a USB port, you will also need to purchase a USB-to-serial port adapter.
Belkin, Keyspan, and Iogear are just three manufacturers of such devices. These should be readily available at your local Macintosh
dealer, or from your favorite mail-order reseller (MacWarehouse, MacConnection, MacZone, etc.).
Once the USB adapter is connected to your Mac’s USB port, connect the appropriate end of the Palm adapter to the USB adapter
serial port.
• CONFIGURING THE MACINTOSH OS
If you are already using your existing modem (either built-in or PCMCIA card) to connect to your company’s network, the Internet,
or to send and receive faxes, you will have to use the Modem control panel to switch the active modem to your Nokia phone each
time you need to use it.
We recommend you download and install the freeware configuration utility, FreePPP from your favorite shareware site
(www.download.com, www.hotfiles.com, etc.). FreePPP allows you to store and recall multiple configurations for various services
(corporate network, mail server, Internet service provider), including which modem to use.
Modify FreePPP settings
Once FreePPP is installed properly, a new icon appears in the upper right corner of your screen (to the left
of the MultiFinder menu). Click and hold the mouse on the phone icon, then select Open FreePPP Setup...
When the setup screen displays, the details of the configuration may be hidden. Click the arrow on the
left side of the screen to display all of the configuration properties.
13
CONFIGURE A NEW MODEM
1 Click the Modems tab, then click New.
2 Enter a name in the Modem config name field to identify your Nokia phone.
[ 42 ]
Page 47

Connecting to the Macintosh
3 Use the pull-down menus to configure as follows:
Connected to: Printer-Modem Port
Port Speed: 19200 bps
Flow Control: CTS & RTS (DTR)
Dial type: Tone
4 In the Modem init string settings section, click the Use: option and enter the following init string: AT&F
5 Click OK, then click the Accounts tab.
6 Click New.
7 Enter a name to identify the new account.
8 Enter your username and password, then click the Dialup tab.
9 Enter the phone number (and area code, if necessary) in the Main Number section (and click the Dial area code option if
needed).
10 If there is an alternate dial-up number, enter the information in the Alternate Number 1 section, then click OK to complete
this screen.
11 Click the Options tab, and enter the necessary configuration information (see your internet service provider’s setup and
configuration information, or consult your company’s Helpdesk for the setup information).
12 Click OK to complete this section.
13 Use the pull-down menu to select your Nokia modem and dial-up account, then click the Connect button to dial the phone.
13
[ 43 ]
Page 48

Connecting to the Macintosh
Follow these steps to create configurations for your existing modem and any other Internet or corporate dial-up accounts you have.
Use the Open FreePPP Setup option to switch between modems or accounts, or Open FreePPP Connection (from the menu) to
dial the last configuration.
• LEARN ABOUT OTHER APPLICATIONS
You can use your Nokia phone with your favorite fax application to send and receive faxes. Please read the section, “Configure your
data and fax software” on page 30 for more information on configuring your fax software to be used with your Nokia phone.
13
[ 44 ]
Page 49

14 Index
Index
A
Abbreviations 2
About MIDI files 12
Add contact to caller group 25
Add new contact 24
Add New Hardware Wizard 30
AOL
CSD modem setup 35
Applications
compatible 1
C
Caller group logos 19
Caller groups
add contact 25
add/change group graphic 27
edit 27
rename 28
Change contact memory location 24
Change note duration 11
Change ringing tone pitch 11
Changing connection type 5
Changing PIM applications 16
Communications
distance between devices 2, 37, 39
enable IR 2
infrared 2
interruptions to IR 2
Compatible applications 1
Compose a ringing tone 10
Configure data software 33
Configure fax software 36
Configure PC Sync 14
Connect to a network/Internet 34
Connect to Palm devices 37
Connection Manager 5
Connection preferences (Palm) 38
Connection to PocketPC devices 39
Contact group
create new 25
Contacts
custom contact lists 16
deleting-settings 15
Content Copier 6
basics 6
compatible phones 6
log 7
saving data 7
source phone 7
target phone 7
unsupported phones 8
Copy contacts 25
Copy data to target phone 7
Copying/moving SMS messages 27
Create a new connection 33
CSD
AOL settings 35
dial-up connection for PalmOS 38
modem setup (PocketPC OS) 40
Custom contact list 16
D
Data applicatons 35
Data call
configure data software 30, 31
establish IR connection 30
modem installation 30
Data call notes 35
Delete contact 24
Delete notes and rests 11
Delete SMS messages 26
Deleting contacts-settings 15
Dial-up connection
PalmOS 38
Dial-up Networking 33
Digital data
before you begin 33
Digital data call reminders 35
Digital data call requirements 1
Download modem driver 29
E
Edit a ringing tone
basics 10
delete notes/rests 11
save 11
Edit caller groups 27
Edit graphic
bitmap files 21
created with PC Graphics 21
existing graphic in phone 21
Edit Profiles 27
Edit ringing tone
change duration 11
change note duration 11
change pitch 11
Edit settings 28
F
Fax
configuring software 36
modem selection 36
File formats
not supported 21
supported 21
H
Half-tone adjustment 22
Hardware setup
PC Composer 9
I
Ignore contact deletions 15
Infrared 2
Installation
change language of installation 4
language selection 4
note to Windows ME users 3
PC Suite 3
temporary files 3
uninstall PC Suite 4
Introduction 1
IR 2
enable IR on PC 30
establishing a connection 30
Windows 2000 update 31
Windows NT Workstation 4.0 32
14
[ 45 ]
Page 50

Index
M
Macintosh support 42
Messages window 25
Modem driver 29
download 29
Modem installation 30
Windows 2000 31
Modem setup 29
configure data software 33
Dial-up Networking 33
Palm 38
PocketPC (CSD) 40
Move contacts 25
N
New contact list
Lotus Organizer 17
Other 17
Outlook 16
New graphic
creating 19
saving 20
send as SMS 20
transfer to phone 20
New modem connection 33
New Synchronization 16
Nokia Modem Setup (Windows 2000) 31
Note capacity 10
ringing tone 10
Notes on data calls 35
NT Workstation 4.0 32
NT Workstation 4.0 and Infrared 32
O
Open Standard MIDI file 12
Other data applications 35
P
Palm(tm) connectivity 37
PC 2
PC Composer 9
launching 9
overview of window 9
PC Suite
Content Copier 6
featured components 3
installation 3
PC Composer 9
PC Sync 14
PC Sync 14
automatic startup 16
basics 15
changing PIM applications 16
exit application 15
New Synchronization 16
options 16
starting application 15
supported PIMs 14
synchronize for the first time 15
task bar icon 15
PC Sync configuration
calendar and conacts 14
general 14
PIM properties 15
resolving conflicts 14
Phone Editor
add/delete contacts 24
change group graphic 27
change memory location 24
Contacts window 23
copying/moving messages 27
create a contact group 25
edit caller groups 27
edit profiles 27
managing contacts 23
Messages window 25
print SMS messages 26
read SMS messages 26
rename caller groups 28
reply/forward SMS messages 26
storing messages on PC 27
write/send SMS message 26
Phone editor
overview of functions 23
Picture messages 19
PIM 2
PocketPC
CSD data call 41
modem setup 39
PocketPC OS
modem setup (CSD) 40
Prerequisites
digital data/fax calls 33
Print SMS messages 26
Profiles
edit 27
R
Rename caller groups 28
Requirements
digital data calls 1
system 1
Resolving synchronization conflicts 14
Ringing tone
edit 11
PC Composer 9
playback 10
ringing tone 10
Ringing tones
from MIDI files 12
RTTTL
Using with PC Composer 13
S
Safety notes 2
Save new ringing tone 11
Save SMS message as text file 27
Saving phone data 7
Send ringing tone options 11
Send SMS message 26
Send tone 12
Send/manage SMS messages 26
Sending ringing tone to phone 11
Settings
edit 28
SMS messages
copying/moving 27
delete 26
read 26
reply/forward 26
save as text file 27
storing on PC 27
Sound card setup 9
14
[ 46 ]
Page 51

Source phone 7
Standard MIDI File
edit 13
Standard MIDI file
open 12
save 13
Standard MIDI files (about) 12
subset of phone book 16
Synchronization conflicts 14
System requirements 1
T
Target phone 7
Time-out 2
Types of data applications 35
U
Using PocketPC modem connection (CSD) 41
W
Windows 2000 Infrared 31
Windows ME installation note 3
Wireless modem
make a data call (CSD) 41
overview (PalmOS) 37
overview (PocketPC OS) 39
Wireless modem installation 30
Index
[ 47 ]
14
 Loading...