

Quick start
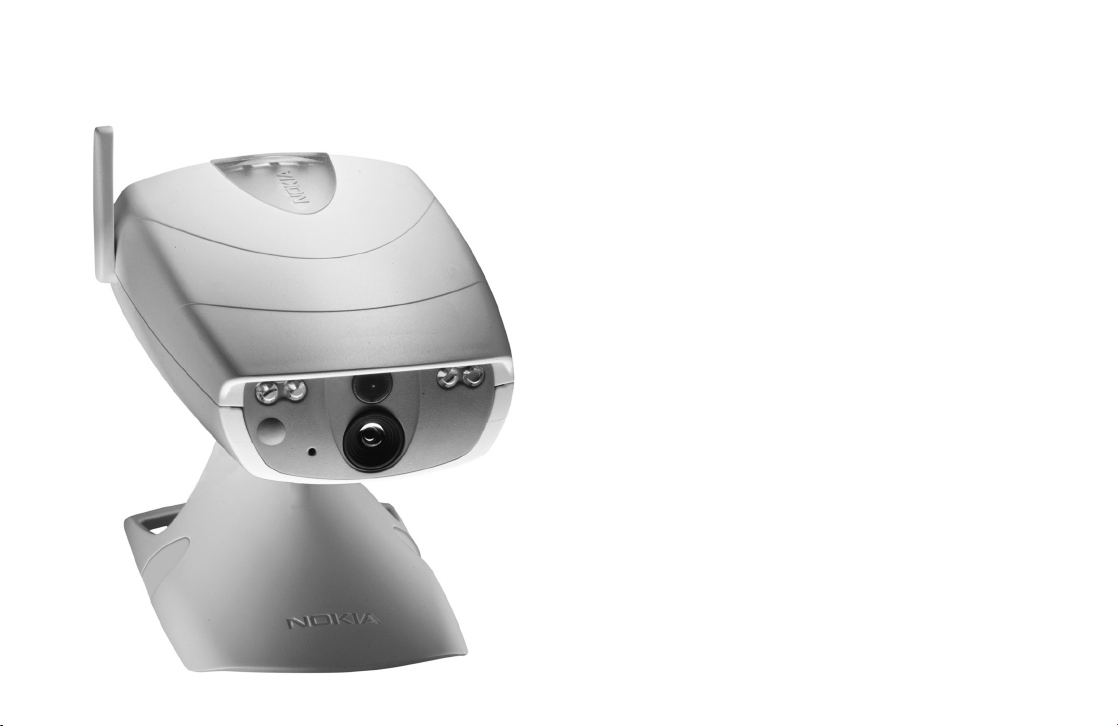
NOKIA OBSERVATION CAMERA
TAKING THE CAMERA IN USE
CAPTURING AN IMAGE
USING MOTION DETECTION
USING TIMED IMAGING
CHECKING THE TEMPERATURE
Issue 1 EN
9311282

For your safety
Taking the camera in use
Read these simple guidelines. Breaking the rules may be dangerous or illegal.
Further detailed information is given in the user’s guide.
Do not switch the camera on when wireless phone use is prohibited or
when it may cause interference or danger.
ROAD SAFETY COMES FIRST Don't install the camera in a vehicle. Do
not use the camera or your mobile phone to control or configure the
camera while driving; park the vehicle first.
INTERFERENCE All wireless devices may get interference, which could
affect performance.
SWITCH OFF IN HOSPITALS Follow any regulations and rules. Switch
the camera off near medical equipment.
SWITCH OFF IN AIRCRAFT Wireless devices can cause interference in
aircraft.
SWITCH OFF WHEN REFUELLING Don't use the camera at a refuelling
point. Don't use near fuel or chemicals.
SWITCH OFF NEAR BLASTING Don't use the camera where blasting is
in progress. Observe restrictions, and follow any regulations or rules.
USE SENSIBLY Use only in the normal operating positions. Don't touch
the antenna unnecessarily.
QUALIFIED SERVICE Only qualified personnel may install or repair
equipment.
ENHANCEMENTS AND BATTERIES Use only approved enhancements
and batteries. Do not connect incompatible products.
BACKUP COPIES Remember to make backup copies of all important
data.
CONNECTING TO OTHER DEVICES When connecting to any other
device, read its user's guide for detailed safety instructions. Do not
connect incompatible products.
WATER-RESISTANCE Your camera is not water-resistant. Keep it dry.
Copyright © 2003 Nokia. All rights reserved.
Note: Further detailed information is given in the separate user’s
guide. Do not use this quick start guide in place of the complete
user’s guide, which provides important safety and maintenance
information.
To use the Nokia Observation Camera you need:
• two SIM cards: one for your phone and one for the camera, with
Multimedia Service (MMS) activated on both of them, see “4.
Configure the mandatory settings” below
• a compatible, MMS-enabled mobile phone with a colour display
• GSM network coverage both in the phone and camera premises
You can configure the settings of the camera with either text
messages or the PC Suite software found on the CD-ROM.
Note: If you use text messages, only one user (the master user) is
able to use the motion detection and timed imaging features.
With PC Suite, up to 20 users can use these features.
Warning: In order to comply with RF exposure requirements for
mobile transmitting devices, a minimum distance of 20 cm must
be maintained between the camera and all persons.
1. Check the functions of the SIM cards
Insert the SIM card of the Nokia Observation Camera to your mobile
phone and ensure that the PIN code query is disabled on that SIM card.
Tip: To ensure that the MMS service is activated on the SIM card,
send an MMS message from your mobile phone back to your
mobile phone.
Note: The images and messages sent from the camera will be
charged to the subscription of the SIM card in the camera.
Remove the SIM card of the camera from your mobile phone. Insert
the SIM card of your mobile phone back to the phone.

Note: Check how large MMS messages your mobile phone is
capable of receiving. Your network operator may also restrict the
size of MMS messages. Ask your network operator for details.
2. Insert the SIM card to the camera
Insert the SIM card of the Nokia Observation Camera into the camera.
Ensure that the bevelled corner of the SIM card is on the left and that
the card is pushed all the way into the slot.
Note: Keep all miniature SIM cards out of the reach of small
children.
3. Power up the camera
Attach the power source to the power connector of the camera and plug
it into a mains outlet.
Wait for the LEDs to light up. When the LEDs 1 and 3 are green, the
camera is ready for use.
Note: If LED 2 blinks red, the PIN code query is on. Enter the PIN
code with PC Suite or power off the camera, remove the SIM card
from the camera, insert it into your mobile phone and disable the
PIN code query.
4. Configure the mandatory settings
To use the camera, you need to configure the master user of the camera,
the MMS settings, and the language used. See below.
You can configure the settings either with text messages or the PC Suite
software found on the CD-ROM in the sales package. For more
information on PC Suite, refer to the user’s guide.
Define the master user
Define the master user on the Users page of the PC Suite software, or
send the following text message to the camera:
Note: The spaces between the items in the text message are marked
with an underline character (_).
8_security code_your name_your mobile number_your e-mail
address
The default security code is 1234.
Copyright © 2003 Nokia. All rights reserved.

For example:
8 1234 Jane
5678910
jane@work.com
Note: It is not mandatory to add the e-mail address to the
message. If you add it, you can send captured images to your email address.
Wait for a confirmation message from the camera. The delay
between sending the text message and receiving the confirmation
depends on the amount of traffic on the GSM network.
Get the MMS settings
The easiest ways to obtain the needed MMS connection settings are:
• Go to www.nokia.com/phonesettings and send the MMS settings
to your mobile phone over the air, or
• Contact Club Nokia, Nokia Careline, or your service provider to
send the MMS settings to your mobile phone over the air.
Tip: The MMS settings of the Nokia Observation Camera are the
same as in the Nokia 7650 phone.
If you want to configure the MMS connection settings manually, refer
to the user’s guide.
Set the language of the camera
The default language of the Nokia Observation Camera is English. If
you want to change the language, go to the Settings page of the PC
Suite software, or send the following text message to the camera:
Note: The spaces between the items in the text message are
marked with an underline character (_).
21_security code_number of language
Select the number of your language from this list: Danish 1, Dutch
2, English 3, Finnish 4, French 5, German 6, Italian 7, Norwegian 8,
Polish 9, Portuguese 10, Spanish 11, Swedish 12, Simplified
Chinese 13, Traditional Chinese (Hong Kong) 14, Traditional
Chinese (Taiwan) 15, Czech 16, Canadian French 17, Greek 18,
Hungarian 19, Brazilian Portuguese 20, Russian 21, Latin Spanish
22, Thai 23.
For example:
Note: If you change the language, the camera accepts text
messages in that language only.
21 1234 7
Your Nokia Observation Camera is now ready for use!
Other text message commands can be found in the wallet card on the
cover of the user’s guide. Cut off the card and insert it into the plastic
holder found in the camera’s sales package, and carry the card with
you.
Tip: If you want to enable the PIN code query after having
configured the camera, send the text message 22_PIN code_on
to the camera. Replace the underline character (_) with a space
and PIN code with your PIN code.
To capture an image
To capture an image and have it sent to your mobile phone, send the
following text message to the camera:
1
Copyright © 2003 Nokia. All rights reserved.

Note: National laws and regulations may place restrictions on
recording images and regarding further processing and use of such
data. Do not use this feature illegally. Honour the privacy and other
legitimate rights of others and obey all laws governing, for example,
data protection, privacy, and publicity.
To use motion detection
To start motion detection, send the following text message to the
camera:
Note: The spaces between the items in the text message are marked
with an underline character (_).
2_on_number of image messages (0-10)
For example:
Now motion detection is active until the camera has detected
motion for 4 times.
Note: If you set 0 as the number of image messages, motion
detection remains on until you turn it off.
To turn off motion detection, send the following text message to the
camera:
2 off
2 on 4
To use timed imaging
To set the camera to capture images at defined intervals, send the
following text message to the camera:
Note: The spaces between the items in the text message are marked
with an underline character (_).
Copyright © 2003 Nokia. All rights reserved.
4_on_desired interval_number of image messages (0-10)
For example:
Now the camera sends you six image messages at 15 minute
intervals.
4 on 00:15 6
To check the temperature
To check the approximate current temperature in the camera premises,
send the following text message to the camera:
3

Copyright © 2003 Nokia. All rights reserved.
Nokia and Nokia Connecting People are registered trademarks of
Nokia Corporation. Other product and company names mentioned
herein may be trademarks or tradenames of their respective owners.
The contents of this document are provided “as is”. Except as required
by applicable law, no warranties of any kind, either expressed or
implied, including, but not limited to, the implied warranties of
merchantability and fitness for a particular purpose, are made in
relation to the accuracy, reliability or contents of this document.
Nokia reserves the right to revise this document or withdraw it at any
time without prior notice.
Copyright © 2003 Nokia. All rights reserved.
 Loading...