

Page 1
Using Quickoffice
Page 2
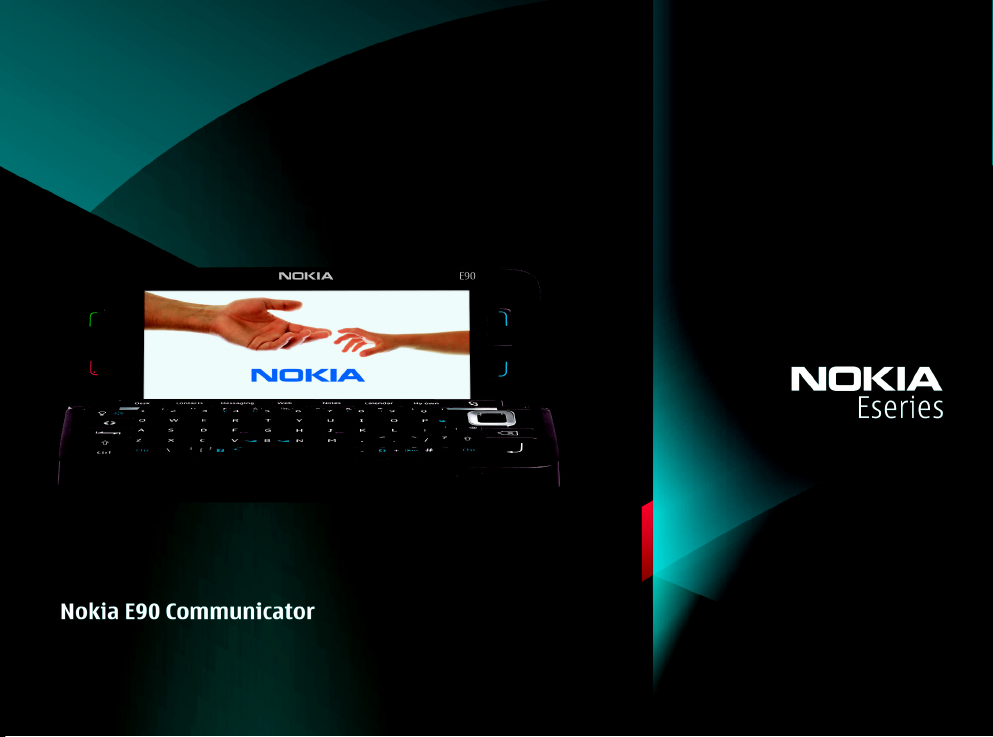
Nokia E90 Communicator
Using Quickoffice
Nokia E90 Communicator Using Quickoffice
Legal Notice
Copyright © 2007 Nokia. All rights reserved.
Nokia, Nokia Connecting People, Eseries and E90 Communicator are trademarks or
registered trademarks of Nokia Corporation. Other product and company names
mentioned herein may be trademarks or tradenames of their respective owners.
Reproduction, transfer, distribution or storage of part or all of the contents in this
document in any form without the prior written permission of Nokia is prohibited.
Nokia operates a policy of ongoing development. Nokia reserves the right to make
changes and improvements to any of the products described in this document
without prior notice.
To the maximum extent permitted by applicable law, under no circumstances shall
Nokia or any of its licensors be responsible for any loss of data or income or any
special, incidental, consequential or indirect damages howsoever caused.
The contents of this document are provided "as is". Except as required by applicable
law, no warranties of any kind, either express or implied, including, but not limited
to, the implied warranties of merchantability and fitness for a particular purpose, are
made in relation to the accuracy, reliability or contents of this document. Nokia
reserves the right to revise this document or withdraw it at any time without prior
notice.
The availability of particular products and applications and services for these
products may vary by region. Please check with your Nokia dealer for details, and
availability of language options.
Copyright © 2007 Nokia. All rights reserved.
Page 3

Contents
Introduction............................................... 4
Supported file formats ......................................................... 4
Updating Quickoffice software..........................................4
Using Quickmanager™..................................................5
Upgrade to editing version..........................................5
Opening Office files.................................. 6
Launching Quickoffice .........................................................6
Creating new files .................................................................6
Saving files ..............................................................................7
Word processing........................................ 8
Text wrap .................................................................................8
Fonts..........................................................................................8
Images.......................................................................................8
Tables ........................................................................................8
Other content .........................................................................9
Spreadsheets............................................ 10
Viewing options ...................................................................10
Formatting your spreadsheet...........................................10
Multiple worksheets ...........................................................11
Other content .......................................................................12
Presentations.......................................... 13
Viewing presentations ..................................................... 13
Slide view ............................................................................ 13
Outline view........................................................................ 14
Notes view........................................................................... 14
Appendix A: Supported functions ........ 15
Appendix B: Some common features
currently not supported ........................ 16
Quickword ........................................................................... 16
Quicksheet........................................................................... 16
Quickpoint........................................................................... 16
Nokia E90 Communicator Using Quickoffice
Copyright © 2007 Nokia. All rights reserved.
Page 4
Introduction
Select > Office > Quickoffice.
The purpose of this document is to guide you in using the
Quickoffice application on your Nokia phone.
Introduction
Quickoffice allows you to view and edit Microsoft Word,
Excel, PowerPoint and text files on your phone. It is
assumed that you already know how to use Microsoft
Word, Excel, and PowerPoint applications on your PC
computer and how to transfer files from your device to a
PC computer and vice versa.
Nokia E90 Communicator is delivered with Quickoffice
version 3.8. To view version information, select Options >
About Quickoffice.
For more information or help, visit
support.quickoffice.com
Supported file formats
Quickoffice opens and saves Microsoft Word, Excel and
PowerPoint files in their native format. Quickoffice
supports the following file formats:
• .doc – Microsoft Word ‘97, 2000, XP and 2003
• .xls – Microsoft Excel ‘97, 2000, XP and 2003
• .ppt – Microsoft PowerPoint 2000, XP and 2003
• .txt – plain text format
The .rtf format is not supported.
Copyright © 2007 Nokia. All rights reserved.
4
Note: All file format are not supported. Apple
Macintosh is not supported.
Files saved as ‘compatible’ with Microsoft Office by other
programs on the desktop such as OpenOffice are often not
fully compatible and may not open or save correctly in
Quickoffice. Quickoffice only fully supports files created by
official Microsoft applications or Quickoffice.
Microsoft Office 2007 file formats are radically different
from the formats used in previous versions of Microsoft
Office. Because of this, Microsoft Office 2007 file formats
are not supported in this version of Quickoffice. It is
suggested that you save the documents in Microsoft Office
2003 file format and then open them in Quickoffice.
Quickoffice will save documents in the file format version
of the original document – for example, if you edit a
Microsoft Word ’97 document in Quickoffice, it will be
saved in Microsoft Word ’97 format.
Updating Quickoffice software
You can update your Quickoffice software directly from
your phone using Quickmanager or by visiting
www.quickoffice.com.
Page 5
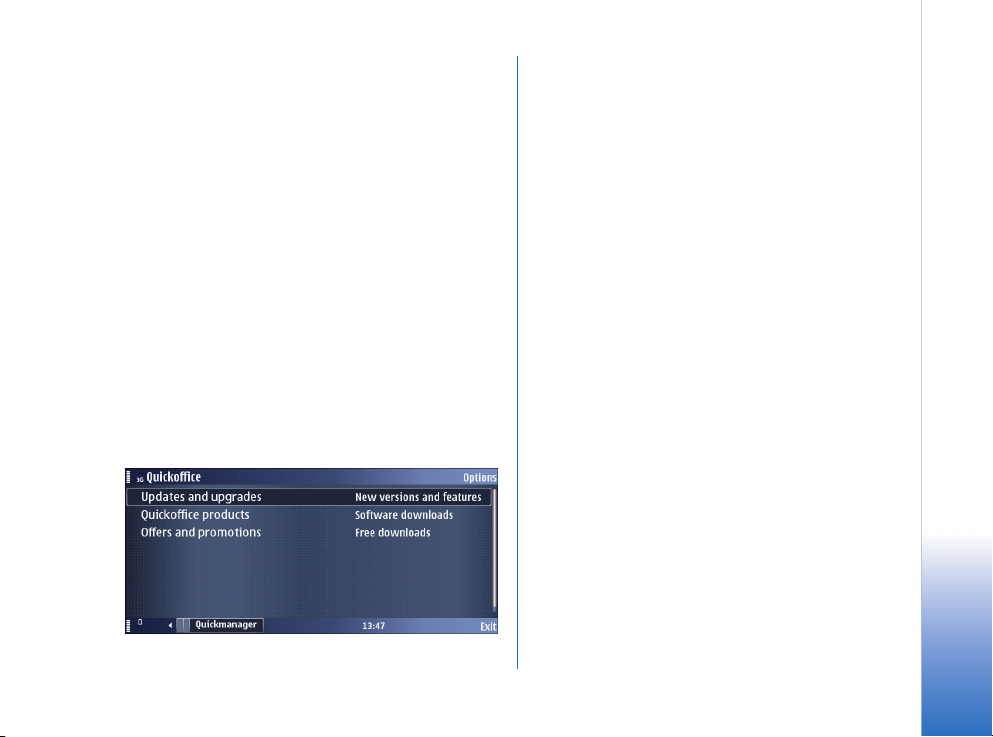
Using Quickmanager
Quickmanager is included in the Quickoffice application.
With it you can access and purchase software updates and
other software.
Upgrade to editing version
Some phones do not have the Quickoffice editing
functionality enabled by default. You can verify this by
checking the Quickoffice menus. If you can create a new
file and edit an existing file, your software has editing
functionality enabled. If not, you can update the software
to a version that enables editing.
To update to an editing enabled version:
1 Open Quickoffice and scroll to the Quickmanager tab.
2 Select Updates and upgrades and press the scroll key.
3 When you use Quickmanager for the first time, the list
of update options will be refreshed. Select an update
option and press the scroll key to install.
4 Follow the instructions on the screen and select a
payment method. In most cases you can pay by SMS
or credit card. All data transfer is encrypted by a
standard encrypted HTTPS connection.
Introduction
Copyright © 2007 Nokia. All rights reserved.
5
Page 6

Opening Microsoft Office files
Quickoffice consists of the following applications:
• Quickword – Edits Microsoft Word documents and
text files.
• Quicksheet – Edits Microsoft Excel spreadsheets.
• Quickpoint – Edit Microsoft PowerPoint presentations.
When a file type supported by Quickoffice is opened from
any application such as the Inbox or web browser, the file
will be opened in the appropriate Quickoffice application;
Microsoft Word or text documents in Quickword,
Microsoft Excel workbooks in Quicksheet, and Microsoft
PowerPoint presentations in Quickpoint.
Opening Microsoft Office files
Launching Quickoffice
Select > Office > Quickoffice.
The first three application tabs in Quickoffice list
Microsoft Word, Excel and PowerPoint files. Files saved on
your device in C:\Data\Documents\ and on the memory
card in E:\Documents\ folder and subfolders will be listed.
To open a file, select the file and press the scroll key.
If you do not see your Microsoft Office file listed in
Quickoffice, make sure the file name has a supported
extension such as .doc for Microsoft Word documents,
and that the file is located in one of the above specified
locations.
Creating new files
Quickoffice allows you to create new Microsoft Word or
Excel files on your mobile phone.
1 Select Options > New.
2 Specify a location, a file type, and a name for the new
file. When you are done, select Save.
Copyright © 2007 Nokia. All rights reserved.
6
Page 7

If the option New is not available, creating office files
is not enabled on your phone. You can purchase the
editing capability using Quickmanager.
If the option to create Microsoft PowerPoint files is not
available, you can enable that feature by upgrading to
Quickoffice version 4 or later.
Saving files
To save edited changes, press Back. This will close the
document and save any changes.
To save to a different file, select Options > Save as. This
allows you to specify a location for the file. Save as also
allows you to save a Microsoft Word document in .txt
(plain text) format. Saving as a text file will cause all
formatting, pictures and objects in your file to be lost.
To exit without saving, select Options > Exit without saving.
Opening Microsoft Office files
Copyright © 2007 Nokia. All rights reserved.
7
Page 8

Word processing
Quickword supports .doc and .txt file formats. It is
optimized for your Nokia E90 Communicator, and in many
ways using it is different from viewing Microsoft Word
documents on your PC computer.
Word processing
Text wrap
Quickword automatically wraps the text to fit your phone
screen at the selected zoom level. This allows you to read
a document without the need to scroll left or right.
Fonts
While your document may use several fonts, Quickword
uses the system fonts available on your Nokia E90
Communicator. Since the system fonts are different from
the commonly used fonts on your PC computer, your
documents may appear somewhat different. However,
when you edit and save a document in Quickword, the
original font information is retained. When you open your
document on a PC, it appears the same way as before.
Any new text added in Quickword will automatically use
the same font that precedes the new added text in the
paragraph.
Copyright © 2007 Nokia. All rights reserved.
8
Images
The version of Quickword supplied with Nokia E90
Communicator does not support the display of images
embedded in Microsoft Word documents. However, when
the document is edited and saved by Quickword, any
images in the document will be retained; they will be
visible when the document is transferred back to a PC.
Tables
For display purposes, tables are resized to fit your screen at
the selected zoom level. The tables may look different from
the original format. However, when the document is saved,
the original table formatting is retained.
Page 9

Other content
Your original Microsoft Word document may contain
macros, embedded files, comments, track changes and
other more advanced features. This content cannot be
viewed with the current version of Quickword.
Word processing
Copyright © 2007 Nokia. All rights reserved.
9
Page 10

Spreadsheets
Quicksheet supports the .xls file format. It is optimized for
your Nokia E90 Communicator, and in many ways using it
is different from viewing spreadsheets on your PC
Spreadsheets
computer.
Viewing options
Quicksheet provides several features to help you
overcome the limitation of the screen size.
• Zoom – Select Options > Zoom > Out to vi ew mo re cell s
and Options > Zoom > In to view more of the details.
• Freeze panes – Select Options > Freeze panes to freeze
the cells above and to the left of the highlighted cell.
• Pan – Select Options > Pan to display an overview of
the spreadsheet. In the overview empty cells are
represented by white rectangles, and non-empty cells
by light-grey rectangles. Your current viewpoint is
identified by a grey background block that you can
move with the scroll key. Select OK to view the
selected region in normal mode.
• Resize – Select Options > Resize > Column and use the
left and right scroll keys to decrease or increase the
width. Select Options > Resize > Rows and use the up
and down scroll keys to decrease or increase the
height.
10
Copyright © 2007 Nokia. All rights reserved.
Formatting your spreadsheet
To format a spreadsheet:
1 Select the cell, row, column or range you want to
format.
• To select a cell – Use the scroll keys and navigate to
the desired cell.
• To select a column – Select Options > Edit range >
Column, then use left and right scroll keys to select
the desired column.
• To select a row – Select Options > Edit range > Row,
then use up and down scroll keys to select the
desired row.
• To select a range – Select Options > Edit range >
Block, then use the scroll keys, while holding the
Shift key to select the desired range.
2 Select the type of formatting.
• To specify number format – Select Options >
Formatting. This allows you to specify the type of
number format such as number, currency or date,
number of decimals (if applicable) and whether to
use a comma separator.
• To specify alignment – Select
This allows you to specify how to align the
contents of the cell with respect to the cell
border.
Options > Alignment.
Page 11

• To specify font – Select Options > Style. This allows
you to specify bold, italics, underline, font and
text wrap.
• To specify colour – Select
Options > Colour.
This allows you to specify the cell and text colour.
To edit a cell:
1 Select the cell you want to edit.
2 Select Options > Edit cell . This positions the cursor in
the formula field. Use the left and right scroll keys to
move within the cell.
3 Enter cell content.
• To insert an operator – Select Options > Operators.
This allows you to insert an operator where the
cursor is positioned.
• To insert a function – Select
Options > Functions.
Functions are grouped by category. First select a
category, and then select a function. A list of the
supported functions in listed in
Supported functions” on page 15
• To insert a reference – Select
. This allows you to insert a reference to
range
“Appendix A:
.
Options > Select
another cell or range of cells.
Spreadsheets
Multiple worksheets
A spreadsheet can contain several worksheets. Quicksheet
displays one worksheet at a time. In normal mode the
name of the current worksheet is displayed on the status
pane. To switch to another worksheet, select Options >
Worksheet, and use the left and right scroll keys to select
the desired worksheet.
In worksheet selection mode:
• To rename a worksheet, select Options > Rename
• To delete a worksheet, select Options > Delete
• To insert a new worksheet, select Options > New sheet
Worksheets that contain only charts are not listed in
worksheet selection mode and hence cannot be deleted or
renamed.
Copyright © 2007 Nokia. All rights reserved.
11
Page 12

Other content
Quicksheet does not display some advanced spreadsheet
features such as pivot tables, charts or macros.
Spreadsheets
12
Copyright © 2007 Nokia. All rights reserved.
Page 13

Presentations
Quickpoint supports the .ppt file format. It is optimized for
your Nokia E90 Communicator, and in many ways using it
is different from viewing presentations on your PC
computer.
Viewing presentations
Quickpoint allows you to view presentations in either Slide
or Outline mode. The Slide mode displays the presentation
with graphics, while the Outline mode displays the
presentation’s outline. In addition, Quickpoint provides a
Notes view that displays the speaker notes for each slide.
To switch between the views, use the left and right scroll
keys.
Slide view
By default, Quickpoint opens a presentation in Slide view,
and the slide is fit to the screen. To view the presentation
in full screen mode, select Options > Full screen. The slide is
displayed without the signal strength, title, or battery level
indicators, or the identification of the soft keys. This view
provides the maximum viewing area and allows you to
control the zoom level. The full screen mode uses the
maximum zoom level. To change the zoom level, select
Options > Zoom > In or Options > Zoom > Out.
You can also zoom in and out in the full screen mode by
pressing 1 (zoom out) and 2 (zoom in).
To return to the normal view, press the scroll key.
The slide view displays images, tables, shapes with
borders, colour, text within objects with formatting and
much more. However, there are important differences to
note:
• Fonts – While your presentation may use many fonts,
Quickpoint uses the system fonts on your Nokia E90
Communicator. Since the system fonts are different
from the commonly used fonts on your PC computer,
your presentations may appear somewhat different.
However, if you edit and save a presentation in the
Slide view, the original font information is retained.
When you open your presentation on a PC, it appears
the same way as before.
• Animations and transitions – Quickpoint does not
render animations and slide transitions.
• Hidden slides – In Microsoft PowerPoint you can mark
certain slides hidden. Quickpoint displays hidden
slides.
• Master slides – This version of Quickpoint does not
view master slides.
• Editing of graphics – This version of Quickpoint does
not support editing of graphics.
Copyright © 2007 Nokia. All rights reserved.
Presentations
13
Page 14

Outline view
The Outline view displays the title and body from each
slide in a hierarchical view. To expand or collapse the each
entry, select Options > Outline >Expand or Options >
Outline >Collapse.
Presentations
In the outline view press 1 to expand and 2 to collapse the
entry.
The outline view displays any formatting such as font size,
bold, italics, underline, and colour applied to the title or
body.
Note that the outline view does not display text within
graphics. To view the text within graphics, use the Slide
view.
To edit the outline text or formatting, select Options >Edit.
This displays the text of the current entry.
Any changes made to the outline text are also applied to
the slide view.
Notes view
The notes view displays the speaker notes if each slide.
To edit the speaker notes, select Options > Edit note.
14
Copyright © 2007 Nokia. All rights reserved.
Page 15

Appendix A: Supported functions
MOD MONTH
ABS ACOS
ACOSH AND
ASIN ASINH
ATAN ATAN2
ATANH AVEDEV
AVERAGE CHAR
CODE CONCATENATE
COS COSH
COUNT COUNTA
DATE DATEVALUE
DAY DAYS360
DEGREES EFFECT
EXP FACT
FV HLOOKUP
HOUR IF
INT IPMT
IRR ISBLANK
ISERROR ISLOGICAL
ISNUMBER ISTEXT
KURT LARGE
LEFT LEN
LN LOG
LOG10 LOWER
MAX MID
MIN MINUTE
NOMINAL NOT
NOW NPER
NPV OR
PI PMT
POWER PPMT
PRODUCT PV
RADIANS RAND
RATE RIGHT
ROUND ROUNDDOWN
ROUNDUP SECOND
SIN SINH
SKEW SMALL
SQRT STDEV
SUM TAN
TANH TIME
TIMEVALUE TODAY
TRUNC UPPER
VAR VLOOKUP
WEEKDAY YEAR
Appendix A: Supported functions
Copyright © 2007 Nokia. All rights reserved.
15
Page 16

Appendix B: Some common features currently not supported
Quickword
The following features are not viewable in Quickword 3.8
but should be preserved in documents sent back to
Microsoft Word on a PC.
• Comments
• Footnotes, Endnotes
• Bookmarks
• References
• Embedded files
•Images
•Macros & Forms
• Header and footer
• Multi-column layout
• Pivot tables
•Grouping
• Header and Footer
• Embedded Objects including images
Quickpoint
The following features are not viewable in Quickpoint 3.8
but should be preserved in documents sent back to
Microsoft PowerPoint on a PC.
• Comments
• Transitions
• Embedded movie or sound clip
• Slide Master
•Animation
Quicksheet
The following features are not viewable in Quicksheet 3.8
but should be preserved in documents sent back to
Microsoft Excel on a PC.
• Comments
• Ability to sort or filter data
•Charts
•Macros
Appendix B: Some common features currently not supported
16
Copyright © 2007 Nokia. All rights reserved.
 Loading...