

Page 1
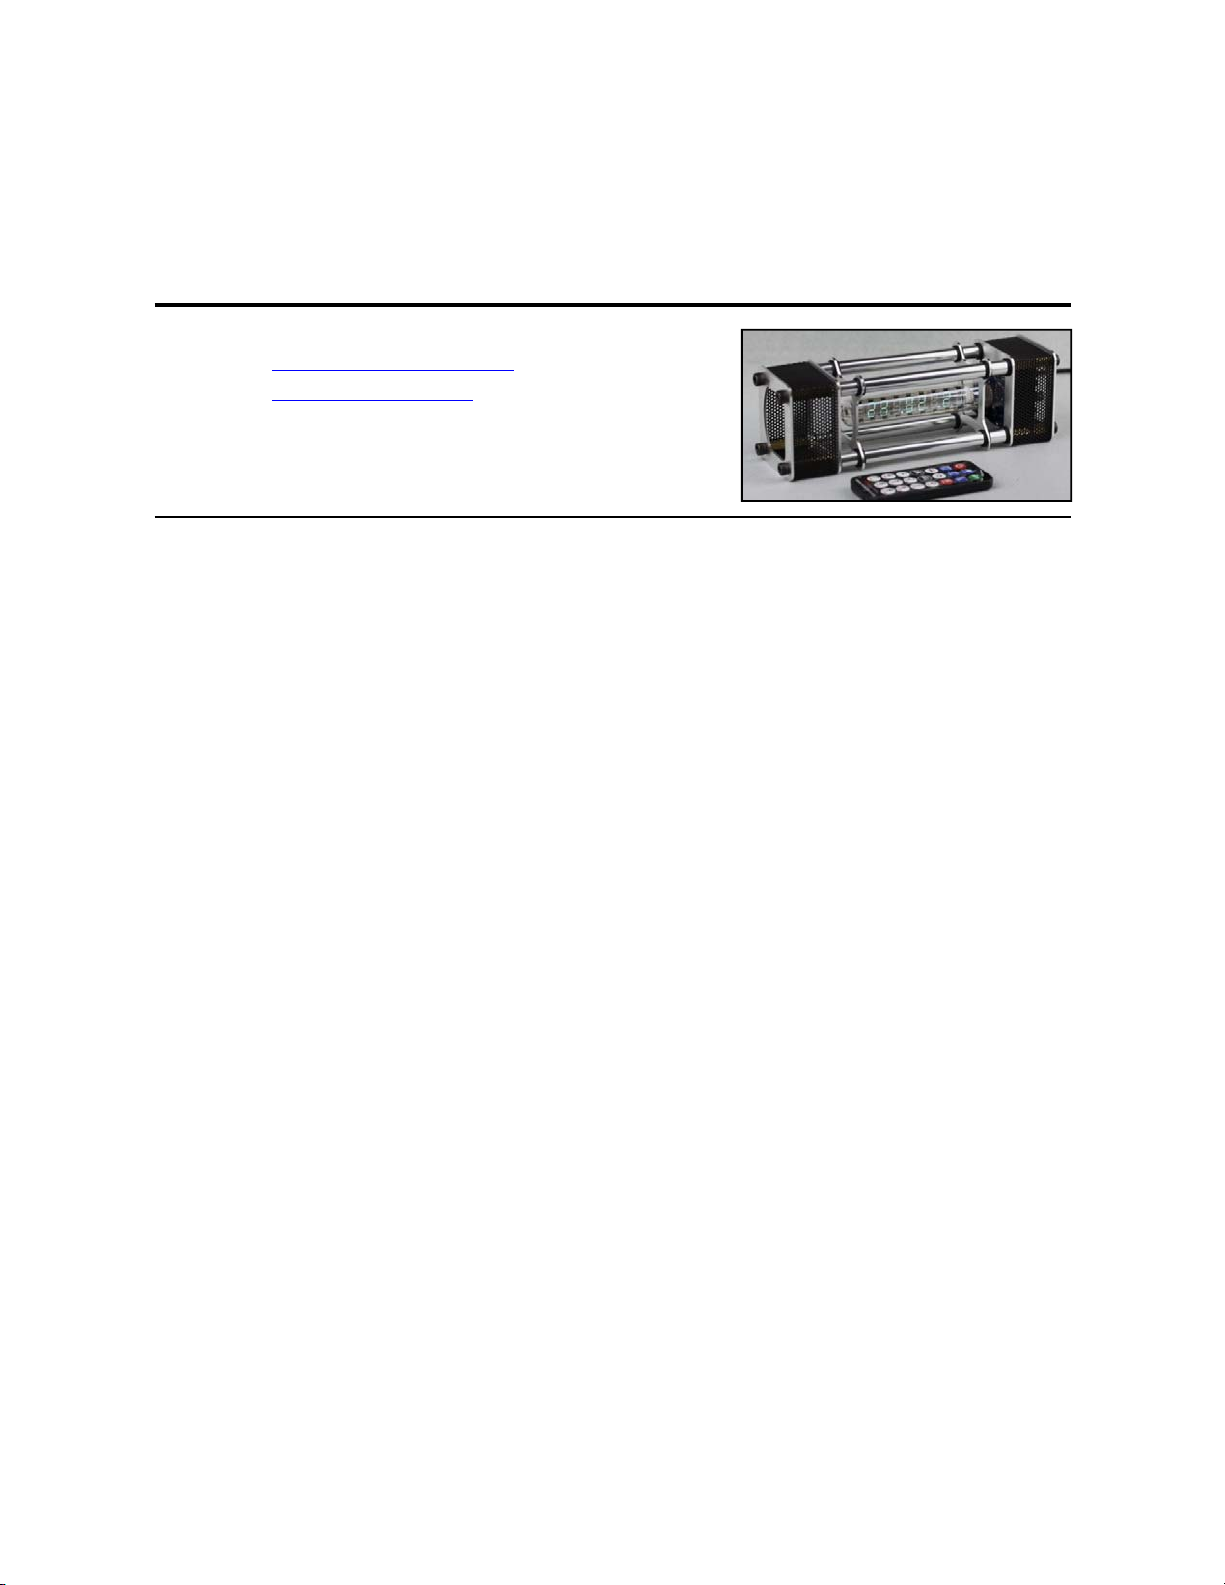
IV-18 (ИВ-18) VFD Tube Clock
Energy Pillar
Instructions
v1.2.0
Contents
Attention……..……….….…………………………………………………………………………………………………………….…… 2
Functional Features….…………………………………………………………………………….…………………………………… 2
Technical Specifications………………………………………………………………………………………...……………….…… 2
Package Contents.……………………………………………………………………………………...….…………………………… 3
Appearance Layout………………………………………………………………………………..……….…………………………… 3
IR Remote Control Function.......……………………………………………..…………………….……………………………… 3
Operational Beep Tones….…………………………………..………………………...….…………………….......……………… 4
Display Mode Switch……………………………………………………..…………………………………………………………… 4
Power On/Off…………………………………………………………….……………………..………………………………………… 4
Brightness Adjustment ...……………………………………………………………….…………………………………………… 4
Temperature Unit ℃/℉……………………………………………………………….……………………..……………………… 5
Set Time……………………………………………………………………………………………………………………………………… 5
Set Date……………………………………………………………………………………………………………………………………… 5
Set Alarm……………………………………………………………………………………………….…………………………………… 5
Menu 1: Date Format YY-MM-DD / YY-DD-MM / DD-MM-YY / MM-DD-YY……………………….……… 6
Menu 2: Time Format 12H/24H…………………………………………………………………………………………..……… 6
Menu 3: Set UTC………………………………………………………………………………………………………………………… 6
Menu 4: GPS Status……………………………………………………………………………………………………………….…… 7
Menu 5: Set GPS BAUD RATE……………………………………………………………………………………………………… 7
Menu 6: Set Leading Zero Mode………………………………………………………………………………………………… 7
Menu 7: Set Buzzer Mode……………………………………………………………………………………………………..…… 8
Menu 8: Interval of Scrolling Date Display ......………………………………………………………………………..…… 8
Menu 9: Interval of Scrolling Temp Display .....……………………………………………………………………….…… 8
Menu 10: Set Auto Power Off Time…………………………………………………………………………………………..… 9
Menu 11: Set Auto Power On Time…………………………………………………………………………………………..… 9
Timer Function…………………………………………………………………………………………………………………………… 10
Special Functions …………………………………………………………………………………………………………………..…… 10
Notes ……………….......................………………………………………………………………………………………………….…… 10
Page 2

IV-18 (ИВ-18) VFD Tube Clock Instructions http://www.nixieclock.org
Attention
◇ Attention: To prevent accidental damage, do not place this clock on an uneven surface.
◇ Warning: The clock has an internal high voltage circuit; do not touch the components
while the clock is operating.
◇ Warning: Clock is for indoor use in a dry place only.
◇ Warning: Please do not let children touch the clock.
Functional features
1. Eight digits in IV-18 (ИВ-18) VFD tube display. (~1980-1992 made in USSR).
2. Display hour, minute and second (12 or 24 hour format optional).
3. Display year, month and day and Chinese lunar date (YY-MM-DD or
MM-DD-YY.DD-MM-YY.YY-DD-MM format optional).
4. Leading zero ON/OFF function.
5. GPS real-time adjustment. Automatically adjusts date and time; GPS status display
(with optional GPS receiver).
6. GMT time zone functions, the clock will calculate the local time based on satellite.
7. Temperature display (℃ or ℉) (with optional temperature sensor).
8. Two alarm clock (set ON/OFF independent alarms).
9. Alternating, date and temperature display. Adjustable display intervals.
10. Timer function. Can be set up to 99 hours, 59 minutes and 59 seconds.
11. Display ON/OFF timer. Easily check time and date after when powered off.
12. 8 manual brightness levels; auto brightness for ambient conditions.
13. Sound ON/OFF button.
14. Display information auto-rotates 180° based on clock orientation.
15. IR remote controller operation. (included)
16. Extremely precise RTC module provides accuracy Δ less than 1 minute/year.
17. Built-in backup lithium battery will maintain clock time more than 3 years.
Technical Specifications
Input voltage: DC5V
Working current: Max 220mA
Tube type: IV-18(ИB-18, manufactured in USSR, 1984-1992)
Size : 200mm x 52mm x 64mm; tube length 115mm x diameter 18mm
Working temp: 0℃ - 60℃
Weight: 350g
Shell material: Aluminum alloy
Page 3
IV-18 (ИВ-18) VFD Tube Clock Instructions http://www.nixieclock.org
Package Contents
Name Quantity Name Quantity
VFD tube clock (1) Power adaptor (Mini USB) (1)
IR remote controller (1) User manual (1)
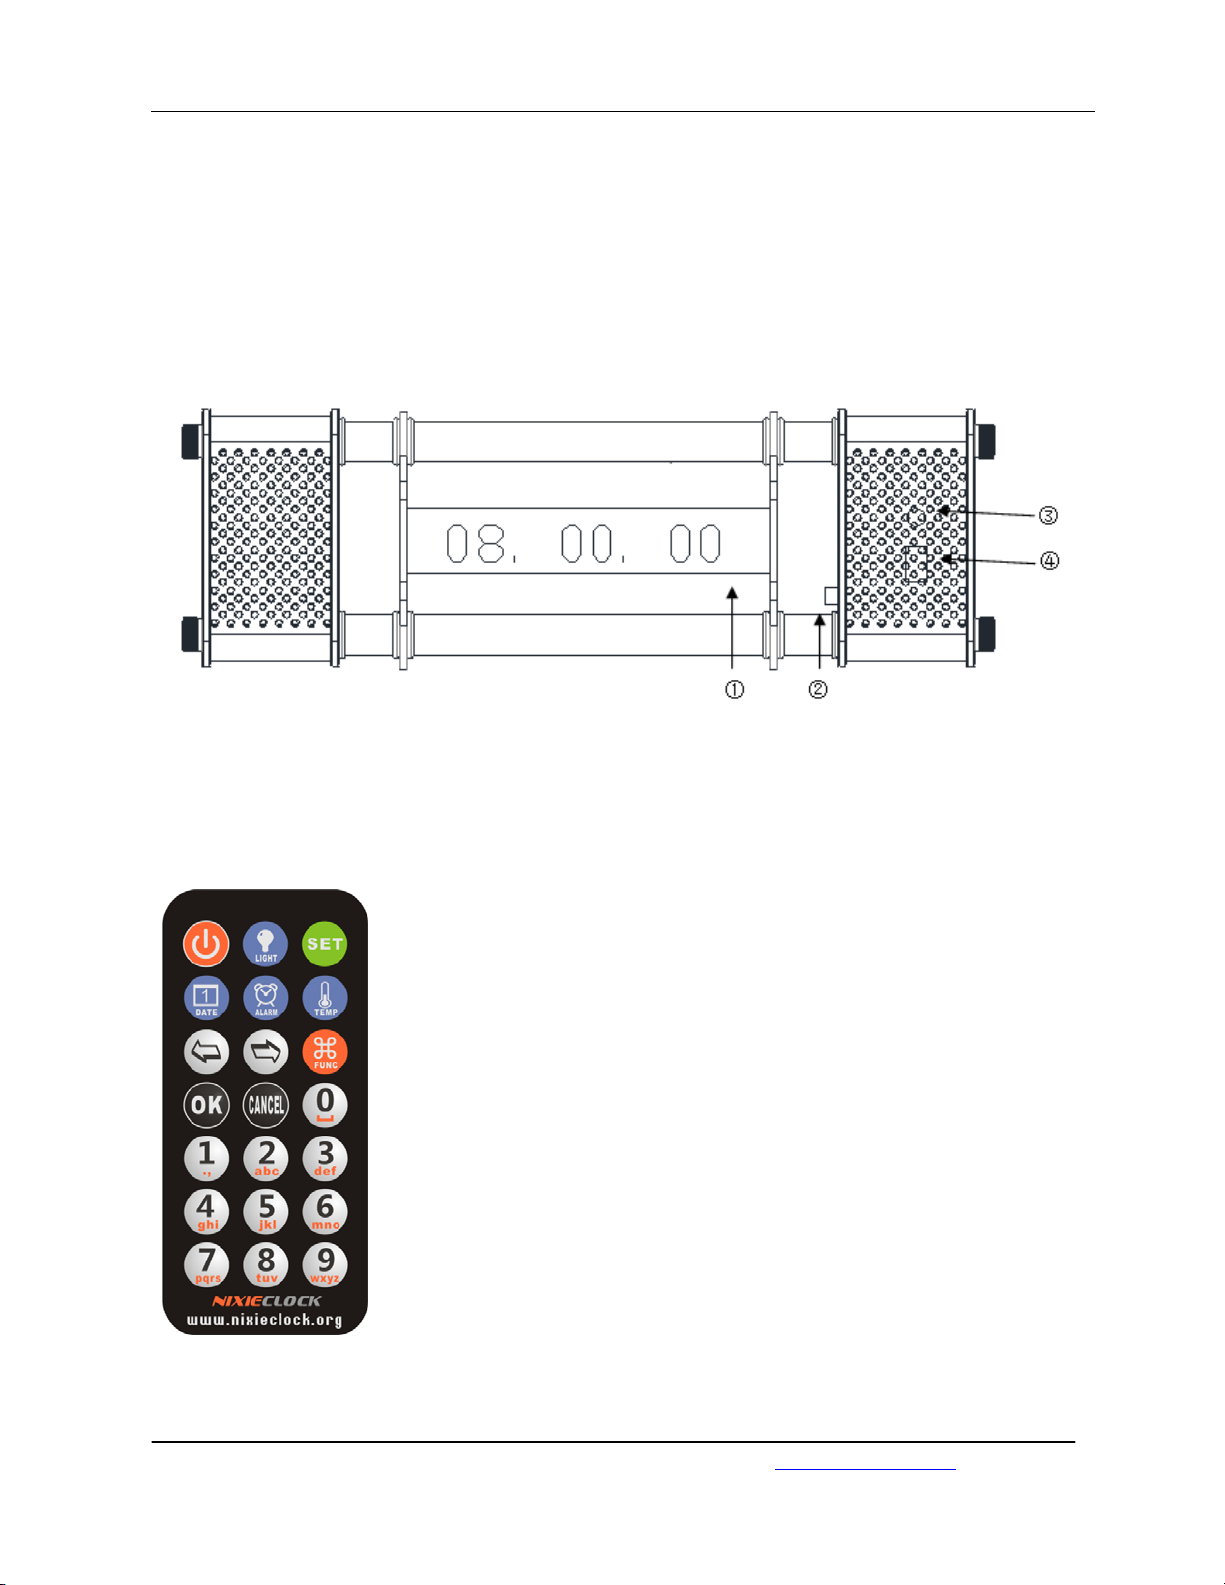
Appearance Layout
Num Name Num Name
①
③
IV-18 VFD tube
GPS Receiver Socket
②
IR receiver
④
Mini USB Power Socket
IR Remote Control Function
1. POWER 2. BACKLIGHT 3. SET
4. DATE 5. ALARM 6. TEMPERATURE
7. LEFT 8. RIGHT 9. FUNCTION
10. OK 11. CANCEL 12. NUM 0
13. NUM 1 14. NUM 2 15. NUM 3
16. NUM 4 17. NUM 5 18. NUM 6
19. NUM 7 20. NUM 8 21. NUM 9
IR controller uses (2) AG10 cells or (1) CR2025 cell, depending on
remote controller supplied. Transportation rules may not permit
shipment with lithium battery installed. Please insert battery or
remove protective insulator to operate.
Designer: YanZeyuan. China. Email:[email protected] Website:
www.nixieclock.org
3 / 10
Page 4

IV-18 (ИВ-18) VFD Tube Clock Instructions http://www.nixieclock.org
Operational Beep Tones
Beep Description Meaning
Be 1 short beep Normal operation
Be… 1 long beep Confirm and saved
Bebebe 3 short beeps GPS-Satellite time sync successful
Bebebebe 4 short beeps Set Error/Cancel/Alarm
Display Mode Switch
1. Display time Mode
After powering on the clock or pressing the POWER button in shutdown state, clock displays
in time mode. Clock will display HOUR, MINUTE, SECOND in this mode.
2. Display calendar date Mode
Press DATE button to enter calendar date display mode. Clock will display YEAR, MONTH,
DAY. Clock will return to display time mode after three seconds.
3. Display lunar date Mode
Press DATE button twice to enter display lunar calendar date mode. Clock will display YEAR,
MONTH, DAY of lunar date. Clock will return to display time mode after three seconds.
4. Display alarm Mode
Press ALARM button to show alarm 1 mode. Press ALARM button again to show alarm 2
mode. Clock will return to display time mode after three seconds.
5. Display temperature Mode
Press TEMPERATURE button to show temperature. (when used with the optional temp.
sensor) Clock will return to display time mode after three seconds.
6. Timer Mode
Press ALARM button three times to enter timer mode. In display timer mode, press
CANCEL to return to the display time mode.
7. Menu Mode
Press FUNCTION button to enter menu mode and then press CANCEL to exit.
Power ON/OFF
In display time mode, press POWER button to control ON/OFF power of clock display. It will
be display "HELLO", when powered ON and "POWER OFF", when powered OFF.
Clock will cut the filament and high voltage supply of the VFD tube in order to extend the
life-span of the VFD tube.
Adjust Brightness
In the display time mode, press the LIGHT button repeatedly to change brightness in 8
steps. After step 8, the display will show "Auto" and the clock will adjust brightness
automatically according to environmental light. This provides high brightness during the
daytime and low brightness at night, so as not to disturb your sleep.
Page 5

IV-18 (ИВ-18) VFD Tube Clock Instructions http://www.nixieclock.org
Temperature Unit ℃/℉
In the display temperature mode (with the optional temp. sensor), press FUNC button to
toggle between ℃/℉.
■ This option is stored in the clock and is not lost when powered off.
Set Time
In display time mode, press SET button to enter set time mode.
After entering set time mode, SECOND will blinking, meaning SECONDS are now being set.
Press LEFT or RIGHT button to change between SECOND (SS), MINUTE (MM) and HOUR (HH) setting.
Press button NUM0 - NUM9 to change the number.
Press OK to save setting.
Press CANCEL to abort setting and exit.
■ After setting success, clock will beep for a long time, and return to display time mode.
■ If setting is illogical, clock will beep four short times and abort. Settings will not
be saved and the clock will return to display time mode.
■ When setting time, clock displays in 24H format.
Set Date
In display date mode, press SET button to enter set date mode.
After entering set date mode, DAY (DD) will be blinking, meaning now setting DAY. Press
LEFT or RIGHT button to change setting position between DD - MM - YY.
Press button NUM0 - NUM9 to change the number.
Press OK to save settings.
Press CANCEL aborts setting and exits.
■ After setting success, clock will beep for a long time, and return to display time mode.
■ If setting is illogical, clock will beep four short times and abort. Settings will not
be saved and the clock will return to display time mode.
■ The moon date doesn't need setting, the clock will calculate automatically
according to the Gregorian calendar.
■ Two digit of YEAR (YY) means 20YY year.
Set Alarm
In display (alarm 1) or (alarm 2) mode, press SET button enter set alarm mode.
In set alarm mode, HOUR (HH) will blink, meaning now setting HOUR of alarm. Press
LEFT or RIGHT button to change between (HH) and (MM) setting position.
Left two digits will display which alarm is being set, A1 means now setting alarm 1, A2
means now setting alarm 2.
Press button NUM0 - NUM9 to change the number.
Page 6

IV-18 (ИВ-18) VFD Tube Clock Instructions http://www.nixieclock.org
Press OK to save setting.
Press CANCEL to abort setting and exit.
■ After setting success, clock will beep for a long time, and return to display time mode.
■ If setting is illogical, clock will beep four short times and abort. Settings will not
be saved and the clock will return to display time mode.
■ To disable the alarm function, press the FUNC button in alarm display mode, then
clock display OFF, means this alarm is disabled.
■ If the clock alarm is sounding, press any button to stop the alarm. The clock will
automatically stop the alarm after 60 seconds.
Menu 1: Date Format YY-MM-DD / YY-DD-MM / DD-MM-YY / MM-DD-YY
Press FUNC button to enter the Menu and use the RIGHT or LEFT key to switch the menu
number to "1" for: Date Format.
Press OK to enter settings screen. The display shows the current date format. Press
RIGHT/LEFT key to toggle to the available date formats. (YY-MM-DD / YY-DD-MM /
DD-MM-YY / MM-DD-YY ).
Press OK to save the settings and exit or press CANCEL for no change and return back to
the main screen.
■ This option is stored in the clock and is not lost when powered off.
■ The date format applies only to the normal date display. When setting the date,
the setting display will follow the YY-MM-DD format.
Menu 2: Time Format 12H/24H
Press FUNC button to enter the Menu and use the RIGHT or LEFT key to switch the menu
number to "2" for: Time Format.
Press OK to enter settings screen. The display shows the current time format. Press
RIGHT/LEFT key to toggle to the available time formats. (12H/24H).
Press OK to save the settings and exit or press CANCEL for no change and return back to
the main screen.
■ This option is stored in the clock and is not lost when powered off.
■ The time format applies only to the normal time display. When setting the time,
the setting display will follow the 24H format.
Menu 3: Set UTC
Press FUNC button to enter the Menu and use the RIGHT or LEFT key to switch the menu
number to "3" for: Set UTC.
Press OK to enter settings screen. The display will show the current UTC settings. Press
RIGHT/LEFT key to toggle the format between GMT-12 and GMT+12.
Press OK to save the settings and exit the menu.
Page 7

IV-18 (ИВ-18) VFD Tube Clock Instructions http://www.nixieclock.org
■ This option is stored in the clock and is not lost when powered off.
■ After setting UTC, the next GPS sync will adjust the local time.
Menu 4: GPS Status
Press FUNC button to enter the Menu and use the RIGHT or LEFT key to switch the menu
number to "4" for: GPS status screen.
Press OK to enter the settings screen. The will show the current GPS status.
Displaying NO GPS: the GPS receiver is disconnected or the BAUD setting is wrong.
Displaying SEARCH: the GPS receiver is connected and is searching for the satellite signal.
Displaying ONLINE: the GPS receiver is receiving the satellite, and it is checking real-time data.
■ If the difference between the clock time and satellite time is 1 second or greater, the
clock will immediately update to the satellite time.
■ After a successful GPS update, the clock will sound three short beeps.
Menu 5: Set GPS BAUD RATE
Press FUNC button to enter the Menu and use the RIGHT or LEFT key to switch the menu
number to "5" for: Set GPS Baud Rate.
Press OK to enter the settings screen. The will show the present GPS BAUD setting. Press
RIGHT/LEFT key to toggle the BAUD rate. (4,800bps / 9,600bps / 19,200bps / 38,400bps)
Press OK to save the settings and exit Menu "5" or press CANCEL for no change and return
back to the main screen.
■ This option is stored in the clock and is not lost when powered off.
■ Please set the BAUD rate according to your GPS receiver user manual. If the BAUD
rate is incorrect for your GPS Receiver, the clock will not synchronize.
Menu 6: Set Leading Zero Mode
Press FUNC button to enter the Menu and use the RIGHT or LEFT key to switch the menu
number to "6" for: Set Leading Zero Mode.
Press OK to enter the settings screen. This will display the leading zero status. Press the
RIGHT/LEFT key to toggle the leading zero ON/OFF.
Displaying ON: when the first number is 0, leading zero will display. e.g. 0
Displaying OFF: when the first number is 0, leading zero will NOT
Press OK to save the settings and exit menu 6, or press CANCEL for no change and return
back to the main screen.
■ This option is stored in the clock and is not lost when powered off.
■ The display mode for Leading Zero only affects the normal time display. When
actually setting the time, the leading 0 will always be displayed in 24H format.
display. e.g. 8:00:00 for 8 am
8:00:00 for 8 am
Page 8

IV-18 (ИВ-18) VFD Tube Clock Instructions http://www.nixieclock.org
Menu 7: Set Buzzer Mode
Press FUNC button to enter the Menu and use the RIGHT or LEFT key to switch the menu
number to "7" for: Set Buzzer Mode.
Press OK to enter the settings screen. This will display the current Buzzer Mode settings.
Press the RIGHT/LEFT key to toggle the Buzzer Mode ON/OFF.
Displaying ON: Buzzer will operate and produce a beep sound.
Displaying OFF: Buzzer sound will not operate and will be silent.
Press OK to save the settings and exit Menu "7", or press CANCEL for no change and return
back to the main screen.
■ This option is stored in the clock and is not lost when powered off.
■ Alarm settings will override the buzzer mode. Even if the buzzer mode is OFF, the
Alarm will ring if scheduled.
Menu 8: Interval of Scrolling Date Display
Press FUNC button to enter the Menu and use the RIGHT or LEFT key to switch the menu
number to "8" for: Interval of Scrolling Date Display.
Press OK to enter the settings screen. This will display the current Interval of Scrolling Date
Display. Enter the digital number to set the interval from 00-99 seconds. (N=interval)
Setting "00 SEC" will prevent clock from displaying the scrolling date.
Press OK to save the settings and exit Menu "8", or press CANCEL for no change and return
back to the main screen.
■ This option is stored in the clock and is not lost when powered off.
■ If the interval is >0, the clock will display the date for 3 seconds every N seconds.
Menu 9: Interval of Scrolling Temp Display
Press FUNC button to enter the Menu and use the RIGHT or LEFT key to switch the menu
number to "9" for: Interval of Scrolling Temp Display.
Press OK to enter the settings screen. This will display the current Interval of Scrolling
Temp Display. Enter the digital number to set the interval from 00-99 seconds. (N=interval)
Setting "00 SEC" will prevent clock from displaying the scrolling temp.
Press OK to save the settings and exit Menu "9", or press CANCEL for no change and return
back to the main screen.
■ This option is stored in the clock and is not lost when powered off.
■ If the interval is >0, the clock will display the temp for 3 seconds every N seconds.
■ Requires optional temp sensor for proper display information.
Page 9

IV-18 (ИВ-18) VFD Tube Clock Instructions http://www.nixieclock.org
Menu 10: Set Auto Power Off Time
Press FUNC button to enter the Menu and use the RIGHT or LEFT key to switch the menu
number to "10" for: Set Auto Power Off Time.
Press OK to enter the settings screen. This will display the current Auto Power Off Time.
Enter the digital number to set the Auto Power Off Time.
Press OK to save the settings and exit Menu "10", or press CANCEL for no change and
return back to the main screen.
■ This option is stored in the clock and is not lost when powered off.
■ After setting the Auto Power Off Time, the clock will make a long beep sound and
return to the menu mode.
■ You may specify every digit of the Auto Power Off Time. If values are an illogical
time, the settings will be cancelled without change.
■ When the Auto Power Off time is reached, the clock will display, "Auto OFF" for
three seconds and then turn off automatically.
■ During the time period that the clock is in OFF time mode, pressing any digital number
button on the remote will cause the clock to display the time for three seconds.
■ In the off time mode, you can still set the time the same as in the power on mode.
Menu 11: Set Auto Power On Time
Press FUNC button to enter the Menu and use the RIGHT or LEFT key to switch the menu
number to "11" for: Set Auto Power On Time.
Press OK to enter the settings screen. This will display the current Time of Auto Power On.
Enter the digital number to set the Time of Auto Power On.
Press OK to save the settings and exit Menu "11", or press CANCEL for no change and
return back to the main screen.
■ This option is stored in the clock and is not lost when powered off.
■ After setting the Auto Power On Time, the clock will make a long beep sound and
return to the menu mode.
■ You may specify every digit of the Auto Power On Time. If values are an illogical
time, the settings will be cancelled without change.
■ When the Auto Power On time is reached, the clock will display immediately.
■ When you want to end the Auto Power Off function, simply set the Auto Power Off
Time and Auto Power On Time to the same value.
Page 10

IV-18 (ИВ-18) VFD Tube Clock Instructions http://www.nixieclock.org
Timer Function
In the display time mode, press the ALARM key 3 times to enter the timer function.
When you enter the timer function, the clock will initially show "o 01.00.00" as the default.
The leading "o" means that the timer is not yet running and the duration of the timer is 1 hour or
"01.00.00". Use the digital numbers on the remote to directly set the countdown time. The
allowed time limits for the countdown duration can be from 00:00:01 - 99:59:59. Please enter
the duration in a valid time format. E.g. 90 minutes is 01.30.00.
After completing the setting, press OK to start the clock countdown function. The first
character on the left side will be scrolling the segments to show that the timer is active.
When the countdown time is over, the clock will make four short beeps repeatedly and at
the same time the display will flash“00:00:00” Press OK to end.
■ When you set the countdown time, any value can be entered but the timer will only
behave correctly if the entered setting is a valid time format. If the time is an
invalid format, the operation will abort with four short beeps.
■ While the timer function is working, the screen will only display the countdown time.
You cannot view any other display mode unless you press OK to stop the timer. If
you press CANCEL, you will exit from timer mode and return to the main screen.
Special Functions
In power off mode, press the following key combination to will show the special function.
8-3-7-7-OK Check the present software version (present: v1.2.0)
4-6-4-8-OK Restore the default option settings (does not change the time and the date)
8-3-7-8-OK Test mode (press RIGHT/LEFT key to check the VFD tube display. After
review, press CANCEL to exit from the Special Function mode.)
Notes
1. The VFD tube product is from the ~1980-1992 time era and is representative of the
available display technology of that period. It is a vintage product and is not intended
to be of the same quality as today's display technology.
2. It is normal and expected for the clock to become warm during operation.
3. The time will be kept even if the power is off but the display will not operate if the Mini
USB power supply is not plugged in. Please check this first.
■ For any questions, please contact the designer.
Software design: YanZeyuan
Hardware design: YanZeyuan
E-mail: [email protected]
Website: www.nixieclock.org
Designer: YanZeyuan. China. Email:yanzeyuan@163.com Website:www.nixieclock.org 10 / 10
 Loading...