

Page 1

Page 2

Page 3

Contents
GettingStarted............................................................................................................................ 2
ViewingYourPhotos.................................................................................................................... 3
ViewingYourVideos.................................................................................................................... 4
ClockandCalendar...................................................................................................................... 5
MotionSensor.............................................................................................................................5
DeletingFiles...............................................................................................................................6
USBFlashDrive......................................................................................................................... 7
Settings......................................................................................................................................7
DiagramsandSpecifications…….......................................................................................................9
RemoteControl.......................................................................................................................... 11
NotesOfImportance...................................................................................................................12
Safety&Compliance................................................................................................................... 12
CleaningYourDigitalPhoto
Frame....................................................................................…....... 13
FrequentlyAskedQuestionsandTroubleshooting...................................................................... 13
1
Page 4
Getting Started
1) To set up your Digital Photo Frame, you first need to attach the stand.
Please see Page 10 for details.
2) Place the frame horizontally on a flat surface.
3) Insert the power lead into the Digital Photo Frame’s socket marked DC
4) Turn on the Digital Photo Frame by either pressing and holding the POWER button on
the back of the unit for 3 seconds or pressing the ON/OFF button on the Remote control.
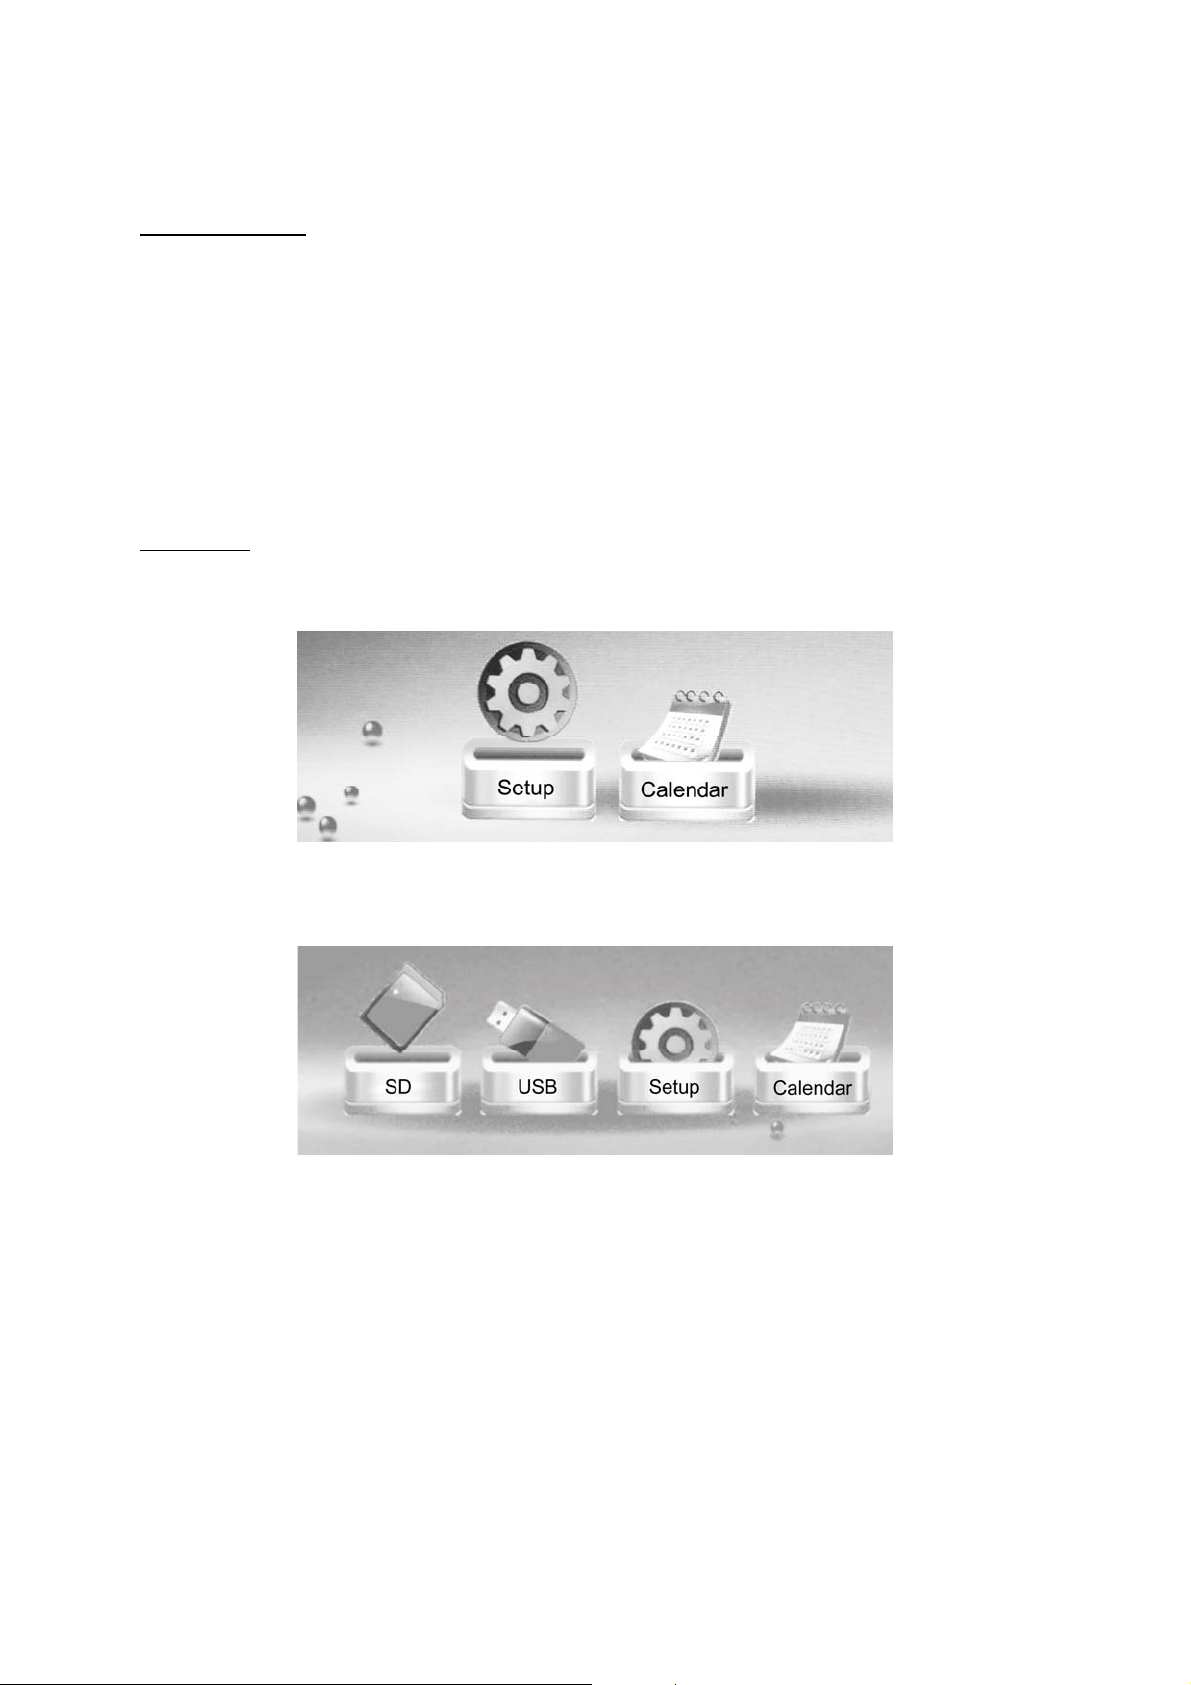
Main Menu:
After turning on the unit, this screen will appear:
If you have memory devices inserted into the frame (ie SD/SDHC or USB Flash Drive), they will
appear as an extra icon in this Menu. For Example:
Use the [◀][▶] buttons to navigate, then press ENTER to select an option.
2
Page 5
Viewing Your Photos
This Digital Photo Frame allows you to view JPEG Photo files only.
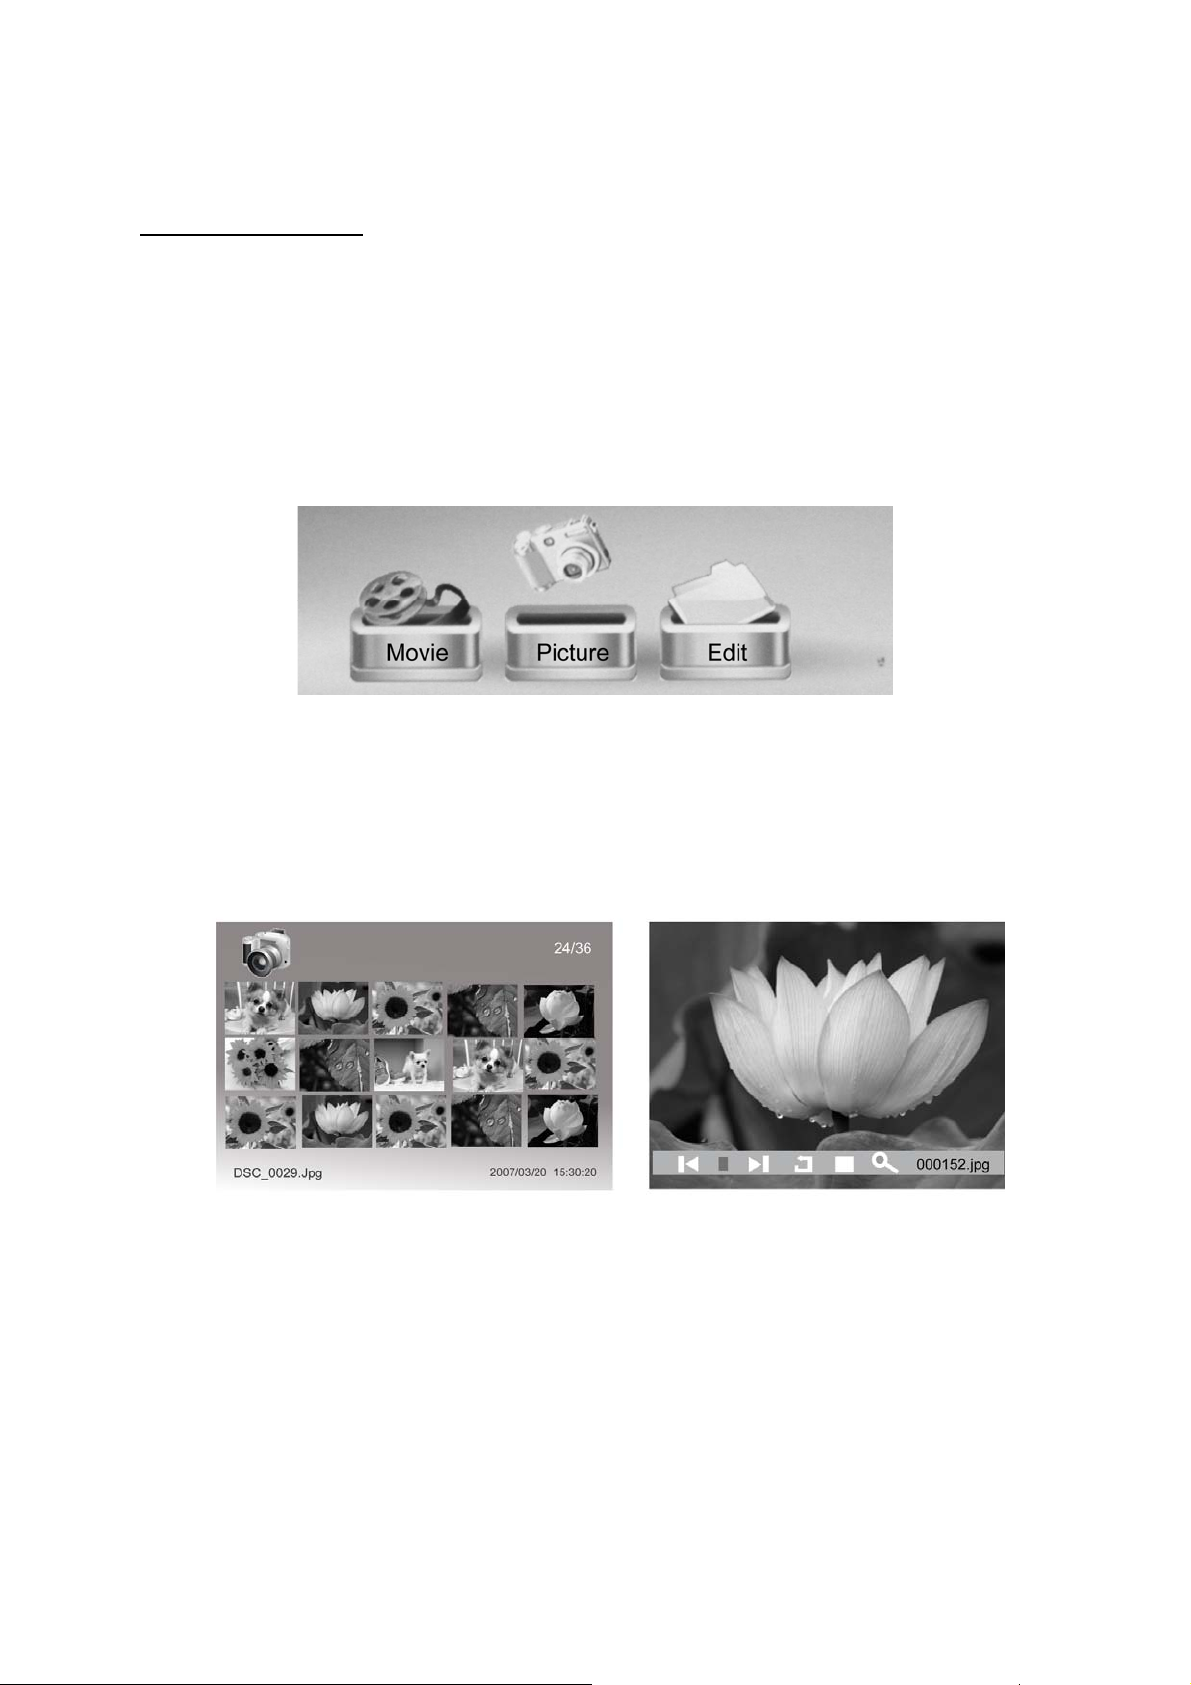
▪ After selecting the memory device you want to view your photos from, you will see
several options displayed in the diagram below. Select ‘Picture’ to view your photos by
pressing ENTER. You will now have access to your photos in thumbnail view. You can
navigate through your photos using the [◀][▶][▲][▼] buttons. Press ENTER to start
playing your photos.
During a slideshow, you can press the MENU button and an info bar will appear on the screen.
This allows you to skip back and forth through the slideshow, rotate a photo, stop the slideshow
or zoom in on a photo.
Press [◀][▶] and ENTER to make a selection.
3
Page 6
Viewing Your Photos from a Folder
If you have photos in a specific folder that you want to view separately, go to ‘Edit’ in the
Menu and press ENTER:
You should see a list of individual files and folders on the device. Locate the folder you wish to
open, so it is highlighted yellow. Then press ENTER. Now press ENTER again to start viewing
photos from just this folder.
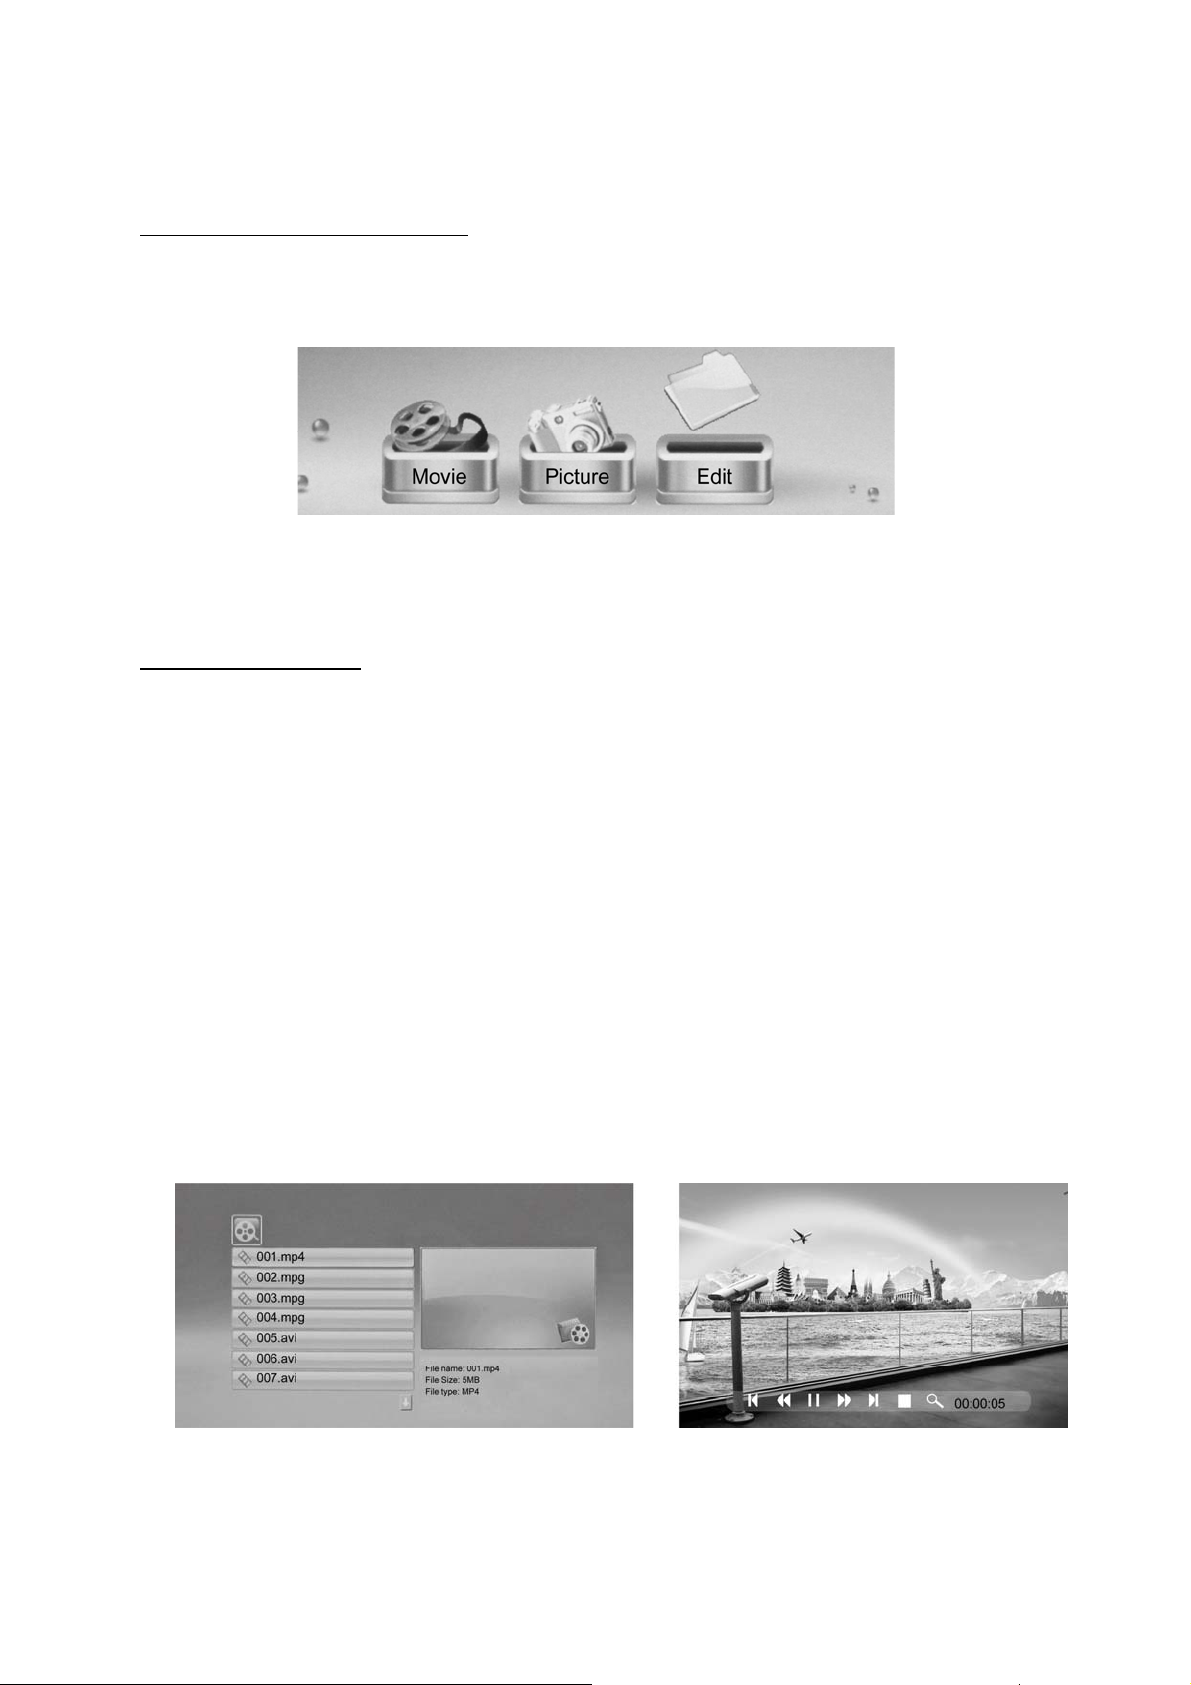
Viewing Your Videos
This Digital Photo Frame allows you to view MPEG-4/AVI Video files only. It is not “HD
Ready”.
If you encounter problems with video playback, please refer to our website FAQ section where
there are links to Video Conversion programs.
▪ Select the Movie icon from the Menu, then press ENTER. Your Video files will list on the
screen.
▪ Press [▲][▼] to choose the video you want to view and press ENTER to play.
▪ During the video, you can press the MENU button and an info bar will appear on the
screen.
This allows you to fast forward or rewind, skip back and forth through the video
collection, stop the video or zoom in on the screen.
▪ Press [◀][▶] and ENTER to make a selection.
4
Page 7

Clock and Calendar
1) To set the Time, press the ‘Setup’ button on the Remote Control. Scroll down the
screen, until ‘Time’ is highlighted. Now, using the [◀][▶][▲][▼] arrows, you can set
the time according to
YEAR/MONTH/DAY/ HOUR: MINUTE
Press ENTER to save these changes.
2) To view the Calendar, choose the Calendar icon from the Main Menu. A Photo slideshow
will play in a small window in the lower right corner.
Motion Sensor
For Energy-Saving and convenience, you can set the Digital Photo Frame to automatically turn
on when it detects human movement and off when there’s nobody around it.
First, you will need to choose the timing of the Motion Sensor. Choose between 5/10/30
minutes or 1 hour. Whatever you choose, this means that if the frame does not sense human
movement within this time, the frame will automatically turn off. When someone re-enters the
room and movement is sensed within 2.5 Meters of the frame, it will turn on again, resuming
the display that was on the screen before it switched off. Videos will restart themselves.
To set the feature, press the ‘Setup’ button on the Remote Control. Scroll down the screen, until
‘Hu Motion Timer’ is highlighted. Now, using the [◀][▶] arrows, you can set the amount of
time to elapse before the frame turns off, having sensed no movement. Press ENTER to save
the setting.
If you do not want to use Motion Sensor feature, select it to ‘Off ‘. Press ENTER to save the
setting.
5
Page 8

Deleting Files
Generally, we would recommend editing and deleting your files on a Computer, as the process
is much faster. With this Digital Photo Frame though, you can delete files from the storage
device.
▪ From the Main Menu, select the Memory Device where the relevant file is stored, ie USB,
SD etc.
▪ Select ‘Edit’ from the Menu as illustrated below:
▪ Now scroll down to the file you wish to delete:
▪ Select the file(s) you wish to delete by pressing the RIGHT ARROW on the Remote
Control. This will place a tick next to the relevant file name:
▪ Now press the MENU button on the Remote Control.
6
Page 9

▪ Select DELETE, by highlighting it and pressing ENTER.
▪ If you are deleting, you will be asked to confirm you want to proceed by selecting the
tick icon and pressing ENTER.
USB Flash Drive
You are able to store your photos, videos and music onto the 16GB USB Flash Drive supplied
with this Digital Photo Frame.
▪ Insert the USB Flash Drive into an available slot on your PC or Mac.
▪ The Disk Drive should automatically open up on your desktop.
Note: If you can’t locate it, go into ‘My Computer’ and you will see your Removable Disks. One
of these will be the USB Flash Drive. To discover which one it is, right click and select
‘properties’. The disk space will denote which is the USB Flash Drive, ie it has a 16GB Memory.
There it is!
▪ Leave this window open, now locate the files you wish to add to the USB Flash Drive.
These can be JPEG for photos, MPEG-4/AVI for videos.
▪ Now, with both windows open on your screen, you can drag and drop your desired files
onto the USB Flash Drive. Alternatively, you can use the copy and paste process.
▪ Depending on how many files are being transferred, this might take a few minutes.
▪ When done, disconnect the USB Flash Drive safely. The best way of ejecting a device
safely is by opening up ‘Computer/My Computer’. When you see the device you want to
remove, right-click on it and click on either ‘Eject’ or ‘Safely Remove Device/Hardware’,
then follow instructions.
Note: For Apple Mac Computer:
▪ The USB Flash Drive will appear on your desktop. Just open it, then drag and drop your
photos from iphoto or your hard drive onto the device.
Settings
Select the ‘setup’ icon from the main menu, to adjust the settings on your Digital Photo Frame.
Alternatively, just press the ‘setup’ button on the Remote Control
7
Page 10

From here, you will see the various options:
[▲][▼] button: Move through items or choose parameters
[◀][▶]button: Change the parameters
ENTER: Confirm/ Save Changes
EXIT: Back to item list.
Explanation of Settings:
Language Choose what language the frame will operate in
Slideshow Time Choose the duration of the slide interval from 3 seconds up to 1 hour
Slideshow Mode Choose from a number of transition effects for the slideshow
Slideshow Order
Movie Repeat
Mode
Choose between viewing your photos in Random Shuffle mode or By
Order
Allows you to repeat one video, all videos or having no repeat
Display Mode Choose the way your photos appear on the screen: Optimal or Original
Time Allows you to set the Date and Time
Brightness Changes the brightness of the image settings
Contrast Changes the contrast of the image settings
Saturation Changes the saturation of the image settings
Splitscreen
Function
Allows you to view up to 4 images on screen at the same time
Hu-Motion Timer Set the timing of the Motion Sensor. See Page 5 for Details
Default Restores Factory Settings
8
Page 11

Diagrams and Specifications
Package Contents:
Please make sure all of the following are present when you unpack your Digital Photo Frame. If
there are any parts missing, contact us via www.nix-digital.com
and we will send you the
relevant part.
Digital Photo Frame Remote Control Power Adapter Power Cable
USB Flash Drive Copper Screw for Stand Stand Anti-Theft Cover With Two Screws
Electrical Specifications:
18 Inch High Definition WXGA LCD Screen (16:9) 1366 x 768 pixels
PowerAdapter:InputAC100V240V,50‐60Hz,Output12V
Rear Overview:
9
Page 12

TIP: If you are using
the frame in a public
area, you may use the
anti-theft cover to
protect your SD card
and Power Adapter.
Side View:
TIP: When attaching the stand;
1) Push the stand into the back of the frame,
with the triangle of dots lined up.
2) Take the large copper screw and screw into
the inserted stand until hand-tight.
3) Check the stand is in a rigid position.
4) Place the frame on a flat horizontal surface.
10
Page 13

Remote Control
Note: 1) Please remove the plastic tab between the Remote Control Battery Door and the
Battery
2) Please point the Remote Control toward the Remote Sensor, which is located on the
front right side of the frame’s panel, 10 cm up from the right corner.
11
Page 14

Notes Of Importance
▪ Never remove a Memory Card or USB Flash Drive from a Digital Photo Frame whilst any
media is being copied or deleted.
▪ Never remove a Memory Card or USB Flash Drive from your personal computer without first
correctly ejecting it. When you see the device you want to remove, right-click on it and click on
‘Eject’ or ‘Safely Remove Hardware’, then follow instructions.
Always keep a back up of your photos!
Your warranty does not cover damage caused by incorrect use of memory devices.
Safety & Compliance
Always follow these basic safety precautions when using your Digital Photo Frame. This will
reduce the risk of fire, electric shock, product damage and personal injury.
Warning: To reduce the risk of electric shock, do not remove the cover or back. There are no
user-serviceable parts inside. Refer servicing to qualified personnel.
Warning: To prevent fire or electric shock hazard, do not expose the unit to rain or moisture.
Do not expose the Digital Photo frame to water (dripping or splashing). Objects filled with
liquids, such as vases, should not be placed near the unit.
▪ Keep the Digital Photo Frame away from direct sunlight and heat sources such as radiators or
stoves.
▪ Do not block the ventilation openings. Slots and openings on the unit are provided for
ventilation. The openings should never be blocked by placing your Digital Photo Frame on a
cushion, sofa or other similar surface.
▪ Do not place the Digital Photo Frame on an unstable cart, stand, tripod, bracket or table.
▪ Never place heavy or sharp objects on the LCD panel or frame.
▪ This Digital Photo Frame is not suitable for use by a child.
▪ Only use the AC adapter included with this Digital Photo Frame. Using any other adapter will
void your warranty.
▪ Protect the power cord from being walked on or pinched particularly at plugs, receptacles and
the point where the cord attaches to the Digital Photo Frame.
12
Page 15

The adapter is specifical l y desig ned for this frame, use of an alternative model might
cause problems, both for frames with re-chargeable batteries, and standard frames.
In case of loss or failure of the adapter, please contact our service department via
www.nix-digital.com
telling us the model of frame, where and when purchased,
your address and we will send you a new adapter.
For USA, Canada and Europe this is a free service. For other areas we will let you
know in advance if there will be a postage charge.
Cleaning your Digital Photo Frame
▪ Before cleaning your Digital Photo Frame, make sure it is turned off.
▪ Never spray or pour liquid directly onto the screen or plastic casing.
▪ To clean the screen, wipe the screen with a clean, soft, lint-free cloth. This removes dust
and other particles. If it is still not clean, apply a small amount of non-ammonia, non-alcohol
based, mildly non-abrasive detergent on a clean, soft, lint-free cloth to clean the surface.
Disclaimer: We do not recommend the use of any ammonia or alcohol-based cleaners on the
screen or plastic casing. Some chemical cleaners have been reported to damage the screen or
display case. The manufacturer will not be liable for any damage resulting from the use of any
ammonia or alcohol-based cleaners.
Frequently Asked Questions and Troubleshooting
▪ Take care when inserting and removing memory cards, USB flash drives and cables. The
copper connectors inside the frame that connect to your memory card and USB flash drive are
by their nature, delicate. Repeated rough use will almost certainly cause wear on the delicate
copper connectors. Also note that the memory card slots are in turn, directly mounted on the
Digital Photo Frame’s main circuit board. Do not push too hard when inserting memory devices
as this can eventually damage the internal circuit board.
▪ In the event the USB Flash Drive becomes unreadable or it is not functioning correctly, you
can restore it by reformatting. Under ‘file system’ you need to select ‘FAT 32’. This will
however, delete any files you have stored on the device.
Q: Why will my Digital Photo Frame not turn on?
A: Press the power button on the back of the frame. If you suspect the power adapter might
be faulty, contact us and we will send you a new one. Be sure to provide the model of
frame you have and your address.
13
Page 16

Q: Certain .AVI and MPEG-4 Video files are not playing properly. Why?
A: The subject of MPEG-4 and .AVI is a tricky thing. Basically there is no absolute standard
format and every major camera manufacturer keep updating their own versions of video file to
improve compression. However, it is possible to convert your files to standard formats. Please
visit www.nix-digital.com
for the latest information on converting your video files.
Q: The slideshow sometimes freezes on a particular picture. What’s happening?
A: Occasionally the frame gets stuck on a particular photo. First of all, make sure you are using
JPEG’s only. The photo might have been edited or saved in manner which is not fully
compatible with the frames processor. The only practical solution we have found is to delete
that photo from the file. If you still had access to the original camera card, you can reload the
original.
Q: How big can Memory Cards be in Capacity?
A: The simple answer is that our frames will accept most High-Capacity Memory Cards like, for
example, a 16 GB SDHC Card.
However, bear in mind that if there are thousands of files on your card and they are in different
folders or formats ie MP3,.avi,.txt) etc, this will probably slow the frame's processor.
If you're just dealing with JPEG's for example, you should be able to view as many as your card
contains. Also, if the frame does not appear to be reading a card, it is worth checking Properties
and ensuring that 'FAT' is selected.
Q: Why won't th e Photos I edited in Photoshop play on my Digital Photo Frame?
A: NIX Frames recognize JPEG files only, so if an image is taken into Photoshop for alterations
make sure you save your work as JPEG-STANDARD or STANDARD-JPEG. Also, if you have
saved files as CMYK, they will be unreadable, so you should convert them to RGB.
Q: How come there are blank images in thumbnail view and also during the
slideshow?
A: This will sometimes occur if your computer is an Apple Mac. Apple Mac’s save jpegs as an
interlaced image (unlike PC’s) and in doing this OSX creates an index file. The index file does
not show up on the Apple Mac, but when you transfer the image to a PC, a USB Flash Drive or
a Digital Photo Frame, you will see an index file next to the actual image file. The index file is
always just 1kb in size and shares the same file name. This frame should be able to simply
ignore these files when displaying a slideshow and skip over them, but sometimes it will display
the blank image. Occasionally, it will also display the index file in the thumbnail view as a red X.
Try deleting them in ‘File’.
Q: Why are some of my Photos the wrong way round?
A: Some photo's are not appearing in the correct orientation. The usual
reason for this is that the original files as taken on the camera, are this
way inclined. Check them in a camera again to see if this is the case.
14
Page 17

If they were just rotated on something like Windows Explorer, they
will not have actually saved in the new orientation, for the Digital Photo Frame
to recognise this.
To properly save photos in an exact orientation on your PC, you need to do
so using a Photo Editing Program that enables this, such as iPhoto,
Photoshop.
Please note: the Rotate option on the Remote Control will only rotate the
file for viewing but will not make permanent changes.
Q: If I rotate a Photo, why are there black bars on either side of the image?
A: It simply is not possible to fit a vertically oriented image into an entire horizontal screen or
fit a horizontally oriented image into the entire vertical screen. This would distort the image.
Q: Why is my Remote Control not working properly?
If the Remote Control is new, firstly make sure you have removed the plastic tab from between
the battery and the tray. Now make sure you are pointing the Remote Control toward the
Remote Sensor and you are pressing the buttons slowly. If you suspect the battery is flat, you
will need to replace it with a CR2025 lithium button-cell battery. If you suspect the Remote
Control is not working at all, please email us and we will send you a new one. Be sure to
provide the model of frame you have and your address.
Q: How can I play Photos in the exact order I want to see them in?
A: It is sometimes possible that your camera, memory stick or the software you are storing your
images on have arranged your photos in a certain sequence that plays fine on the original
device but not on the frame.
We recommend that you choose the photos you want to see in an exact sequence, then load
them individually onto the SD Card or USB Flash Drive in the precise order you want. So if you
are loading from a Computer, select the first photo you want in the collection, add it to the Disk
Drive. Now select the second photo you want in the collection, add it next to the first photo.
And so on. Before you finish, just make sure you look at the window where you have placed
these files and you are satisfied that from left to right, they appear in the sequence you want to
see them in. The frame’s processor will understand this and display the photos in the order you
individually placed them on the memory device. Simply selecting a folder of many different
filenames (even if they are number or date specific) and loading them onto the memory device
will not work.
15
Page 18

Warranty:
This frame comes with a full one-year Manufacturer’s Warranty. You do not need to register
your Warranty. In the event your fame requires any servicing, you just need to contact us via
our website:
www.nix-digital.com.
Please provide a copy of your original order information as proof of purchase.
This symbol on the product or in the instructions means that your electrical and
electronic equipment should be disposed of at the end of its life separately from your
household waste. There are separate collection systems for recycling in your country.
For more information, please contact the local authority or your retailer where you
purchased the product.
16
Page 19

Page 20

We warmly welcome all suggestions from any country of what you like and don’t like about our
Digital Photo Frames. Please contact us with suggestions, comments, possible improvements or
even design ideas!
NIX is a registered trademark of Creedon Technologies Ltd., UK, Creedon
Technologies Ltd., Canada and Creedon Technologies USA LLC.
This product is designed in London, UK and made in China.
All trademarks and designs are copyright protected.
Ver:3.2
 Loading...