

Page 1
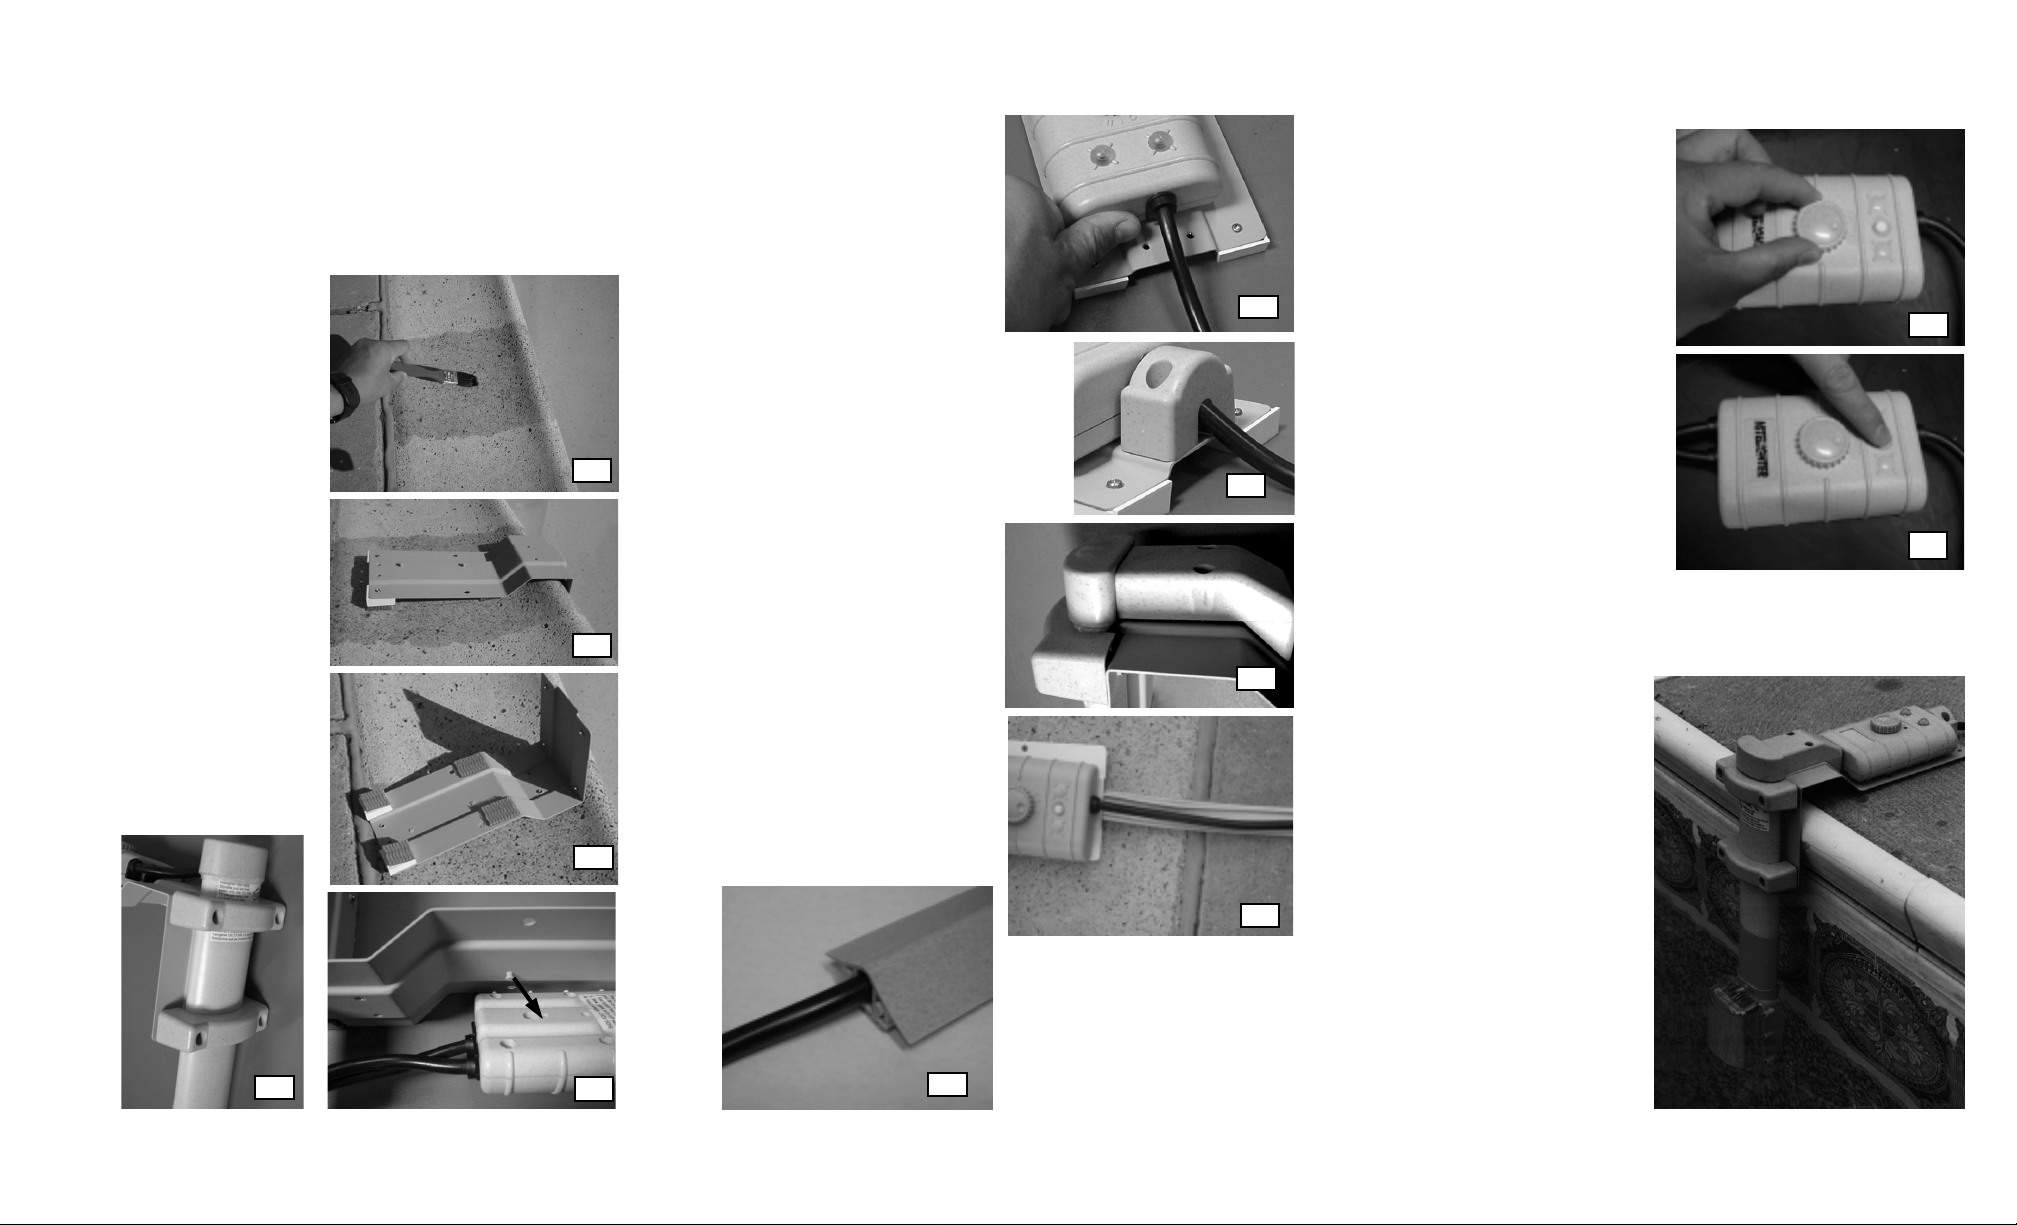
1.0 Installation
The unit is designed to be installed to any existing in
ground pool using the deck mounting kit. The powder
coated stainless steel metal bracket can be either
bolted onto the deck or by 3M Dual-Loc k.
1.1 If using Dual-Lock pads,
paint the deck with any
water resistant paint to
seal the porous holes and
get a smooth surface
where pads will be set.
1.2 If the deck has a sloped
edge, attach the two
square plastic pieces to
the end of metal bracket
to make it lev el.
1.3 Attach the 4 pieces of 3M
Dual-Lock on the bottom
of the metal bracket and
the other 4 pieces on the
painted deck.
1.4 Use the two plastic “U”
clamps to hold the unit
onto the metal bracket. Do
not tighten up the screws.
.
1.1
1.2
1.3
1.5 Put the control unit onto
the metal bracket. Engage
the two keyholes on the
back of the control unit to
the two studs on the metal
bracket.
1.6 Push the control unit
forward until it stops.
1.7 Attach the plastic piece at the
end of the metal bracket to hold
the control unit in place. This
plastic piece is not symmetrical
and the smaller opening should
face outside.
1.8 Attach the wire cover at
the top of the metal
bracket. Finally, tighten up
all screws including the
“U” clamps.
1.9 If you want to cov er the
wire leading to the
transformer , y ou can use
the 4 sections of wire
cover. Attach the bottom
piece to the deck by
water resistant glue such
as silicone (not included).
1.7
1.6
1.8
2.0 Operation
The unit can be turned on for
either 3 hours or 6 hours
and will then shut off
automatically.
2.1 Turn the knob to the left f or
3 hours or turn to the right
for 6 hours.
2.2 Press the black rubber
button to turn on the unit.
Press it again to turn it off.
2.3 Snap the color filter onto
the clear cover
3 hrs
6 hrs
2.1
2.2
1.4
1.5
1.9
1.9
SmartPool Inc.
575 Prospect Street
Unit 205
Lakewood NJ 08701
Tel: 888-560-7665
NITELIGHTER
1004 In Ground Light
Page 2
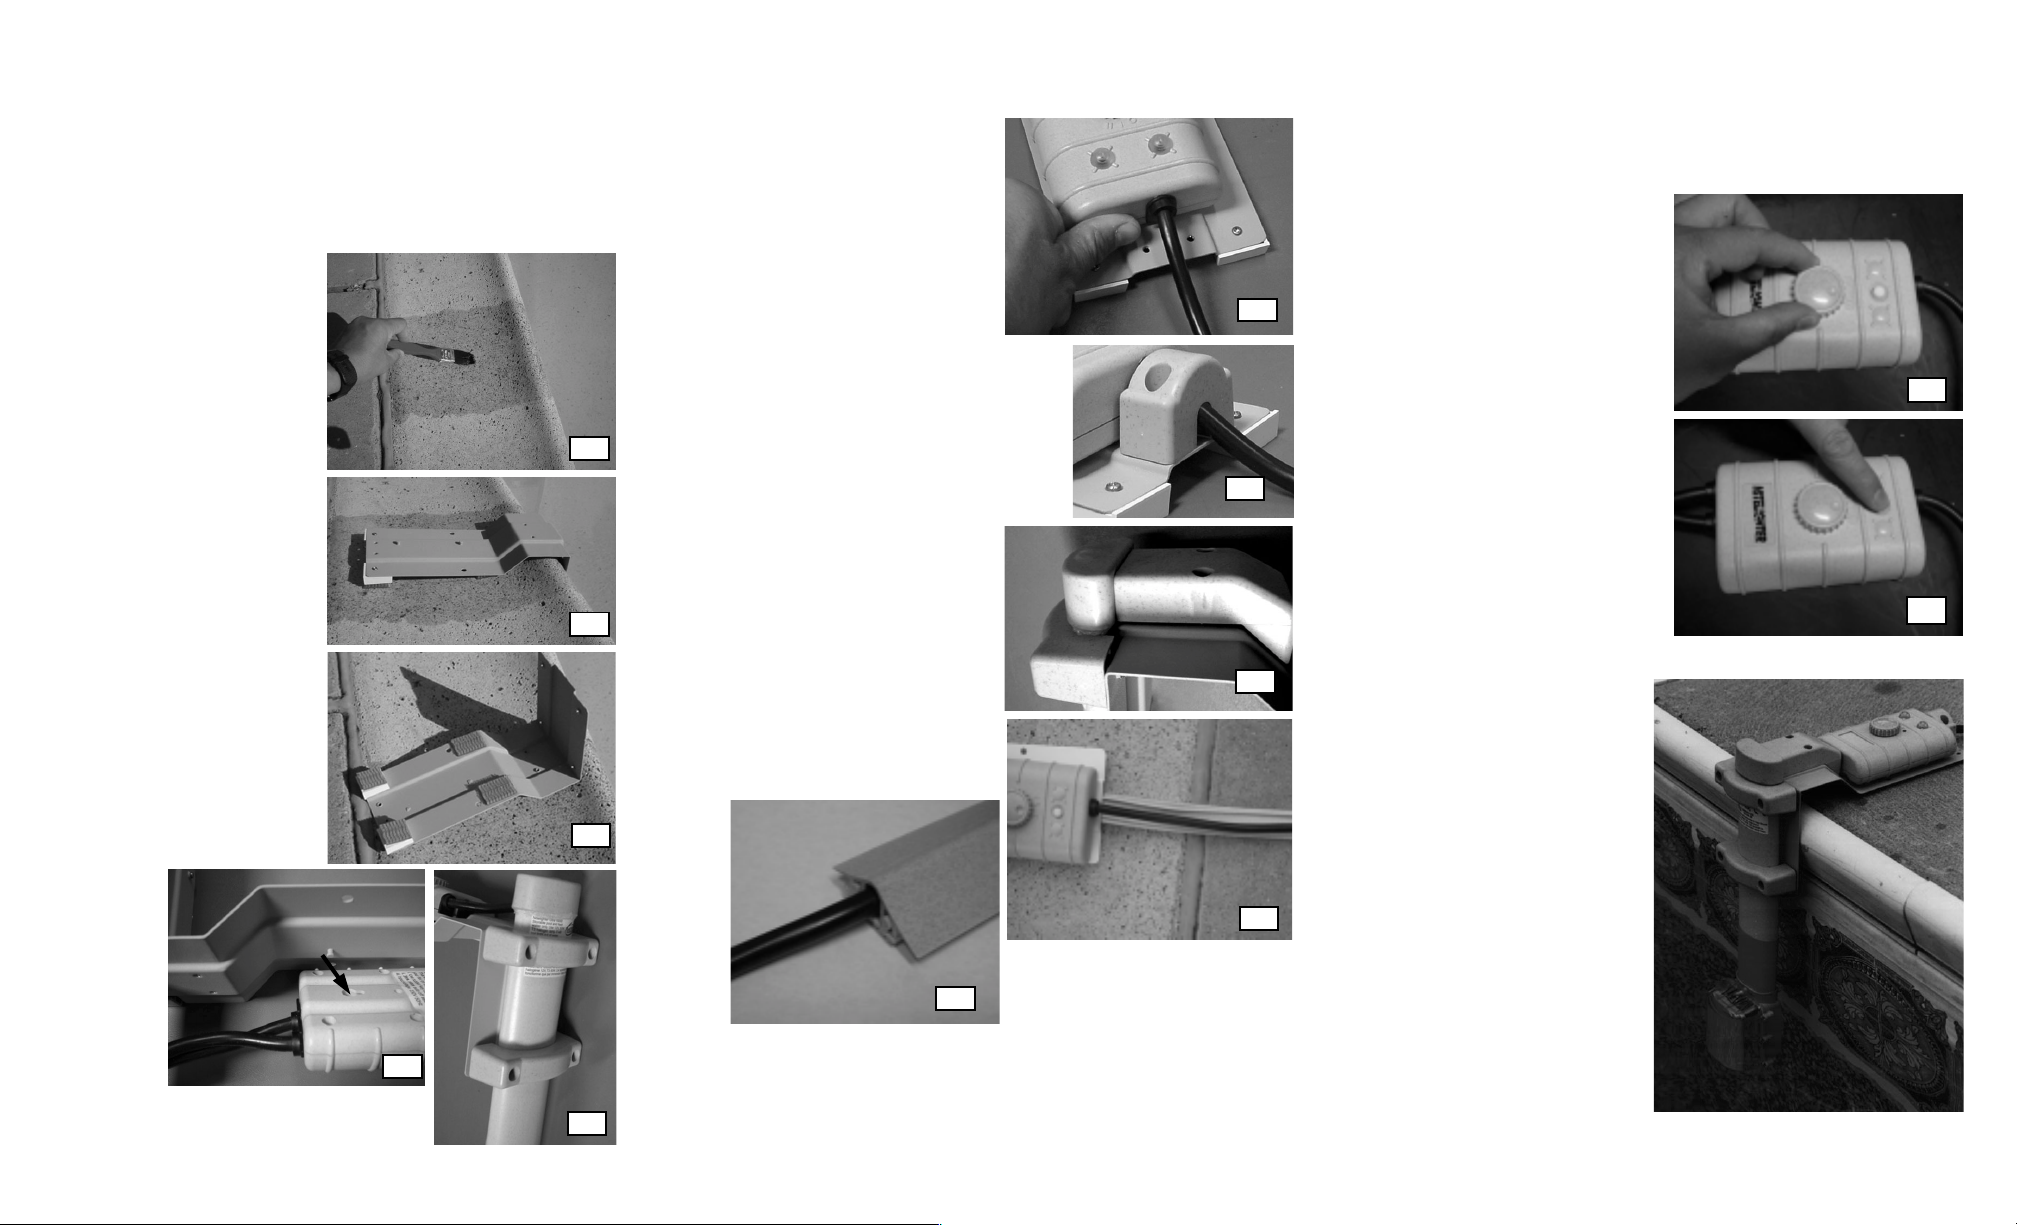
1.0 Installation
L’unité est conçue pour être installée sur une piscine
creusée existante en utilisant le nécessaire pour patio .
Le support d’acier inoxydable enduit de plusieurs
couches de poudre cuite
peut être, soit verrouillé
sur le patio ou par
<Dual-Lock> de 3M.
1.1 Si vous utilisez les
tampons <Dual-Lock>,
peignez le patio avec
une peinture résistante à
l’eau pour sceller les
trous poreux et pour
obtenir une surface lisse
où les tampons y seront
installés.
1.2 Si le patio a un rebord
incliné, attachez les deux
pièces de plastique carré
à l’extrémité du support
de métal pour le mettre
de niveau.
1.3 Attachez les 4 piéces du
<Dual-Lock> 3M sous le
support de métal et les 4
autres pièces sur le patio
peint.
1.1
1.2
1.3
1.5 Placez l’unité de contrôle
sur le support de métal.
Engagez les deux trous de
serrure à l’endos de l’unité
de contrôle sur les deux
montants sur le support de
métal.
1.6 Poussez l’unité de contrôle
vers l’avant jusqu’à ce qu’elle arrête.
1.7 Attachez la pièce de plastique à
l’extrémité du support de métal pour
tenir l’unité de contrôle en place.
Cette píèce de plastique n’est pas
symétrique et la plus petite
ouverture devrait faire face
vers l’extérieur.
1.8 Attachez la housse du fil au
haut du support de métal.
Fianalement, serrez toutes
les vis y compris les pinces
en “U”.
1.9 Si vous désirez couvrir le fil
qui méne au transformateur,
1.7
1.6
1.8
2.0 Mise en marche
L’unité peut être en mise en
marche pendant 3 heures
ou 6 heures et s’éteindra
automatiquement.
2.1 Tournez le bouton vers la
gauche pour 3 heures ou
vers la droite pour 6
heures.
2.2 Pressez le bouton de
caoutchouc noir pour
mettre l’unité en marche.
Pressez de nouveau pour
l’éteindre.
2.3 Enclenchez le filtre de
couleur sur le couvercle
clair.
3 h
6 h
2.1
2.2
1.4
Utilisez
les
deux
pinces
de
plastique
en “U”
pour tenir l’unité sur le support de
métal. Ne pas serrez les vis.
.
1.5
1.4
1.9
au patio avec de la colle résistante à l’eau tel que de la
silicone (non incluse)
vous pouvez utiliser les 4
sections de la housse du fil.
Attachez la pièce inférieure
1.9
SmartPool Inc.
575 Prospect Street
Unit 205
Lakewood NJ 08701
Tel: 888-560-7665
NITELIGHTER
Lumiére 10004 pour
piscine creeusée
 Loading...