

Nitek ET1551UW User Manual
Models: EL1500CW, ET1500CW, EL1500UW,
Installation and
ET1500UW, EL1551UW, ET1551UW and EE328W.
Operation Manual
Introduction
The WP1325 is a NEMA 4X polycarbonate high-impact ABS molded enclosure which is ideal for use when installing the
systems outdoors. The WP1325 is often ordered as a “W” option with other Nitek products. Making the EE328 the
EE328W or the ET1500C the ET1500CW.
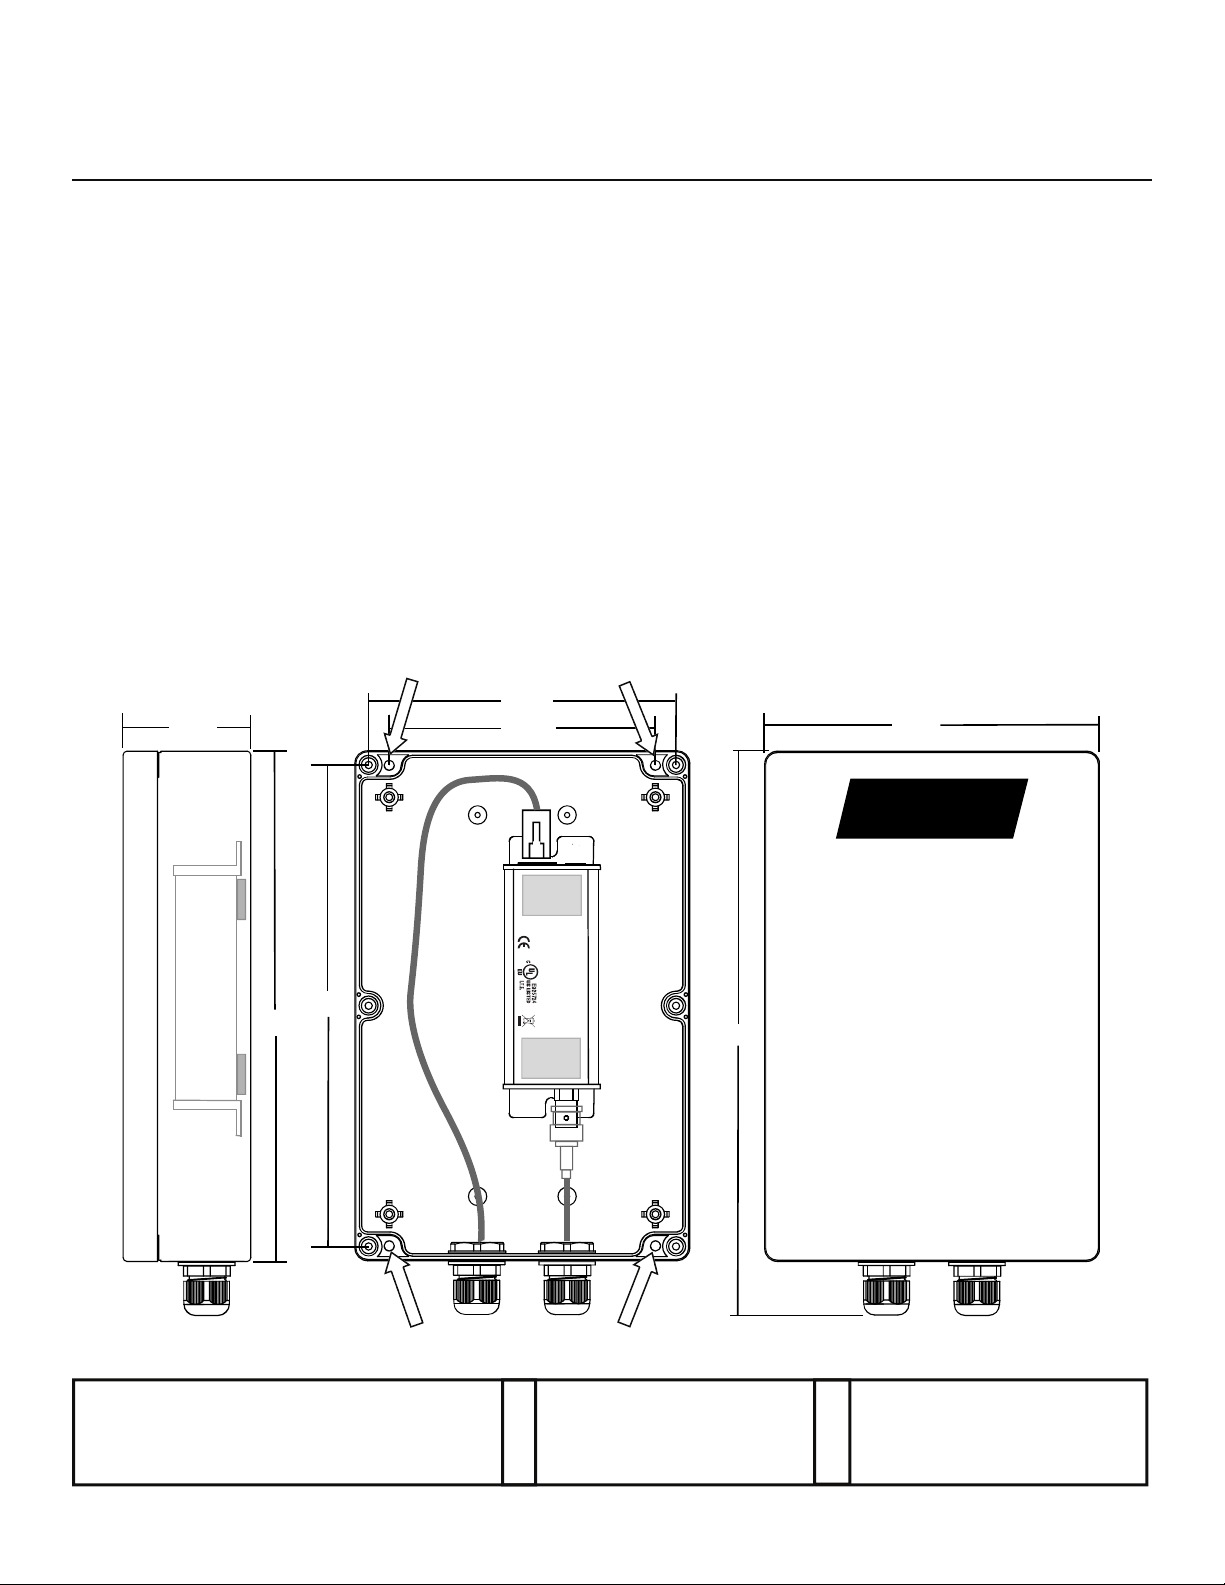
Installation (ET1500CW)
1) Mount the box with the holes provided. DO NOT drill extra holes in the box. This will void the water tight
seal.
2) Secure the transmitter to the box, as shown below, using supplied 3M Dual Lock (SJ3560) material, one
square at each end of the transmitter, press device firmly to inside of box.
3) Route the communication cables through the cable grommets and secure the outer nut. Only route one
cable through each grommet. Use only round cables and if using the box outdoors be sure to use outdoor
rated cables.
4) Use ALL six screws to secure the water tight cover.
Mounting Holes
5.268
2.170
4.560
5.740
NITEK
Transmitter
ET1500C
NITEK
Made in USA
8.250
8.740
Top (Side View)
Bottom (Side View)
9.920
NITEK ®
680240121
Mounting Holes
5410 Newport Drive, # 24
Rolling Meadows, IL 60008
Phone: (847) 259-8900
Fax: (847) 259-1300
USA
E-mail: info@nitek.net
WWW.NITEK.NET
De Schans 19-21 2a
8231 KA Lelystad
Tel: +31(0)320-230005
E-mail: info@nitek.nl
WWW.NITEK.NL
EUROPE
05012013
Models: EL1500CW, ET1500CW, EL1500UW, ET1500UW, EL1551UW, ET1551UW
and EE328W.
Introduction
The WP1325 is a NEMA 4X polycarbonate high-impact ABS molded enclosure which is ideal for use when installing the
systems outdoors. The WP1325 is often ordered as a “W” option with other Nitek products. Making the EE328 the
EE328W or the ET1500U the ET1500UW.
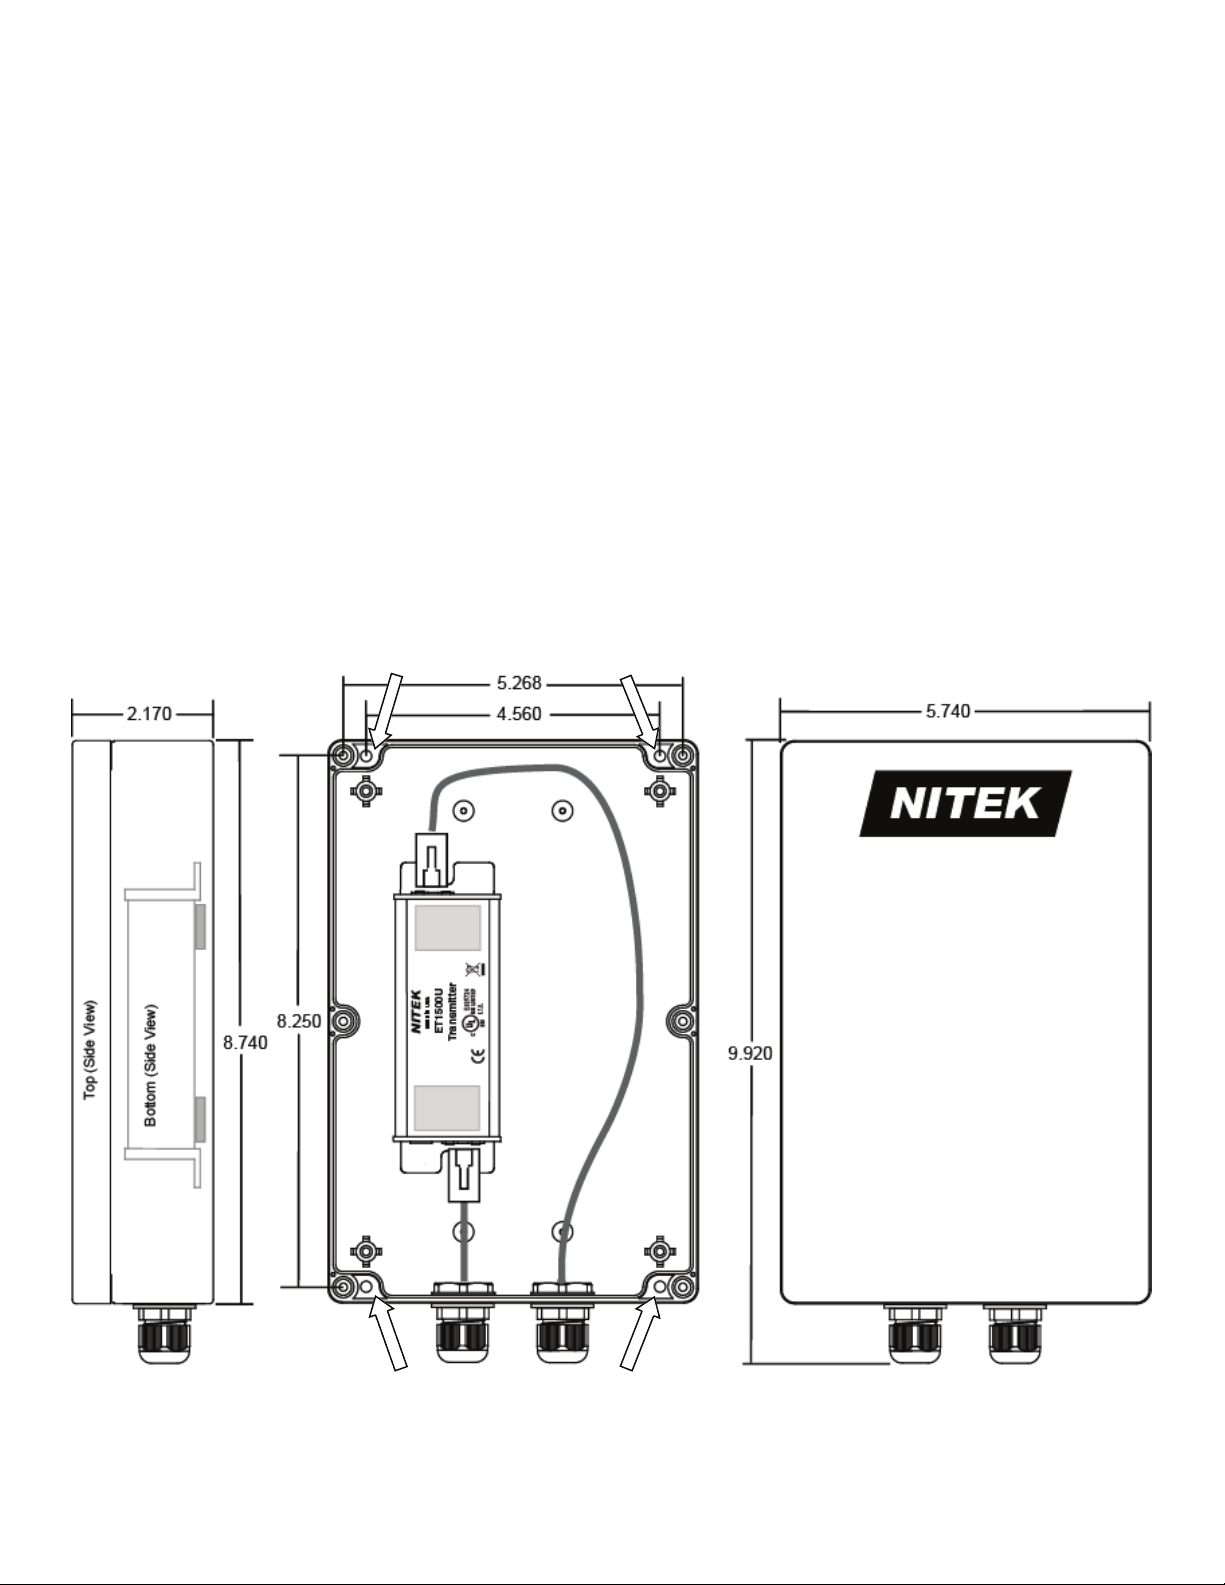
Installation (ET1500UW)
1) Mount the box with the holes provided. DO NOT drill extra holes in the box. This will void the water tight
seal.
2) Secure the transmitter to the box, as shown below, using supplied 3M Dual Lock (SJ3560) material, one
square at each end of the transmitter, press device firmly to inside of box.
3) Route the communication cables through the cable grommets and secure the outer nut. Only route one
cable through each grommet. Use only round cables and if using the box outdoors be sure to use outdoor
rated cables.
4) Use ALL six screws to secure the water tight cover.
Mounting Holes
Mounting Holes
 Loading...