

Page 1
Compact RGB LED PAR
utilizing the latest in Chip On Board technology
to project saturated perfectly mixed colors
Page 2

TABLE OF CONTENTS
SAFETY / GENERAL INSTRUCTIONS
INTRODUCTION
Features
Specications
OVERVIEW
Front view
Rear view
DIMENSIONS
MAGNETIC FRESNEL LENS
CONTROL MENU OVERVIEW
Control Panel
Function Menu
UFI OPERATION
DMX FUNCTION CHART
8-channel mode
3-channel mode
OPERATING MODE PRIORITY RANK
STAND-ALONE OPERATION
INFRARED (IR6) REMOTE CONTROL OPERATION
MASTER/SLAVE OPERATION (via DMX cable)
MASTER/SLAVE OPERATION (via UFI wi-)
MAINTENANCE
- PHOTON 80
- Fresnel lens
- Power cord
- User manual
- Warranty Card
PACKING CONTENT
2
15
Page 3
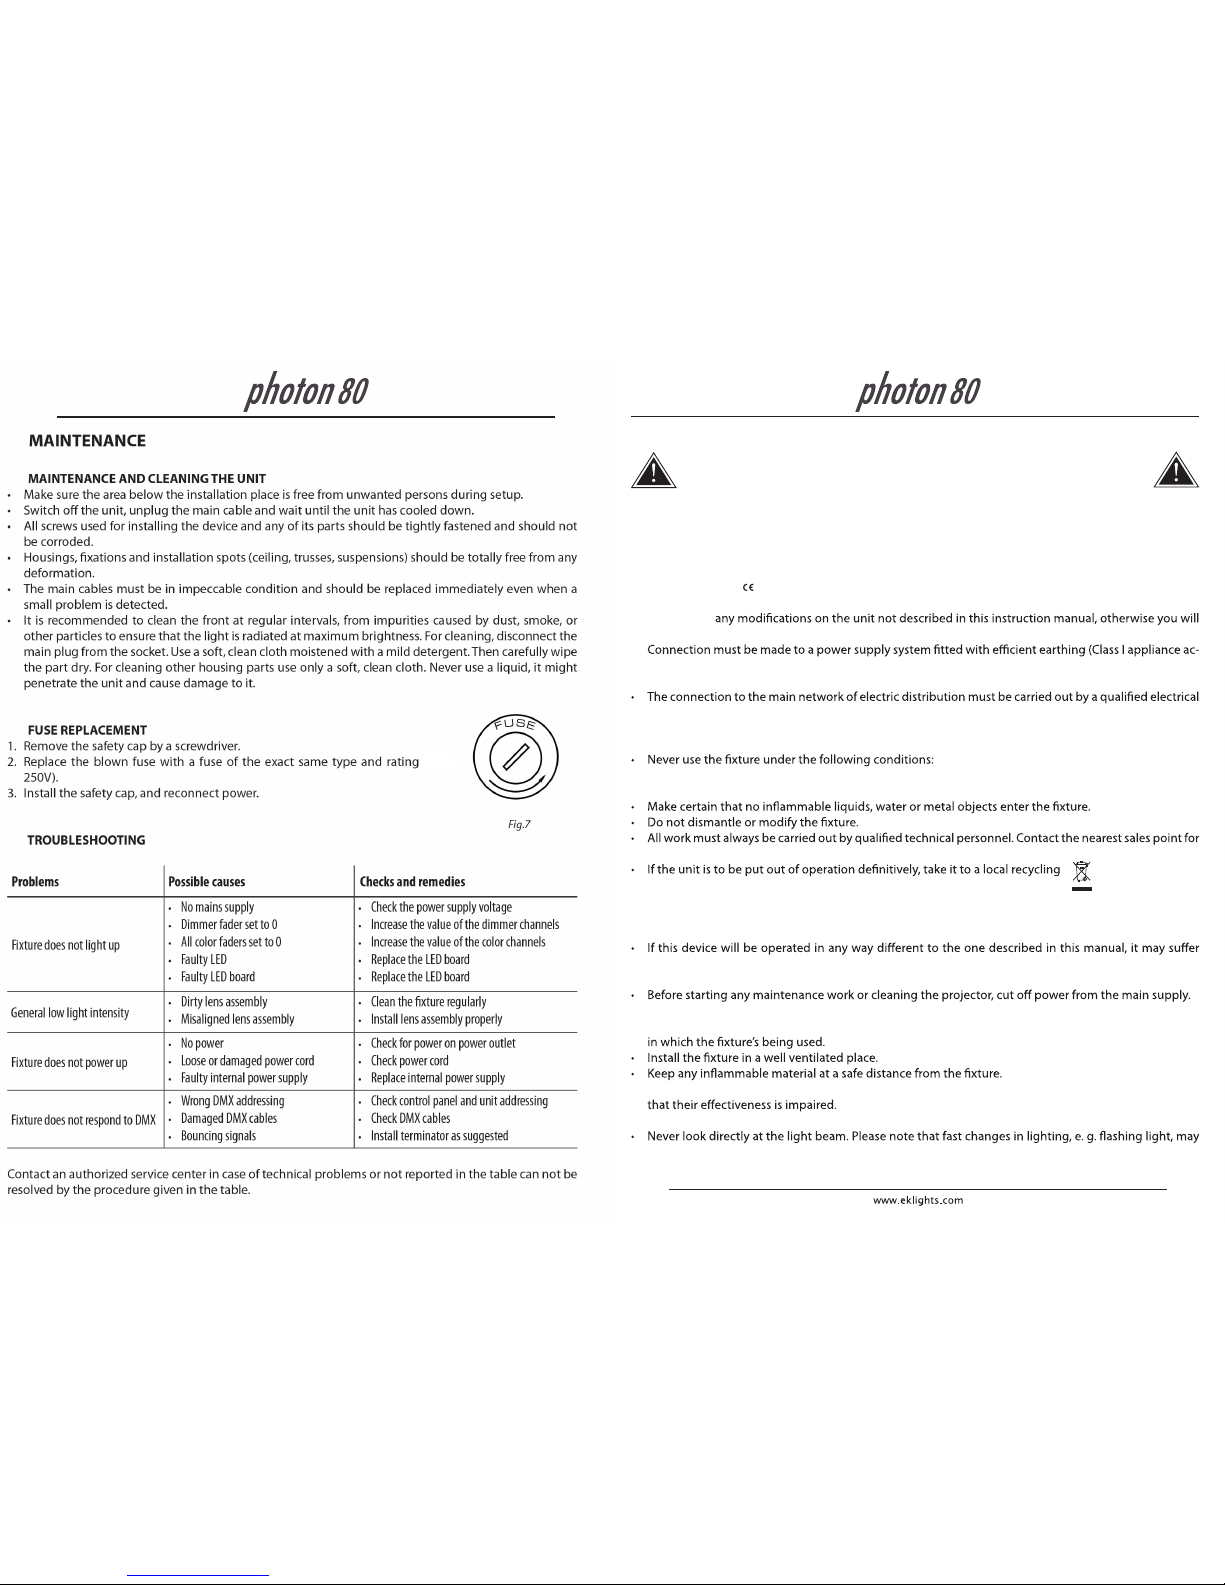
WARNING! Before carrying out any operations with the unit, carefully read this instruction
manual and keep it with cure for future reference. It contains important information about
the installation, usage and maintenance of the unit.
SAFETY
General instruction
• The products referred to in this manual conform to the European Community Directives and are therefore marked with
.
• The unit is supplied with hazardous network voltage (230V~). Leave servicing to skilled personnel only.
Never make
risk an electric shock.
•
cording to standard EN 60598-1). It is, moreover, recommended to protect the supply lines of the units
from indirect contact and/or shorting to earth by using appropriately sized residual current devices.
installer. Check that the main frequency and voltage correspond to those for which the unit is designed
as given on the electrical data label.
• This unit is not for home use, only professional applications.
- in places subject to vibrations or bumps;
- in places with a temperature of over 45 °C.
an inspection or contact the manufacturer directly.
plant for a disposal which is not harmful to the environment.
Warnings and installation precautions
damage and the guarantee becomes void. Furthermore, any other operation may lead to dangers like
short circuit, burns, electric shock, etc.
• Always additionally secure the projector with the safety rope. When carrying out any work, always comply scrupulously with all the regulations (particularly regarding safety) currently in force in the country
• Shields, lenses or ultraviolet screens shall be changed if they have become damaged to such an extent
• The lamp (LED) shall be changed if it has become damaged or thermally deformed.
trigger epileptic seizures in photosensitive persons or persons with epilepsy.
• Do not touch the product’s housing when operating because it may be very hot.
3
14
(T2A-
Page 4
MASTER/SLAVE OPERATION (via UFI wi- transceiver)
PHOTON 80 units can operate in Master/Slave mode wirelessly using the optional UFI wi-
transceiver. The master UFI-enabled unit can be operated in Auto mode or by the IR6
infrared remote, with the UFI set to transmit. The slave units should all be set to slave
mode, with the UFI set to receive.
Note: Slave units should be congured before conguring master unit
Note: All units should be set to same DMX address, mode and UFI channel
Setup as below:
SLAVE UNITS:
Press MENU button until 3-CH or 8-CH is displayed
Press ENTER
Set DMX address to d 1
Set UFI to preferred receiving channel (1-16)
Attach UFI to the PHOTON 80's USB port
MASTER UNIT:
Press MENU button until DMX mode is displayed that matches slave conguration
Press ENTER
Set DMX address to d 1
Set to Auto mode or control by IR6 infrared remote
Set UFI to chosen transmitting channel (1-16)
Attach UFI to the PHOTON 80's USB port
13
INTRODUCTION
PHOTON 80 is a ompact RGB LED PAR utilizing the latest in Chip On Board technology to project saturated perfectly mixed colors.
FEATURES
- Die-cast road-worthy custom housing design that allows for easy sit-at oor mounting
- Easily ts inside standard truss dimensions for dramatic uplighting eects
- Side-mounted Power and DMX connections for easy linking and cable management
- High-frequency LED modulation for icker-free video playback
- Built-in sound-active and auto (stand-alone) programs
- Four selectable dimming curves
- Manual color mixing via onboard menu
- Power In and Out connections for linking mutliple units
- USB port for optional UFI wi- transceiver for wireless DMX control
- Infrared sensor for optional IR6 remote control
- Magnetic lens attachment system for easy swapping of
narrow and wide Fresnel lenses (included)
SPECIFICATIONS
Light Source: 80W COB LED
Beam Angle:
2
5° or 60°
Colors: RGB color mixing
Strobe: 0 - 30 Hz
Dimming: 0-100% dimming, 4 selectable dimming curves
Control modes: DMX, Auto, Sound-Active, Koala wireless DMX (with optional UFI
transceiver), IR (with optional IR6 controller)
DMX Channels: 3 / 8
Built-in Programs: Color macros, pulse eect, fade/snap transition selection
Menu: 4-digit LED display
Mains: 100 - 240 VAC, 50/60 Hz (auto-ranging)
Power: 42W
Power Linking: Up to 7 units @ 120V ~ Up to 13 units @ 230V
Power connections: IEC power In/Out
Data connections: 3-pin XLR In/Out for DMX
Housing: Die-cast Aluminium
Finish: Matte Black
IP rating: IP20
Cooling: Passive
Dimensions: 200 x 143 x 253 mm
Weight: 2 KG
4
Page 5

MASTER/SLAVE OPERATION (via DMX cable)
When multiple PHOTON 80 units are used together, Master/Slave mode enables the
assignment of one master unit and multiple slave units. The master unit can be operated
in stand-alone mode or by IR6 infrared remote control. The slave units should all be set to
slave mode.
Note: Slave units should be congured and connected before linking to master unit
Setup as below:
SLAVE UNITS:
Press MENU button until 3-CH or 8-CH is displayed
Press ENTER
Set DMX address to d 1
Connect DMX cable from master unit to DMX In connector
Link following slave units in similar cable conguration
MASTER UNIT:
Set to Auto or control with IR6 infrared remote
Link to slave units, beginning from the master DMX Out connector
12
OVERVIEW
Display
DMX In
UFI Port
Power Out
Menu
Buttons
Rear View
IR sensor
Adjustment knob
5
Power In
DMX Out
Mounting bracket
Safety cable
attachment point
Page 6
DIMENSIONS
6
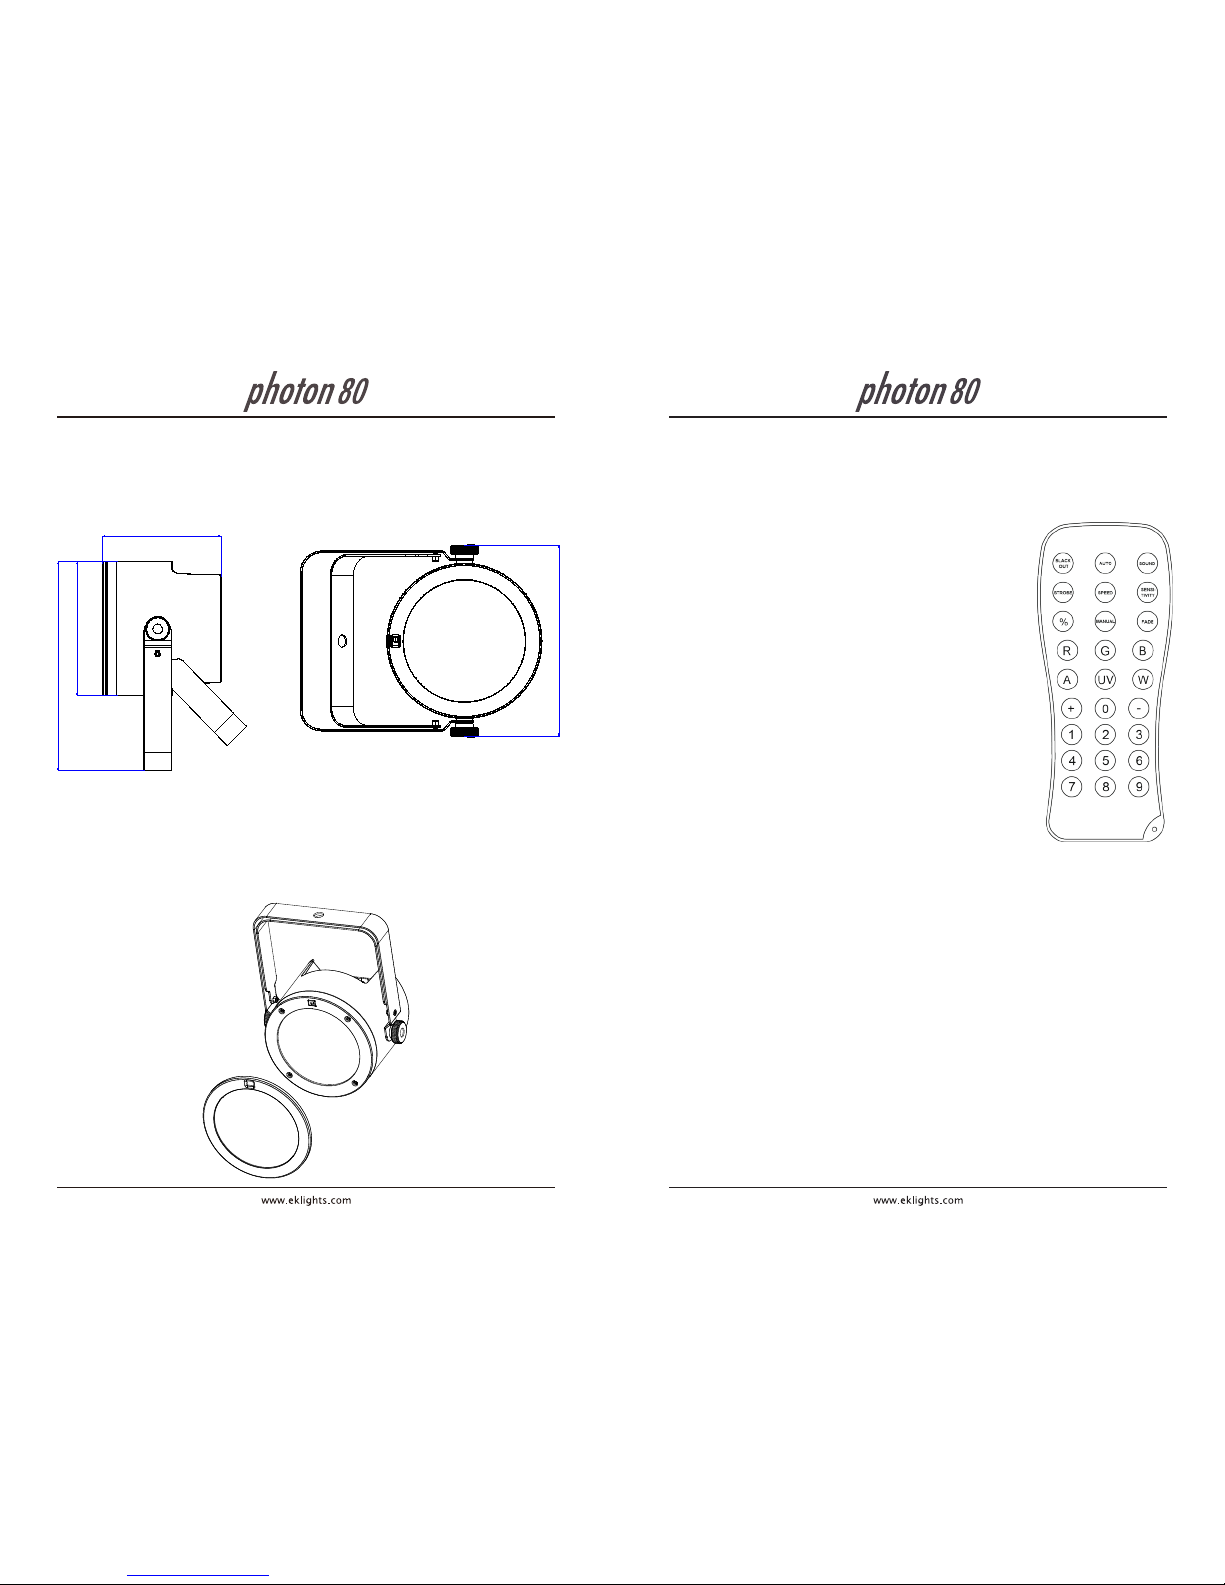
MAGNETIC FRESNEL LENS
The PHOTON 80 features a fresnel lens
with magnetic mounts, allowing lenses
to be easily attached and removed.
143
Ø162
253
200
INFRARED (IR6) REMOTE CONTROL OPERATION
The (optional) IR6 infrared controller enables remote control of the PHOTON 80.
To pair the IR6 to the PHOTON 80, follow these steps:
1. Press MENU button until Ser is displayed
2. Press ENTER
3. Press UP or DOWN to turn infrared operation ON or OFF
4. Press ENTER
IR6 BUTTON FUNCTIONS
AUTO : Run auto programs
FADE : Fade auto programs
SPEED : Enable speed adjustment of auto programs
+ / - : Increase / decrease speed of auto programs
SOUND : Activate sound-active mode
+ / - : Select Snd1 or Snd2 sound-active programs
SENSITIVITY : Enable sound sensitivity adjustment
+ / - : Increase / decrease sound sensitivity
MANUAL : Enable manual selection of colors
0 - 9 : Press numbers between 0 - 9 to choose colors
R G B : Press MANUAL, then Press R G or B buttons
+ / - : Increase / decrease output of each color using +/- buttons
% : Adjusts total output level
+ / - : Increase / decrease output level
STROBE : Enable adjustment of strobe rate
+ / - : Increase / decrease strobe rate
STROBE : Press again to turn o strobe
BLACKOUT : Turn o all output
BLACKOUT : Press again to exit blackout mode
Note: : If IR6 remote is not responding, press BLACKOUT to conrm
that blackout mode was not mistakenly activated
11
Page 7

STAND-ALONE OPERATION
AUTO PROGRAM MODE
Press MENU button until P-- is displayed
Press ENTER
Press UP or DOWN to select program (P 1-4)
Press ENTER
SELECTING PROGRAM SPEED
Press MENU button until S-- is displayed
Press UP or DOWN to select speed (S 1-100)
Press ENTER
SOUND-ACTIVE MODE
Press MENU button until Snd is displayed
Press ENTER
Press UP or DOWN to select sound-active program (Snd1 or Snd2)
Press ENTER
ADJUSTING SOUND SENSIVITY
Press MENU button until Sens is displayed
Press UP or DOWN to adjust mic sensitivity (u 0-100)
Press ENTER
PRESET COLOR SELECTION COLOR MIXING
Press MENU button until C-- is displayed Press MENU button until U-- is displayed
Press ENTER Press ENTER to select r__, g__ or b__
Press UP or DOWN to select static color (C 1-18) Press UP or DOWN to select color output levels
Press ENTER Repeat until desired color output is achieved
DIMMING CURVE SELECTION
Press MENU button until dIM is displayed
Press ENTER
Press UP or DOWN to select dIM1 (fast), dIM2 (medium), dIM3 (slow), or OFF
Press ENTER
READING TEMPERATURE
Press MENU button until teMP is displayed
Press ENTER
OPERATING MODE PRIORITY RANK
Higher priority control modes override lower priority modes
1. UFI
2. DMX (wired)
3. Infrared (IR6 remote)
4. Manual (onboard menu)
10
BUTTON FUNCTION
Menu
Selects operating mode or exits submenus
Up
Scrolls up through option lists or selects higher value
Down
Scrolls down through option lists or selects lower value
Enter
Activates displayed menu option or selected value
CONTROL MENU OVERVIEW
CONTROL PANEL
FUNCTION MENU
7
MODE OPTIONS / VALUES DESCRIPTION
3-CH
d 1–512
3-channel DMX mode
8-CH
d 1–512
8-channel DMX mode
C--
C 1– 18
Static color
P--
(Automatic)
P 1
7-color program (snap)
P 2
7-color program (fading)
P 3
18-color program (snap)
P 4
18-color program (fading)
S--
S 1–100
Program speed for P1-P4
Snd
(Sound-Active)
Snd1
7-color program (sound-active)
Snd2
18-color program (sound-active)
SenS
u 0–u100
Sound Sensitivity
U--
r-- (Red)
r 0–255
Custom static colors
Combines red, green, and blue
g-- (Green)
g 0–255
b-- (Blue)
b 0–255
dIM
OFF
Dimmer speed settings
dIM1
dIM2
dIM3
SEr
On
Turns infrared on or off
OFF
teMP
XX
Displays the product temperature
Page 8
RECEIVING
TRANSMITTING
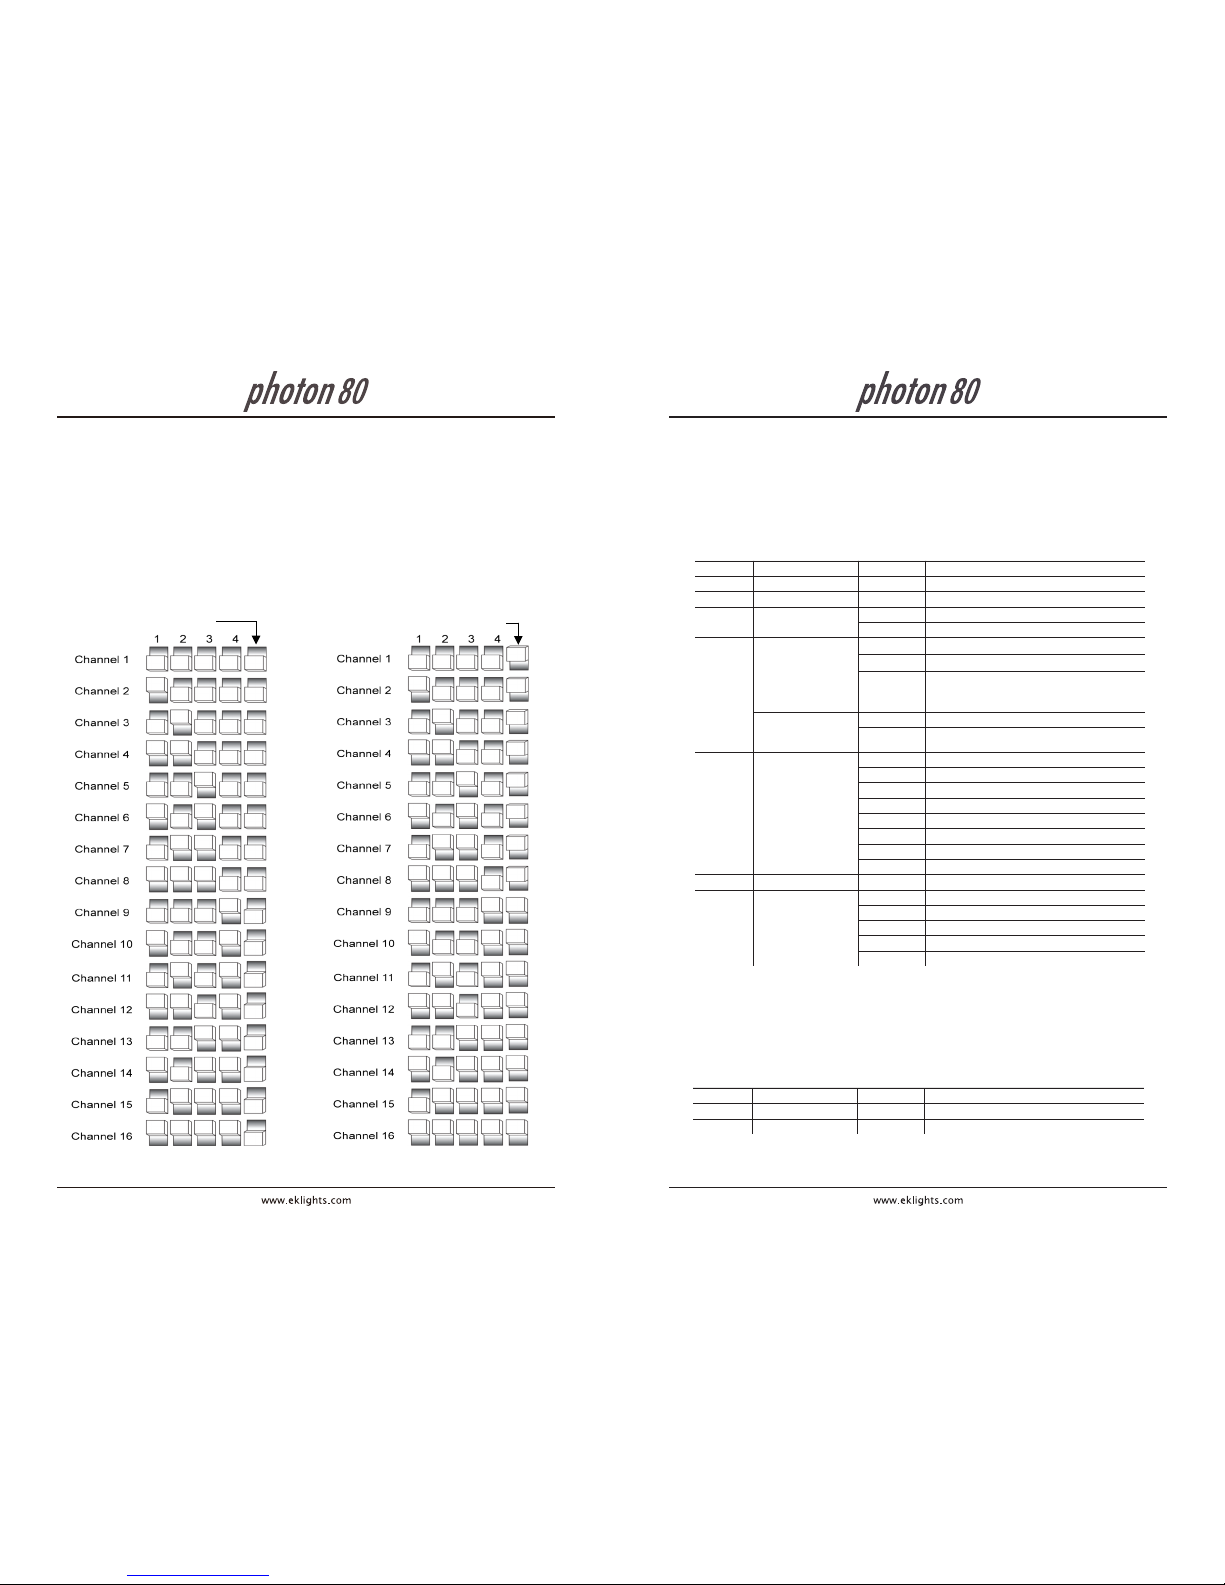
To enable wireless DMX operation via the optional UFI wi- transceiver:
1) Set the PHOTON 80 starting DMX address
2) Set the UFI sending/receiving channel
3) Attach the UFI to the PHOTON 80 USB port
4) Use Dipswitch 5 to select UFI send or receive mode.
UFI OPERATION
8
DMX FUNCTION CHART
Value
Percent/Setting
8-CHANNEL MODE
3-CHANNEL MODE
9
Percent/Setting
1
Red
000 255
0–100%
2
Green
000 255
0–100%
3
Blue
000 255
0–100%
4
Color Macros
(overrides CH1-CH3)
000 015
No function
016 255
Color macros
5
Strobe
(when CH6 is 0-31)
000 015
No function
016 255
Slow to fast strobe
Program Speed
(when CH6 is
128–223)
000 255 Slow to fast speed
Sound Sensitivity
(when CH6 is
224–255)
000 010
Sound sensitivity off
011 255 Low to high sensitivity
6 Programs
000 031
No function
032 063
Pulse effect 0–100%
064 095
Pulse effect 100%–0
096 127
Pulse effect 100%–0–100%
128 159
Auto fade transition
160 191
Auto snap transition (7 colors)
192 223
Auto snap transition (18 colors)
224 255
Sound triggering mode
7
Dimmer
000 255
0–100%
8 Dimmer Speed
000 051
Dimmer speed set from menu options
052 101
Dimmer speed mode off
102 152
Dimmer speed fast
153 203
Dimmer speed middle
204 255
Dimmer speed slow
1
Red
000 255
0 –100%
2
Green
000 255
0 –100%
3
Blue
000 255
0 –100%
Channel
–
–
–
Function
Channel
–
–
–
–
–
–
–
–
–
–
–
–
–
–
–
–
–
–
–
–
–
–
–
–
 Loading...