


Thank you for choosing our product. For proper operation, please read this manual carefully and keep this
manual. If you lose the user manual, contact the installer, or visit www.nipon-coolair.com, or send an e-mail
to geral@nipon-coolair.com to obtain the digital version.
Remote Control NRGA/F6
User Manual
Content
Buttons on remote controller .................................................................................
Introduction for buttons on remote controller.........................................................
Function introduction for combination buttons .......................................................
Operation guide.....................................................................................................
Replacement of batteries in remote controller .......................................................
Introduction for icons on display screen ................................................................ 11
2
8
9
9
Remote Controller NRGA/F6
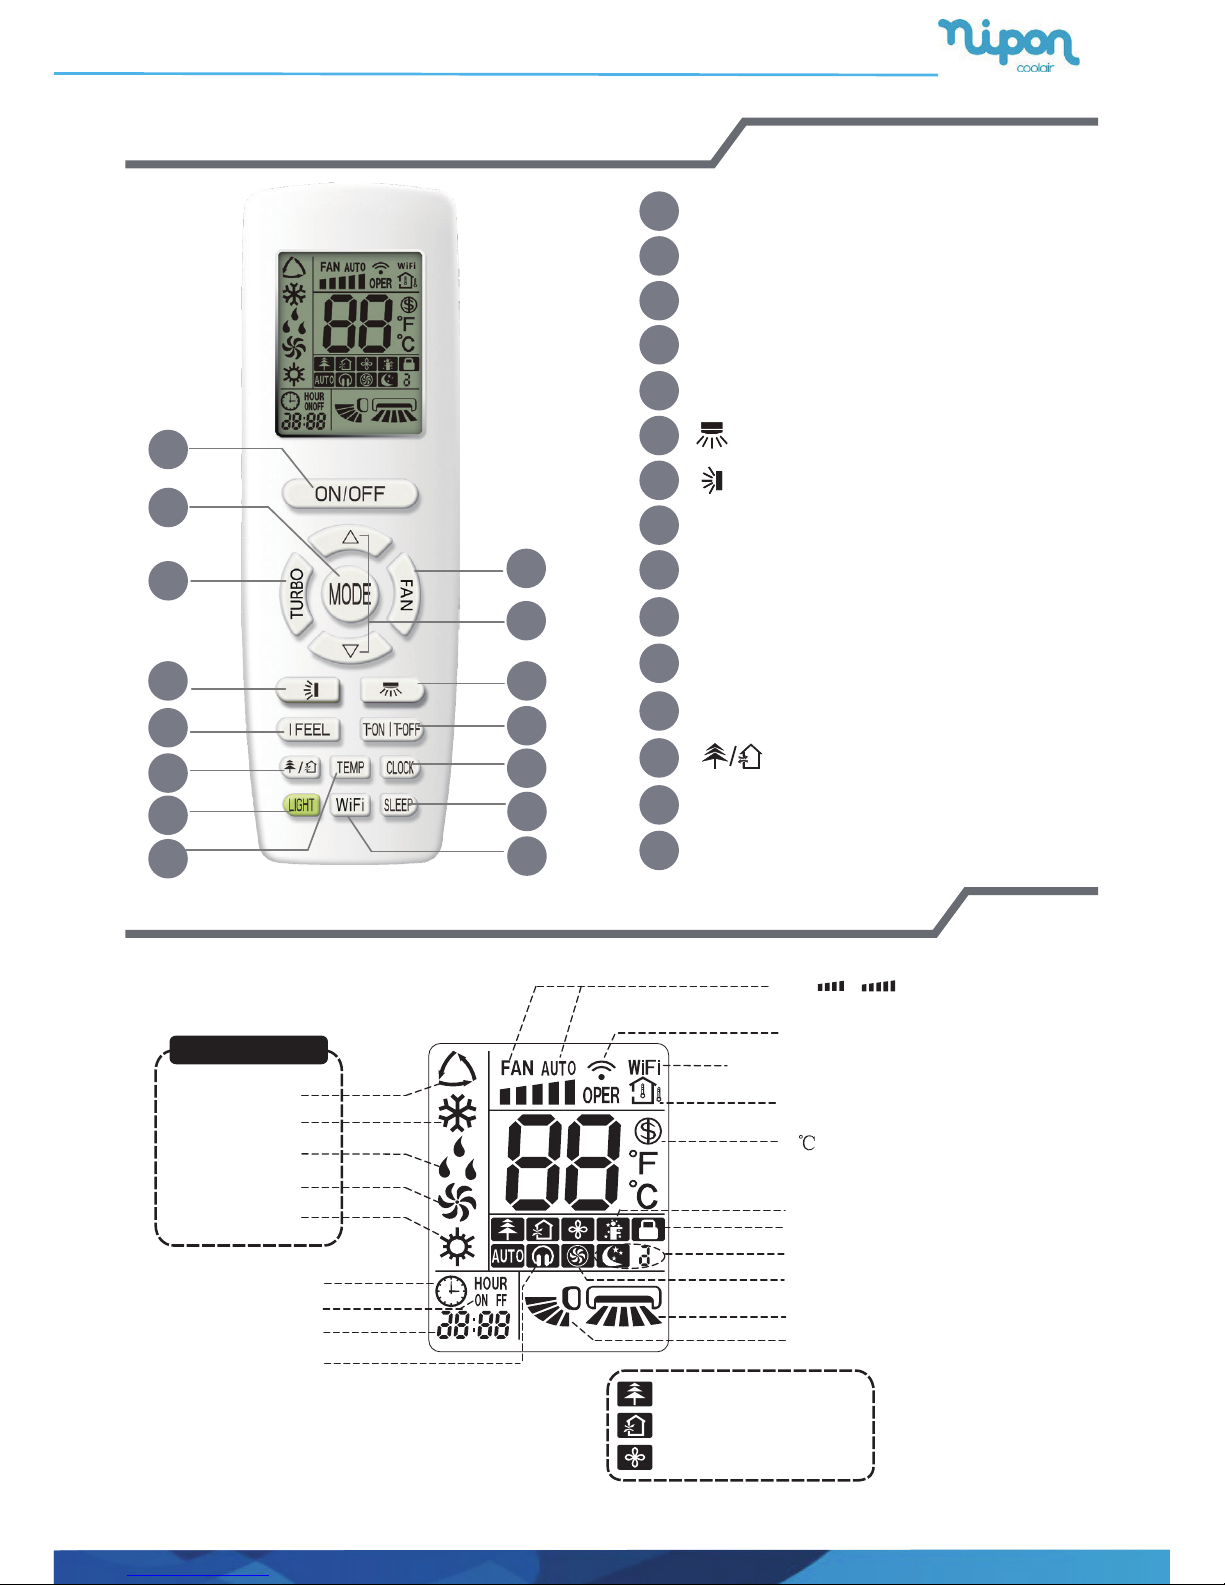
Quiet
Set fan speed
(No 、 fan speed. It’s displayed
only after turning it on.)
{
Send signal
Turbo mode
8 heating function
Switch temperature displaying type on
the unit’s display
Set time
T-ON /T-OFF
Child lock
Up & down swing
Left & right swing
Sleep mode
Clock
Heat mode
Fan mode
Dry mode
Cool mode
Auto mode
Operation mode
I feel
WiFi
This is a general remote controller.Some
models have this function while some
do not. Please refer to the actual models.
{
Buttons on remote controller
Introduction for icons on display screen
6
3
7
9
10
14
15
13
12
8
11
5
4
2
1
1 ON/OFF button
2 MODE button
3 FAN button
4 TURBO button
6 button
7 button
9 I FEEL button
13
LIGHT button
14
15 TEMP button
11
CLOCK button
12
WiFi button
10
T-ON / T-OFF button
8
SLEEP button
5 ▲/ button
▲
button
X-FAN function
Healthy mode
Scavenging functions
1
Remote Controller NRGA/F6
2
F
F
F F
Introduction for buttons on remote controller
Note:
1
2
AU FANRY A
Remote Controller NRGA/F6
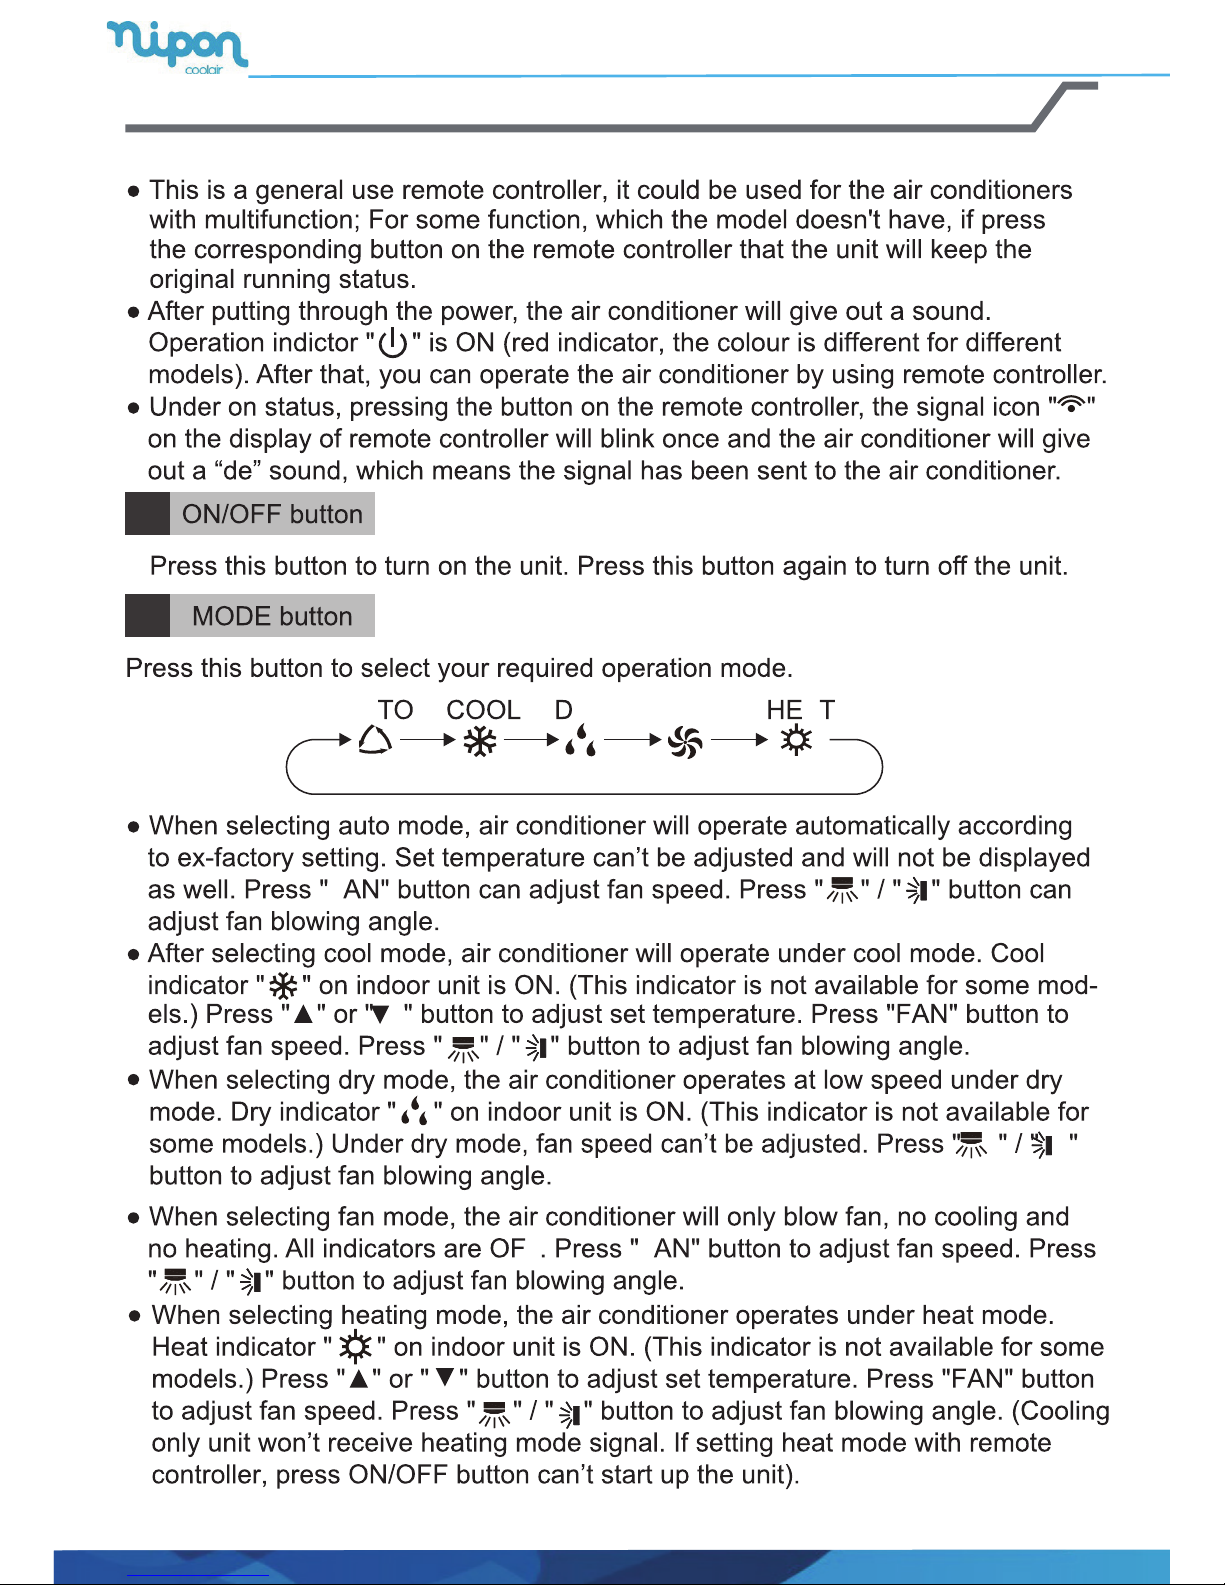
FAN button
3
Pressing this button can set fan speed circularly as: auto (AUTO), low( ), medium
( ), high( ).
Auto
Introduction for buttons on remote controller
Note:
● For preventing cold air, after starting up heating mode, indoor unit will delay 1~5
minutes to blow air (actual delay time is depend on indoor ambient temperature).
● Set temperature range from remote controller: 16~30 (61-86°F);
Fan speed: auto, low speed, low-medium speed,medium speed, medium-high
speed,high speed.
TURBO button
4
Under COOL or HEAT mode, press this button to turn to quick COOL or quick
HEAT mode. " " icon is displayed on remote controller. Press this button again
to exit turbo function and " " icon will disappear.
If start this function, the unit will run at super-high fan speed to cool or heat quickly
so that the ambient temp. approachs the preset temp. as soon as possible.
▲
▲/ button
5
● Press "▲" or " " button once increase or decrease set temperature 1 (°F).
Holding "▲" or " " button, 2s later, set temperature on remote controller will
change quickly. On releasing button after setting is finished, temperature indica-
tor on indoor unit will change accordingly.
▲
▲
● It’s Low fan speed under Dry mode.
This function indicates that moisture on evaporator of indoor unit will be blowed
after the unit is stopped to avoid mould.
Having set X-FAN function on: After turning off the unit by pressing ON/OFF
button indoor fan will continue running for a few minutes. at low speed. In this
period, Hold fan speed button for 2s to stop indoor fan directly.
Having set X-FAN function off: After turning off the unit by pressing ON/OFF
button, the complete unit will be off directly.
X-FAN function Hold fan speed button for 2s in COOL or DRY mode, the icon “ ” is
displayed and the indoor fan will continue operation for a few minutes in order to dry
the indoor unit even though you have turned off the unit. After energization, X-FAN
OFF is defaulted. X-FAN is not available in AUTO, FAN or HEAT mode.
●
●
●
● Under AUTO speed, air conditioner will select proper fan speed automatically
according to ex-factory setting.
Note:
3
Remote Controller NRGA/F6

T-ON, o
T-ON, o
or o )
4
Note:
r
Introduction for buttons on remote controller
7
o
Note:
r
6
o )
Remote Controller NRGA/F6
5
Introduction for buttons on remote controller
Note:
● Under on and off status, you can set T-OFF or T-ON simultaneously.
● Before setting T-ON or T-OFF, please adjust the clock time.
● After starting up T-ON or T-OFF, set the constant circulating valid.
After that, air conditioner will be turned on or turned off according to setting time.
ON/OFF button has no effect on setting. If you don’t need this function, please
use remote controller to cancel it.
I FEEL button
9
Press this button to start I FEEL function and " " will be displayed on the remote
controller. After this function is set, the remote controller will send the detected
ambient temperature to the controller and the unit will automatically adjust the
indoor temperature according to the detected temperature. Press this button again
to close I FEEL function and " " will disappear.
● Please put the remote controller near user when this function is set. Do not put
the remote controller near the object of high temperature or low temperature in
order to avoid detecting inaccurate ambient temperature.
● T-ON button
"T-ON" button can set the time for timer on. After pressing this button, " "
icon disappears and the word "ON" on remote controller blinks. Press "▲" or
" " button to adjust T-ON setting. After each pressing "▲" or " " button,
T-ON setting will increase or decrease 1min. Hold "▲" or " " button, 2s
later, the time will change quickly until reaching your required time.
Press "T-ON" to confirm it. The word "ON" will stop blinking. " " icon
resumes displaying. Cancel T-ON: Under the condition that T-ON is started up,
press "T-ON" button to cancel it.
● T-OFF button
"T-OFF" button can set the time for timer off. After pressing this button," "
icon disappears and the word "OFF" on remote controller blinks. Press "▲" or
" " button to adjust T-OFF setting. After each pressing "▲" or " " button,
T-OFF setting will increase or decrease 1min. Hold "▲" or " " button, 2s
later, the time will change quickly until reaching your required time.
Press "T-OFF" word "OFF" will stop blinking. " " icon resumes displaying.
Cancel T-OFF. Under the condition that T-OFF is started up, press "T-OFF"
button to cancel it.
▲
▲
▲
▲
T-ON / T-OFF button
8
▲
▲
Remote Controller NRGA/F6

13
Press this button to achieve the on and off of healthy and scavenging functions in
LCD displays " ". Press the button for the second time to start healthy and
scavenging functions simultaneously; LCD displays " " and " ". Press this
button for the third time to quit healthy and scavenging functions simultaneously.
Press the button for the fourth t ime to start healthy function; LCD display " ".
Press this button again to repeat the operation above.
button
e models.
Press " WiFi " button to turn on or turn off WiFi function. When WiFi function is
turned on, the " WiFi " icon will be displayed on remote controller; Under status
of remote controller off, press "MODE" and " WiFi " buttons simultaneously for 1s,
WiFi module will restore to factory default setting.
6
12
Introduction for buttons on remote controller
Press this button to set clock time. " " icon on remote controller will blink. Press
im
clock time will increase or decrease 1 min r,
time will change quickly. Release this button when reaching your required time.
Note:
on can’
ller will quit setting status. Operation for
CLOCK button
SLEEP button
11
Under COOL, or HEA mode, press this button to start up sleep function.
" " icon is displayed on remote controller. Press this button again to cancel sleep
function and " " icon will disappear.After powered on, Sleep Off is defaulted. After
the unit is turned off, the Sleep function is canceled.
In this mode, the time of time can be adjusted. Under Fan DRY and Auto modes,
this function is not available.
10
WiFi button
Remote Controller NRGA/F6

7
LIGHT button
14
Press this button to turn off display light on indoor unit. " " icon on remote
controller disappears. Press this button again to turn on display light. " " icon is
displayed.
Introduction for buttons on remote controller
15
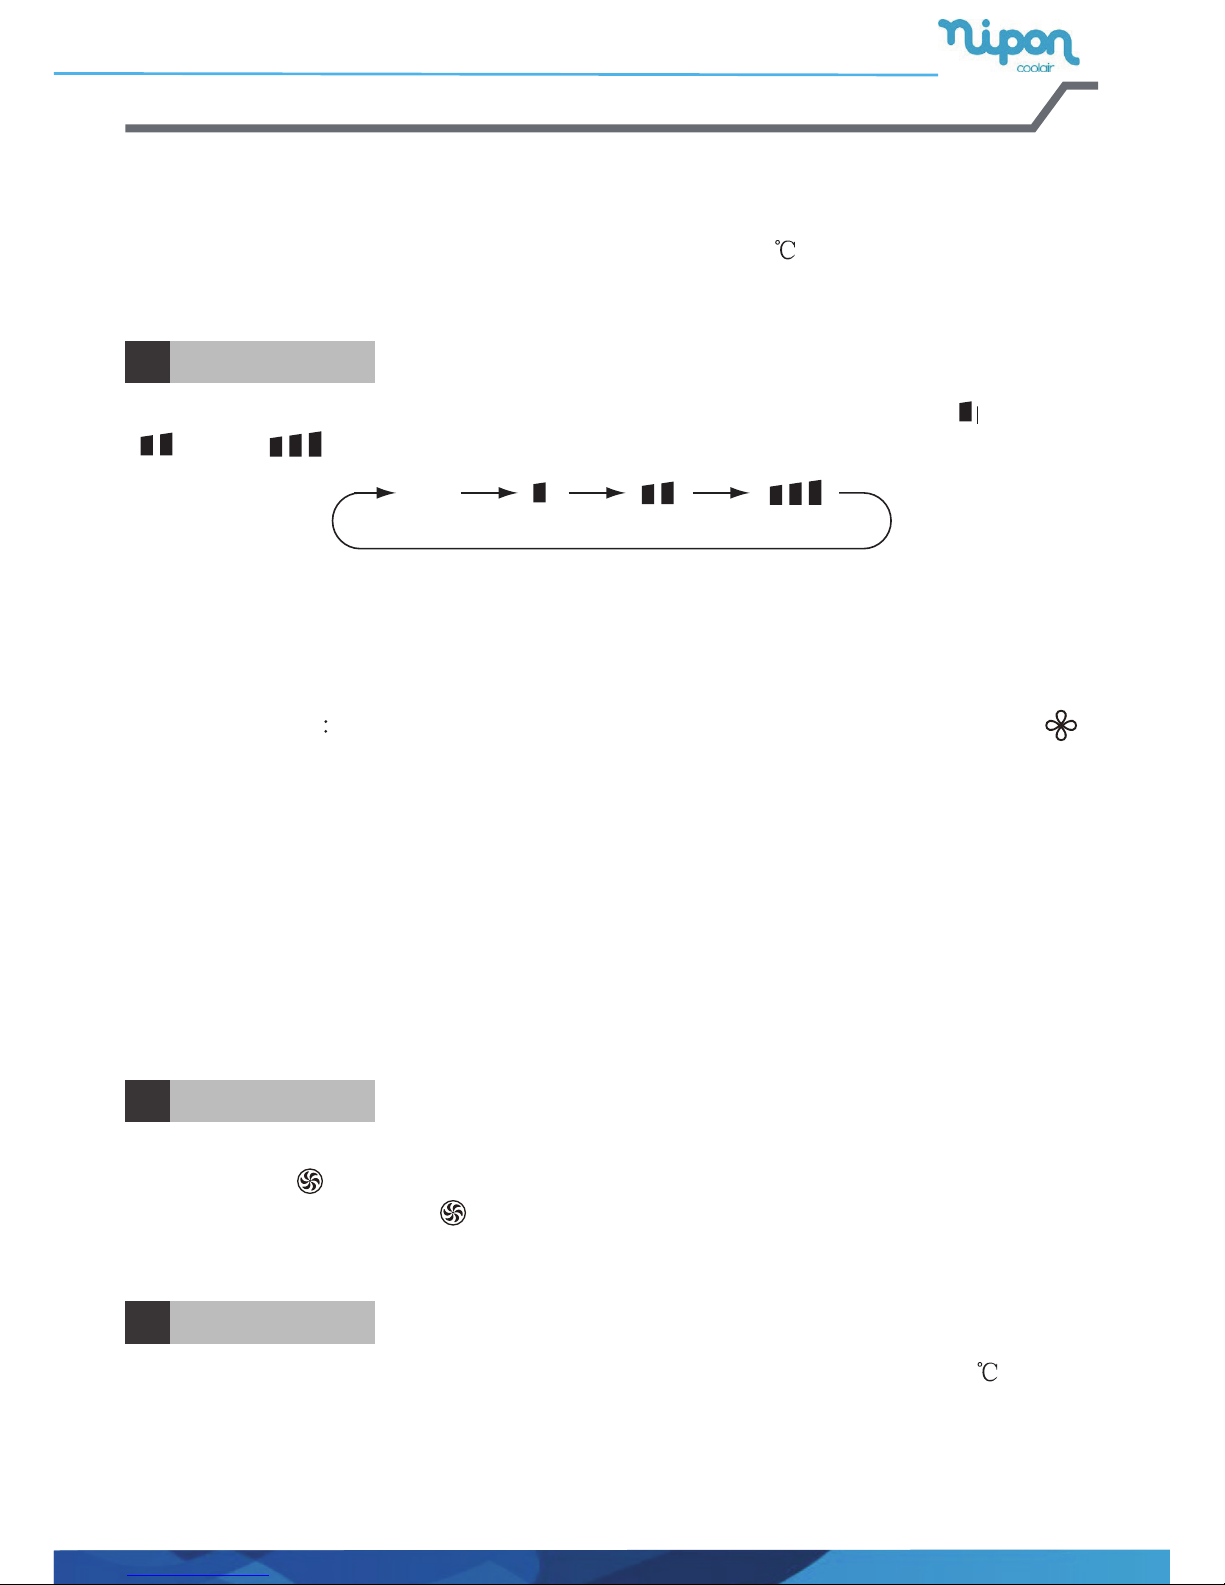
TEMP button
By pressing this button, you can see indoor set temperature, indoor ambient temperature or outdoor ambient temperature on indoor unit’s display. The setting on
remote controlleris selected circularly as below:
no display
● When selecting " " or no display with remote controller, temperature indicator
on indoor unit displays set temperature.
● When selecting " " with remote controller, temperature indicator on indoor unit
displays indoor ambient temperature.
● When selecting " " with remote controller, temperature indicator on indoor unit
displays outdoor ambient temperature.
Note:
●
Outdoor temperature display is not available for some models. At that time, indoor
unit receives " " signal, while it displays indoor set temperature.
● It’s defaulted to display set temperature when turning on the unit.There is no
display in the remote controller.
● Only for the models whose indoor unit has dual-8 display.
● When selecting displaying of indoor or outdoor ambient temperature, indoor
temperature indicator displays corresponding temperature and automatically turn
Remote Controller NRGA/F6

8
Function introduction for combination buttons
Energy-saving function
Under cooling mode, press "TEMP" and " CLOCK" buttons simultaneously to
start up or turn off energy-saving function. When energy-saving function is started
up, "SE" will be shown on remote controller, and air conditioner will adjust the set
temperature automatically according to ex-factory setting to reach to the best
energy-saving effect. Press "TEMP" and "CLOCK" buttons simultaneously again to
exit energy-saving function.
Note:
● Under energy-saving function, fan speed is defaulted at auto speed and it can’t
be adjusted.
●
Under energy-saving function, set temperature can’t be adjusted. Press "TURBO"
button and the remote controller won’t send signal.
● Sleep function and energy-saving function can’t operate at the same time. If
energy-saving function has been set under cooling mode, press sleep button will
cancel energy-saving function. If sleep function has been set under cooling
mode, start up the energy-saving function will cancel sleep function.
8℃ heating function
Under heating mode, press "TEMP" and "CLOCK" buttons simultaneously to start
up or turn off 8℃ heating function. When this function is started up, " " and "8℃"
will be shown on remote controller, and the air conditioner keep the heating status
at 8℃. Press "TEMP" and "CLOCK" buttons simultaneously again to exit 8
℃
heating function.
Note:
● Under 8℃ heating function, fan speed is defaulted at auto speed and it can’t be
adjusted.
● Under 8℃ heating function, set temperature can’t be adjusted. Press "TURBO"
button and the remote controller won’t send signal.
● Sleep function and 8℃ heating function can’t operate at the same time. If 8
℃
heating function has been set under cooling mode, press sleep button will cancel
8℃ heating function. If sleep function has been set under cooling mode, start up
the 8℃ heating function will cancel sleep function.
● Under ℉ temperature display, the remote controller will display 46℉ heating.
Child lock function
Press "▲" and " " simultaneously to turn on or turn off child lock function. When
child lock function is on, " " icon is displayed on remote controller. If you operate
the remote controller, the " " icon will blink three times without sending signal to
the unit.
▲
Temperature display switchover function
Under OFF status, press " " and "MODE" buttons simultaneously to switch temperature display between ℃ and ℉.
▲
Remote Controller NRGA/F6
9
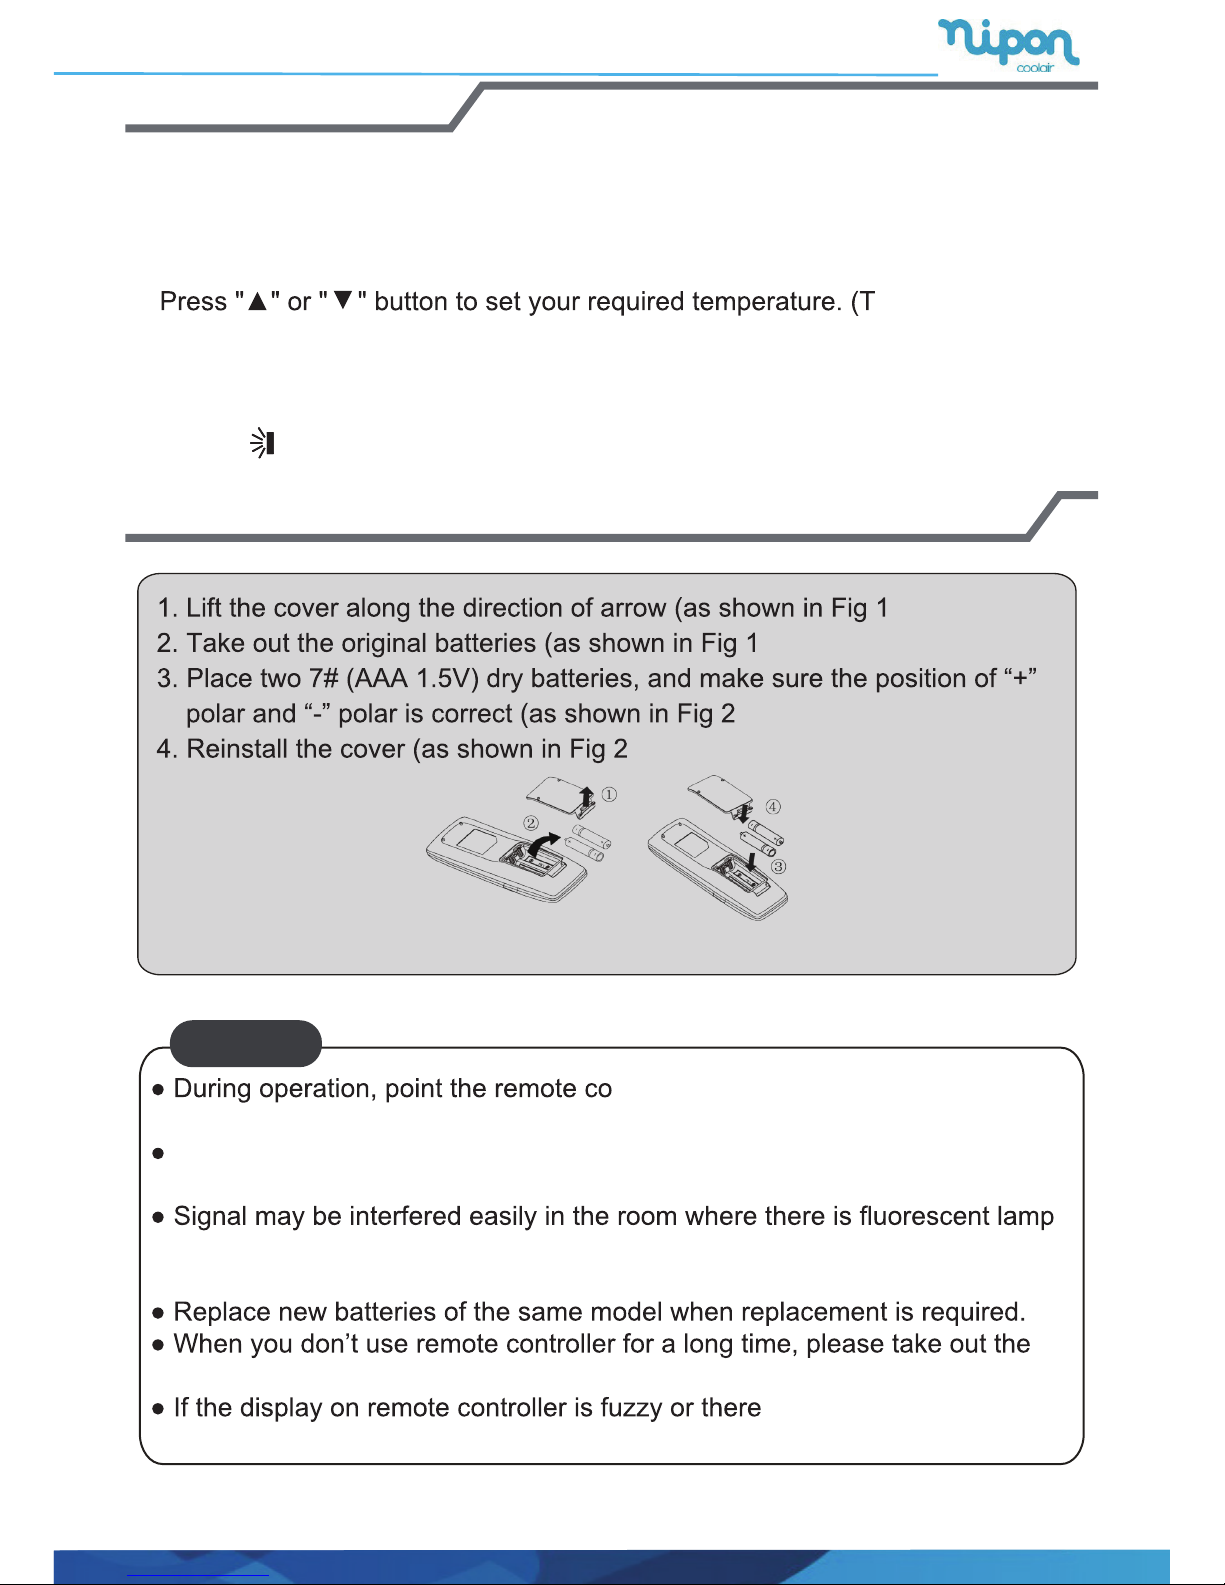
1.
After putting through the power, press "ON/OFF" button on remote controller to
turn on the air conditioner.
2.
Press "MODE" button to select your required mode: AUTO, COOL, DRY, FAN,
HEAT.
3.
emperature can’t
be adjusted under auto mode).
4.
Press "FAN" button to set your required fan speed: auto, low speed, low-medium
speed,medium speed, medium-high speed,high speed.
Operation guide
Replacement of batteries in remote controller
ntrol signal sender at the receiving
window on indoor unit.
The distance between signal sender and receiving window should be no
more than 8m, and there should be no obstacles between them.
or wireless telephone; remote controller should be close to indoor unit during
operation.
batteries.
’s no display, please
replace batteries.
NOTICE
5.
Press " " button to select fan blowing angle.
①).
②).
③).
④).
Fig.1 Fig.2
Remote Controller NRGA/F6

 Loading...