

Page 1
P.O. Box 957, Redmond, WA 98073-0957 U.S.A.
Nintendo of America Inc.
www.nintendo.com
58292A
PRINTED IN USA
INSTRUCTION BOOKLET
OUTSIDE FRONT COVEROUTSIDE BACK COVER
Page 2
PLEASE CAREFULLY READ THE SEPARATE HEALTH AND SAFETY
PRECAUTIONS BOOKLET INCLUDED WITH THIS PRODUCT BEFORE
USING YOUR NINTENDO® HARDWARE SYSTEM, GAME CARD OR
ACCESSORY. THIS BOOKLET CONTAINS IMPORTANT HEALTH AND
SAFETY INFORMATION.
IMPORTANT SAFETY INFORMATION: READ THE FOLLOWING
WARNINGS BEFORE YOU OR YOUR CHILD PLAY VIDEO GAMES.
WARNING - Seizures
• Some people (about 1 in 4000) may have seizures or blackouts triggered by light flashes or patterns,
such as while watching TV or playing video games, even if they have never had a seizure before.
• Anyone who has had a seizure, loss of awareness, or other symptom linked to an epileptic condition
should consult a doctor before playing a video game.
• Parents should watch when their children play video games. Stop playing and consult a doctor if you or
your child have any of the following symptoms:
Convulsions Eye or muscle twitching Loss of awareness
Altered vision Involuntary movements Disorientation
• To reduce the likelihood of a seizure when playing video games:
1. Sit or stand as far from the screen as possible.
2. Play video games on the smallest available television screen.
3. Do not play if you are tired or need sleep.
4. Play in a well-lit room.
5. Take a 10 to 15 minute break every hour.
WARNING - Radio Frequency Interference
The Nintendo DS can emit radio waves that can affect the operation of nearby electronics, including
cardiac pacemakers.
• Do not operate the Nintendo DS within 9 inches of a pacemaker while using the wireless feature.
• If you have a pacemaker or other implanted medical device, do not use the wireless feature of the
Nintendo DS without first consulting your doctor or the manufacturer of your medical device.
• Observe and follow all regulations and rules regarding use of wireless devices in locations such as
hospitals, airports, and on board aircraft. Operation in those locations may interfere with or cause
malfunctions of equipment, with resulting injuries to persons or damage to property.
WARNING - Repetitive Motion Injuries and Eyestrain
Playing video games can make your muscles, joints, skin or eyes hurt after a few hours. Follow these
instructions to avoid problems such as tendinitis, carpal tunnel syndrome, skin irritation or eyestrain:
• Avoid excessive play. It is recommended that parents monitor their children for appropriate play.
• Take a 10 to 15 minute break every hour, even if you don't think you need it.
• When using the stylus, you do not need to grip it tightly or press it hard against the screen. Doing so
may cause fatigue or discomfort.
• If your hands, wrists, arms or eyes become tired or sore while playing, stop and rest them for several
hours before playing again.
•
If you continue to have sore hands, wrists, arms or eyes during or after play, stop playing and see a doctor.
WARNING - Battery Leakage
The Nintendo DS contains a rechargeable lithium ion battery pack. Leakage of ingredients contained within the
battery pack, or the combustion products of the ingredients, can cause personal injury as well as damage to your
Nintendo DS.
If battery leakage occurs, avoid contact with skin. If contact occurs, immediately wash thoroughly with soap and
water. If liquid leaking from a battery pack comes into contact with your eyes, immediately flush thoroughly with
water and see a doctor.
To avoid battery leakage:
• Do not expose battery to excessive physical shock, vibration, or liquids.
• Do not disassemble, attempt to repair or deform the battery.
• Do not dispose of battery pack in a fire.
• Do not touch the terminals of the battery, or cause a short between the terminals with a metal object.
• Do not peel or damage the battery label.
Page 3
Page 4
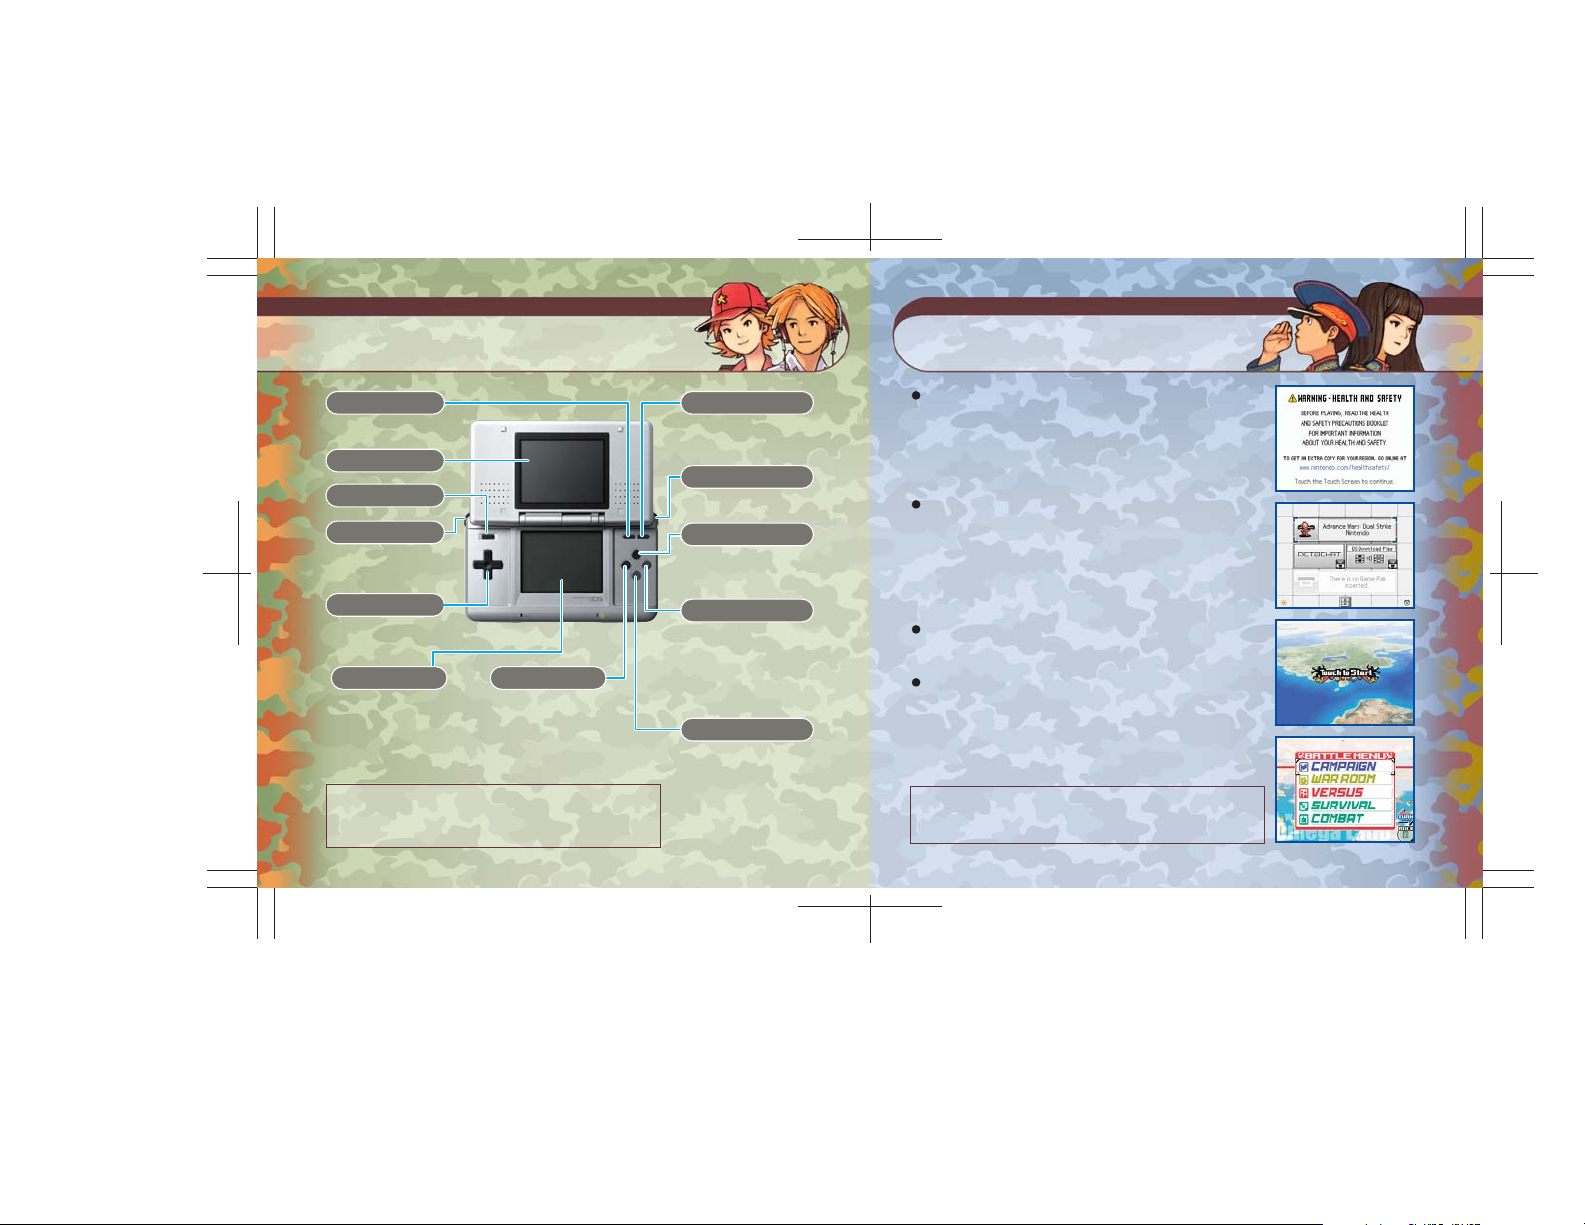
Controls Getting Started
SELECT
•Display Map Menu
Top screen
POWER Button
L Button
•Move cursor to next unit
+ Control Pad
•Move cursor
•Make selections
Touch Screen
•All touch-screen control
Sleep: Close your Nintendo DS to activate Sleep Mode. Open it to resume playing.
Reset: Press and hold START, SELECT, and the L and R Buttons to reset the game.
Touch Controls
Touch controls typically take effect once you lift the stylus off the screen.
Y Button
•Turn page when
selecting maps
START
•Skip dialogue and cinema scenes
•Display overhead map
R Button
•Display intel windows
X Button
•Turn Page
(during map selection)
A Button
•Confirm selections
•Select a unit
•Display map menu
(when terrain or a non-
production property is selected)
B Button
•Cancel selections
•Display attack range
(when unit is selected)
•Make units transparent
(when terrain is selected)
Confirm that your Nintendo DS is turned off. Insert your Advance
Wars: Dual Strike Game Card and turn the power on. Read the
screen pictured to the right when it appears, then touch the
screen when you are ready to proceed.
• Press and hold the POWER Button to turn the power off.
On the Nintendo DS system menu, touch the Advance Wars:
Dual Strike panel. After a brief cinema scene, the title screen
will appear.
• If your system start up has been set to Auto Mode, you can
skip this step. See the Nintendo DS hardware instruction booklet
for more information.
When Touch to Start appears on-screen, simply touch the Touch
Screen to begin.
There are 11 different modes to choose from on the modeselection screen. Touch the Turn icon to turn the page.
• See page 18 for information on each mode.
In this instruction booklet, screen shots with a red border
represent the top screen and screen shots with a blue border
represent the Touch Screen.
5544
Page 5

Saving Rules of Engagement
There are two ways to save game data: completing a mission or selecting
Save from the map menu during a mission.
Completing a Mission
When you finish a mission, you will have the option of saving
your progress.
Map Menu
Select the Save command from the Map Menu.
Clear All Saved Game Data
If you want to delete all of your saved data, press and hold SELECT, the L Button, and right on the
+ Control Pad when you touch the Advance Wars: Dual Strike panel on the Nintendo DS system menu.
You will be given the option to erase all saved data.
The game screen is divided into a grid of square-shaped spaces that represent HQs, bases,
properties, and terrain like mountains and seas. Take these features into account when
you move your units. The objective of the game is to complete your mission on each map.
If you fail to complete your mission, the game is over.
Game Screen
In DS Battle maps, the top
screen will show a second
map, called the secondary
front.
Terrain intel
•Displays terrain intel on
currently selected space.
Your unit
Factory
Enemy unit
Cursor
Your HQ
Unit
Unit HP
Unit Fuel
Ammunition
Terrain type
Terrain
Terrain Cover
Capture number
Unit Window
•This window appears when you
move the cursor over a unit. Touch
the R Info icon on the touch screen
to get additional intel.
CO power meter
Your CO
Current funds
Cursor window
FPO
7766
Page 6
Victory and Defeat
There are units from five different nations in all. Battles consist of a CO
issuing orders (fire, move, capture, etc.) to her troops, then waiting while the
enemy CO does the same. When both COs are finished, the day ends. The
cycle continues until a victor emerges.
Mission Complete (Victory)
Mission Failure (Defeat)
•These conditions may change depending on the map or the game mode.
Capture Enemy HQ / All Enemies Defeated
HQ Captured by Enemy / All Troops Defeated / Surrender
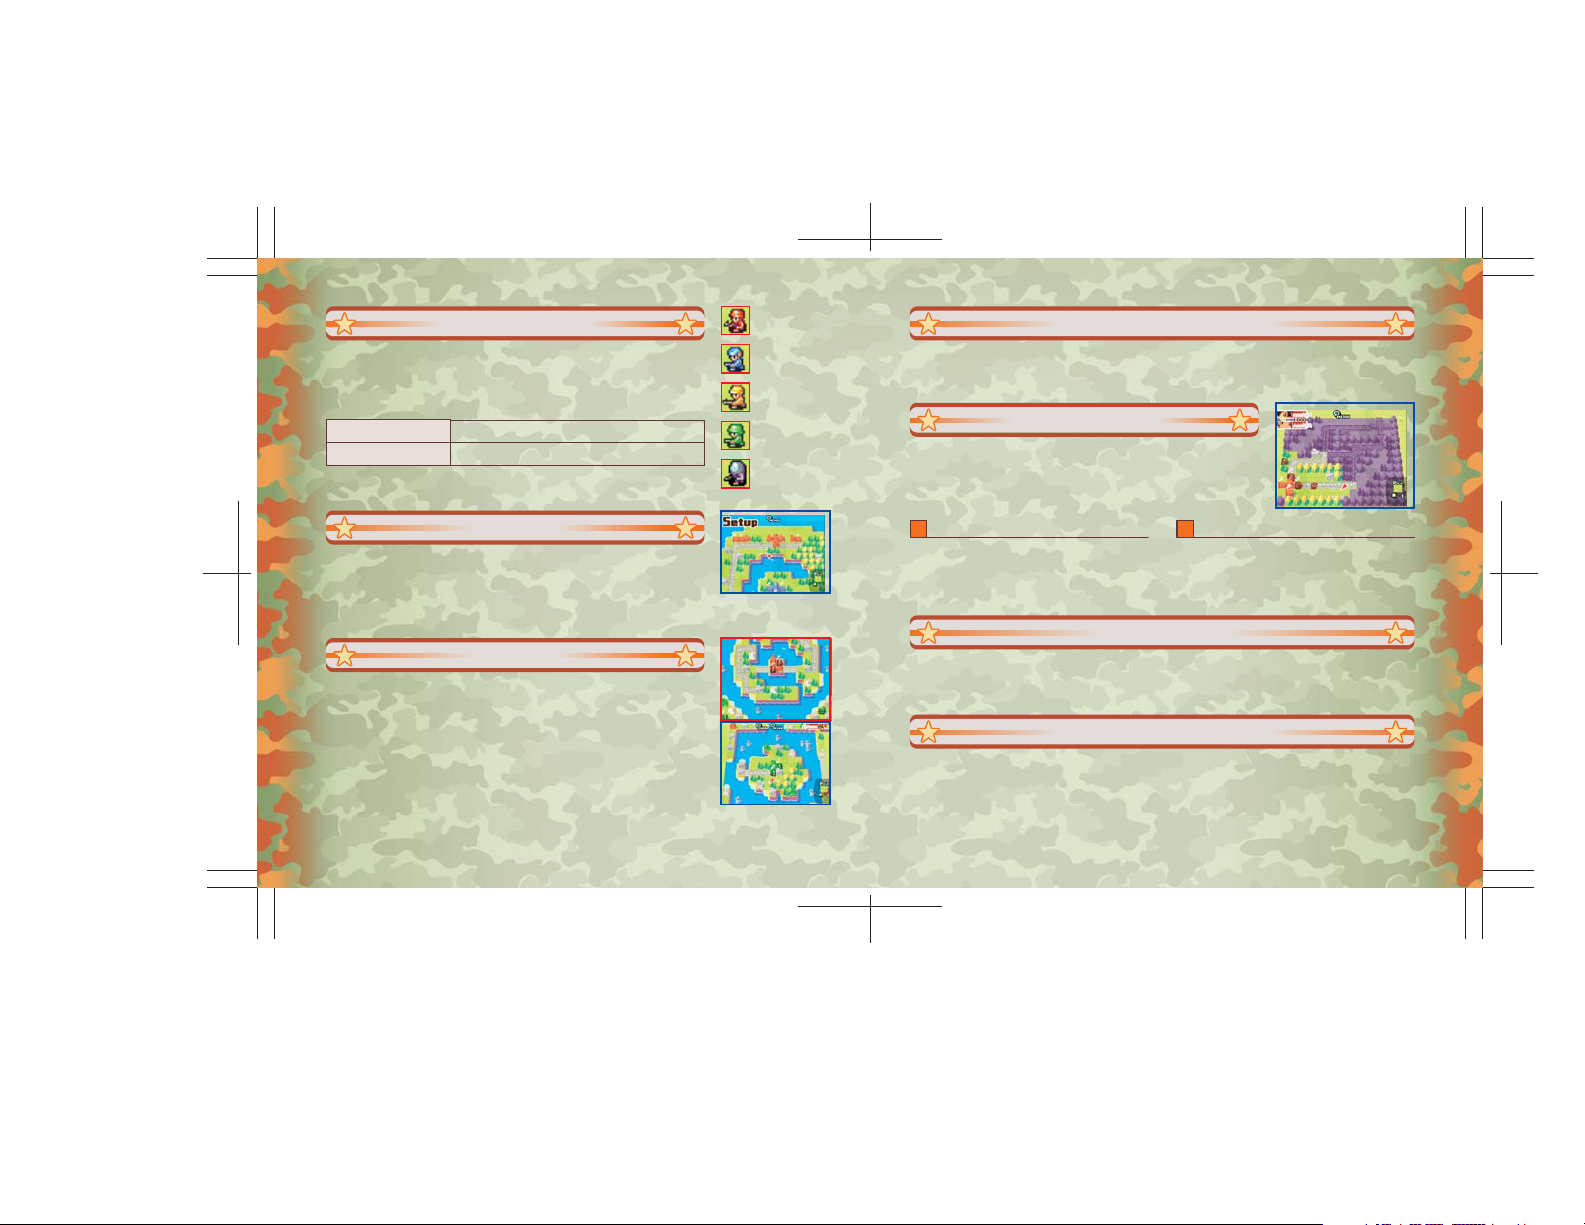
Setup
Before beginning a battle, you must deploy your troops. After making your
adjustments, touch Deploy.
Note: not all missions and modes require setup before deployment.
DS Battle
Some battles feature action on both the top screen and the Touch Screen.
These missions are called DS Battles. In a DS Battle, the Touch Screen is the
main front and the top screen is the secondary front.
•In these battles, touch the X Swap icon on the Touch Screen to switch the top-screen
display between the secondary front and the intel screen.
•Use the cursor to select units, and then touch the R Info icon to get more detailed
intel on the selected unit.
Orange Star
Blue Moon
Yellow Comet
Green Earth
Black Hole
Tag Battles
Tag Battles allow you to use two different COs in a single battle. At the end of your turn, touch Change
to pass command to the other CO. By building up both CO Power meters and using the Dual Strike
power, both COs can attack and use their Super CO Powers in a single turn.
Fog of War
Each unit has a vision range. In missions with Fog of War enabled,
anything that falls beyond that range of vision is obscured by the Fog
of War and cannot be seen. Vision ranges vary for each unit. You
cannot attack units that are not within your vision range.
Infantry and Mech Vision Ranges Ambushes
Infantry and mech units normally have a vision
range of 2. This means they can scout two spaces
around them. When these units climb a mountain,
their vision range expands to five spaces.
In Fog of War battles, a unit moving to a space
outside its vision range may encounter a hidden
enemy unit. When this happens, that unit is
ambushed—it stops immediately and cannot accept
any commands until the next turn.
War Funds
At the start of each turn, war funds are collected from properties (bases, cities, HQ, etc.) controlled by
your army. These funds are added to your total and can be used to produce more units.
Note: war funds carry over from turn to turn but not from one mission to the next.
Experience and Wars Points
Each time you clear a map in the Campaign, War Room, Survival, or Combat modes you earn Wars
Points, the currency in Wars World. Any COs you used in the battle also earn experience points. A CO’s
rank increases by one level each time his experience-point total hits 1000.
9988
Page 7
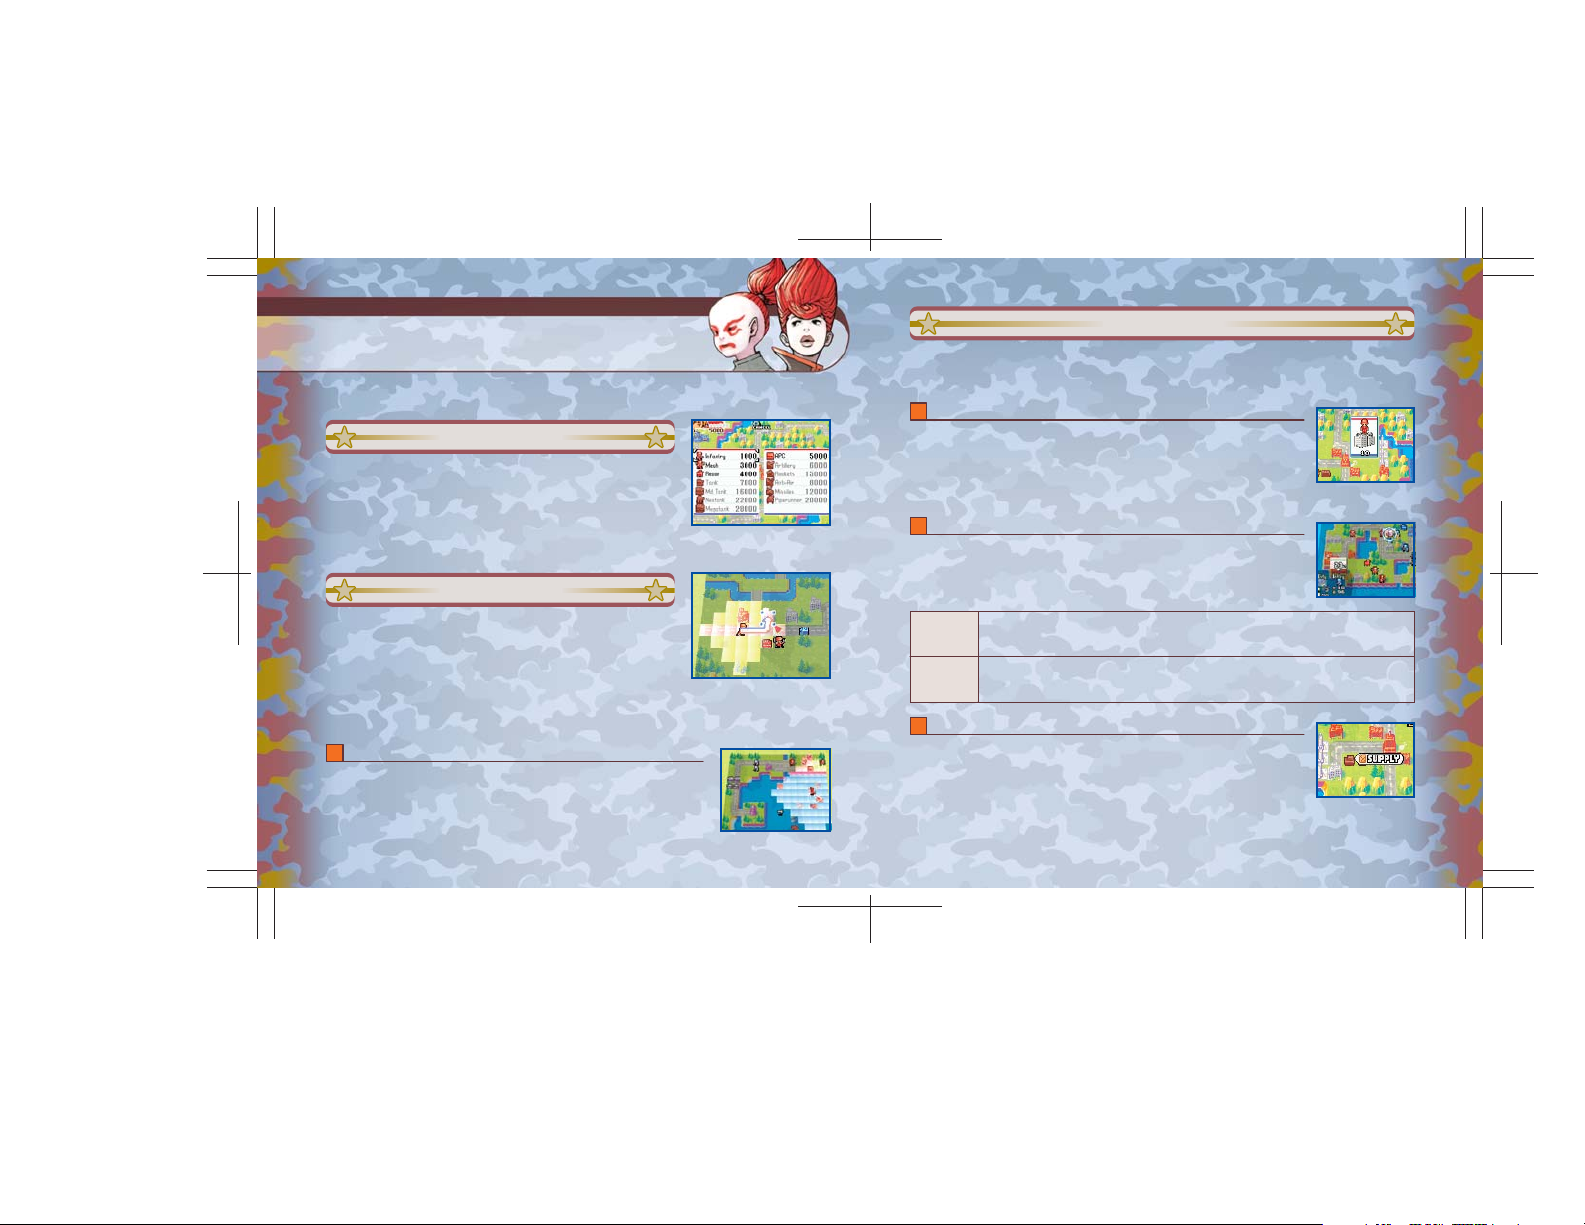
Units
Soldiers, vehicles, and artillery that appear on the map represent entire
units. Each unit starts with a total of 10 HP (hit points).
Unit Production
You can manufacture units in factories, airports, ports, and other
production bases controlled by your army. Simply touch the facility to
view the production window, where you can use your war funds to
produce another unit. The unit produced will be ready for action the
following turn.
Unit Movement
When you touch a unit, its range of movement will appear highlighted
on the map. To move it, touch the position you want to move the unit
to. Next, a command menu will appear. Issue a command to the unit
by touching the command on the menu. Once a command is issued,
the unit is darkened and cannot be moved. Until a command is issued,
movement can be canceled by pressing the B Button.
Gas
All units burn fuel when they move. Air and sea units also burn fuel when they stay in
place, and they will crash or sink if they run out of fuel. Be sure to check their fuel
status on the intel window.
Command Menu
After a unit moves, the command menu appears. Touch a command on the menu to issue it to the
unit. The available commands change depending on the situation.
Capture
The Capture command becomes available when you move an infantry or mech unit
onto a neutral or enemy property. Each property has a capture number, which drops
each turn by the number of HP the capturing unit has. An infantry or mech unit with
10 HP can capture a property with a capture number of 20 in two days. Once a
property is secured, it turns the color of the army that captured it.
Fire
The Fire order appears in the Command menu when a unit is able to attack an enemy.
Once you have selected an enemy target, touch the unit again to confirm your choice.
Your unit will immediately open fire on the enemy. When a unit’s HP is reduced to
zero, it is destroyed and will be removed from the map.
Direct
Attacks
Indirect
Attacks
A direct attack occurs when a unit attacks an adjacent unit. Units can move and attack in the same turn, but
they can’t return fire against units attacking indirectly.
An indirect attack occurs when a unit attacks another unit from a distance. Units with indirect attack
capabilities can either move or attack in a turn, but not both. They also can’t return fire against units
attacking them directly. The range of fire of indirect-combat units differs between unit types.
Supply
You can supply units with their maximum amount of fuel and ammo by moving APCs
(Armored Personnel Carriers) adjacent to them. Units can also replenish their fuel and
ammo by stopping on secured properties. They will also recover 2 HP every turn they
remain on a property. Air and naval units can load up on supplies and replenish hit
points only by resting in airports and ports, respectively.
•These conditions may change depending on the map or the game mode.
111111101010
Page 8

Join
Send
You can join two units of the same type into one unit if both units have been
damaged. The newly formed unit has the combined amount of fuel and ammo of
the individual units, but that number cannot exceed the maximum amount for that
unit type.To join units, move one unit onto a space occupied by a unit of the same
type and touch Join on the command menu. Joining ends the turn for both units.
Load
Transport units have the ability to carry other units. They can carry units with low
movement ranges farther than normal, even allowing them to cross otherwise
impassable terrain. To load a unit, select it and move it onto a space occupied by a
transport unit. Next, touch Load on the command menu. You can place the cursor on
a transport vehicle to view intel on the units being carried.
• Units being transported are not damaged if the transport vehicle is fired upon.
However, if a transport is destroyed while carrying another unit, that unit is also
destroyed.
• Transports can continue to load units even after they have been ordered to Wait.
Hide
Stealth fighters are the only units with cloaking technology that allows them to hide.
When cloaked, stealth fighters can only be attacked by other fighter jets.
Repair
Black boats are units that are capable of using war funds to repair damaged units in
the field of battle. They also simultaneously supply those units with fuel and ammo.
Explode
Black bombs are the only units capable of exploding. The bombs explode upon
command, damaging all units within the blast radius.
Drop
Loaded units can, of course, be unloaded. First, use the cursor to move the transport
unit to the desired location. If the transport unit stops in terrain that allows for the
unloading of troops, Drop will appear in the command menu. When you touch Drop,
a cursor will appears that will allow you to choose where you want to unload a unit.
If the transport is carrying two units, you must choose which unit you’ll unload.
Dive
Submarines are the only units with the ability to dive. The only units that can attack
submerged submarines are cruisers and other submarines..
Send
The send command is used in dual-front DS Battles to transfer
units from bases and factories on the main front to the
secondary front. Units are typically sent to the vicinity of the
secondary front HQ. If a unit can’t be sent to the secondary
front, a notice will appear.
• In some DS Battles, the area of the secondary front that
units are sent to can vary.
Wait
Choose this command when you do not want the unit to take any action.
Second Front
Send
Send
Primary Front
131313121212
Page 9

Map Menu
Touch the A Menu icon to display the map menu. Touch
commands to issue them.
• The commands that appear vary depending on the mode
Setup
Choose the CO you’ll send into battle with your forces.
CO Selection
The CO selection screen allows you to choose the COs you want to use in
battle. If you want to change the CO you will field, touch the name of the CO
that is currently slated to enter battle and then touch the face of the CO you
want to send.
Note: in some modes, the CO you use will be decided for you.
Skills
As COs gain rank levels they can use up to four different special skills. On
the CO selection screen, touch the X Skill icon to access the skill selection
screen. The available skills will appear under the CO’s name on the Touch
Screen. Simply touch a skill icon to equip your CO with that skill. When a
skill is equipped, an “E” will appear next to it. Touch the X icon on the
bottom–right corner of the screen to remove the selected skill.
CO
Choose this option to view detailed information on all the COs
engaged in the battle.
Intel
Use the Intel menu to view information about the current battle.
Status
Status displays the current map name, the number of units each side has
deployed, the number days the battle has been waged, the number of
bases held by each army, and information on each army’s funds.
Terms (Appears in Campaign Mode Only)
Check the victory conditions for your current battle here.
Unit
This screen displays vital intel on your troops. Touch headers to sort by
data. Touch a unit to switch to the map screen and highlight it with the
cursor.
Rules (Appears Depending on Mode)
Confirm the rules for the current battle. Note: you cannot change the
rules here.
Hint (Appears in Survival Mode Only)
Choose this option to get a hint about the current map.
XXXXXXXXX
XXXXXXXX
151515141414
Page 10

Extras (Appears Only on Certain Campaign Mode Maps)
Turn the secondary–front control on to allow the CPU to control the action or off to control it manually.
AI (Appears Only in DS Battles)
Choose a strategy type for your CPU ally.
General
Standard Tactics Offensive Tactics
Defense
Defensive Tactics All-Out Offensive Tactics
Note: when Extras are set to off, the AI option will not appear.
Assault
Strike
Yield
Surrender the current battle.
Music
Turn the music on or off.
Visuals
Change the in-game animations by simply touching your preferred option.
Display both battle and capture animation
Visual A
Display all animation, fast unit speed
Visual B
Display battle animation, fast unit speed
Visual C
Visual D
No Visual
No CPU battle animation, fast unit speed
Display no animation, fast unit speed
CO Power & Super CO Power
These two options only appear on the menu when the CO Power meter is sufficently full. Select them
to use special CO powers.
CO Power
Super CO Power
Dual Strike
Usable when all small stars are filled
Usable when all stars are filled
Usable in tag battles when both COs’ meters are completely filled
CO Power Meter
Options
Use the options menu to change game sounds, animations, and other settings. Touch a menu item to
change its settings.
Delete
Use this option to remove units from the field of battle. Touch a unit to delete it. Touch any area
where there are no units to finish deleting.
Save
Choose this option to save your progress during a battle.
End
Select End when you finish issuing commands to end your turn.
Change (Appears Only in Tag Battles)
Select Change in a tag battle to switch to your other CO. Doing so will end your turn.
When using a Dual Strike power, both COs can attack in a single turn.
Deploy
Deploy your troops with your current setup.
171717161616
Page 11

Game Modes
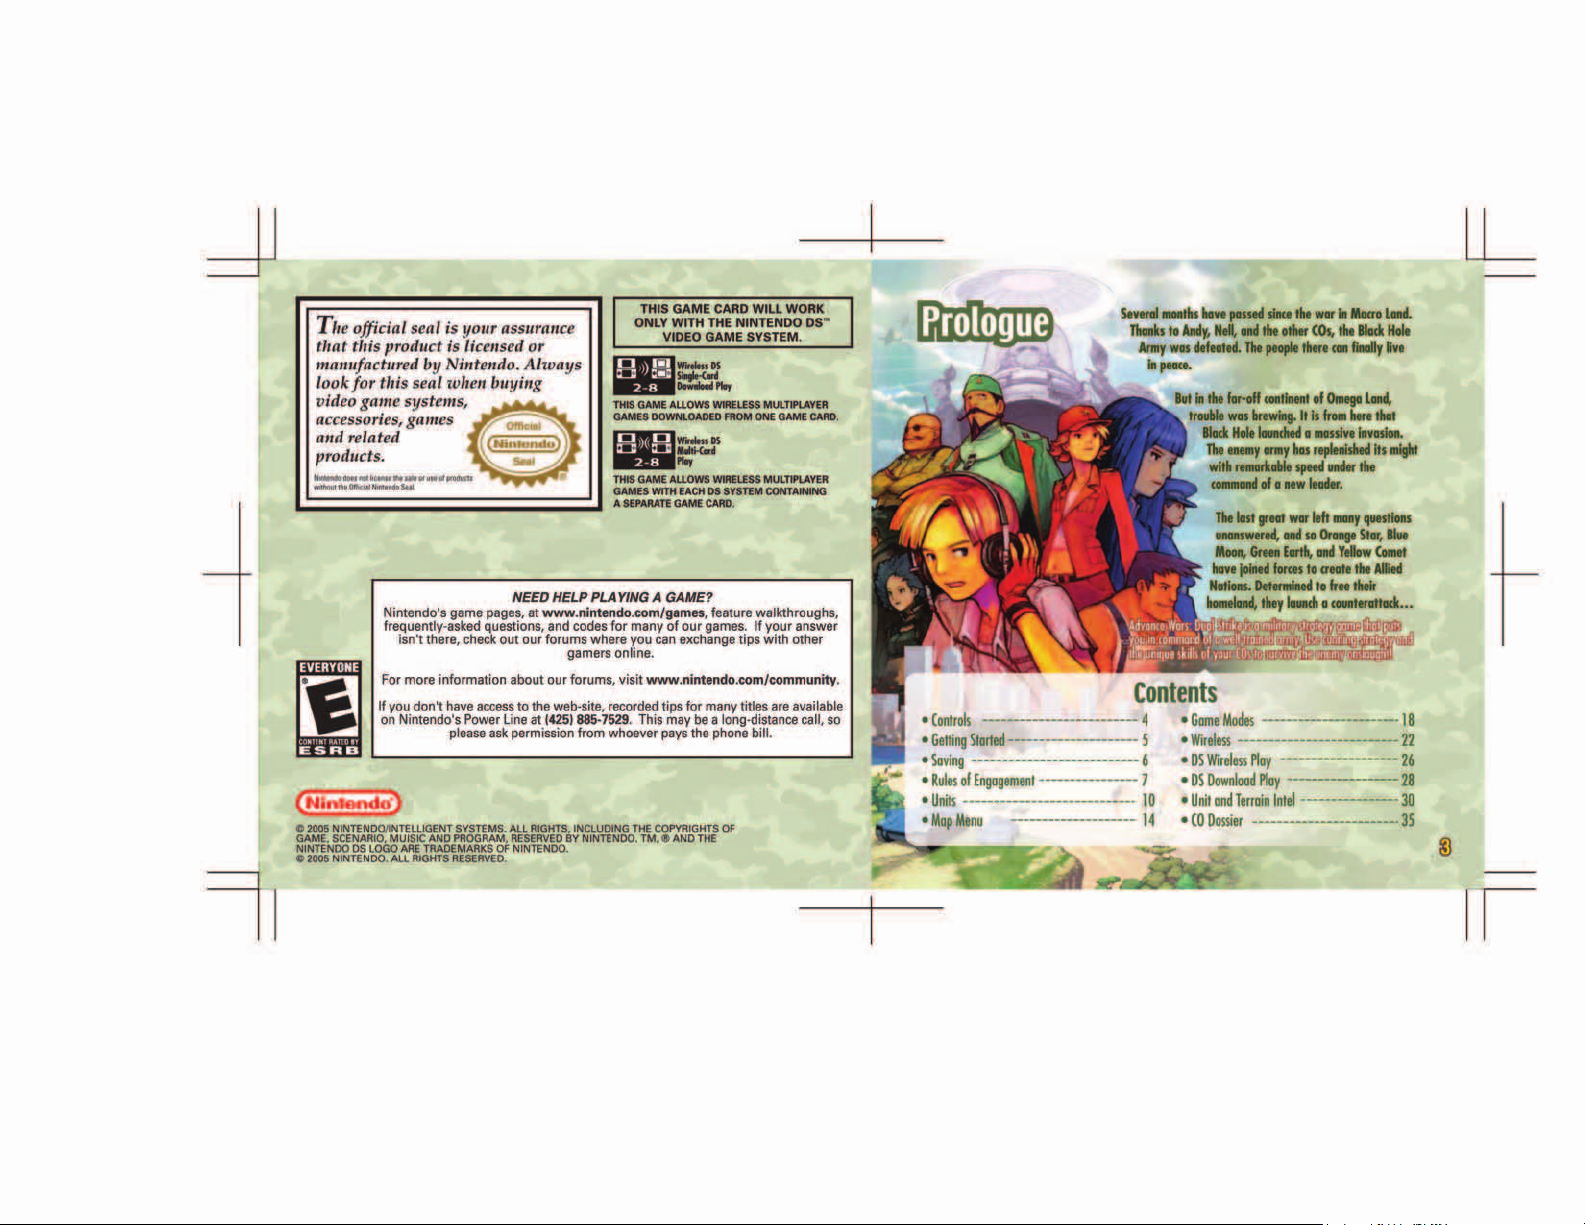
Campaign
Campaign mode is a long series of missions that follows an exciting
storyline. Touch New Game to begin the campaign starting with the
prologue. When the region map appears, touch the Mission 01 icon to
begin your first mission. Rachel will offer you some advice on the
coming battle.
War Room
Battle against computer-controlled opponents and earn points based
on your strategy. Touch New Game to access the map selection screen,
where you can choose the map you want to play, how many COs to
use, and whether or not to use CO skills. Touch the X Page and Y Page
icons to flip pages. Touch a map to proceed to the map screen.
Battle Type Skills
Face one computer opponent
2 COs
Face two computer–controlled opponents
3 COs
Face three computer–controlled opponents
4 COs
Fight against the computer in a two-front battle
DS
Human Icons
Skills
Exp
*In DS Battles, the secondary front can be set to CPU
control or player control.
Indicates either a single CO or tag battle
Choose to play with skills on or off
Display how many bonus points it is possible
to earn
Versus
Up to four players can take turns battling using one Nintendo DS and
one Game Card. Choose New Game, then touch Normal Battle or DS
Battle. When the map-selection screen appears, touch a map name
to begin.
Map Types
Deployed
Maps that provide you with a set type and
number of pre-deployed units
2 COs
Maps designed for two players
3 COs
Maps designed for three players
Maps designed for four players
4 COs
You can purchase more maps using points you earn in Campaign and the War Room
play. See page 21 for more information.
You can set the teams on the team–selection screen. Use the Touch Screen to
select COs and set them to a human or CPU player, then touch the A Next icon.
When three or more players play, designate teams using letters.
After using the Touch Screen to set rules on the rule–selection screen, touch the A
Next icon to proceed. Rule explanations can be viewed on the top screen.
War Room
Maps that originally appeared in the War Room
Classic
Maps that originally appeared in Advance Wars
Design
Custom maps that have been designed with the
Maps
map editor
191919181818
Page 12

Survival
There are three ways to play Survival mode: Money, Turn and
Time. Touch New Game, then choose the mode you want to
play. Choose the way you want to play, then touch Basic
Course, choose a CO, and proceed to battle. Touch the R Info
icon on any screen to get additional information.
Money
Clear a series of maps using only a preset amount of money.
Controls
+ Control Pad
Touch Screen
A Button
Move unit
Fire in direction touched
Fire
L Button
START
Use CO Power
Pause game
Choose Continue or Quit
Rules
Move your unit onto neutral or enemy properties to begin the capture countdown. When the countdown reaches zero, the
property is captured.
Rest your unit on an allied property to recover HP.
When you capture a factory, an additional unit of the kind that captured the factory will be added to your units.
Touch Manual on the Combat menu to see descriptions of the items and the victory conditions.
Turn
Clear a series of maps using only a preset number of turns.
Time
Clear a series of maps within a given time limit.
Combat
Combat is a fast-paced, real-time action mode in which you
engage enemy units over six different maps. Touch New Game
to start a new Combat game. Next, choose your CO and
purchase units. Select the unit you want to use on the top screen
and touch the A Go! icon to begin the battle. If you need help,
touch Manual on the Combat menu to learn more about the
game rules and controls.
Battle Maps
Visit the Battle Maps store to buy new maps, outfits for your
COs, and other useful information. Touch an item on the shop
screen to purchase it. You can earn more points to buy items by
playing Campaign, Versus, Survival, and Combat modes.
History
View your detailed game–play stats here. On the Touch Screen,
tap All, Units, Foes, or Items to see detailed information for
those subjects. Keep playing to build up your stats and earn
medals!
212121202020
Page 13

Wireless
Before playing, read pages 26–27 about DS Wireless Play for Normal Battle, DS Battle, Trade Maps and Combat modes.
Read pages 28–29 about DS Download Play and Download mode.
Wireless mode allows two or more Nintendo DS units to connect wirelessly so you can battle against
your friends or trade maps you created with the map editor. Touch the mode you want to play on the
Wireless selection screen.
* Note: if wireless communication fails, a communication error will appear and you will have to reconnect and
start over.
Follow the following steps for Normal Battle, DS Battle, Trade Maps, and
Combat Modes: once all players appear on the screen, player one should
touch New Team and the other players should choose their teams by
touching the icons. After player one confirms all the teams, touch the A
Next icon.
Combat (2-8 Players)
One Nintendo DS system and one Advance Wars: Dual Strike Game Card is
required for each player. Up to eight players can simultaneously engage in
combat. Choose settings on the map selection screen before entering battle.
Download
Use the wireless functionality of the Nintendo DS to send Combat to up to seven
other Nintendo DS systems. Each player must have their own system to play, but
only one Game Card is required. Up to eight players can play Combat together
simultaneously.
Parent System (System Sending Data)
Follow the instructions listed on page 28 for the Parent System. Touch Download
when you are ready to download data.
Child Systems (Systems Receiving Data)
Follow the instructions on page 28 for the Child Systems. Once the download is
complete, the mode-selection screen will appear. Touch a mode and confirm
settings before heading to the map screen.
Parent System Screen
Child System Screen
Normal Battle (2-4 Players)
One Nintendo DS system and one Advance Wars:
Dual Strike Game Card is required for each player.
Choose settings on the map-selection screen before
going into battle.
DS Battle (2 Players)
One Nintendo DS system and one Advance Wars:
Dual Strike Game Card is required for each player.
Choose settings on the map-selection screen before
going into battle.
Trade Maps
One Nintendo DS system and one Advance Wars: Dual Strike Game Card is required for each player. This mode
allows you to send an original map created in the map editor to one other player. On the map–trading screen,
player one must choose who will send the map. The sender must then touch a map to send. The player receiving
the map must choose a place to save the map.
Messages
You can assign personal messages to each of the system buttons and send them
to opponents during battle. On the message screen, touch a message, then input
whatever text you want.
Sound Room
Go to the sound room to listen to all the different sounds and music used in the game. This menu
appears after you clear Campaign mode and purchase the Sound Room at Battle Maps. Touch a song
name to hear the song.
232323222222
Page 14

Gallery
This menu appears after you clear Campaign mode and purchase the Gallery at Battle Maps. Here,
you can view the art used in the game. Flip between illustrations or touch the R Info button to hide
menu displays.
Design Room
Enter the Design Room to change CO clothing designs, create original maps, or change in-game
wallpapers. Touch an option to access its features.
CO
Choose this option to change CO hair and clothing color using color options
at Battle Maps. Just choose a CO, then touch a color number.
purchased
Map
Use the map editor to create your own original map. The maps you create can
be played in Versus, Wireless, and Trade Maps modes.
Copy Unit Place Unit Delete Unit Select Unit Copy Terrain Place Terrain Select Terrain
Touch the Select Unit icon and touch any unit in the list. Next, touch the Place Unit icon,
Place Unit
Delete Unit
Copy Unit
then touch a location on the map where you want it placed. To place terrain, use the
Select Terrain and Place Terrain icons.
Touch the Delete Unit icon, then touch the unit you want to delete.
Touch the Copy Unit icon. Next, touch the unit you want to copy, then touch where
you’d like to place the unit. To copy terrain, use the Copy Terrain icon.
Menu Window
Load: Load a saved map.
Save: Save the current map. Up to three maps can be saved.
File
Enter Name: Name the map you’ve created.
Get information on using the editing tools.
Help
Write over the entire map with the chosen terrain. You can also choose random terrain.
Fill
Return to the mode selection screen.
Exit
Requirements for Creating Vs. Maps
* Maps must have at least two different-colored HQs.
* Each army must have at least one unit or one factory in addition to its HQ.
Display
New wallpaper is earned based on how you cleared Campaign mode. Choose display to change the game’s visuals
using those wallpapers.
252525242424
Page 15

DS Wireless Play
Establishing a DS Wireless Link
This section explains how to establish a link for wireless play.
What You Will Need:
Nintendo DS
Advance Wars: Dual Strike Game Card One for each player
Steps
1. Make sure that all DS systems are turned off, then insert a Advance Wars: Dual Strike
Game Card into each system.
2. Turn on the power of all the systems. The DS menu screen will appear.
3. Touch the Advance Wars: Dual Strike panel.
4. Now follow the instructions on page 22.
One for each player
272727262626
Page 16

DS Download Play
Establishing a DS Wireless Link
This section explains how to establish the link for DS Download play.
What You Will Need:
Nintendo DS
Advance Wars: Dual Strike Game Card One
You can enjoy Advance Wars: Dual Strike even if you do not have enough Game Cards
for all players
Steps for the Parent system
1. Make sure that all DS systems are turned off, then insert an
Advance Wars: Dual Strike Game Card into the system.
2. Turn on the power of all the systems. The DS menu screen
will appear.
3. Touch the Advance Wars: Dual Strike panel.
4. Now follow the instructions on page 23.
One for each player
Game-Selection Screen
Steps for the receiving systems
1. Turn on the power of all the systems. The DS menu
screen will appear.
2. Touch the “DS Download Play” panel. The gameselection screen will appear.
3. Touch the Advance Wars: Dual Strike panel. The
game-confirmation screen will appear.
4. When the correct software appears, touch “Yes.” P1
will start the download process.
5. Please follow the instructions on page 23.
Game-Confirmation Screen
292929282828
Page 17

Unit and Terrain Intel
Learning the advantages of each unit in your arsenal and every terrain type you may encounter will greatly
enhance your performance on the battlefield. Study the information below to brush up on the latest intel.
Note: when units have two types of weapons, the appropriate weapon type will be used automatically during battles.
Land Units
Infantry
Weapon
Weapon
Weapon
Weapon
Weapon
Weapon
Weapon
––
One
Fire 1 Vision 2 399Move Fuel
Mech
Bazooka 3
One
Fire 1 Vision 2 270Move Fuel
Recon
––
One
Fire 1 Vision 5 880Move Fuel
Tank
Tank Cannon 9
One
Fire 1 Vision 3 670Move Fuel
Medium Tank
Medium Tank
Cannon
One
Fire 1 Vision 1 550Move Fuel
Neotank
Neocanon
One
Fire 1 Vision 1 699Move Fuel
Megatank
Megacannon
One
Fire 1 Vision 1 450Move Fuel
Ammo
Ammo
Ammo
Ammo
Ammo
Ammo
Ammo
Cost
Weapon
Two
Cost
Weapon
Two
Cost
Weapon
Two
Cost
Weapon
Two
Cost
Weapon
8
Two
Cost
Weapon
9
Two
Cost
Weapon
9
Two
Machine Gun
Machine Gun
Machine Gun
Machine Gun
Machine Gun
Machine Gun
Machine Gun
These units are the cheapest units to deploy.
1,000
They can capture new bases, but they lack
firepower.
These units are able to capture bases and have
3,000
high attack power. They are also effective at
moving through difficult terrain.
These units are designed for reconnaissance.
4,000
They are effective against infantry units and
have a large movement range.
These small, inexpensive tanks have a large
7,000
range of movement, making them easy to
deploy in large numbers.
These tanks have high offensive and defensive
16,000
capabilities.
A unit based on tank technology originally
22,000
developed by the Black Hole Army, the
Neotank is significantly more powerful than
a Medium Tank.
The megatank is the most powerful land unit
28,000
ever developed. It was designed by the Green
Earth army. Its size makes it the slowest of
the tanks.
APC
Weapon
Weapon
Weapon
Weapon
Weapon
Weapon
––
One
Fire – Vision 1 670Move Fuel
Artillery
Cannon 9
One
Fire 2-3 Vision 1 550Move Fuel
Rocket Launcher
Rockets 6
One
Fire 3-5 Vision 1 550Move Fuel
Anti-Air
Vulcan Cannon
One
Fire 1 Vision 2 660Move Fuel
Missile Launcher
Surface-to-Air
One
Missiles
Fire 3-5 Vision 5 450Move Fuel
Pipe Runner
Pipe Cannon
One
Fire 2-5 Vision 4 999Move Fuel
Cost
Ammo
Cost
Ammo
Cost
Ammo
Cost
Ammo
Cost
Ammo
Cost
Ammo
Air Units
Fighter
Weapon
Missiles
One
Fire 1 Vision 2 999Move Fuel
Bomber
Weapon
Bombs
One
Fire 1 Vision 2 799Move Fuel
Battle Copter
Air-to-Surface
Weapon
Missiles
One
Fire 1 Vision 3 699Move Fuel
Cost
Ammo
Cost
Ammo
Cost
Ammo
These units can transport infantry and mech
5,000
Weapon
Two
Weapon
Two
Weapon
Two
Weapon
9
Two
Weapon
5
Two
Weapon
9
Two
Weapon
9
Two
Weapon
9
Two
Weapon
6
Machine Gun
Two
units. They can also deliver fuel and ammo to
–
other units. APCs are not armed and therefore
can’t fire on enemy units.
These basic indirect-combat units are relatively
6,000
inexpensive. They pound enemy units from a
–
distance.
These Powerful units are capable of firing on
15,000
both ground and naval units from a great
–
distance. Their range of fire is better than
standard artillery units.
These specialized units are strong against air
8,000
units, infantry, and mech units. They’re
–
ineffective against tanks, though.
These powerful units wreak havoc on air units.
12,000
Their vision range on Fog of War maps is also
–
quite large.
These devastating indirect-combat units were
20,000
developed by the Black Hole army. They can
–
only move along pipes and factories.
Fighters rule the skies, inflicting heavy damage
20,000
on other air units.
–
Bombers can inflict heavy damage to both
22,000
ground and naval units.
–
These copters can fire on many types of units,
9,000
which makes them invaluable in the field.
313131303030
Page 18

Transport Copter
Weapon
Weapon
Weapon
–
One
Fire 0 Vision 2 699Move Fuel
Stealth Fighter
Missile
One
Fire 1 Vision 4 660Move Fuel
Black Bomb
–
One
Fire 0 Vision 1 945Move Fuel
Cost
Ammo
Cost
Ammo
Cost
Ammo
Naval Units
Battleship
Weapon
Cannon 9
One
Fire 2-6 Vision 2 599Move Fuel
Cruiser
Weapon
Anti-Sub Missiles 9
One
Fire 1 Vision 3 699Move Fuel
Lander
Weapon
Weapon
Weapon
Weapon
–0
One
Fire 0 Vision 1 699Move Fuel
Submarine
Torpedo
One
Fire 1 Vision 5 560Move Fuel
Black Boat
–
One
Fire 0 Vision 1 660Move Fuel
Aircraft Carrier
Missiles
One
Fire 3-8 Vision 4 599Move Fuel
Cost
Ammo
Cost
Ammo
Cost
Ammo
Cost
Ammo
Cost
Ammo
Cost
Ammo
These copters can transport both mech and
5,000
Weapon
0
Two
Weapon
6
Two
Weapon
0
Two
Weapon
Two
Weapon
Two
Machine Guns
Weapon
Two
Weapon
6
Two
Weapon
0
Two
Weapon
9
Two
infantry units. They carry no weapons, though,
–
and cannot fire on enemy units.
When cloaked, these planes can only be
24,000
attacked by fighters and other stealth fighters.
–
They can only be detected if a unit is directly
adjacent to it.
These unmanned aerial weapons were
25,000
developed by the Black Hole army. When
–
they explode, all units within three spaces
take damage.
These powerful ships have a tremendous range
28,000
of fire. Their cannon does enormous amounts
–
of damage to other naval units.
Cruisers can do heavy damage to both
18,000
submarines and air units. They can also
Anti-Air
transport up to two copters at a time.
These transport units can carry up to two
12,000
ground units at a time.
–
Submerged subs can only be attacked by
20,000
cruisers and other subs, and the only way to
–
find a submerged sub is to run into it.
Designed by the Black Hole army, this ship can
7,500
not only carry two infantry or mech units, it
–
can also repair damaged units, replenishing 1
HP and resupplying the unit in the process.
This humongous ship can shelter up to two air
30,000
units at a time, resupplying them in the process.
–
It also boasts extremely long-range indirect
attack capabilities against air units.
Terrain Intel
Plains
Roads
Woods
Mountains
Pipes
Pipe Joints
Rivers
Seas
Shoals
Plains were the most common type of terrain found in Advance Wars 2: Black
Hole Rising. They provide only minimal defensive cover.
Roads allow units to move rapidly across maps, but they offer no other
terrain benefits.
When Fog of War is present, units deployed in woods can only be seen by
units adjacent to them and air units. Woods provide above-average
defensive cover. Air units cannot hide in woods during Fog of War.
Only mech, infantry, and air units can travel over mountains. In Fog of War,
mech and infantry units increase their vision range by 3 when they’re in the
mountains. Mountains also offer excellent defensive cover.
Pipes are indestructible tubes that can't be passed by any unit.
Pipe Joints are sections of pipe that can be destroyed, allowing units to pass
through.
Rivers cross much of the terrain. They can only be traversed by infantry,
mech, and air units. Rivers offer no defensive cover.
Seas can be crossed only by naval and air units. Seas offer no terrain
benefits.
Shoals provide loading and unloading points for landers. Almost all units can
travel over shoals, but shoals provide no defensive cover.
333333323232
Page 19

Reefs
Bridges
Missile Silos
Headquarters (HQ)
Cities
Bases
Airports
Ports
Communication
Towers
When Fog of War is present, units deployed in reefs can only be seen by
adjacent units and air units. Aside from this benefit, reefs offer few other
advantages. Air units cannot hide in reefs during Fog of War.
Bridges are essential: they allow ground units to cross bodies of water. Bridges
provide no other terrain benefits.
Missile silos can be used by infantry and mech units. Move one of these
units onto a missile silo to fire a single missile with an unlimited range of
fire and a blast radius of two spaces. Each silo contains one missile.
Each army in the field has a headquarters that acts as its base of operations. An
HQ can supply ammo and fuel, restore HP, and provide superior defensive cover
for all ground units. Victory is yours if you can capture your enemy’s HQ.
Cities can be allied, neutral, or controlled by the enemy. Both infantry and
mech units can capture neutral and enemy cities, which can then provide
ground units with supplies and HP.
Bases are the deployment points for all ground units. In addition to providing
supplies and HP to these units, they also provide excellent defensive cover.
Air units enter the field of battle from these air bases. They also receive
supplies and regain HP here. They offer excellent defensive cover.
Naval bases are the deployment points for all naval units. They also provide
them with ammo, fuel, and repairs. Ports are safe havens for ships and subs
because of their excellent defensive cover.
Capture these properties to improve communication between your units,
thereby improving their attack power.
CO Dossier
Likes Dislikes
Rachael
A young Orange Star CO.
She strives to follow in the
footsteps of her big sister,
Nell. Her troops work
hard, increasing base
repairs by one.
Hard work
Excuses
Jake
A young, energetic CO who
is also a top-notch tank
commander. He fights best
on wide-open plains.
Clubbing
Easy listening
353535343434
Page 20

Max
A brave and loyal friend, not to
mention a strong fighter. Max is
a strong direct-combat fighter, but
his indirect-combat units have
reduced range and firepower.
Colin
Blue Moon’s rich boy CO and
Sasha’s little brother. A gifted CO
with a sharp, if insecure, mind.
He purchases troops at lower prices,
but they are slightly less effective.
Olaf and Grit
Black Hole
Weight training
Studying
Sami
A strong-willed Orange Star
special forces captain. Her
foot soldiers do more
damage and capture faster,
but non-infantry units have
weaker firepower.
Chocolate
Cowards
Sasha
Colin’s wealthy sister. She is
normally ladylike, but she
becomes daring when she gets
angry. She earns an additional
100 funds from allies bases.
Truffles
Pork rinds
Grit
A laid-back style masks his
dependability. He is a peerless
marksman who is devastating
with indirect-combat units, but
his non-infantry direct-attack
units are less potent.
Cats
Rats
Grimm
A Yellow Comet CO with a
dynamic personality. He could
care less about the details. His
units have strong firepower, but
their defense is a little weak.
Donuts
Planning
Sensei
A former paratrooper rumored
to have been quite the CO back
in the day. Great with Copters
and infantry, but his naval units
have weaker attacks.
Lazy, rainy days
Busy malls
Sonja
Kanbei’s cool and collected
daughter. She excels in
information warfare. Her
units have extended vision
range in Fog of War and
hide their HP info.
Computers
Bugs
373737363636
Page 21

Javier
A Green Earth CO who values
chivalry and honor above all else.
Excellent defense vs. indirect
attacks. Defense increase when he
captures com towers.
Honor
Retreating
Eagle
Green Earth’s daring pilot hero.
Air units use less fuel and have
superior firepower, but naval
units have weaker firepower.
Lucky goggles
Swimming
Koal
A CO of the Black Hole Army who is always
planning his next destructive act. Charges his CO
Power meter at a fast rate than other COs and is a
master of road-based battles.
Proverbs, ramen
Fondue
Hawke
A CO of the Black Hole Army who
will stop at nothing to achieve his
goals. All units possess superior
firepower, but his CO Power builds up
more slowly than those of other COs.
Black coffee
Incompetence
Jess
A gallant tank-driving CO who
excels at analyzing information.
Vehicular units have superior
firepower, but air and naval
units are comparatively weak.
Dandelions
Unfit COs
Jugger
A robot-like CO with the
Black Hole Army. No one
knows his true identity. High
firepower, but his shoddy
technique sometimes reduces
the damage his units deal.
Energy
Static electricity
Kindle
Jugger and Koal’s commanding
officer. Has a blunt, queen-like
personality. Excels at urban warfare.
Anything chic
Anything passé
Lash
The wunderkind of the
Black Hole forces. She
invented most of the Black
Hole’s new weapons. Skilled
at taking advantage of
terrain features.
Getting her way
Not getting her way
393939383838
Page 22

Important Legal Information
REV–D
Copying of any video game for any Nintendo system is illegal and is strictly prohibited by domestic
and international intellectual property laws. “Back-up” or “archival” copies are not authorized and
are not necessary to protect your software. Violators will be prosecuted.
This video game is not designed for use with any unauthorized copying device or any unlicensed
accessory. Use of any such device will invalidate your Nintendo product warranty. Nintendo (and/or
any Nintendo licensee or distributor) is not responsible for any damage or loss caused by the use of
any such device. If use of such device causes your game to stop operating, disconnect the device
carefully to avoid damage and resume normal game play.
If your game ceases to operate and you have no device attached to it, please contact Nintendo
Customer Service (see below).
The contents of this notice do not interfere with your statutory rights.
This booklet and other printed materials accompanying this game are protected by domestic and
international intellectual property laws.
For further information or assistance, please contact:
Nintendo Consumer Service
www.nintendo.com
or call 1-800-255-3700
(U.S. and Canada)
Warranty & Service Information
You may need only simple instructions to correct a problem with your product. Try our website at www.nintendo.com or call
our Consumer Assistance Hotline at 1-800-255-3700, rather than going to your retailer. Hours of operation are 6 a.m. to 7 p.m.,
Pacific Time, Monday - Sunday (times subject to change). If the problem cannot be solved with the troubleshooting information available online or
over the telephone, you will be offered express factory service through Nintendo. Please do not send any products to Nintendo without contacting
us first.
HARDWARE WARRANTY
Nintendo of America Inc. ("Nintendo") warrants to the original purchaser that the hardware product shall be free from defects in material and
workmanship for twelve (12) months from the date of purchase. If a defect covered by this warranty occurs during this warranty period, Nintendo
will repair or replace the defective hardware product or component, free of charge. The original purchaser is entitled to this warranty only if the date
of purchase is registered at point of sale or the consumer can demonstrate, to Nintendo's satisfaction, that the product was purchased within the last
12 months.
GAME & ACCESSORY WARRANTY
Nintendo warrants to the original purchaser that the product (games and accessories) shall be free from defects in material and workmanship for a
period of three (3) months from the date of purchase. If a defect covered by this warranty occurs during this three (3) month warranty period,
Nintendo will repair or replace the defective product, free of charge.
SERVICE AFTER EXPIRATION OF WARRANTY
Please try our website at www.nintendo.com or call the Consumer Assistance Hotline at 1-800-255-3700 for troubleshooting information and repair or
replacement options and pricing. In some instances, it may be necessary for you to ship the complete product, FREIGHT PREPAID AND INSURED FOR
LOSS OR DAMAGE, to Nintendo. Please do not send any products to Nintendo without contacting us first.
WARRANTY LIMITATIONS
THIS WARRANTY SHALL NOT APPLY IF THIS PRODUCT: (a) IS USED WITH PRODUCTS NOT SOLD OR LICENSED BY NINTENDO (INCLUDING, BUT NOT
LIMITED TO, NON-LICENSED GAME ENHANCEMENT AND COPIER DEVICES, ADAPTERS, AND POWER SUPPLIES); (b) IS USED FOR COMMERCIAL PURPOSES
(INCLUDING RENTAL); (c) IS MODIFIED OR TAMPERED WITH; (d) IS DAMAGED BY NEGLIGENCE, ACCIDENT, UNREASONABLE USE, OR BY OTHER CAUSES
UNRELATED TO DEFECTIVE MATERIALS OR WORKMANSHIP; OR (e) HAS HAD THE SERIAL NUMBER ALTERED, DEFACED OR REMOVED.
ANY APPLICABLE IMPLIED WARRANTIES, INCLUDING WARRANTIES OF MERCHANTABILITY AND FITNESS FOR A PARTICULAR PURPOSE, ARE
HEREBY LIMITED IN DURATION TO THE WARRANTY PERIODS DESCRIBED ABOVE (12 MONTHS OR 3 MONTHS, AS APPLICABLE). IN NO EVENT SHALL
NINTENDO BE LIABLE FOR CONSEQUENTIAL OR INCIDENTAL DAMAGES RESULTING FROM THE BREACH OF ANY IMPLIED OR EXPRESS WARRANTIES.
SOME STATES DO NOT ALLOW LIMITATIONS ON HOW LONG AN IMPLIED WARRANTY LASTS OR EXCLUSION OF CONSEQUENTIAL OR INCIDENTAL
DAMAGES, SO THE ABOVE LIMITATIONS MAY NOT APPLY TO YOU.
This warranty gives you specific legal rights. You may also have other rights which vary from state to state or province to province.
Nintendo's address is: Nintendo of America Inc., P.O. Box 957, Redmond, WA 98073-0957 U.S.A.
This warranty is only valid in the United States and Canada.
REV–P
 Loading...