

Page 1
Nintendo Family Computer (Famicom) Teardown
Nintendo Family Computer (Famicom) Teardown
Step 1 -
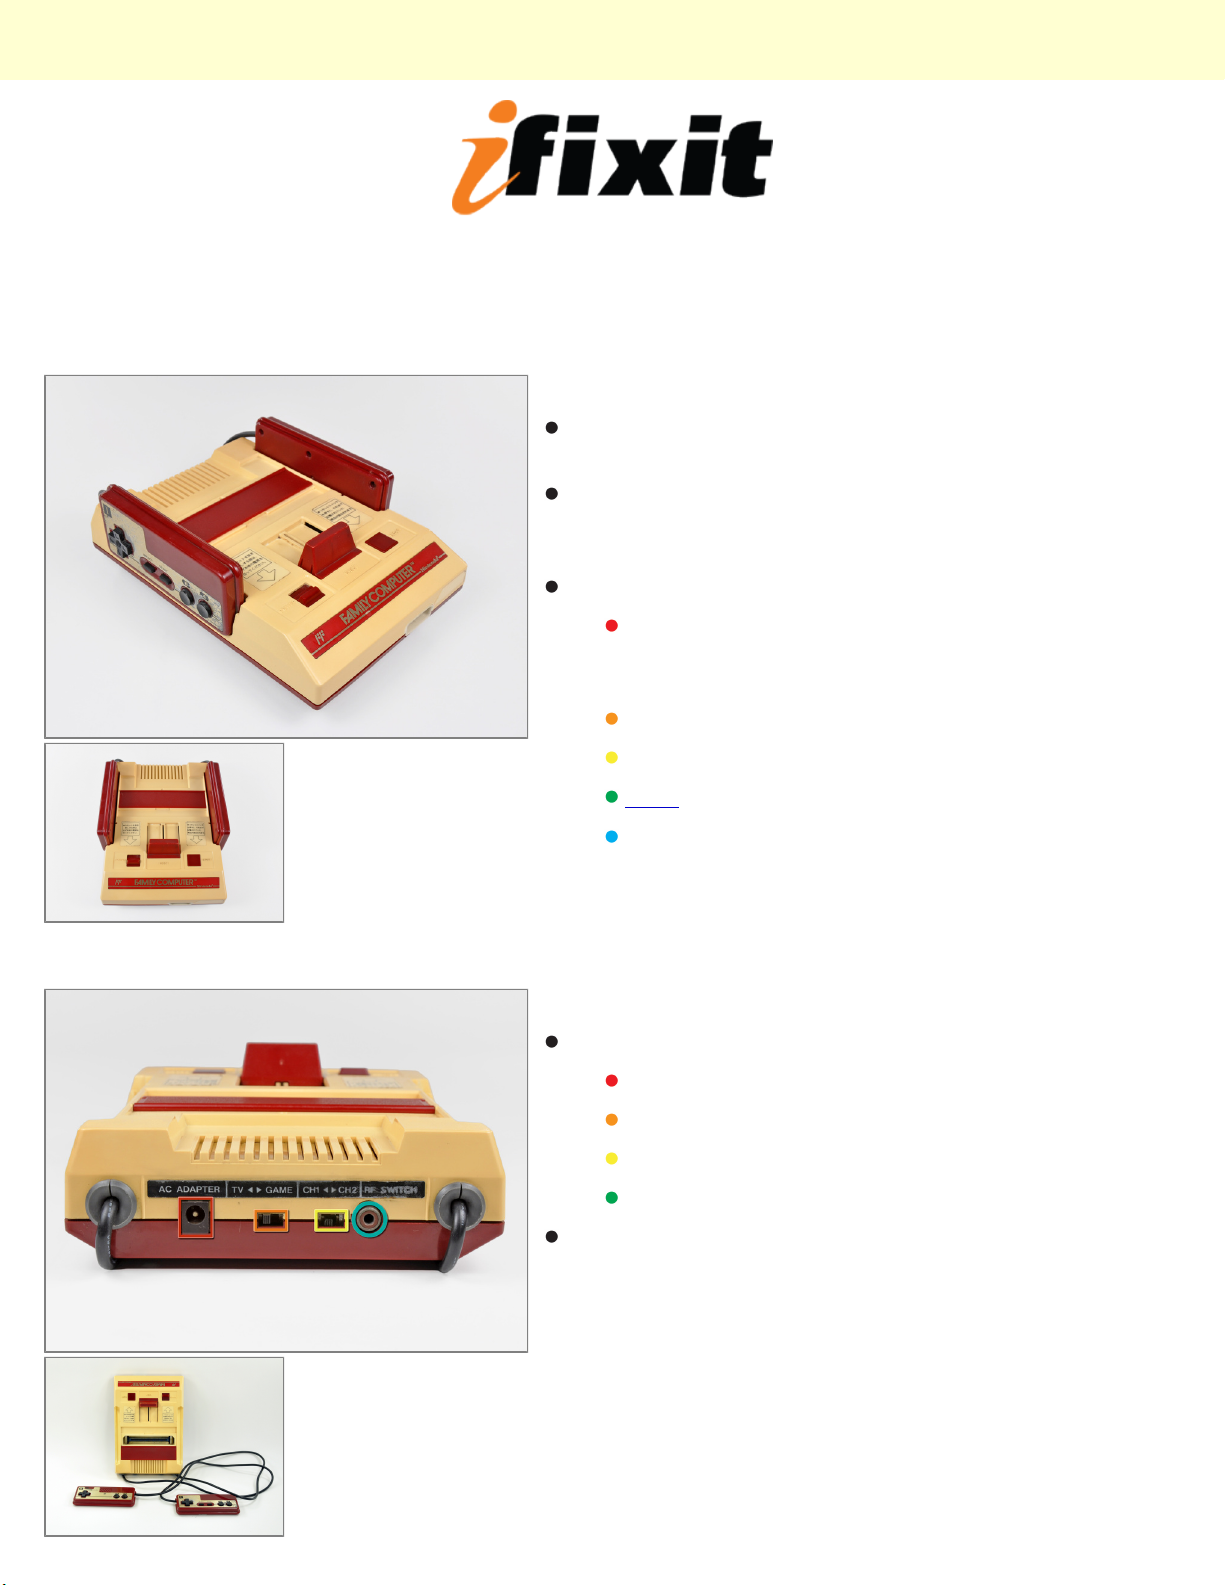
Our contestant hails from a mystical place, the land of
the rising sun, Japan!
The Nintendo Family Computer, released in 1983 in
most of Asia, is the overseas brother of the Nintendo
Entertainment System.
Technical Specifications:
Ricoh 2A03 8-bit 1.79 MHz processor (MOS
Technology based on the Motorola 6502 8-bit
processor core)
2KB (16Kb) on-board RAM
2KB (16Kb) on-board Video RAM
PSG Sound
256 x 240 pixels resolution
Step 2
Backside ports include:
Why are you looking so scared, little buddy? Don't
worry -- our hands are gentle. We won't hurt you.
© 2010 iFixit — CC BY-NC-SA www.iFixit.com Page 1 of 7
AC adapter port
TV/Game switch
Channel selector switch
RF Audio/Video output
Page 2
Nintendo Family Computer (Famicom) Teardown
Step 3
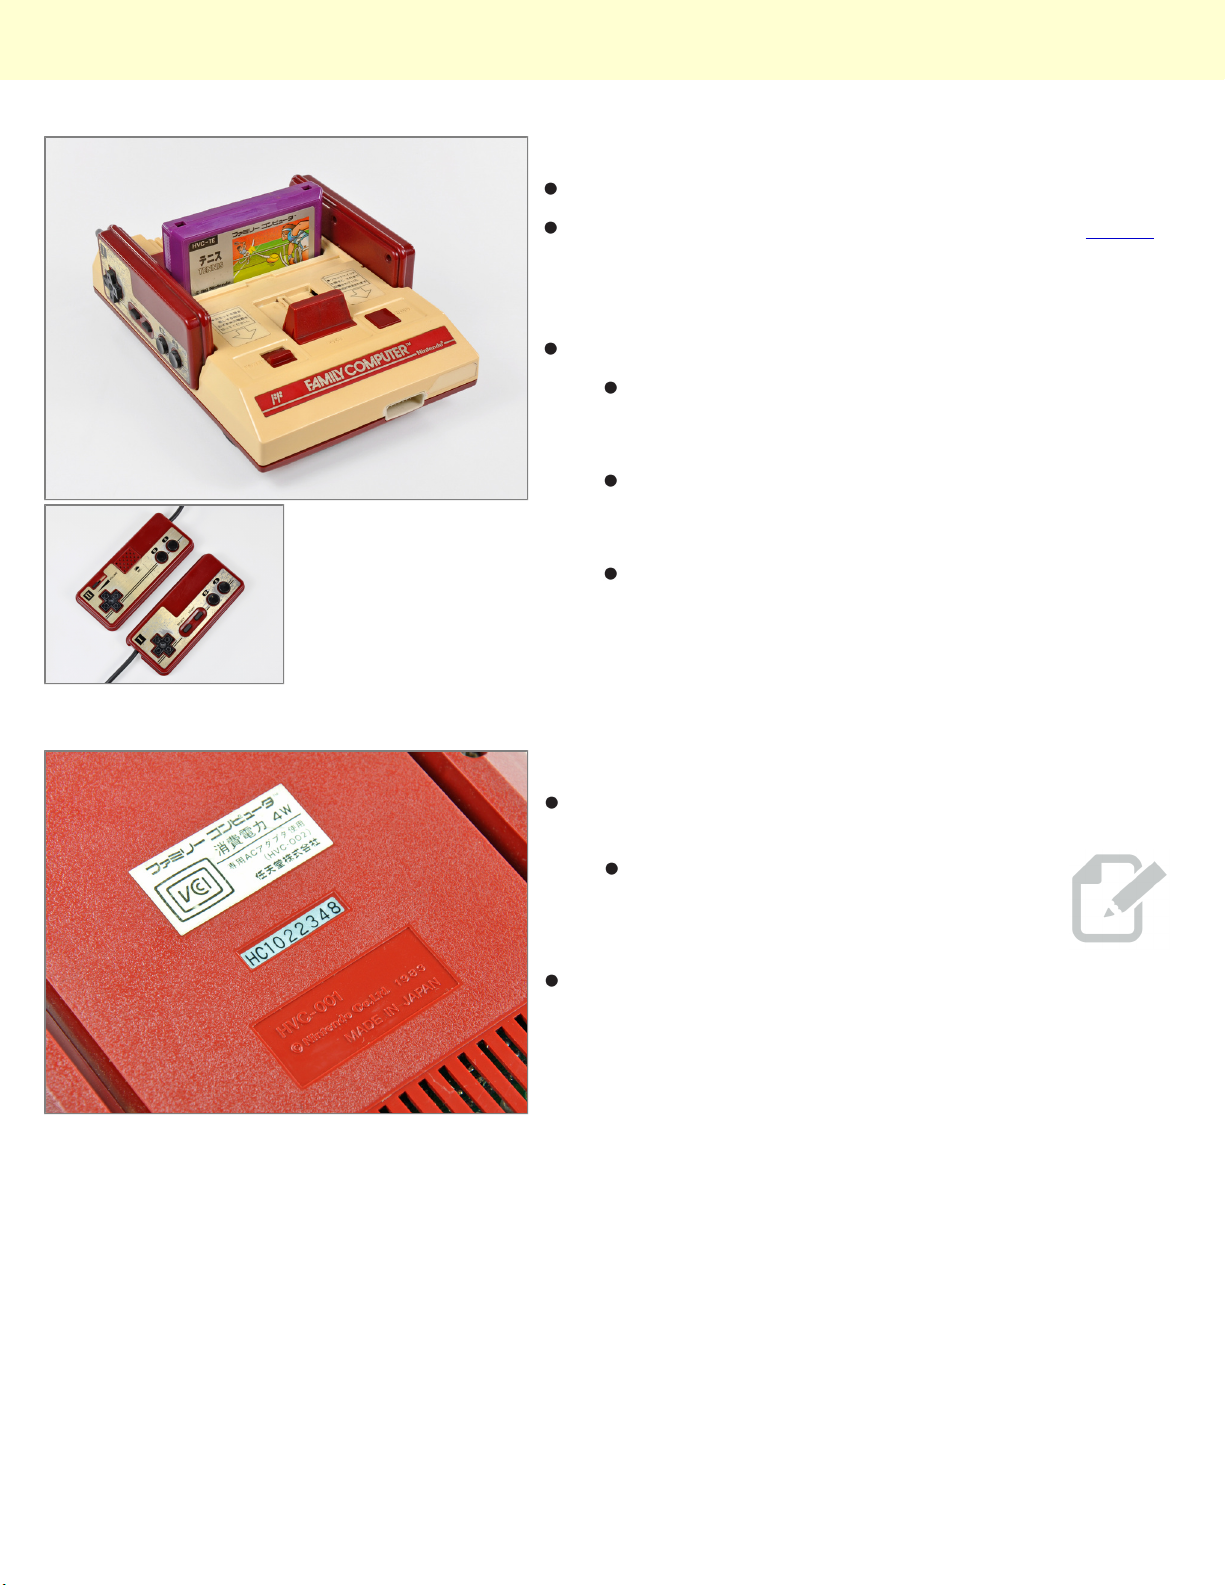
Fully assembled Nintendo Famicom console.
The Famicom was the first console to popularize D-pad
controllers to acquire user input. Departing from the era
of joysticks, the inclusion of the D-pad allowed for quick
and accurate controls.
The controllers are similar, but not the same...
The first controller boasts the traditional layout: Dpad on the left, "select" and "start" buttons in the
center, and "b" and "a" buttons on the right.
However, the second controller has a built-in
microphone and a volume switch at the expense
of the central "select" and "start" buttons... Cool!
This is the only console we know of that has a
microphone on one of its standard controllers.
Step 4
The Famicom's miniscule 4W power supply won't be
popping fuses anytime soon.
Nintendo Famicom model number HVC-001, Made in
Japan. We wouldn't want our Famicom any other way.
That's about 2.5% of the power that
the Xbox 360 devours.
© 2010 iFixit — CC BY-NC-SA www.iFixit.com Page 2 of 7
Page 3
Nintendo Family Computer (Famicom) Teardown
Step 5
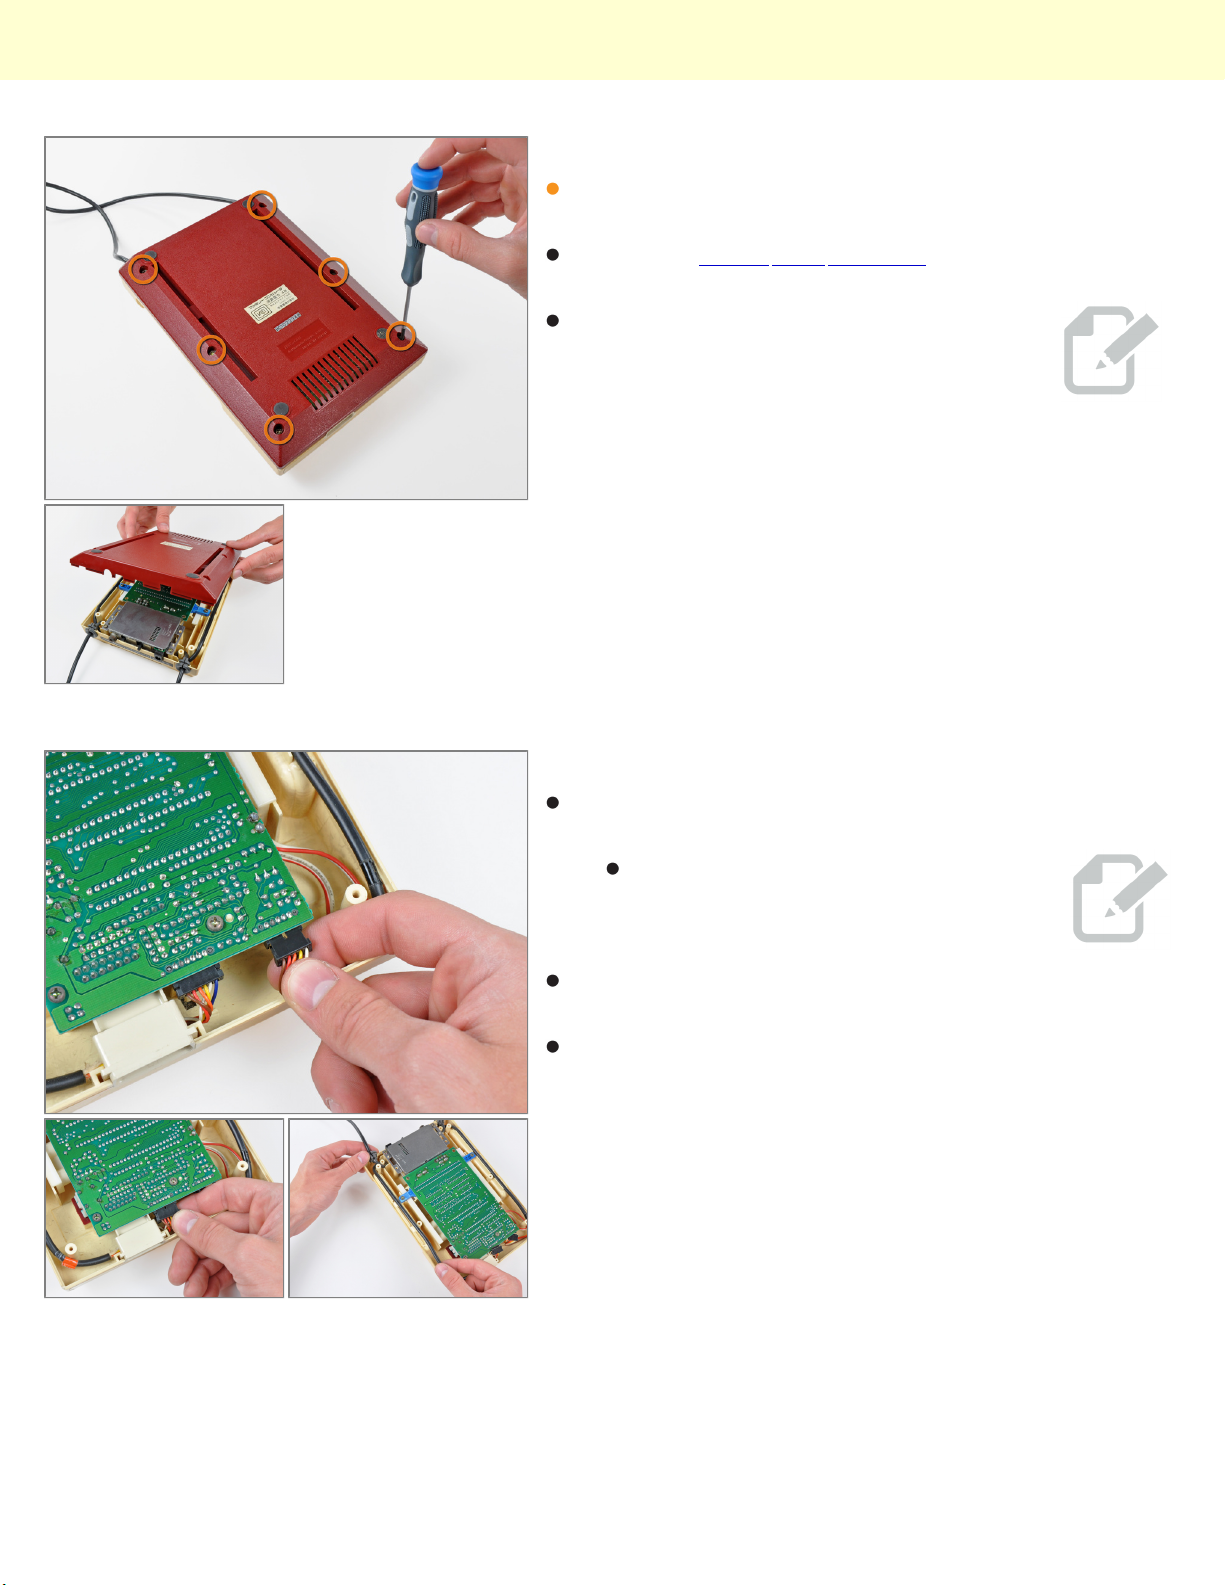
A quick removal of six Phillips screws and the bottom
cover lifts right off.
Just like the earlier retro consoles, Fami is super-easy
to disassemble.
(yes, we named him Fami.)
Step 6
Two antiquated connectors exchange signals between
the controllers and the board.
Controller II has an extra wire for microphone input and
controlling the volume.
After disconnecting them from the board, the controller
cables can be lifted out of the case.
Want to disconnect a controller? Gotta
remove the bottom cover -- but that's
pretty much it.
© 2010 iFixit — CC BY-NC-SA www.iFixit.com Page 3 of 7
Page 4
Nintendo Family Computer (Famicom) Teardown
Step 7
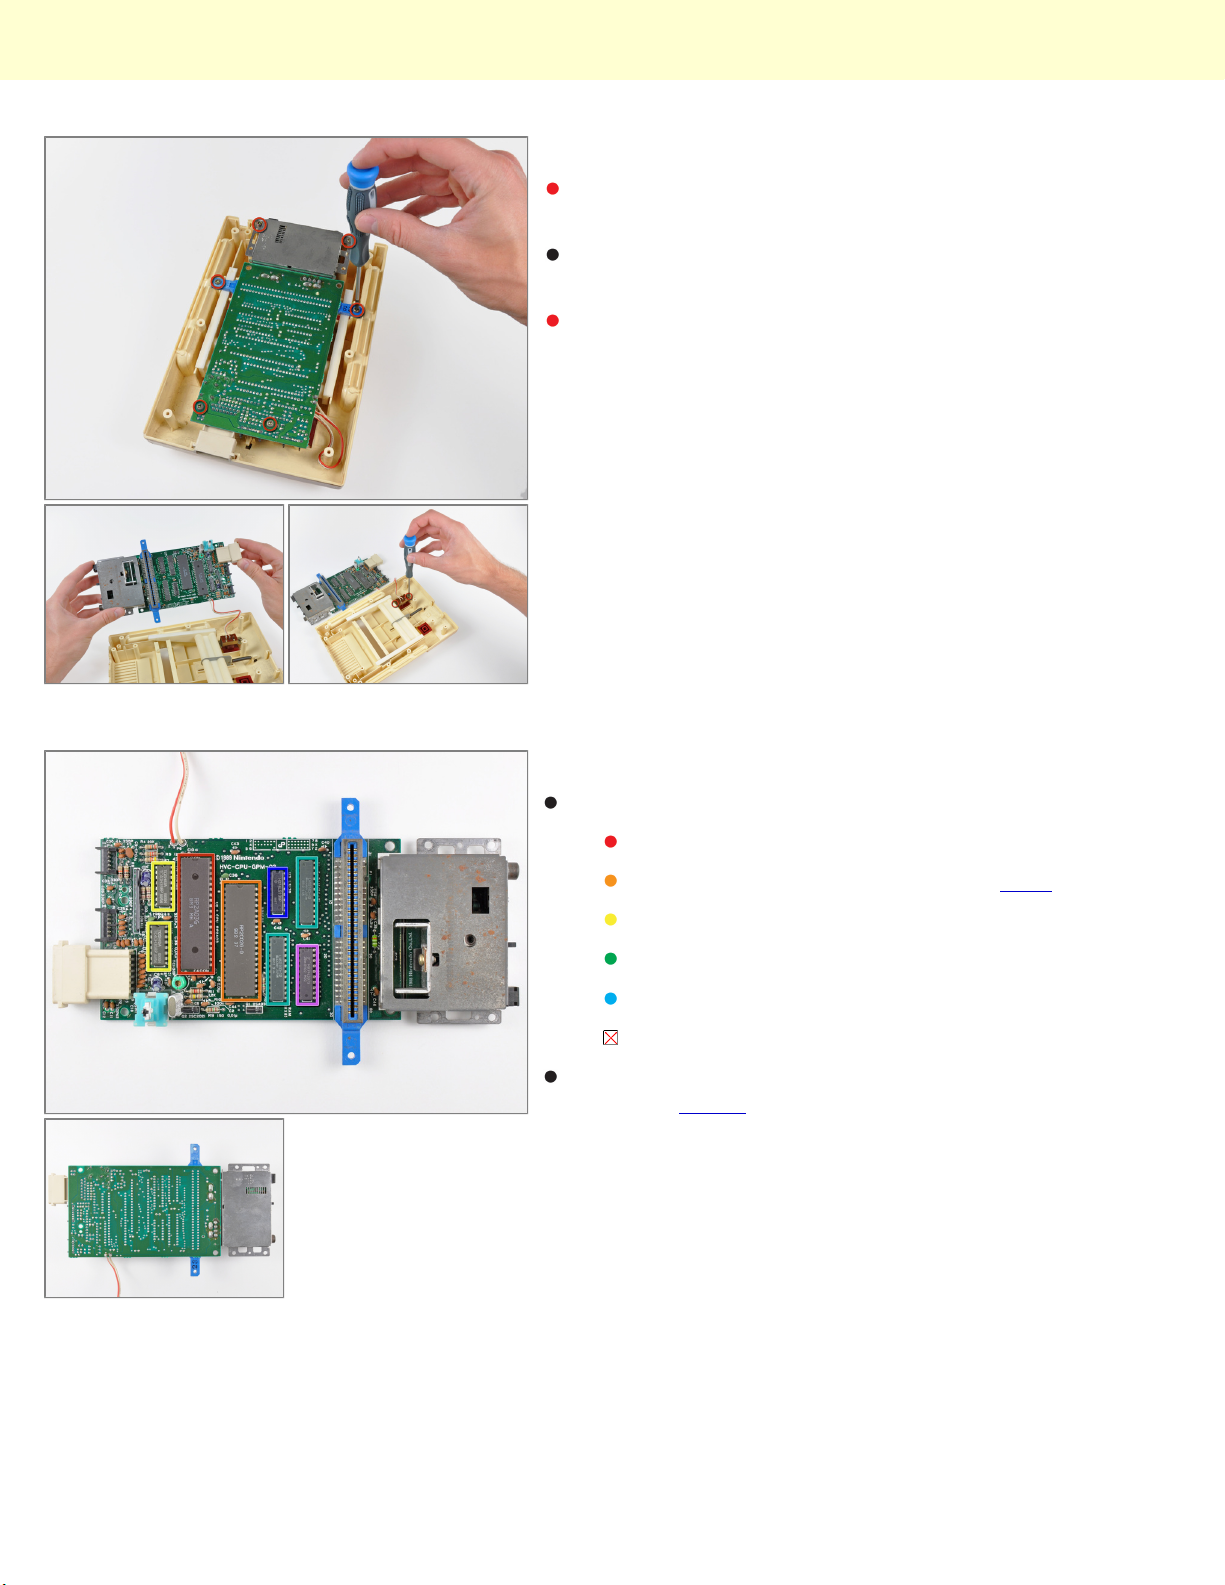
Six Phillips screws secure the motherboard assembly
to the outer case.
Lifting the assembly out of the case gives us a good
look at the archaic silicon that makes this thing tick.
Two more Phillips screws secure the hefty power
switch to the outer case.
Step 8
Notable chips on the board include:
Unsurprisingly, lead solder abounds on the bottom of
the board. RoHS standards weren't established until 20
years after this puppy was made.
Ricoh RP2A03G 8-bit, 1.79 MHz CPU
Ricoh RP2C02G-0 8-bit, 5.32 MHz PPU
Toshiba TC40H368P hex bus buffers
Sharp LH5216D-12 static RAM
Hitachi HD74LS139P decoder/demultiplexer
Fujitsu MB74LS373
© 2010 iFixit — CC BY-NC-SA www.iFixit.com Page 4 of 7
Page 5
Nintendo Family Computer (Famicom) Teardown
Step 9
Well hello there!
"Shall I compare thee to an Xbox 360? Thou art more
lovely and more temperate...But thy internal structure
shall not fade...Nor shall time brag thou wand'rest in its
shade...So long as gamers can breathe or eyes can
see, So long lives this, and this gives life to thee."
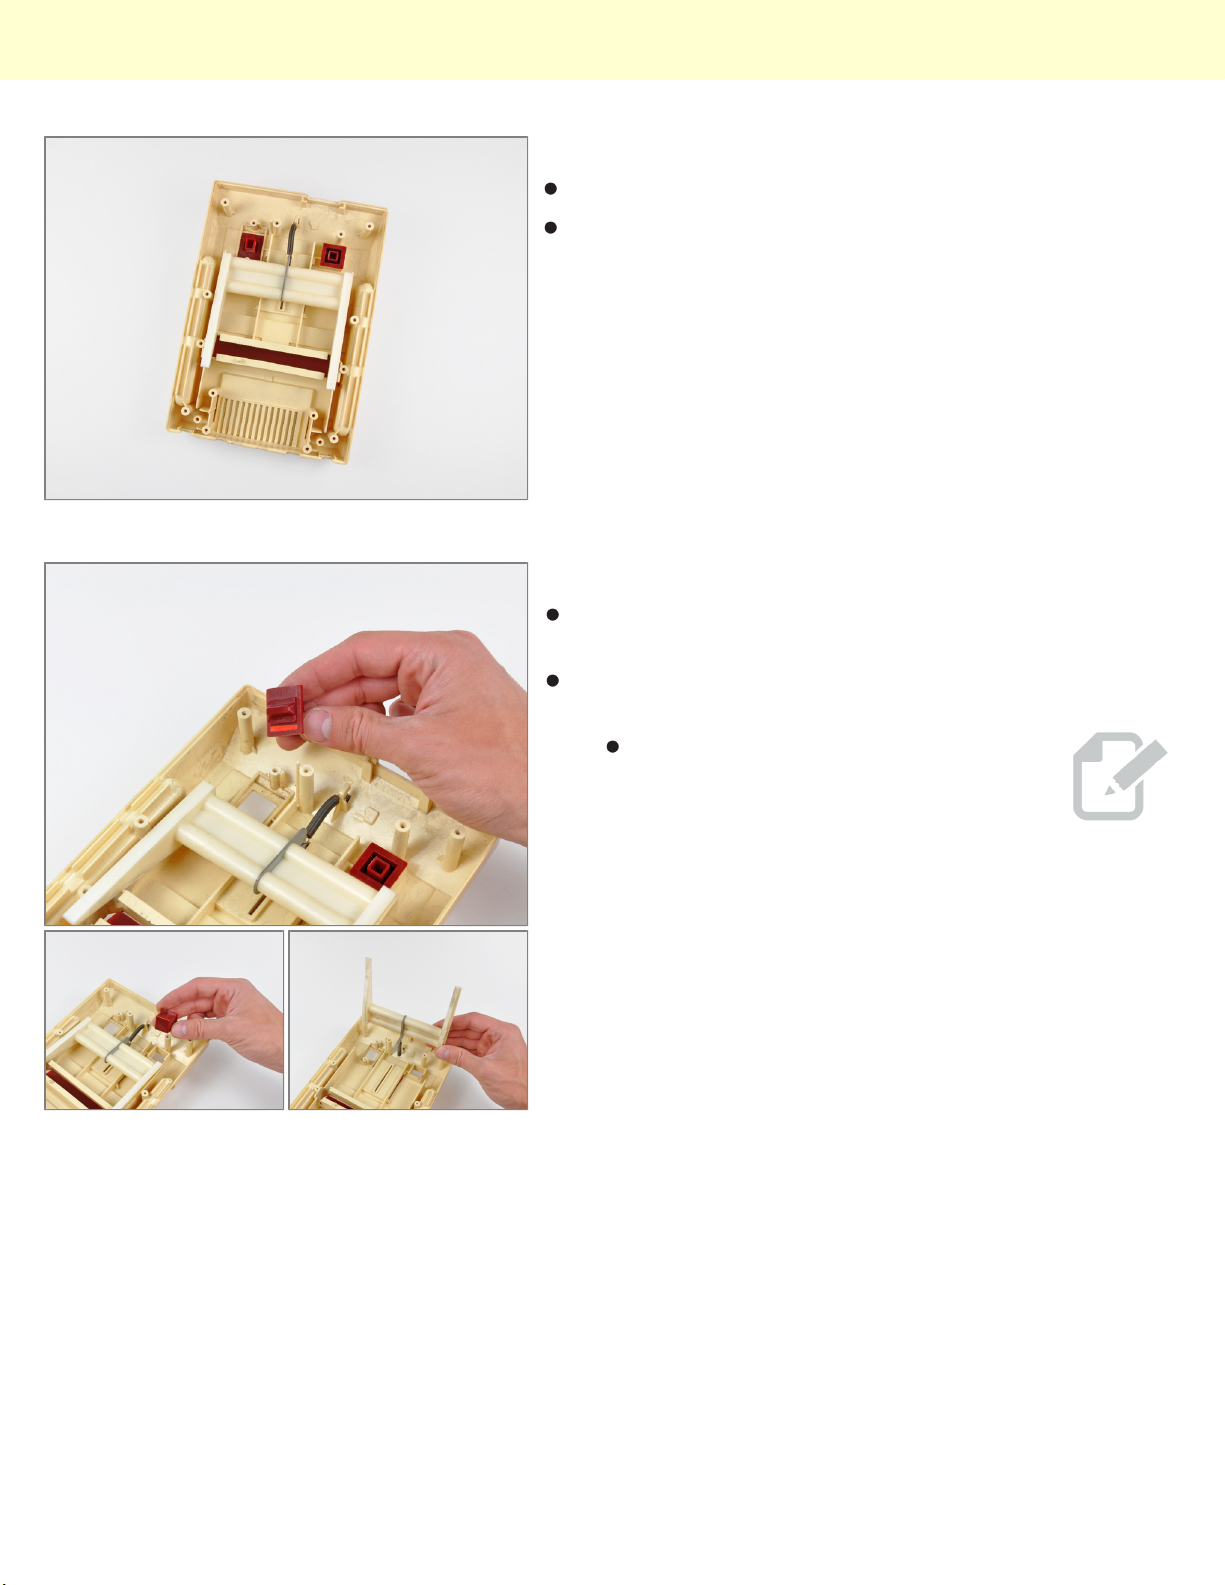
Step 10
After the motherboard assembly is out, the reset and
power button covers can easily be removed.
Unclipping a spring is all that's needed to remove the
eject mechanism from the outer case.
Ejecting a cartridge is accomplished
by pushing two inclined planes
underneath the cartridge until it pops
up off the connector attached to the
board.
© 2010 iFixit — CC BY-NC-SA www.iFixit.com Page 5 of 7
Page 6
Nintendo Family Computer (Famicom) Teardown
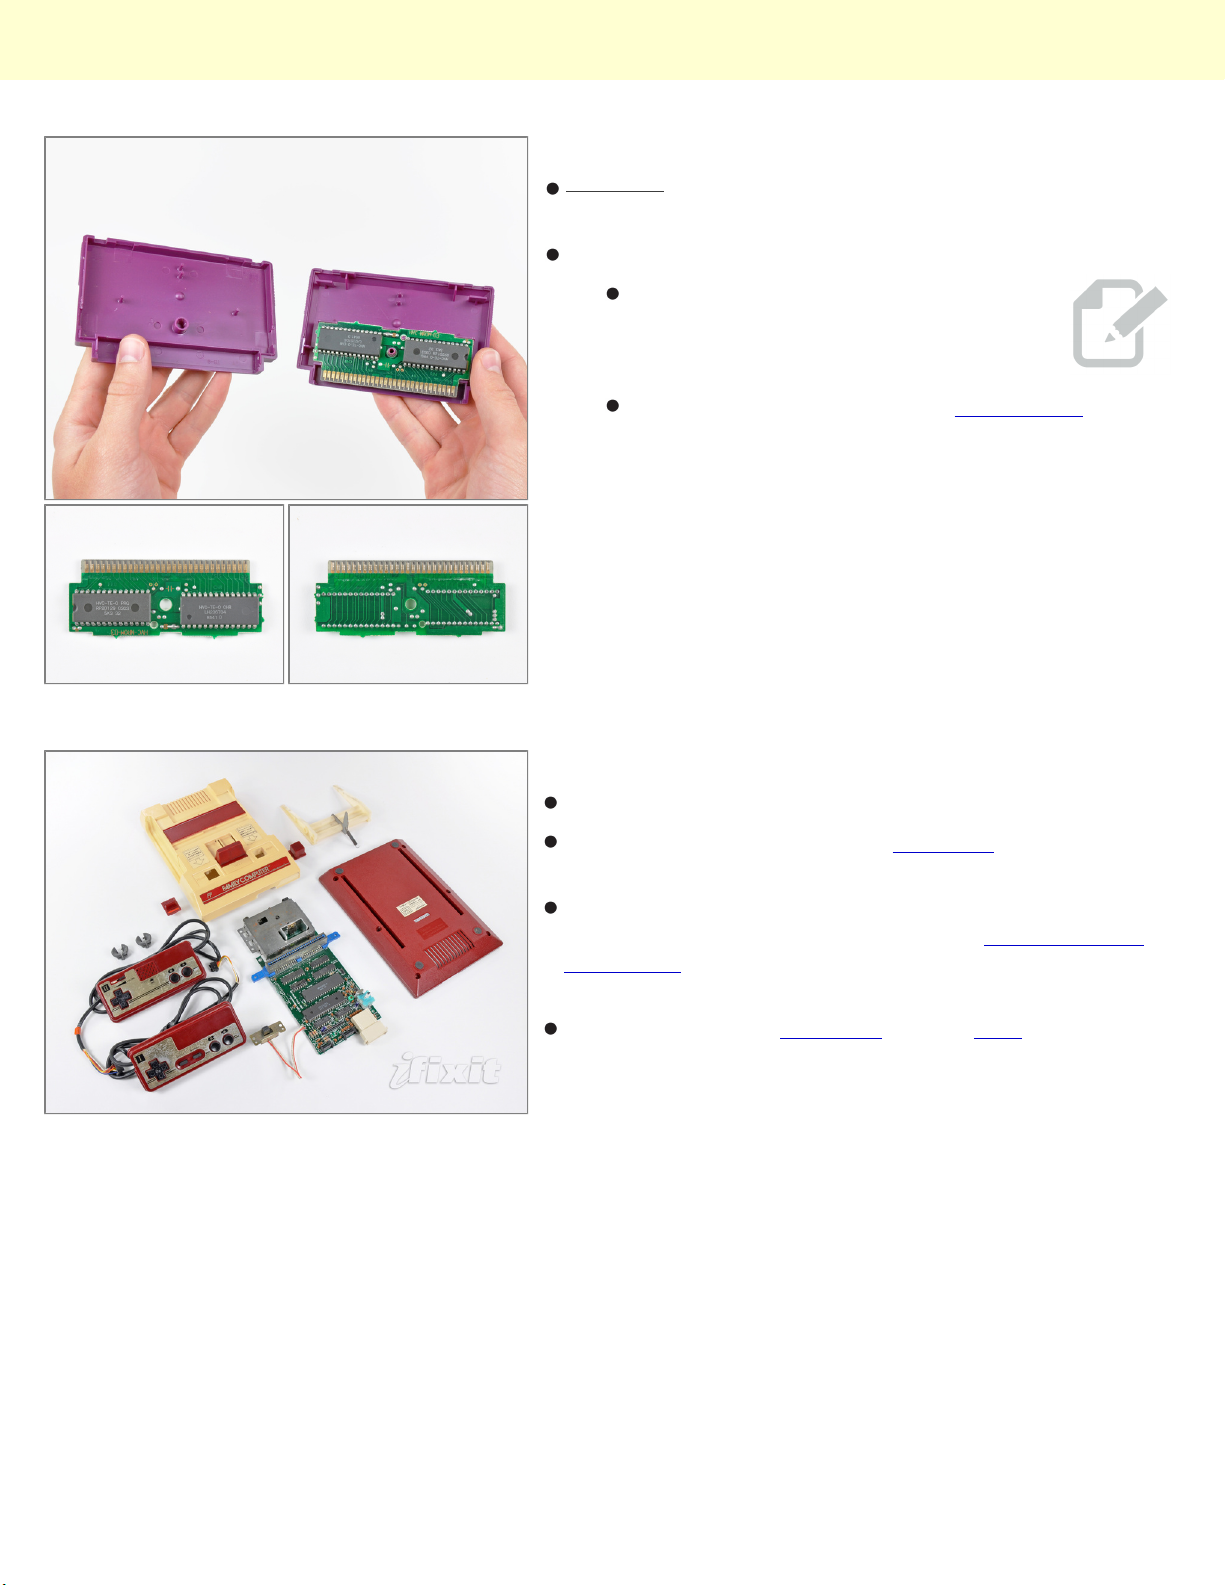
Step 11
Breaking Gently releasing the retaining clips holding the
cartridge together reveals a 60 pin printed circuit board.
Front and back sides of the Famicom cartridges:
This PCB from a Tennis cartridge has
two ROM packages -- totaling 24 KB -soldered to one side.
For comparison, a single layer Blu-ray disc has a
25,000,000 KB capacity.
Step 12
And there you have it - the Famicom in pieces.
Be sure to keep an eye on our teardown page for an
inside-look at all the latest gadgets.
We're sad to say that we don't have parts for the
Famicom, but we do have a brand new game console
parts store to help keep your (slightly more modern)
consoles running.
Keep an eye on our teardown page or blog for a
detailed look at another retro game console tomorrow!
© 2010 iFixit — CC BY-NC-SA www.iFixit.com Page 6 of 7
Page 7

Nintendo Family Computer (Famicom) Teardown
To reassemble your device, follow these instructions in reverse order.
© 2010 iFixit — CC BY-NC-SA www.iFixit.com Page 7 of 7
 Loading...