

NINTENDO New 3DS Guide rapide [fr]
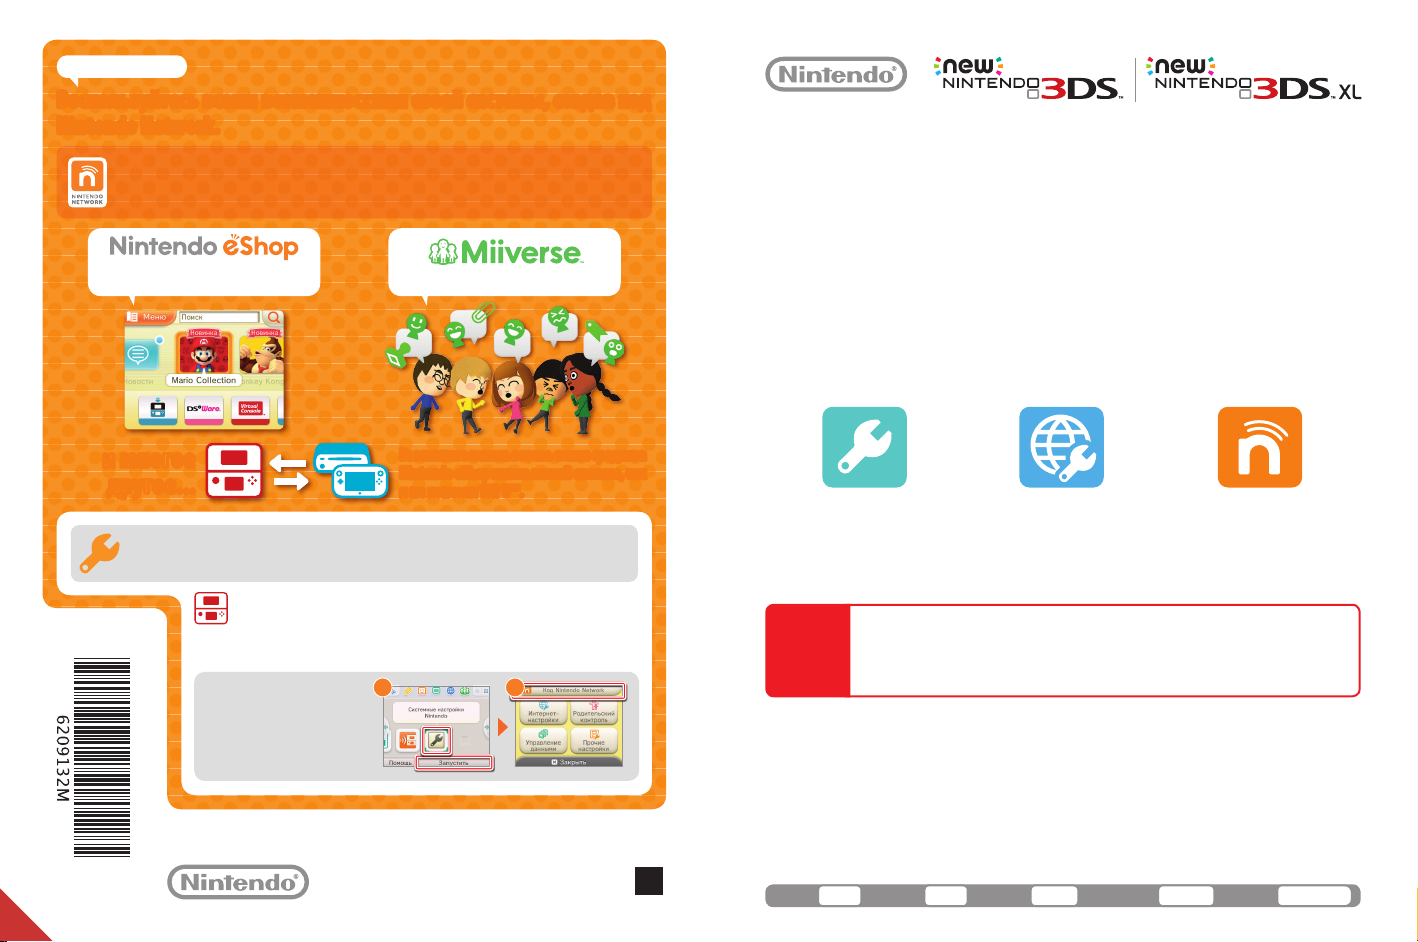
Подключитесь к Интернету
Воспользуйтесь всеми возможностями своей системы, создав код
Nintendo Network.
С помощью кода Nintendo Network вы сможете воспользоваться разными
функциями сервиса Nintendo Network, предоставляемого компанией Nintendo.
Примечание. Код Nintendo Network не является учетной записью Клуба Nintendo.
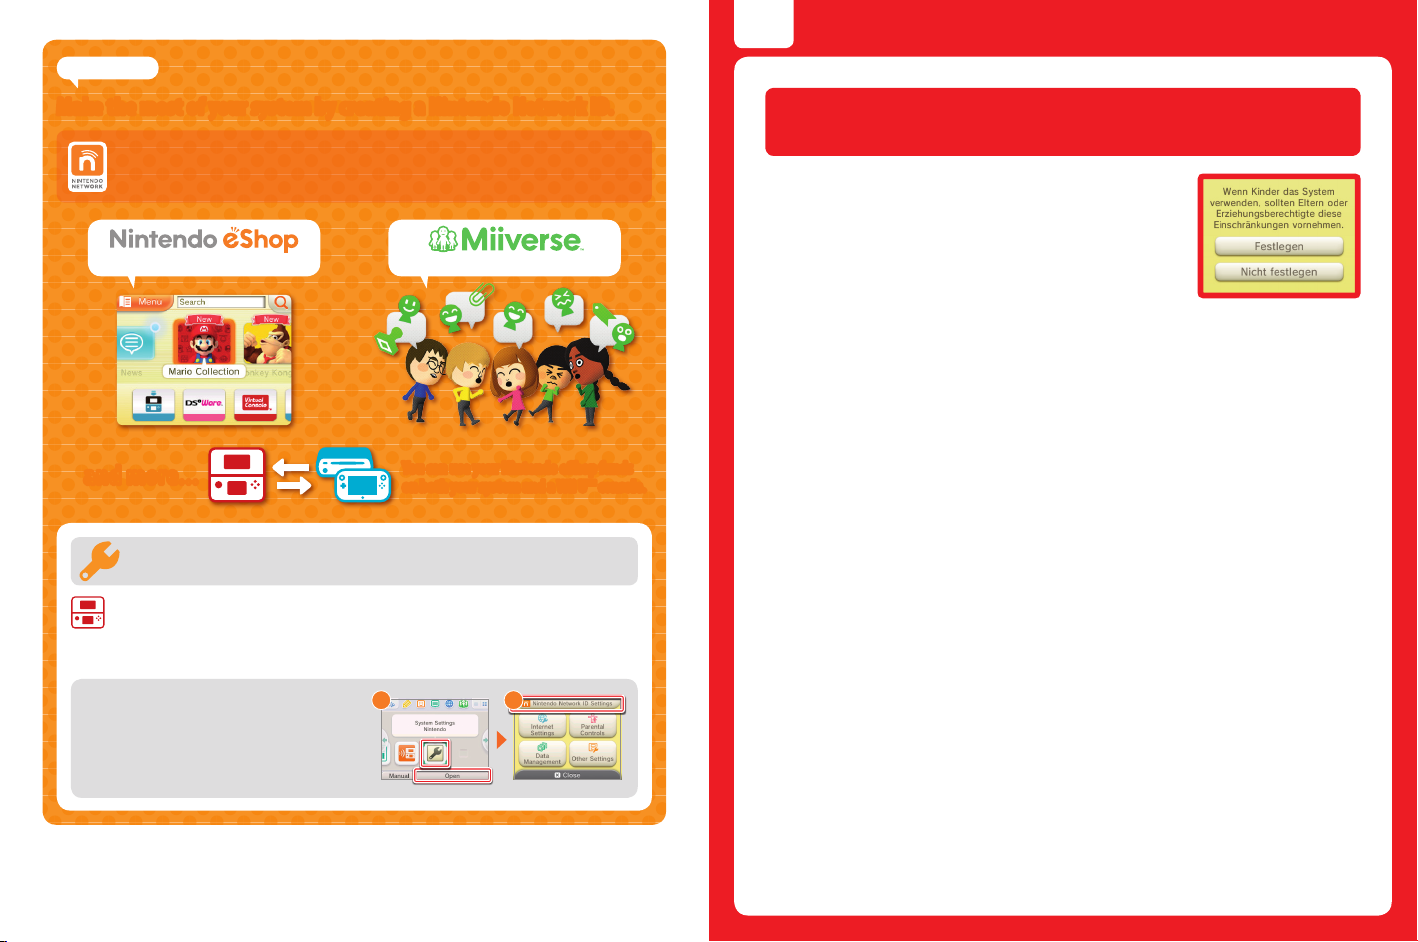
Загружайте демоверсии и бесплатные
программы.
Беседуйте о своих любимых играх.
Quick-Start Guide
Schnellstart-Anleitung • Guide de démarrage rapide
Snelstartgids • Краткое руководство
This guide explains how to congure your system, launch software and connect to the internet.
Diese Anleitung erklärt die ersten Schritte bei der Einrichtung des Systems, dem Starten von Software und der Herstellung einer
Verbindung zum Internet.
connecter à Internet.
В этом руководстве рассказывается, как настроить систему, как запускать приложения и подключаться к Интернету.
Ce guide vous explique les étapes à suivre pour paramétrer votre console, démarrer un logiciel et vous
•
Deze gids legt uit hoe je je systeem congureert, software opstart en verbinding maakt met het internet.
•
и многое
другое...
Вы можете создать новый код Nintendo Network на вашей системе или установить связь с имеющимся
кодом Nintendo Network, который вы создали на консоли Wii U. Создавать код Nintendo Network для
детей или устанавливать с ним связь должны взрослые.
Вы можете использовать ваши средства
Nintendo eShop как на вашей системе, так
и на консоли Wii U™.
Если у вас имеется другая система Nintendo 3DS, и вы хотите
передать данные на вашу новую систему...
Не создавайте код Nintendo Network и не связывайте его с новой системой до передачи
данных, в противном случае вы не сможете передать данные.
Выполнение настроек
Откройте системные настройки
в меню HOME, затем коснитесь
КОД NINTENDO NETWORK, чтобы
выполнить настройки кода.
Trademarks are property of their respective owners. Nintendo 3DS is a trademark of Nintendo. Les marques appartiennent a leurs
proprietaires respectifs. Nintendo 3DS est une marque de Nintendo. © 2014 Nintendo Co., Ltd.
1 2
MKA-KTR-S-EUA-C1
Initial Settings
Grundeinstellungen
Paramétrage initial
Systeem instellen
Начальные настройки
IMPORTANT
WICHTIG:
IMPORTANT :
BELANGRIJK:
ВАЖНО!
Note: All illustrations in this guide show the New Nintendo 3DS™ system. • Be sure to read the Health and Safety Information section of the Operations
Manual before use, and follow the instructions carefully.
Hinweis: Auf sämtlichen Abbildungen dieser Anleitung ist das New Nintendo 3DS-System dargestellt.
und Sicherheitsinformationen in der Bedienungsanleitung und befolgen Sie sorgfältig die darin enthaltenen Anweisungen.
Notes : les illustrations gurant dans ce guide représentent la console New Nintendo 3DS ; veuillez lire la section Informations sur la santé et la sécurité du
mode d'emploi de la console avant de l'utiliser et observer les précautions indiquées.
Opmerking: alle afbeeldingen in deze gids tonen het New Nintendo 3DS-systeem.
in de handleiding van het systeem, en volg de aanwijzingen nauwkeurig op.
Примечания. На всех иллюстрациях в этом руководстве изображена система New Nintendo 3DS.
прочитайте раздел Информация о здоровье и безопасности в руководстве пользователя и внимательно следуйте приведенным в нем инструкциям.
English Deutsch Français Nederlands Русский
An adult should congure the system if it is to be used by children.
Ein Erwachsener sollte das System einrichten, wenn es von Kindern verwendet wird.
Un adulte doit eectuer le paramétrage initial de la console si celle-ci est destinée à être utilisée par un enfant.
Een volwassene dient het systeem te congureren als het door kinderen wordt gebruikt.
Если системой будут пользоваться дети, настройка системы должна быть произведена взрос лым.
Page 2 Seite 9 Page 16 Pagina 23 Cтраница 30
Internet Settings
Interneteinstellungen
Paramétrage Internet
Internet instellen
Интернет-настройки
• Lees voor gebruik het hoofdstuk “Gezondheids- en veiligheidsinformatie”
Nintendo Network™ ID Settings
Nintendo Network ID-Einstellungen
Paramétrage de l'identiant Nintendo Network
Nintendo Network ID instellen
Код Nintendo Network
• Bitte lesen Sie vor der Inbetriebnahme die Gesundheits-
• Перед использованием системы обязательно
English
IMPORTANT INFORMATION FOR PARENTS
PLEASE READ!
Your system offers a variety of exciting features, but not all of them may be
suitable for children. We have prepared special steps to make your system sa fe
for your child.
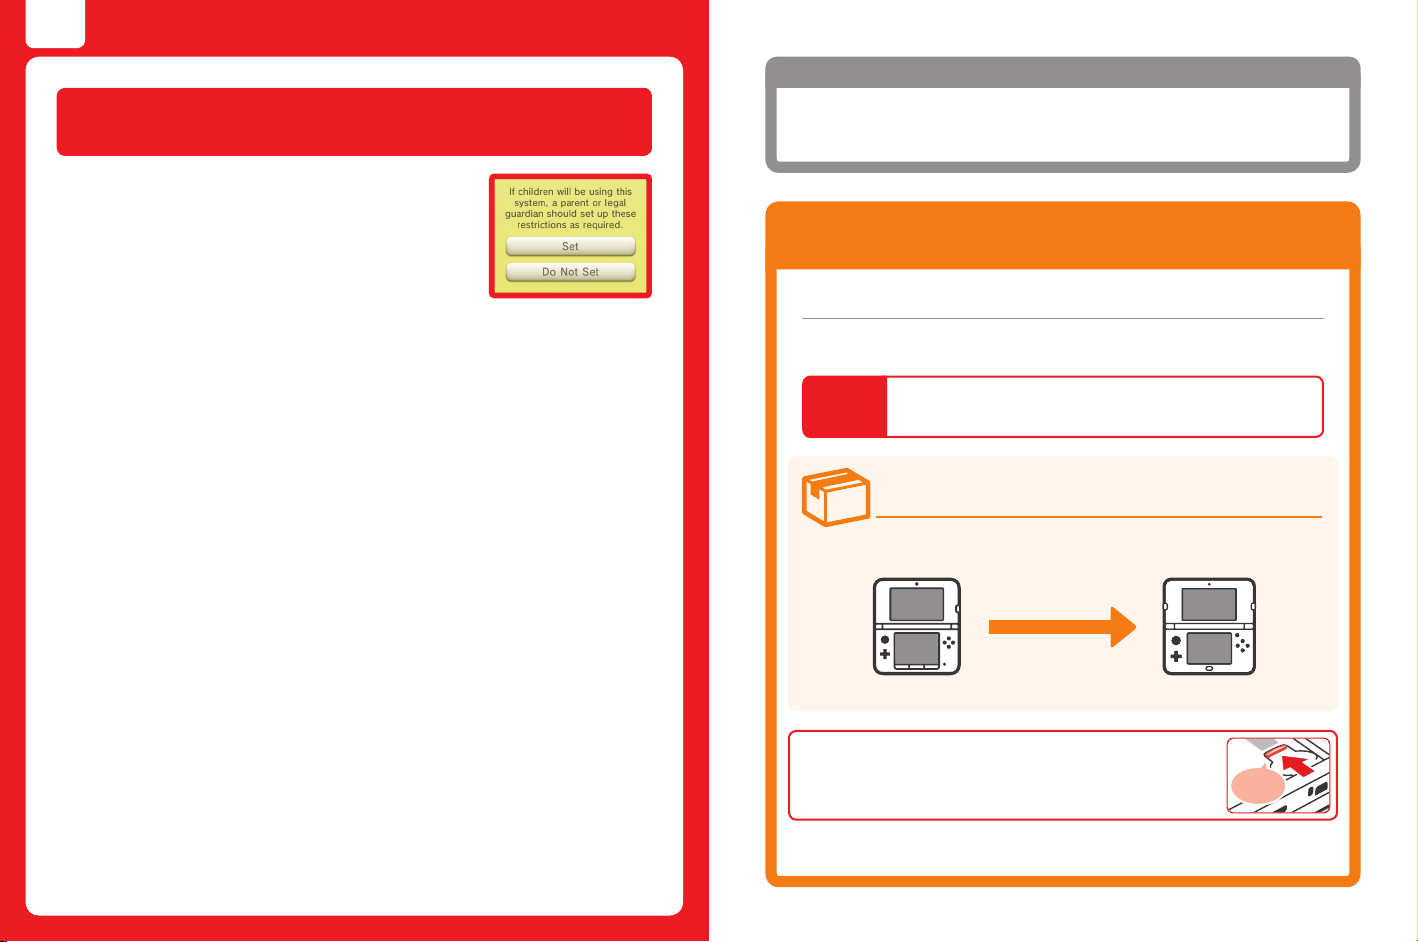
During the initial setup of your system, you will be asked to set Parental Controls.
Touch SET to begin, then follow the on-screen instructions.
Choose a PIN code to ensure that your child cannot change the settings you made.
You can then set the following restrictions which are enabled by default:
• SOFTWARE RATING restricts what games your child can play by age rating.
• INTERNET BROWSER prevents your child from browsing the internet.
• NINTENDO 3DS SHOPPING SERVICES restricts your child’s use of Nintendo eShop and any other Nintendo 3DS shopping services.
• DISPLAY OF 3D IMAGES disables the 3D feature. The use of the 3D feature by children aged six and under may cause vision damage.
It is highly recommended that only children over six should use the system in 3D mode.
• MIIVERSE restricts Miiverse™ functionality.
• SHARING IMAGES / AUDIO / VIDEO / LONG TEXT DATA prevents your child from sending and receiving photos, images, sounds,
videos and long messages.
• ONLINE INTERACTION prevents your child from any online communication in games.
• STREETPASS switches off StreetPass™. StreetPass allows automatic exchange of photos, images, videos and other content between
two Nintendo 2DS™ / Nintendo 3DS systems that are close to each other.
• FRIEND REGISTRATION restricts registration of new friends. Registered friends can see the online status of your child and freely
exchange messages and other content with your child.
• DS DOWNLOAD PLAY prevents your child from downloading Nintendo DS™ demos and playing multiplayer games using local
wireless communication.
• VIEWING DISTRIBUTED VIDEOS restricts the distributed videos your child can view.
Make sure you select DONE to save your settings.
To use Parental Controls or to change the settings after the initial setup has been completed, open the System Settings from the
HOME Menu and select PARENTAL CONTROLS.
In addition, you can restrict your child’s use of Nintendo Network services from PCs, smartphones and other devices. This option
will be offered automatically when a Nintendo Network ID is first created or linked, and can be changed at any time by touching
ACCESS FROM PCS AND OTHER DEVICES in the Nintendo Network ID Settings. Please also make sure that you have set up a PIN code
in Parental Controls as detailed above to ensure that your child cannot make changes to settings.
Thank you. With these available options, your child will be able to safely enjoy using your system.
Contents
If you own another Nintendo 3DS system and
want to transfer data to your new system . . . 3
Charge and turn on the system . . . . . . . . . . . . . 4
Congure the system . . . . . . . . . . . . . . . . . . . . . 5
Start software . . . . . . . . . . . . . . . . . . . . . . . . . . . 6
Connect to the internet . . . . . . . . . . . . . . . . . . . 7
If you own another Nintendo 3DS system and
want to transfer data to your new system
Transfer your data before playing.
After conguring initial settings for this system, owners of a system in the Nintendo 3DS family
should perform a system transfer before play.
If you have played on this system before transferring data from your old Nintendo 3DS system,
CAUTION
then any save data created for downloadable or built-in software on this system will become
unusable after the transfer.
System Transfer
Nintendo 3DS / Nintendo 3DS XL / Nintendo 2DS New Nintendo 3DS / New Nintendo 3DS XL
Software save data,
Nintendo Network ID, etc.
Caution when removing microSDHC memory card
Be sure to push the microSD card in until it clicks and pops out, then remove it.
Failure to do so may lead to damage to the microSD card slot.
Please refer to the Operations Manual for further details about system transfers and removing the
microSD card.
2 3
Click
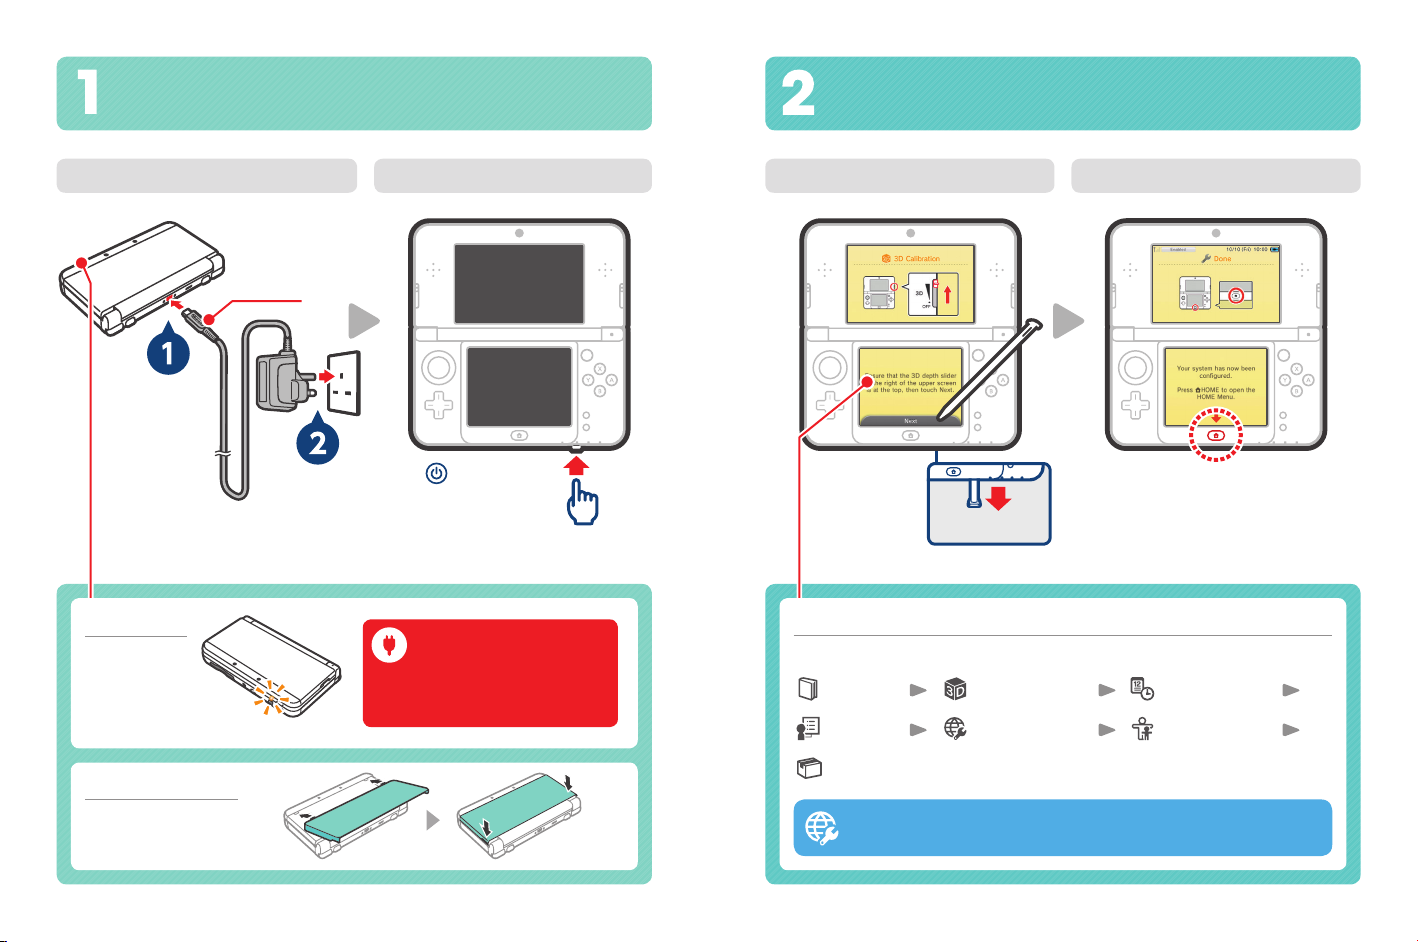
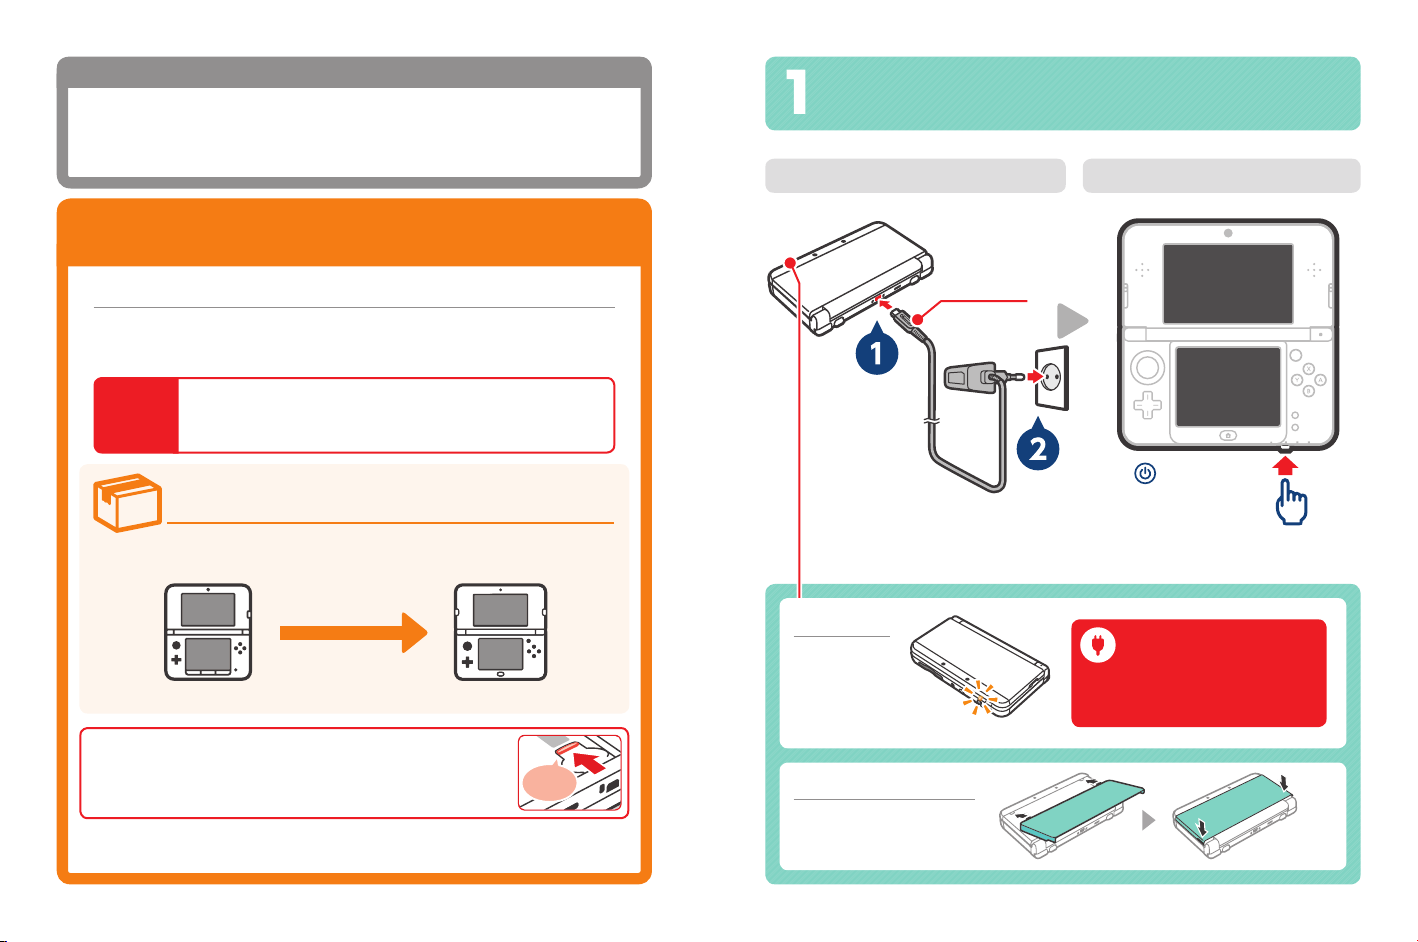
Charge and turn on the system
Congure the system
Charge Initial settingsTurn the power on Complete setup
Nintendo logo
facing upwards
Press the
POWER Button
Note: The illustration above shows the UK version
of the AC adapter.
Recharge LED
LED lit – charging
LED o – charging
complete
This package does not include
an AC adapter.
To recharge your system, you will need a
Nintendo 3DS AC adapter (WAP-002(UKV)/
WAP-002(EUR)) (sold separately).
New Nintendo 3DS
Please attach the front plate
before using the system.
4 5
The stylus is
used to operate
the Touch Screen.
Remove it from the
stylus holder.
To complete the setup, press
the HOME Button to display the
HOME Menu.
Settings Screen
Please follow the instructions to congure the system after turning it on for the rst time.
Language
Prole
3D Calibration
Internet Settings
Date and Time
Parental Controls
System Transfer
Please refer to the “Connect to the internet” section for more details about
connecting to the internet.
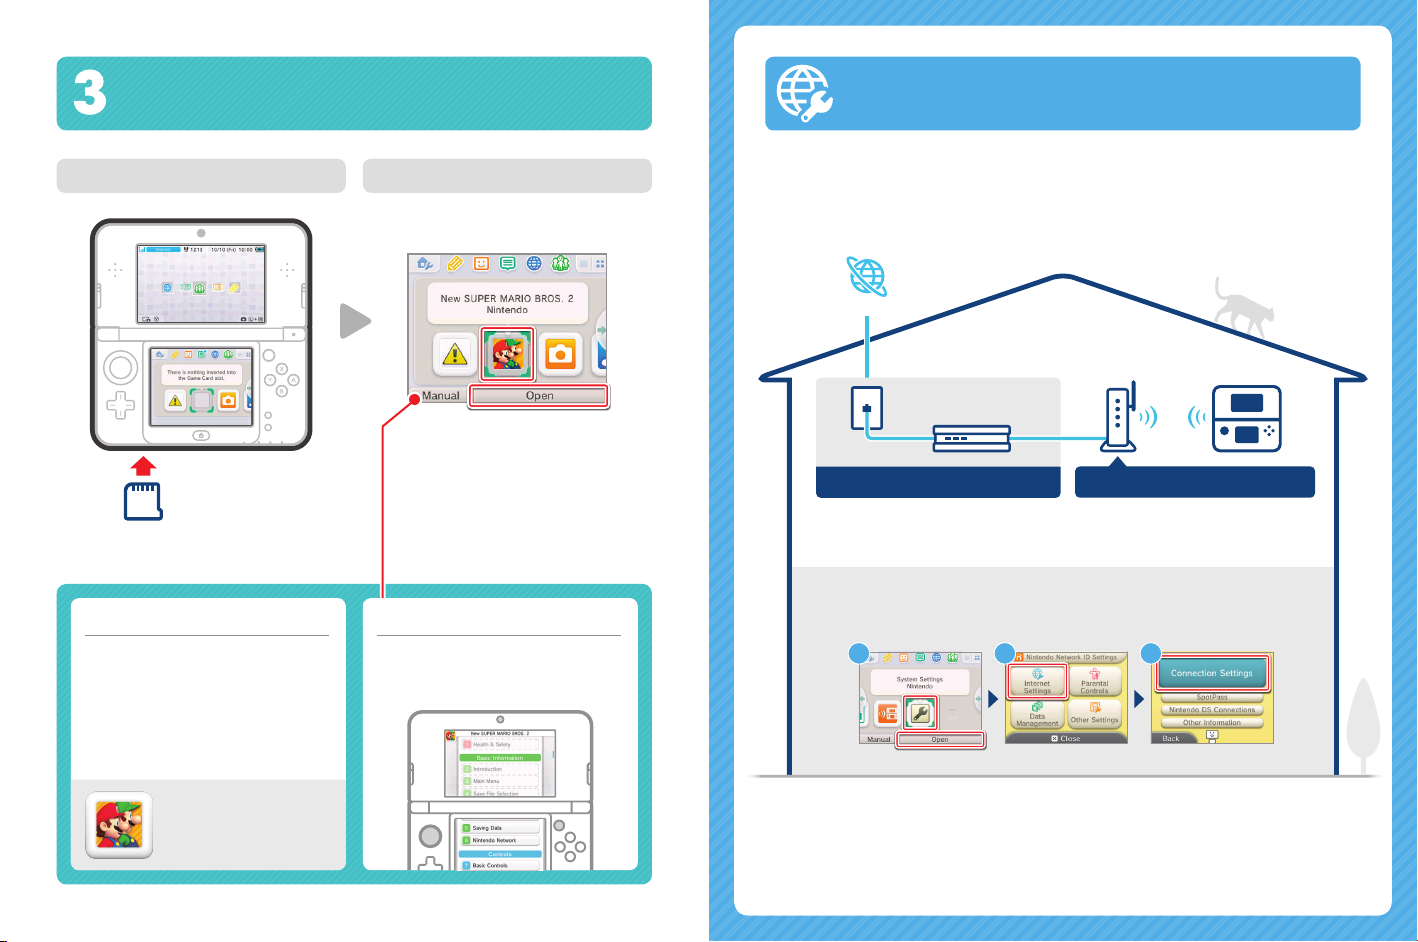
Start software Connect to the internet
Insert the Game Card Open the software
Touch the icon for the software
you want to use, then touch
Game Card
OPEN.
(label facing downwards)
Inserting the Game Card
Check which way the Game Card and the system
are facing. Ensure that the power is turned o,
or that the HOME Menu is displayed and no
software is currently suspended, before inserting
or removing a Game Card.
Need help?
Just touch MANUAL to get help from the
electronic manual of the software that you
have selected.
Prepare your wireless access point
A wireless connection is required to connect to the internet. A computer is needed to congure the settings on your
wireless access point (router).
Internet
Modem and/or router
Broadband internet connection Wireless access point
(ADSL, cable or bre optic)
Congure settings
Open the System Settings, then touch INTERNET SETTINGS, and then CONNECTION SETTINGS.
It is easiest to connect to wireless access points
which support AOSS™ or Wi-Fi Protected Setup™.
1 2 3
You can purchase the downloadable
version of a title and play it wherever
you go.
6 7
Please refer to the Operations Manual for further details.
Connect to the internet
Deutsch
Make the most of your system by creating a Nintendo Network ID.
A Nintendo Network ID allows you to enjoy various features of Nintendo Network oered
by Nintendo.
Note: A Nintendo Network ID is not the same as a Club Nintendo ID.
Get demos and a variety of free software. Chat about your favourite games.
and more...
You can create a new Nintendo Network ID on your system or link an existing Nintendo Network ID that you
have already created on a Wii U console. Adults should create or link a Nintendo Network ID for their children.
If you currently have another system in the Nintendo 3DS family and want to transfer
data to your new system...
Do not create or link a Nintendo Network ID to the new system before the transfer, otherwise you will be unable to transfer
data.
Congure settings
Open the System Settings on the HOME Menu, and then
touch NINTENDO NETWORK ID SETTINGS to congure settings
for an ID.
You can use your Nintendo eShop funds
on both your system and a Wii U™ console.
1 2
WICHTIGE INFORMATIONEN FÜR ELTERN:
BITTE LESEN!
Ihr System hält eine Vielzahl fantastischer Funktionen für Sie bereit, jedoch
könnten nicht alle davon für Kinder geeignet sein. Wir haben Ihr System mit
besonderen Sicherheitsmaßnahmen versehen, damit Ihr Kind es bedenkenlos
verwenden kann.
Während der Erstkonfiguration Ihres Systems werden Sie aufgefordert, Einstellungen
zu den Altersbeschränkungen vorzunehmen. Berühren Sie FESTLEGEN und folgen Sie
daraufhin den Anweisungen auf dem Bildschirm.
Wählen Sie eine Geheimzahl aus, um sicherzustellen, dass Ihr Kind die von Ihnen
vorgenommenen Einstellungen nicht ändern kann.
Sie können die folgenden Optionen bearbeiten, die standardmäßig aktiviert sind:
• SOFTWARE-ALTERSEINSTUFUNG: Schränkt den Zugriff Ihres Kindes auf Spiele mithilfe von Altersfreigaben ein.
• INTERNETBROWSER: Sperrt den Zugriff Ihres Kindes auf das Internet.
• NINTENDO 3DS SHOP-SERVICES: Schränkt den Zugriff Ihres Kindes auf den Nintendo eShop und jegliche andere Nintendo 3DS
Shop-Services ein.
• 3D-DARSTELLUNG: Deaktiviert die 3D-Funktion. Bei Kindern bis einschließlich 6 Jahren kann die Verwendung der 3D-Funktion
zu einer Beeinträchtigung des Sehvermögens führen. Daher wird empfohlen, dass nur Kinder über 6 Jahre das System im
3D-Modus verwenden sollten.
• MIIVERSE: Schränkt die Funktionen des Miiverse™ ein.
• AUSTAUSCH VON DATEIEN: Unterbindet das Senden und Empfangen von Foto-, Bild-, Audio- und Videodateien sowie langer
Textnachrichten durch Ihr Kind.
• ONLINE-INTERAKTION: Sperrt jegliche Kommunikation über das Internet während des Spielens.
• STREETPASS: Deaktiviert StreetPass™. Mithilfe von StreetPass können Fotos, Bilder, Videos und andere Inhalte automatisch
zwischen zwei Nintendo 2DS™- / Nintendo 3DS-Systemen, die sich in der Nähe zueinander befinden, ausgetauscht werden.
• FREUNDESREGISTRIERUNG: Sperrt die Registrierung neuer Freunde. Registrierte Freunde können den Onlinestatus Ihres Kindes
sehen und ungehindert Nachrichten sowie andere Inhalte mit Ihrem Kind tauschen.
• DS-DOWNLOAD-SPIEL: Sperrt den Download von Nintendo DS™-Demoversionen und das Spielen von Mehrspielerpartien über
den lokalen Modus.
• BEREITGESTELLTE VIDEOS ANSEHEN: Sperrt bereitgestellte Videos, die nicht von Ihrem Kind angesehen werden sollen.
Stellen Sie sicher, dass Sie FERTIG berühren, um Ihre Einstellungen zu speichern.
Um die Altersbeschränkungen aufzurufen oder Einstellungen zu ändern, nachdem die Erstkonfiguration abgeschlossen wurde,
rufen Sie die Systemeinstellungen im HOME-Menü auf und wählen Sie dann ALTERSBESCHRÄNKUNGEN.
Außerdem können Sie die Nutzung der Nintendo Network-Services über PCs, Smartphones und andere Geräte durch Ihr Kind ein-
schränken. Diese Option wird bei der Erstellung bzw. der ersten Verknüpfung einer Nintendo Network ID automatisch angeboten
und kann jederzeit unter ZUGRIFF ÜBER PC UND ANDERE GERÄTE in den Nintendo Network ID-Einstellungen geändert werden.
Achten Sie bitte ebenfalls darauf, eine Geheimzahl für die Altersbeschränkungen festzulegen. So stellen Sie sicher, dass Ihr Kind
die Einstellungen nicht ändern kann.
Herzlichen Dank! Durch die oben beschriebenen Optionen ist gewährleistet, dass Ihr Kind Ihr System
bedenkenlos verwenden kann.
8 9
Inhalt
Falls Sie ein weiteres Nintendo 3DS-System
besitzen und Daten auf Ihr neues System
übertragen möchten… . . . . . . . . . . . . . . . . . . 10
System auaden und einschalten ......... 11
System einrichten . . . . . . . . . . . . . . . . . . . . . . . 12
Software starten . . . . . . . . . . . . . . . . . . . . . . . . 13
Verbindung zum Internet herstellen . . . . . . . 14
Falls Sie ein weiteres Nintendo 3DS-System besitzen
und Daten auf Ihr neues System übertragen möchten...
Übertragen Sie Ihre Daten, bevor Sie zu spielen beginnen.
Nachdem für dieses System die Grundeinstellungen vorgenommen wurden, sollten Besitzer eines
weiteren Systems der Nintendo 3DS-Familie, bevor sie zu spielen beginnen, einen Datentransfer
durchführen.
Falls Sie dieses System zum Spielen verwendet haben, ohne vorher Daten von Ihrem zuvor
VORSICHT
verwendeten Nintendo 3DS-System übertragen zu haben, können jegliche für herunterladbare
oder integrierte Software erstellte Speicherdaten nach einem Datentransfer nicht mehr verwendet werden.
Datentransfer
Nintendo 3DS / Nintendo 3DS XL / Nintendo 2DS New Nintendo 3DS / New Nintendo 3DS XL
System auaden und einschalten
Auaden Einschalten
Nintendo-Logo muss
nach oben zeigen
Drücken Sie den
POWER-Schalter.
Software-Speicherdaten,
Nintendo Network ID usw.
Ladeanzeige
LED leuchtet -
Ladevorgang
LED leuchtet nicht Ladevorgang beendet
Dieses Set enthält kein
Netzteil.
Um Ihr System aufzuladen, benötigen Sie ein
Nintendo 3DS-Netzteil (WAP-002(EUR)), separat
erhältlich.
Vorsicht beim Entfernen der microSDHC Card
Drücken Sie die microSD Card hinein, bis Sie ein Klicken hören und diese heraus-
springt, und entfernen Sie sie anschließend. Ansonsten kann es zu Schäden am
microSD Card-Steckplatz kommen.
Weitere Informationen über Datentransfers sowie das Entfernen der microSD Card nden Sie in der
Bedienungsanleitung.
10 11
Klick!
New Nintendo 3DS
Bitte bringen Sie die Frontblende an,
bevor Sie das System verwenden.
 Loading...