

Ninja SPECIALTY CM400 Quick Start Manual
Please make sure to read the enclosed Ninja® Owner’s Guide prior to using your unit.
QUICK
START
GUIDE
+ 5 IRRESISTIBLE RECIPES
COFFEE MAKER
SPECIALT Y
®
For how-to videos and more, visit ninjakitchen.com Questions? 1-877-646-5288
32
BEFORE
YOUR
FIRST
BREW
You’ll need to prime your
system by running two
Full Carafe brew cycles,
using only fresh water.
With your brewer plugged
in and powered on, fill the
reservoir with fresh water
up to, but not exceeding,
the Max Fill line. Place the
empty carafe under the
brew basket, then select
Full Carafe and Classic Brew.
When the first cycle is
complete, discard the water
in the carafe and repeat.
After completing two
water-only priming cycles,
you’ll be ready to brew
delicious coee.
1
2
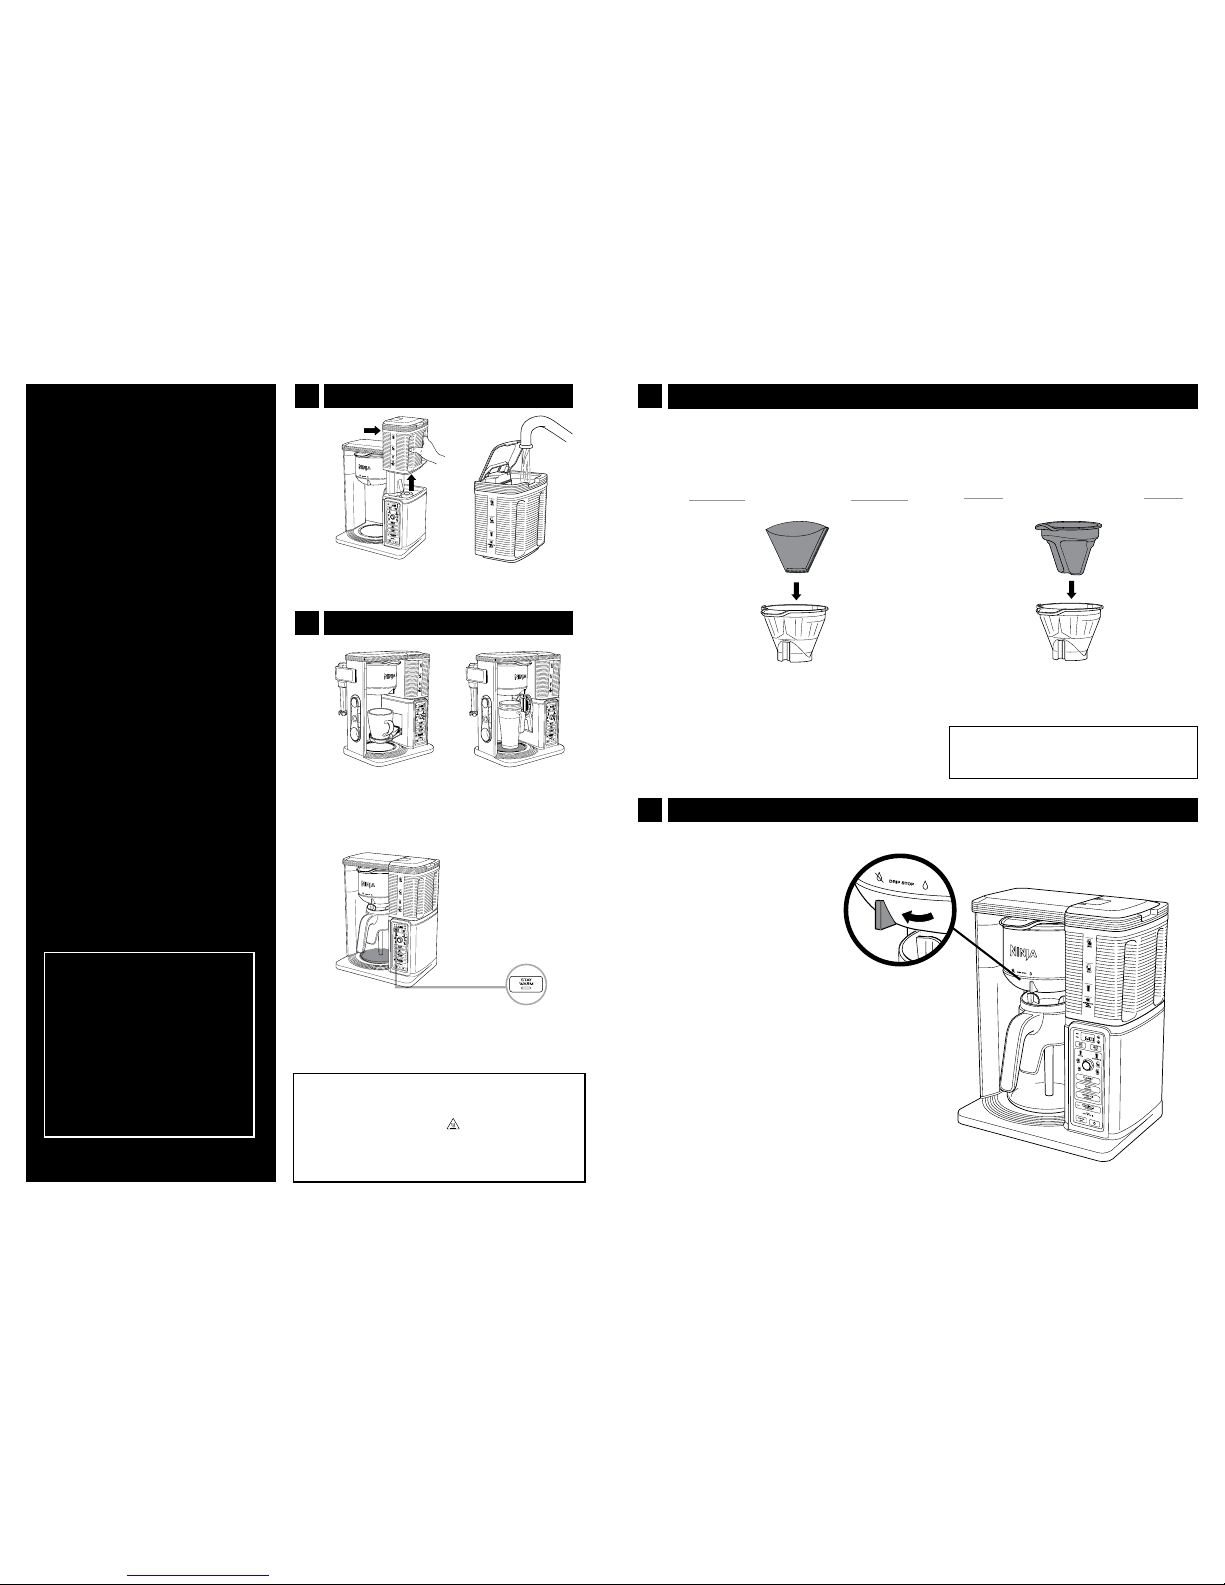
DRIP STOP
CAN’T WAIT FO R
THAT FIRST CU P?
Close the dr ip stop to
pause the c arafe brew
cycle, and t hen pour
yourself a c up. Reope n
the drip sto p to continue
the br ew.
STOP THE DRIPS
AFTER A B REW
At the end of a brew,
close the dr ip stop to
prevent coe e drippin g
from the brew b asket.
4
HIGH-ALTITUDE
CALIBRATION BREW
(Optional, but recommended for
users in high-altitude areas.)
Because water boils at lower
temperatures at higher altitudes,
running a calibration c ycle before
your first brew allows the unit to
detect the bo iling point of water
at your locatio n. Refer to the
Owner’s Guide for instructions.
FILLING T HE WATER RESERVOIR
CUP, MUG, OR C ARAFE
FILL TO THE M AX LIN E
Fill up to, but d o not exceed , the Max Fill l ine.
REMOVABLE FILTER HOLDER & FILTER OPTIONS
TRAVEL MU G
& XL SIZES
Place your XL Cup, Travel
Mug, or XL Tumbler on
the base of the brewer.
CUP
Pull down th e cup
platfor m to set
your mug on it .
CARAFE
Place your carafe on the
Intelligent Warming Plate.
The Intelligent Warming
Plate will only turn on if
brewing a Full or Half Carafe
of Classic or Rich Brew.
WANT YOUR COFFE E TO STAY HOT LONGER ?
You can program how long the Intelligent Warming Plate
remains on (up to 4 hours) and/or set the temperature to
High or Low. Refer to the Owner’s Guide for instructions.
3
MANUALLY TURN OFF THE INTELLIGENT WARMING
PLATE BY PRES SING STAY WARM AGAIN.
NOTE: The HOT S URFACE
indicato r will
illumin ate when the wa rming pla te surface i s hot.
The indic ator will rem ain illum inated unti l the
warming p late has retur ned to a safe tem peratur e.
NOTE: A perm anent fil ter is not incl uded
with this unit , but can be p urchase d online
at ninjakitchen.com .
The filter ho lder rem oves for easy fi lling and q uick clea nup. Plac e either a pa per filter or
perman ent filter (sold s eparatel y) into the filter ho lder. To avoid spills and d rips afte r a brew,
keep the pa per or per manent fi lter inside t he filter hol der as you ca rry it to the tr ash.
Place your p ermane nt mesh filte r into the
filter hold er, then add you r coee dir ectly
into it.
IF USIN G
PERMANENT FILTER
Fold a #4 paper c one filter al ong the sea ms
and inse rt firmly in to the filter ho lder.
IF USIN G
PAPER FILTER
 Loading...