

Page 1
®
Master Prep® Professional
QB1000 Series
OWNER’S GUIDE
Page 2

IMPORTANT SAFETY INSTRUCTIONS
For Household Use Only
WHEN USING ELECTRICAL APPLIANCES, BASIC
SAFETY PRECAUTIONS SHOULD ALWAYS BE
FOLLOWED, INCLUDING THE FOLLOWING:
READ ALL INSTRUCTIONS BEFORE USING YOUR
NINJA® MASTER PREP® PROFESSIONAL.
IMPORTANT:
This appliance is not intended for use by persons with
reduced physical, sensory or mental capabilities, or
lack of experience and knowledge, unless they have
been given supervision or instruction concerning use of
the appliance by a person responsible for their safety.
Children shall not use or play with this appliance. Close
supervision is necessary to keep appliance and cord
out of reach of children during use.
WARNING:
TO REDUCE THE RISK OF FIRE, ELECTRIC SHOCK OR
INJURY:
1 To protect against electric shock, DO NOT
immerse cord, plug or any part of the main unit in
water or any other liquids.
2 DO NOT let cord hang over edge of table or
counter, or touch hot surfaces.
3 DO NOT allow children to operate the appliance or
use as a toy. Close supervision is necessary when
any appliance is used near children.
4 DO NOT use with damaged cord or plug.
5 DO NOT USE if the appliance is not working, has
been dropped, dropped into water, damaged or
left outdoors.
6 NO SERVICEABLE PARTS. Incorrect reassembly or
repair can cause a risk of electrical shock or injury
to persons when the appliance is used. Contact
Customer Service or Service Center for the repair or
replacement under the warranty agreement.
7 If the supply cord is damaged, it must be replaced
by the manufacturer, its service agent or similarly
qualified persons in order to avoid hazard.
8 Unplug appliance from outlet when not in use and
before cleaning.
9
Turn the appliance off and remove the power cord
from the electrical outlet when not in use, before
assembling or disassembling parts, accessing
parts that move while in use and before cleaning.
To unplug, grasp the plug and pull from the
electrical outlet. Never pull from the power cord.
10 DO NOT place on or near a hot gas or electric
burner.
1
1-877-646-5288
Page 3

11 DO NOT operate the appliance for more than 15
seconds.
12 DO NOT operate the appliance empty.
13 Extreme caution must be used when moving an
appliance containing hot food, water or other
liquids.
14 Use this appliance on a stable work surface away
from water.
15 DO NOT remove the motor head before the
chopping blades have stopped turning.
16 CAUTION! Chopping blades are sharp, handle
with care. When handling the chopping blades,
always hold by the plastic shaft.
17 DO NOT attempt to sharpen blades.
18 DO NOT expose the pitchers or bowl to extreme
temperature changes.
19 DO NOT use the pitchers or bowl if they are
cracked or chipped.
20 DO NOT use the appliance if chopping blades are
bent or damaged.
21 Avoid contact with moving parts at all times.
Keep hands, hair, clothing as well as spatulas and
other utensils away from pitcher or chopping bowl
during operation to prevent risk of personal injury
and /or damage to the appliance.
22 CAUTION: DO NOT PROCESS HOT FOODS
OR HOT LIQUIDS.
Allow hot ingredients to cool
before processing.
23 Immediately release the On/Off pulse button on
the motor head in the event that the appliance
malfunctions during use.
24 To reduce the risk of injury, NEVER operate the
appliance without the splash guard in place;
DO NOT try to defeat the interlock mechanism;
make sure that the cutting blades are properly
assembled before operating the appliance.
25 DO NOT use outdoors.
26 DO NOT use appliance for other than intended
use.
27 If the appliance overheats, a thermal switch will
become activated and shut off the motor. To reset,
unplug the appliance and let it cool down for
approximately 10 minutes before using again.
28 The use of accessory attachments, including
canning jars not recommended by EURO-PRO
Operating LLC may cause fire, electrical shock or
risk of personal injury.
NOTE: This unit has a short power supply cord to
reduce the risk resulting from becoming entangled in
or tripping over a long cord. An extension cord may be
used if you are careful in its use.
1 If using an extension cord, the electrical rating
of the extension cord should be rated at least 15
amperes. Extension cords rated for less amperage
may overheat.
2 An extension cord must be arranged so that it will
not drape over the countertop or tabletop where
it can be pulled on by children or tripped over
accidentally.
SAVE THESE
INSTRUCTIONS
2
Page 4

This appliance complies with the WEEE-Directive 2012/19/EU on the disposal of electrical and electronic equipment ( WEEE).
This marking indicates that this product should not be disposed with other household wastes throughout the
EU. To prevent possible harm to the environment or human health from uncontrolled waste disposal, recycle it
responsibly to promote the sustainable reuse of material sources. To return your used device, please use the return
and collection systems or contact the retailer where this product was purchased. They can take this product for
environmental safe recycling.
This appliance complies with the European directives for electromagnetic compatibility (EMC) 2004/108/EC and its revisions, as
well as Low Voltage Directive (LVD) 2006/95/EC and its revisions.
THIS MANUAL COVERS MODEL:
QB10******* 30
TECHNICAL SPECIFICATIONS
Voltage: 220-240V~, 50/60Hz.
Power: 500 Watts
Pitcher Capacity: 1.25 L
1.5 L
Bowl Capacity: 500 ml
3
1-877-646-5288
Page 5
Contents
Thank you for
purchasing the
Ninja® Master
Prep® Professional.
Getting Started ................................................................................................................. 5
Using the Master Prep® Professional Pitcher ....................................................................... 7
Using the Master Prep® Professional Bowl .......................................................................... 9
Cleaning and Maintenance .............................................................................................. 11
Troubleshooting Guide .....................................................................................................11
4
Page 6

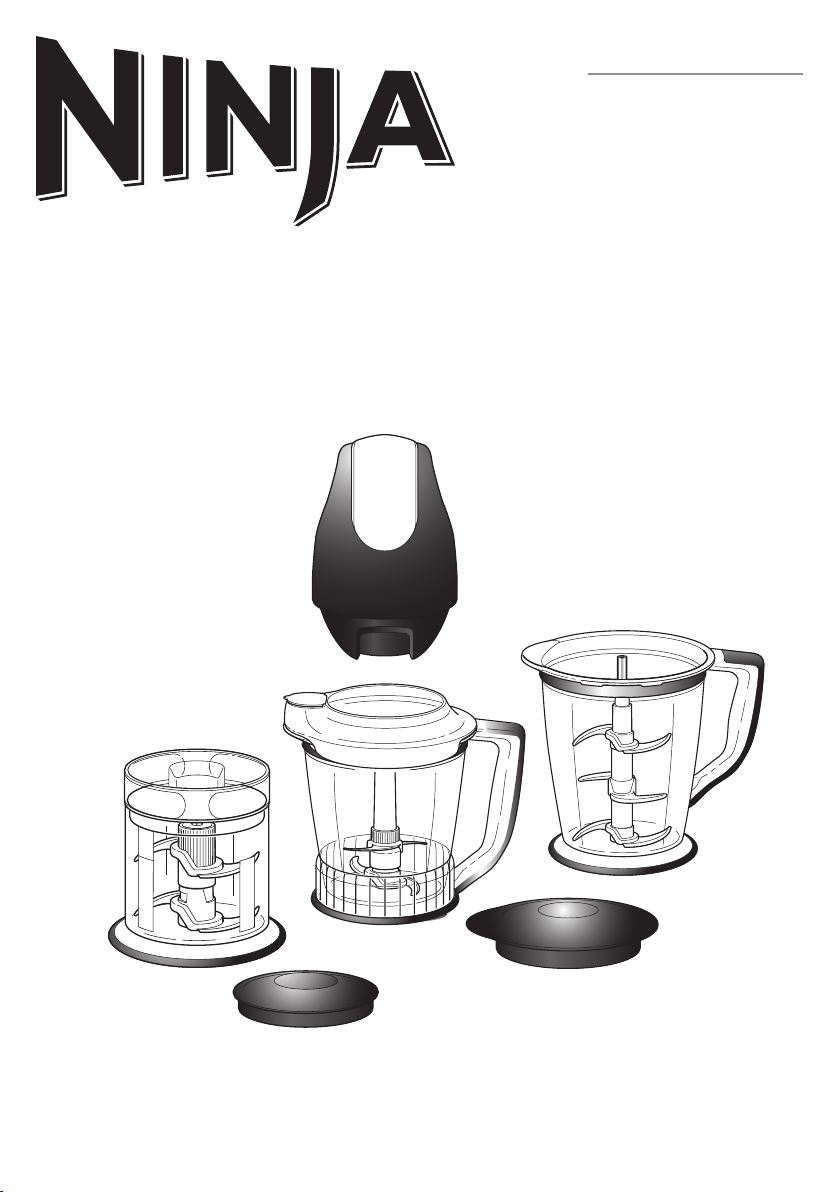
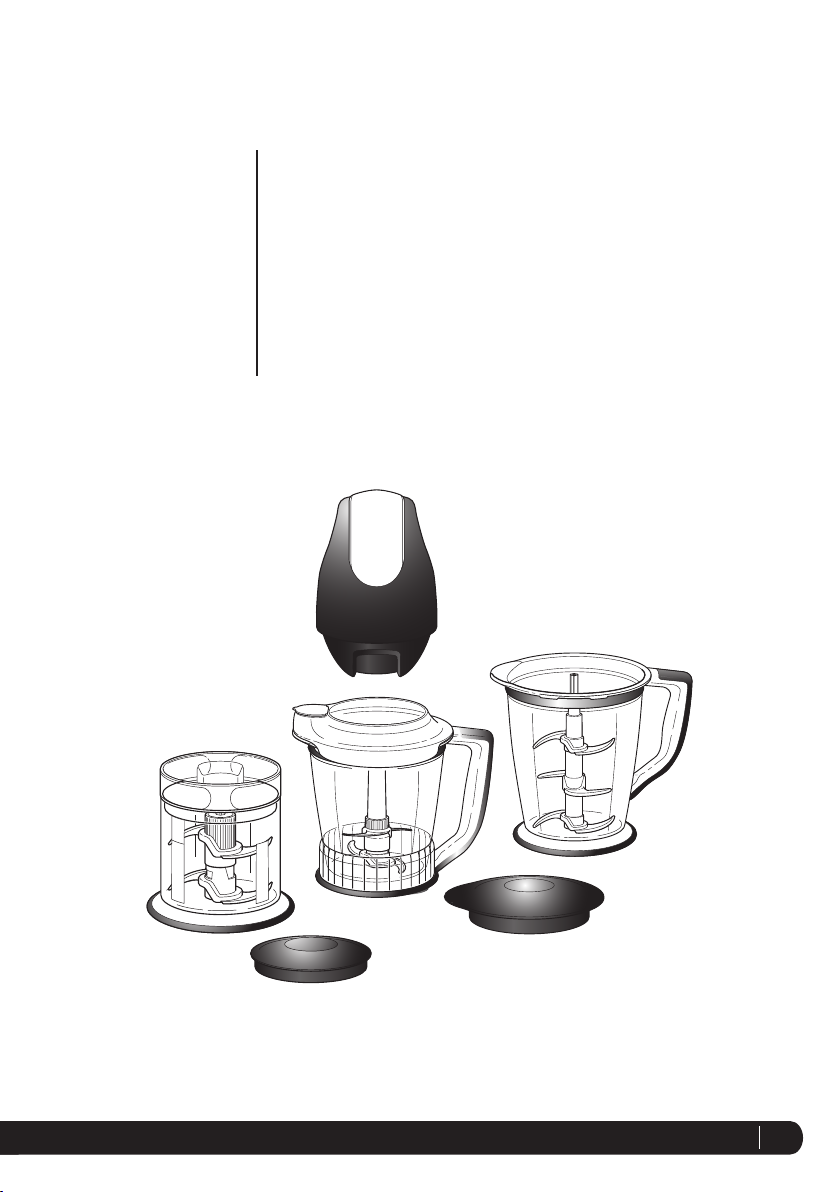
Getting Started
a
b
c
d
k
e
h
l
m
f
i
n
g
j
g g
o
a On/Off Pulse Button
b Power Head
c Pouring Spout
d Pitcher Splash Guard
e Ninja® 6-Blade
f Master Prep® Professional 1.5 L Pitcher
with Non-Slip Base
g Spindle Pin
h Ninja® 4-Blade
5
1-877-646-5288
i Master Prep® Professional 1.25 L Pitcher
with Non-Slip Base
j Pitcher Storage Lid
k Bowl Splash Guard
l Upper Blade
m Lower Blade
n Master Prep® Professional Bowl with
Non-Slip Base
o Bowl Storage Lid
p Power Cord (not shown)
Page 7

The Ninja® Master Prep® Professional is an indispensable kitchen tool that is perfect for blending, chopping, mixing or pureeing
when preparing your favorite recipes. For best results, be sure to carefully read all the instructions contained in the manual
before using this appliance.
500 Watt Power Head
NEVER allow the power head to become wet when plugged into an electrical outlet.
WARNING: The power head should never be immersed in water or any other liquid.
CAUTION: Make sure that the power head is unplugged from the electrical outlet and that the blades have stopped
turning before attaching or removing any accessory.
CAUTION: Blades are sharp! Use extreme caution when handling the blades. Always hold them by the
shaft. Do not attempt to sharpen blades.
IMPORTANT: Never run the appliance empty.
6
Page 8

Using the Master Prep® Professional Pitcher
Shaft
Fig. 1
CAUTION: Blades are sharp! Use extreme caution when
handling the blades. Always hold them by the shaft.
IMPO RTAN T: Never run the appliance empty.
1 Place the Master Prep® Professional Pitcher on a clean, dry,
level surface.
2 Holding the blade by the shaft, place it onto the spindle pin
inside the Master Prep® Professional Pitcher.
• Use the Ninja® 6-Blade in the 1.5 LPitcher. (Fig. 1)
• Use the Ninja® 4-Blade in the 1.25 L Pitcher. (Fig. 2)
IM POR TANT: Place blade inside the container carefully as
blades are sharp.
Fig. 3
Shaft
Fig. 2
WARNING: DO NOT try to place the blade onto the power
head and then into the Master Prep® Professional Pitcher.
3 Add the ingredients to be processed into the Master Prep®
Professional pitcher.
IM POR TANT: Never add ingredients into the Master Prep®
Professional pitcher before placing the blades in first.
4 Place the pitcher splash guard onto the top of the Master
Prep® Professional pitcher. (Fig. 3)
7
1-877-646-5288
Page 9

Fig. 4 Fig. 5
5 Place the power head on top of the pitcher splash guard
making sure that it is securely in place. (Fig. 4) DO NOT
attempt to operate the appliance without the safety splash
guard in place.
6 To start the applian ce, plug the power cord into the
electrical outlet, securely hold power head while operating
and press on the on/off pulse button located on the top of
the power head. (Fig. 5)
7 Hold the Master Prep® Professional pitcher firmly while
depressing the on/off pulse button to ensure the unit stays
in place.
NOTE: DO NOT operate the appliance continuously for
more than 15 seconds at a time.
8 To stop the appliance, remove your fingers from the on/off
pulse button.
9 In order to obtain a better quality of chopping, operate the
appliance by using the “pulse” method.
10 Make sure that the blades have stopped completely before
removing the power head.
11 If the ingredients stick to the side of the Master Prep®
Professional pitcher, stop the appliance, remove the power
head and the splash guard. Use a spatula to dislodge the
pieces and then replace the splash guard and the power
head. Continue processing.
12 Depending on the consistency of the contents, use the
pouring spout to empty liquid contents.
13 For thicker consistencies, first remove splash guard and
blade (by its shaft), then empty contents of the Master
Prep® Professional Pitcher.
8
Page 10

Using the Master Prep® Professional Bowl
Shaft
Fig. 6 Fig. 7
CAUTION: Blades are sharp! Use extreme caution when
handling the blades. Always hold them by the shaft.
IM POR TANT: Never run the appliance empty.
1 Place the Master Prep® Professional bowl on a clean, dry,
level surface.
2 Holding the lower blade by the shaft, place it over the
spindle pin inside the Master Prep® Professional bowl.
(Fig. 6)
3 Carefully insert the upper blade over the lower blade
rotating it until it locks onto the lower blade. (Fig. 7)
IM POR TANT: Always assemble the blades inside the
container.
9
1-877-646-5288
WARNING: DO NOT try to place the blades onto the power
head and then into the Master Prep® Professional bowl.
4 Place the food that you want to process into the Master
Prep® Professional bowl.
IM POR TANT: Never add ingredients into the Master Prep®
Professional bowl before placing the blade assembly in first.
NOTE: DO NOT add more than 450 ml dry or 230 ml liquid
ingredients as this will strain the motor and may cause
overflow.
Page 11

Fig. 8 Fig. 9 Fig. 10
5 Place the splash guard on the bowl. (Fig. 8)
6 Place the power head on top of the splash guard making
sure that it is securely in place. (Fig. 9) DO NOT attempt
to operate the appliance without the safety splash guard in
place.
7 To start the appliance, plug the power cord into the
electrical outlet, securely hold power head while operating
and press on the on/off pulse button located on the top of
the power head. (Fig. 10)
8 Hold the Master Prep® Professional bowl firmly while
depressing the on/off pulse button to ensure the unit stays
in place.
NOTE: DO NOT operate the appliance continuously for
more than 15 seconds at a time. Be careful not to over
process. For coarsely chopped foods, use repeated short
pulsing action until the desired consistency is reached.
9 To stop the appliance, remove your fingers from the on/off
pulse button.
10 In order to obtain a better quality of chopping, operate the
appliance by using the “pulse” method.
11 Make sure that the blades have stopped completely before
removing the power head.
12 If the ingredients stick to the side of the Master Prep®
Professional bowl, stop the appliance, remove the power
head and the splash guard. Use a spatula to dislodge the
pieces and then replace the splash guard and the power
head. Continue processing.
13 Remove the blade assembly by its shaft before you empty
the contents of the Master Prep® Professional bowl.
HINTS & TIPS FOR USING YOUR NINJA® MASTER
PREP® PROFESSIONAL
• The chopping blades can be used for chopping meat, fish,
vegetables, cheese etc.
• For mincing, chopping and pureeing, increase the length of
pulses.
• For coarse chopping, use short, quick pulses and monitor
food texture.
• Pre-cut larger pieces to make them fit into the Master
Prep® Professional. When chopping hard foods (e.g. meat,
cheese) cut into 1-inch cubes.
10
Page 12

Cleaning and Maintenance
CAUTION: Make sure that the power head is unplugged from power source before inserting or removing any attachment and
before cleaning.
DO NOT immerse the power head into water or any other liquid. Clean with a damp sponge or cloth and wipe dry.
The Master Prep® Professional pitcher, Master Prep® Professional bowl, storage lids, Master Prep® Professional splash guards
and chopping blades are all dishwasher safe. It is recommended to place the storage lids and the chopping blades on the top
rack. Use extreme caution when handling the chopping blades as they are very sharp.
Clean the Ninja® Master Prep® Professional and all parts before first use and immediately after each use.
Troubleshooting Guide
PROBLEMS POSSIBLE REASONS & SOLUTIONS
Check that the bottom of motor head is clean and there is no food blocking
connection when placing on containers.
There is too much food in the container.
Motor Doesn’t Start or Blades Don’t
Rotate.
The unit has overheated. Unplug and wait approximately 10 minutes before using
again.
Make sure the splash guard is securely on container.
Make sure the power head is securely placed on splash guard.
Check that the plug is securely inserted into the electrical outlet.
Check fuse or breaker. Replace fuse/reset breaker.
Food is Unevenly Chopped.
Food is Chopped Too Fine or is Too
Watery.
Food Collects On Splash Guard/Safety
Cover or On the Sides of the Master
Prep® Professional Pitcher or Master
Prep® Professional Bowl.
You Cannot Achieve Snow From
Solid Ice.
11
1-877-646-5288
Either you are chopping too much food at one time, or the pieces are not small
enough. Try cutting the food into smaller pieces of even size and processing
smaller amounts per batch.
The food has been over processed. Use brief pulses or process for shorter time.
Let blades stop completely between pulses.
You may be processing too much food. Turn the machine off. When the blades
stop rotating, remove the power head and the splash guard. Remove some of the
food being processed.
Do not use ice that has been sitting out or has started to melt. Be sure to use
short pulses in the beginning to break up large pieces.
Page 13

Notes
12
Page 14

**THIS WARRANTY IS FOR ALL COUNTRIES EXCEPT GERMANY**
ONE (1) YEAR LIMITED WARRANTY
EURO-PRO Operating LLC warrants this product to be free from material defects and workmanship for a period of one (1) year from
the date of purchase when utilized for normal household use, subject to the following conditions, exclusions and exceptions.
The liability of EURO-PRO Operating LLC is limited solely to the cost of the repair or replacement of the unit at our option. This
Limited Warranty does not cover normal wear of parts and does not apply to any unit that has been tampered with or used for
commercial purposes. This Limited Warranty does not cover damage caused by misuse, abuse, negligent handling or damage due
to faulty packaging or mishandling in transit. This Limited Warranty does not cover damage or defects caused by or resulting from
damages from shipping or repairs, service or alteration to the product or any of its parts, which have been performed by a repair person
not authorized by EURO-PRO Operating LLC.
If the appliance is found to be defective in material or workmanship, EURO-PRO Operating LLC will repair or replace it free of charge.
Proof of purchase is required and a fee of $19.95 will apply to cover the cost of return freight. *
This Limited Warranty is extended to the original purchaser of the unit and excludes all other legal, implied and/or conventional
warranties. The responsibility of EURO-PRO Operating LLC if any, is limited to the specific obligations expressly assumed by it under
the terms of this Limited Warranty. In no event is EURO-PRO Operating LLC liable for incidental or consequential damages to anyone
of any nature whatsoever. Some states do not permit the exclusion or limitation of incidental or consequential damages, so the above
may not apply to you.
This Limited Warranty gives you specific legal rights, and you may also have other rights which vary from state to state or from
province to province.
*IMPORTANT: Carefully pack item to avoid damage in shipping. Be sure to include proof of purchase date and to
attach tag to item before packing with your name, complete address and phone number with a note giving purchase
information, model number and what you believe is the problem with the item. We recommend you insure the package
(as damage in shipping is not covered by your Limited Warranty). Mark the outside of your package “ATTENTION
CUSTOMER SERVICE”.
Product Registration
The registration will enable us to contact you in the unlikely event of a product safety notification. By registering you acknowledge to
have read and understood the instructions for use, and warnings set forth in the accompanying instructions.
13
1-877-646-5288
Page 15

**THIS WARRANTY IS FOR GERMANY ONLY**
TWO (2) YEAR LIMITED WARRANTY
EURO-PRO Operating LLC warrants this product to be free from material defects and workmanship for a period of two (2) years from
the date of purchase when utilized for normal household use, subject to the following conditions, exclusions and exceptions.
The liability of EURO-PRO Operating LLC is limited solely to the cost of the repair or replacement of the unit at our option. This
Limited Warranty does not cover normal wear of parts and does not apply to any unit that has been tampered with or used for
commercial purposes. This Limited Warranty does not cover damage caused by misuse, abuse, negligent handling or damage due
to faulty packaging or mishandling in transit. This Limited Warranty does not cover damage or defects caused by or resulting from
damages from shipping or repairs, service or alteration to the product or any of its parts, which have been performed by a repair person
not authorized by EURO-PRO Operating LLC.
If the appliance is found to be defective in material or workmanship, EURO-PRO Operating LLC will repair or replace it free of charge.
Proof of purchase is required and a fee of $19.95 will apply to cover the cost of return freight. *
This Limited Warranty is extended to the original purchaser of the unit and excludes all other legal, implied and/or conventional
warranties. The responsibility of EURO-PRO Operating LLC if any, is limited to the specific obligations expressly assumed by it under
the terms of this Limited Warranty. In no event is EURO-PRO Operating LLC liable for incidental or consequential damages to anyone
of any nature whatsoever. Some states do not permit the exclusion or limitation of incidental or consequential damages, so the above
may not apply to you.
This Limited Warranty gives you specific legal rights, and you may also have other rights which vary from state to state or from
province to province.
*IMPORTANT: Carefully pack item to avoid damage in shipping. Be sure to include proof of purchase date and to
attach tag to item before packing with your name, complete address and phone number with a note giving purchase
information, model number and what you believe is the problem with the item. We recommend you insure the package
(as damage in shipping is not covered by your Limited Warranty). Mark the outside of your package “ATTENTION
CUSTOMER SERVICE”.
Product Registration
The registration will enable us to contact you in the unlikely event of a product safety notification. By registering you acknowledge to
have read and understood the instructions for use, and warnings set forth in the accompanying instructions.
14
Page 16

Euro-Pro Operating LLC
180 Wells Avenue Suite 200, Newton MA 02459
United States of America
1-877-646-5288
Copyright © 2015 Euro-Pro Operating LLC
Euro-Pro, Master Prep and Ninja are registered trademarks of
Euro-Pro Operating LLC.
Technical Details
Model number: QB10******* 30
Input: 500 Watts
Printed in China
Illustrations may differ from actual product. We are constantly
striving to improve our products, therefore the specifications
contained herein are subject to change without notice.
QB10_INTL_30_IB_151109_6
 Loading...