

NINGBO CSTAR IMP and EXP 0043 User Manual
43mm
English
SR06- iTAG User Manual
The tiny iTag is a Bluetooth 4.0 tracker. It can find your
valuable belongings quickly using your smart phone with
APP “iSearching”. Through the app, the device can find
your belongings, find your phone, drop a pin on a map
of navigation, and be used as a selfie remote and voice
recorder.
35mm
The iTag has a range of approximately 75 feet from your
bluetooth enable device.
Phot ograp h
1. Pre ss the “P hotog raph” butto n, it wil l run to ca mera mo de.
2. Pre ss top le ft and ri ght ico n to chan ge the fl ashli ght and
came ra mode :
3. Press the setting button “ ” under photography to set up
the burst shooting and interval timer. Press the button on the
iTag to cintrol the smart phone and take the photo.
APP : iSear ching
Get t he free a pp on Goo gle Pla y Store o r App Sto re
Switch on/off
Switch on: Press and hold the button of the iTag for 3
seconds until the unit beeps twice.
Switch off: Press and hold the button of iTag for 3
seconds until the unit beeps once.
Loc ation
Loca tion li st:
1.Af ter par king yo ur car, pr ess the b utton o n iTag to mar k
your c urren t locat ion on th e map.
2.Pr ess “Lo catio n list” a nd you wi ll find w here yo ur car is
with e asy tra cking .
172mm
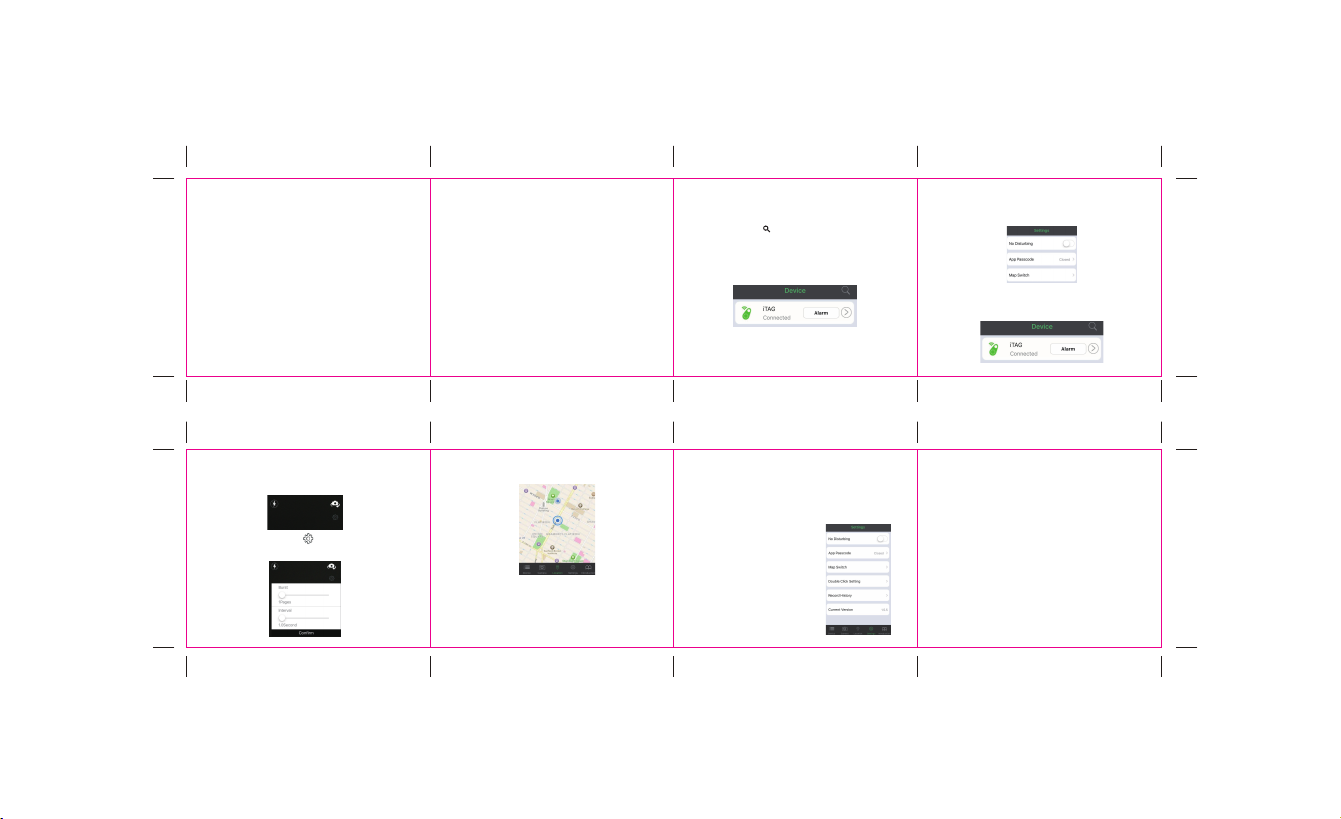
Conn ectio n
1. Turn o n the Blu etoot h devic e on smar t phone .
2. Cli ck the bu tton “ ” on iSear ching t o find iTag devic es.
3. iTag will automatically connect to the smart phone. If the App
shows “disconnected”, please click “Connect”button again.
(Note: Click the arrow icon will run to submenu for edit; such as
adding photo for iTag, rename and set the ring tone etc.)
4. To remo ve the it em from t he devi ce list ; simpl y slide t he
item t o left.
Lost h istor y:
1.If t he iTag is lo st, a pin -drop w ill be ma rked au tomat icall y
on Map to t ell you t he site i t was los t, just p ress “l ost his tory”
to fin d the rec ord.
Rema rk: To dele te the li st, jus t scrol l left th e list an d press
the “D elete ”menu .
Do Not Disturb Mode
On the “ Setti ng”in terfa ce,sw itch on “ No Disturbing ” . The ale rt
on of al l devic es will b e shut do wn.
func ti
Sett ing for Al ert
1. Cli ck the “A lert” b utton o n the App to t rigge r the ale rt.
2. To stop t he aler t, clic k the but ton on iTag ; or clic k “stop a lert”
on the Ap p.
APP Passcode setting: to set up a password.
Map sw itch: to choo se Goog le map or B aidu ma p.
Doub le clic k setti ng:se tting f or alar m or voic e recor ding
Reco rd Hist ory:
1.When you select “voice recording” under “Double clock
setting”, double click iTag to record the voice.
2.To listen the recorded voice, go to “record history” and
select the file
3.To delete the recorded voice, scroll left the list. Press the
play button to play/pause and scroll left the list to delete it.
Version:Version of current App
Battery replacement
iTag uses a CR2032 Lithium Battery.

FCC Statement
This device complies with Part 15 of the FCC Rules. Operation is subject to the following
two conditions:
(1)This device may not cause harmful interference.
(2)This device must accept any interference received, including interference that may
cause undesired operation.
2. Changes or modifications not expressly approved by the party responsible for
compliance could void the user’s authority to operate the equipment.
Note:This equipment has been tested and found to comply with the limits for a class B
digital device,pursuant to Part 15 of the FCC Rules. These limits are designed to provide
reasonable protection against harmful interference in a residential installation.
This equipment generates uses and can radiate radio frequence energy and,if not
installed and used in accordance with the instructions,may cause harmful interference to
radio communications.However,there is no guarantee that interference will not accor in a
particular installation.if this equipmemt does cause harmful interference to radio or
television reception,which can be determined by turning the equipment off and on,the user
is encouraged to try to correct the interference by one or more of the following measures:
• Reorient or relocate the receiving antenna.
• Increase the separation between the equipment and receiver.
• Connect the equipment into an autlet on a circuit different from that to which the
receiver is connectec.
• Consult the dealer or an experienced radio/TV technician for help.
The device has been evaluated to meet general RF exposure requirement. The devicecan
be used in portable exposure condition without restriction.
 Loading...