

NimbeLink Skywire, Skywire NL-SW-LTE-TSVG, Skywire NL-SW-LTE-TSVG-B, Skywire NL-SW-LTE-TNAG-B Series Manual

Configuring Skywire
®
CAT 3 LTE
Modems for MBIM Mode on Windows
8 and 10
NimbeLink Corp
Updated: October 2018
PN 1001794 rev 1 © NimbeLink Corp. 2018. All rights reserved. 1

Table of Contents
Table of Contents 2
1. Introduction 3
1.1 Overview 3
1.2 Supported Devices 3
2. Skywire Configuration Procedure 4
2.1 Introduction 4
2.2 Install Drivers 4
2.3 Preliminary Skywire Setup 4
2.4 Enable MBIM Mode 4
2.5 Enable Cellular Functionality 5
3. Configure Windows Cellular Settings 6
3.1 Connect the Skywire to USB 6
3.2 Configure the Connection Settings 7
3.2.1 Verizon Connection Settings 8
3.2.2 AT&T Connection Settings 9
3.2.3 T-Mobile Connection Settings 10
3.3 Verify Cellular Connectivity 11
PN 1001794 Rev 1 © NimbeLink Corp. 2018. All rights reserved. 2

1. Introduction
1.1 Overview
The Mobile Broadband Interface Model (MBIM) is a networking protocol created by the
USB Implementers Forum, and is designed for USB-based networking solutions, such
as cellular modems. This protocol facilitates the connection of USB-enabled embedded
modems with other USB-enabled electronics such as personal computers.
This application note will describe how to configure a 4G LTE CAT3 Skywire modem to
use MBIM protocol and establish a connection to a cellular LTE network. Please note
that MBIM protocol only works for Windows 8 and Windows 10. Users running Windows
7 must use RNDIS protocol to implement an ethernet over USB interface.
1.2 Supported Devices
This application note has been tested on and designed for use with the following
Skywire modems:
Supported Device
Firmware Version Tested
Carrier
NL-SW-LTE-TSVG
17.01.571
Verizon
NL-SW-LTE-TSVG-B
17.01.573
Verizon
NL-SW-LTE-TNAG-B
17.01.502
AT&T and T-Mobile
PN 1001794 Rev 1 © NimbeLink Corp. 2018. All rights reserved. 3

2. Skywire Configuration Procedure
2.1 Introduction
Section 2 describes the part of the setup procedure that is common for each of the
different cellular carriers. This includes the installing of Windows drivers, enabling of
MBIM mode, and the verification of cellular signal strength and cellular functionality.
2.2 Install Drivers
First, install the most recent Windows 8/10 drivers for the Skywire. These drivers are
located at the link below:
https://nimbelink.com/Documentation/Skywire/Telit_USB_Driver_Win_Desktop.zip
Inside of the zip file is a guide for the driver installation process, as well as the drivers
themselves. Follow the instructions in the guide to ensure that the drivers are installed
correctly. Once the drivers have been installed, proceed to Section 2.3.
2.3 Preliminary Skywire Setup
Ensure that the target Skywire has a functioning SIM card inserted, and that the Skywire
is properly installed into a Skywire development kit or a similar development interface.
Additionally, ensure that the modem’s firmware is up to date, and that the correct
carrier-specific firmware is installed on the modem.
Also, it is important to note that the modem must be connected via UART for Section
2.4 and Section 2.5. After that point, the modem must be connected via USB in order to
establish an internet connection using MBIM protocol.
2.4 Enable MBIM Mode
First, establish a serial connection to the target modem using a preferred terminal
emulator. Verify that the modem is responsive by issuing:
AT
The modem will respond with:
OK
After the modem is responsive, issue the following command to switch the modem into
MBIM mode:
AT#USBCFG=3
The modem will reboot. Once it is back up and running, the terminal should respond
with:
OK
PN 1001794 Rev 1 © NimbeLink Corp. 2018. All rights reserved. 4

Once the modem has rebooted, verify that the correct setting has been applied. Issue
this command:
AT#USBCFG?
The modem will respond with:
#USBCFG: 3
If the modem returns the proper response, proceed to Section 2.5. Otherwise, attempt
Section 2.4 again.
2.5 Enable Cellular Functionality
Next, ensure that cellular functionality is enabled by issuing the following command:
AT+CFUN?
If cellular functionality is indeed enabled, the modem will respond with:
+CFUN: 1,0
If the modem does not respond with the above text, issue the following command:
AT+CFUN=1,1
The ‘1,1’ argument tells the modem to restart and boot up with cellular functionality
enabled. After the modem reboots, check for functionality by issuing the first command
listed in this section.
Once cellular function has been enabled, it is important to verify the that the primary
antenna is receiving an adequate signal. To check signal strength, issue the following
command:
AT+CSQ
The modem should respond with:
+CSQ: <rssi>,<sq>
Where each item in "< >" is replaced with an integer value. See the bullet points below
for an explanation of the two parameters:
● 'rssi' indicates the received signal strength.
○ The returned value should be between 0 and 31.
○ A value of 99 indicates that the the signal strength is not detectable or is
unknown. This is usually indicative of an improperly connected antenna.
● 'sq' indicates the reference signal received quality (RSRQ).
○ The returned value should be between 0 and 7.
○ A value of 99 indicates that the received signal quality is not detectable or
is unknown. This is usually indicative of an improperly connected antenna.
For further information regarding the 'AT+CSQ' command, consult the AT command
manual. The AT command manual is located on the CAT 3 product page.
Once cellular functionality and signal strength have been verified, proceed to Section 3.
PN 1001794 Rev 1 © NimbeLink Corp. 2018. All rights reserved. 5

3. Configure Windows Cellular Settings
3.1 Connect the Skywire to USB
Now, disconnect the modem from the UART port, and plug the USB cable into the USB
port. After a short moment, the modem will pop up in the "Wireless Internet Settings"
menu in the Windows toolbar. It should look something like the image below where
'Verizon Wireless (LTE)' is replaced by the carrier that corresponds to the SIM card:
PN 1001794 Rev 1 © NimbeLink Corp. 2018. All rights reserved. 6
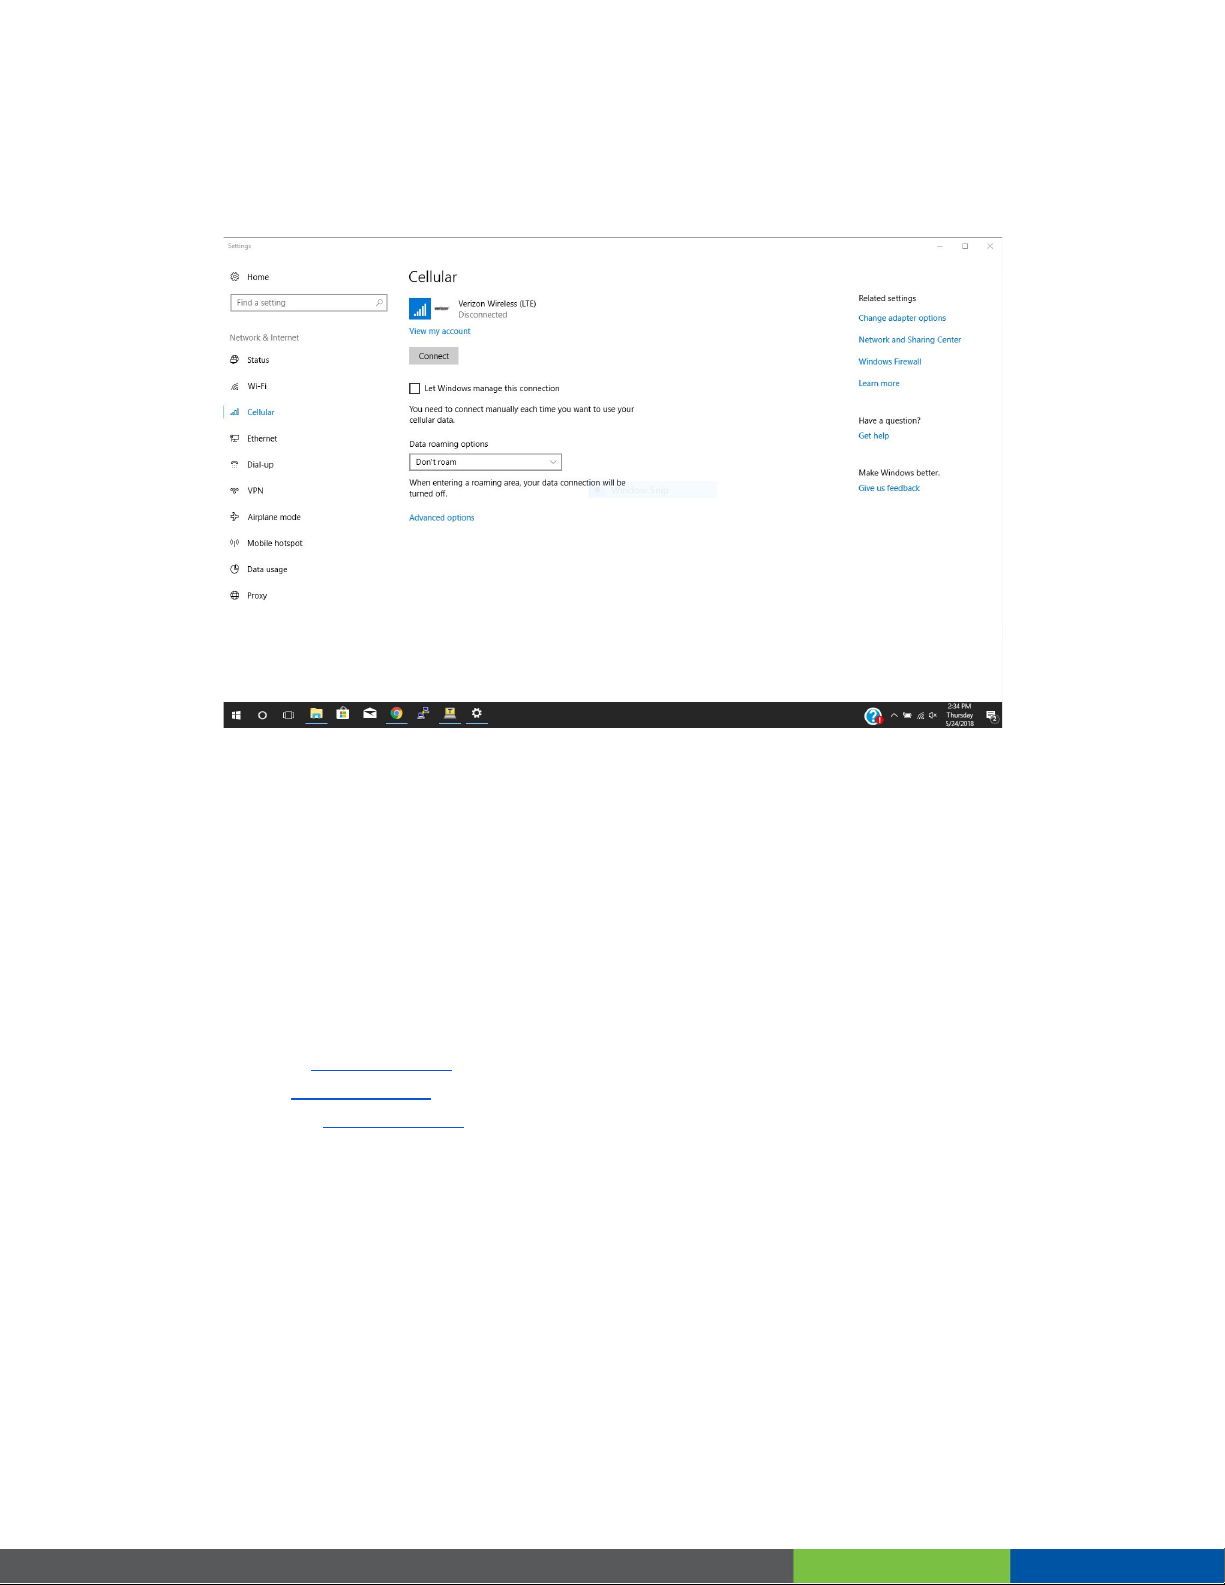
Now, open up the "Cellular" settings menu by typing “change cellular settings” into the
search bar. The menu should look like this:
If an option for a cellular connection appears in this menu, proceed to the next section.
Otherwise, make sure that the latest drivers are installed for the modem, and retry the
connection.
3.2 Configure the Connection Settings
Section 3.2 contains instructions for configuring the connection settings for each carrier.
Click on a link below or navigate to the section that contains the proper instructions for
the relevant carrier:
● Verizon: Section 3.2.1
● AT&T: Section 3.2.2
● T-Mobile: Section 3.2.3
PN 1001794 Rev 1 © NimbeLink Corp. 2018. All rights reserved. 7

3.2.1 Verizon Connection Settings
Within the "Cellular" settings menu, click on the link that says "Advanced options." A
new page will open with information about the modem. It should look similar to the
image below:
Select “Add an APN”. In the new window, enter the following information:
Note: The value of the APN field may vary. Please make sure that the APN entered into
the Windows settings is the correct APN associated with the data plan being used.
After filling out the info in the image above, press "Save" and proceed to Section 3.3.
PN 1001794 Rev 1 © NimbeLink Corp. 2018. All rights reserved. 8

3.2.2 AT&T Connection Settings
Within the Windows Cellular Settings menu, click on the link that says "Advanced
options." A new page will open with information about the modem. It should look similar
to the image below:
Select “Add an APN”. In the new window, enter the following information:
PN 1001794 Rev 1 © NimbeLink Corp. 2018. All rights reserved. 9

Note: The value of the APN field may vary. Please make sure that the APN entered into
the Windows settings is the correct APN associated with the data plan being used.
After filling out the info in the image above, press "Save" and proceed to Section 3.3.
3.2.3 T-Mobile Connection Settings
Within the Windows Cellular Settings menu, click on the link that says "Advanced
options." A new page will open with information about the modem. It should look similar
to the image below:
Select “Add an APN”. In the new window, enter the following information:
PN 1001794 Rev 1 © NimbeLink Corp. 2018. All rights reserved. 10
Note: The value of the APN field may vary. Please make sure that the APN entered into
the Windows settings is the correct APN associated with the data plan being used.
After filling out the info in the image above, press "Save" and proceed to Section 3.3.
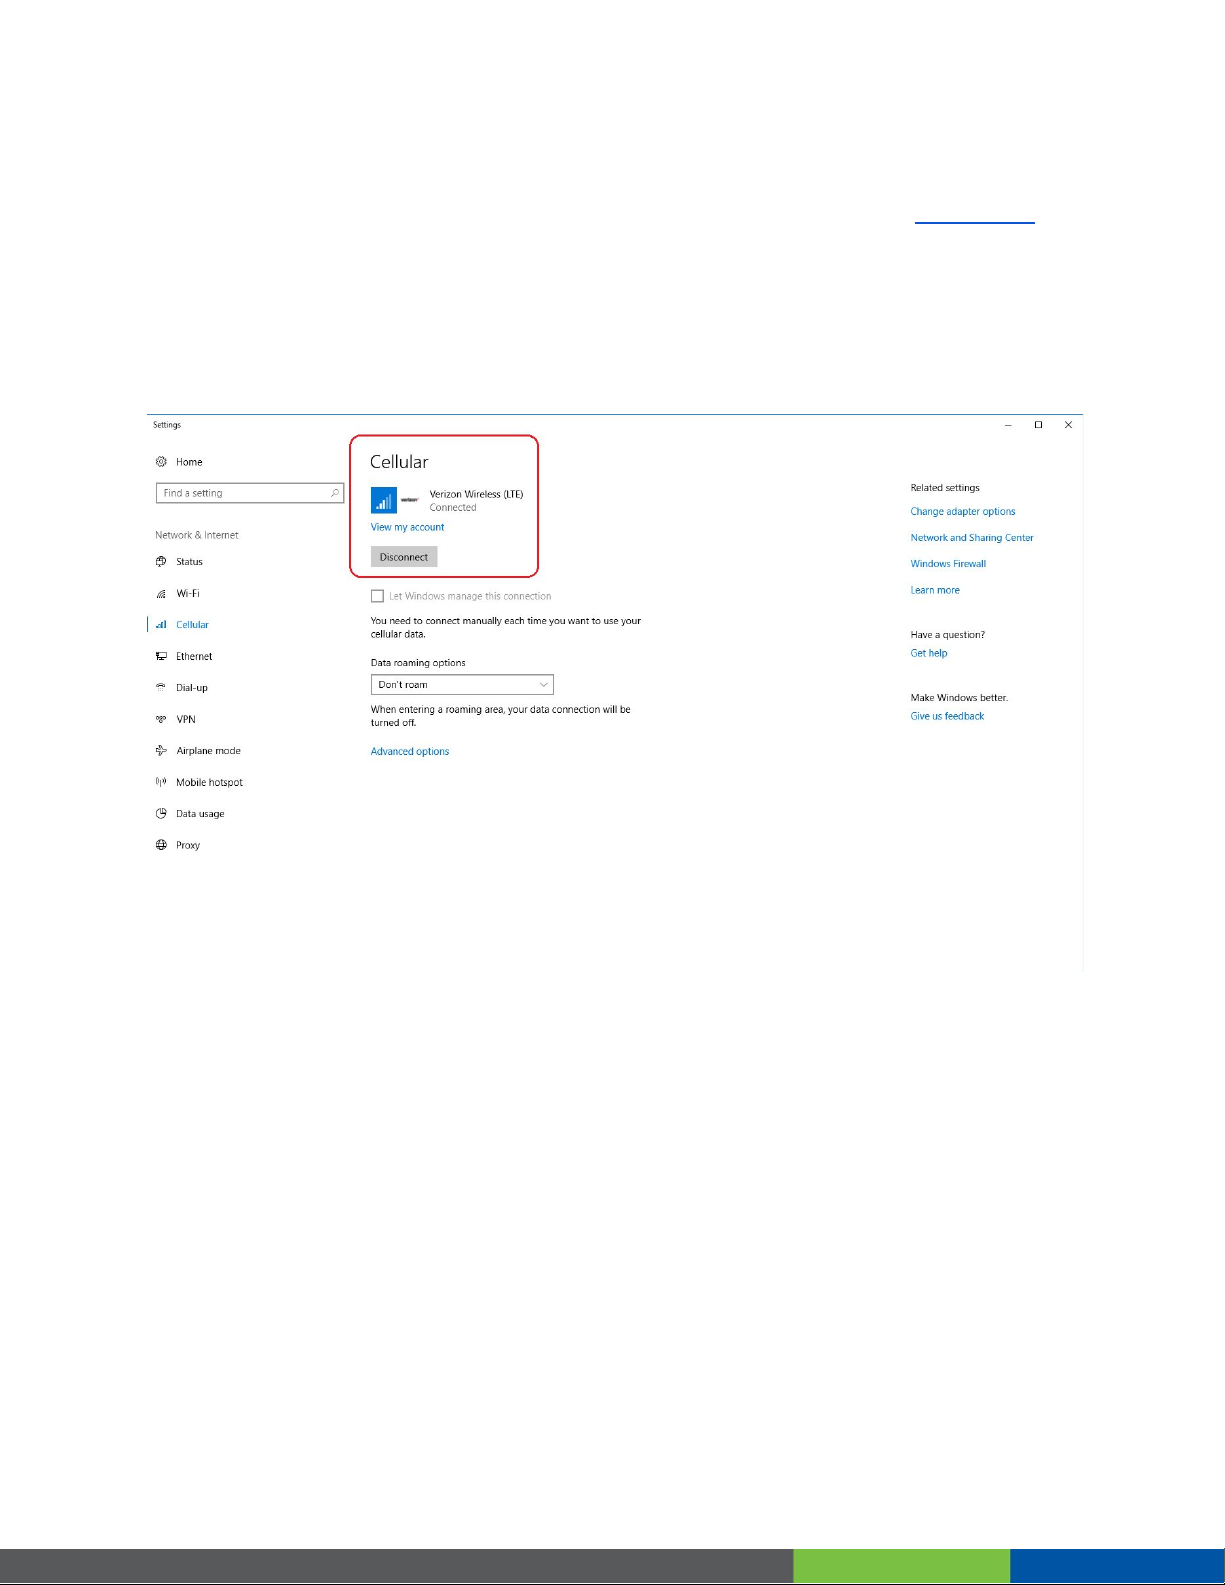
3.3 Verify Cellular Connectivity
In the "Cellular" menu, hit the ‘Connect’ button, and the modem should establish a
cellular connection. If connected, the window should look something like this:
If the cellular connection has been established, then the internet connection is ready to
use. The connection will function just like any other ethernet or WiFi connection.
PN 1001794 Rev 1 © NimbeLink Corp. 2018. All rights reserved. 11
 Loading...