

Page 1
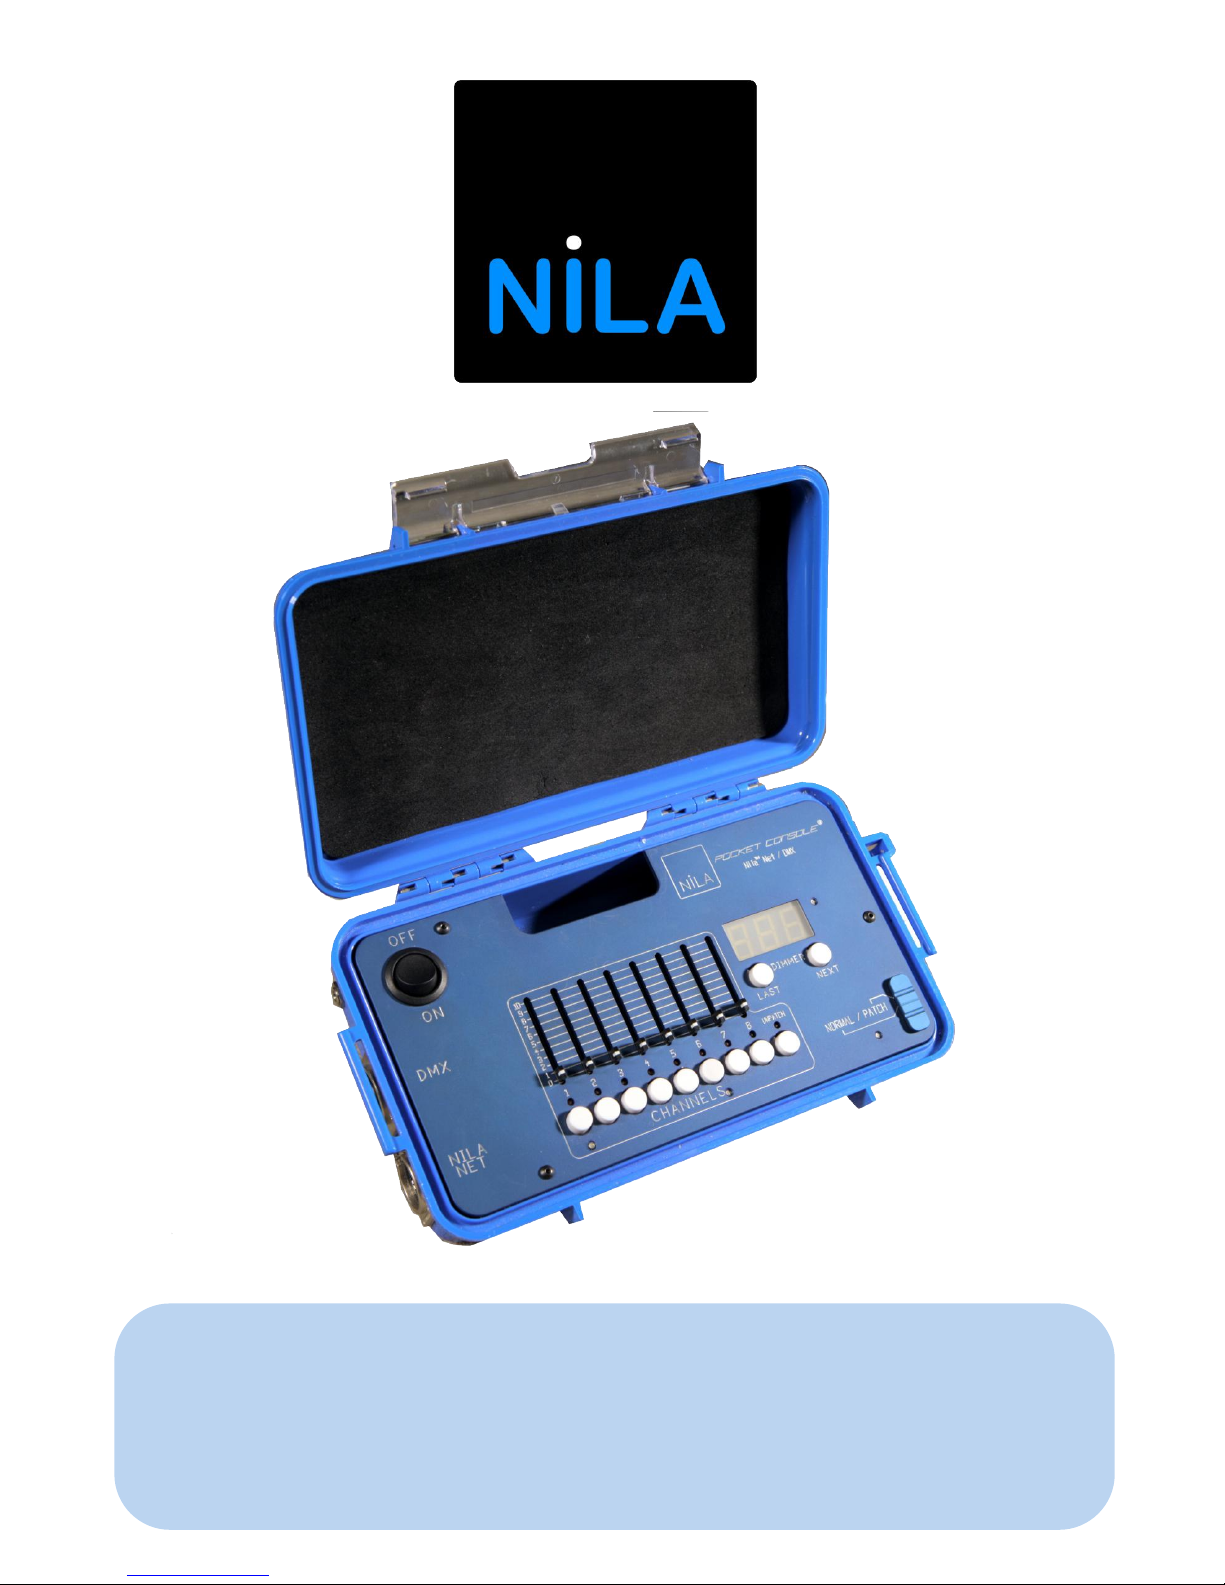
POCKET CONSOLE
USER GUIDE
Page 2
Patents Pending
Contents Copyright Nila, Inc. 2013
Nila is a registered trademark of Nila, Inc.
Nila products are intended for indoor use only (unless
clearly specified for outdoor use).
Nila products should not be used if the ambient
temperature is over 50° C (120°F).
Do not use Nila products in wet conditions unless
clearly specified for all-weather use. A shock hazard
may exist if a fixture is placed directly in water.
Nila products are not suitable for direct mounting on
normally flammable surfaces (suitable only for
mounting on non-combustible surfaces).
When mounting a Nil a product for use, make sure the
power cable is not stressed or kinked.
A shock hazard may exist if the power cable is being
stressed due to the position of the fixture.
Only connect Nila produ cts to grounded power
supplies. Nila lights can only be attached to AC power
supplies of 90 to 240 volts AC, 50 to 60 hertz (unless
specifically noted as DC compatible).
Nila products conform t o all applicable CE directives.
Nila products comply wit h North American safety
standards.
Nila products comply wit h the Restriction of Hazardous
Substances Directive.
This user guide is published by Nila, Inc. without any warranty. Improvements
and changes to this user guide necessitated by typographical errors,
inaccuracies of current information, or improvements to programs and/or
equipment may be made by Nila, Inc. at any time and without notice. Such
changes will, however, be incorporated into new editions of this user guide. All
rights reserved.
723 West Woodbury Rd., Altadena, CA, 91001 818.392.8370 www.nila.com
pocket console manual version 2 updated 2-14-14
Page 3
1 - CONTROLS
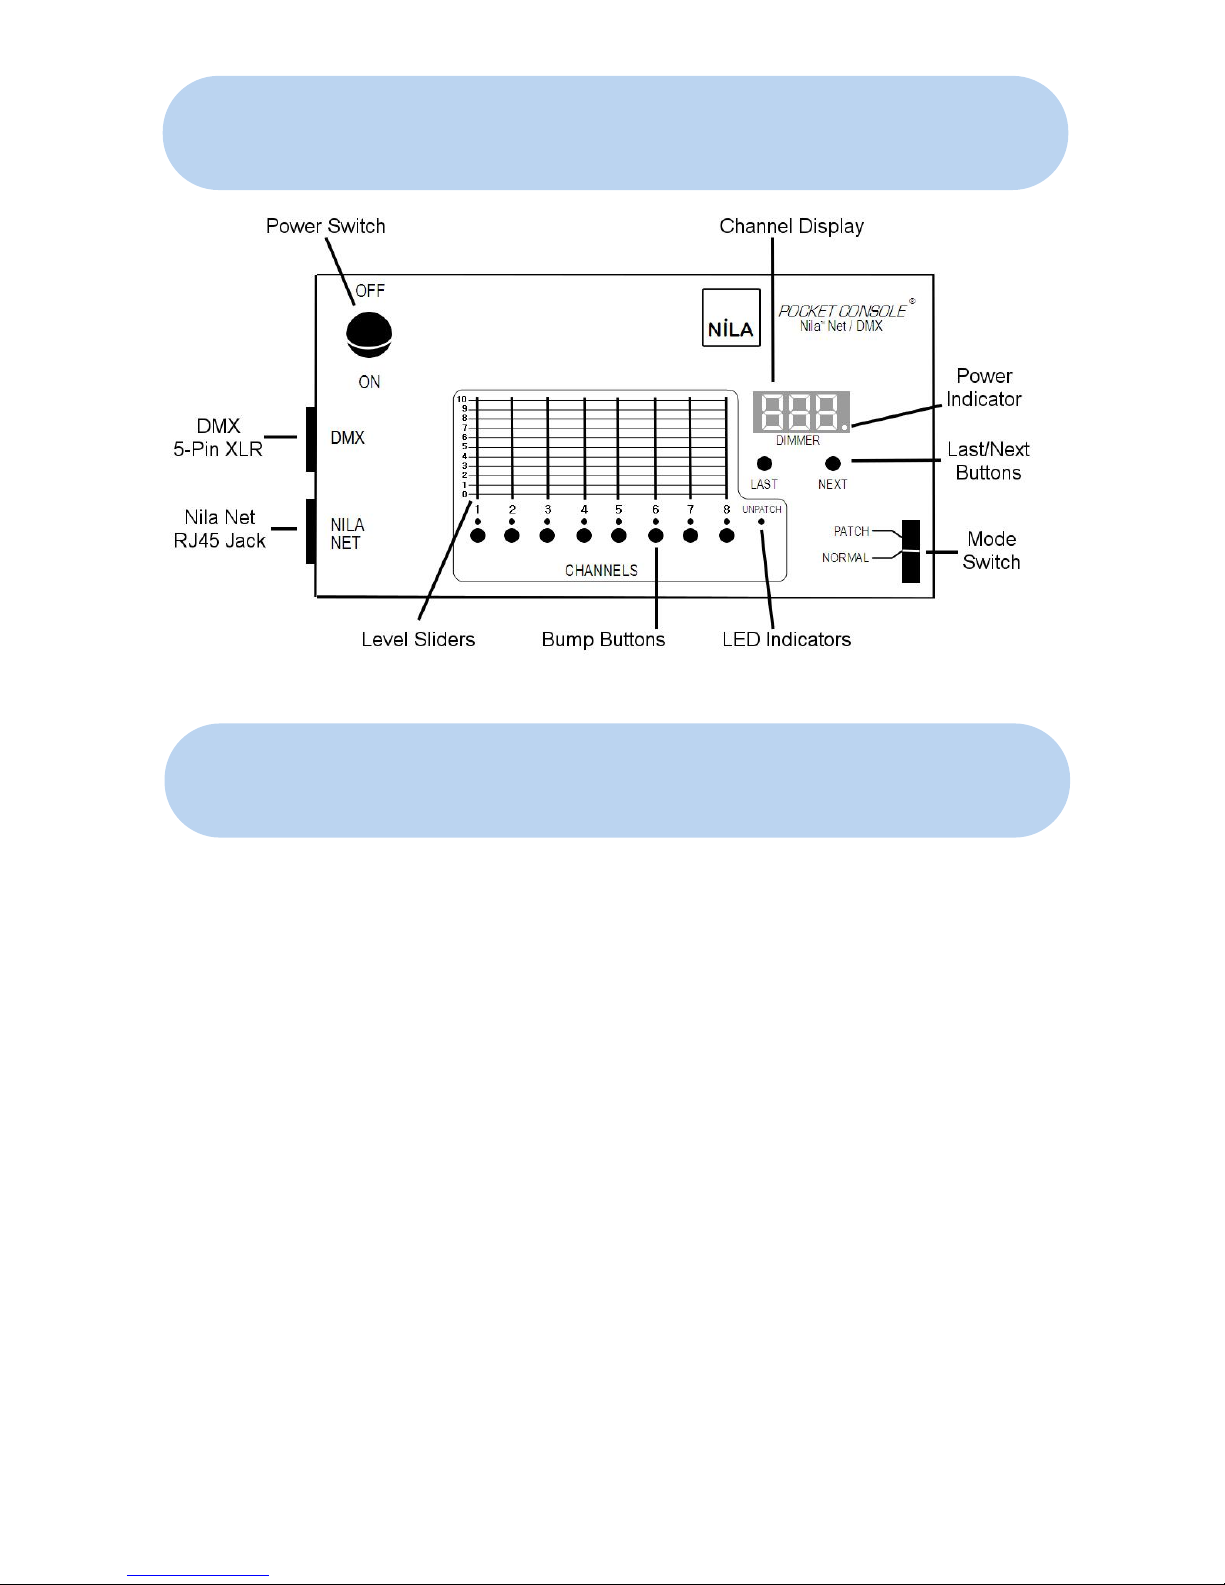
•Plug in the suppli ed AC adapter or connect a 9V battery.
•Switch the power switch to the "ON" position
•Make sure the mode switch is set to "Normal". An LED dot will illuminate
in the lower right of the display, indicating the unit is in "Normal" mode.
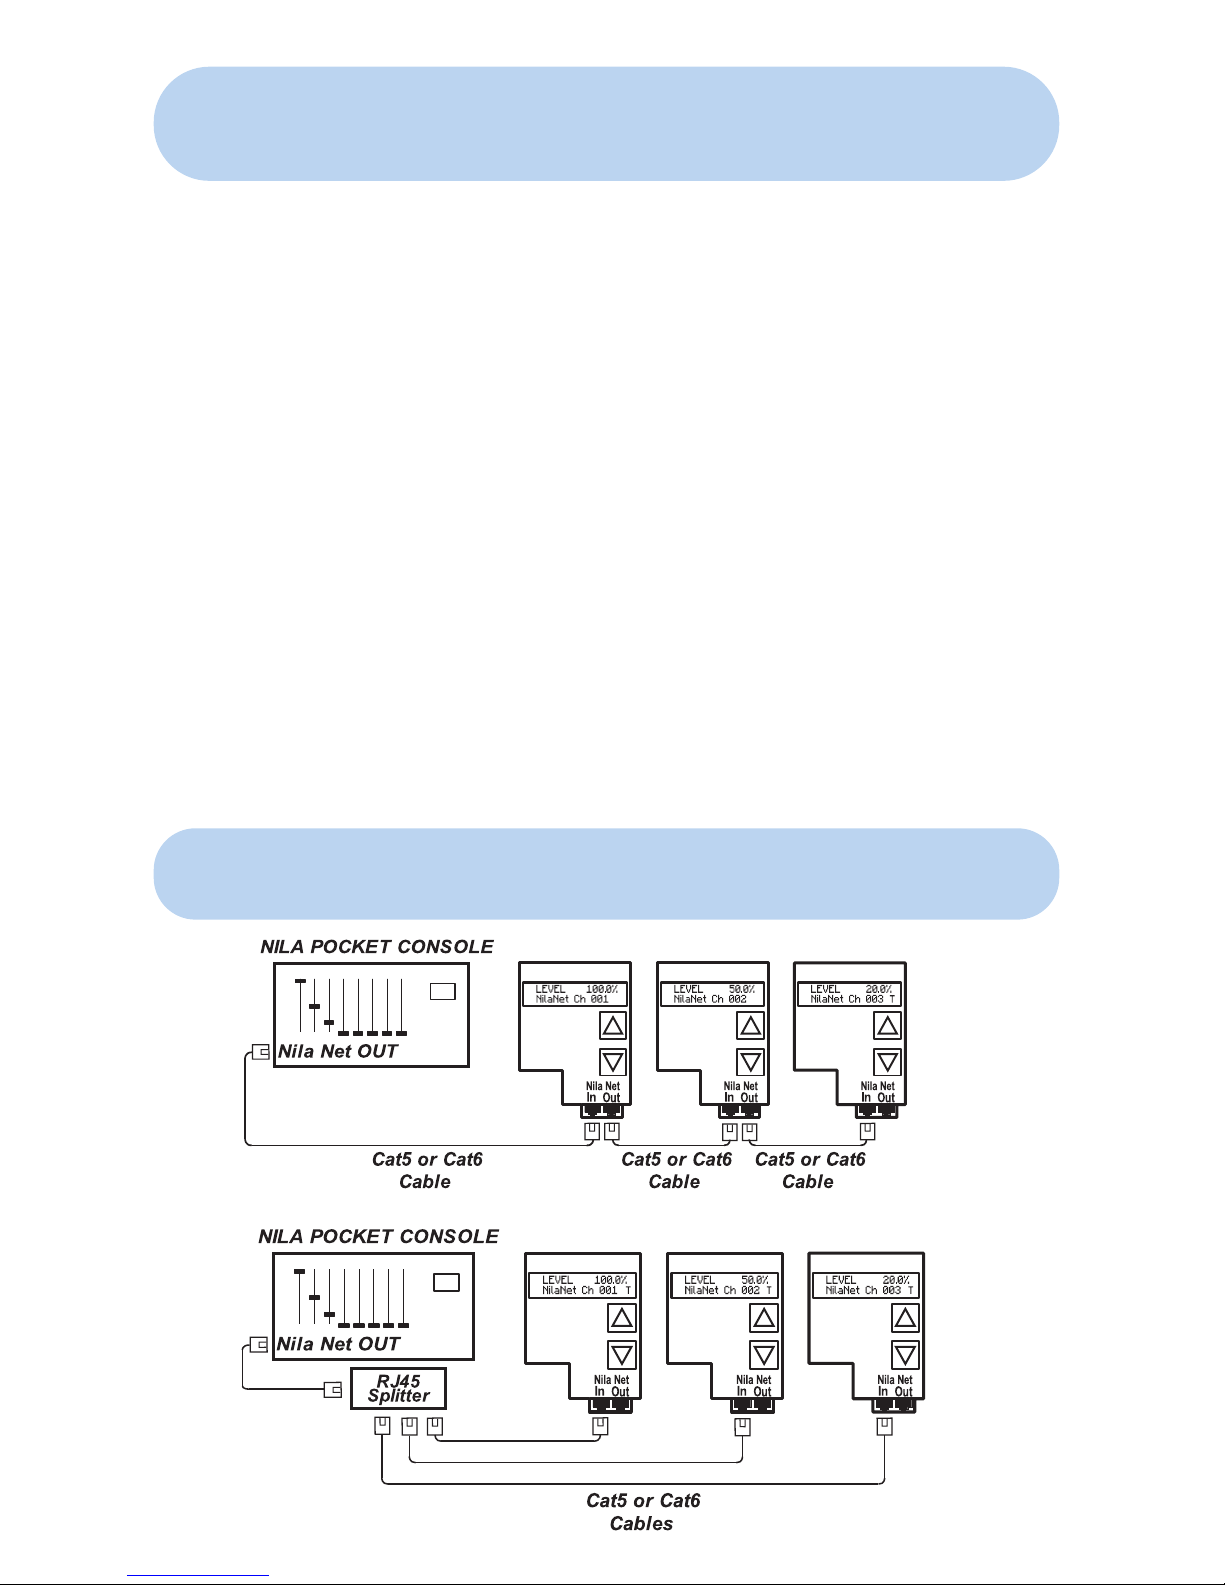
•Connect your Nila fixt ure s using Cat 6 cables. Run the wires from the
RJ45 connector on the left end of your Pocket Console to the "Nila Net In"
jack on the rear of your nila light fixture.
•Use the channel sliders to change the output level of the eight control
channels. Any number of light fixtures can be controlle d by your Pocket
Console but they must all be patched to one of the eight control channels.
(see the section on Patch Mode Operation)
•Use the buttons below the sliders to "bump" each channel to 100%
regardless of where that channels slider may be set.
•When finished, be sure to switch the power switch to the "OFF" position.
This is especially import ant when using battery power.
1
2 - NORMAL MODE OPERATION
Page 4
3 - PATCH MODE OPERATION
•Set the mode sw it ch to PATCH. The display will light up and show you
the DMX channel numbe r (001-512) that you are currently patching.
•Use the LAST and NEXT buttons to scroll through the DMX channels
(001-512). When you reach the DMX channel number that you'd like to
assign to a control channel (1-8), press the BUMP BUTTON under that
control channel. The LED Indicator above that control channel bump
button will illuminate, indicating that the DMX channel number currently
being displayed is now patched to that control channel.
•Each control channel (1-8) can control as many different DMX channels
as you'd like to assign. Each DMX channel may only be assigned to one
control channel.
•If you'd like t o remove a DMX channel assignment from a control channel
fader, you may do so by pressing the UNPATCH button.
•Hold down the UNPATCH button and the LAST or NEXT button
simultaneously to cycle t hrou gh all of the DMX channels and unpatch
them.
4 - CONNECTING MULTIPLE FIXTURES
 Loading...