

Nikon f-14G-AF-S User Manual [en, es, fr, it]
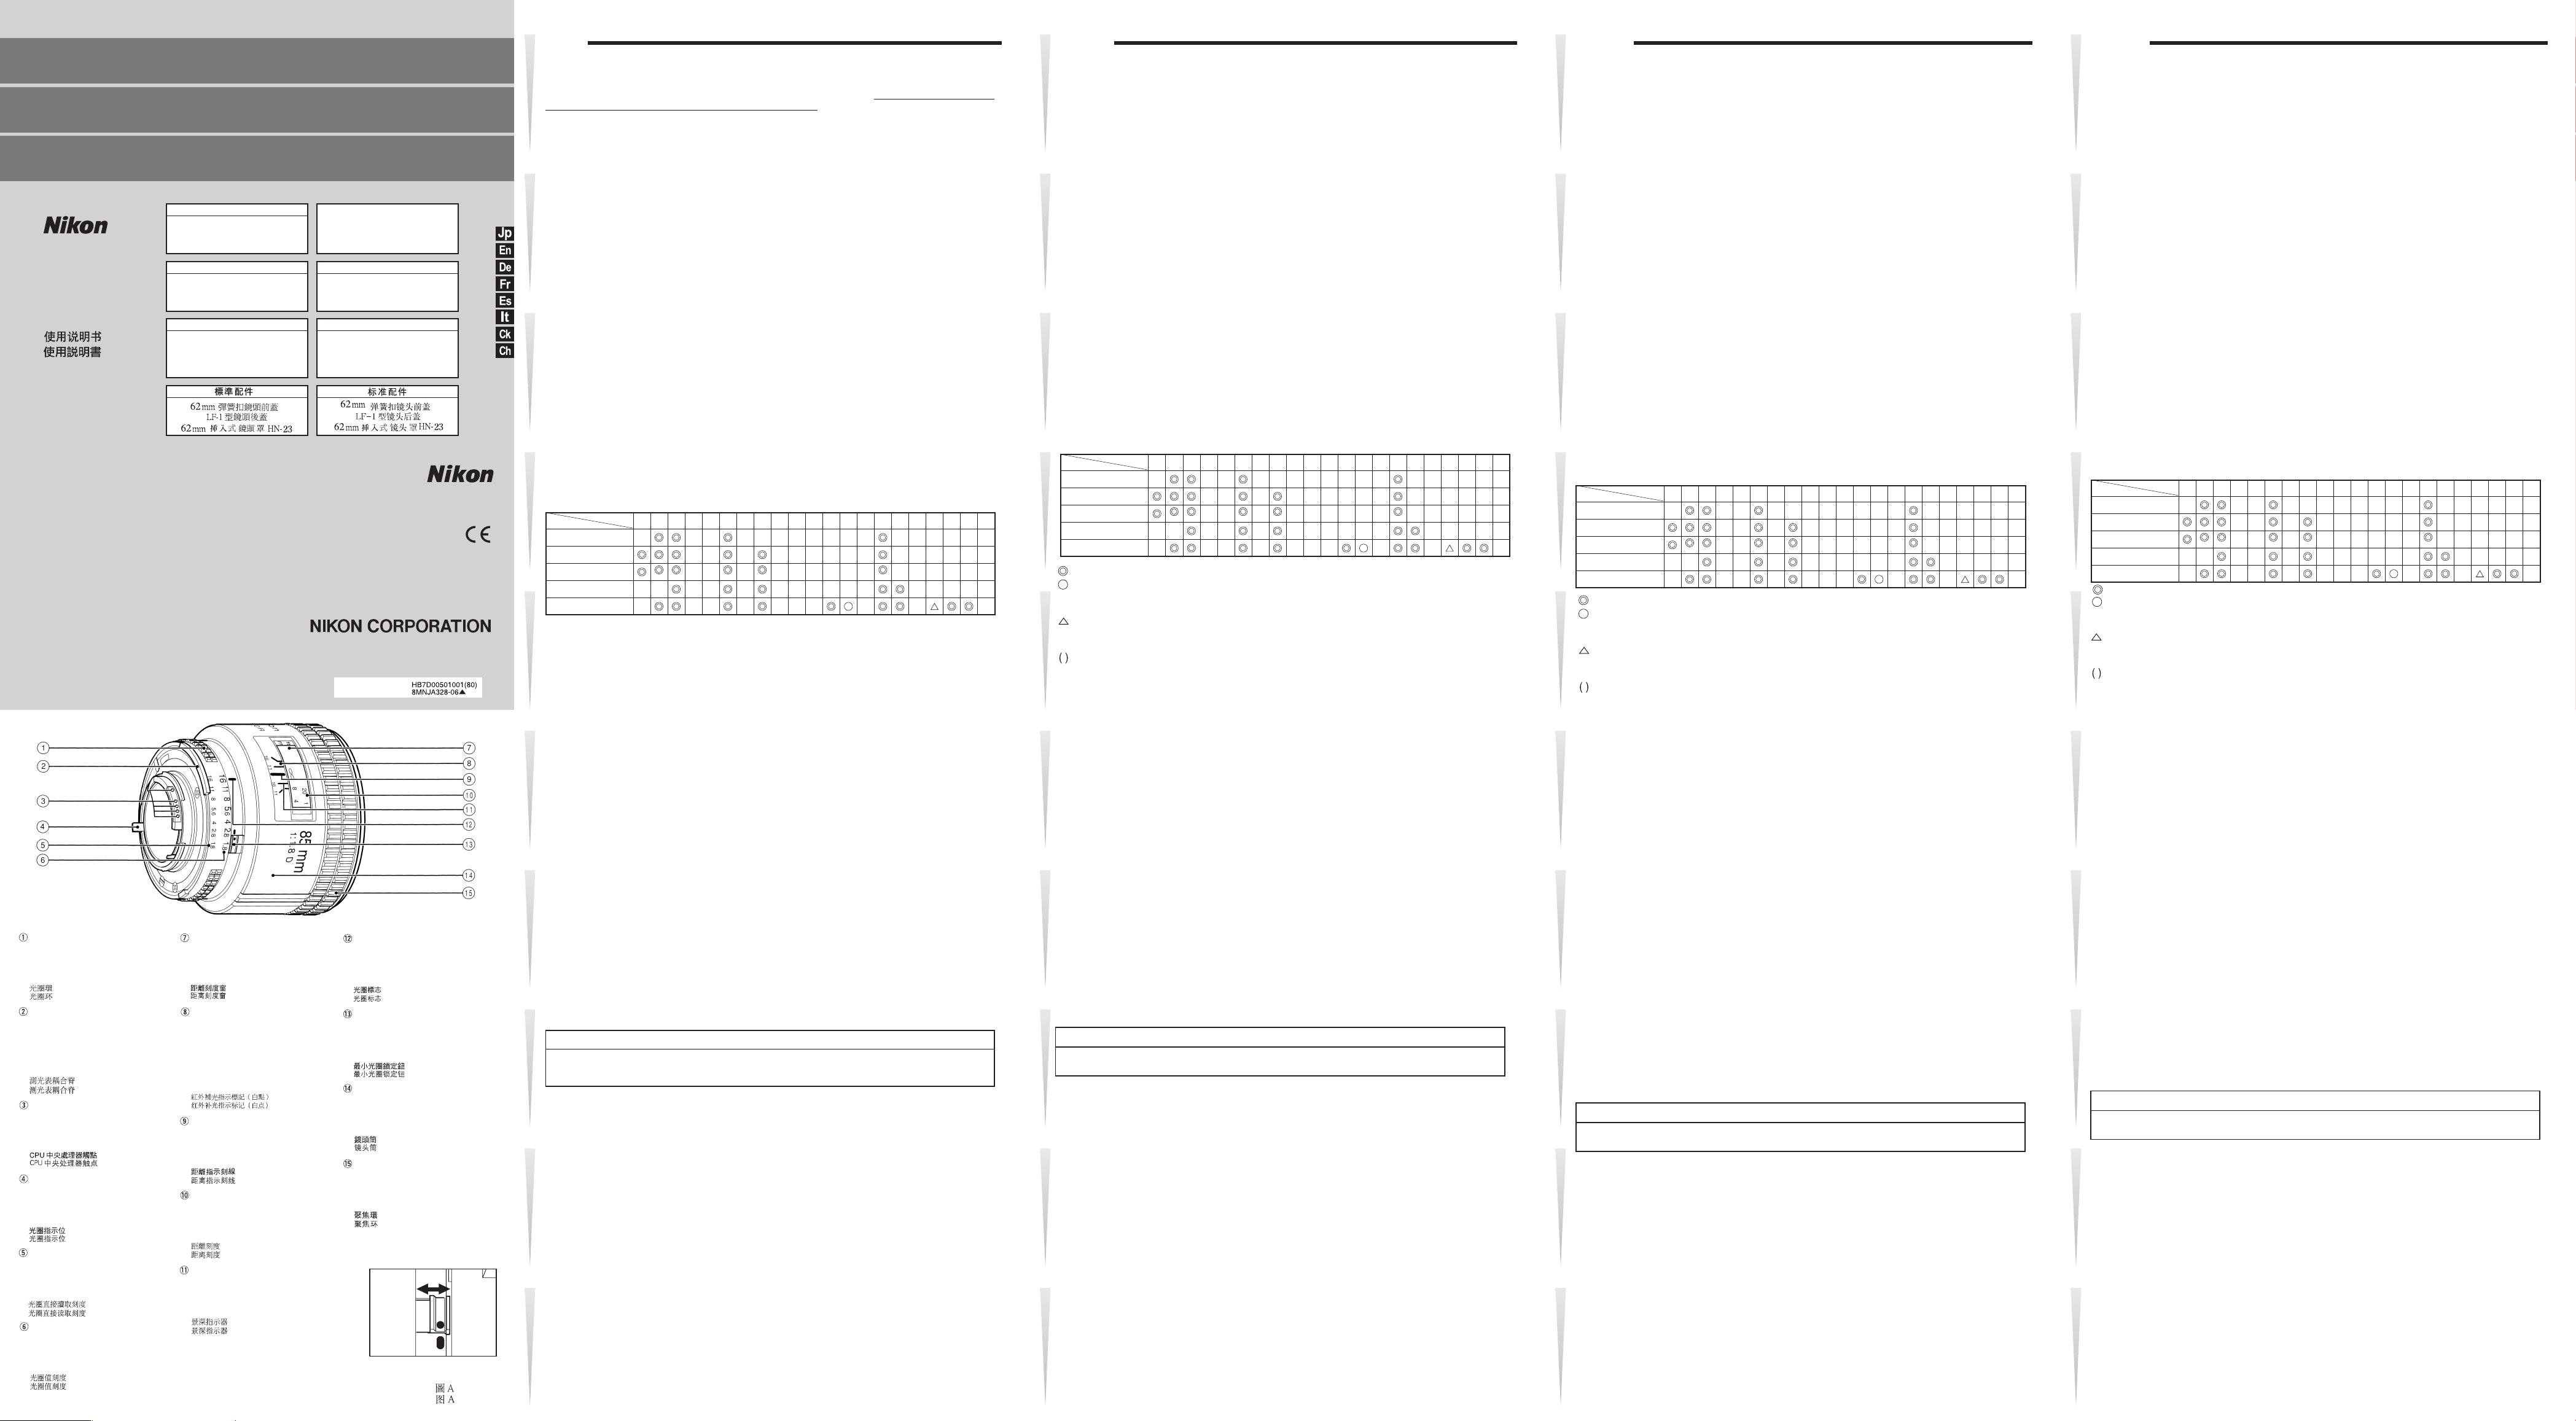
AF Nikkor
85mm
f/1.8 D
付属アクセサリー
62mmスプリング式前キャップ
裏ぶたLF-1
使用説明書
I
nstruction Manual
B
edienungsanleitung
Manuel d'utilisation
Manual de instrucciones
Manuale di
使用説明書の内容が破損などによって判読できなくなったときは、
当社サービス機関にて新しい使用説明書をお求めください。(有償)
No reproduction in any form of this manual, in
whole or in part (except for brief quotation in
articles or reviews), may be made without written
authorization from NIKON
絞りリング
Aperture ring
Blendenring
Bague des ouvertures
Anillo de aberturas
Anello dell’aperture
露出計連動ガイド
Meter coupling ridge
Steuerkurve
Index de couplage photométrique
Protuberancia de acoplamiento al
exposímetro
Indice di accoppiamento
dell’ esposimetro
CPU信号接点
CPU contacts
-Kontakte
CPU
Contacte CPU
Contactos CPU
Contatti
CPU
開放F値連動ガイド
Apertureindexingpost
Anschlag für Blendenkupplung
Coupleru de l’ouberture
Pivote indicador de abertura de diafragma
Per no per misurazione dell’apertura
ファインダー内直読用絞り目盛
Aperture-direct-readout scale
S
kaka für direkte Blendenablesung
Echelle de lecture directe d’ouvertures
Escala de lectura directa de abertura
Scala di lettura diretta dell’apertura
絞り目盛
Aperture scale
Blendenskala
Echelle des ourvertures
Escala de aberturas
Scala delle aperture
istruzioni
CORPORATION.
62mmねじ込みフードHN-23
Standard accessories
62mm snap-on front lens cap
Rear lens cap LF-1
62mm Screw-in lens hood HN-23
Serienmäßiges Zubehör
Aufsteckbarer Frontdeckel
Hinterer
Objektivrückdeckel
Einschraub-Sonnenblende 62 mmØ
HN-23
critical
距離目盛窓
Distance scale window
Entfernungsskalenfenster
Fenêtre d'échelle des distances
Ventanilla de escala de distancias
Finestralla scala delle distanze
赤外指標(白色)
Infrared compensation index (white dot)
Infrarot-Kompensationsindex
(weißer Punkt)
Repère de mise au point en
infrarouge (point blanc)
Indicador de enfoque infrarrojo
(punto blanco)
Indice di compensazione per
infrarossi (punto bianco)
距離目盛基準線
Distanceindexline
Entfernungs-lndexlinie
Lignederepère des distances
Lineaindicadoradedistancia
Contrassegnodistanza
距離目盛
Distancescale
Entfernungsskala
Echelledesdistances
Escaladedistancias
Scaledelledistanze
被写界深度目盛
Depth-of-fieldindicators
Schärfentiefenskala
Echelle de profondeur de champ
Escala de profundidades de campo
Scala profoudità di campo
62 mmø
LF-1
Accessoires standard
Bouchon avant à emboîtement 62mm
Bouchon arriére LF-1
Parasoleil vissants 62 mm
Accesorlos estándar
T
apa frontal de presión
T
apa trasera del pbjetivo
Parasol de rosca de 62 mm HN-23
Accessori standard
Tappo anteriore da 62 mm dia,
Tappo posteriore LF-1
Cappuccio HN-23 per obiettivo a vite
da 62 mm
FUJI BLDG.,2-3,
CHIYODA-KU,TOKYO
Printed in Japan ●
絞り目盛基準線
Aperture index line
Blenden-indexlinie
Ligne de repère des ouvertures
Linea indicadora de abertura
Contrassegno aperture
最小絞りロックレバー
Minimumaperturelocklever
Hebelfür Verriegelung für kleinste Blende
Levierdeverroudel’ouverture minimale
Palancedebloqueodeabertureminima
Levadelbloccoaperturaminima
レンズ鏡筒
Lens barrel
Objektivtubus
Barillet d'objectif
Tubo portalentes
Cilindro objettivo
距離リング
Focus ring
Einstellring
Bague de mise au point
Anillo de enfoque
Anello di messa a fuoco
イラスト A
Illust. A
HN-23
de 62 mm
LF-1
MARUNOUCHI
100-8331,JAPAN
Ilust. A
Fig A
Bild A
Illust A
3-CHOME,
日本語
はじめに
このたびはニッコールレンズをお買い上げいただきありがとうございます。ご使用の前に以下の「安全上の
ご注意」及び製品の使用説明書をよくお読みのうえ、十分に理解してから正しくお使いください。お読みに
なった後は、お使いになる方がいつでも見られる所に必ず保管してください。なお、カメラ本体の使用説明
書に記載されている「安全上のご注意」も併せてお読みください。
「安全上のご注意」
●分解したり修理・改造をしないでください。
●使用しないときは、レンズにキャップをつけるか太陽光の当たらない所に保管してください。
このレンズは、ニコンAF[オートフォーカス(F3用AF除く)]カメラと組み合わせますと、オートフォーカ
ス撮影が可能です。またマニュアル(手動)によるピント合わせも容易に行えます。ピント合わせは、レンズ系
の一部分のみを移動する当社独自のリア・フォーカス方式を採用し、無限遠から至近距離まで良好な描写が
得られます。このレンズは、ポートレート撮影に好適で、舞台撮影や比較的暗い室内での撮影、夜景の撮影
にも威力を発揮します。また、被写体までの距離情報をカメラボティ側に伝達する機能を備え、3D 測光機能
を持ったカメラとの組み合わせ時により的確な露出制御を実現する3D-マルチパターン測光・3D-マルチBL調
光を可能とします。
注記
●下記のアクセサリーはCPU信号接点等を損傷しますので、直接このレンズに取り付けないでください。
オート接写リングPK-1、PK-11、K1リング、オートリングBR-4
(PK-11の代わりには、PK-11Aリングをご使用ください。)
また上記以外のアクセサリーにつきましても、カメラボディとの組み合わせによりご使用できないことがあります。
アクセサリーの使用に際しては必ず各カメラボディの使用説明書も併せてご参照ください。
●DX-1ファインダー(ニコンF3AF用)と組み合わせてのご使用はできません。
最小絞りロックレバー(イラストA参照)
プログラム撮影時や、シャッター優先による撮影時は、絞りリングを最小絞り目盛りで固定することが
できます。ロック方法はまずレンズの絞りリングを回転させ、最小絞り目盛の(16)を絞り指標(白色)に
合わせます。最小絞りロックレバーを絞りリングの方向にスライドさせることによりロックすることが
できます。
ロックの解除は、ロックしたときと反対方向にロックレバーをスライドさせることにより行なえます。
ファインダースクリーンとの組み合わせ
ニコンF6、F5、F4およびF3シリーズカメラボディには多種類のファインダースクリーンがあり、レンズのタイ
プや撮影条件に合わせて最適なものを選ぶことができます。このレンズに適したファインダースクリーンは次の
表のとおりです。(なお、ご使用に際しては必ず各カメラボディの使用説明書を併せてご参照ください。)
カメラ
スクリーン
EC-B/
A/L BCDEG1G2G3G4H1H2H3H4JK/P M RTUF
EC-E
F6
F5+DP-30
F5+DA-30
(+0.5) (+0.5) (+0.5) (+1.0) (+0.5)
F4+DP-20/DA-20
F3
◎:最適です。
○:視野の一部が多少見にくくなりますが使用できます。
△:スプリットの合致像は見えますが、ピント合わせには精度上適しません。
():中央部重点測光時の補正値です。
F6カメラの場合、測光値の補正は、カメラのカスタムメニュー「b6:スクリーン補正」を「BorE以外」
にセットして行います。B型およびE型以外を使用する場合は、補正量が0でも、「BorE以外」にセット
してください。F5カメラの場合は、カスタムセッティングNo.18の設定で測光値の補正を行います。F4
シリーズカメラの場合は、ファインダースクリーン露出補正ダイヤルを回して補正を行います。
詳しくはカメラの使用説明書をご覧ください。
空欄:使用不適当です。
ただし、Mスクリーンの場合、撮影倍率1/1倍以上の近接撮影に用いられるため、この限りではありま
せん。
上記以外のカメラでB2/B3、E2/E3、K2/K3スクリーンをご使用の場合は、それぞれB、E、Kスクリーンの欄
をご覧ください。
レンズ取り扱い上のご注意
●レンズの清掃は、ホコリを拭う程度にしてください。万一指紋がついたときは、柔らかい清潔な木綿のふき
んに無水アルコール(エタノール)を少量湿らせ、中心から外側へ渦巻状に、拭きムラ、拭き残りのないよ
うに注意して拭いてください。
●シンナーやベンジンなどの有機溶剤は絶対に使用しないでください。
●レンズ表面の汚れや傷を防ぐために、NCフィルターの使用をおすすめします。レンズの保護には、フード
も役立ちます。
●レンズをご使用にならないときは、必ず前後にレンズキャップをしておいてください。
●
長時間お使いにならないときや保管の際は、カビあるいはサビを防ぐため、高温多湿のところや直射日光の
あたるところ、また、ナフタリンや樟脳のあるところは避けて風通しのよい場所に保管してください。
●レンズを水に落としたり濡らしたりすると、部品がサビつくなどして故障の原因となりますので注意して
ください。
●
この製品の外観の一部には強化プラスチックを使用していますが、極端に温度が高くなると変形する場合が
あります。ストーブの前等、高温となる場所に置くことは避けてください。
別売りアクセサリー
62mmねじ込み式フィルター、ソフトケースCL-0815
English
ThankyouforyourkindpatronageofNikon.
FeaturesoftheAFNikkor85mmf/1.8Dlensare:
• Compact and lightweight lens.
• Clossest focus distance of 0.85m (3 ft.)
• Distance information used for 3D Matrix metering or the 3D Multi-Sensor Balanced Fill-
Flash will be transmitted instantly from the lens to the camera body.
Before using your new lens, read the following caefully so you get the most out of your
lens now and for years to come.
Important!
• Be careful not to soil or damage the CPU contacts.
Do not attach the following accessories to the lens, as they might damage the lens CPU
•
contacts:
Auto Extension Ring PK-1, Auto Extension Ring PK-11, K1 Ring, Auto Ring BR-4.
(Use PK-11A instead of PK-11.)
• Other accessories may not be suitable for use with certain camera bodies. For details,
carefully read the camera instruction manual.
• This lens cannot be used with the AF Finder DX-1 attached to the Nikon F3AF camera.
Minimun Aperture Lock (Illust. A)
For programmed auto or shutter-priority auto exposure shooting, use the minimum aperture
lock lever to lock the lens aperture at f/16.
1. Set the lens to its minimum aperture(f/16).
Slide the lock lever in the direction of the aperture ring so the white dot on the lever
2.
with the orange dot.
aligns
To release the lock, slide the lever in reverse direction.
Recommended Focusing Screens
Var ious interchangeable focusing screens are available for Nikon cameras to suit any tupe
of lens or picture-taking situation. Those which are recommended for use with your lens are
listed.
EC-B/
Camera
Screen
F6
F5+DP-30
F5+DA-30
F4+DP-20/DA-20
F3
= Excellent focusing
= Acceptable focusing
Slight vignetting or moire phenomenon affects screen image, but film image shows no
traces of this.
= Acceptable focusing
The in-focus image in the central circular area may prove to be slightly out of focus on
the film. Focus on the surrounding matte area.
= Indicates degree of exposure compensation needed (Center-Weighted metering only).
For F6 cameras, compensate by selecting “Other screen” in Custom Setting “b6:
Screen comp.” and setting the EV level to –2.0 to +2.0 in 0.5 EV steps. When using
screens other than type B or E, “Other screen” must be selected even when the
required compensation value is “0” (no compensatio required). For F5 cameras,
compensate using Custom Setting #18 on the camera body. For F4-Series cameras,
compensate using the Exposure Compensation Dial for the focusing screen.
See instruction manual of the camera body for more details.
Blank box means not applicable.
Since type M screen can be used for both macrophotography at 1:1 magnification ratio
and for photomicrography, it has different applications than other screens.
When using the B2/B3, E2/E3 and K2/K3 focusing screens in cameras other than those
listed above, refer to the columns for the B, E and K screens.
Lens Care
Clean lens surface with a blower brush. To remove dirt and smudges, use a soft, clean
•
cotton cloth or lens tissue moistened with ethanol (alcohlo) or lens cleaner. Wipe in a
circular motion from center to outer edge, taking care not to leave traces and not to
touch the other lens parts.
Never use thinner or benzine to clean the lens.
•
To proect the lens surface from dirt or damage, the use of an NC filter is recommended
•
at all times.
Keep the lens cap in place whenever the lens is not in use.
•
If you will not use the lens for a long time, protect it from rust and mold by storing it in a
•
The lens hood also helps to protect the lens.
cool, dry place.
or camphor.
Be careful not to get the lens wet or drop it in water. Water on the lens may cause
•
malfunction.
Reinforced plasitic is used on the exterior of the lens unit; to avoid demage, take extra
•
care to never leave the lens in an excessively hot place.
62mm screw-in filters, Flexible lens pouch CL-0815
A/L BCDEG1G2G3G4H1H2H3H4JK/P M RTUF
EC-E
(+0.5) (+0.5) (+0.5) (+1.0) (+0.5)
Also,
do not store in direct sunlight,
and keep it away from naphthalene
Optional Accessories
Deutsch
WirdankenIhnenfür das Vertrauen. daß Sie Nikon mit dem Kauf dieses Objektivs
entgegengebracht haben.
Das AF Nikkor 85 mm f/1.8 D zeichnet sich durch folgende Merkmale aus:
Kompakt und leicht
•
Naheinstellgranze 0.85 m
•
D-Chrakteristik zur Nutzung der 3D-Matrixmessung bzw. des 3D-Multi-Sensor-
•
Aufhellblitzes.
Bitte lesen Sie die folgende Beschreibung sorgfältig durch, damit Sie viele Jahre ungetrübte
Freude an diesem Objektiv haben.
Wichtig!
Sorgen Sie dafür, daß die AF-Kontakte unter keinen Umständen Verschmutzen oder
•
bedchädigt werden.
Setzen Sie bitte folgendes Zubehör nicht an das Objektiv, da es die AF-kontakte
•
beschädigen könnte:
Die Automatik-Zwischenringe PK-1 und PK-11, die Zwischenringe K1, den
•
Automatikring
BR-4. (Verwenden Sie PK-11A statt PK-11.)
Anderes Zubehör ist möglicherweise für bestimmte Kameras nicht geeignet. Lesen Sie
•
sorgfältig die Anleitungen zu Ihrer Kamera.
Dieses Objektiv kann nicht mit dem Sucher DX-1 (der Nikon F3AF) verwendet werden.
•
Verriegelung der kleinsten Blende (Bild A)
Verriegeln Sie mit dem Schieber den Blendenring bei f/16, wenn Sie Programm-oder
Blendenautomatik verwenden.
1. Stellen Sie den Blendenring auf den kleinste Wert (f/16).
2. Drücken Sie den Verriegelungs-Schieber in Richtung des Blendenrings, bis der weiße
Punkt aut dem Schieber dem orange Punkt gegenübersteht.
Drücken Sie den Schieber in die entgegengesetzte Richtimg, um wieder zu entriegeln.
Empfohlene Einstellscheiben
Für Nikon Kameras stehen verschiedene, auswechselbare Einstellscheiben zur Verfügung,
um jedem Objektiv und jeder Aufnahmesituation gerecht zu werden. Die zur Verwendung
mit Ihrem
Kamera
F4+DP-20/DA-20
Ein Leerfeld bedeutet unbrauchbar.
Bei Verwendung der Scheiben B2/B3, E2/E3 bzw. K2/K3 in anderen als den obengenannten
Kameras gelten die Spalten für die Scheiben B, E und K.
Objektivpflege
Reinigen Sie die Linsenoberfläche zunächst mit einem Blasepinsel. Benutzen Sie zur
•
•
Die Frontlinse des Objektivs sollte grundsätzlich durch ein Filter NC vor Staub und
•
Bei Nichtbenutzung sollte der vordere Objektivdeckel grundsätzlich aufgesetzt bleiben.
•
Wird das Objektiv ohne Kameragehäuse aufbewahrt, sollten vorderer und hinterer
•
Wenn Sie das Objectiv Iängere Zeit unbenutzt lassen, bewahren Sir as an einem kühlen,
•
Bestimmte Bauteile des Objektivs sind aus verstärktem Kunststoffen gefertigt. Um
•
Objektiv empfohlenen Einstellscheiben sind aufgelistet.
Einstrllscheibe
EC-B/
A/L BCDEG1G2G3G4H1H2H3H4JK/P M RTUF
EC-E
F6
F5+DP-30
F5+DA-30
(+0.5) (+0.5) (+0.5) (+1.0) (+0.5)
F3
= Ausgezeichnete Scharfeinstellung
= Brauchbare Scharfeinstellung
Leichte Vignettierung oder Moiré im Sucherbild, nicht je-doch auf dem Film.
= Brauchbare Scharfeinstellung
Der in der Suchermitte scharf erscheinende Aufnahme-gegenstand kann auf dem Film
liecht unschart sein. Fo-kussierung auf dem Einstellscheiben-Umfeld.
= Zeigt den Betrag zusätzlich erforderlicher Belichtungskorrektur (Nur mittenbetonte
Belichtungsmessung).
Bei F6-kameras korrigieren Sie durch Wahl von “Andere” in der Individualfunktion “b6:
Einstellscheibe” und Einstellen des LW-Werts im Bereich zwischen –2,0 und +2,0 in
0,5-LW-Schritten. Bei Gebrauch von anderen Scheiben als B oder E, ist “Andere” auch
dann zu wählen, wenn der erforderliche Korrekturwert “0” beträgt (keine korrektur
nötig). Zur Einstellung des Korrekturwerts am F5 Kameragehäuse dient die
Individualfunktion Nr. 18. Mit den F4-Serien-Geräten durch den Belichtungkompensationsanzeiger für Visiermattscheiben kompensieren.
Näheres hierzu finden Sie in der Bedienungsanleitung des Kameragehäuses.
Da die Einstellscheibe Typ M für Makrofotografie bei einem Abbildungsverhätnis von
1:1 sowie für Mikrofotografie verwendet wird, unterscheidet sich ihre Anwendung von
den anderen Einstellscheiben.
weitergehenden Reinigung ein mit reinem Alkohol befeuchtetes weiches und sauberes
Baumwolltuch bzw. Linsenreinigungspapier. Wischen Sie debei in einer größer
werdenden Kreisbewegung von innen nach außen,
Zum Reinigen des Objektivs unter keinen Umständen Verdünner oder Benzin werewenden.
Beschädigung geschützt werden. Auch die Gegenlichtblende bewährt sich als
Frontlinsenschutz.
Objektivdeckel aufgesetzt sein.
trockenen Ort auf, um Rost und Schimmelbefall zu vermeiden. Schützen Sie das Objektiv
vor direkter Sonneneinstrahlung und vermeiden Sie die Nähe von Naphtalin und Kampfer.
Schäden zu vermeiden, darf das Objektiv miemals Plätzen mit extrem hoher Wärme
ausgesetzt werden.
Français
Nikon vous remercie d’avoir porté votre choix sur son AF Nikkor 85 mm f/1,8 D, dont les
caractéristiques sont les suivantes:
Objectif conpact et léger
•
Distance de mise au point minimale de 0,85 m (3 pied)
•
Les informations de distance utilisées pour la mesure matricielle 3D ou le dosage auto/
•
flash ambiance multi-capteur sont instantanément transmises de l’objectif au boîtier.
Lisez attentivement les paragraphes suivants avant d’utiliser votre nouvel objectif, les
quelques minutes ainsi passées vous permettront de tirer le meilleur de votre objectif tout
de suite et pour des années.
Important!
• Veiller à ne pas salir ou endommager les contacts CPU.
• Ne pas fixer les accessoires suivants à un objectif, car ils peuvent endommager les
contacts CPU de l'objectif:
Bague d'auto-rallonge PK-1, Bague d'auto-rallonge PK-11, Bague K1, Auto Bague BR4, (Utiliser la PK-11A à la place de PK-11.)
• Les autres accessoires peuvent ne pas convenir à certains boîtiers. Pour les détails,lire
attentivement le manuel d’utilisation de l’appareil.
• Cet objectif ne peut pas s'employer à l'intention du viseur AF de DX-1 fixé à l'appareil
F3AF Nikon.
Verrou de l’ouverture minimale (Illust. A)
Pour une prise de vues automatique programmée ou priorité obturation, utiliser le levier de
verrou de l’ouverture minimale pour verrouiller l’ouverture minimale (f/16).
1.
Régler l’objectif sur son ouverture minimale (f/16).
2.
Glisser le levier de verrou vers la direction de la bague des ouvertures de sorte que le
point blanc sur le levier fasse face au point orange.
Pour relâcher le verrou, glisser le levier dans le sens inverse.
Verres de visée recommandés
Différents verres de visée interchangeables peuvent être montés sur les appareils photo
Nikon. Ils sont utilisables avec tous les types d’objectifs et dans toutes les situations de
prise de vue. Les verres de visée recommandés pour chaque objectif sont répertoriés dans
le tableau.
Boîtier
F5+DP-30
F5+DA-30
F4+DP-20/DA-20
= Mise au point excellente
= Mise au point passable
Léger vignettage ou effets de moire sur l’image du verre, mais le film ne présente
aucune trace de ces phénomènes.
= Mise au point passable
L’image de la zone circulaire centrale paraît légèrement brouillée. Mise au point autour
de la zone tressée.
= Indique la compensation de l’exposition additionnelle requise (Mesure pondérée
centrale uniquement).
Pour les appareils F6, corrigez en sélectionnant “Activ.: autre” dans le réglage
personnalisé “b6: Plage visée” et en réglant le niveau IL de –2,0 à +2,0 par pas de 0,5
IL. Lorsque vous utilisez des verres autres que ceux de type B ou E, il faut sélectionner
“Activ.: autre” même lorsque la valeur de correction est de “0” (pas de correction
nécessaire). Pour les appareils F5, compenser en utilisant le réglage personnalisé
n° 18 sur I’appareil. Pour les appareils de la série F4, compenser en utilisant le cadran
de compensation de l’exposition prévu pour les filtres de mise au point.
Voyez le manuel d’instructions de I’appareil photo pour plus de détails.
Les cases vides désignent des verres inutillisables.
Comme le verre de type M est utilisé pour la macro photographie à un rapport
d’agrandissement de 1:1 aussi bien que pour la photomicrographie, son utilisation est
différente de celle des autres verres.
Lors de I’utiIisation de verres B2/B3, E2/E3 ou K2/K3 dans des appareils autres que ceux
indiqués cidessus, se reporter aux colonnes sur verres B, E, et K.
Soins à apporter à votre ovjectif
Nettoyez la surface de l’objectif avec un pinceau souflante. Pour enlever la saleté et les
•
taches, utilisez un chiffon doux en coton ou une étoffe de nettoyage pour objectif
légèrment imprégné d’alcool éthylique ou de liquide de nettoyage pour objectif. Essuyez
avec des mouvements circulaires du centre vers l’extérieur, en prenant soin de ne pas
laisser de traces et de ne pas toucher les autres parties de l’objectif.
Ne jamais utiliser de diluants ou de benzine pour nettoyer l’objectif.
•
Laisser un filtre NC monté en permanence constitue une bonne protection de la lentille
•
avant contre la poussière et les chocs. Le bouchon avant est également une protection
efficace de la lentille avant.
Bouchez l’avent de votre objectif lorsque vous ne vous servez pas de votre appareil.
•
Lorsque votre objectif n’est pas monté, mettez-lui ses bouchons avant et arrière.
•
Si vous n’utilisez pas l’objectif pendant une longue période de temos, protégez-le contre
•
la rouille et l’humidité en le rangeant dans un endroit sec et frais, Ne le rangez également
pas en plein soleil et éloignez-le de la naphtaline ou du camphre.
Certaines pièces de l’objectif sont en plastique renforcé; pour éviter toute détérioration,
•
ne pas renger l’objectif dans un endroit excessivement chaud.
F6
F3
EC-B/
Verre
A/L BCDEG1G2G3G4H1H2H3H4JK/P M RTUF
EC-E
(+0.5) (+0.5) (+0.5) (+1.0) (+0.5)
Accessoires optionnels
仕様
焦点距離
最大口径比
レンズ構成
画角
撮影距離情報
距離目盛
絞り目盛
最小絞りロック
絞り方式
測光方式
マウント
アタッチメントサイズ
大きさ
質量(重さ)
:85mm
:1:1.8
:6群6枚
:28°30'
:∞〜0.85m、 3ft(併記)
:カメラボディへの撮影距離情報出力可能
:1.8〜16ファインダー内直読用絞り目盛併記
:ロックレバーによりf/16にロック可能
;自動絞り
:
CPU・Al方式のカメラボディでは開放測光、従来方式のカメラボディでは
絞り込み測光
:ニコンFマウント
:62mm(P=0.75mm)
:約71.5mm(最大径)x58.5mm(長さ:バヨネット基準面からレンズ先端まで)、
全長約69mm
:約380g
Specifications
Focal length: 85mm
Maximum aperture: f/1.8
Lens construction: 6 elements in 6 groups
Picture angle: 28°30'
Distance scale: Graduated in meters and feet from 0.85m (3ft.) to infinity (∞)
Distance information: Output into cameras body
Aperture scale: f/1.8 to f/16 on both standard and aperture-direct-readout scales
Minimum aperture lock: Provided
Diaphragm: Fully automatic
Exposure measurement:Via full–aperture method for Al cameras or cameras with CPU
interface system; via stop- down method for the other cameras
Mount: Nikon bayonet mount
Attachment size: 62mm (P= 0.75mm)
Dimensions: Approx. 71.5mm dia. x 58.5mm extension from the camera’s lens mounting
flange; overall length is approx. 69mm
Weight: Approx. 380g
Einschraubfilter 62mmø, Fester Objektivbeutel CL-0815
Technische Daten
Brennweite: 85mm
GröBte Blende:1:1,8
Optik: 6 Elemente in 6 Gruppen
Bildwinkel: 28°30'
Entfernungsskala: In Meter und Fuß von 0,85 m (3 ft.) bis unendlich (∞)
Entfernungsdaten:
Blendenskala:Blende 1,8 bis 16 auf der Standardskala und auf der Skala für direkte
Blendenablesung
Verriegelung für keinste Blende: Vorgeseheh
Blendentyp:Vollautomatisch
Belichtungsmessung: Offenblendenmessung bei Kameras mit Al-Blendenkupplung oder
CPU-interface-System; Arbeits-blendenmessung bei anderen Kameras
Objektivfassung:Nikon-Bajonettanschluß
Frontgewinde: 62 mm (P=0,75 nn)
Abmessungen:ca. 71.5 mm Durchm. x 58.5 mm Länge bis Flansch;
Gesamtlänge ca. 69 mm
Gewicht: ca 380 g
Werdem an Kameras übertragen
Sonderzubehör
Filtres vissants 62mm Pouchette souple CL-0815
Caractéristiques
Longueur focale:85mm
Ouverture maximum:f/1.8
Construction optique:6 élements en 6 grpupes
Champ angulaire:28°30'
Echelle des distances:Graduée en mètues et en pieds depuis0.85m(3ft.) à l'infini (∞)
Données relativesà la distance: Figurent pour les appareils
Echelle des ouvertures:f/1,8 à f/16 sur les deux normes et les échelles de lecture directe
d’ouverture
Verrou de l’ouverture minimale: Pourvu
Diaphragme:Entièrement automatique
Mesure de l’exposition:Par la méthode à pleine ouverture avec les appareils Al ou les
appareils à systéme interface CPU; par la méthode à ouverture réelle avec les autres
appareils
Monture:Monture à baîonnette Nikon
Taille des accessoires:62 mm (P= 0,75 mm)
Dimensions
l’appareil; longueur hort-tout est env. 69 mm
Poids:Env. 380 g
: Env. 71.5 mm diam. x 58,5 mm rallonge de la bride de montage d’objectif de

Español
Muchas gracias por utilizar los productos Nikon.
Algunas características de los objetivos AF Nikkor 85 mm f/1,8 D son:
Objetivo compacto y ligero
•
Distancia de enfpque minima de 0,85 m (3 pies)
•
La información de distancia utilizada para la medición matricial 3D o para el flash de
•
relleno equilibrado multisensor 3D se transmitirá instantáneamente del objetivo a la
cámara.
Antes de utilizar su nuevo objetivo, lea cuidadosamente les siguientes instrucciones, con el
fin de obtener el mayor rendimiento de su nuevo objetivo ahora y durante muchos años
más.
¡Importante!
• Tenga cuidado para no ensuciar ni dañar los contactos del CPU.
• No monte los siguientes accesorios en el objetivo, pues se pueden dañar los contactos
CPU del mismo:
Anillo Automático de Extensión PK-1, Anillo Automático de Extensión PK-11, Anillo K1 o
Anillo Automático BR-4.
(Utilice el PK-11A, en lugar del PK-11.)
•
Otros accesorios pueden resultar inadecuados para ciertos tipos de cuerpo de cámara.
Para más detalles,
• Este objetivo no poede ser utilizado con el Visor AF DX-1 anexo a la cámara F3AF de
Nikon.
Bloqueo de abertura mínima (Ilust. A)
Para operación automática programada o con prioridad al obturador, utilice la palanca de
bloqueo de abertura minima para bloquear la abertura del pbjetivo en f/16.
1.Coloque el objetivo a su abertura mínima (f/16).
2.Deslice la palanca de bloqueo en la dirección del anillo de abertura de tal manera que el
punto blanco de la palanca se alinee con el punto anaranjado.
Para liberar el bloqueo, deslice la palanca en la dirección inversa.
Pantallas de enfoque recomendadas
Existen varias pantallas de enfoque inter-cambiables para las cámaras Nikon aptes para todo
tipo de objetivo o situación fotográfica. Las pantallas recomiendadas para ser utilizadas con
este objetivo aparecen en la lista.
Cámara
Pantalla
F6
F5+DP-30
F5+DA-30
F4+DP-20/DA-20
F3
= Enfoque excelente
= Enfoque aceptable
Ligero viñeteo o fenómeno de moiré afecta la imagen de la pantalla, pero la imagen de
la película no es afectada por esto.
= Enfoque aceptable
La imagen en foco en el área circular central puede resultar ligeramente fuera de foco
en la película. Enfoque en el área mate circundante.
= Indica la cantidad de compensación adicional necesaria (Solamente medición
ponderada central).
Para cámaras F6, compense seleccionando “Otra pantalla” en el ajuste personal del
usuario “b6: Compens pantalla” y ajustando el nivel EV a –2,0 a +2,0 en pasos de 0,5
EV. Cuando se utilice una pantalla que no sea de tipo B o E, debe seleccionarse “Otra
pantalla” incluso cuando el valor de compensación requerido sea “0” (no se requiere
compensación). Para la cámara F5 compense usando el ajuste personal del usuario
No. 18 en el cuerpo de la cámara. Para las cámaras de la serie F4, compense usando
el dial de compensación de exposición para las pantallas de entoque.
Para más detalles, consulte el manual de instrucciones de la cámara.
Los espacios en blanco corresponden a los casos inaplicables.
Como la pantalla del tipo M se usa para la macrofotografía con una relación de
aumento de 1:1 y para la microfotografía, su aplicación difiere de las demás pantallas.
Cuando se utilicen las pantallas de enfoque B2/B3, E2/E3 y K2/K3 en cámaras distintas de
las relacionadas arriba, ver las columnas correspondientes a las pantallas B, E y K.
Cuidado del objetivo
•
Limpie la superficie del objetivo con un cepillo en pomo. Para eliminar la suciedad y las
manchas, utilice un paño de algodón suave y limpio o un papel para cristales empapado
en etanol (alcohol) o limpiador de cristales. Limpie con un movimiento circular delcentro
al borde exterior, cuidando de no dejar marcas y de no tocar las otras partes del objetivo.
•
Para limpoar el objetivo, no utilice nunca ni solvente ni bencina.
•
Para proteger la superficie del objetivo de polvo o perjuicio alguno se recomienda el uso
de un filtro NC en todo momento. El oarasik también ayuda a proteger el objetivo.
•
Dejar la tapa puesta siempre que no se use el objetivo.
•
Si usted no va a usar el objetivo por un período de tiempo prolongado, protéjalo contra la
oxidación y el moho almacenándolo en un lugar fresco y seco. Además, no lo almacene a
la luz solar directa, y manténgalo alejado de la naftalina o alcanfor.
•
Asegúrese de no mojar el objetivo ni dejarlo caer en agua. El agua puede causar mal
funcionamiento del objetivo.
•
Se utiliza plástico reforzado en algunas partes de la unidad de objetivo; para evitar daño,
tenga cuidado adicional para nunca dejar el objetivo en un lugar excesibemente caliente.
Filtros con rosca de 62mm Bolsa flexible CL-0815
lea cuidadosamente el manual de instrucciones de la cámara.
EC-B/
A/L BCDEG1G2G3G4H1H2H3H4JK/P M RTUF
EC-E
(+0.5) (+0.5) (+0.5) (+1.0) (+0.5)
Accessorios Opcionales
Italiano
Grazie per aver acquistato un prodotto Nikon.
Le funzioni dell’ obiettivo AF Nikkor 85 mm f/1,8 D sono le seguenti:
Obiettivo compatto e leggero
•
Distanza di messa a fuoco minima di 0,85 m
•
Le informazioni sulla distanza usate per la misurazione Matrix 3D o per l’esposizione Fill-
•
Flash con bilanciamento a sensore multiplo 3D saranno trasmesse istantaneamente
dall’obiettivo al corpo della fotocamere.
Prima di utilizzare il nuovo obiettivo, leggete attentamente le seguenti istruzioni per ottenere
i migliori risultati per molti anni a venire.
Importante:
• Non sporcare o non dannegiare i contatti CPU.
• Per evitare di danneggiare i contatti CPU, evitare di attaccare i seguenti accessori
all’obiettivo:
Anello di auto estensione PK-1, Anello di auto estensione PK-11, Anello K1, Anello auto
BR-4.
(Usare il PK-11A invece del PK-11.)
Gli altri accessori possono non essere adatto all’ usp con alcuni apparecchi. Per i
•
particolari, leggere attentamente il manuale di istruzioni dell’apparecchio.
• Questo objettivo non può essere utilizzato se all’ apparecchio Nikon F3AF è già stato
inserito il Visore AF DX-1.
Blocco apertura minima (Fig. A)
Per fotografie automatiche o con priecedenza data all otturatore, usare la leva del blocco di
apertura minima per bloccare la apertura dell’obiettivo a f/16.
1.Posizionare le lente alla sua apertura minima (f/16).
2.Spostare la leva di bloccaggio nella direzione dell’ anello di apertura per allineare il punto
bianco della leva con il punto colore arancione.
Per disimpegnare il sistema di bloccaggio, spostare la leva nella direzione opposta.
Schermi di messa a fuoco racoomandati
Vari schermi di messa a fuoco sono a disposizione per le fotocamere Nikon per far fronte ad
ogni situazione di presa. Si danno in lista quelli raccomandati per il Vostro obiettivo.
Schermo
EC-B/
fotocamere
F6
F5+DP-30
F5+DA-30
F4+DP-20/DA-20
F3
= Messa a fuoco eccellente
= Messa a fuoco accettabile
L’immagine sullo schermo presenta una leggera riduzione di luminositá o fenomeno del
moiré, ma questo non lascia tracce sull’immagine della pellicola.
= Messa a fuoco accettabile
L’immagine messa a fuoco mella zona circolare centrale può risultare leggermente fuori
fuoco sulla pellicola. Mettere a fuoco l’area opaca circostante.
= Indica il valore della compensazione di esposizione aggiuntiva richiesto (Solamente
misurazione a preferenza centrale). Con le fotocamere F6, compensare selezionando
“Otra pantalla” nell’impostazione personalozzata “b6: Compens pantalla”, quindi
impostando il livello EV tra –2.0 e +2.0 ad intervalli di 0,5 EV. Quando si utilizzano
schermate diverse da B o E, è nesessario selezionare “Otra pantalla” anche quando il
valore di compensazione richiesto è pari a “0” (nessuna compensazione necesaria).
Per la fotocamere F5, compensare utilizzando l’impostazione personalizzata 18 sul
corpo della fotocamere. Per gli apparecchi della serie F4, compensare utilizzando il
quadrante di compensazione dell’esposizione previsto per i filtri di messa a fuoco.
Per ulteriori dettagli, fare riferimento al manuale d’istruzioni della fotocamere.
Il quadrato vuoto significa che non è applicabile.
Poiché lo schermo del topo M puó essere utilizzato per entrambe macro-fotografia con
rapporto di ingrandimento 1:1 e fotomicrografia, esso predenta differenti applicazioni
rispetto agli altri schermi.
lmpiegando gli schermi B2/B3, E2/E3 ed K2/K3 con fotocamere diverse da quelle elencate
sopra, fate riferimento alle rispettive colonne delle versioni B, E e K.
Cura degli obiettivi
•
Pulire la superficie della lente con uno spazzolino a soffietto. Per rimuovere sporco e
macchie, usare un panno di cotone morbido o un panno per lenti imbevuto di etanolo
(alcol) o di un pulitore per lenti. Passare il panno con un movimento circolare del centro
verso il bordo esterno, facendo attenzione a non lasciare tracce e a non toccare le altre
parti dell’obiettivo.
•
Non usare diluenti o benzina per pulire le lenti.
•
Per proteggere la superficie di vetro dell’obiettivo contro polvere o danni, è consigliato
l’uso di un filtro NC per qualsiasi circonstanza. ll paraluce dell’obiettivo serve anch’esso a
proteggere l’obiettivo.
•
Mantenere il tappo fissato sull’ obiettivo quando quest’ ultimo non viene usato.
•
Applicare entrambi i tappi quando l’obiettivo viene conservato separatamente.
•
Quando non si usa la lente per lungo tempo, è necessario proteggerla dalla ruggine e
dalla muffa, conservandola in un luogo fresco ed asciutto. Non lasciarla inoltre sotto la
luce solare diretta e tenerla lontana da naftalina o canfora.
•
La plastica rinforzata viene utilizzata per alcuni pezzi dell’ obiettivo. Per evitare ogni
danno, non si dave lasciare l’ obiettivo in un posto dove la temperatura ambiente è
eccessivamente elevata.
Filtn a vite da 62mm, Portaobiettivo morbido CL-0815
A/L BCDEG1G2G3G4H1H2H3H4JK/P M RTUF
EC-E
(+0.5) (+0.5) (+0.5) (+1.0) (+0.5)
Accessori Opzionali
Depth of Field
2’ 11 9/16”
3’ 3/8”
3
3’ 11
/16”
4’ 3/4”
1
5’ 10
/16”
6’ 1 15/16”
7
/16”
7’ 8
8’ 3 3/4”
11’ 3”
–
12’ 9 ”
18’ 1”
22’ 4”
177’
– ∞
Depth of field
–
–
–
–
–
2’ 11 7/16”
3’ 1/2”
15
3’ 10
4’ 1 1/16”
3
5’ 9
/8”
6’ 2 13/16”
1
/8”
7’ 7
8’ 5 3/8”
11’
–
13’ 1 ”
17’ 5”
23’ 5”
126’
– ∞
Reproduction
/16”
/16”
15
–
/16”
–
2’ 10 1/2”
–
3’ 1 9/16”
3’ 9
–
4’ 3 1/4”
5’ 5
–
6’ 8 3/4”
–
6’ 11
9’ 5 5/16”
9’ 8”
15’ 10 ”
14’ 1”
34’ 9”
44’
– ∞
5
1
/2”
/16”
1
/4”
–
2’ 10 15/16”
–
3’ 1 1/16”
15
3’ 9
–
4’ 2 3/16”
1
5’ 7
–
6’ 5 3/4”
–
7’ 2
8’ 11 1/4”
10’ 3”
14’ 4 ”
15’ 6”
–
28’ 2”
64’
– ∞
2’ 11 1/14”
–
3’ 3/4”
3’ 10
/16”
–
4’ 1 9/16”
5’ 8
–
6’ 4 1/16”
–
7’ 5
8’ 7 7/8”
10’ 8”
13’ 7 ”
16’ 6”
–
25’ 4”
88’
– ∞
1
1
/8”
/16”
7
/16”
–
ratio
–
–
–
–
–
Focused
distance
3
4
6
8
12
20
∞
被写界深度表
f/1.8 f/2 f/2.8 f/4 f/5.6 f/8 f/11 f/16
2’ 11 13/16”
3’ 1/8”
3’ 11
4’ 5/16”
5’ 11
6’ 7/8”
7’ 10
8’ 1 5/8”
11’ 8”
12’ 4 ”
19’ 1”
20’ 11”
393’
– ∞
2’ 11 3/4”
–
2’ 11 11/16”
–
3’ 3/16”
5
/8”
–
1
/8”
–
3
/8”
–
–
–
9
3’ 11
/16”
4’ 3/8”
5’ 11”
6’ 15/16”
3
7’ 10
8’ 1 13/16”
11’ 7”
–
12’ 4 ”
19’
–
20’ 1”
354’
– ∞
/16”
–
–
–
3’ 1/4”
7
3’ 11
4’ 1/2”
5
5’ 10
6’ 1 3/8”
1
/2”
7’ 9
8’ 2 9/16”
11’ 6”
12’ 6 ”
18’ 7”
21’ 7”
253’
– ∞
/16”
/8”
–
–
–
–
–
–
/Depth of Field/Schärfentiefen-Tabelle
Profondeur de champ/Profundidad de campo/Profondità di campo
撮影距離
Focused distance
Eingestellte Entfernung
Distance de mise au point
Distancia de enfoque
Distanza messa a fuoco
0.85
1.0
1.2
1.5
2.5
4
8
∞
Profondeur de chanp/
f/1.8 f/2 f/2.8 f/4 f/5.6 f/8 f/11 f/16
0.846
0.854
0.995
1.01
1.19
1.21
1.49
1.51
2.46
2.54
3.88
4.12
7.52
8.54
120.02
∞
0.846
–
0.854
0.994
–
1.01
–
1.19
1.21
1.48
–
1.52
2.45
–
2.55
3.87
–
4.14
7.48
–
8.61
108.03
–
∞
0.844
–
0.856
0.992
–
1.01
–
1.19
1.21
1.48
–
1.52
2.43
–
2.57
3.82
–
4.20
7.28
–
8.87
77.20
–
∞
Profundidad de campo/ Profondità di campo
0.842
–
0.858
0.988
–
1.01
–
1.18
1.22
1.47
–
1.53
2.41
–
2.60
3.75
–
4.29
7.02
–
9.31
54.08
–
∞
0.839
–
0.862
0.983
–
1.02
–
1.17
1.23
1.46
–
1.55
2.37
–
2.65
3.66
–
4.41
6.69
–
9.97
38.67
–
∞
0.834
–
0.867
0.976
–
1.02
–
1.16
1.24
1.44
–
1.57
2.32
–
2.71
3.53
–
4.62
6.25
–
11.15
27.11
–
∞
0.828
–
–
–
–
–
–
–
–
0.873
0.968
1.03
1.15
1.25
1.42
1.59
2.25
2.80
3.38
4.90
5.78
13.09
19.75
∞
–
–
–
–
–
–
–
–
/
Depth of field/Schärfentiefe
被写界深度
0.819
0.884
0.954
1.05
1.13
1.28
1.38
1.64
2.16
2.97
3.16
5.47
5.14
18.49
13.52
∞
撮影倍率
Reproduction ratio
Abbildungsmaßstab
Rapport de reproduction
Relación de reproducción
Rapporto di riproduzione
–
–
–
–
–
–
–
–
1/9.17
1/11.0
1/13.4
1/17.0
1/28.9
1/46.6
1/93.9
1/∞
Photographic Range with Close-up Attachment
Close-up
attachment
**
PK-series Ring
PN-Ring
Bellows PB-4 or PB-5
Bellows PB-6
Extension bellows
PB-6E
Repro copy outfit
PF-2,PF-3 or PF-4
*
The optional Adapter Ring BR-5 or BR-2A is required to mount the lens in the reverse position.
**
The first values are for the PK-11A ring used alone and the other ones for the PK-11A –––PK-13, PK-11 –––PK-13, or PK-1 –––PK-3
Reproduction
ratio
1/10.6 – 1/1.3
1/1.6 – 1/1.3
1/2.0 – 2.2
1/1.8 – 2.5
1/1.8 – 5.2
1/9.2 – 1/9.1
Lens in normal position
Subject field
10.0 x 15.0 – 1.3 x 1.9 40.9 – 11.8 –
1.5 x 2.3 – 1.2 x 1.8
1.9 x 2.8 – 0.43 x 0.67
1.7 x 2.5 – 0.39 x 0.59
1.7 x 2.5 – 0.18 x 0.28
8.7 x 13.1 – 8.6 x 12.9
Focused
distance
12.7 – 11.7
13.5 – 14.0 1/1.2 – 2.5
13.0 – 14.8
13.0 – 23.1
33.6 – 33.5
Reproduction
1/1.3 – 2.0
1/1.3 – 5.1
ratio
–
–
rings used together. However, the PK-11 and PK-1 rings cannot be attached directly to the lens.
接写表
/Photographic Range with Close-up Attachment/ Fotografische Bereiche mit dem Nahaufnahme-Zubehör
Lens in reverse position
Subject field
– –
–
11 x 1.6 – 0.37 x 0.55
1.3 x 1.9 – 0.47 x 0.7
1.3 x 1.9 – 0.2 x 0.3
–
Focused
distance
11.9 – 15.0
12.2 – 13.5
12.2 – 21.6
Rapports obtenus en proxiphotographie et photomacrographie
Rangos fotográficos con accesorios de acercamiento/Fotografia con dispositivi per riprese Close-up
使用器具
Close-up attachment
Nahaufnahmezubehör
Accessoires macro
Accesorio de acercamiento
Dispositivi Close-up
PKリング
**
PK-series Ring
Zwischenringe PK
Bagues PK
Anillo de la Serie PK
Anello serie PK
PNリング
PN-Ring
Zwischenringe PN
Bagues PN
Anillo de la Serie PN
Anello serie PN
ベローズアタッチメント PB-4、PB-5
Bellows PB-4 or PB-5
Balgengerät PB-4, PB-5
Soufflet PB-4 PB-5
Fuelles PB-4 y PB-5
Soffietto PB-4, PB-5
ベローズアタッチメント PB-6
Bellows PB-6
Balgengerät PB-6
Soufflet PB-6
Fuelles PB-6
Soffietto PB-6
エクステンションベローズ PB-6E
Extension Bellows PB-6E
Zusatzbalgen PB-6E
Soufflet additionnel PB-6E
Fuelle de extensión PB-6E
Estensione soffietto PB-6E
複写装置PF-2、PF-3、PF-4
Reprocopy Outfit PF-2, PF-3 or PF-4
Reprogerät PF-2, PF-3 oder PF-4
Statif de reproduction PF-2,PF-3
ou PF-4
Unidad de reproducción PF-2,
PF-3 o PF-4
Corredo per riproduzione/copia
PF-3, PF-3 o PF-4
レンズ正方向
Lens in normal position
Objektive in Normalstellung
Objedtif en position normale
Objetivo en la posición normal
Obiettivo alla posizione normale
撮影倍率 撮影倍率
Reproduction ratio
Abbildungs maßstab
Rapport de
reproduction
Releción de
reproducción
Rapporto di
riproduzione
1/10.6–1/1.3
1/1.6 – 1/1.3
1/2.0 – 2.2
1/1.8 – 2.5
1/1.8 – 5.2
1/9.2 – 1/9.1
被写界面積 被写界面積
Dubject field
Aufnahmefeld
Champ couvert
Campo abarcado
Campo del soggetto
25.4 x 38.2 – 3.2 x 4.8
3.9 x 5.8 – 3.0 x 4.5
4.7 x 7.1 – 1.1 x 1.7
4.2 x 6.4 – 0.98 x 1.5
4.2 x 6.4 – 0.46 x 0.7
22.1 x 33.1 – 21.9 x 32.8
撮影距離
Focused distance
Eingestellte
Entfemung
Distance de mise
au point
Distancia de
enfoque
Distanza messa a
fuoco
104–29.9
32.1 – 29.7
34.2 – 35.6
33.0 – 37.5
33.0 – 58.6
85.3 – 85.0
Reproduction ratio
Abbildungs maßstab
Rapport de
reproduction
Releción de
reproducción
Rapporto di
riproduzione
–
–
1/1.2 – 2.5
1/1.3 – 2.0
1/1.3 – 4.7
–
レンズ逆向き*
Lens in reverse position*
Objektive in Reprostellung*
Objedtif en position retoumée*
Objetivo en posición invertida*
Obiettivo alla posizione inbersa*
反装
反装
Dubject field
Aufnahmefeld
Champ couvert
Campo abarcado
Campo del soggetto
–
–
2.8 x 4.2 – 0.94 x 1.4
3.2 x 4.8 – 1.2 x 1.8
3.2 x 4.8 – 0.51 x 0.77
–
撮影距離
Focused distance
Eingestellte
Entfemung
Distance de mise
au point
Distancia de
enfoque
Distanza messa a
fuoco
30.3 – 38.1
30.9 – 34.4
30.9 – 54.9
(ft)
1/10.0
1/13.6
1/20.9
1/28.2
1/42.6
1/71.4
1/∞
(m)
(in)
–
–
(cm)
–
–
–
Especificaciones
Longitud focal: 85 mm
Abertura máxima: f/1,8
Construcción del objetivo:
Angulo fotográfico: 28°30'
Escala de distancias:
Datos de distancias: Salida en las cámeras
Escala de aberturas:
abertura
Bloqueo de abertura mínima: Se suministra
Diafragma: Totalmente automático
Medición de la exposición: Por medio del método de plana abertura en cámaras Al o
oámaras con sistema de interfaz de CPU; por medio del método de diafragmado en
otras cámeras
Montura: A
bayoneta Nikon
Medida de enlazamiento: 62 mm (P = 0,75 mm)
Dimensiones: Aprox. 71,5 mm x diám.
aprox. 69 mm largo(total)
Paso: Aprox. 380 g
6 elementos en 6 grupos
Graduada en metros y pies, desde 0,85 m (3 ft.) hasta infinito(∞)
f/1,8 ~ f/16
tanto que
en la escala normal y la de lectura directa de la
58,5 mm desde la pesta-ña de montaje;
Caratteristiche techiche
Lunghessa focale: 85 mm
Apertura massima: f/1,8
Costruzione obiettivo:
Angolo di campo: 28°30'
Scala distanze:
Dati distanze: Uscita in fotocamere
Scala aperture:
apertura
Blocco apertura minima: Inseribile
Diaframma:
Completamente automatico
Misurazione dell’ esposizione: Con metodo ad apertura massima per le fotocamere Al o
fotocamere con sistema di interfaccia CPU; tramite il sistema Stop-Down con le
altre fotocamere
Innesto:
Nikon a baionetta
Dimensioni attacco: 62 mm (P = 0,75 mm)
Dimensioni: ca. 71,5 mm diam. x
Peso: ca. 380 gr.
6 elementos en 6 grupos
Graduada en metros y pies, desde 0,85 m (3 ft.) hasta infinito(∞)
f/1,8 a f/16
sia sulla scala normale che sulla scala di lettura diretta delle
58,5 mm estensione della flangia;
Iunghezza totale ca. 69 mm
*
レンズを逆向きにして使用するときには、アダプターリングBR-5およびBR-2Aリングが必要です。
**
PKリングのはじめの数値はPK-11Aリング1個使用のとき、あとの数値はPK-11A〜PK-13リング、PK-11〜PK-13リングまたはPK1〜PK-3リングを連結したときのものです。ただし、PK-11リングおよびPK-1リングはこのレンズに直接取付けることはできませ
んのでご注意ください。
Zur Montage des Objektivs in Reprostellung ist der Adapterring BR-5 oder BR-2A als Sonderzubehör erhältlich.
*
**
Die ersten Werte gelten für den
Kombinationen PK-11A –– PK-13, PK-11 –– PK-13 oder PK-1–– PK-3. Die Zwischenringe PK-11 und PK-1
Zwischenring
PK-11A, wenn dieser allein benutzt wird. Die anderen Werte gelten für die
lassen sich nicht direkt
am Objektiv anbringen!
*
La bague adaptatrice BR-5 ou BR-2A est nécessaire
**
Les premiéres valeurs sont pour la bague
PK-1 –– PK-3
Para montar el objetivo en la posición inversa se requiere el Anillo Adaptador BR-5 o BR-2A opcional.
*
Los primeros valores son para el caso en;que se utilica el anillo PK-11A solo y los otros valores para el caso en que se utilicen los
**
anillos PK-11A –––PK-13, PK-11 –– PK-13, o PK-1 –––PK-3 juntos. Sin embargo, no es posible montar los anillos PK-11 y PK-1 en
el objetivo en forma derecta.
L’anello adattatore opzionale BR-5 o BR-2A
*
**
I primi valori sono per l’anello PKPK-3
*
**
*
**
utilisées ensemble.
usati assieme. Si tenga comunque presente che gli anelli PK-11 e PK-1 non p
PK-11A
Toutefois, les
11A usato da soko mentre i seguenti sono per gli anelli PK-11A –– PK-13, PK-11 –––PK-13,o PK-1 ––
pour monter l’objedtif dans la position retournée
utilisée
seule et
bagues PK-11 et PK-1 ne
les autres pour les
peuvent être directement fixées à l’objectif.
bagues PK-11A –– PK-13, PK-11 –– PK-13 ou
serve per montare l’obiettivo nella posizione inversa.
ossono essere agganciati direttamente all’obiettivo.
 Loading...