


iPIX Photography with
Nikon Digital Cameras
Coolpix 700, 800, 900, and 950 models
DOC- NIKL- R1


NTERNET PICTURES CORPORATION
I
CORPORATE
Oak Ridge, TN
World Headquarters
Internet Pictures Corporation
1009 Commerce Park Drive
Suite 400
Oak Ridge, TN 37830, USA
1-888-909-iPIX
Phone: (865) 482-3000
Fax: (865) 276-2331
Customer Service: 888-425-0098
Technical Support: 888-425-0048
Sales: 800-336-7113
Web site: http://www.ipix.com
San Ramon, CA
Co-Headquarters
Internet Pictures Corporation
3160 Crow Canyon Rd., 4th Floor
San Ramon, CA 94583
Phone: (925) 277-9499
Fax: (925) 277-9494
Email: ipixsr@ipix.com
Web site: http://www.ipix.com
SALES OFFICES
Oak Ridge, TN
Internet Pictures Corporation
1009 Commerce Park Drive
Suite 400
Oak Ridge, TN 37830, USA
Phone: 1-888-909-iPIX
(865) 482-3000
Fax: (865) 276-2331
Email: sales@ipix.com
Web site: http://www.ipix.com
United Kingdom/Europe
Internet Pictures UK LTD.
22 Welbeck Street
London W1G 8EG
United Kingdom
Phone: +44(0) 207 935 1287
Fax: +44(0) 207 486 8110
Email: info@ipix.co.uk
Web site: http://www.ipix-eu.com
San Ramon, CA
Internet Pictures Corporation
3160 Crow Canyon Rd., 4th Floor
San Ramon, CA 94583
Phone: (925) 277-9499
Fax: (925) 277-9494
Email: ipixsr@ipix.com
Web site: http://www.ipix.com
SUPPORT OFFICES
Oak Ridge, TN
Internet Pictures Corporation
1009 Commerce Park Drive
Suite 400
Oak Ridge, TN 37830, USA
Technical Support: 888-425-0048
Customer Service: 888-425-0098
Fax: (865) 276-2331
Email:
technical_support@ipix.com
Web site: http://www.ipix.com
United Kingdom/Europe
Internet Pictures UK LTD.
22 Welbeck Street
London W1G 8EG
United Kingdom
Phone: +44(0) 207 935 1287
Fax: +44(0) 207 486 8110
Customer and Technical Support:
technical_support@ipix.com
Email: info@ipix.co.uk
Web site: http://www.ipix-eu.com

EGAL
L
Copyright ©2000-2001 Internet Pictures Corporation. All rights
reserved. iPIX image, PhotoBubble, iPIX Real Estate Virtual Tour
Wizard software, iPIX Wizard software, iPIX MyPhotoBubble
software, iPIX® Builder software, iPIX TV-Studio software, iPIX
WebCam software, and iPIX I-Linker software are trademarks of
Internet Pictures Corporation.
iPIX images are a means of viewing a totally immersive, unbounded
image created from two fisheye photographs. Based on the following
U.S. Patents RE 36,207; 5,384,588; 5,764,276; 5,877,801; and
5,903,319 (others pending).
Macintosh is a registered trademark of Apple Computer Inc.
Acrobat and Photoshop are registered trademarks of Adobe Systems
Incorporated.
Java is a registered trademark of Sun Microsystems, Inc.
Microsoft, Windows, and Internet Explorer are registered trademarks
of Microsoft Corporation.
Netscape is a registered trademark of Netscape Communications
Corporation.
This software is based in part on the work of the Independent JPEG
Group. Portions of the imaging technology of this product are
copyrighted by Accusoft Corporation. Other product and brand names
may be trademarks or registered trademarks of their respective owners
This manual was last modified on February 11, 2002. DOC-NIKL-R1.
N
OTICE

TABLE OF CONTENTS
1 • Welcome to iPIX® Imaging . . . . . . . . . . . . . . . . . . . . 1
Supported Camera Models . . . . . . . . . . . . . . . . . . . . . . . . . . . . . 2
The iPIX Picture-taking Process . . . . . . . . . . . . . . . . . . . . . . . . 2
Minimum Requirements. . . . . . . . . . . . . . . . . . . . . . . . . . . . . . . 3
Technical Support . . . . . . . . . . . . . . . . . . . . . . . . . . . . . . . . . . . 4
2 • Installing Your Software . . . . . . . . . . . . . . . . . . . . . . 5
Step 1: Install iPIX Software . . . . . . . . . . . . . . . . . . . . . . . . . . . 6
Step 2: Install Adobe Acrobat Reader . . . . . . . . . . . . . . . . . . . . 7
3 • Preparing for Photography . . . . . . . . . . . . . . . . . . . . 9
Photography Preparations . . . . . . . . . . . . . . . . . . . . . . . . . . . . 10
Assembling Your iPIX Camera Equipment. . . . . . . . . . . . . . . . 12
4 • Setting up Your Camera . . . . . . . . . . . . . . . . . . . . . 15
Nikon Coolpix 700. . . . . . . . . . . . . . . . . . . . . . . . . . . . . . . . . . 16
Nikon Coolpix 800. . . . . . . . . . . . . . . . . . . . . . . . . . . . . . . . . . 17
Nikon Coolpix 900. . . . . . . . . . . . . . . . . . . . . . . . . . . . . . . . . . 19
Nikon Coolpix 950. . . . . . . . . . . . . . . . . . . . . . . . . . . . . . . . . . 20
5 • Taking Your Pictures . . . . . . . . . . . . . . . . . . . . . . . . 23
Photography Tips for iPIX Images . . . . . . . . . . . . . . . . . . . . . . 24
Step 1: Set the Auto Exposure Lock. . . . . . . . . . . . . . . . . . . . . 26
Step 2: Set the White Balance . . . . . . . . . . . . . . . . . . . . . . . . . 28
iPIX® Photography with Nikon Digital Cameras
i

Step 3: Take the First Picture. . . . . . . . . . . . . . . . . . . . . . . . . . 30
Step 4: Take the Second Picture . . . . . . . . . . . . . . . . . . . . . . . 31
Step 5: Finish Your Photo Session. . . . . . . . . . . . . . . . . . . . . . 31
6 • Downloading Images . . . . . . . . . . . . . . . . . . . . . . . . 33
Option 1: Serial or USB Cables . . . . . . . . . . . . . . . . . . . . . . . . 34
Option 2: PCMCIA Card. . . . . . . . . . . . . . . . . . . . . . . . . . . . . . 38
Option 3: USB Card Reader . . . . . . . . . . . . . . . . . . . . . . . . . . . 38
Option 4: Parallel Port Card Reader . . . . . . . . . . . . . . . . . . . . . 38
ii
iPIX® Photography with Nikon Digital Cameras
.
Welcome to iPIX® Imaging
Thank you for your purchase of an iPIX® Camera Kit featuring the Nikon
Coolpix digital camera. With your kit, you can shoot and build immersive
iPIX images in a matter of minutes. iPIX images enable you to “step
inside” an environment—exploring up, down, and all around. It is a solution that has proven valuable for many markets, including real estate,
travel, publishing, education, training, and journalism.
This book describes the steps to set up your equipment, establish settings
on your camera to optimize it for iPIX photography, and download your
images to your computer.
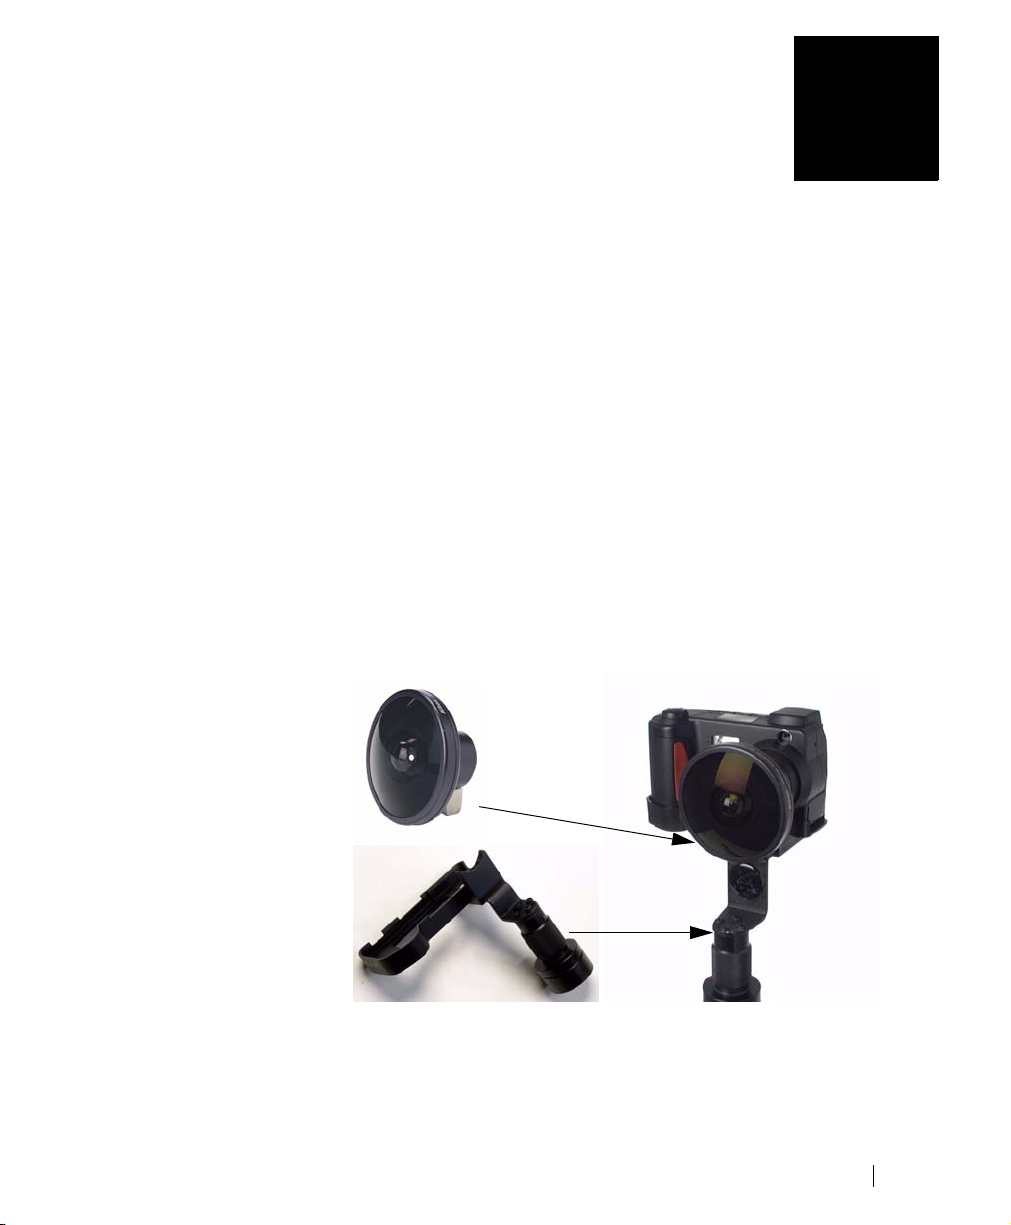
Two of the most important camera kit components are the fisheye lens and
rotator. The fisheye lens attaches to your camera and broadens the field of
view (FOV) of your camera’s fixed lens. The rotator lets you turn your
camera exactly 180°—capturing one 180° picture, or “hemisphere.” Two
hemispheres are used to create an iPIX image.
1
. . . .
The Fisheye Lens
attaches to the
camera’s fixed lens.
The Rotator attaches
to the camera base
and the tripod.
The fisheye lens and rotator attach to the camera. The rotators are customized for each
camera model.
iPIX® Photography with Nikon Digital Cameras
1

1 - WELCOME TO IPIX® IMAGING
Supported Camera Models
Supported Camera Models
iPIX photography supports eight Nikon Coolpix digital camera models,
including the 700, 800, 880, 885, 900, 950, 990, and 995. This photography guide covers the Coolpix 700, 800, 900, and 950 models. Contact
Internet Pictures on the World Wide Web at http://www.ipix.com for
guides for camera models not listed here.
The iPIX Picture-taking Process
This iPIX Photography guide explains how to set up your camera and take
pictures for iPIX image creation. The picture taking process is illustrated
below.
1. Select a location and place the camera close to an area of interest.
2. Take the first picture using the settings outlined in this Guide.
3. Rotate the camera 180°.
4. Take the second picture.
5. Download the images to your computer.
iPIX® Photography with Nikon Digital Cameras
2
Sel ect a loca t ion
Downloa d
images
Take the
first pi ctur e
Rot at e the
cam era
Take the
second pictur e
Minimum Requirements
The minimum system requirements will depend upon the software you
purchased. Your iPIX software manual contains complete details.
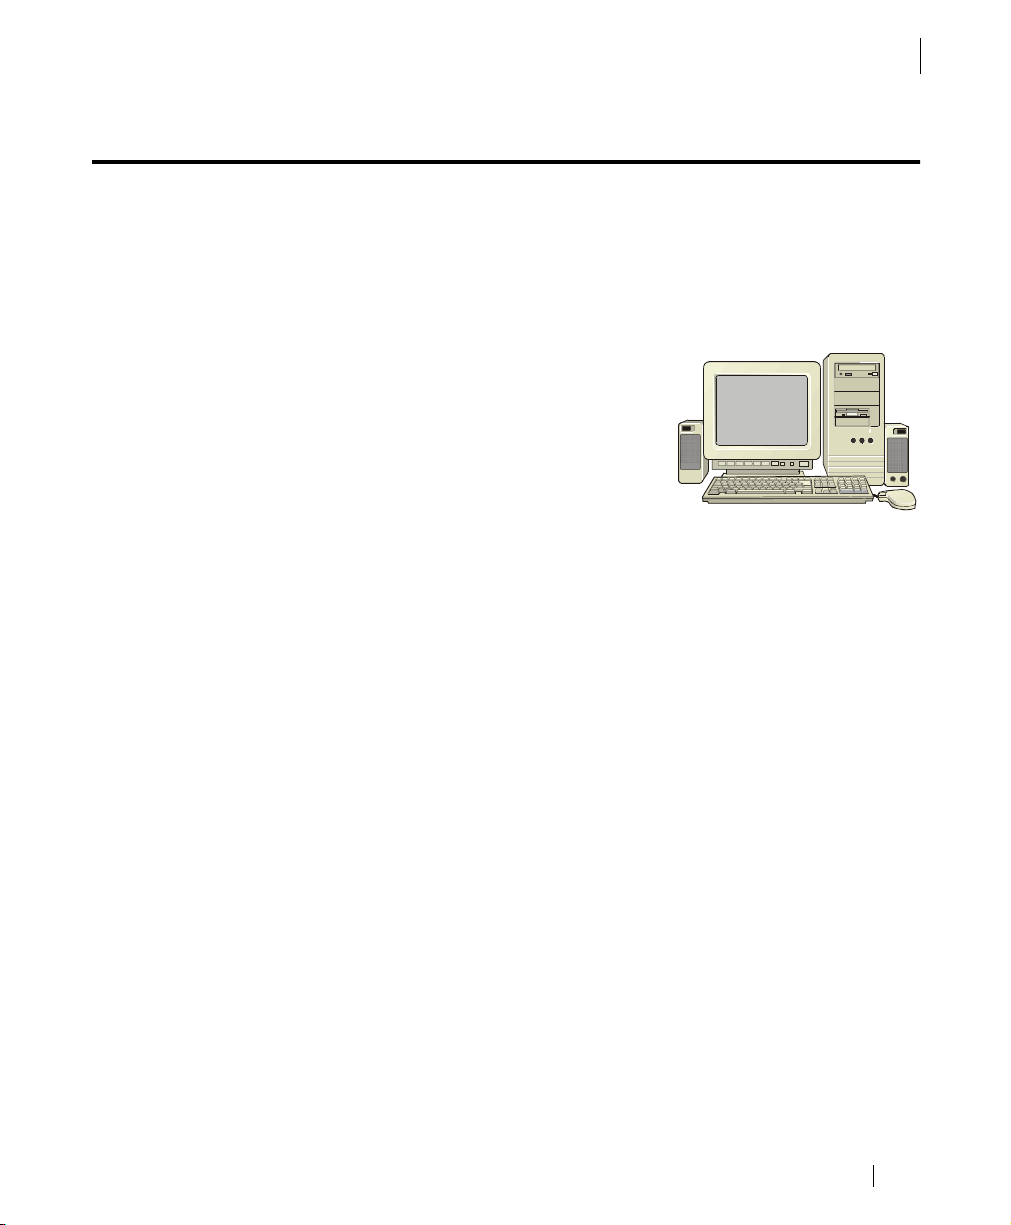
Personal Computer Requirements
To use this kit and all included software
with your personal computer, you will need:
• One free serial port, USB port, or a
PCMCIA Type II card slot.
• Microsoft Windows 95, 98, 2000, ME,
XP, or Windows NT 4.0 or later.
• Quad-speed or faster CD-ROM drive.
• Pentium 133 MHZ or faster processor (166 MHz or faster recommended).
• 32 MB RAM (64 MB recommended).
• 75 MB or more free hard disk space.
• Video display capable of 800 x 600 pixels or higher with 256 colors
(65,535 colors or higher recommended).
1 - WELCOME TO IPIX® IMAGING
Minimum Requirements
iPIX® Photography with Nikon Digital Cameras
3
1 - WELCOME TO IPIX® IMAGING
Technical Support
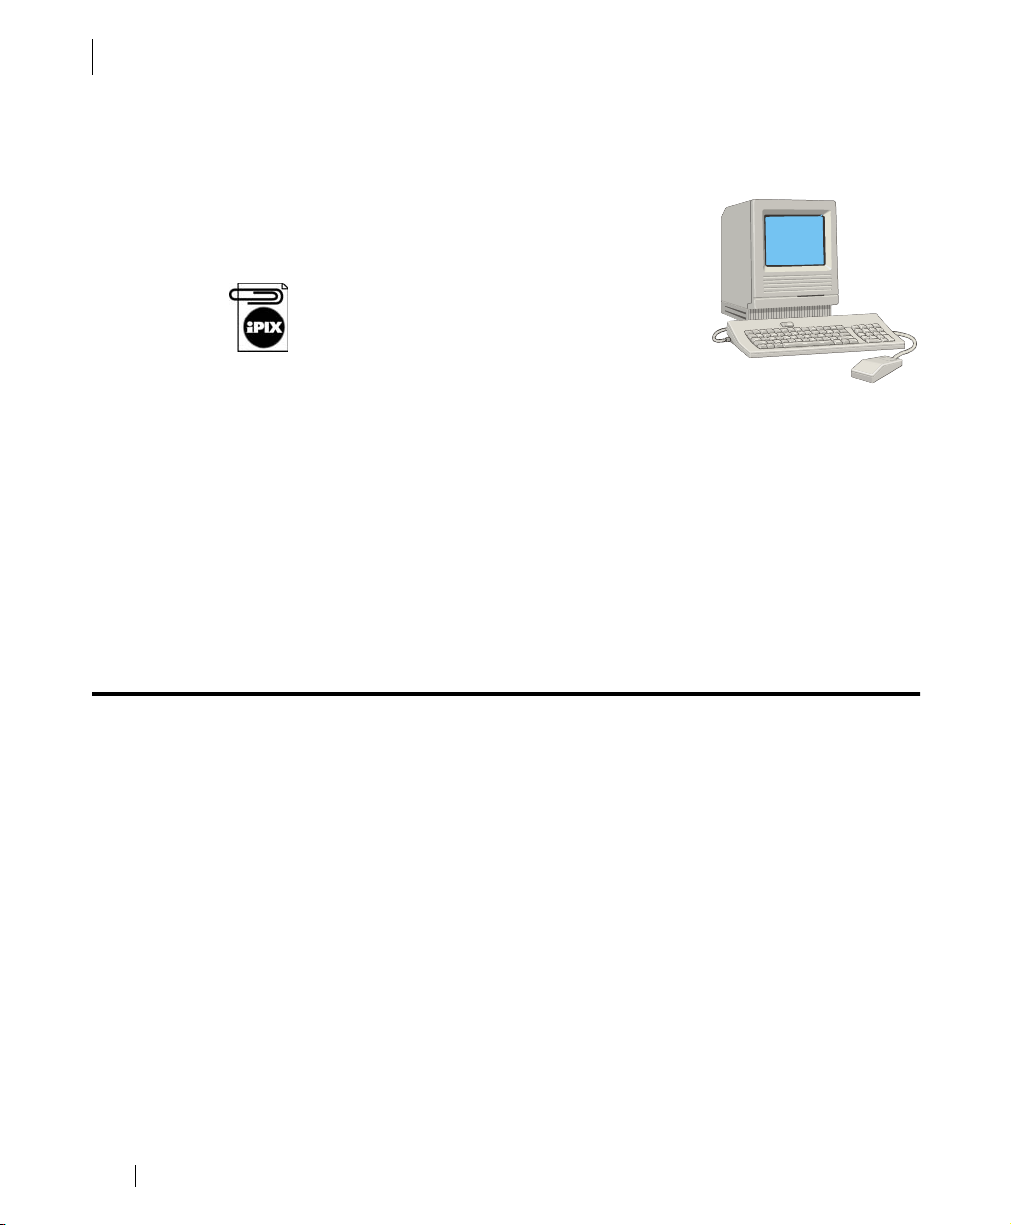
Macintosh Computer Requirements
To use this kit and all included software with
your Macintosh computer, you will need:
• One free serial port on your computer,
USB port, or a PCMCIA Type II card slot
To use the USB connectivity option, System 8.6
or later must be installed on your computer.
• System 8.1 with Appearance Manager
installed, System 8.6 or later recommended.
• QuickTime 4.0 or later installed.
• Quad-speed or faster CD-ROM drive.
• PowerPC 603e 180 Mhz or faster processor.
• 64 MB of physical RAM.
• 60 MB of free hard disk space.
• Video display capable of 640 x 480 pixels or higher with 256 colors
(thousands of colors or better recommended).
Technical Support
Technical support is available for assistance with any iPIX product by visiting Internet Pictures Corporation’s Web site located at
http://www.ipix.com/support/support.shtml or by calling toll-free (888)
425-0048.
iPIX® Photography with Nikon Digital Cameras
4

.
Installing Your Software
Your iPIX® Camera Kit includes three or more CD-ROMs: iPIX Software,
Nikon Coolpix Reference Manuals, and Nikon View software, depending
upon your camera model.
• iPIX Software. Your iPIX software creates interactive, spherical
images by aligning and seaming, two opposing hemispheres taken
with a fisheye lens-equipped digital camera.
• iPIX Viewer Software. The iPIX CD includes the iPIX Viewer, a
standalone application for viewing iPIX images. The Viewer software
also comes with Internet browser plug-ins for Netscape Navigator/
Communicator, and Microsoft Internet Explorer.
• Nikon Reference Manuals CD. The Nikon Reference CD contains elec-
tronic versions of the available camera documentation. This CD also
contains the installation program for Adobe Acrobat Reader. Adobe
Acrobat Reader allows you to view, navigate, and print PDF files.
• Nikon View. The Nikon View software allows your computer and the
Nikon Coolpix camera to communicate. The Nikon View software also
lets you view the images on your camera and download them to your
hard drive.
2
. . . .
iPIX® Photography with Nikon Digital Cameras
5

2 - INSTALLING YOUR SOFTWARE
Step 1: Install iPIX Software
Step 1: Install iPIX Software
The iPIX Viewer and iPIX Plug-ins are installed during this process. The
exact steps may vary. Please refer to your iPIX User Manual for detailed
instructions.
Windows Installation
This procedure will walk you through installing the iPIX software on your
computer.
1. Insert the iPIX CD into your CD-ROM drive. The Setup program
should start automatically.
If the program does not start, click on the Start button on the Windows
Task Bar. Select Run. Type D:\setup.exe (where D: is the letter of your CDROM drive) and press the Enter key on your keyboard.
2. Select the iPIX software you wish to install.
3. Follow the on-screen instructions.
Macintosh Installation
This procedure will install the iPIX software on your computer.
iPIX software on the Macintosh requires the Appearance Manager and
QuickTime. If you do not have these items on your computer, the
Installation program will automatically install them. After the installation
is completed, you may need to restart your computer.
1. Close any open applications and insert the iPIX CD into your CD-
2. Double-click the iPIX icon when it appears on the desktop, then open
3. Select the iPIX software you wish to install.
4. Follow the on-screen instructions.
iPIX® Photography with Nikon Digital Cameras
6
ROM drive.
the Setup icon.

Step 2: Install Adobe Acrobat Reader
Adobe Acrobat Reader software is used to read the electronic copy of the
software manual included with your iPIX software. This step is optional.
Windows Installation
1. Turn on your computer and place the iPIX CD in your CD-ROM
drive. The setup screen should start automatically.
2. Select the Install Acrobat Reader option.
3. Follow the on-screen directions.
Macintosh Installation
1. Turn on your computer and place the iPIX CD into your CD-ROM
drive.
2. Double-click on the iPIX CD icon when it appears on your desktop.
3. Double-click on the Setup icon to start the setup screen.
2 - INSTALLING YOUR SOFTWARE
Step 2: Install Adobe Acrobat Reader
4. Select the Install Acrobat Reader option to begin.
5. Follow the on-screen directions.
iPIX® Photography with Nikon Digital Cameras
7

2 - INSTALLING YOUR SOFTWARE
Step 2: Install Adobe Acrobat Reader
iPIX® Photography with Nikon Digital Cameras
8

.
Preparing for Photography
This chapter will walk you through preparing your digital camera for
iPIX® photography. Some steps are specific to particular camera models.
These sections are labeled with the camera model number in the heading.
Before you work with your camera, familiarize yourself with your new
equipment. Most kits will include software, rotator, fisheye lens, and fisheye lens adapter for your camera. Other optional items, like additional
memory cards, memory card readers, tripods, etc., may be included in your
kit.
3
. . . .
Supported digital camera
Fisheye lens and adapter
Customized rotator for
this digital camera model.
Every digital camera supported by
Internet Pictures uses a custom-
designed fisheye lens, rotator, and
lens adapter, like the one shown.
Turning the Camera Off
Before changing batteries and inserting or removing the memory card,
make sure that your camera is turned off. To turn your Nikon digital camera off, switch the camera’s mode dial to the OFF position.
iPIX® Photography with Nikon Digital Cameras
9

3 - PREPARING FOR PHOTOGRAPHY
Photography Preparations
Photography Preparations
The following instructions in this section will work with any supported
Nikon Coolpix digital camera models.
Step 1: Insert the Batteries
1. Remove the batteries from the kit.
If your kit comes with rechargeable batteries, charge the nickel metal
hydride (NiMH) batteries before using them in the camera. Only use the
charger with NiMH batteries.
2. Open the battery compartment on the underside of the camera by
pressing the button and sliding the cover out.
3. Slide the battery compartment door out, and lift it up.
4. Insert the batteries according to the inner diagram.
5. Push the flap down and slide it in.
Nikon 800
Nikon 950
iPIX® Photography with Nikon Digital Cameras
10
Battery
compartment
with batteries.
The Nikon Coolpix 800 and 950 digital cameras
with the battery compartments open.

Step 2: Insert the Memory Card
1. Locate the memory card. Some kits include a larger
memory card, like the one shown at right
2. Remove the card from its plastic case.
3. Open the memory card door.
3 - PREPARING FOR PHOTOGRAPHY
Photography Preparations
The memory card door is on the underside or side of the camera,
depending upon your camera model.
4. Gently insert the card.
5. As you insert the card, the Card Release button to the left side will
move up.
6. After the card release button pops up, fold the button down.
7. Close the door.
iPIX® Photography with Nikon Digital Cameras
11

3 - PREPARING FOR PHOTOGRAPHY
Assembling Your iPIX Camera Equipment
Assembling Your iPIX Camera Equipment
Careful assembly of your camera equipment and tripod will ensure high
iPIX image quality. Make sure your tripod is firmly set up and that you
pay close attention to avoid bumping or moving it between pictures.
Step 1: Assemble the Tripod and Rotator
1. Remove the rotator.
2. Extend each tripod leg by starting at the bot-
tom, loosening the twist bolts, and extending
it to its full length.
3. Tighten the bolt.
4. Repeat the process for the remaining legs.
5. Turn the base of the rotator clockwise to firmly attach it to the tripod.
iPIX® Photography with Nikon Digital Cameras
12

Assembling Your iPIX Camera Equipment
Step 2: Attach the Fisheye Lens Adapter
1. Remove the fisheye lens with attached adapter from the case.
2. Remove the back lens cap from the fisheye converter lens, being careful
not to touch the lens glass.
3. Leave the front fisheye lens cap on until you are ready to shoot.
3 - PREPARING FOR PHOTOGRAPHY
4. Attach the back of the fisheye converter lens to the threaded camera
lens. Do not over tighten.
iPIX® Photography with Nikon Digital Cameras
13

3 - PREPARING FOR PHOTOGRAPHY
Assembling Your iPIX Camera Equipment
Step 3: Attach the Camera to the Rotator
1. Place the camera on the rotator.
2. Align the threaded mount on the bottom of the camera with the
thumb screw on the rotator.
3. The camera body will sit differently on the rotator depending upon
your camera model. The front of the camera lens should sit directly
over the rotator’s center.
Thumb screw
The rotator cradles and supports the camera body. The camera
should have very little movement once it is securely fastened to
the rotator.
4. Gently turn the thumb screw on the rotator clockwise to secure the
5. Turn the rotator until it clicks softly into place.
6. Rotate the camera clockwise by gripping the rotator base until it clicks
To avoid image misalignment or camera/lens damage, rotate the camera
clockwise using the rotator base only. Whenever you rotate the camera,
make sure the rotator remains securely attached to the tripod.
iPIX® Photography with Nikon Digital Cameras
14
camera. Do not over tighten.
into place.

.
Setting up Your Camera
iPIX® photography uses optimized camera settings. Each time you take
iPIX image pairs, the exposure lock should be reset to ensure the highest
quality. Some settings are not retained after the camera is turned off.
Image quality settings are retained unless the batteries are removed.
The first time you use your Nikon Coolpix digital camera, you will need to
set the date and time. Refer to your camera manual for detailed instructions.
Procedures for setting these options differ according to your camera
model. Instructions for each camera appear on separate pages. Locate your
camera model in the section heading and follow the instructions. For
example, if you have a Nikon Coolpix 800 digital camera, only follow the
directions for that camera, and disregard the other models’ procedures.
4
. . . .
iPIX® Photography with Nikon Digital Cameras
15

4 - SETTING UP YOUR CAMERA
Nikon Coolpix 700
Nikon Coolpix 700
Set Fisheye Lens Mode
This procedure will prepare your Nikon CoolPix 700 digital camera for
iPIX photography.
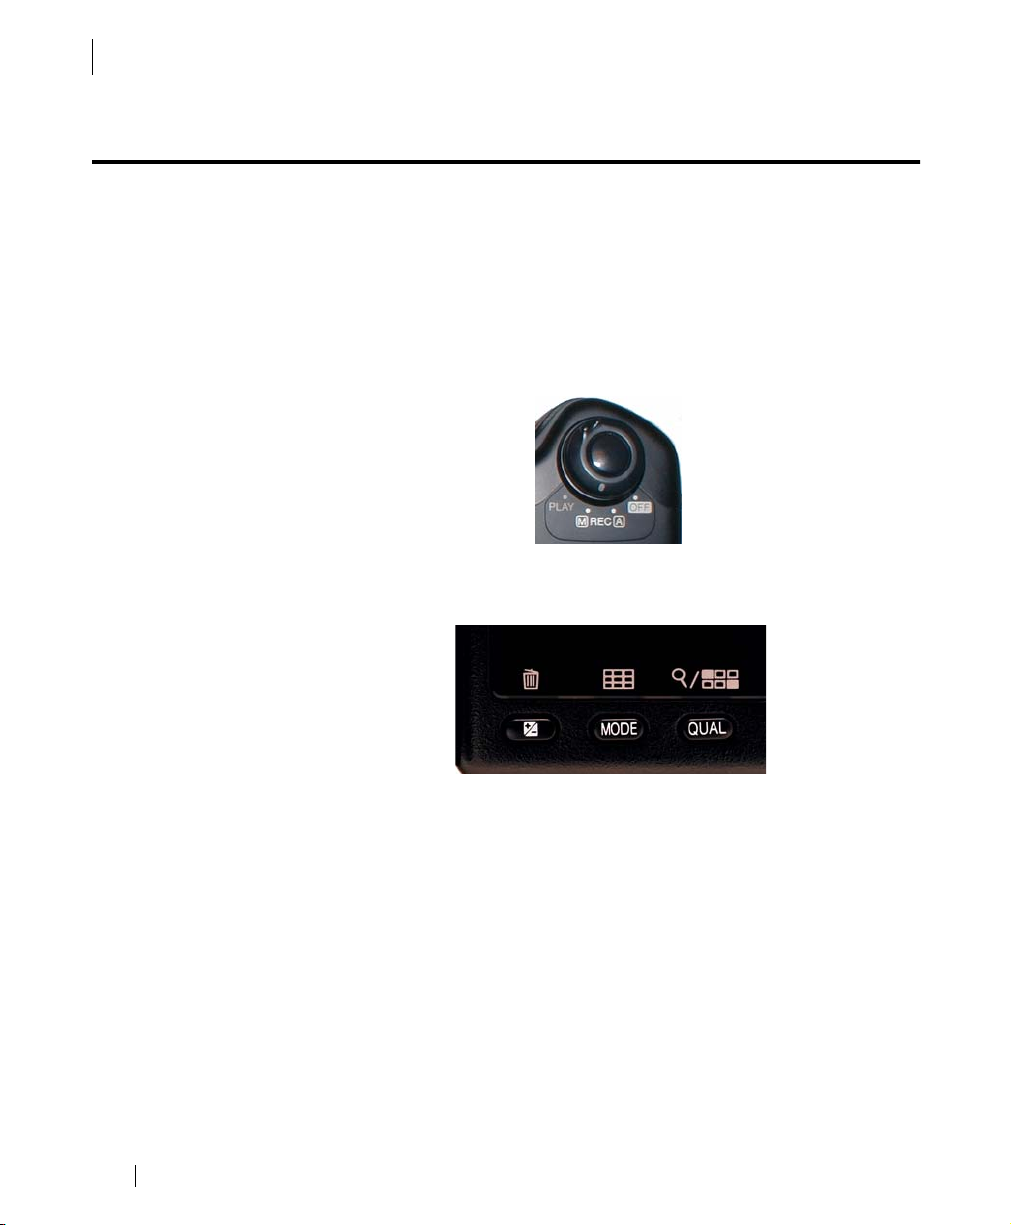
1. Pivot the mode dial around the shutter release button on the top of
the camera to M-REC mode.
2. Press the Menu button below the back LCD screen twice to show the
second page of the Shooting menu.
3. Use the up and down arrow buttons to select Lens.
4. Press the shutter release button to move to the Lens menu.
5. Select Fisheye option from the Lens menu.
6. Press the shutter release button to activate the option.
7. The LCD screen will return to a normal display.
Set the Image Quality
Setting the image quality for IPIX photography is a crucial step. If your
images are taken a lower resolution mode, IPIX images created using these
hemispheres may appear pixelated.
1. Press the QUAL button on the top of the camera twice until the word
2. Turn off the camera by pivoting the switch around the shutter release
iPIX® Photography with Nikon Digital Cameras
16
“FINE” appears in the top LCD screen.
button to off.

Nikon Coolpix 800
Select Fisheye Lens Mode
4 - SETTING UP YOUR CAMERA
Nikon Coolpix 800
These instructions walk you through setting the image quality and fisheye
lens mode on your Nikon Coolpix 800 digital camera.
1. Turn the mode dial to M-REC mode.
2. Press the MENU button below the back LCD screen twice to show the
second page of the Shooting menu.
3. Use the up and down arrow buttons to select LENS.
4. Press the shutter release button to move to the LENS menu.
5. Select the FISHEYE option from the LENS menu.
6. Press the shutter release button to activate the option.
iPIX® Photography with Nikon Digital Cameras
17

4 - SETTING UP YOUR CAMERA
Nikon Coolpix 800
Set the Image Quality
Setting the image quality for IPIX photography is a crucial step. If your
images are taken at a lower resolution mode, IPIX images created using
these hemispheres may appear pixelated.
1. Make sure the camera is in M-REC mode.
1. Press the QUAL button on the top of the camera until the word
2. Turn off the camera by pivoting the switch around the shutter release
“FINE” appears in the top LCD screen.
button to the off position.
Your camera is now ready for iPIX Photography.
iPIX® Photography with Nikon Digital Cameras
18

Nikon Coolpix 900
Select Fisheye Lens Mode
4 - SETTING UP YOUR CAMERA
Nikon Coolpix 900
These instructions walk you through setting the image quality and fisheye
lens mode on your Nikon Coolpix 900 digital camera.
1. Pivot the switch around the silver shutter button on the top of the
camera to M-REC.
2. Press the Menu button below the back color LCD panel.
3. Select Extra Func from the menu and press the Shutter button to
enable it.
4. Select Fisheye from the menu and press the shutter button to select it.
An X will appear in the box next to the Fisheye option.
5. Scroll to the top of the menu and select Execute using the arrow but-
tons.
6. Press the shutter button to enable it.
Set the Image Quality
1. Locate the Quality button on the top of the camera.
2. Press the Quality button until the word Fine appears in the top LCD
window.
X
iPIX® Photography with Nikon Digital Cameras
19
4 - SETTING UP YOUR CAMERA
Nikon Coolpix 950
Nikon Coolpix 950
Select Fisheye Lens Mode
This procedure walks you through setting the image quality and the Fisheye lens mode on your camera.
1. Pivot the mode dial around the shutter release button on the top of
the camera to M-REC mode.
2. Press the Menu button below the back LCD screen twice to display the
second page of the Shooting menu.
3. Use the up and down arrow buttons to select Lens.
4. Press the shutter release button to move to the Lens menu.
5. Select the Fisheye 1 option from the Lens menu.
6. Press the shutter release button to activate the option.
7. The LCD screen will return to a normal display.
iPIX® Photography with Nikon Digital Cameras
20

Set the Image Quality
Setting the image quality for iPIX photography is a crucial step. If your
images are taken at a lower resolution mode, iPIX images created using
these hemispheres may appear pixelated.
1. Press and hold the QUAL button.
2. Rotate the mode dial on the front of the camera.
3. The word “FINE” will appear in the top LCD screen.
4 - SETTING UP YOUR CAMERA
Nikon Coolpix 950
Mode dial
The Nikon Coolpix 950 digital camera has several image quality modes:
VGA, XGA and high quality. In XGA and VGA modes, the letters VGA or
XGA appear next to the word FINE. In high quality mode, FINE appears by
itself.
4. Release the QUAL button.
iPIX® Photography with Nikon Digital Cameras
21

4 - SETTING UP YOUR CAMERA
Nikon Coolpix 950
iPIX® Photography with Nikon Digital Cameras
22

.
Taking Your Pictures
This chapter will walk you an iPIX® photography session. Every time you
take a new set of pictures (after every two shots), you will need to repeat
each of these steps, which include taking the first picture, rotating the
camera, taking the second picture, and resetting Exposure Lock mode.
Before you begin taking pictures, make sure you have everything you
need:
• Freshly charged batteries and a new set of alkaline batteries. Digital
cameras use batteries very quickly. Even if you are using nickel metal
hydride (NiMH) batteries, they may run down before you are finished
taking pictures. Carrying a spare set is always a good idea.
• The flash must be disabled when you use your Nikon digital camera
for iPIX photography. When you set the camera to Fisheye Lens mode,
the flash is automatically disabled.
• Your camera should be in Fine mode when you turn it on. The letters
“FINE” will appear in the top LCD panel.
General photography tips are also provided in this chapter.
5
. . . .
For the best results, it is strongly recommended that you familiarize yourself with the Nikon Coolpix manuals included with your camera before
taking any pictures.
iPIX® Photography with Nikon Digital Cameras
23

5 - TAKING YOUR PICTURES
Photography Tips for iPIX Images
Photography Tips for iPIX Images
Composing the Image
Composing an iPIX image involves two major decisions: seam placement
and image viewpoint.
First, choose where the seam will fall. For example, if you are shooting a
living room that features a complex and detailed dried flower arrangement, avoid placing the seam on this area. If you are shooting journalistic
or action-packed subjects, such as a sporting event, avoid placing the
seam in the areas where most of the action is taking place.
Second, determine the point of view by deciding where to place the camera and tripod. iPIX images place the viewer in the middle of the picture,
and can make objects appear farther away than they really are.
• Don’t place the tripod exactly between two areas of interest in the
scene. Instead, position the tripod such that an area of interest is in
the foreground of your scene.
• Determine the point of view of your shot and adjust the tripod to the
appropriate height.
• Remember that the fisheye lens has over 180° of coverage. Make sure
that you remain well behind the tripod when pictures are taken.
iPIX® Photography with Nikon Digital Cameras
24

Use of Lighting
Lighting plays a crucial role in how your hemispheres look as a completed
iPIX image. Just like in traditional photography, you must be aware of
light sources. If you take a picture of a room facing the brightest light
source, a window for example, then that hemisphere will appear dark in
the area surrounding the window. The opposing hemisphere will have a
normal exposure. When you build the iPIX image using these two hemispheres, the lighting will be unbalanced, with one half of the image dark,
and the other half light.
• If there is a primary light source, place it on the seam. This will balance the light between the hemispheres and keep overexposure to a
minimum.
• Always use the Exposure Lock setting to capture equal lighting
between hemisphere pictures.
• To even out the lighting on sunny days, blinds or curtains should be
closed and all room lights turned on.
• Do not turn on the flash function.
iPIX photography never involves the use of your camera’s flash. Using the
flash can cause uneven image exposure between hemispheres. Even if
the room is darkened, you will have more consistent results if you do not
use the flash.
Photography Tips for iPIX Images
5 - TAKING YOUR PICTURES
iPIX® Photography with Nikon Digital Cameras
25

5 - TAKING YOUR PICTURES
Step 1: Set the Auto Exposure Lock
Step 1: Set the Auto Exposure Lock
Turn on the Auto Exposure (AE) Lock to capture equal lighting between
two hemisphere images. The first picture you take using the AE Lock in a
pair of hemisphere images will establish the exposure for both the front
and back hemispheres. Using AE Lock automatically disables the flash.
Always remember to reset the exposure lock before every pair of hemispheres. If your hemisphere images appear dark, try resetting the AE lock
and retaking your images.
Nikon Coolpix 700
1. Position the switch around the shutter release button to M-REC
mode.
2. Press the Menu button twice to display the second screen of the
Shooting menu.
3. Use the zoom buttons to scroll down to AE Lock.
4. Press the shutter button to activate it.
5. Use the zoom buttons to select On and press the shutter release button
Nikon Coolpix 800 and 950
1. Position the switch around the shutter release button to M-REC
2. Press the Menu button twice to display the second screen of the
3. Use the zoom buttons to scroll down to AE LOCK.
4. Press the shutter button to activate it.
5. Use the zoom buttons to select On and press the shutter release button
After capturing each pair of hemisphere images, press the Menu button
twice to display the second Shooting menu. Use the zoom buttons to scroll
to AE Lock and press the shutter button. Select Reset to reset the current
settings.
iPIX® Photography with Nikon Digital Cameras
26
to activate it.
mode.
Shooting menu.
to activate it.

Nikon Coolpix 900
1. Position the switch around the shutter release button to M-REC.
2. Press the menu button, and use the down arrow to select Extra Func
option.
3. Press the shutter button to activate it.
4. Scroll down to AE Lock.
5. Press the shutter button so an X appears in next to AE Lock.
6. Select Execute, and press the shutter button.
Step 1: Set the Auto Exposure Lock
5 - TAKING YOUR PICTURES
iPIX® Photography with Nikon Digital Cameras
27

5 - TAKING YOUR PICTURES
Step 2: Set the White Balance
Step 2: Set the White Balance
Next, set the White Balance. The steps for setting the White Balance
depends upon your camera model and the firmware version number. Firmware is a camera’s operating system. Nikon periodically provides firmware
updates on their Web site, http://www.nikon.com.
Determining Your Camera’s Firmware Version
You can determine the firmware version by holding down the Menu button when turning the camera on. Continue to hold the Menu button while
the firmware version number appears in the back LCD.
Camera Model
700 All Versions Manual selection
800 Version 1.0 Manual selection
800 Version 1.1 Automatic
950 Version 1.0, 1.1 Manual Selection
950 Version 1.2, 1.3 Automatic
Nikon Coolpix 700
To set the White Balance:
1. Position the switch around the shutter-release button to MREC
mode.
2. Press the Menu button once to display the Shooting menu.
3. Use the zoom buttons to scroll down to White Balance, and press the
shutter-release button to select it.
4. Choose the option appropriate to lighting where you are shooting and
press the shutter-release button to select it.
Firmware White Balance Steps
iPIX® Photography with Nikon Digital Cameras
28

5 - TAKING YOUR PICTURES
Step 2: Set the White Balance
Nikon Coolpix 800 Version 1.0 and 950 Versions 1.0, 1.1
To set the White Balance:
1. Position the switch around the shutter-release button to M-REC
mode.
2. Press the Menu button once to display the Shooting menu.
3. Use the zoom buttons to scroll down to White Balance, and press the
shutter-release button to select it.
4. Choose the option appropriate to lighting where you are shooting and
press the shutter-release button to select it.
Nikon Coolpix 800 Version 1.1, and 950 Versions 1.2, 1.3
Cameras with these firmware revisions need to use the Automatic setting
for the White Balance option. Follow the directions for your camera model
below.
To set the White Balance:
1. Position the switch around the shutter-release button to M-REC
mode.
2. Press the Menu button once to display the Shooting menu.
3. Use the zoom buttons to scroll down to White Balance, and press the
shutter-release button to select it.
4. Choose Auto and press the shutter-release button to select it.
iPIX® Photography with Nikon Digital Cameras
29

5 - TAKING YOUR PICTURES
Step 3: Take the First Picture
Step 3: Take the First Picture
When you take your first set of pictures, be aware of where you are in
relation to the camera’s field-of-view and the order in which pictures are
taken.
• Sequencing pictures (front/back, back/front) helps to locate matching
hemispheres when creating iPIX images in your iPIX software.
• Make sure that you are not in the range of the fisheye lens when you
are taking pictures.
• Try to avoid capturing people at the edge of the field of view. Take
care to not place the IPIX image seam on visually important regions
of the image.
• Make sure your hands are out of the way so they do not appear in the
image.
Procedure
1. Position the switch around the shutter-release button to M-REC
mode.
2. Point the camera with the lens forward to take the picture.
3. Grasp the rotator clockwise until it clicks into place. Do not turn the
4. Squeeze your thumb and forefinger together to take the picture. This
5. Once the picture is taken, a review image will appear in the color LCD
iPIX® Photography with Nikon Digital Cameras
30
rotator using the camera body.
prevents the camera from moving and your pictures from blurring.
screen. This picture will be the first half of your iPIX image.

Step 4: Take the Second Picture
The first picture you take using the Auto Exposure Lock will establish the
exposure for both the front and back hemispheres.
1. Move the rotator clockwise 180° until it clicks into place.
While rotating the camera, be sure the tripod does not move.
2. Squeeze your thumb and forefinger together to take the picture. This
prevents the camera from moving and your pictures from blurring.
3. Once the picture is taken, a preview image will appear in the color LCD
screen. This picture will become the second half of your iPIX image.
4. Reset the AE Lock by following the procedure in Step 1.
5. Repeat Steps 1 through 4 for any additional images.
Always take pictures in pairs, resetting the exposure lock for each new
pair.
5 - TAKING YOUR PICTURES
Step 4: Take the Second Picture
Step 5: Finish Your Photo Session
The black and white LCD display on the top of the camera shows the number of remaining pictures.
Disassemble the camera, lens, rotator, and tripod. Return the components
to their protective places in your kit.
iPIX® Photography with Nikon Digital Cameras
31

5 - TAKING YOUR PICTURES
Step 5: Finish Your Photo Session
iPIX® Photography with Nikon Digital Cameras
32

.
Downloading Images
There are several ways to download images from your Nikon digital camera to your computer. The most common way is to use the serial or USB
cable provided with your camera. Other options include using a PCMCIA
adapter card, a parallel port, or a USB memory card reader.
What if I don’t have a free serial or USB port?
The adapters included with your camera kit are provided as a convenience
to speed image file downloads and are included in order to support a
broad range of configurations. Unfortunately, it is not possible to include
an adapter for every PC connectivity option.
Parallel port memory card readers, USB card readers, and PCMCIA adapter
cards are viable alternatives if you do not have an available serial port.
Deleting Images From the Memory Card
After one or more photography sessions, your memory card may have
reached full storage capacity. Images can be deleted from the memory card
while your camera is attached to the computer, or by using the camera’s
menus. The Nikon Coolpix Pocket Guide contains directions for deleting
images from the memory card.
6
. . . .
iPIX® Photography with Nikon Digital Cameras
33

6 - DOWNLOADING IMAGES
Option 1: Serial or USB Cables
Option 1: Serial or USB Cables
Serial and/or USB cables are provided with your camera. The Nikon View
software must be installed on your computer to establish a connection
between your camera and your computer.
Connecting
These instructions walk you through connecting your camera to the computer. Your camera and computer should be powered off before you begin:
1. Locate the cable for your computer.
2. Connect the cable to the IO port in your camera.
3. Plug the other end of the serial cable into the serial port in your com-
puter.
During file transfer, the data-transfer icon will appear on the camera’s
top LCD screen. This icon is displayed for up to sixty seconds after the
data transfer is complete. Do not disconnect the camera from the computer while the data-transfer icon is displayed.
iPIX® Photography with Nikon Digital Cameras
34
This icon, which appears on the
top LCD screen of the camera,
indicates that a file transfer is
occurring.

Downloading Images to a PC
Follow these instructions to download the images to your personal computer:
To download images to your hard drive using the provided serial cables:
1. Position the camera’s mode dial to A-REC, M-REC, or PLAY mode.
2. Open the Nikon View software.
3. Double-click on the Digital Camera icon.
6 - DOWNLOADING IMAGES
Option 1: Serial or USB Cables
4. Double-click on the 100NIKON icon. A new window will appear show-
ing small image previews or thumbnails of the pictures stored on the
memory card.
5. Click on the Edit menu and choose Select All.
6. Once all of the images are highlighted, click on an image with your
mouse, hold the mouse button down, and drag the images onto your
desktop.
iPIX® Photography with Nikon Digital Cameras
35

6 - DOWNLOADING IMAGES
Option 1: Serial or USB Cables
7. Once the image outlines are over the desktop, release the mouse but-
8. Close the Nikon View window when you are done.
9. Turn off your camera before disconnecting the cable.
ton. Your computer will copy the images from the camera to your hard
drive. Move the pictures to another location, if desired.
iPIX® Photography with Nikon Digital Cameras
36

Downloading Images to a Macintosh
To download images from the camera to your Macintosh computer:
1. Open the Control Panels folder by selecting it under the Apple Menu.
2. Choose Nikon View Control from the Control Panels folder.
3. On the Nikon View Control screen, select the connected camera port
from the Port drop-down box.
6 - DOWNLOADING IMAGES
Option 1: Serial or USB Cables
4. Click
MOUNT CAMERA NOW
to access the camera. The camera will
appear as an additional drive on the desktop.
5. Double-click on the camera icon to display the images.
6. Select the images by clicking on their icons and dragging them to your
hard drive.
7. After you have copied the files, drag the Nikon View icon to your
folder icon or the trash.
8. Turn the camera off, and disconnect the computer and camera.
iPIX® Photography with Nikon Digital Cameras
37
6 - DOWNLOADING IMAGES
Option 2: PCMCIA Card
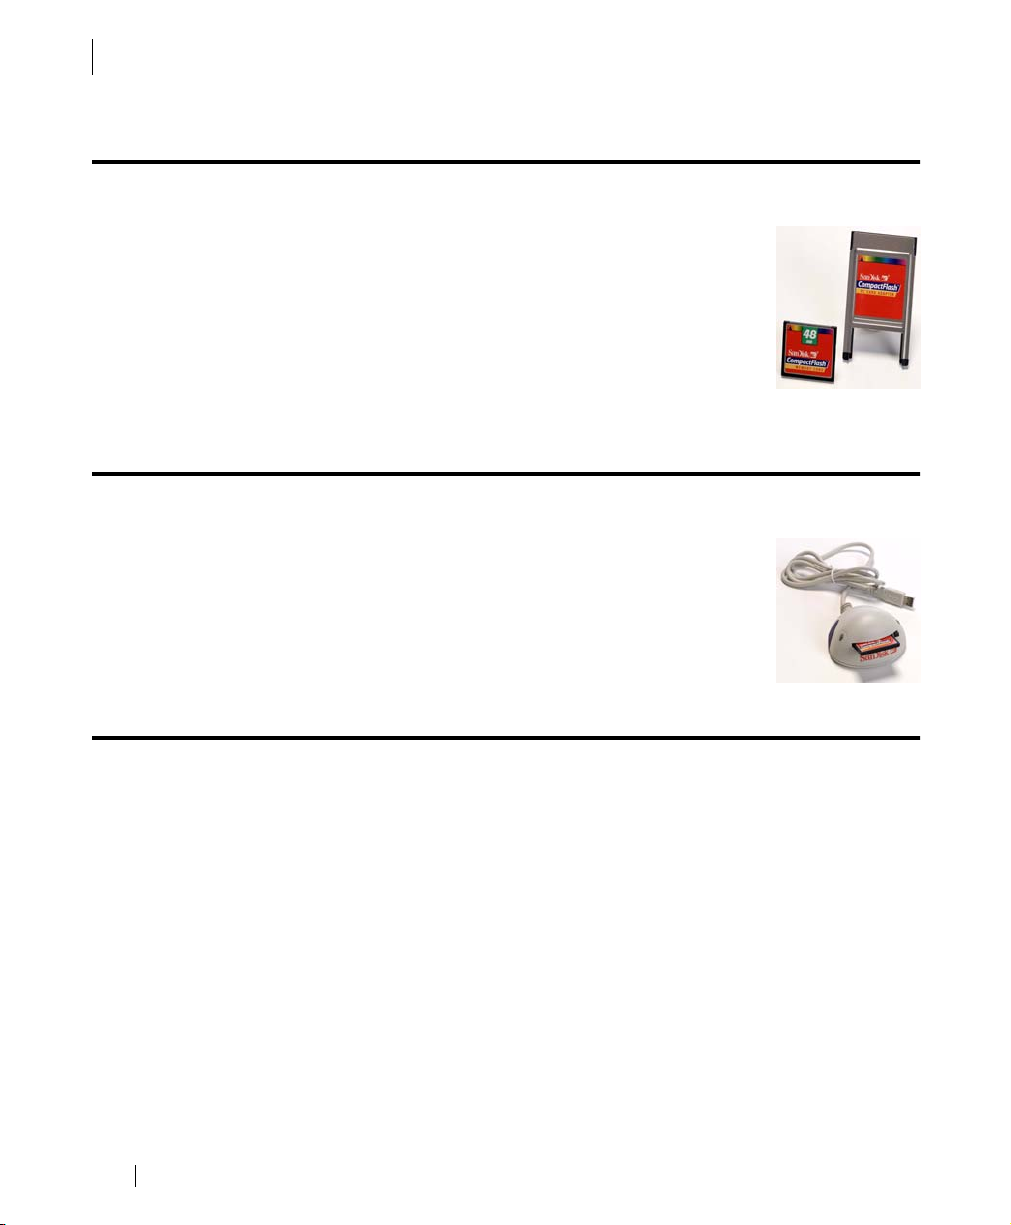
Option 2: PCMCIA Card
If you have a computer with a Type II PCMCIA card
slot, you can use a PCMCIA adapter. Your camera’s
memory card fits directly inside the PCMCIA adapter.
The adapter fits into the appropriate slot in your portable computer, or into a PCMCIA card reader in your
desktop computer. Refer to the Nikon Coolpix Reference
Manual on the Nikon Reference CD for detailed instructions.
Option 3: USB Card Reader
If your computer has a USB-compatible port, you can
use a USB card reader to copy images from a memory
card to your hard drive. USB Card readers are available
for Macintosh and PC computers from Internet Pictures.
The instructions included with the USB Card Reader will
walk you through using this device.
Option 4: Parallel Port Card Reader
Another download option is a parallel port memory card reader. This
memory card reader works like a Zip drive: a card shows up as a hard
drive in Windows Explorer. This option is not directly available through
Internet Pictures. For more information on this option, contact your local
computer retailer.
iPIX® Photography with Nikon Digital Cameras
38
 Loading...