

Page 1
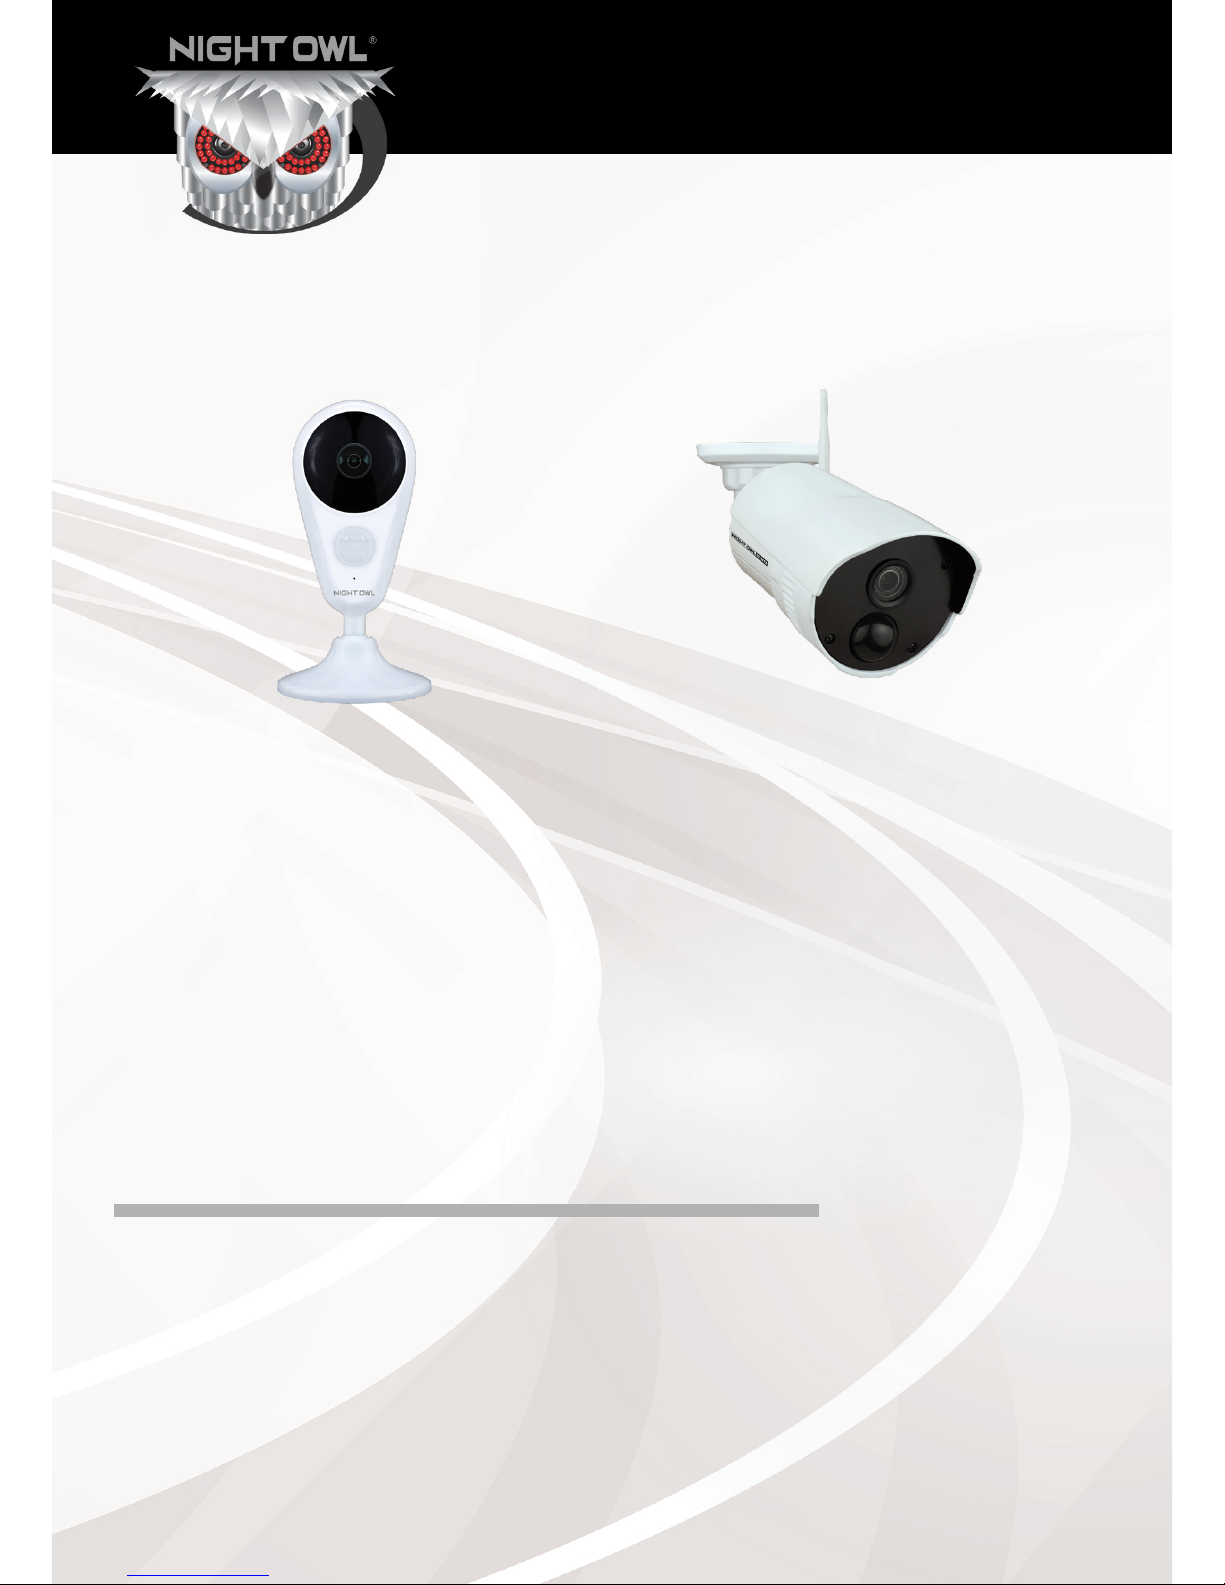
QUICK SETUP GUIDE
WNVR SERIES
ADD ON / STANDALONE
SECURITY SYSTEMS
Home
&
Business
Indoor
Model #
CAM-WNVR2P-IN
Outdoor
Model #
CAM-WNR2P-OU
Page 2
1
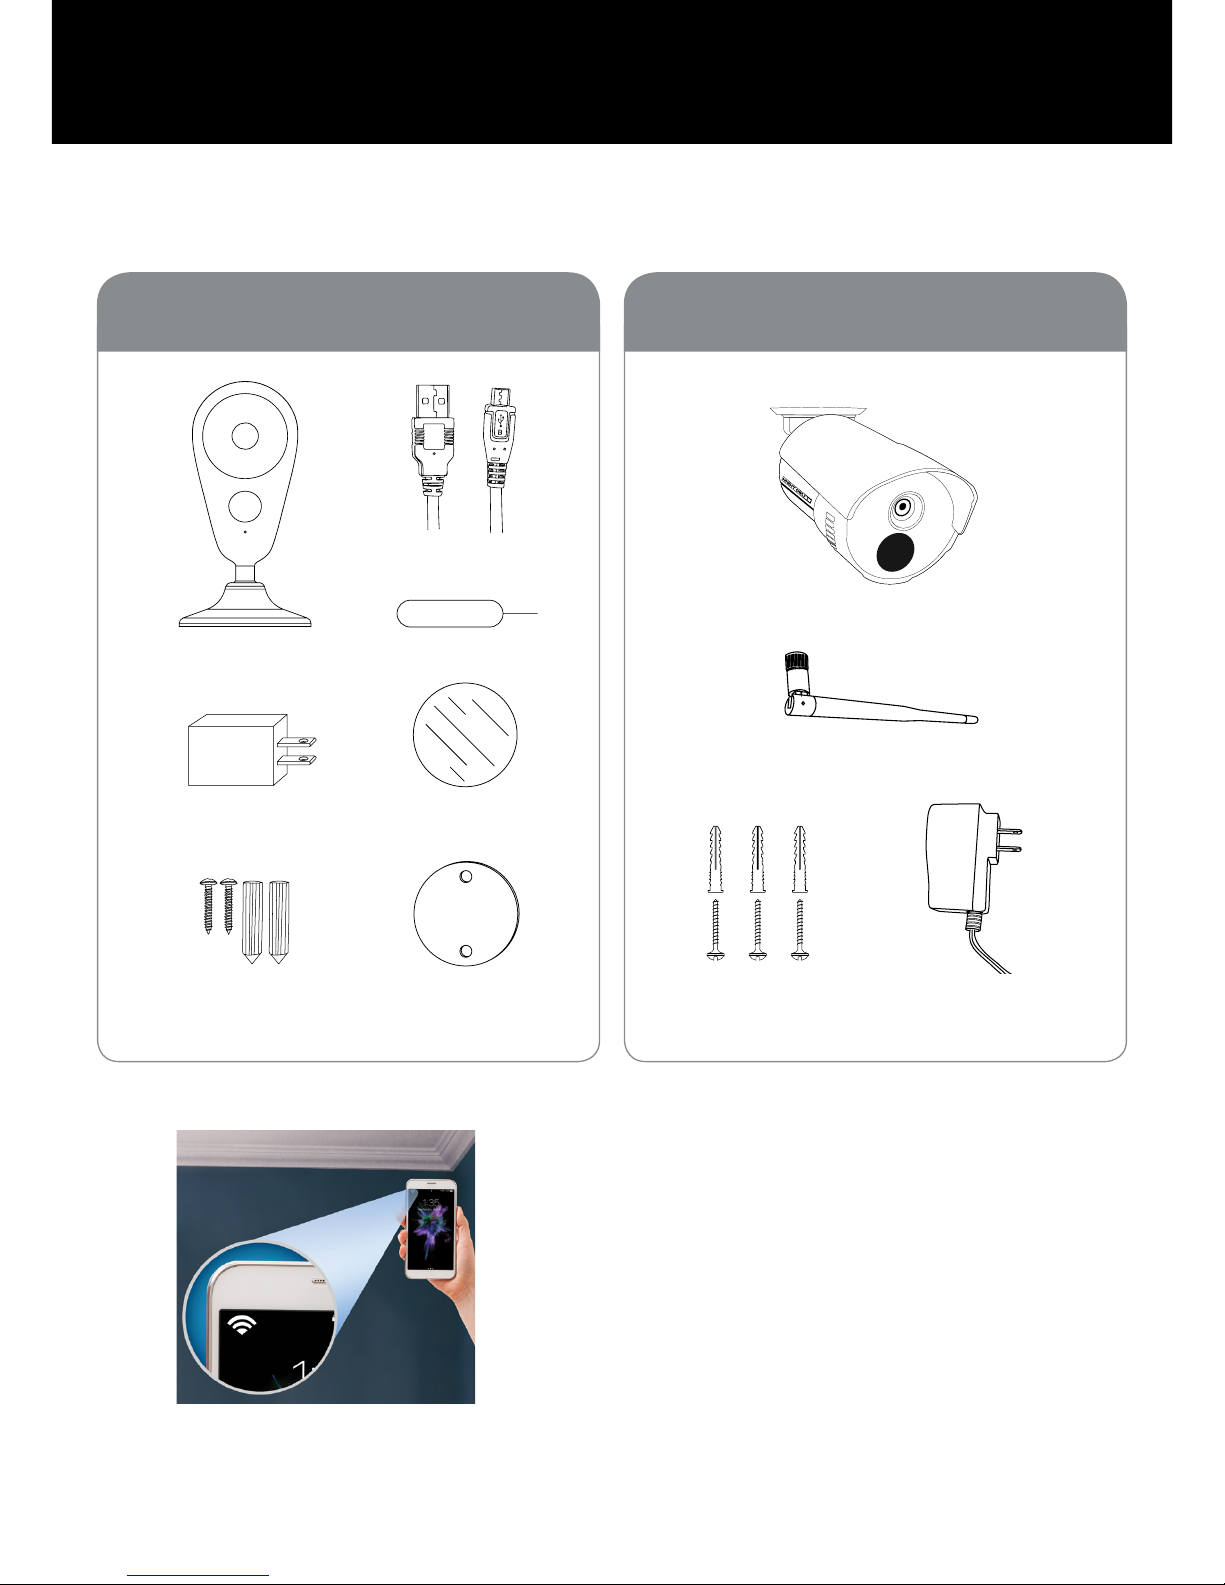
What’s in the Box
Status Light Key
Quickly Flashing–Pairing Mode (default).
Slowly Flashing–Camera is not connected
to your WNVR or Wi-Fi network.
Solid Light–Camera is connected to
a network and functional.
Testing with a Smart Device
NOTE: For Option #2 setup, Night Owl recommends using your cell phone to test the
location for your WiFi signal strength before installing the camera.
NOTE: Whether you’ve purchased an indoor or outdoor camera, the setup is the same.
Camera (1x)
Bracket Mounting
Hardware
1 x 12V DC 1.0A
Power Supply (16.4 ft.)
Camera Antenna (1x)
Wireless IP Outdoor Camera
Model # CAM-WNR2P-OU
Wireless IP Indoor Camera
Model # CAM-WNVR2P-IN
Camera (1x)
5V DC 1.0A
Power Supply (1x)
Bracket Mounting
Hardware
Reset Pin (1x)
Adhesive Mounting
Tape (1x)
Magnetic Mounting
Bracket (1x)
9.8 ft. Power
Cord (1x)
Package Contents
Page 3
2
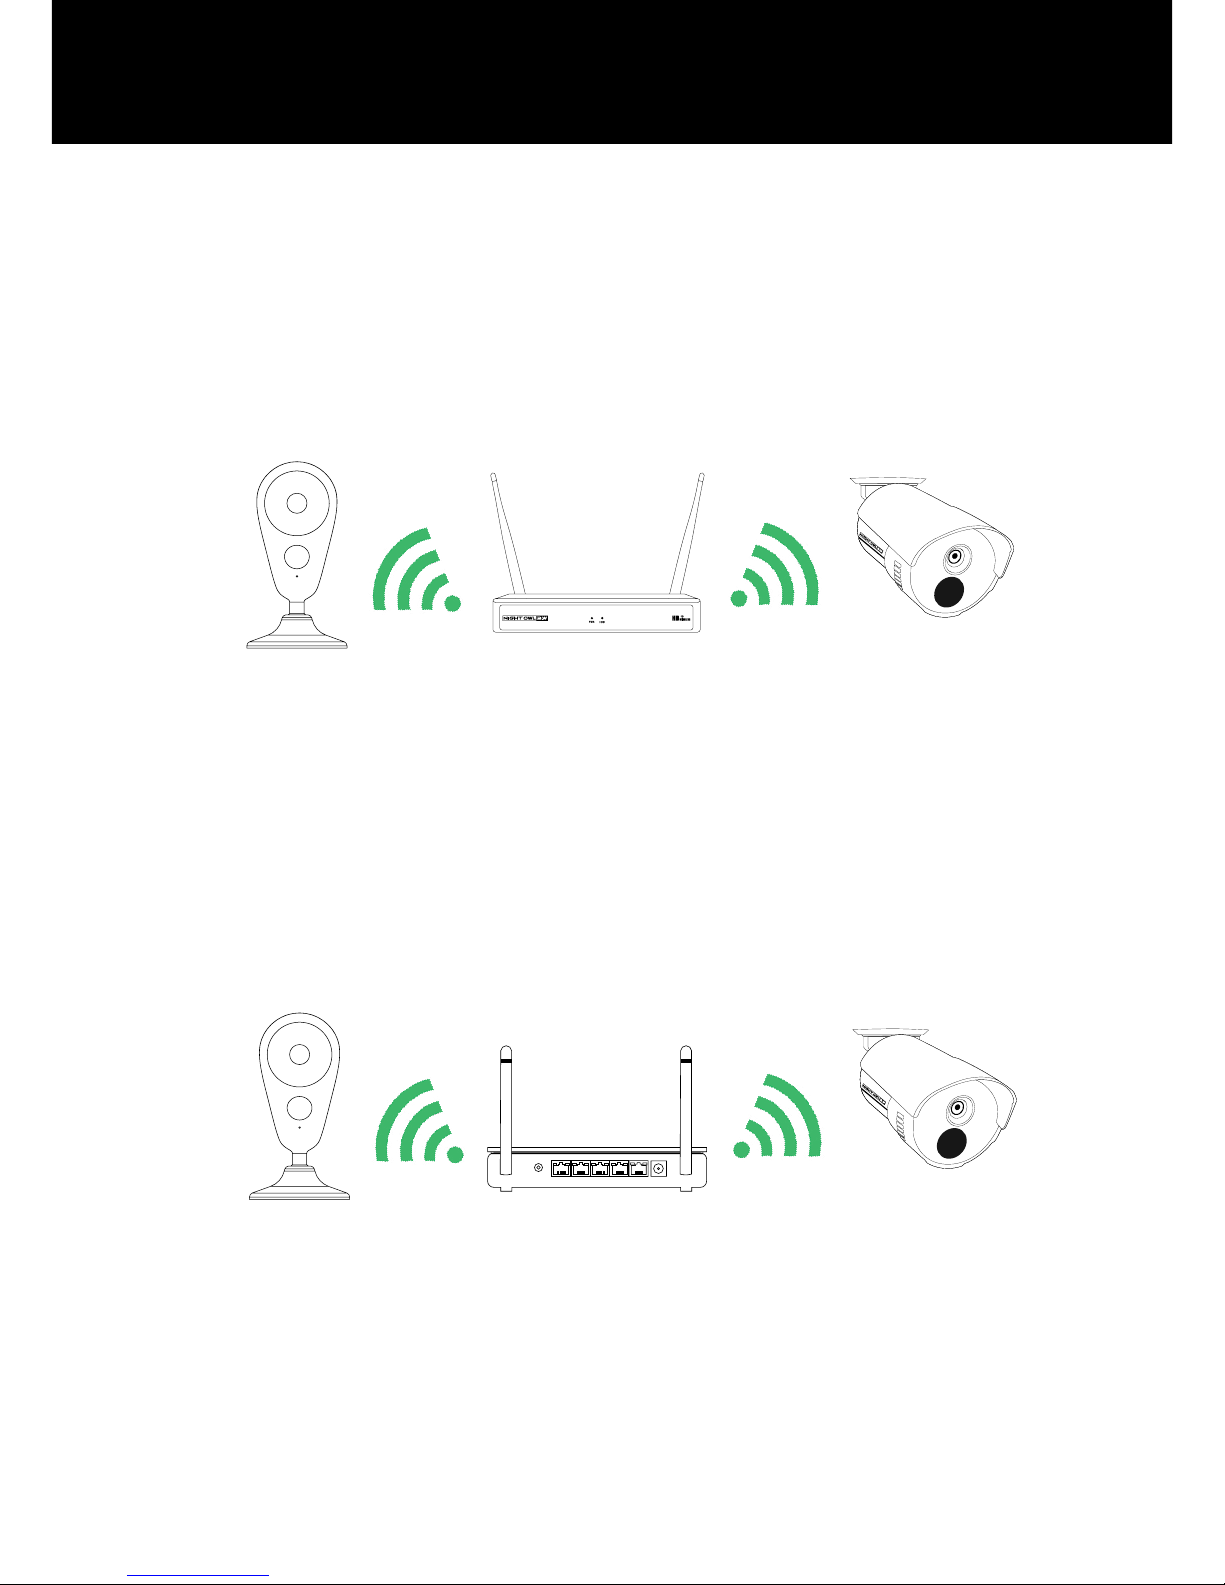
Add-On or Stand-Alone
Night Owl gives you options! Your camera can be used as an add-on to an
existing Night Owl Wireless NVR kit or as a stand-alone camera that records to
a microSD card.
Option 1:
Pairing to your existing Wireless NVR System
When used as an add-on to your existing Wireless NVR System, the camera
can be viewed using your Night Owl X (for Smart Phones) and/or Night Owl X
HD (for Tablets) application. Please follow the OPTION #1 setup instructions
to add your camera.
NOTE: You must complete add-on camera setup in the same room as the NVR.
To use as a stand-alone camera, please follow the Option #2 setup instructions
found on page 6. You will need to download and install the Night Owl Connect
App to view and control the camera. A microSD card (not included) will be
required to use the recording function.
NOTE: Camera will be in pairing mode when first powered on. If the camera is not in
pairing mode please follow pairing instructions found on page 9.
Option 2:
Stand-alone Camera Pairing to your Router
RESET
LAN1 LAN2 LAN3 LAN4 WAN
Page 4
3
1
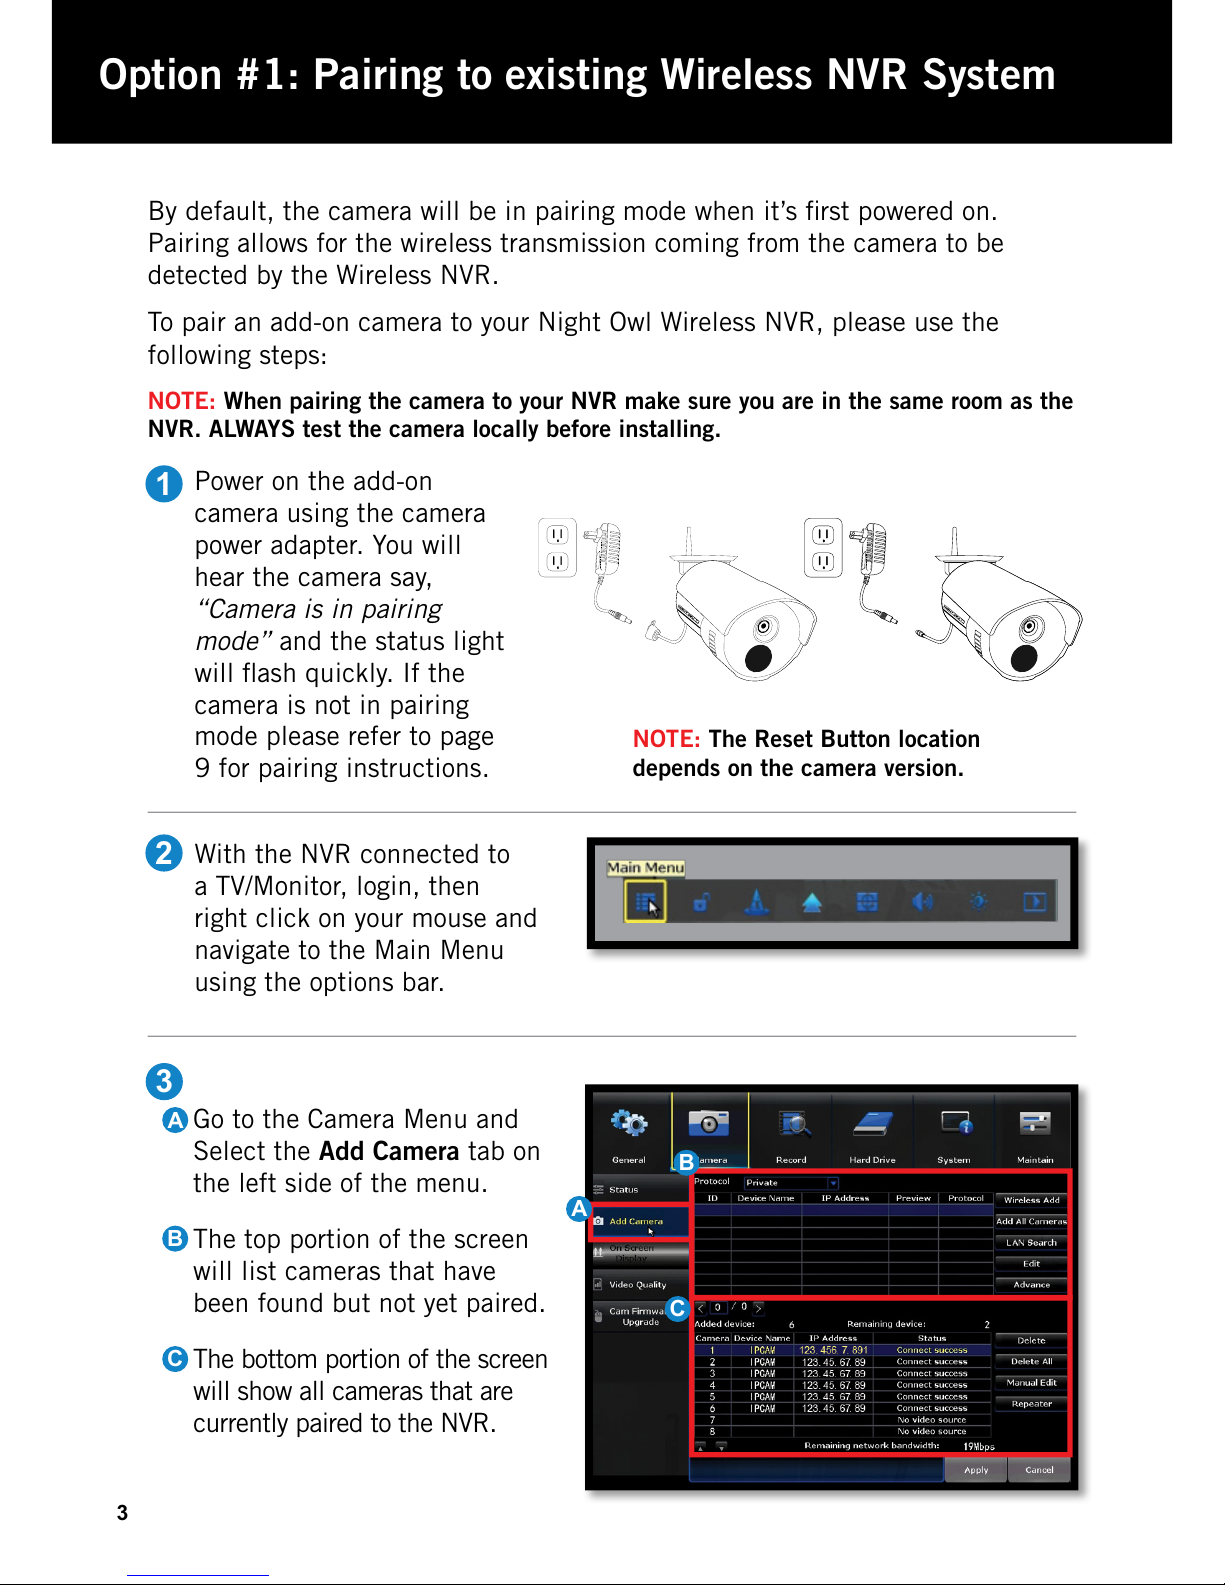
Power on the add-on
camera using the camera
power adapter. You will
hear the camera say,
“Camera is in pairing
mode” and the status light
will flash quickly. If the
camera is not in pairing
mode please refer to page
9 for pairing instructions.
2
With the NVR connected to
a TV/Monitor, login, then
right click on your mouse and
navigate to the Main Menu
using the options bar.
By default, the camera will be in pairing mode when it’s first powered on.
Pairing allows for the wireless transmission coming from the camera to be
detected by the Wireless NVR.
To pair an add-on camera to your Night Owl Wireless NVR, please use the
following steps:
NOTE: When pairing the camera to your NVR make sure you are in the same room as the
NVR. ALWAYS test the camera locally before installing.
3
A
B
C
A
B
C
Option #1: Pairing to existing Wireless NVR System
Go to the Camera Menu and
Select the Add Camera tab on
the left side of the menu.
The top portion of the screen
will list cameras that have
been found but not yet paired.
The bottom portion of the screen
will show all cameras that are
currently paired to the NVR.
NOTE: The Reset Button location
depends on the camera version.
Page 5
4
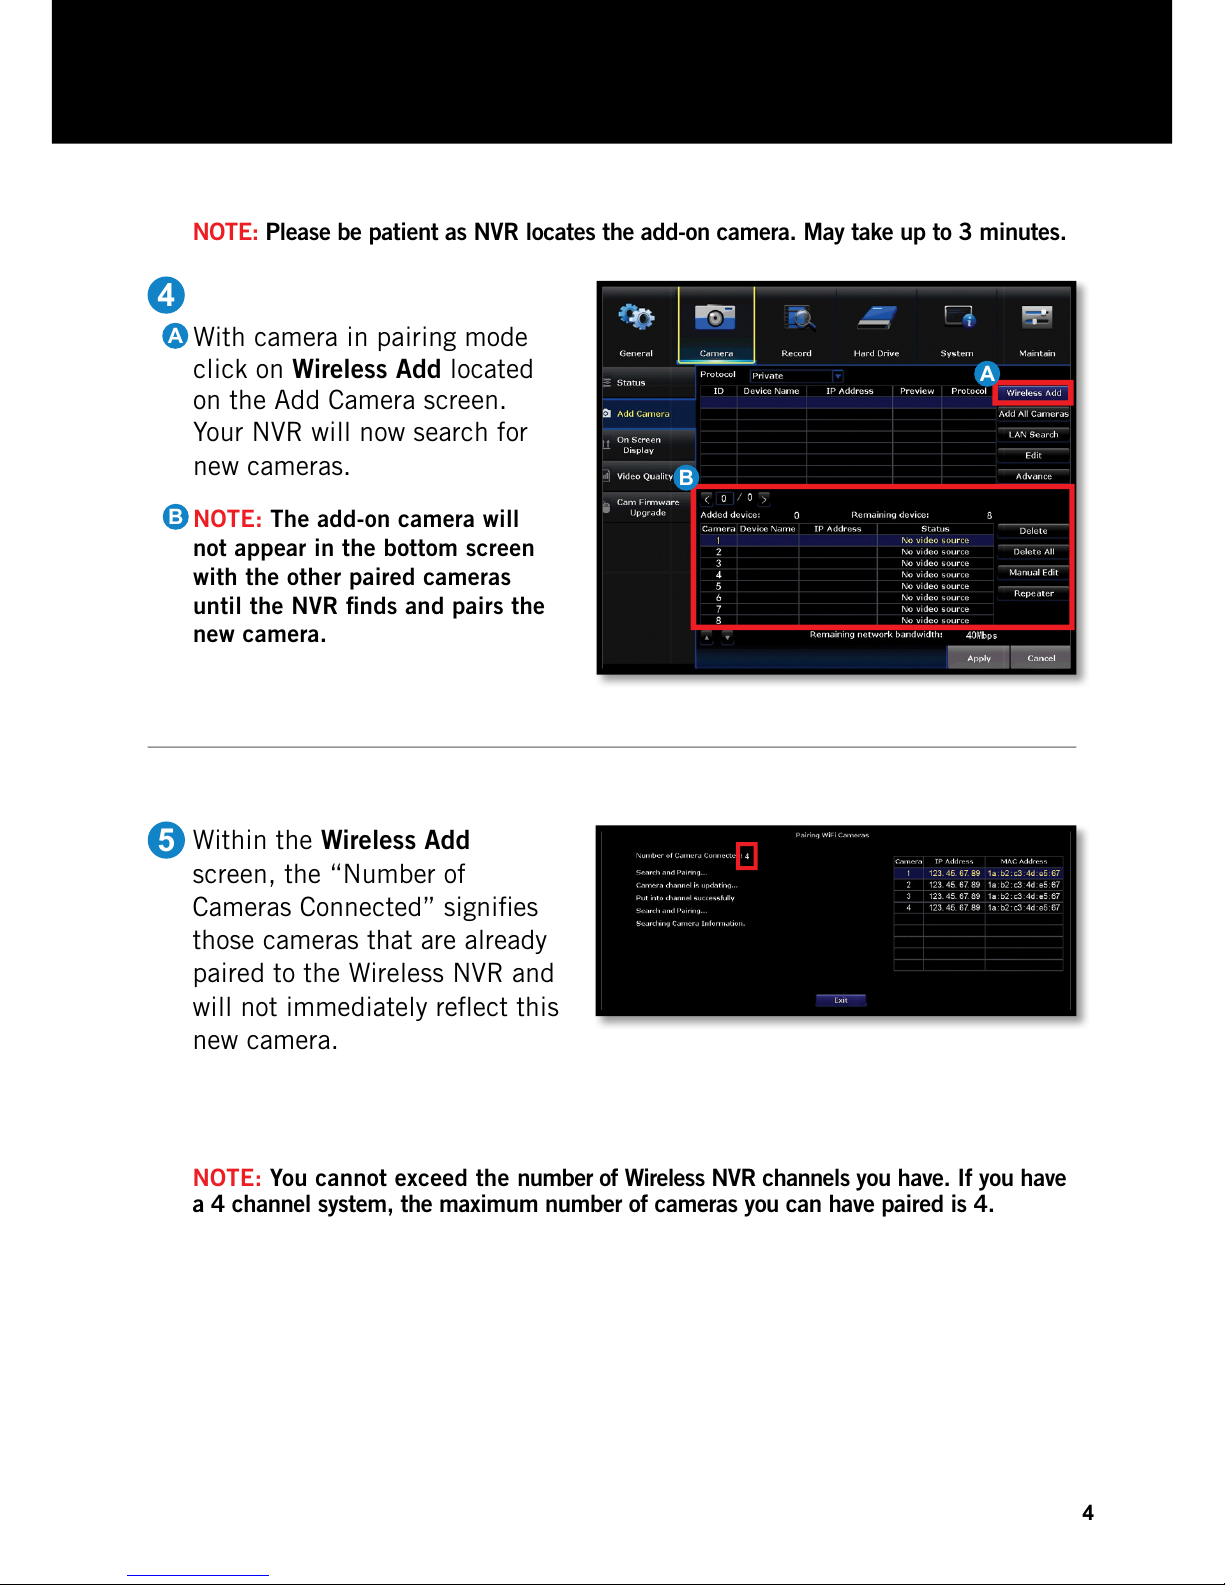
NOTE: Please be patient as NVR locates the add-on camera. May take up to 3 minutes.
Within the Wireless Add
screen, the “Number of
Cameras Connected” signifies
those cameras that are already
paired to the Wireless NVR and
will not immediately reflect this
new camera.
5
4
With camera in pairing mode
click on Wireless Add located
on the Add Camera screen.
Your NVR will now search for
new cameras.
NOTE: The add-on camera will
not appear in the bottom screen
with the other paired cameras
until the NVR finds and pairs the
new camera.
NOTE: You cannot exceed the number of Wireless NVR channels you have. If you have
a 4 channel system, the maximum number of cameras you can have paired is 4.
A
A
B
B
Page 6
5
7
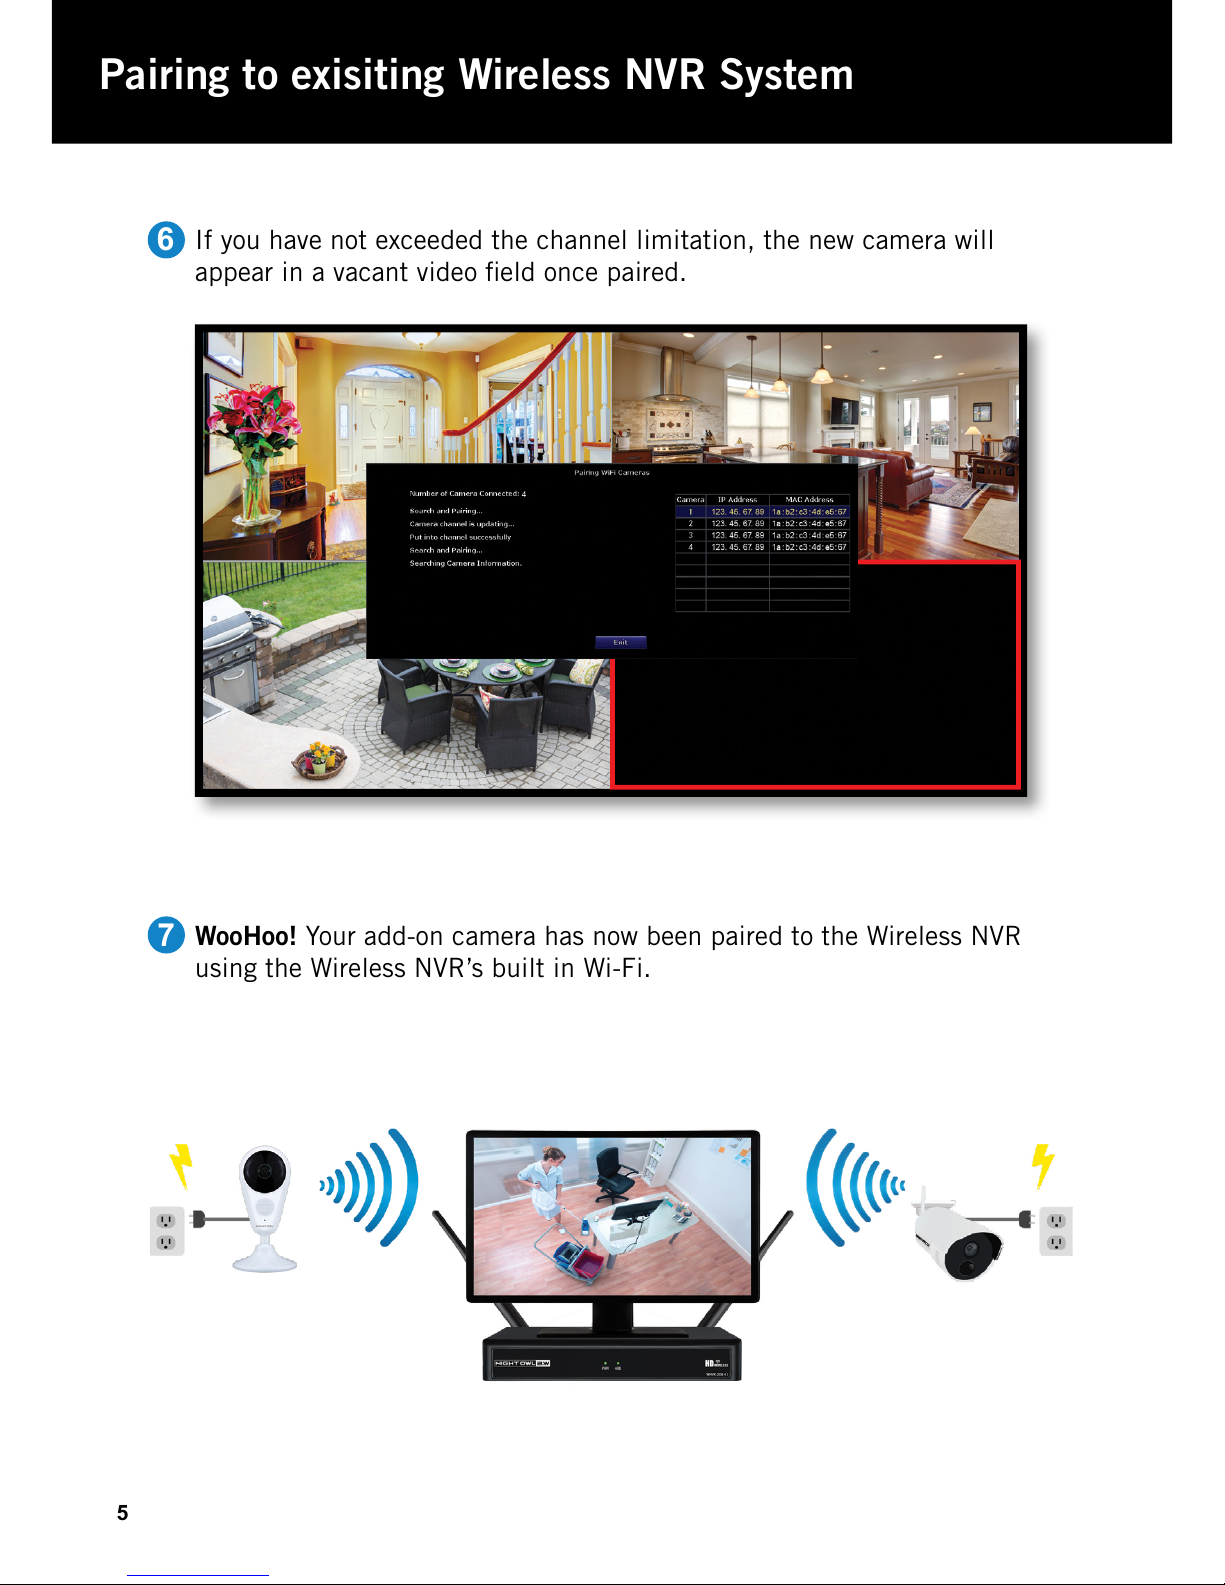
WooHoo! Your add-on camera has now been paired to the Wireless NVR
using the Wireless NVR’s built in Wi-Fi.
6
Pairing to exisiting Wireless NVR System
If you have not exceeded the channel limitation, the new camera will
appear in a vacant video field once paired.
Page 7
6
Don’t have a Wireless NVR or want to use the camera on its own? No problem! To
use as a Stand-Alone camera the following technical requirements must be met.
WiFi 2.4 GHz Router compatible with 802.11 b/g/n.
High Speed Internet Connection with a minimum of 2 Mbps upload speed.
Optional microSD Card needed to record (not included).
1
2
3
To use as a Stand-alone camera:
Be in same room as the router during setup, if possible.
Power on camera using the camera power adapter.
Camera will be in pairing mode:
Status light will flash quickly.
Camera will say “Camera is in pairing mode”.
NOTE: If the camera is not in pairing mode please refer to page 9 for
pairing instructions.
Know the name and password of Wi-Fi network being used.
NOTE: If you don’t know your Wi-Fi password, please contact your Internet Service
Provider (ISP). Night Owl will not be able to provide this information.
1
2
3
4
A
B
Option #2 Stand-Alone Camera Setup
Page 8
7
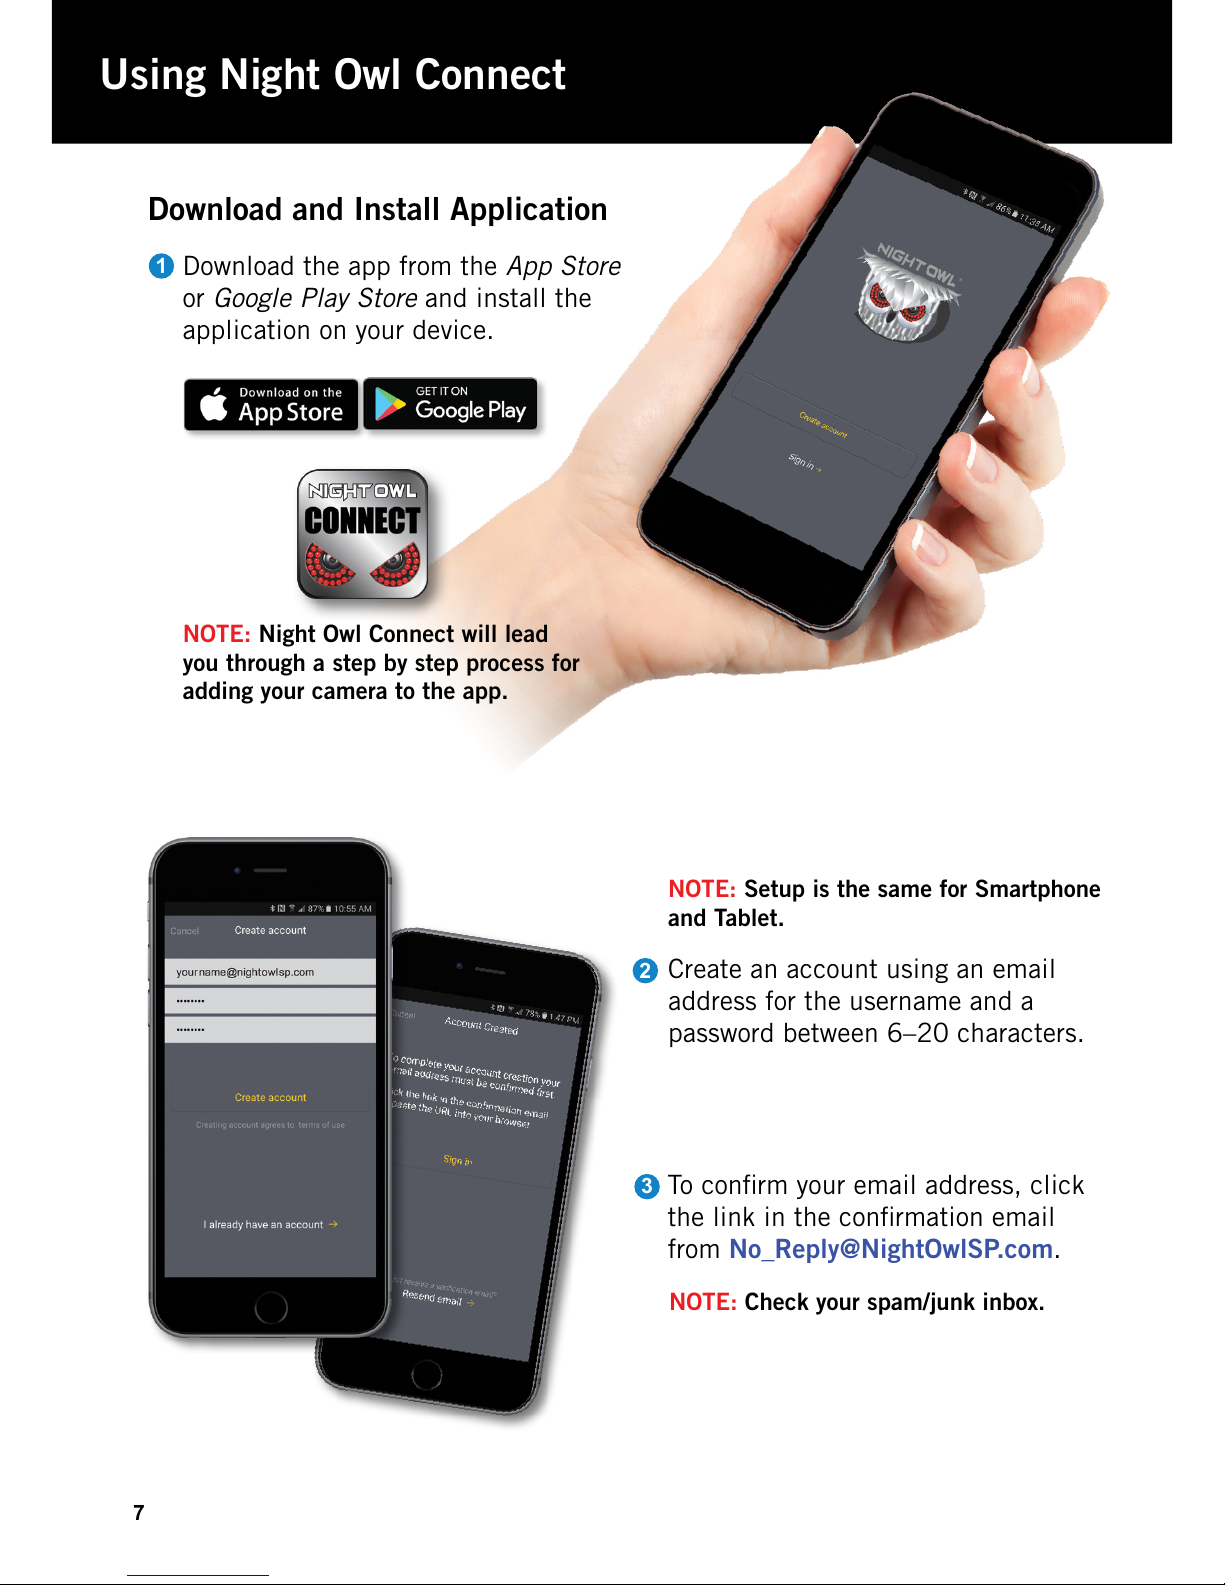
Create an account using an email
address for the username and a
password between 6–20 characters.
2
To confirm your email address, click
the link in the confirmation email
from No_Reply@NightOwlSP.com.
3
NOTE: Check your spam/junk inbox.
NOTE: Night Owl Connect will lead
you through a step by step process for
adding your camera to the app.
Using Night Owl Connect
Download the app from the App Store
or Google Play Store and install the
application on your device.
NOTE: Setup is the same for Smartphone
and Tablet.
Download and Install Application
1
Page 9
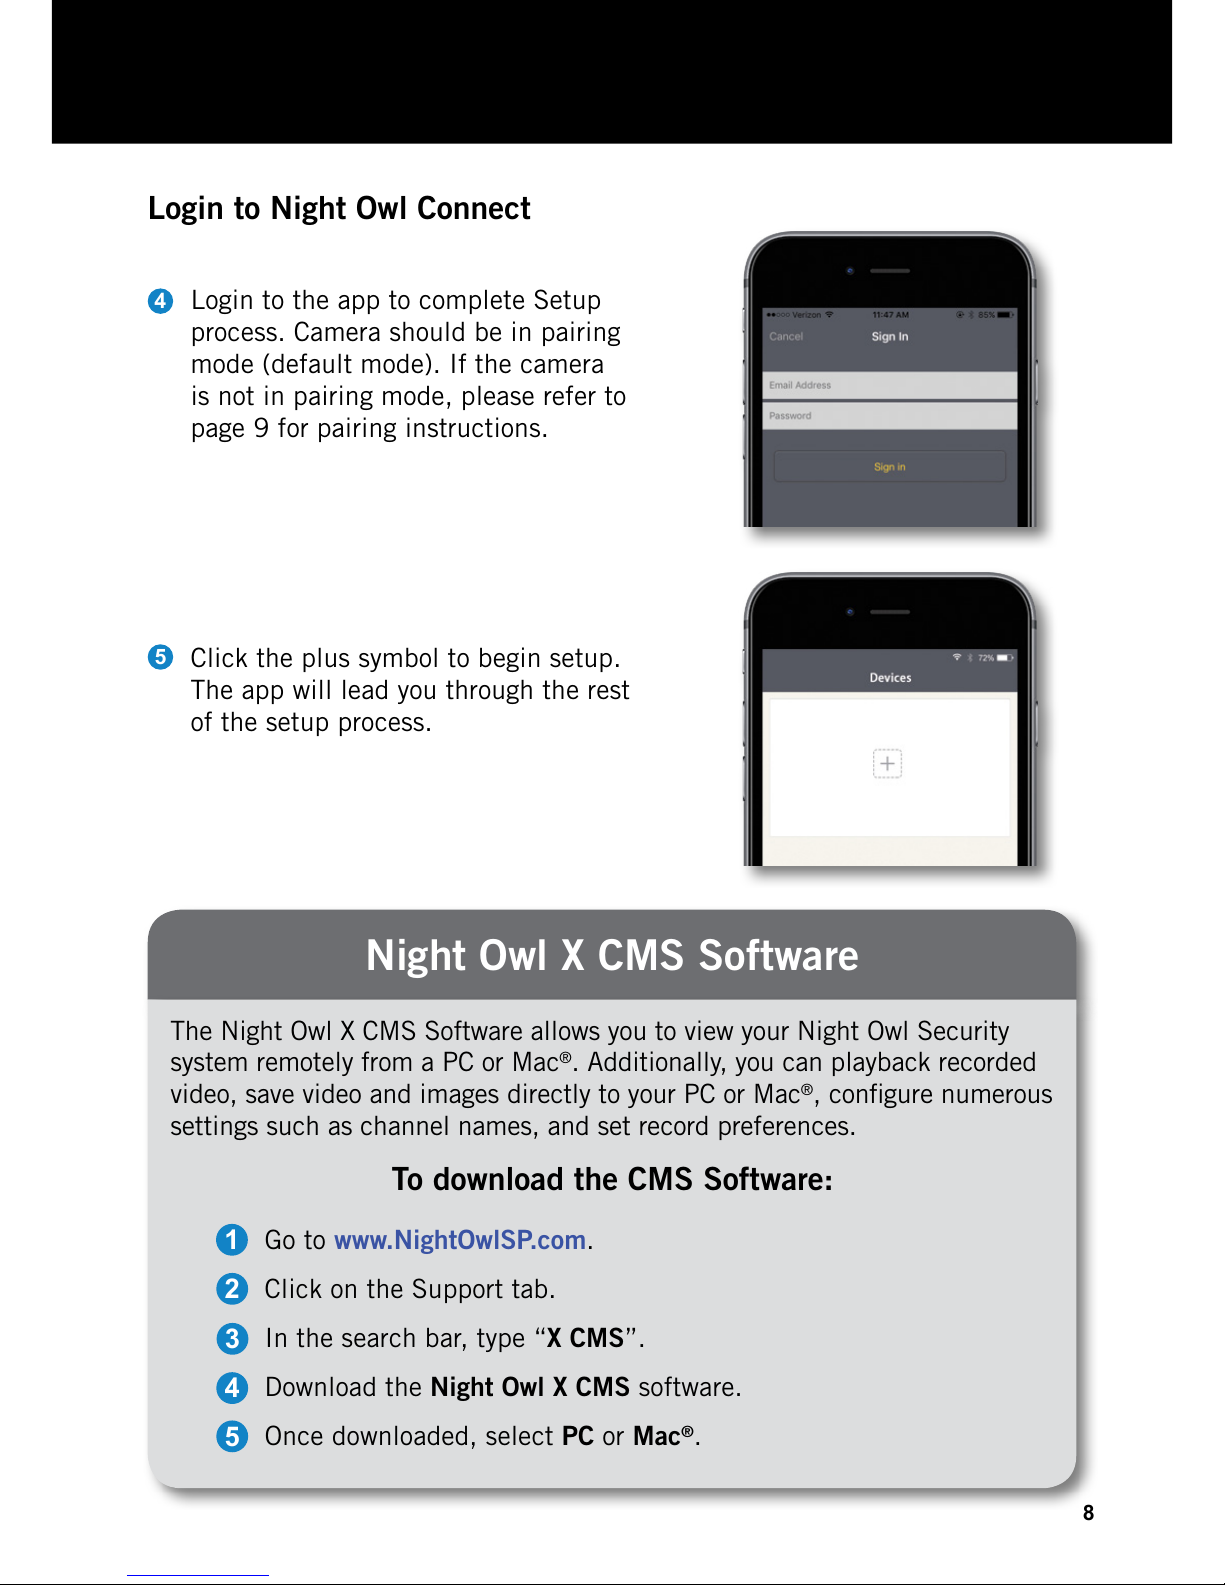
To download the CMS Software:
Night Owl X CMS Software
The Night Owl X CMS Software allows you to view your Night Owl Security
system remotely from a PC or Mac®. Additionally, you can playback recorded
video, save video and images directly to your PC or Mac®, configure numerous
settings such as channel names, and set record preferences.
Login to Night Owl Connect
Login to the app to complete Setup
process. Camera should be in pairing
mode (default mode). If the camera
is not in pairing mode, please refer to
page 9 for pairing instructions.
4
Click the plus symbol to begin setup.
The app will lead you through the rest
of the setup process.
5
Go to www.NightOwlSP.com.
Click on the Support tab.
In the search bar, type “X CMS”.
Download the Night Owl X CMS software.
Once downloaded, select PC or Mac®.
1
2
3
4
5
8
Page 10
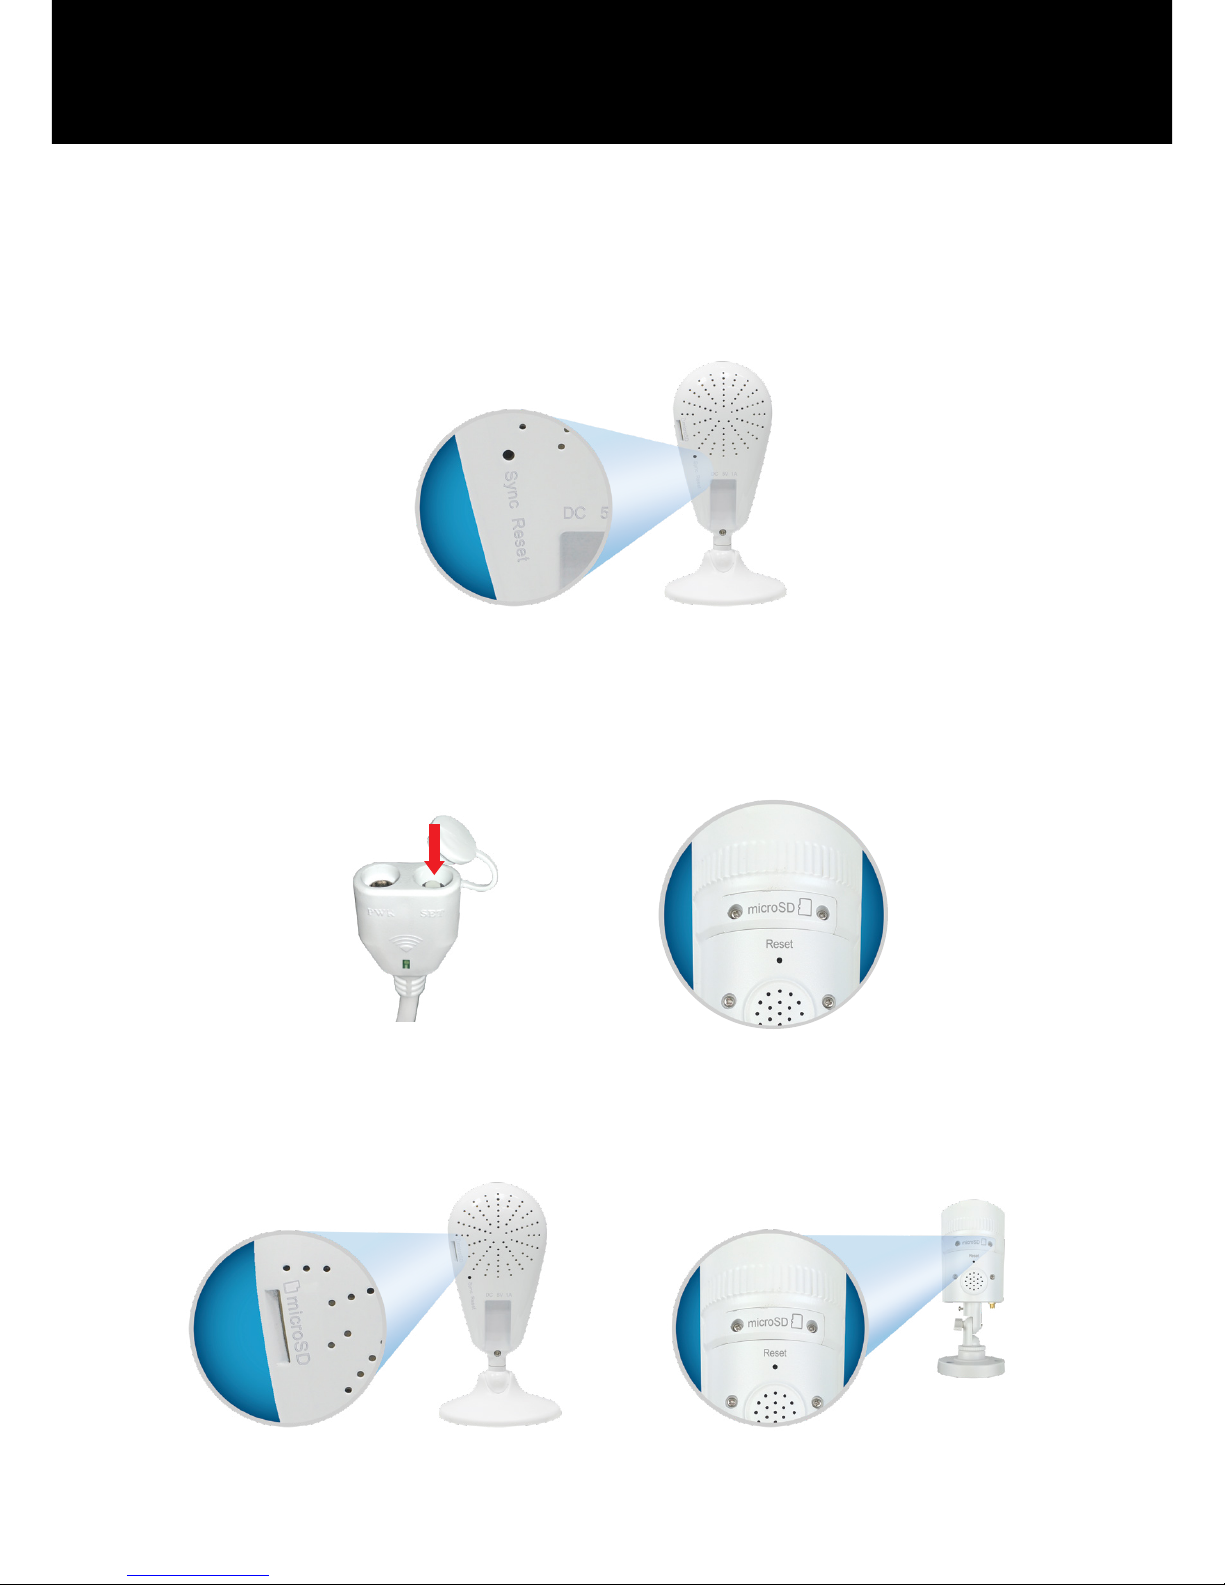
For CAM-WNVR2P-IN–Insert the reset pin into the Sync/Reset hole and press
until you hear the camera say “Please be patient. Camera is resetting”. Once
the camera resets, you will hear “Camera is in pairing mode” and the Status
light will flash quickly.
9
To Pair Camera:
Using a microSD Card:
Recommended compatibility: Class 10, maximum space 128GB. If an SD card
is used, video files will be stored on the SD card. microSD card is not include.
For CAM-WNR2P-OU–Press and hold the reset button until you hear the camera
say “Please be patient. Camera is resetting”. Once the camera resets, you will
hear “Camera is in pairing mode” and the Status light will flash quickly.
Remove screws to open microSD card slot.
Slide microSD Card into SD card slot.
Slide microSD card into the camera.
Quick Tips
NOTE: The Reset Button location depends on the camera version.
Page 11
10
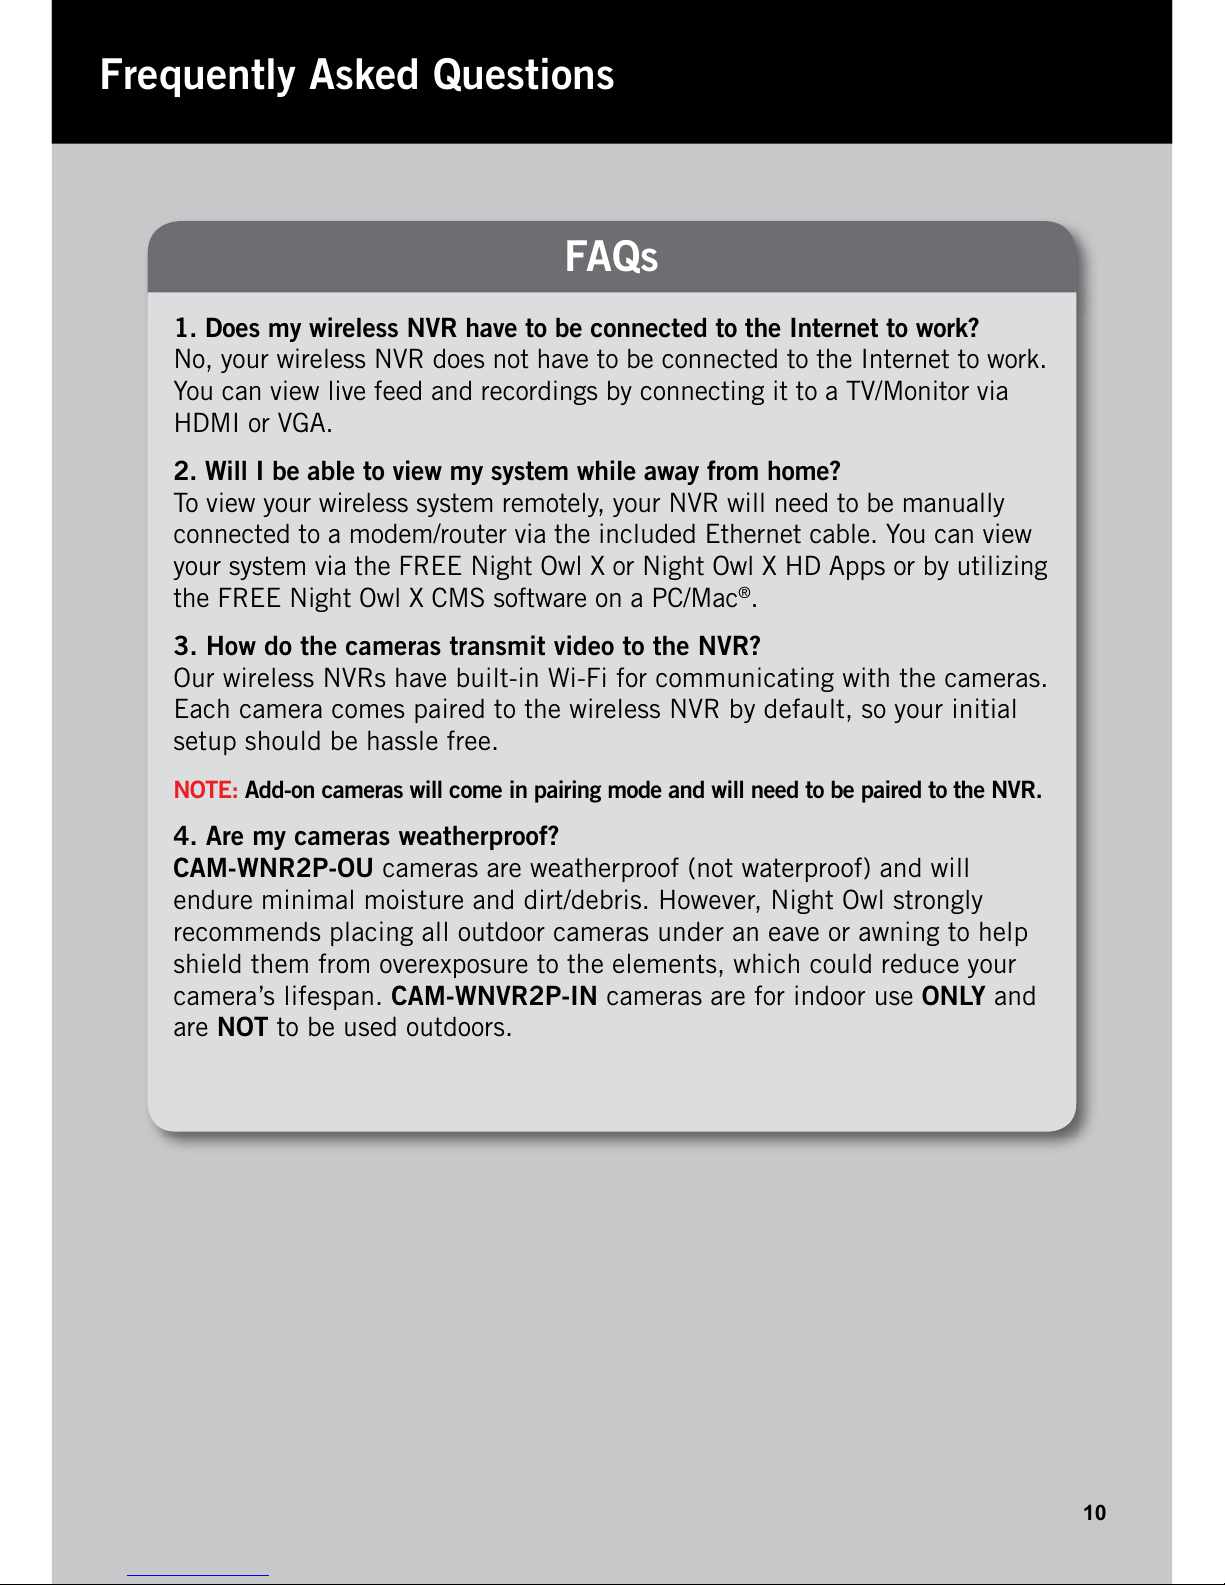
1. Does my wireless NVR have to be connected to the Internet to work?
No, your wireless NVR does not have to be connected to the Internet to work.
You can view live feed and recordings by connecting it to a TV/Monitor via
HDMI or VGA.
2. Will I be able to view my system while away from home?
To view your wireless system remotely, your NVR will need to be manually
connected to a modem/router via the included Ethernet cable. You can view
your system via the FREE Night Owl X or Night Owl X HD Apps or by utilizing
the FREE Night Owl X CMS software on a PC/Mac®.
3. How do the cameras transmit video to the NVR?
Our wireless NVRs have built-in Wi-Fi for communicating with the cameras.
Each camera comes paired to the wireless NVR by default, so your initial
setup should be hassle free.
NOTE: Add-on cameras will come in pairing mode and will need to be paired to the NVR.
4. Are my cameras weatherproof?
CAM-WNR2P-OU cameras are weatherproof (not waterproof) and will
endure minimal moisture and dirt/debris. However, Night Owl strongly
recommends placing all outdoor cameras under an eave or awning to help
shield them from overexposure to the elements, which could reduce your
camera’s lifespan. CAM-WNVR2P-IN cameras are for indoor use ONLY and
are NOT to be used outdoors.
Frequently Asked Questions
FAQs
Page 12
iPhone, iPad, Mac and Mac OS X are registered trademarks of Apple Inc.
Windows, Windows XP, Windows Vista, Windows 7, Windows 8 and
Windows 10 are registered trademarks of Microsoft Corporation in the
United States and/or other countries.
FCC RADIATION NORM
FCC
This device complies with Part 15 of the FCC Rules. Operation is subject to the following two conditions: (1) this device may not cause harmful
interference, and (2) this device must accept any interference received, including interference that may cause undesired operation.
FCC Compliance Statement
These limits are designed to provide reasonable protection against frequency interference in residential installation. This equipment generates,
uses, and can radiate radio frequency energy, and if not installed or used in accordance with the instructions, may cause harmful interference to
radio communication. However, there is no guarantee that interference will not occur in television reception, which can be determined by turning
the equipment off and on. The user is encouraged to try and correct the interference by one or more of the following measures:
•
Reorient or relocate the receiving antenna.
•
Increase the separation between the equipment and the receiver.
•
Connect the equipment into an outlet on a circuit different from that to which the receiver is connected.
•
Consult the dealer or an experienced radio/TV technician for help.
CAUTION!
The Federal Communications Commission warns the user that changes or modifications to the unit not expressly approved by the party responsible
for compliance could void the user’s authority to operate the equipment.
This equipment should be installed and operated with a minimum distance of 8 inches between the radiator and your body.
www.NightOwlSP.com
EMAIL
Sales Support
Sales@NightOwlSP.com
Technical Support
Support@NightOwlSP.com
PHONE (English, Spanish & French)
Sales/Technical Support
1.866.390.1303
Live Chat 24/7, 365 days a year
WEBSITE
24/7 Product Support
• How-To Videos
• Manuals
CONTACT US
Need Help?
For system manuals, troubleshooting
guides, FAQs, video tutorials and more:
Please visit www.NightOwlSP.com.
Click the Support tab.
Enter your product’s model number
in the search bar.
Access the support material needed.
1
2
3
4
Rev 180727
 Loading...