

Night Owl PE-DVR16-1TB User Manual

2
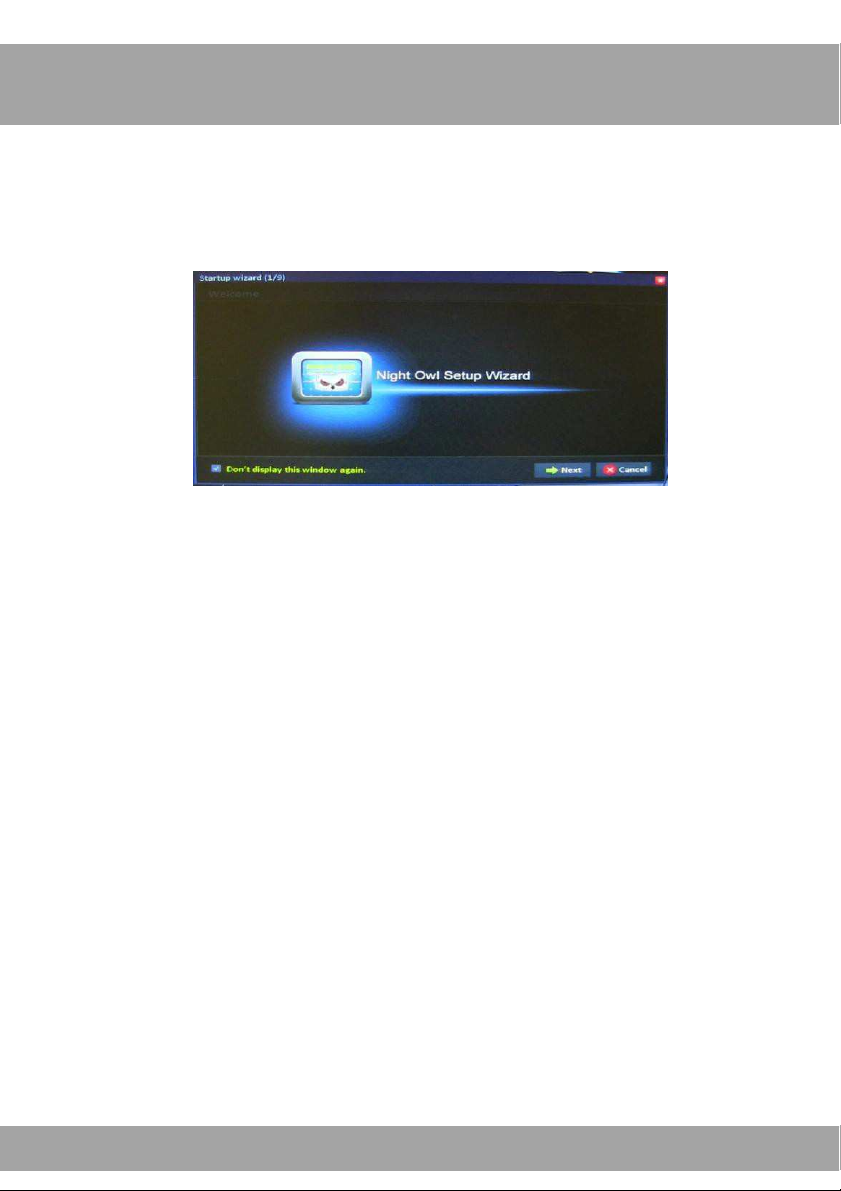
Step 1: Welcome Page
Use the Startup Wizard to set up your security system. The Wizard lets you
customize basic settings, network settings, application settings, record
settings, and HD settings.
The Startup Wizard will appear on your TV screen when you turn on the
DVR. You will complete nine quick and easy steps to set up the basic
functions of your DVR. Use the USB mouse that came with the DVR to
make your selections on the screen.
Each page includes the following navigation options:
• Prev.: Go to the previous step.
• Next: Go to the next step.
• Cancel: Exit the Startup Wizard without saving changes.
• Check “Don’t display this window again” if you do not want to run
the Startup Wizard every time the DVR is powered on.
Note: Have a pen handy to write down information such as your user name
and password. Do not pause for a long period while using the Startup
Wizard, or it will time out and you will need to re-enter your information.

3
Step 2: Administrator Password
To help keep your system secure, you should create an administrator user
name and password to access the DVR. Be sure to write down this
information in Step 9 of this guide and store it in a secure location. (For
better security, you might want to keep your password in a separate
document.)
Using the mouse that is connected to the DVR, click in a text field to
display the onscreen keyboard. Click outside the keyboard when you
have finished typing.
• User Name: Change this name to any name you like.
• Password: Enter a password that you will use to log in to the DVR.
Passwords are case-sensitive.
• Retype Password: Enter the same password as above.
Once you have written down your user name and password in Step 9 of
this guide, select the Next button to move to the next step.
4
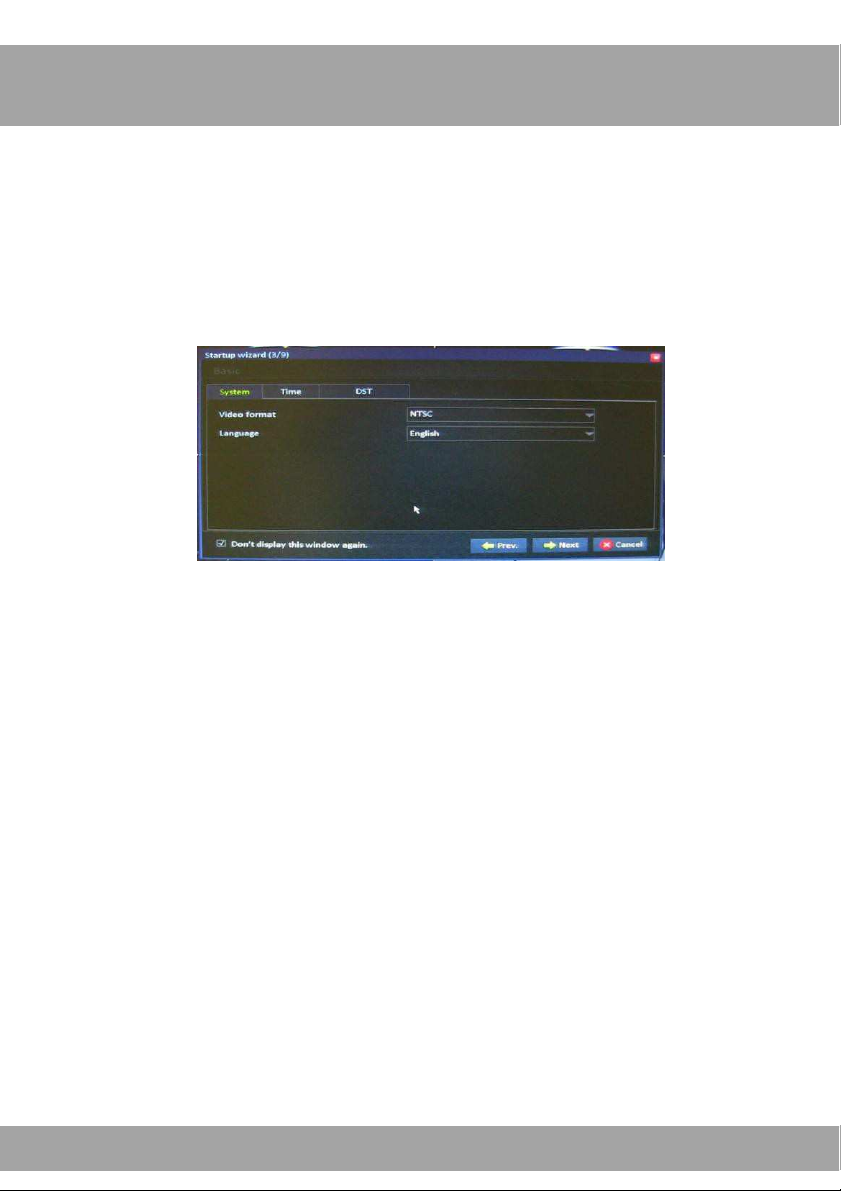
Step 3: Basic Settings
You should configure the basic settings on your DVR to ensure that it will
display the information in the correct language and record the correct time
and date.
System Tab
• Video Format: You will generally not need to change this setting.
Change it only if you are using a PAL television. If you incorrectly
change this setting, you will not see a picture on your TV screen.
• Language: If you would like the DVR menus to be displayed in a
language other than English, choose a language (French or
Spanish) from the drop-down menu.
5
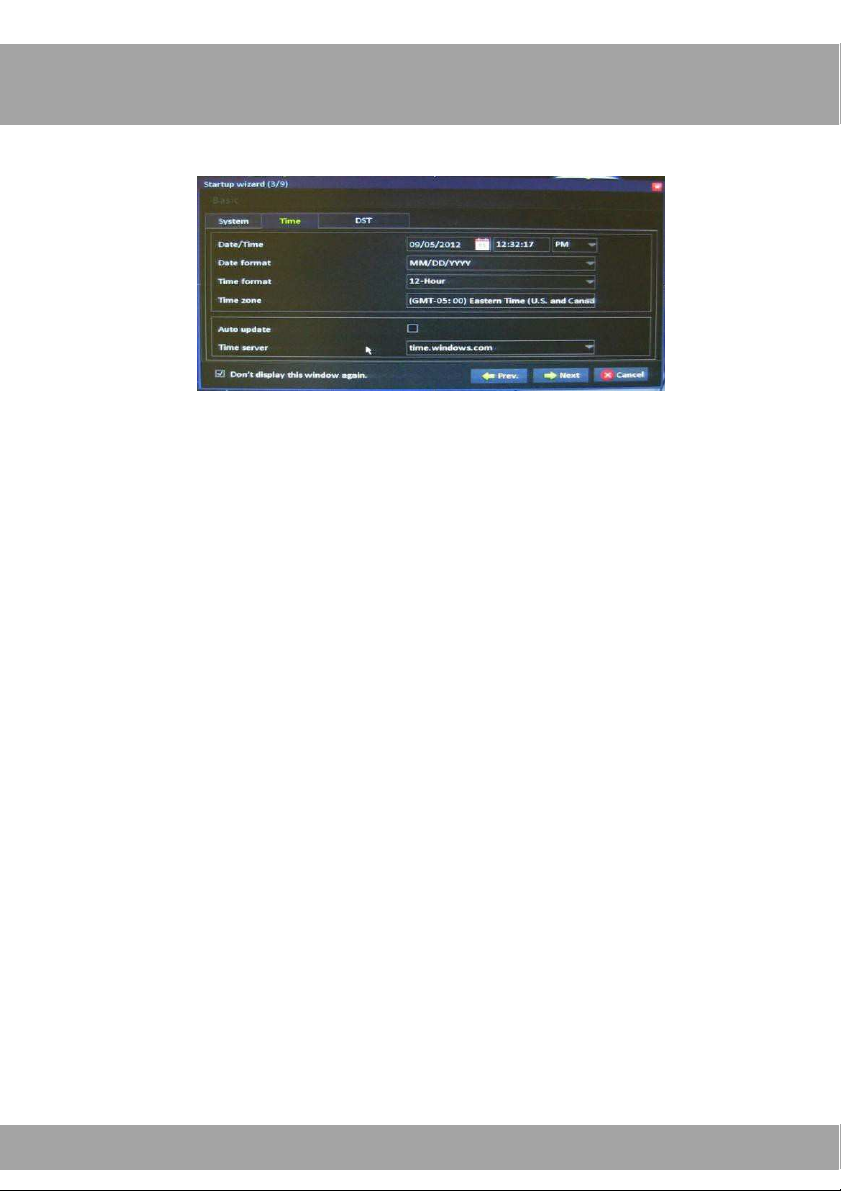
Step 3: Basic Settings (continued)
Time Tab
• Date/Time: Select a date format and the current date. Select a time
format and enter the current time. If you select the 12-hour format,
you will need to differentiate between AM and PM.
• Date Format: Use the drop-down men to, choose the way you
would like the date displayed.
• Time Format: Use the drop-down menu, choose the way you
would like the time displayed.
• Time Zone: Use the drop-down menu to choose the time zone in
which you are located. Keep in mind that if you have already
manually changed the date/time, it will change again to reflect the
time zone you chose.
• Auto Update: Check this box if you would like the DVR to
automatically update the date/time. Keep in mind that this feature
will only work if the network settings have been configured properly.
• Time Server: You will generally not need to change this setting.
This is the web address that retrieves the date and time for
automatic updates.
 Loading...