

Night Owl LTE-DVR8 User Manual
Networking Quick Setup Guide
LTE, STA, and BUL Series Security Kits
Before You Get Started You Will Need:
High-Speed Internet (at least 512K of bandwidth; download and upload
speeds)
DVR connected to the router/modem and a TV or monitor
Computer running Windows Vista, XP, 7 or 8 connected to the same
router/modem as the DVR
Router/modem’s login information (Refer to router/modem user manual)
STEP 2: Entering Information into the DVR
STEP 4: Port Forwarding
STEP 3: Accessing Your Router/Modem
STEP 1: Determining Network Information
A
B
C,D
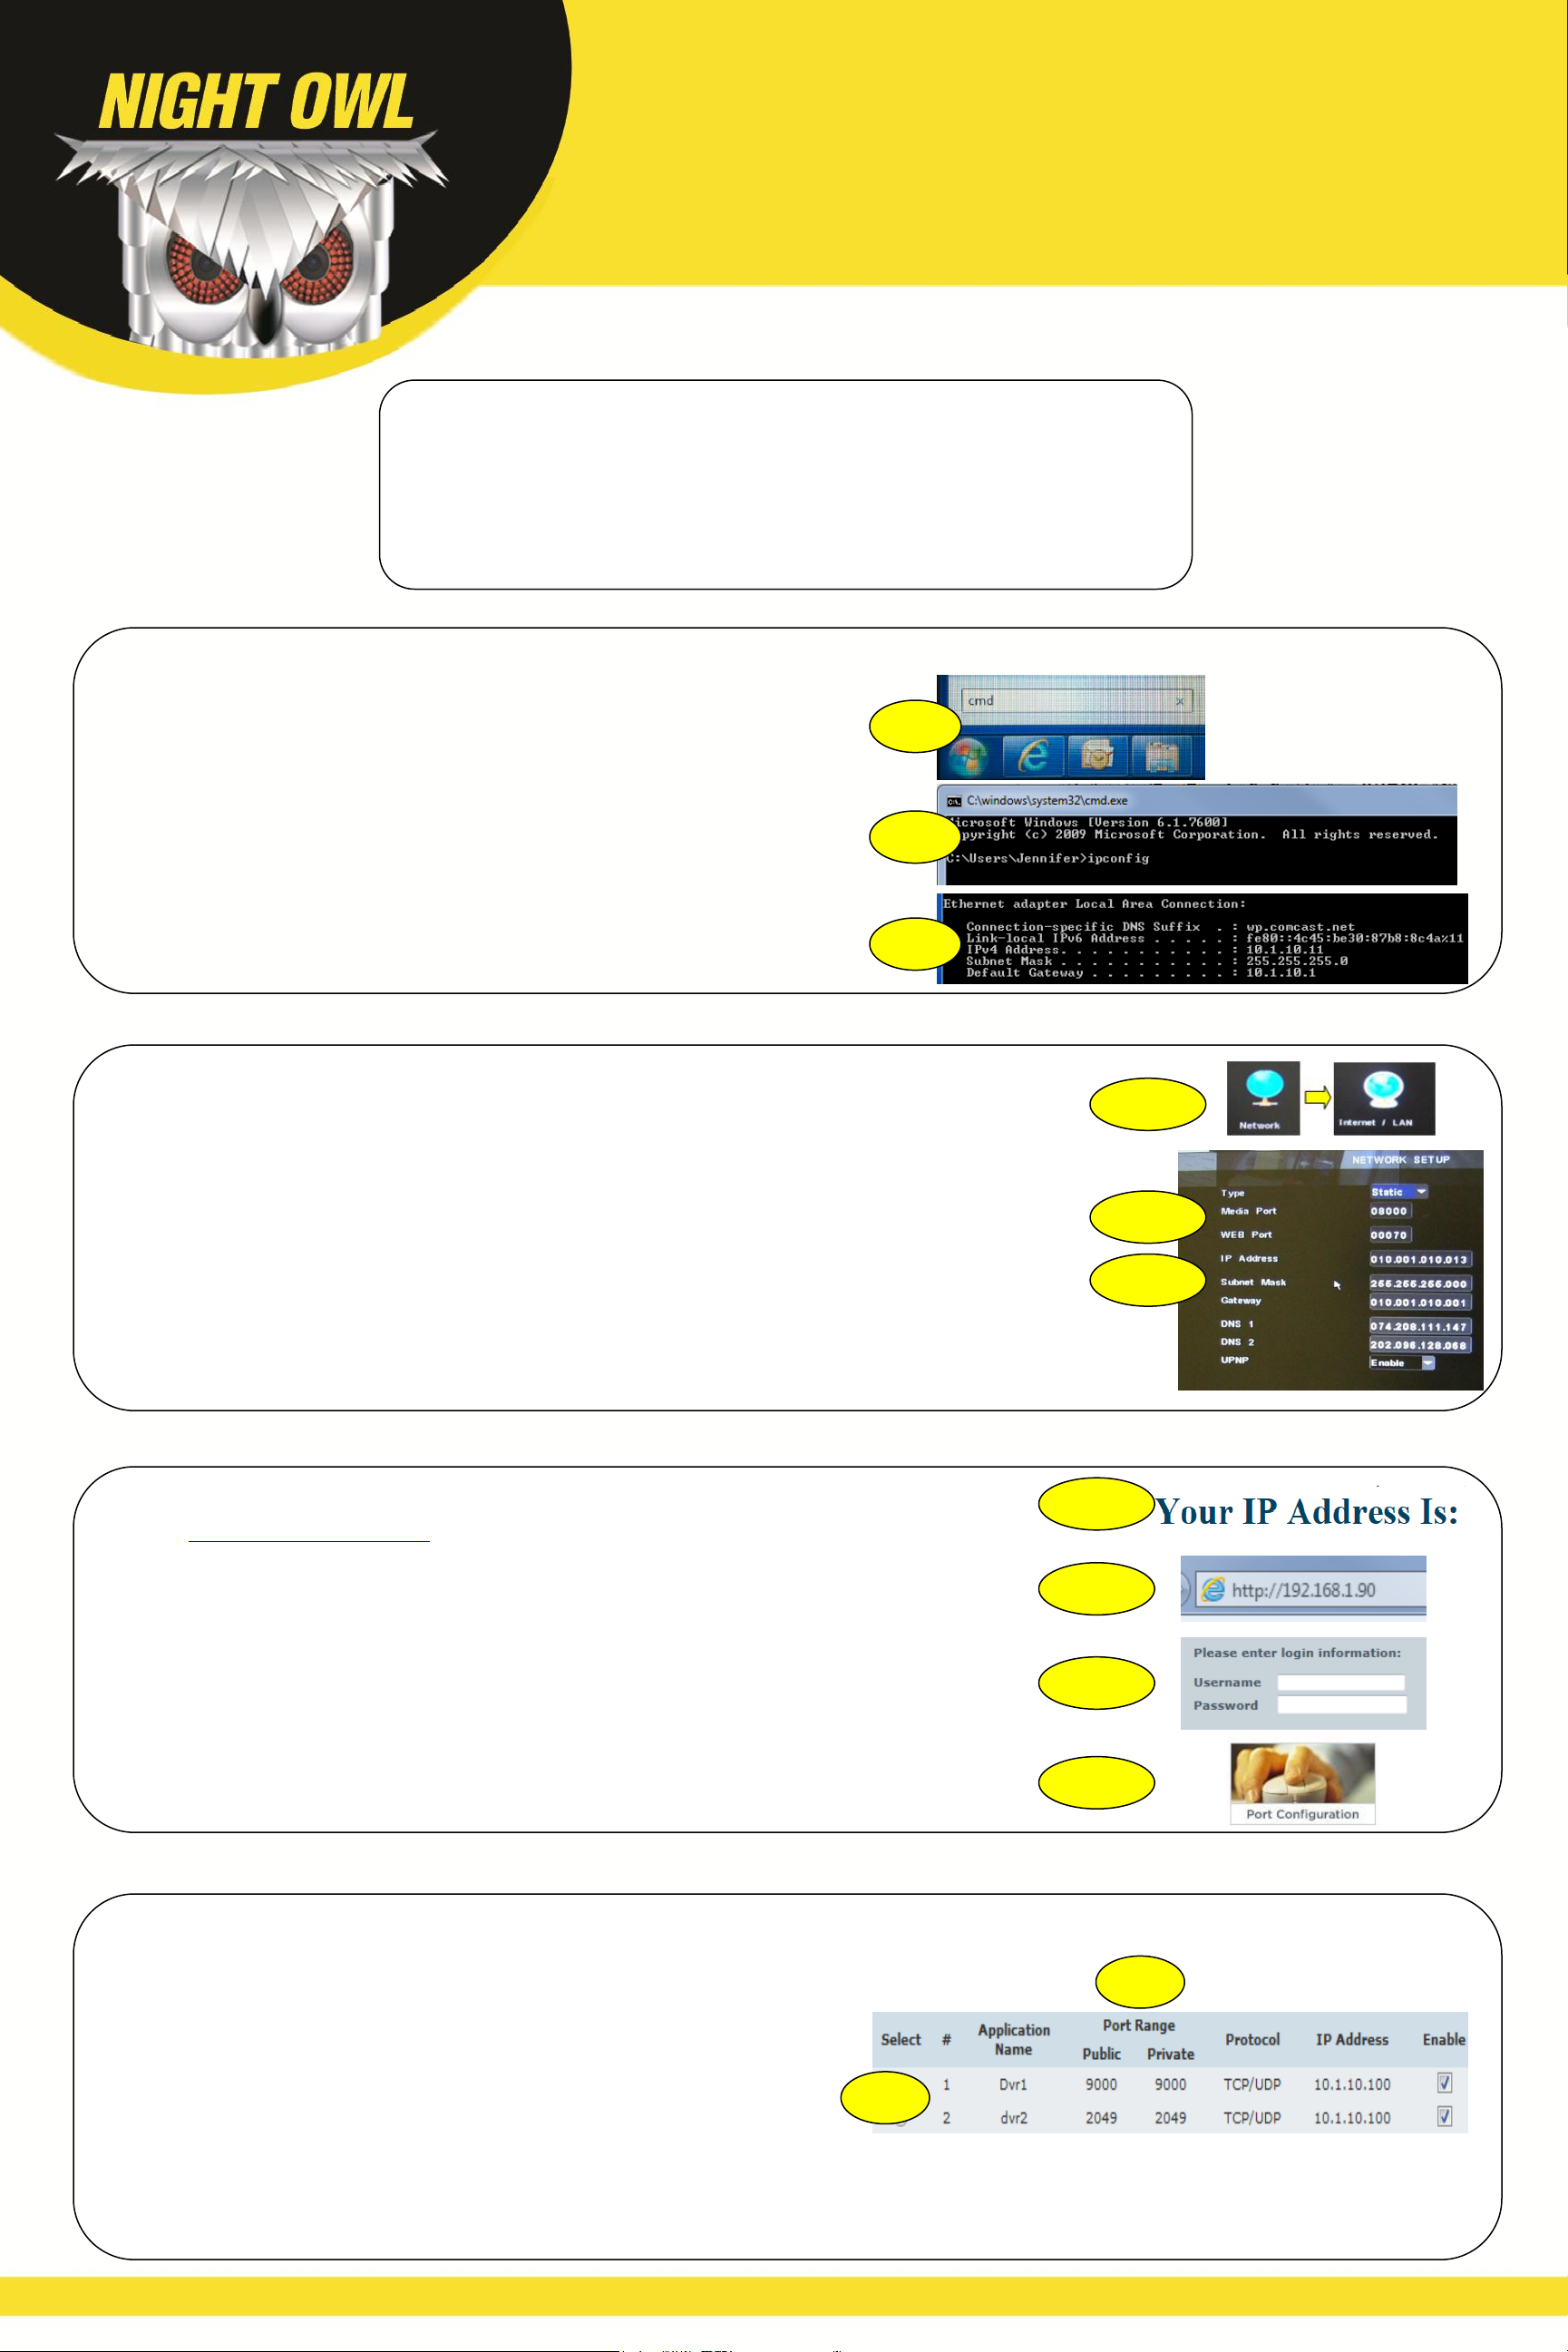
A. Right click the mouse, select Main Menu then select the Network icon and then the
Internet/LAN icon.
B. Change the type to Static. Change the Media Port to 9000 and the Web Port to
80.
C. Change this to the IP Address that you wrote down from the previous section.
You will have to enter a zero in front of any numbers that do not have three
digits.
D. The Subnet Mask should be set to 255.255.255.000.
E. Change the Gateway to Default Gateway number that you wrote down from the
previous section.
A. Select the start menu on your computer screen. Type cmd in the “Search
programs and files” field and press enter.
B. In the command prompt window, type ipconfig and press Enter. Find the section
called “Ethernet adapter Local Area Connection”.
C. Find the IPv4 Address (or may be named IP Address in some versions of
Windows). Change the last digits to 150. Example, you wrote down the IP
Address 10.1.10.11. When the last digits are changed the IP address will now
be 10.1.10.150. Write this number down on a piece of paper.
D. Find the Default Gateway. Write down the Default Gateway number.
B
C,D,E
A. Go to http://www.whatismyip.com your IP address will appear at the top of the
page. This is your public IP address.
B. Open the Internet Explorer browser and enter http://youripaddress and then
press enter.
C. Login into your router/modem using your user name and password. (Contact
your Internet Service Provider if you are unsure about the login information)
D. Once you have logged into your router/modem. Go into the section indicated to
forward your ports.
A B D
A
C
A. You will need to enter a separate port forwarding entry for each port that your
DVR uses – Media Port (9000), Web Port (80), and Server Port (2050).
B. When entering the port numbers and IP address into your router’s port
forwarding section, you will need to do away with the leading zeros (i.e. 09000
becomes 9000, 192.168.001.090 becomes 192.168.1.90, and so on).
B
A
Networking Quick Setup Guide
LTE, STA, and BUL Series Security Kits
STEP 6: Enable ActiveX Controls
STEP 5: DDNS Registration
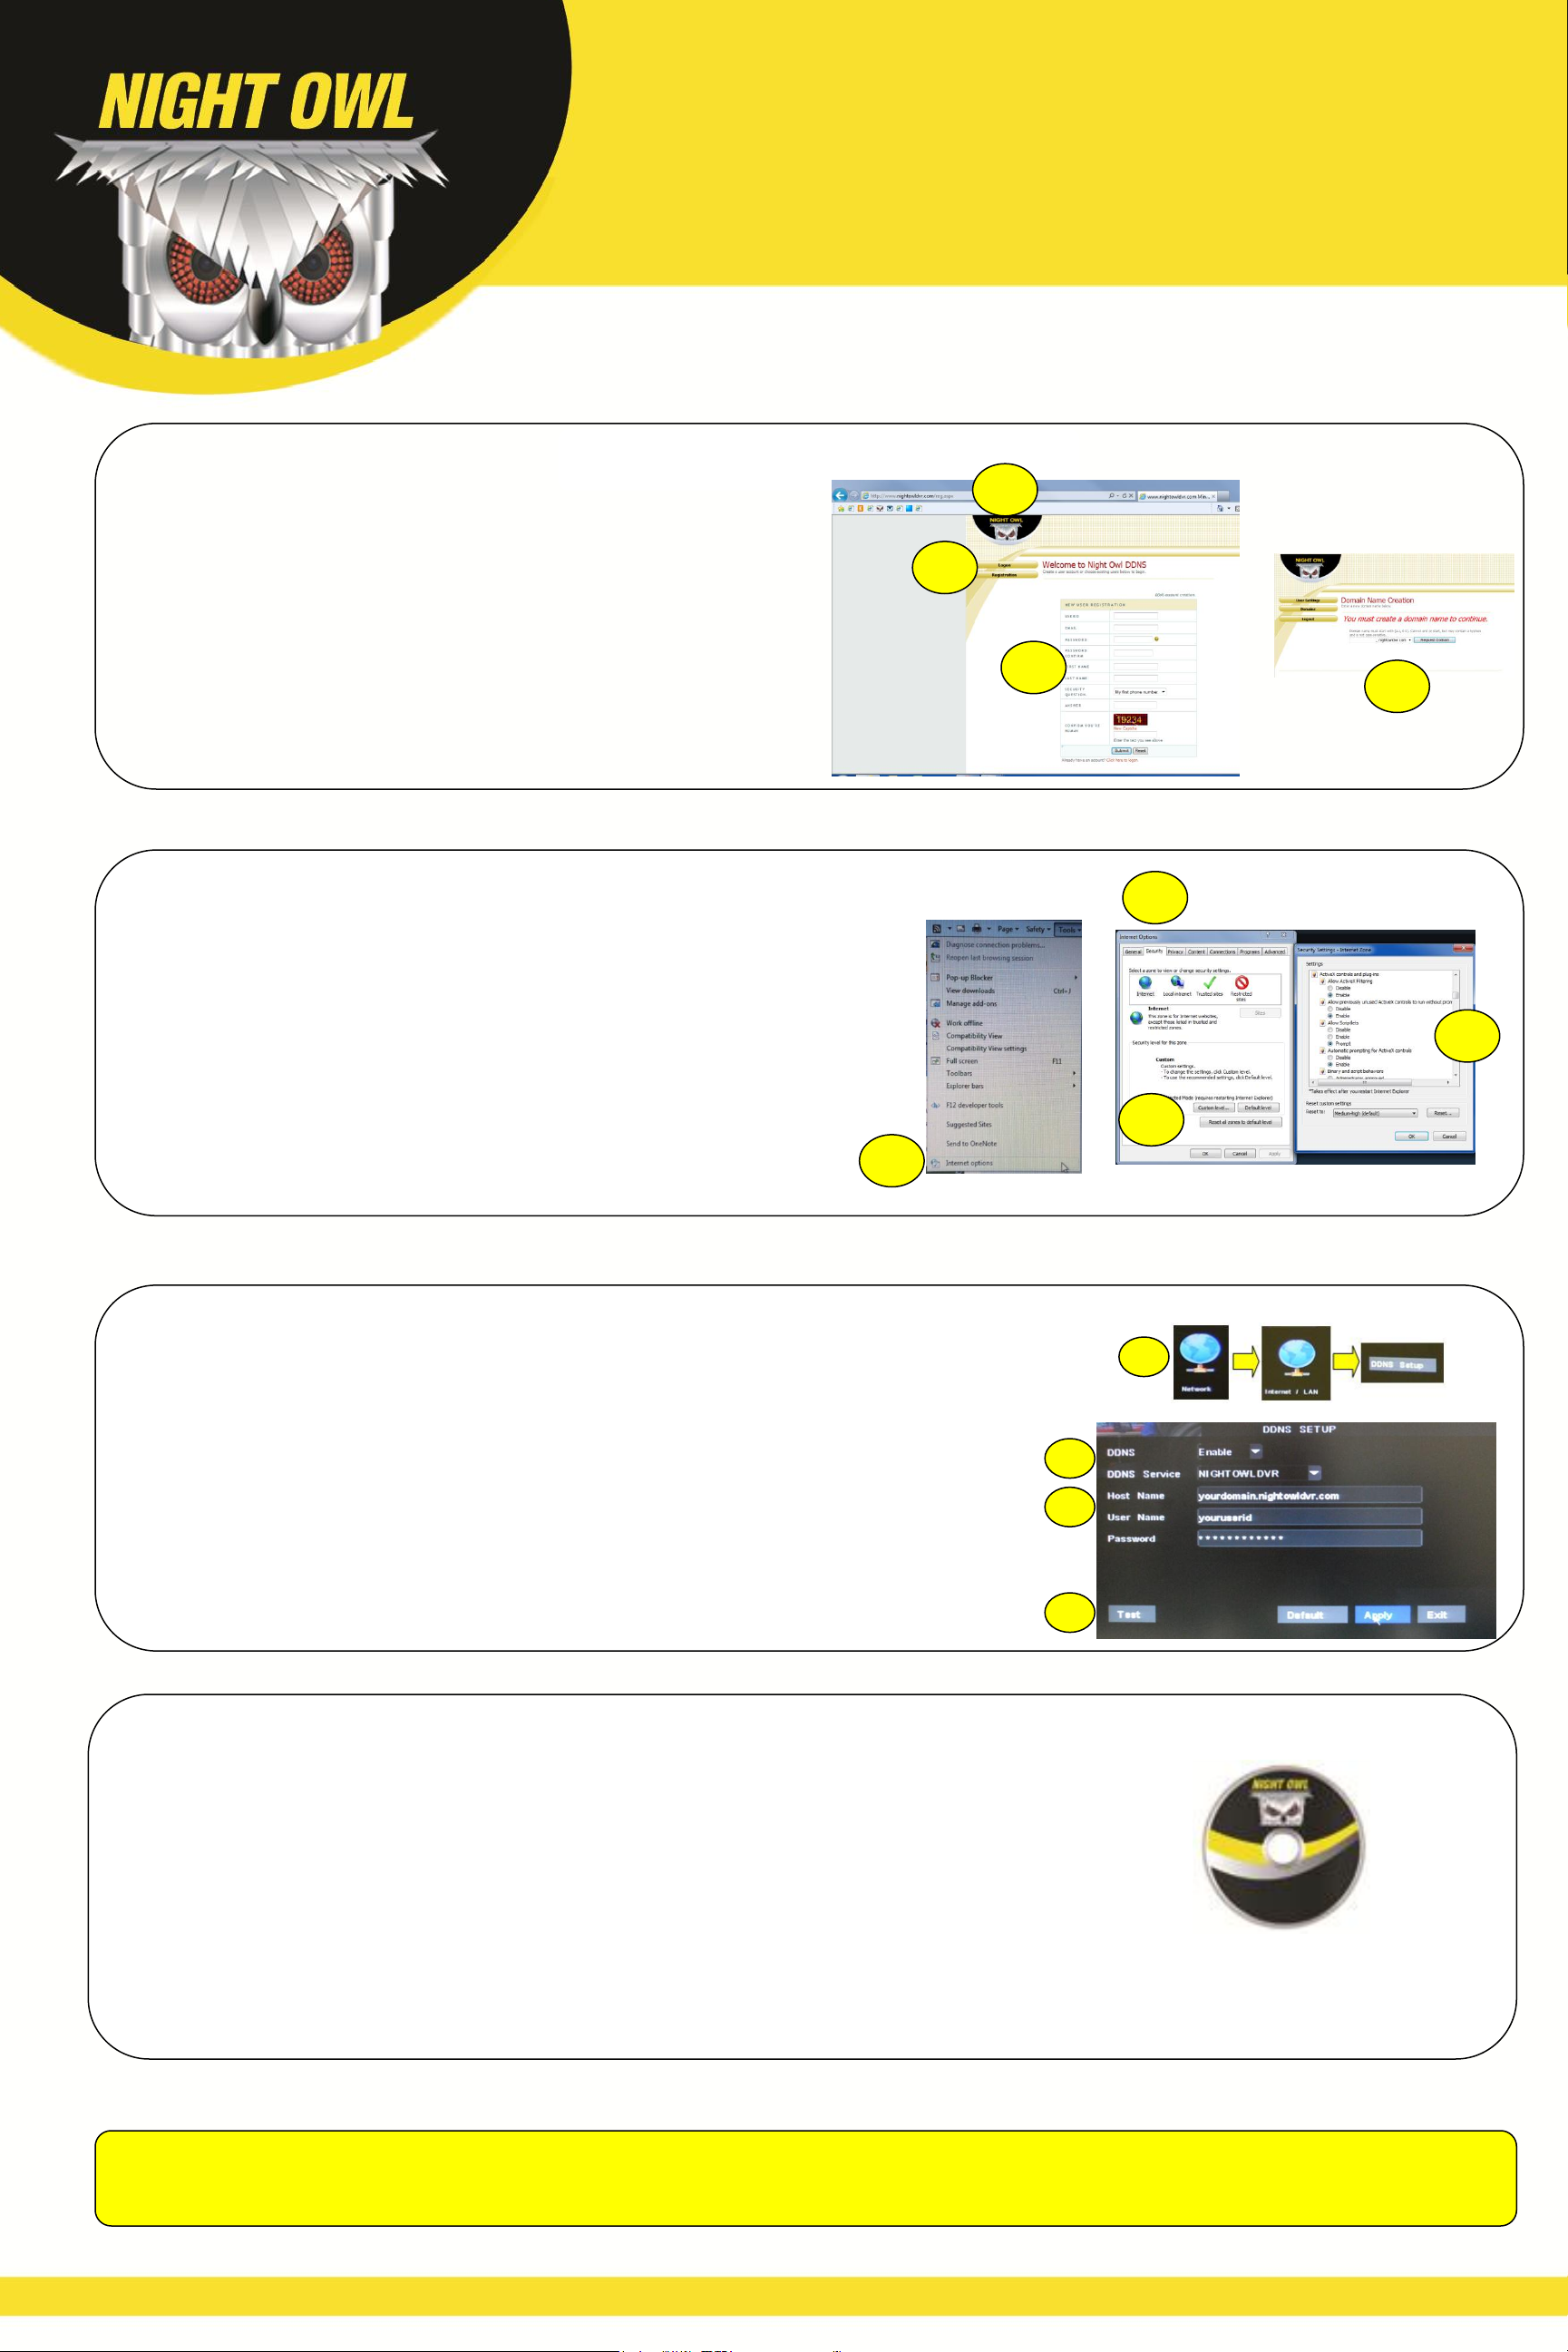
A. Go to http://www.nightowldvr.com.
B. Select the Registration button located at the top left corner of the page.
C. Complete the New User Registration form.
D. Create a domain name. If your domain name that you have chosen is
available, you will receive a window that says that your domain was
successfully created.
E. Your domain name has now been created.
B C D
A
A. Open an internet browser.
B. Go to Tools and select Internet Options.
C. Go to the Security Tab.
D. Select the Custom Level button.
E. Scroll down until you see ActiveX controls and plug-ins.
F. Set every setting to either Enable or Prompt.
B
C D E
STEP 7: Entering DDNS Information into the DVR
STEP 8: Remote Viewing Options
A. Right click the mouse, select Main Menu then select the Network icon and then
the Internet/LAN icon. Then select DDNS Setup.
B. Enable the DDNS option and set the service to NightOwlDVR.
C. Enter the information that was setup during the DDNS registration.
a. Enter the domain name into the Host Name field.
b. Enter your UserID into User Name field.
c. Enter your Password into Password field.
D. Select Test to test the settings to ensure that they work correctly. Be sure to
Apply all the changes before selecting Test or it will not work. (This only
applies to 4 & 8 channel DVRs)
A. You can access your DVR through Internet Explorer 7, 8, 9, or 10 or Safari
5.1 and 6.0 by opening a web browser.
B. You can access your DVR through software included on the included software
CD.
a. NetViewer Software
b. Control Management Software
C. You can view over Smartphones and Tablet PCs.
a. iPhone®, iPad®, Blackberry®, Android®, Windows Mobile®, and
Symbian®.
Please visit our website at www.NightOwlSP.com for all manuals, software, and firmware updates. There are also
free How-To Videos with step by step instructions for configuring the settings on your DVR.
Please refer to your software CD for the User Manual to learn how to configure the remote settings.
 Loading...