

Night owl CAM-WNR2P-OU, CAM-WNVR2P-IN User Manual
QUICK SETUP GUIDE
WNVR SERIES
ADD-ON CAMERAS
Indoor
Model #
CAM-WNVR2P-IN
www.NightOwlSP.com
Outdoor
Model #
CAM-WNR2P-OU
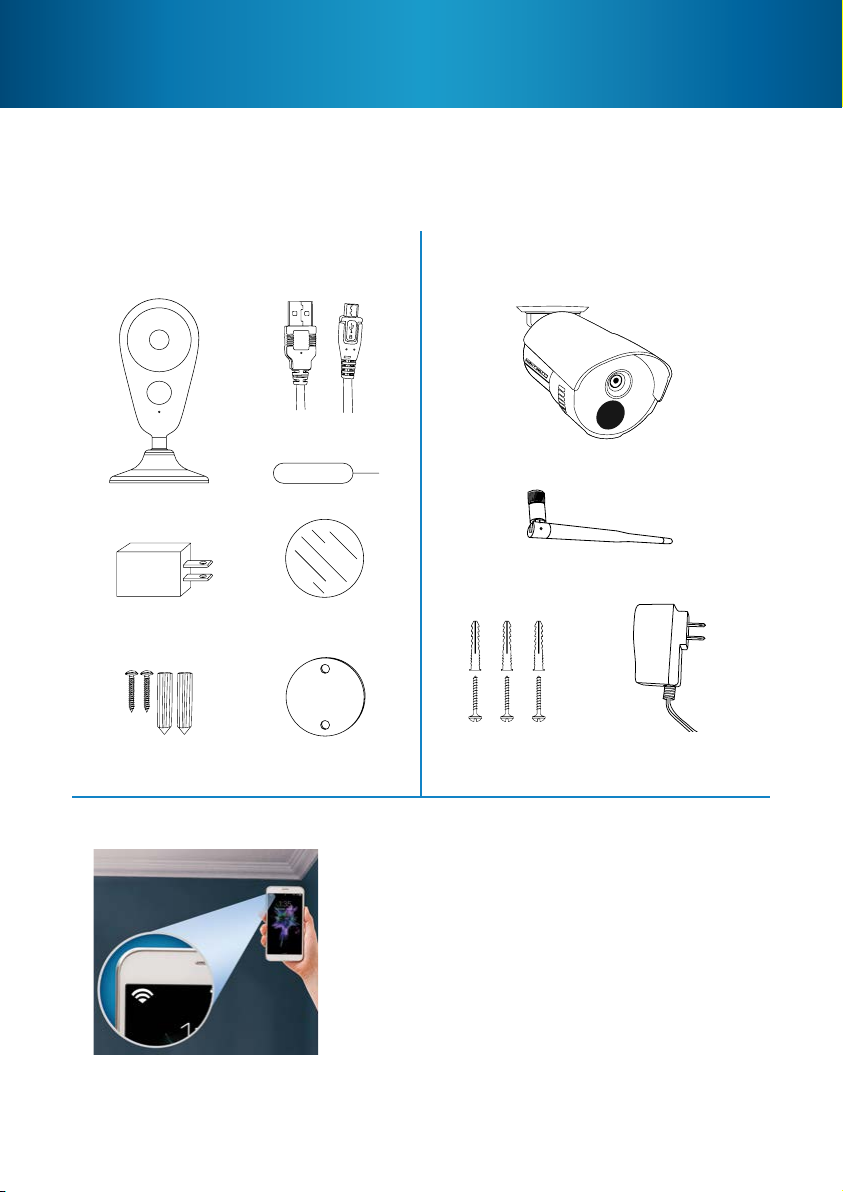
What’s in the Box
NOTE: Whether you’ve purchased an indoor or outdoor camera, the setup
is the same.
Wireless IP Indoor Camera
Model # CAM-WNVR2P-IN
Camera (1x)
5V DC 1.0A
Power Supply (1x)
Bracket Mounting
Hardware
Adhesive Mounting
Magnetic Mounting
9.8 ft. Power
Cord (1x)
Reset Pin (1x)
Tape (1x)
Bracket (1x)
Wireless IP Outdoor Camera
Model # CAM-WNR2P-OU
Camera (1x)
Camera Antenna (1x)
Bracket Mounting
Hardware
Power Supply (16.4 ft.)
1 x 12V DC 1.0A
Testing with a Smart Device
Status Light Key
Quickly Flashing–Pairing Mode (default).
Slowly Flashing–Camera is not
connected to your WNVR or
Wi-Fi network.
Solid Light–Camera is connected to
a network and functional.
NOTE: For Option #2 setup, Night Owl recommends using your cell phone to
test the location for your WiFi signal strength before installing the camera.
1
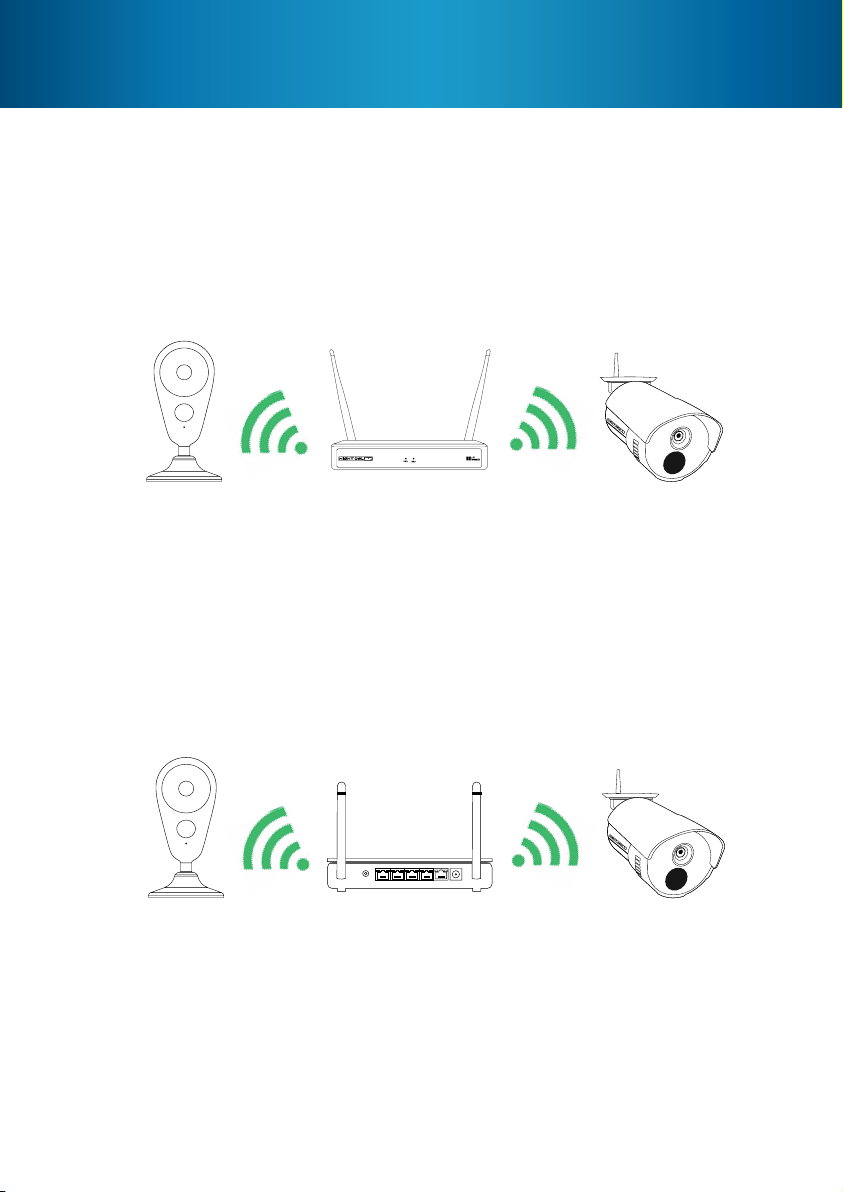
Add-On or Stand-Alone
Night Owl gives you options! Your camera can be used as an add-on to
an existing Night Owl Wireless NVR kit or as a stand-alone camera that
records to a microSD card.
Option 1:
Pairing to your existing Wireless NVR System
When used as an add-on to your existing Wireless NVR System, the camera
can be viewed using your Night Owl X (for Smart Phones) and/ or Night
Owl X HD (for Tablets) application. Please follow the OPTION #1 setup
instructions to add your camera.
NOTE: You must complete add-on camera setup in the same room as the NVR.
Option 2:
Stand-alone Camera Pairing to your Router
RESET
LAN1 LAN2 LAN3 LAN4 WAN
To use as a stand-alone camera, please follow the Option #2 setup instructions
found on page 6. You will need to download and install the Night Owl
Connect App to view and control the camera. A microSD card (not included)
will be required to use the recording function.
NOTE: Camera will be in pairing mode when first powered on. If the camera is
not in pairing mode please follow pairing instructions found on page 9.
2
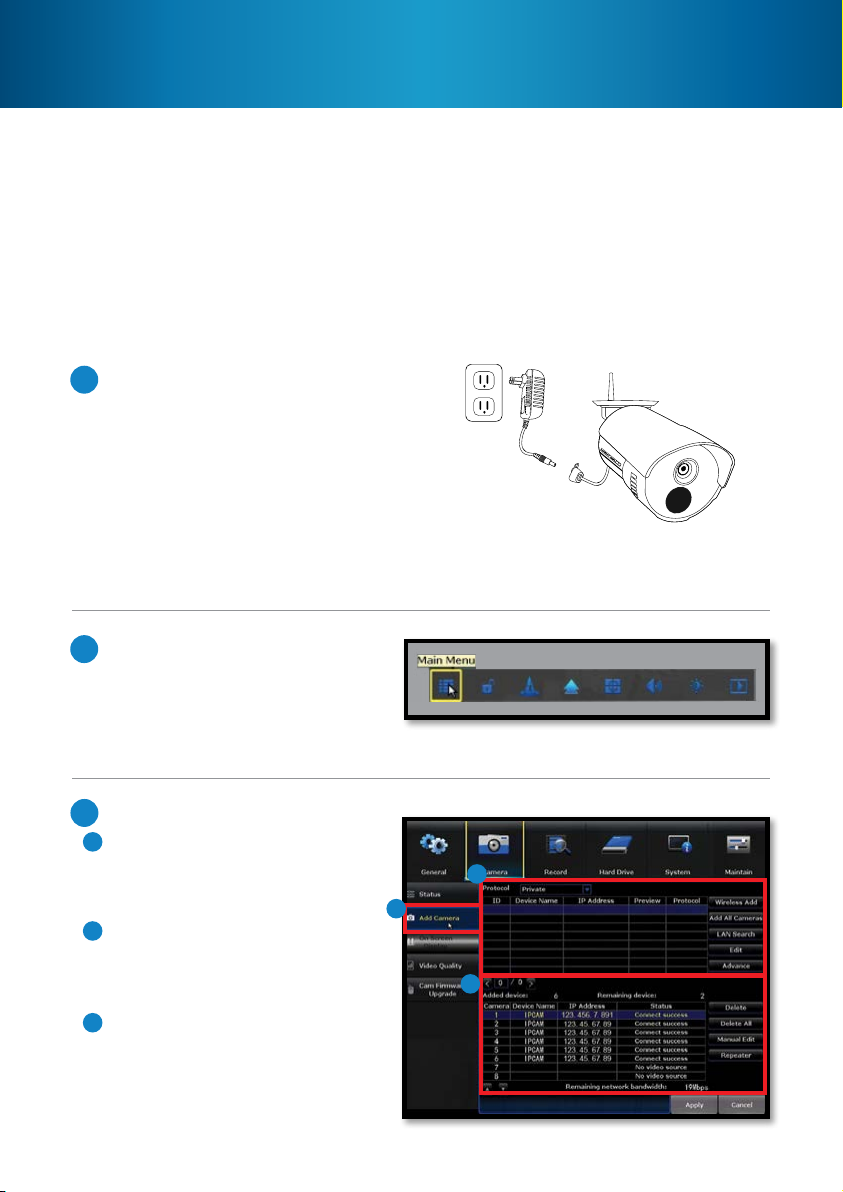
Option #1: Pairing to existing Wireless NVR System
By default, the camera will be in pairing mode when it’s first powered on.
Pairing allows for the wireless transmission coming from the camera to be
detected by the Wireless NVR.
To pair an add-on camera to your Night Owl Wireless NVR, please use the
following steps:
NOTE: When pairing the camera to your NVR make sure you are in the same
room as the NVR. ALWAYS test the camera locally before installing.
Power on the add-on camera
1
using the camera power adapter.
You will hear the camera say,
“Camera is in pairing mode”
and the status light will flash
quickly. If the camera is not in
pairing mode please refer to
page 9 for pairing instructions.
NOTE: Setup is the same for
Indoor and Outdoor models.
With the NVR connected to a
2
TV/Monitor, login, then right
click on your mouse and
navigate to the Main Menu
using the options bar.
3
A
Go to the Camera Menu and
Select the Add Camera tab on
the left side of the menu.
B
The top portion of the screen
will list cameras that have
been found, but not yet paired.
C
The bottom portion of the
screen will show all cameras
that are currently paired to
the NVR.
3
B
A
C
 Loading...