


DVR
MINI
RECORDER
USER MANUAL
nightgoggles.com

WARNING
TRANSFERRING VIDEO OR AUDIO
WHILE THE SYSTEM HAS A LOW
BATTERY MAY RESULT IN FILE
TRANSFER ERRORS, DATA LOSS,
OR FILE CORRUPTION.
CAUTION
THIS IS AN ELECTRONIC DEVICE
AND THERE IS RISK FOR SHOCK IF
USED IMPROPERLY. DO NOT
REMOVE DVR HOUSING.
SAFETY INSTRUCTIONS
SAFETY INSTRUCTIONS
DO NOT USE DAMAGED BATTERY OR
CHARGER.
OVERCHARGING WILL SHORTEN THE
LIFE OF THE BATTERY. THIS DEVICE
USES A RECHARGEABLE BATTERY
THAT WILL NEED TO BE REPLACED
OVER TIME.
AFTER PROLONGED USE, IF BATTERY DOES NOT HOLD A CHARGE OR
CHARGE FULLY, REPLACE BATTERY.
AVOID DEVICE EXPOSURE TO WATER
OR OTHER LIQUIDS.
DO NOT CHARGE THIS DEVICE WITH
POWER INVERTERS/CONVERTERS.
DO NOT LEAVE THIS DEVICE OR ANY
OF ITS COMPONENTS IN DIRECT SUN
LIGHT FOR PROLONGED PERIODS OF
TIME.
RULE OF THUMB: TREAT THIS DEVICE
AS YOU WOULD A SMARTPHONE.

1
2
3
4
5
6
7
8
9
10
11
12
13
14
1. POWER BUTTON
2. RECORD BUTTON
3. SELECT KEY
4. SELECT KEY
5. ESC BUTTON
6. ENTER BUTTON
7. MICRO SD CARD SLOT
8. SPEAKERS
9. VIDEO/AUDIO INPUT
10. CHARGING INDICATOR
11. RECORDING INDICATOR
12. VIDEO/AUDIO OUTPUT
13. MINI USB PORT
14. MODE SWITCHING KEY
ESC
OK
DEVICE DIAGRAM

1
2
3
1. POWER ON
2. POWER OFF
3. LED INDICATOR
*THIS REMOTE UTILIZES AN “A27” BATTERY. THESE CAN BE PURCHASED
ONLINE AND AT MAJOR RETAIL LOCATIONS.
DEVICE DIAGRAM

ESC
OK
1
2
3
4
5
6
1. MINI DVR
2. WIRELESS REMOTE
3. 1800MAH BATTERY
4. WALL CHARGER
5. MINI USB CABLE
6. A/V CABLE
PARTS LIST

2.5 inch lcd screen
video output
video mode
image resolution
video format
frequency range
output channel
headphone output
speaker
internal memory
memory card
usb
language
power adapter
battery
record time
system time
2.5 x 2.7 LCD
NTSC/PAL
NTSC/PAL
800x600 / 640x480
.avi
20Hz - 20KHz
stereo
160 (max volume)
1.5W
16MB
micro SD card
USB 2.0
english/chinese
DC 5V 2A
Lithium ion
~2 hours
~5 hours
320x240
DEVICE SPECIFICS
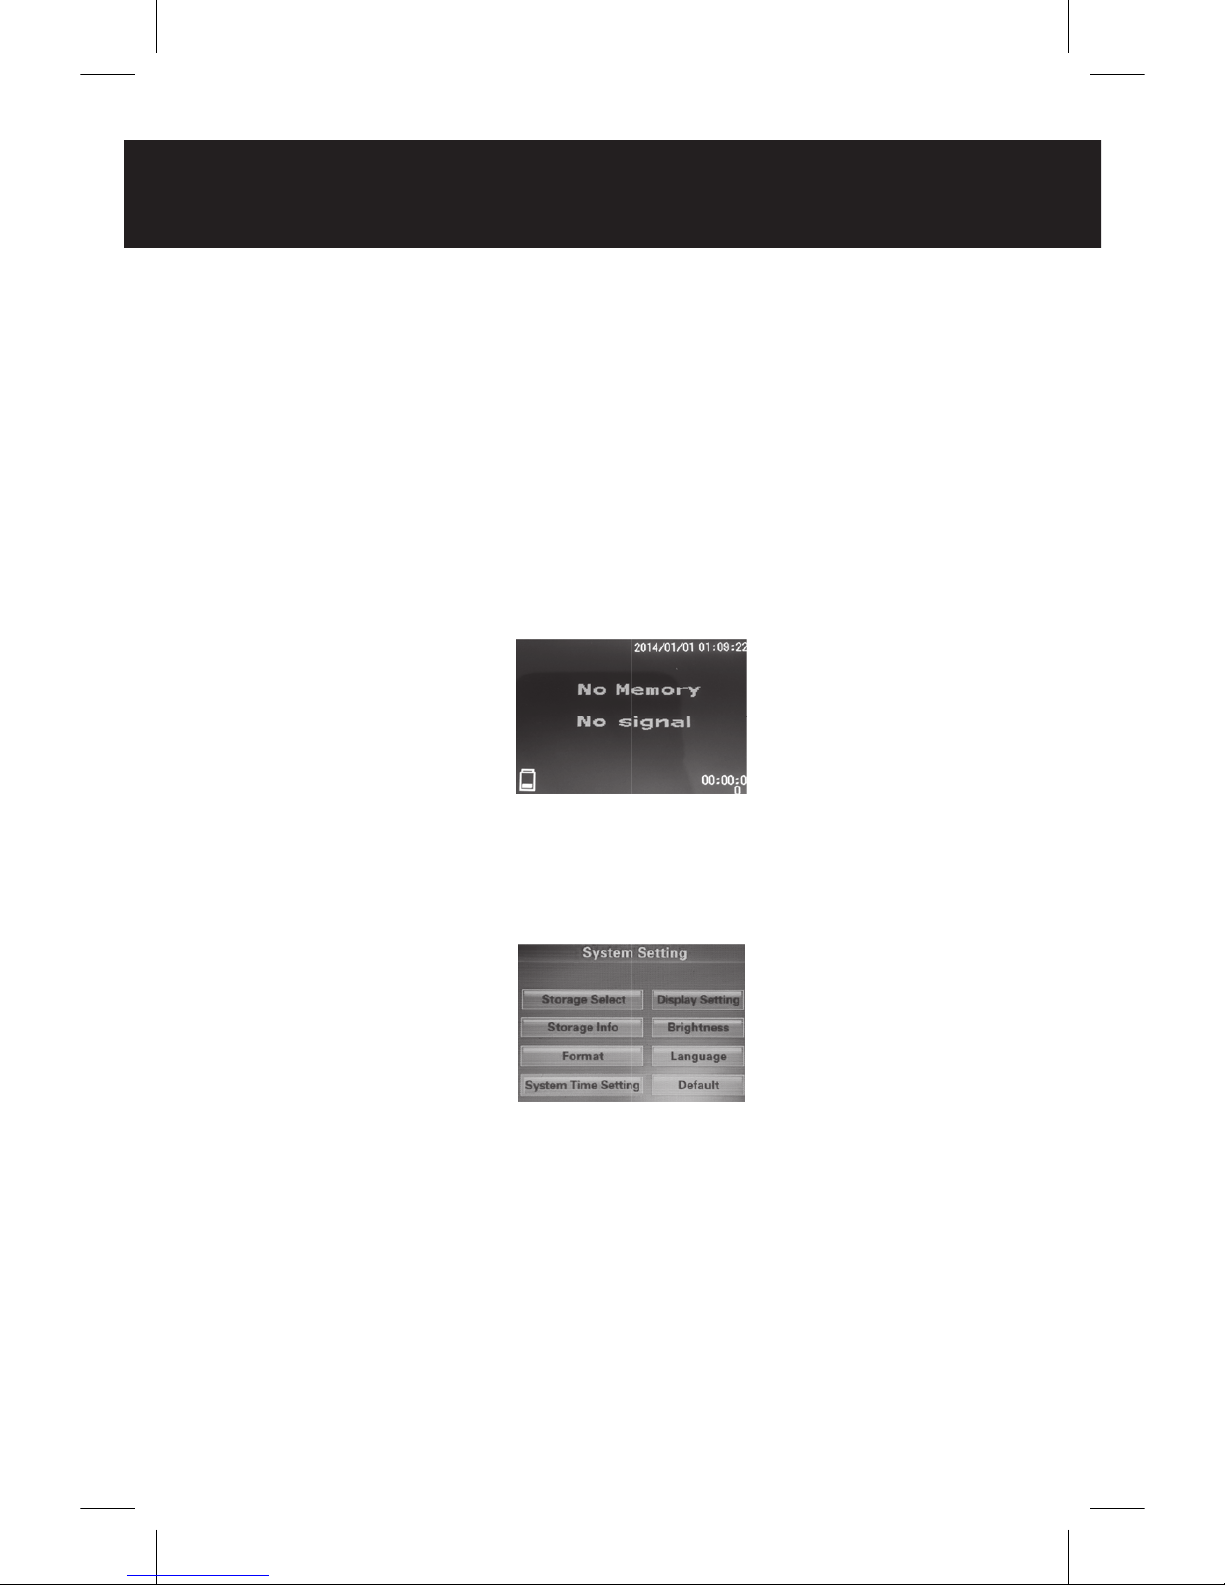
DATE & TIME
to set device date &time Stamp:
- ensure battery is installed in the
dvr.
- ensure that there is no micro sd
card in the dvr.
-press and hold the power button
for three seconds. this screen will
appear.
-press [esc]. Toggle to the far right
icon (gear symbol) and press [ok].
this screen should appear.
-select [system time setting]. set date
and time.
-insert sd card and connect to your
thermal device.
*the only other item we recommend
adjusting in this menu is [brightness].
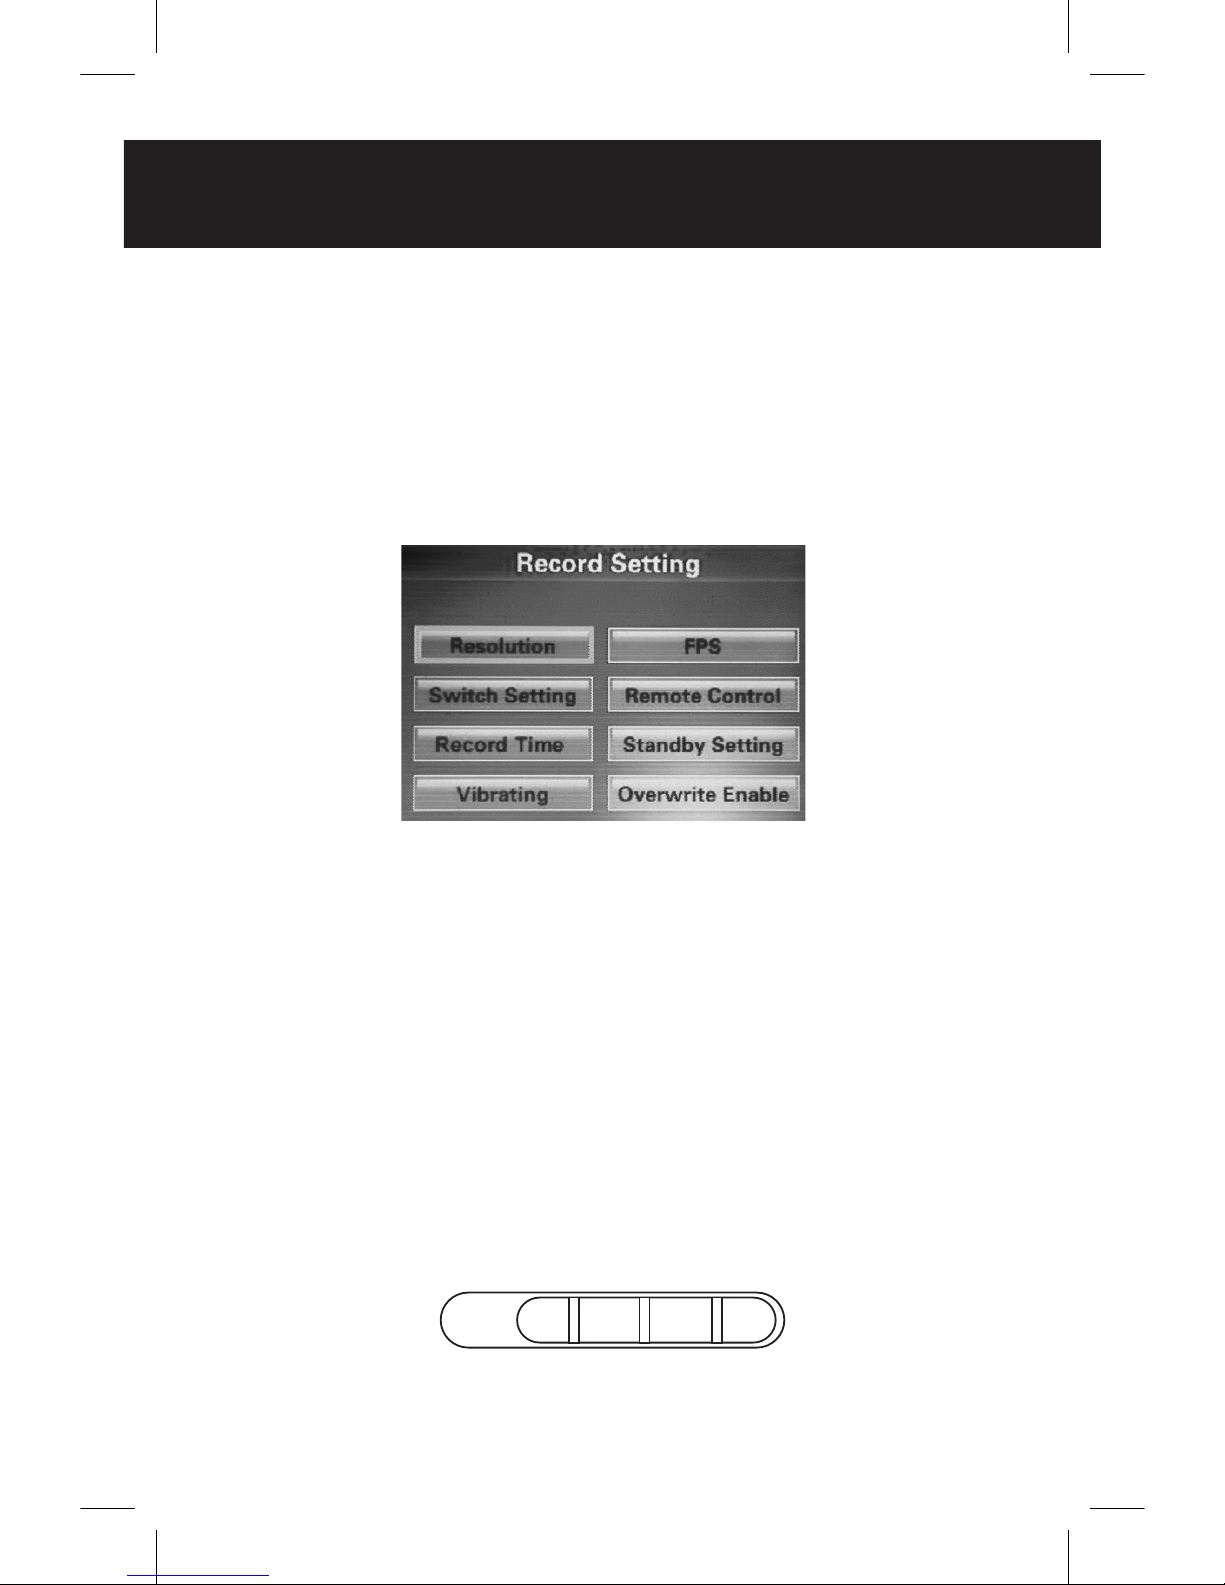
RECORD SETTINGS
TO ACCESS RECORD SETTINGS:
-press and hold to power button
for 3 seconds. when the device
boots up, press [ok]. you should
see this screen.
each setting will bring you to a
sub-menu.
1. RESOLUTION
-800 x 600
-640 x 480
-320 x 240
2. SWITCH SETTING
on the right side of your
dvr you will see a toggle
switch like below.
Switch
N
Q

RECORD SETTINGS
when the toggle is in the Q position,
the dvr screen is dark and you are not
able to use the buttons on the dvr
itself. think of it as a “lock” mode.
when the toggle is in the N position,
you see live feed on the dvr screen,
and you can use the buttons on the
dvr.
select the [lock, standby and record
video] setting. this allows the dvr to
operate the simplest way possible.
3. RECORD TIME
maximum record time. auto shut off.
-5 min / 15 min / 30 min
4. VIBRATING
vibrates when there is a function
change, such as record.
-ON / OFF
5. FRAMES PER SECOND
-30 is recommended
6. REMOTE CONTROL
-[off] turns off remote.
-[boot & record video] setting is
is recommended.
7. STANDBY SETTING
how long it takes for screen to
go black while recording.
-10sec / 20sec / never

8. OVERWRITE ENABLE
when off, device will stop recording
when full. when on, device will over
write previous files.

RECORD VIDEO WITH REMOTE
To record video with the remote control,
you must start with the DVR powered off.
Hold down the Unlock symbol on the
remote for 2-3 seconds. The DVR will emit
a long vibration to indicate that recording
has started. Hold down the Lock symbol
for 2-3 seconds to end recording, and the
DVR will vibrate 3 times to indicate that
recording has stopped and the DVR has
powered off.
TIPS
TRANSFERRING YOUR FILES TO COMPUTER
your files will not transfer correctly to
your computer if the toggle switch is set
to the Q position.
we experience the best results with file
transferring if you use a micro sd card
reader instead of attaching your dvr
directly to the computer.

THERMAL DEVICES
-when using the dvr with the ir hunter line
of thermal scopes, you must set the internal
frame rate on the scope to 60fps. if you do not
do this, your video will not export correctly.
-when using the dvr with any thermal device, you
must set the internal [video output] on the scope
or device to the “on” position.
-set the internal FPS on the dvr to 30fps.
-we have cables [sold separately] that will allow
you to utilize your dvr with several thermal
devices, including: FLIR RS, FLIR M18, FLIR LS,
FLIR T70, IR HUNTER, IR PATROL, ETC.
-when using your dvr with a thermal device, we
recommend using our dvr rifle/helmet pouch for
the best possible user experience. this can be
purchased on our website.
for any further questions or trouble shooting
tips, please give us a call or send us an email.
909-312-5424
909-796-7000
sales@nightgoggles.com
sales@tnvc.com
nightgoggles.com
tnvc.com


DVR
MINI
RECORDER
 Loading...