

Page 1
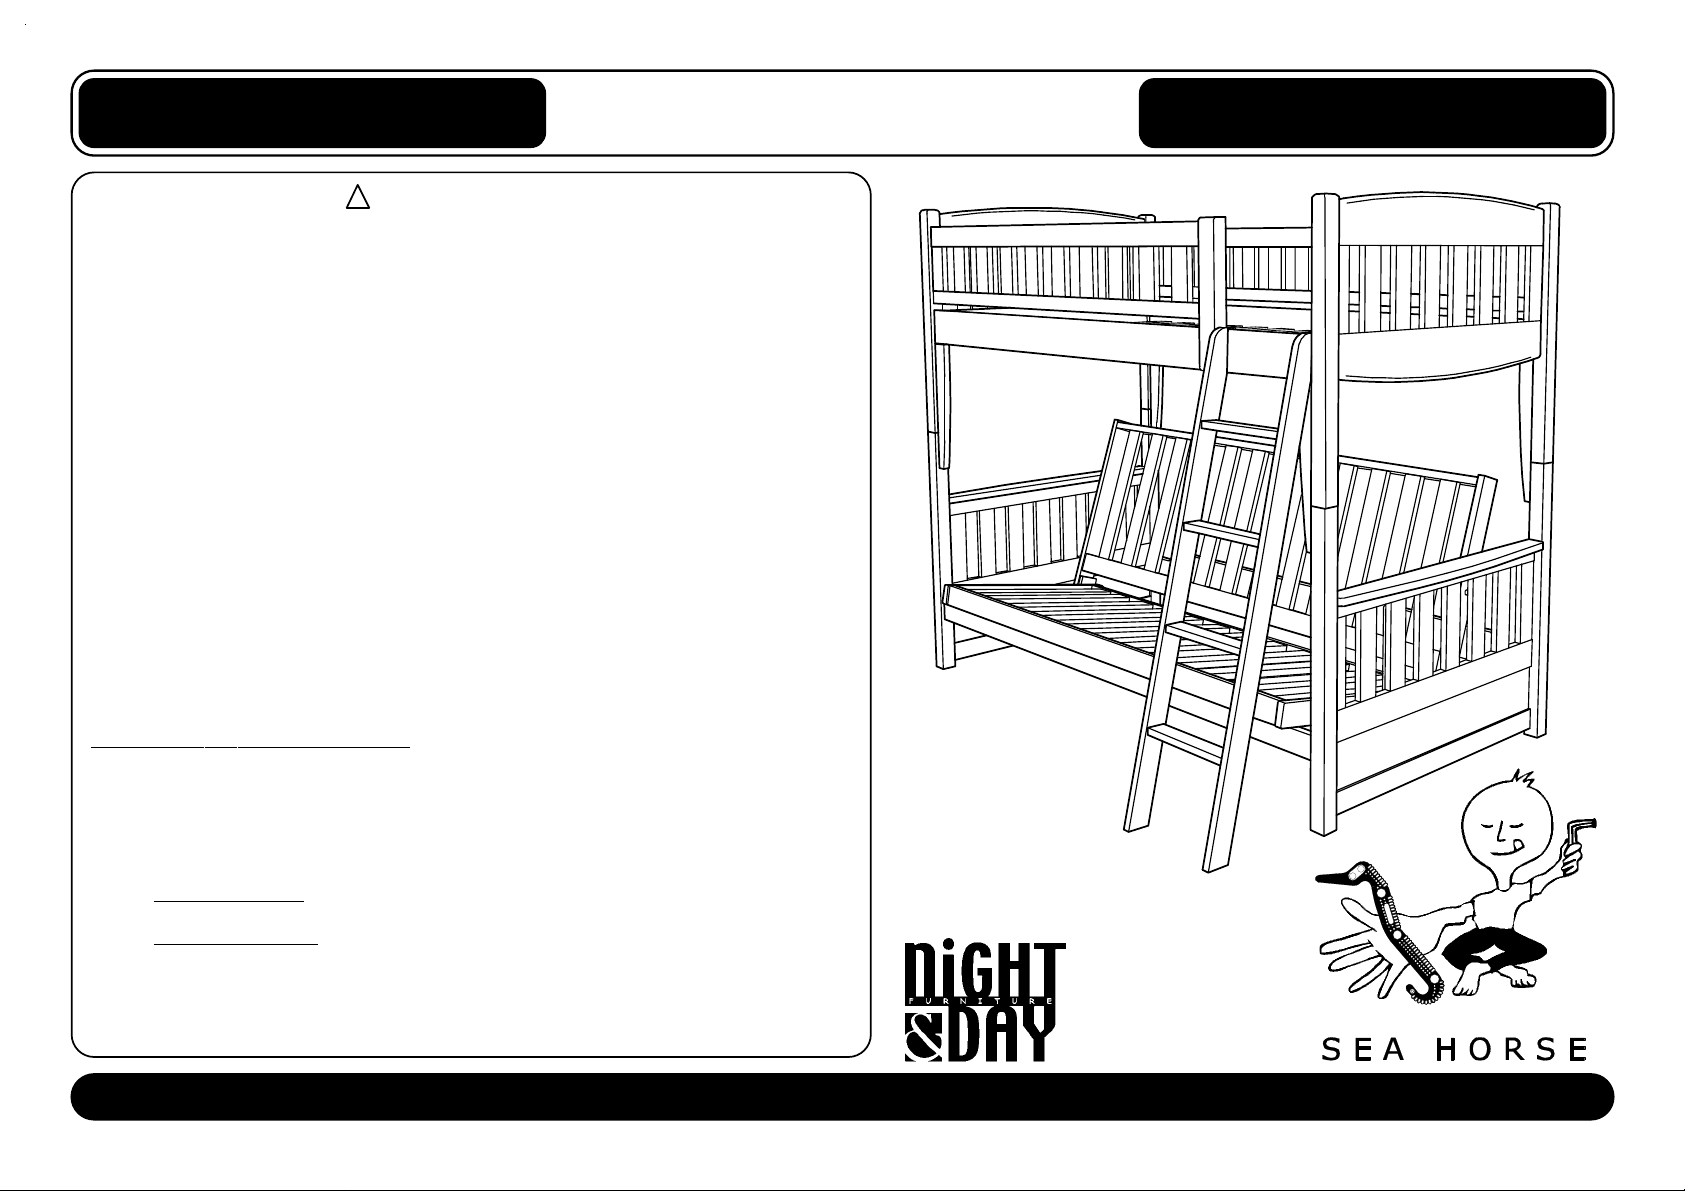
Cinnamon
F U T O N B U N K B E D
!
SAFETY WARNING
1.
Follow th e information on the warn ings appearing on the upper bunk end structure and on
the carton. Do not remove warning label from bed.
2.
Always use the recommended size mattress or mattress support, or both, to help prevent
the likelihood of entrapment or falls.
3.
Surface of mattress must be at least 5 in. (127 mm) below the upper edge of guardrails.
4.
Do not allow children under 6 years of age to use the upper bunk.
5.
Periodical ly check and ensure that the guardrail, ladder, and other components are in th eir
proper position, free from damage, and that all connectors are tight.
6.
Do not allow horseplay on or under the bed and prohibit jumping on the bed.
7.
Always use the ladder for entering and leaving the upper bunk.
8.
Do not use substitute parts. Contact the manufacturer or dealer for replacement parts.
9.
Use of a night light may provide added safety precaution for a child using the upper bunk.
10.
Always use guardrails on both long sides of the upper bunk. If the bunk bed will be placed
next to the wall, the guardrail that runs the full length of the bed should be placed against
the wall to prevent entrapment between the bed and wall.
11.
The use of water or sleep flotation mattresses is prohibited.
12.
STRANGULATION HAZARD–Never attach or hang items to any part of the bunk bed
that are not designed for use with the bed; for example, but not limited to, hooks, belts
and jump ropes.
S H O E F I T T I N G S
TM
TM
GoldAssembly Instructions
SF 0307
Keep these instruc tions for futu re reference.
13.
SIZE OF MATTRESS AND FOUNDATION:
Use only mattress, which is 37 1/2" - 38 1/2" width and 74"-75" long on upper bunk (twin size.)
Ensure that the thickness of the mattress does not exceed 6" and that the mattress surface is at
least 5" (127mm) below upper edge of guardrails.
Replacement Parts:
Replacement parts, including addit ional guardrails may be obtained from an y
Night & Day Furniture Dealer.
Certified:
This bunk bed conforms to all applicable consumer product safety standards
16 CFR PARTS 1213, 1500, 1513 and ASTM F-1427
Page 1 of 12
Note: Shoe Fittings™ including the Snapper™ and the Sea Horse™ are Patent Pending: US#60/201,672 and US#09/760,749.
TM
featuring the Rubber
TM
Page 2
Cinnamon
F U T O N B U N K B E D
S
H O E F I T T I N G S
TM
TM
GoldAssembly Instructions
SF 0307
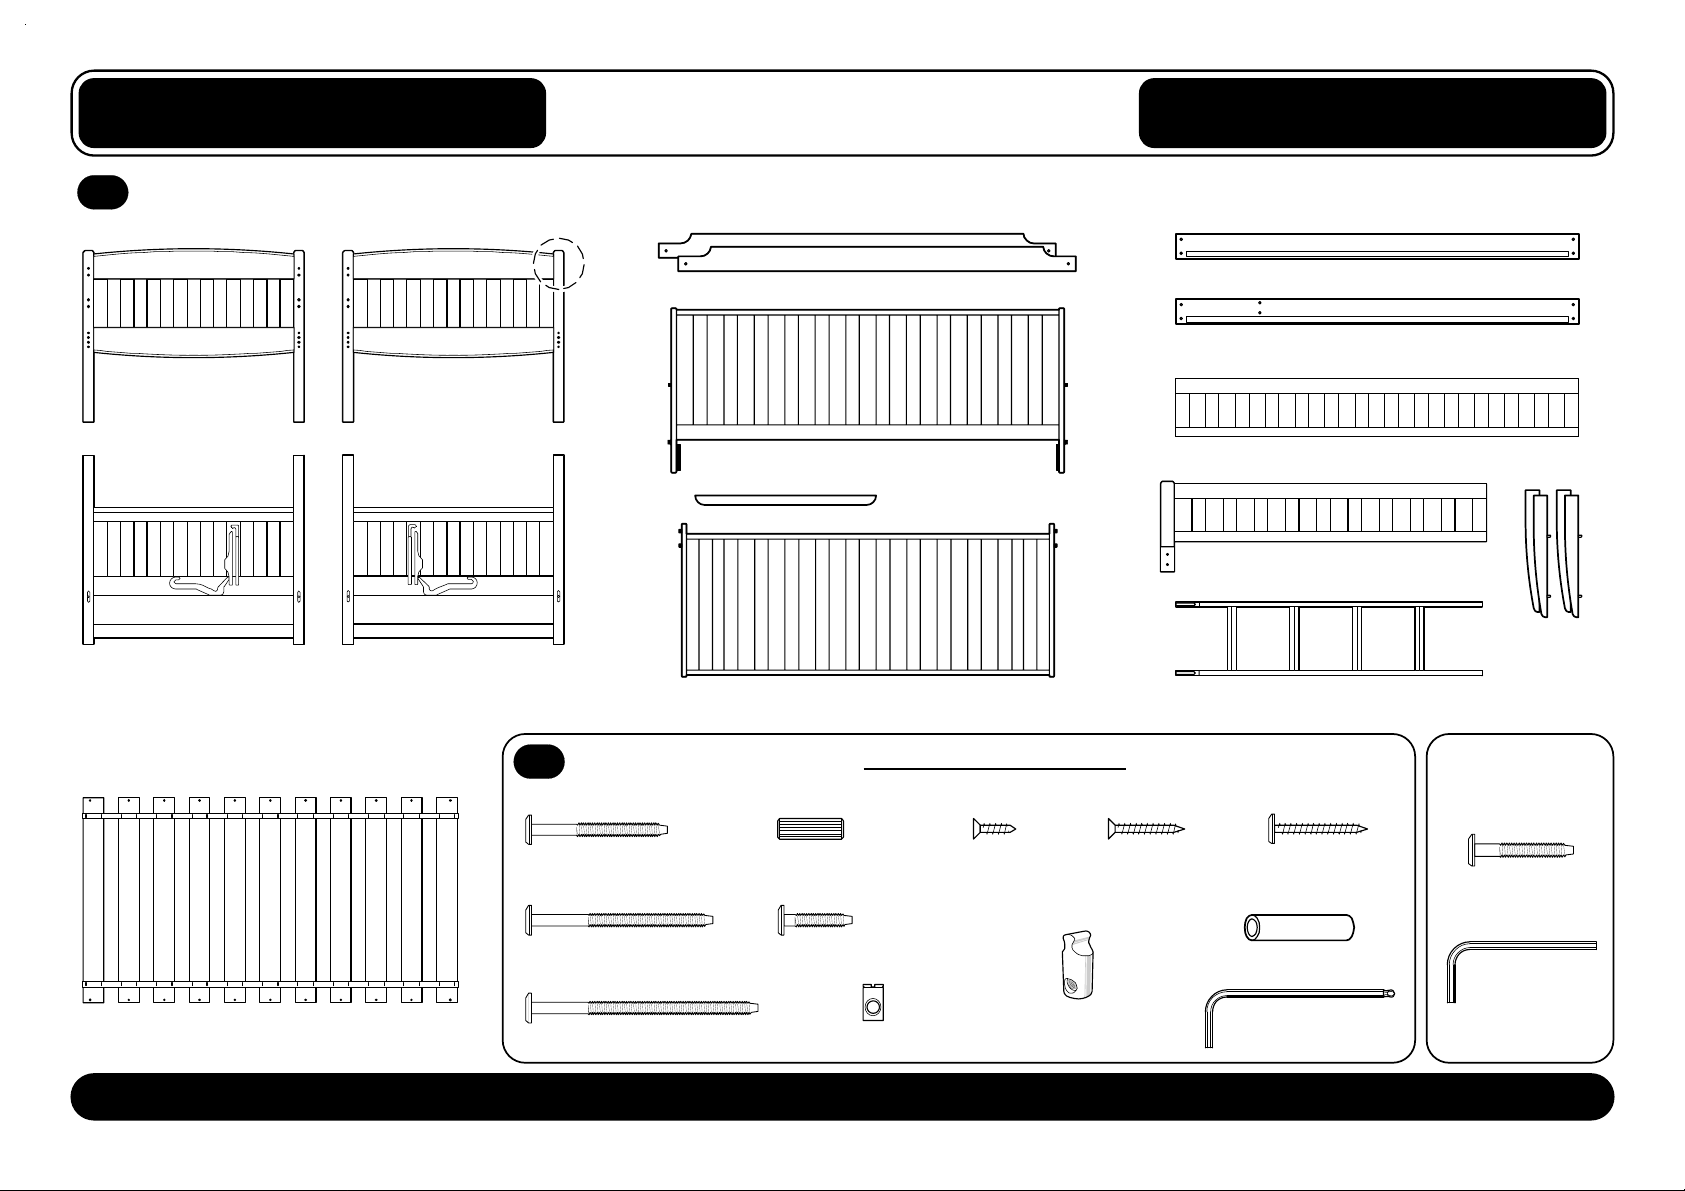
Parts List: Box 1 - Head/Footboards:
1A
Upper Bunk
(Left Hand)
Lower Bunk
(Left Hand)
x 1
x 1
Upper Bunk
(Right Hand)
Lower Bunk
(Right Hand)
Box 4 - Slats:
Note: No Holes!
x 1
x 1
Hardware List : Box 1
1B
Stretchers x 2
Back Deck x 1
Strong Back x 1
Seat Deck x 1
Tools required for assembly:
Allen Key (supplied) • Phillips Screwdriver (not supplied)•
Box 3 - Guard Rails and Ladder:Box 2 - Futon Decks and Stretchers:
Upper Stretcher x 1
Upper Stretcher
Rear Guard Rail x 1
Front Guard Rail x 1
Ladder x 1
(with extra holes)
x 1
Brackets
x 4
Hardware in
Box 2:
Set of Slats x 1
Page 2 of 12
60mm Bolts x 16
80mm Bolts x 11
100mm Bolts x 4
Wood Dowels x 17
30mm Bolts x 2
Barrel Nuts x 11
16mm Wood
Screws x 2
ThumNut™ x 4
Patent No.: US 6,457,923
30mm Wood
Screws x 18
40mm Threaded
Wood Bolts x 4
Metal Tubes x 4
Long Allen Key x 1
40mm Bolts x 4
Allen Key
x 1
Page 3

2A
100mm
Bolt
Attac h Stretc hers to Lo we r Frame.
Lower Bunk
Left Hand
ThumNuts™
Cinnamon
F U T O N B U N K B E D
Using 100mm Bolts and ThumNuts™,
attach the Stretchers (from Box 2 ) to
the Lower Bunk ends as shown below
Lower Bunk
Right Hand
ThumNut™
100mm
Bolt
TM
S
H O E F I T T I N G S
Be sure the Stretchers are the correct way up!
GoldAssembly Instructions
This way up.
Attach the Strong Back to
2B
the Futon Back Deck
Use the 40mm Bolts (from Box 2)
to attach the Strong Back to the
Futon Back Deck.
SF 0605
Stretcher
Please Note:
Use 2 People!
Bolt and ThumN ut ™A ssembly.
Do not force the Bolt as you may strip the
thread. Be sure the thread is properly started.
Be sure the holes are free of wood chips
and saw dust.
Page 3 of 12
Strong
Back
100mm
Bolt
40mm Bolts
(from Box 2)
Page 4
Cinnamon
F U T O N B U N K B E D
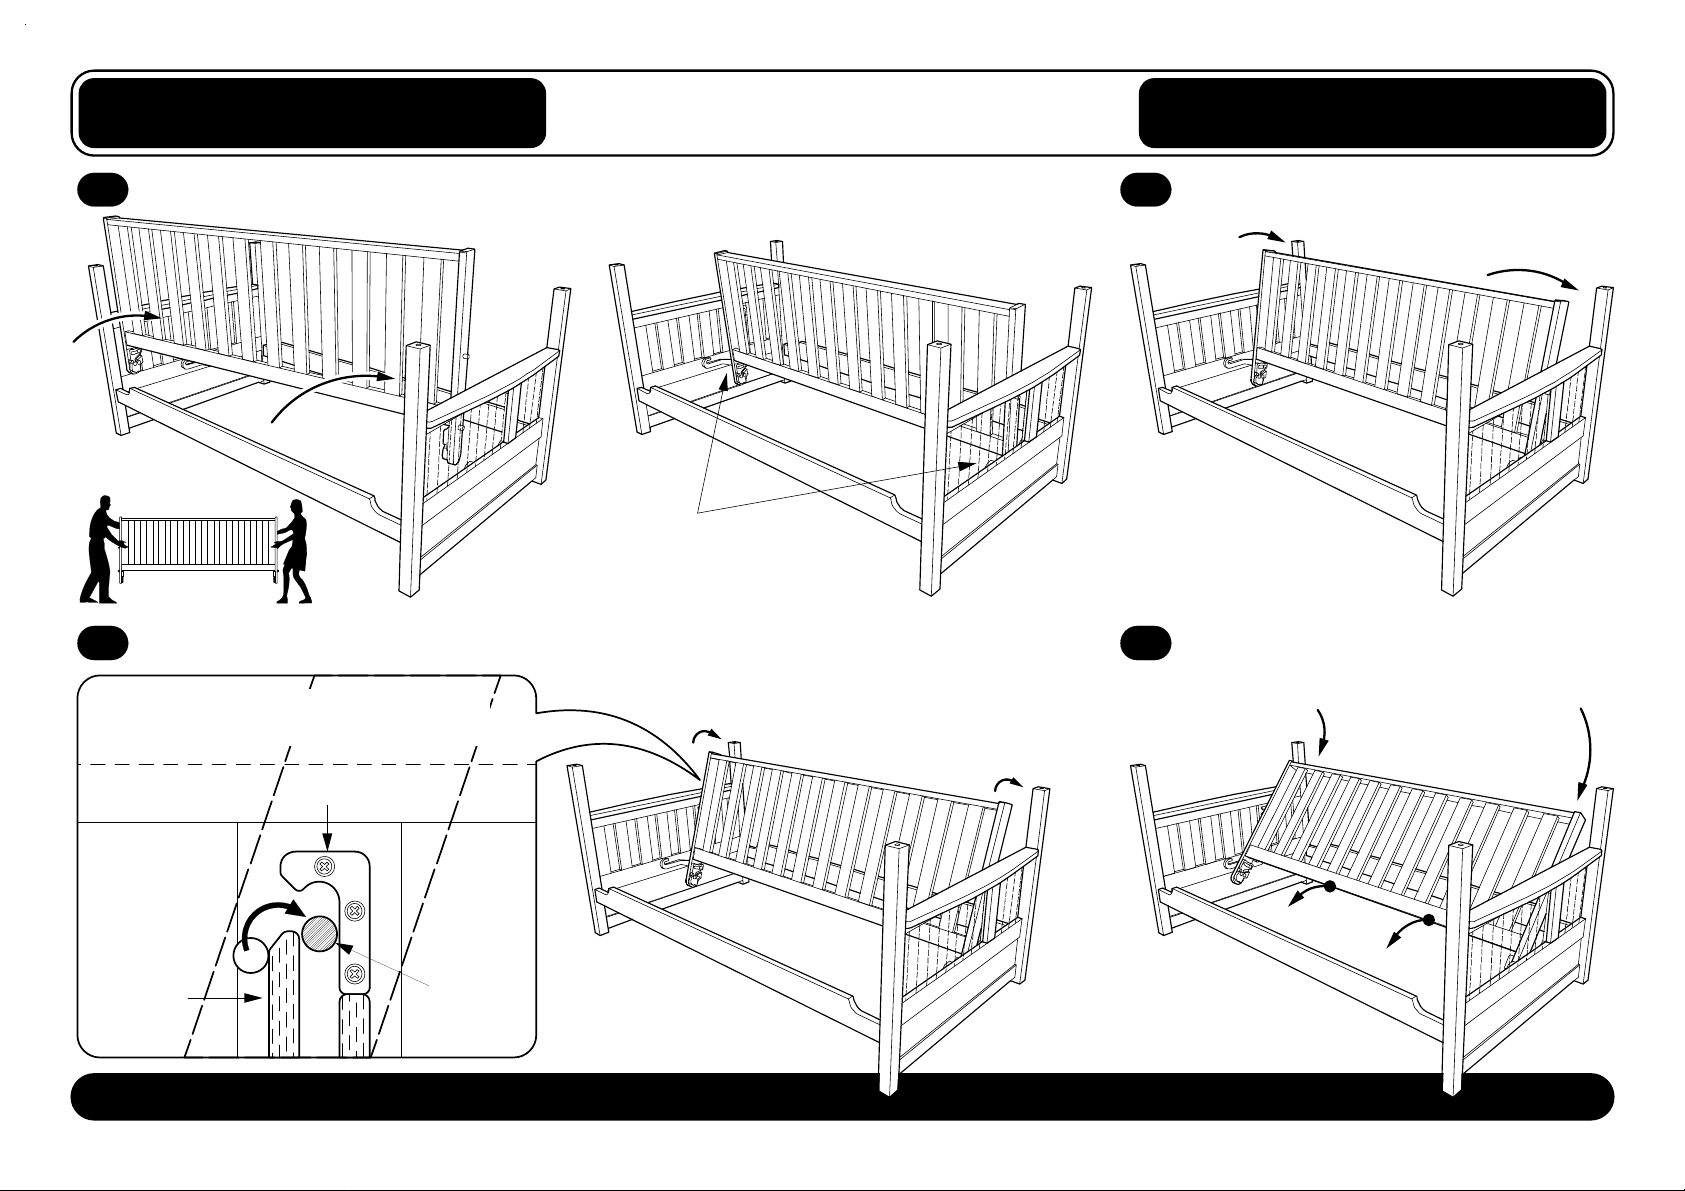
Carefully lift the Back Deck into position. Place the Bottom Rollers onto the
3A
back of the Rubber Sea Horse.
Please Note:
The Bottom Roller
should be sittin g o n
Use 2 People!
the Rubber Sea Horse.
S
H O E F I T T I N G S
Rest the Top Rollers againt the Leg.
3B
TM
GoldAssembly Instructions
SF 0605
Gently lift the Back Deck so the Top Roller goes in under the Plastic Cap.
3C
Very Important: Make sure the Top
Rollers are fully inside on both sides!
Plastic Cap
Back Leg
of Arm
Final Position
of Top Roller
From the Bac k: G e ntly ea se
the Top Roller s into positio n.
Page 4 of 12
Gently Lower the Back down until it
3D
is lying flat.
From the Bac k :
Lower the Back Deck.
It will help to
pull on the Bottom
of the Bac k Deck.
Page 5

Hook the Seat Deck onto the Snapper.
4A
Cinnamon
F U T O N B U N K B E D
Lift the Seat Deck in vertically, so the Pins
meet with the Rubber Snapper. The head of
the Snapper should fit between both Pins.
S
H O E F I T T I N G S
Pull the Seat over the "Snap Point."
4B
Put your foot on the Back
TM
GoldAssembly Instructions
SF 0605
and Pull Hard
Please Note:
Use 2 People!
Push down on the Seat, and the
4C
Back will Lift.
Remember:
Top Pin
- over the top
Bottom Pin
- underneath
This is the Lounge Po sition.
4D
•The Top Pin - fits over the top,
•The Lower Pin - goes underneath.
Rubber
Snapper
Notch
With the Top Pin
inside the notch on
the Rubber Snapper, put
your foot on the Back Deck
and pull the Seat over the "Snap Point"
This is the Sofa Pos ition.
4E
Push the Sea t
down further and the
Back will rise until it is
in the "Lounge Position"
Page 5 of 12
Push
Push the Sea t
with your kne e, to
conve r t to the Sofa Positio n
Add Mattress and
Enjoy! S ee se parate page
for Operating I nstructi o ns.
Page 6

Cinnamon
F U T O N B U N K B E D
Attach the Stretchers and Rear Guard Rail to the Upper Bunk.
5A
Tap Wooden Do we l s into th e en ds of the Stretchers an d Rear
Guard Ra il . Usi n g 80mm Bolts and Ba r rel Nuts, attach these to
the Upper Bunk, carefully noting Left and Right hand sides.
Upper Bunk
Left Hand
80mm
Bolts
Barrel
Nuts
Rear Guard Rail
Barrel
Nuts
S
H O E F I T T I N G S
Bolt and Barrel Nut Assembly.
Do not force the Bolt as you may strip the
thread. Be sure the thread is properly started.
Be sure the holes are free of wood chips
and saw dust.
80mm
Bolt
TM
GoldAssembly Instructions
SF 0605
Wooden
Dowel
Front Stretcher
with Extra Holes
Please Note:
Use 2 People!
Page 6 of 12
Note:
Extra Holes
Note: No
Holes Here!
80mm
Bolts
Wooden
Dowels
Upper Bunk
Right Hand
80mm
Bolts
Wooden
Dowels
Page 7

Attach Front Guard Rail to the Upper Bunk.
6A
Cinnamon
F U T O N B U N K B E D
Tap Woo den Dowels into the ends of the Front Guard Ra il. Use the
80mm Bolts and Barrel Nuts fix it in place. The Front Guard Rail
attaches to the Stretcher usi ng the 30mm Bolts.
S
H O E F I T T I N G S
TM
GoldAssembly Instructions
SF 0605
80mm
Bolt
Wooden
Dowels
Front Guard Rail
Page 7 of 12
Front Guard Rail
Barrel Nut
Front Guard Rail
30mm
Bolts
Stretcher
Page 8

Cinnamon
F U T O N B U N K B E D
S
H O E F I T T I N G S
TM
GoldAssembly Instructions
SF 0307
Bolt the Slats to the Stretchers.
7A
Lay the Sl a ts i n sid e the Stretchers as shown below , a n d Bo lt in
place with the 40mm Threaded Wood Bolts (total 4 Bolts.)
40mm Threaded
Wood Bolts
40mm Threaded
Wood Bolts
Fix the Re maining Slat s wit h screws.
7B
Use the 30mm W o o d Sc r ew s to fix the
remaining slats to the Stretchers
(total 18 screws.) An electric screwdriver
will make this much easier.
Wood Screws
Wood Screws
Page 8 of 12
Wood Screws
Page 9

Assembly Instructions
Fit the Upper Bunk onto the Lower Bunk.
8A
Cinnamon
F U T O N B U N K B E D
Fit the Meta l T ubes into the tops o f the l egs. Carefu l ly Li f t the Top
Bunk on to the Lower Bunk.
Metal Tubes
S H O E F I T T I N G S
Fit the Brackets to the Legs.
8B
Use the 60mm Bo l ts to fix the Brackets to
the Legs.
TM
Gold
SF 0605
60mm
Bolts
Please Note:
Use 2 People!
Page 9 of 12
Metal Tubes
60mm
Bolts
Page 10

Attach the Ladder to the Upper Stretcher.
9A
Final ly, hook the Ladder onto the Upper
Stretc her. Use the 16mm Woo d Screws
to fix the Ladder in place.
•
Pleas e take note of the warning s sh own on page
one of these instructions, printed on the carton
box and on stickers on the Bunk bed.
Cinnamon
F U T O N B U N K B E D
S
H O E F I T T I N G S
TM
GoldAssembly Instructions
SF 0605
Wood Screws
Page 10 of 12
16mm
Ladder
S
t
r
e
t
c
h
e
r
Page 11

Disassembly Instructions
10A
Please Note:
Use 2 People!
Lift from the front,
using both Handles.
Cinnamon
Disassembly: How to Remove the Futon Seat
Lift all the way until the
Top Pin dr ops into the
notch on th e Ru b b er Sn a pp er .
S H O E F I T T I N G S
10C10B
Rubber
Snapper
Push the Seat ov er the "S n ap Poi n t."From the Bed position, lift the Seat. Lift the Seat all the way.
You will need to Push Hard.
Top Pin
Notch
TM
Gold
SF 0605
10D
From the Back, lift out the Top Pin and ease the Seat Deck for ward.
Page 11 of 12
Lift and ease the Deck forward
Lift up so the Top Pin is out of
its notch in the Rubber Snapper.
Ease the Back Deck forward,
keeping it orientated vertically.
Rubber
Snapper
10E
Be careful when lifting the
Seat Deck out, not to scratch
the Arms with the Rollers.
Lift the Seat clear of the frame.
Page 12

Disassembly Instructions
11A
Lift the Back Deck up.
Cinnamon
Disassembly: How to Remove the Futon Back
11B
Lift Back Deck so the Top Roller is clear of the Back Leg.
S H O E F I T T I N G S
TM
Gold
SF 0605
Lift from the B ack Lift from the B ack
Please Note:
Use 2 People!
Push the Deck forward at the top. Lift the Back away from the Arms.
11D11C
Very Important: Make sure the Top
Rollers are fully outside on both sides!
Plastic Cap
Final Position
of Top Roller
Back Leg
of Arm
11E
The frame can now be disassembled.
Page 12 of 12
Be careful when lifting the
Back De c k out, not to scratc h
the Arms with the Rollers.
 Loading...