

Page 1
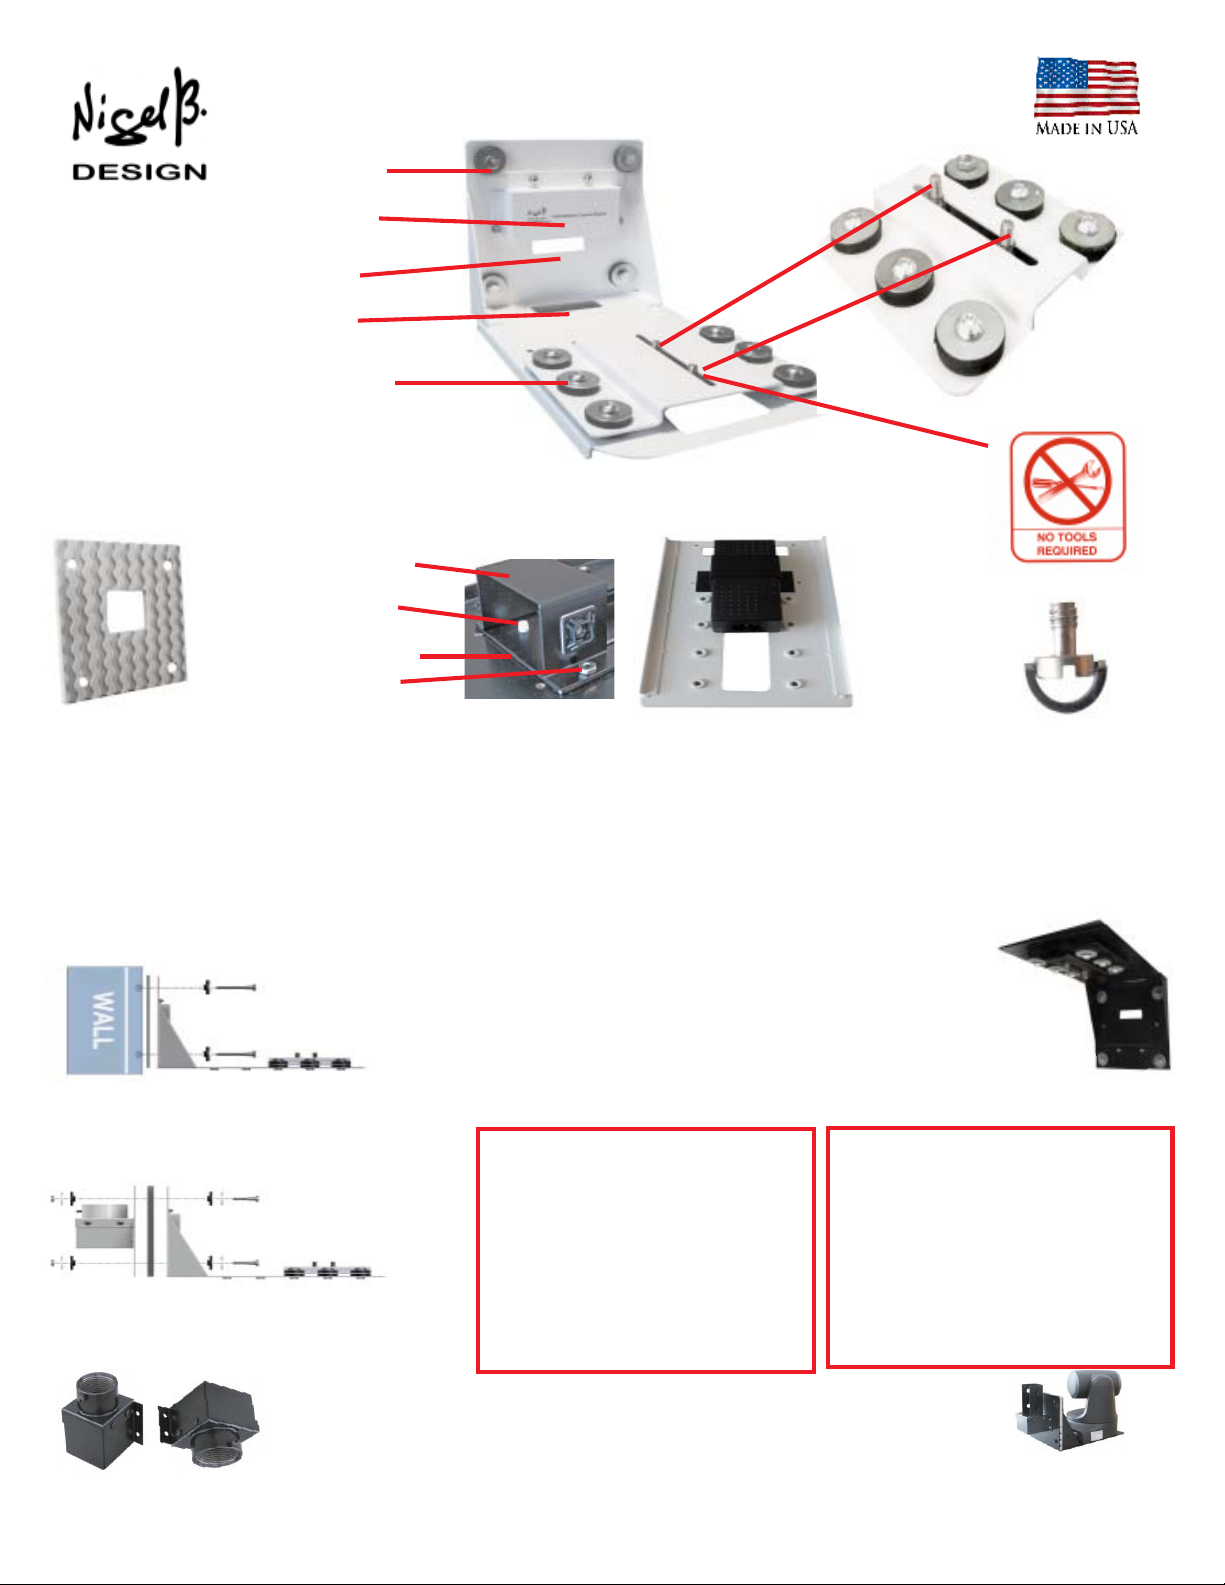
ANTI-VIBRATION MULTI-CAMERA MOUNTING BRACKET
INSTRUCTIONS
Insulated Attatchment
Cable Cover
(A Nigel B Design Exclusive)
Cable Entry/Exit Point
Power Supply Entry
The Camera sits on
(6) Anti-Vibration
Mounting Pads
Bolts
A TT ACHING THE POWER SUPPLY CLIP UNDERNEA TH
The Power Supply Clip supplied is designed to hold most Power Supplies in position underneath the Mouting
Bracket. Adjusting the "Gap Adjustment" Screws (supplied), allows the Power Supply to be held firmly in place.
Power Supply Clip
Gap Adjustment
Screw (2)
Saddle Clamp
6.32 Nut (2)
The Anti-Vibration Gasket goes between the
Mounting Bracket and Wall or when used with the
Back Plate Option, the Gasket is sandwiched
between the Camera Bracket and the Back Plate
The Power Supply when attached, forms
an intregral part of the Mounting Bracket
The user simply slides the Captive
Tripod Screws along the 3" Slot,
aligning them up with the Camera's
(A Nigel B Design Exclusive)
Tripod Position(s)
A TT ACHING THE MUL TI-CAMERA MOUNTING BRACKET T O THE W ALL
The preferred Method is to mount the Bracket as shown in the Diagrams to get the most benefit in eliminating any Vibration. If the User
Inverts the Bracket the (6) Camera Plate Bolts should be cinched down to ensure the Anti-Vibration Pads are compesssed to ensure a
tight fit when the weight of the Camera can often cause a slight gap beteen the Pads and the Camera Bracket
REVERSE MOUNTING THE BRACKET
The Screws holding the Camera Bracket are Factory set with the correct
torque to obtain the maximum benefit of the Anti-Vibration Pads. It is
recommended that they are tightened (usually no more than one full
turn) when Inverting the Camera Bracket to ensure adequate contact is
maintained when mounting the Bracket in the inverse position, as the
weight of the camera may cause a slight reduction in the effectivenss of
the Anti-Vibration properties of the Pads.
A TT ACHING THE MUL TI-CAMERA
MOUNTING BRACKET TO THE BACK PLA TE
Both can be reverse mounted allowing the entire
Mounting Bracket and Camera to be inverted
Adding the Back Plate Options allows the Camera to be placed anywhere in a room
P ARTS LIST
(4) 2" Lag Bolts
(4) 1' dia Washers
(4) 1" dia. Isolation Pads
(1) 6.5"x 6.5" Isolation Gasket
(1) Camera Plate with fittings
(1) Power Supply Clip & Saddle Clamp
(2) 6.32 Nuts
(2) 1/4.20 x 1/2" Plastic Set Screws
ADDITIONAL P ARTS REQUIRED
WHEN USING THE BACK PLA TE
( 1) Back Plate Assembly
(4) 1/4.20 x 1 1/4 Hex Bolts
(4) 1' dia Washers
(4) 1" dia Isolation Pads
(1) Pole Mounting Adaptor (as ordered)
or
(1) Unistrut Monting Adaptor
Pole Mounting Adaptor
attaches to the Back Plate
Designed and Manufactured in the USA by
Nigel B Design, Inc. CA USA. Tel: (818) 487-9323 Fax: (818) 766-9805
Web Site: www.nigelbdesign.com E-Mail: [email protected]
Using the Unistrut®
Mounting Back Plate to
attach the Camera Bracket
to other Unistrut® fittings
 Loading...