

Page 1
ETH1CTRL1
L AUD1 R ASI1 VID1
ETH2CTRL2
L AUD2 R ASI2 VID2
I
0
Control Ports
1
B264 Encoder and BRD Decoder Quick Start
The B264 Encoder and BRD Decoder stand-alone devices are managed through the Dashboard
application. Dashboard can control both the stand-alone devices, as well as openGear frames.
The user interface for the modular device is essentially the same as the corresponding openGear
cards. In this guide, we will refer to the B264 and BRD products as the “Device”.
The steps are as follows:
1. The first step is to install the Dashboard software. Dashboard is available for Windows,
Linux1, and Mac OSX. You can find the installers in the Dashboard Software directory
in the enclosed CD.
2. By default, the Device is configured with a factory IP address of 192.168.1.30 and a
subnet mask of 255.255.255.0. In order to perform the initial configuration, you will
need to configure the PC/Mac running Dashboard for an IP address in the same network.
We suggest you use 192.168.1.2. Once you gain access to the Device, you can
reconfigure its IP address to whatever value you require, or configure it to run DHCP.
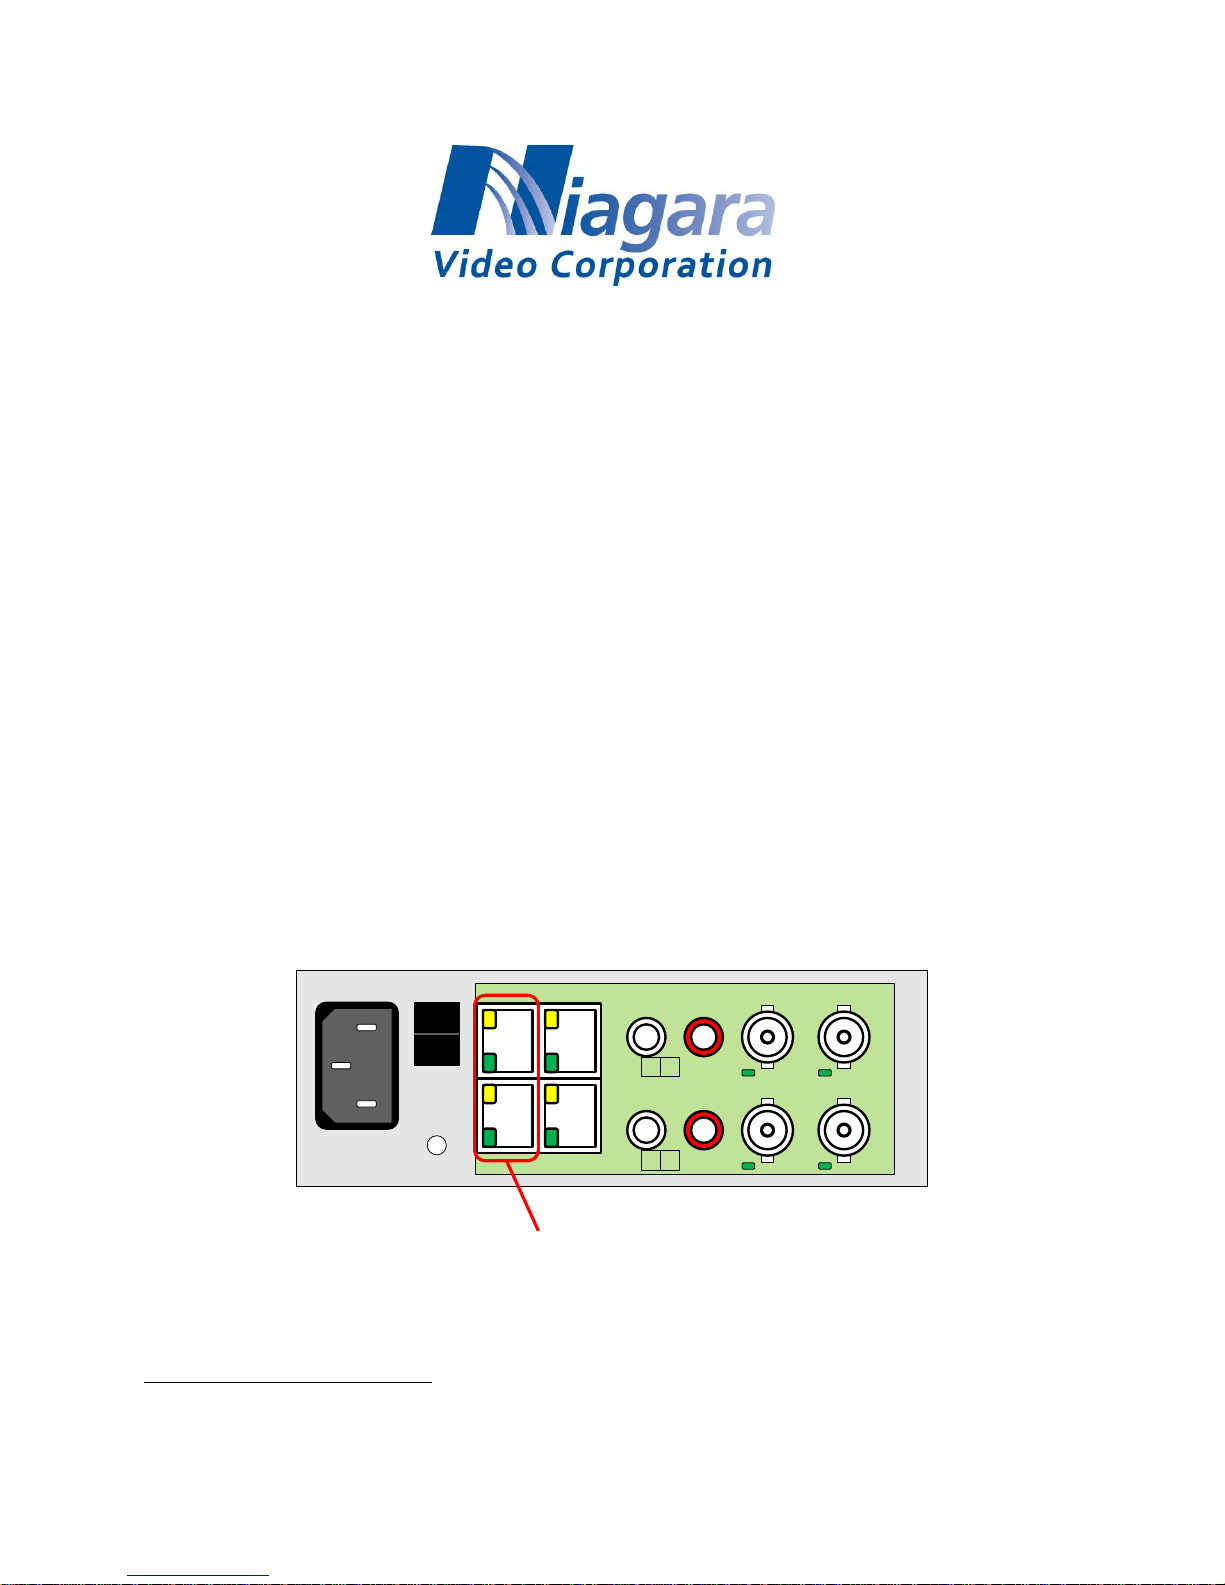
3. Connect the PC/Mac running Dashboard and the Device to the same network. For
simplicity, even running an Ethernet cable between the two devices will work. The
Device has auto-crossover capabilities, so any Ethernet cable will work. Connect the
cable to a control ports in the Device, as illustrated below:
B264 Encoder with Unbalanced Audio Inputs
Dashboard is not officially supported in 64-bit Linux distributions. Please consult the README.TXT file in the
Linux directory for more details.
1
Page 2
I
0
Control Port
L AUD R
CVBS ASI Out ASI In
REF
HDMI
SDI
CTL ETH
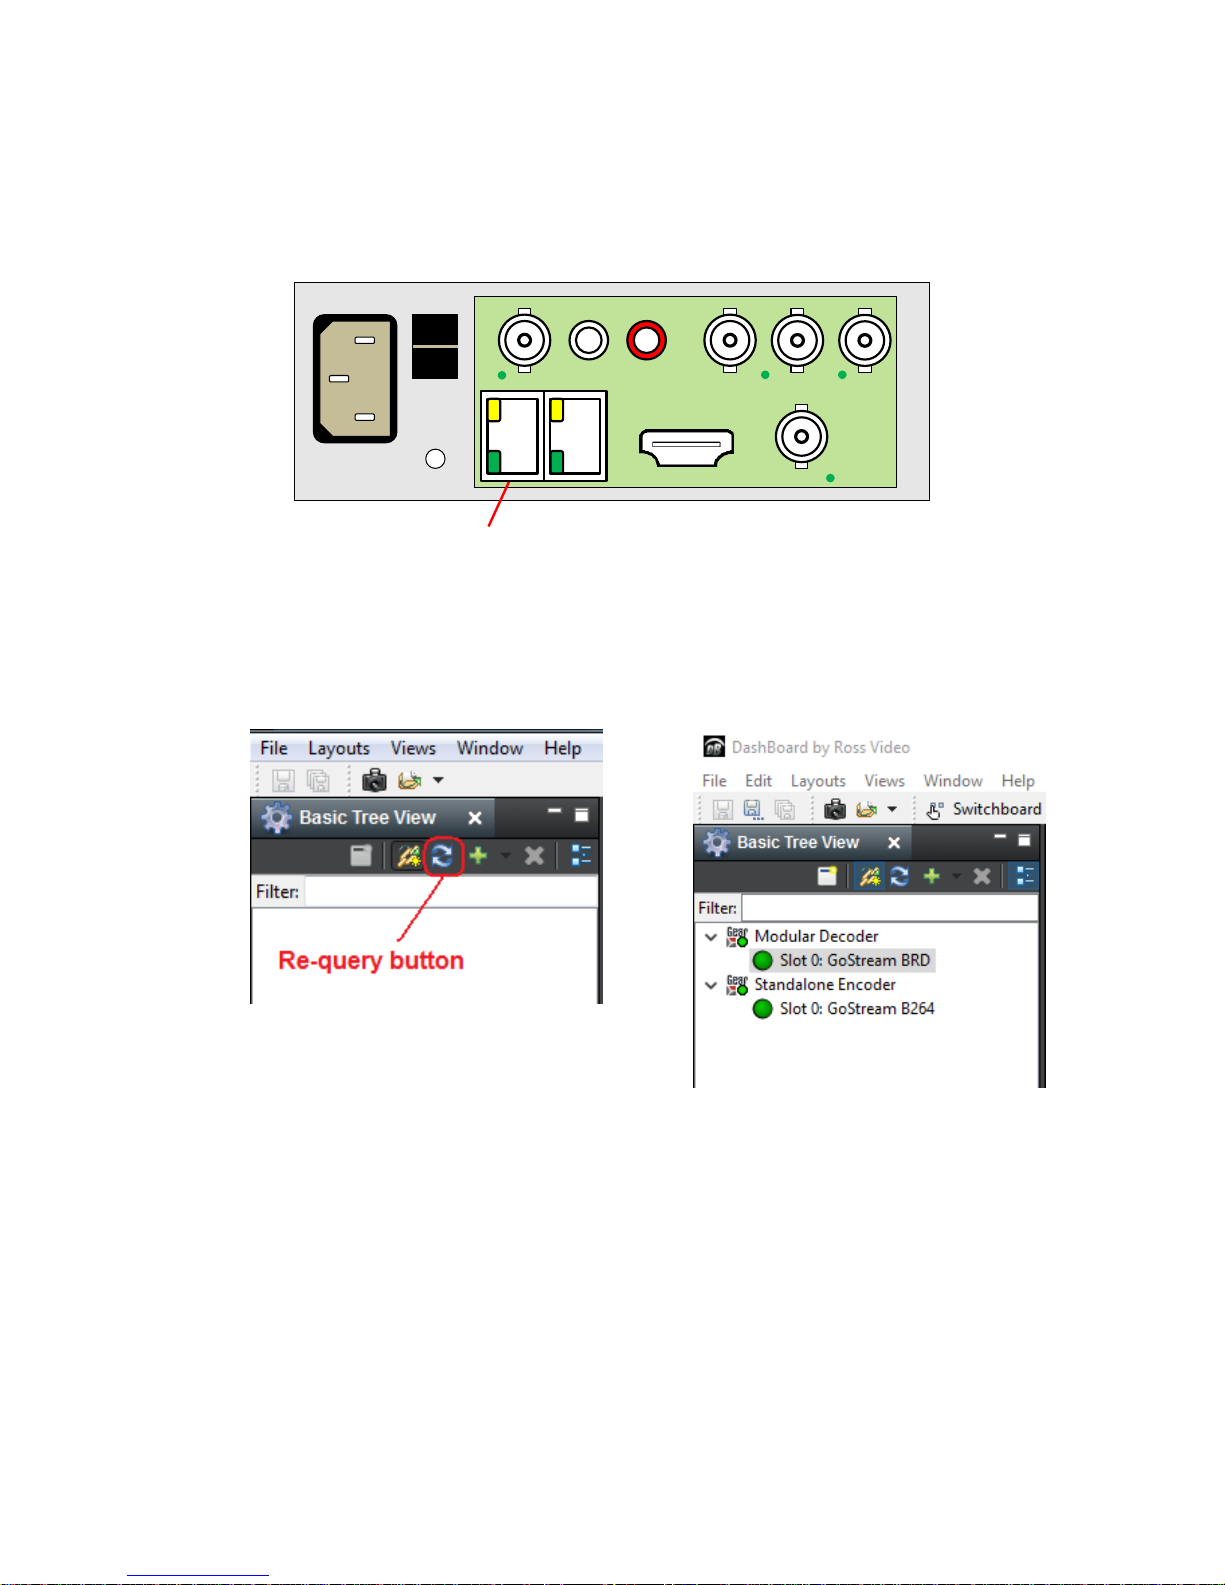
BRD Decoder with Unbalanced Audio Outputs
4. The Dashboard application should automatically find the Device and display it in the tree
view on the left. If the device is not automatically found, click on the re-query button at
the top of the Dashboard tree view, as indicated below. If found, the B264 Encoder will
be identified as Standalone Encoder and the BRD Decoder will be identified as
Modular Decoder.
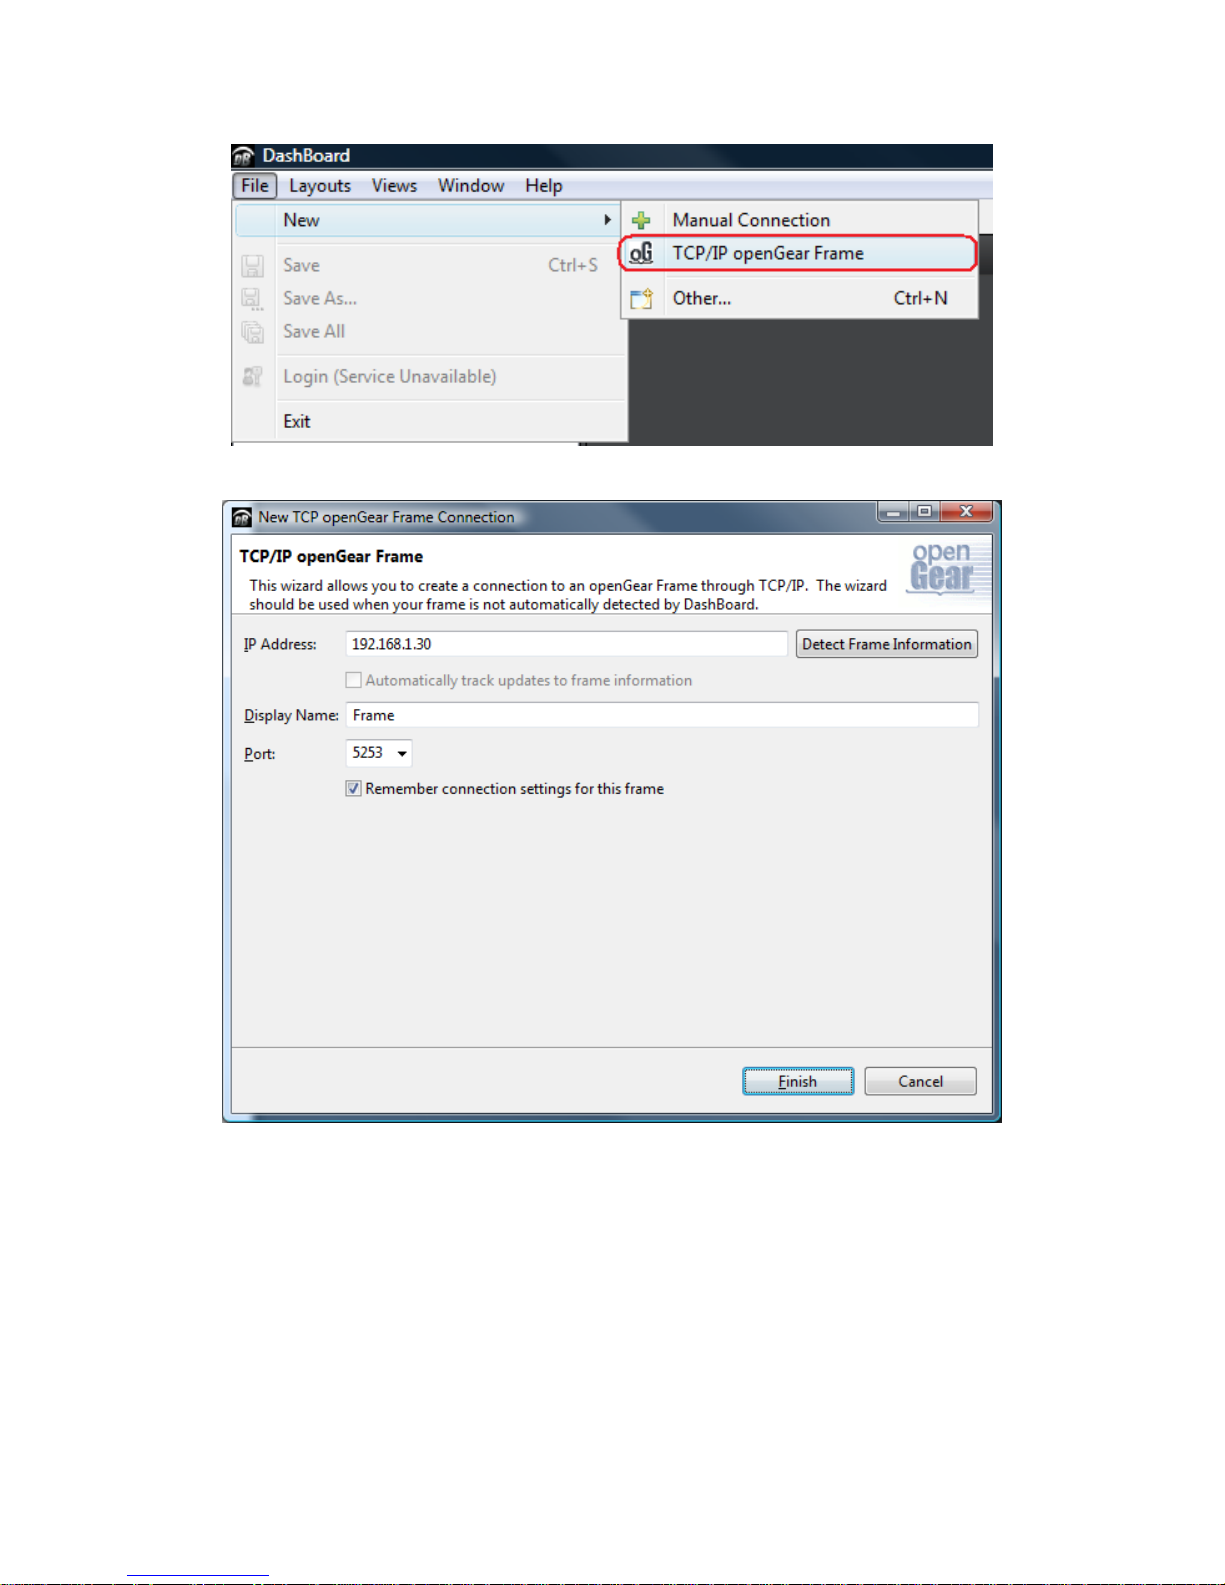
5. In the unlikely case that the Device is not automatically found by Dashboard, you can
force a manual connection. Select File New TCP/IP openGear Frame, enter the
IP address of the Device, and click on Finish:
2
Page 3
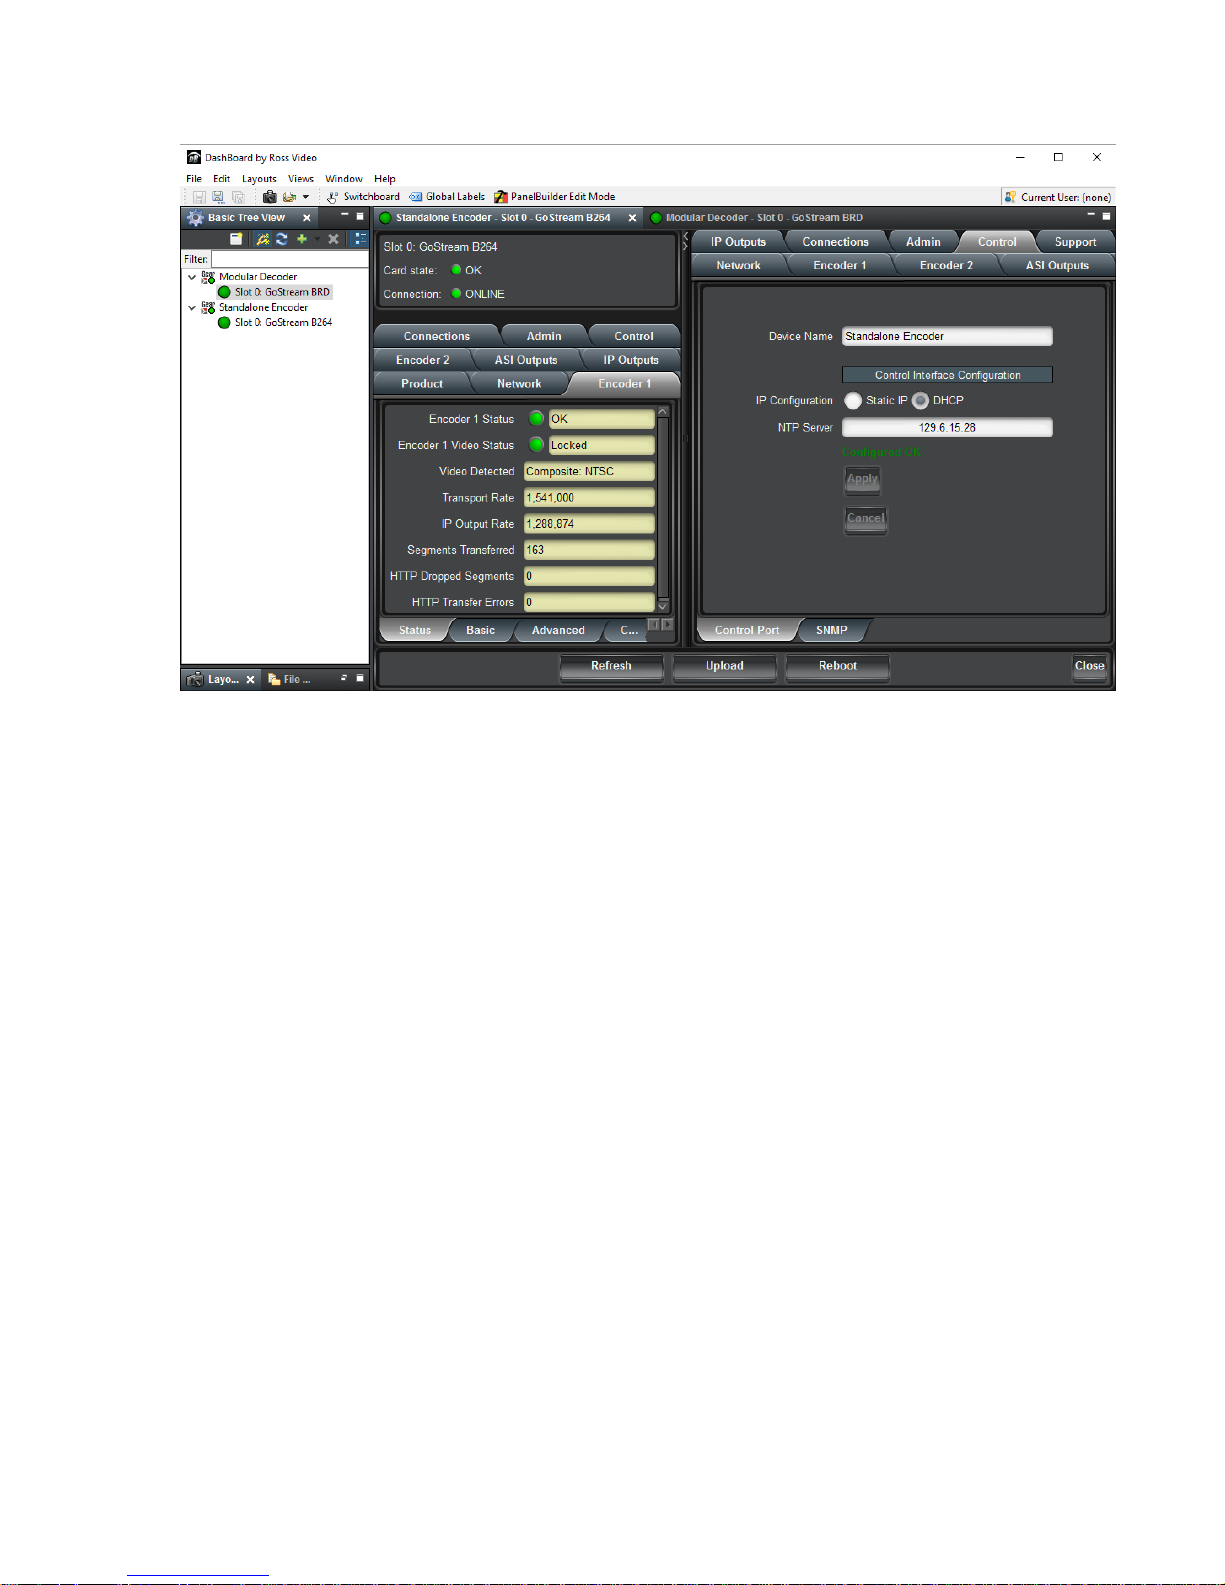
6. Once the Device is available on Dashboard, open its user interface (by double-clicking on
Standalone Encoder or Modular Decoder to open it, and then on GoStream B264
Encoder or GoStream BRD Decoder in slot 0). Go to the Control tab on the right; you
can now configure the IP address of the Device as desired. You can also rename the
device if you wish.
3
Page 4
7. Some Devices have two control ports, the encoder for example. They are intended for
redundancy. You can connect either one of them (or both) to your control network. The
device will use whatever port is connected to respond to control operations.
Note on DashBoard Versions
DashBoard versions 4.0.0 and 4.1.0 have significant GUI performance issues when used with the
Device (GUI tabs may take noticeable time to update). Niagara Video recommends that only
DashBoard versions 5.0.0 or higher used with the Device.
4
 Loading...