

Page 1

USER MANUAL
VGA USB 2.0 PC Web Camera
2516512
Page 2

2
Contents ........................................................................Page
1. Package includes .......................................................................1
2. System Requirements ................................................................1
3. Name of Parts ............................................................................2
4. Installing USB Driver and Software .........................................3
5. Checking Connection of your Camera ......................................4
6. Uninstalling USB Driver and Software ....................................5
7. ArcSoft PhotoImpression 5 .......................................................6
8. ArcSoft VideoImpression 2 .......................................................8
9. Internet Video Conference ......................................................11
10. Specifications ........................................................................12
Page 3
3
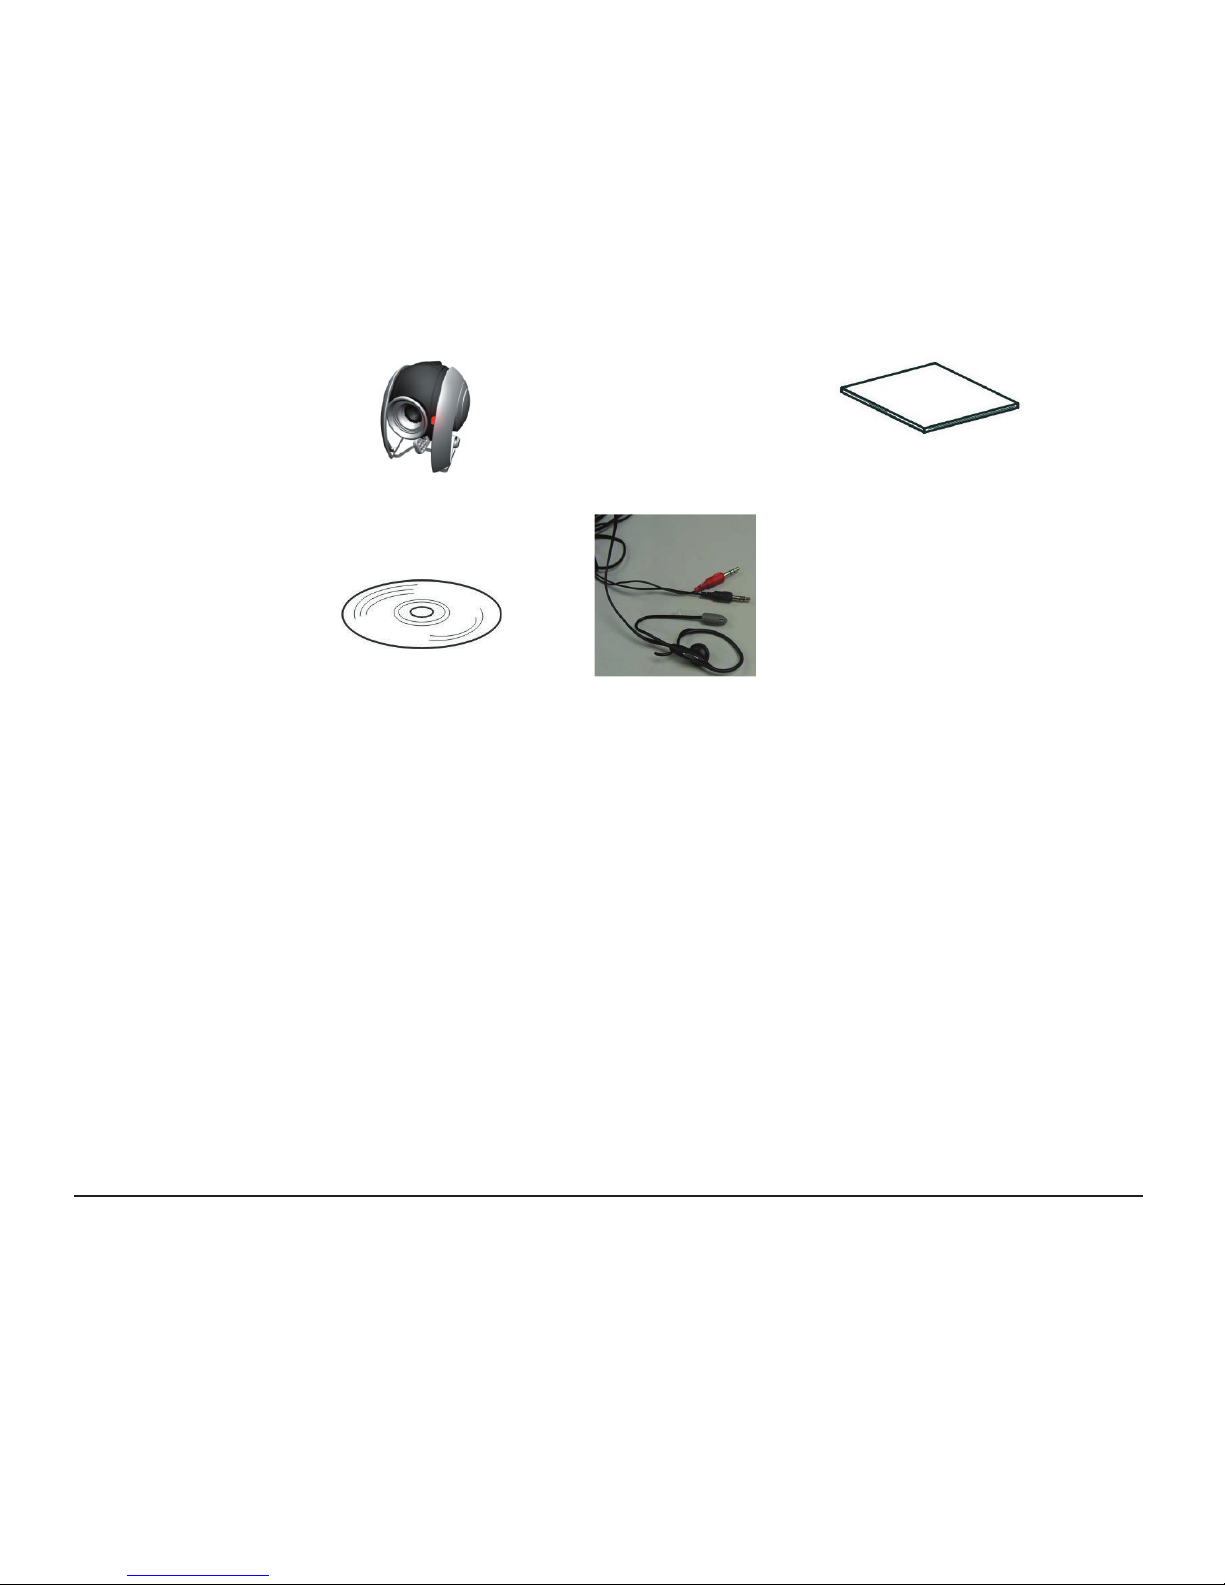
1. Package Includes
2. System Requirements
• Personal computer, laptop, desktop or IBM compatible with Pentium
166 MHz minimum, and with an active USB (Universal Serial Bus) port.
• Windows 98 SE / /ME / 2000 / XP, CD-ROM drive, colour monitor,
mouse and keyboard.
• For video conference, your computer must have modem and
communication software for Internet connection.
PC Camera
(with USB cable)
Userʼs Guide
CD Installation
Disc
Headset with
Mic
Page 4
4
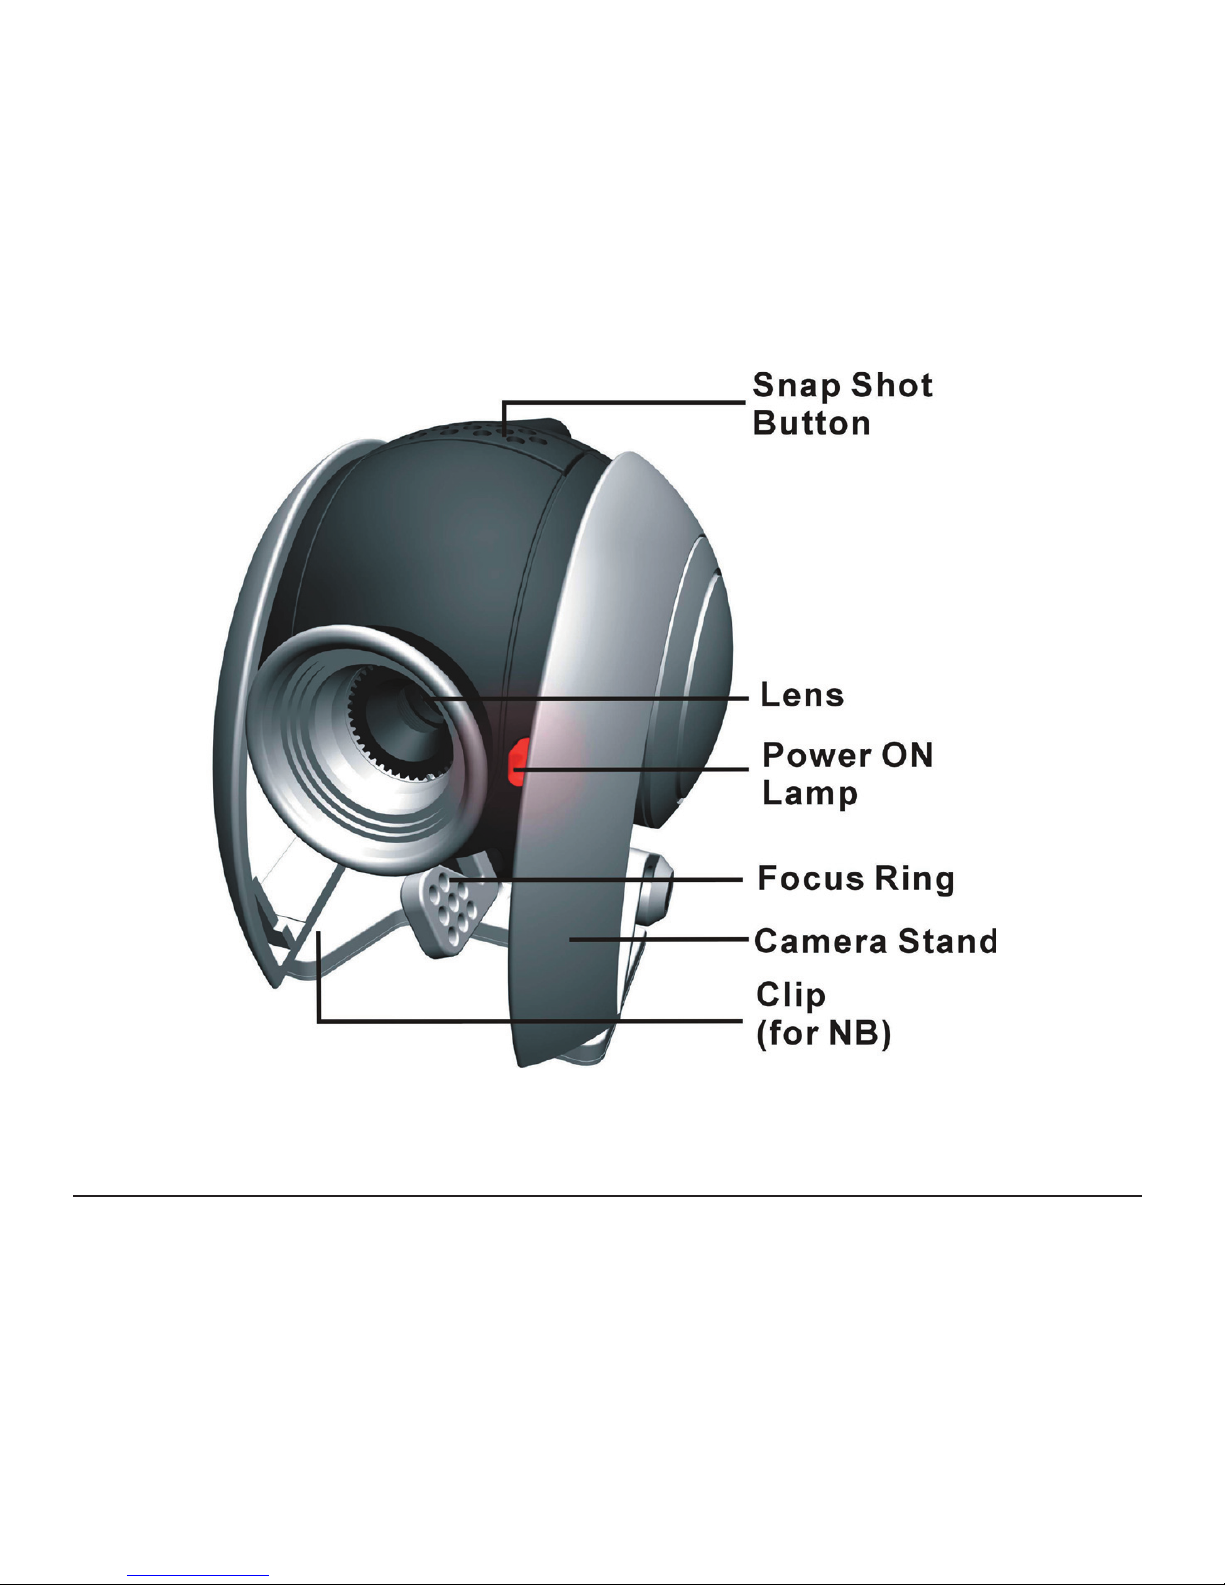
3. Names of Parts
Page 5
5
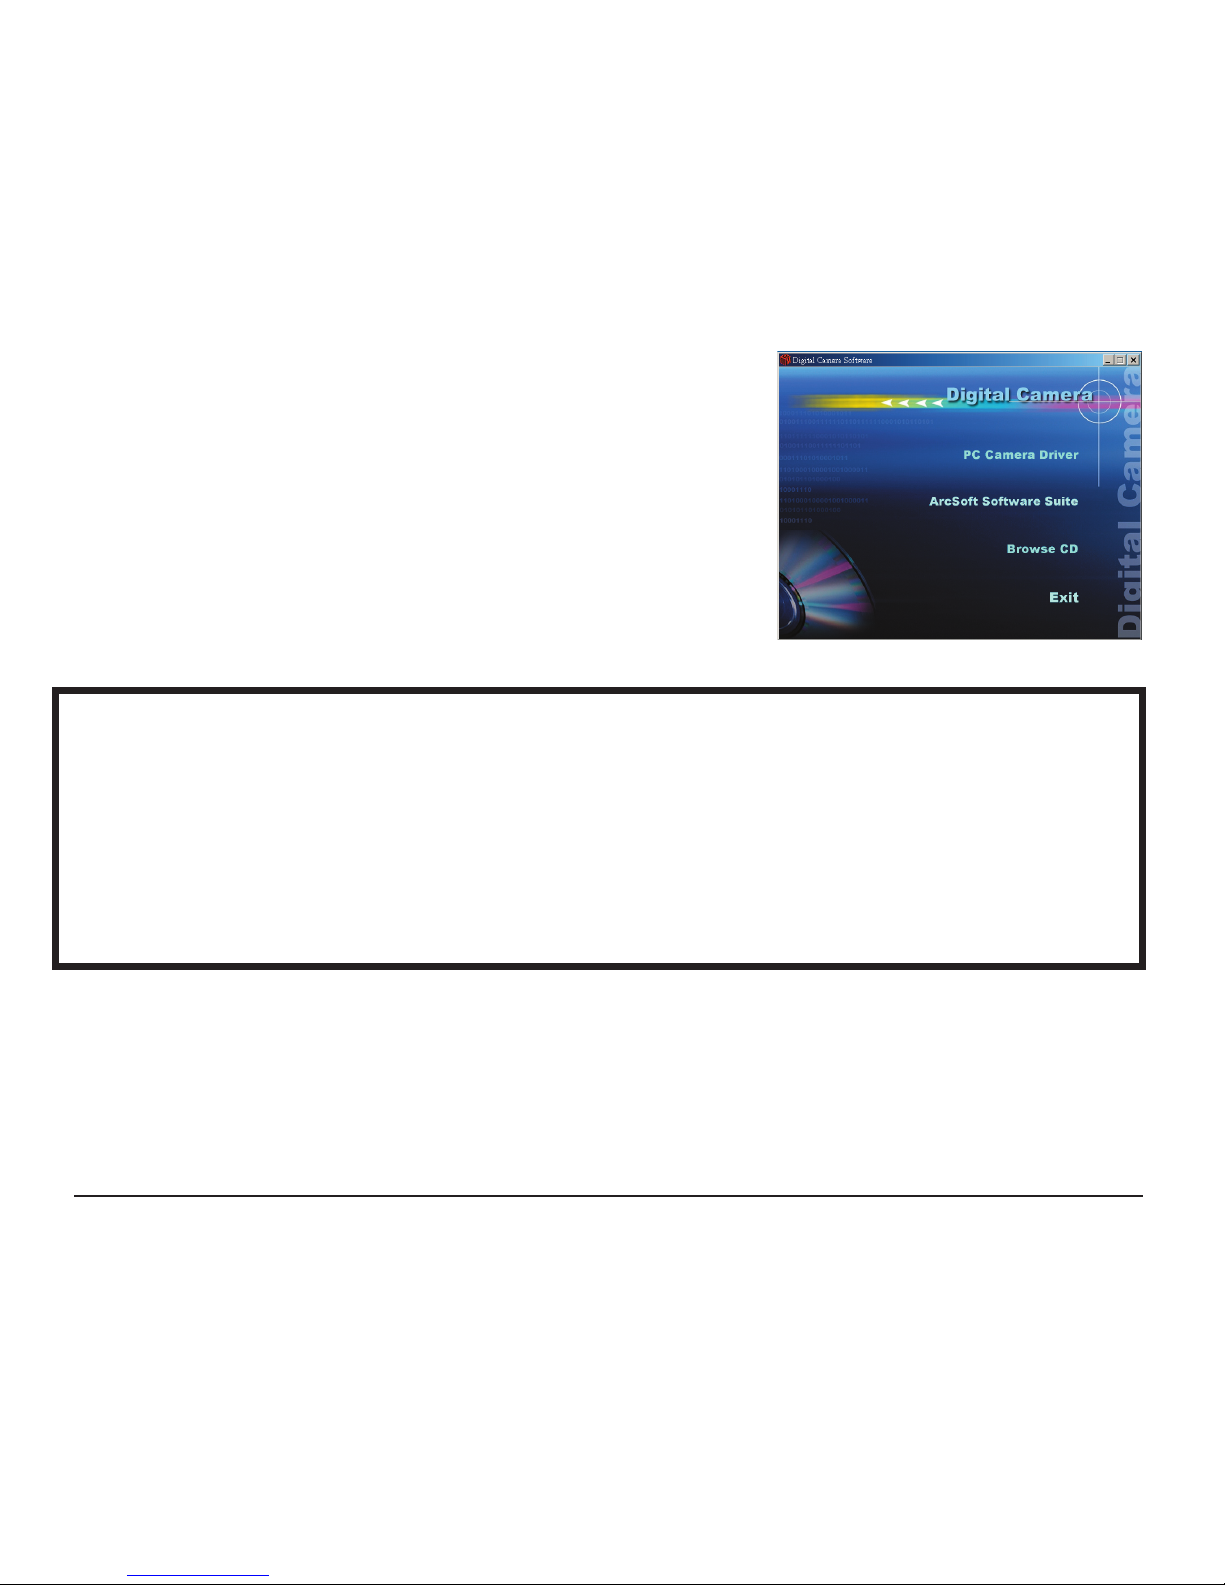
4. Installing USB Driver and Software
• Installing Driver
1. Turn on the computer.
2. Insert installation CD into the CD-ROM drive
and installation CD menu will appear.
3. When you see the following screen, choose
“PC Camera Driver”.
4. Follow the on-screen instructions.
5. Restart the computer.
For Windows 2000/XP only:
During installation of the driver or software, computer may display the
message: “The software you are going to install doesnʼt contain the
Microsoft signature, and may not work correctly.
Do you want to continue? Y/N”.
Please select Y to continue the installation.
Page 6
6
• Installing Software
1. Insert installation CD into the CD-ROM drive
and the installation CD menu should appear.
2. When you see the following screen, choose
“ArcSoft Software Suite” to install the software.
3. Follow the on-screen instructions.
4. The installed software will automatically create
“PhotoImpression 5” or “VideoImpression 2”
shortcut icons on your desktop.
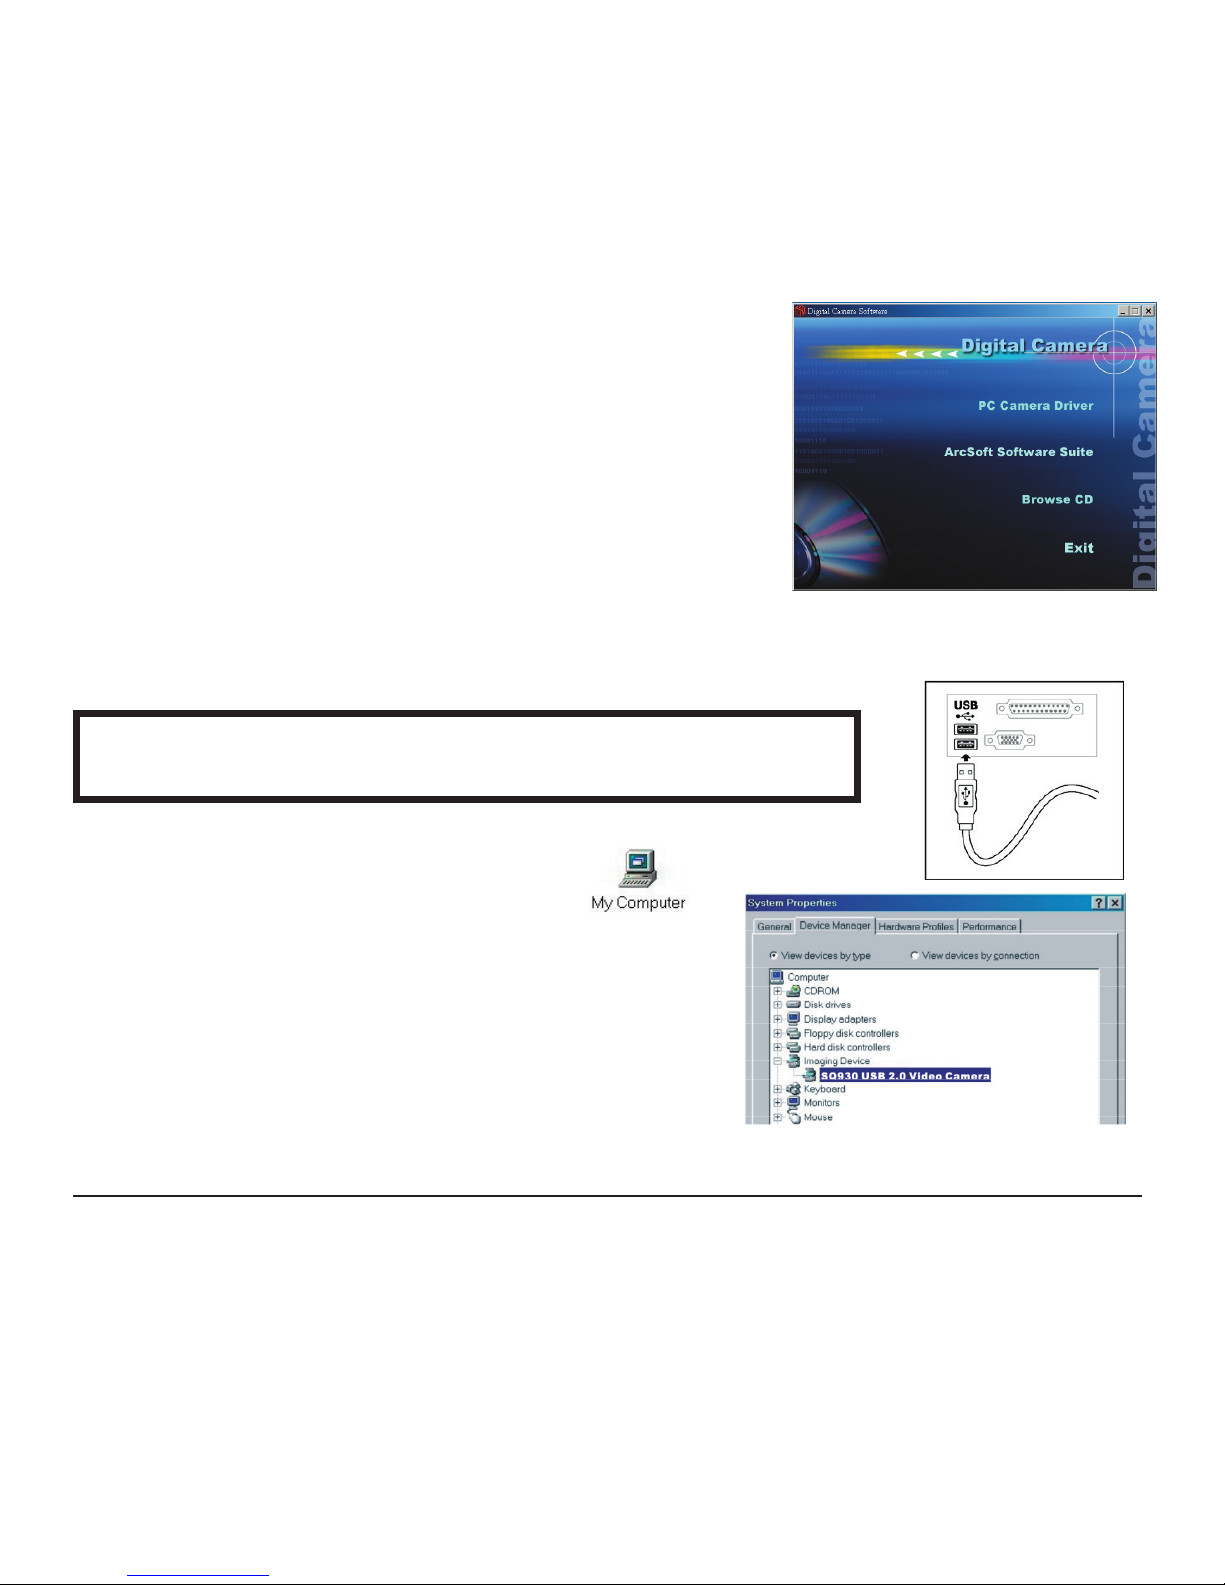
5. Checking the Connection of your Camera
Plug one end of the USB cable into your camera
then another end to the computerʼs USB Port.
For Windows 98/ME only:
• Double click “My Computer” icon
Control Panel -> System -> Device Manager
-> Imaging Device; when you see
“SQ930 USB 2.0 Video Camera”
that means
now the camera is installed.
Page 7

7
For Windows 2000/XP only:
• Double click “My Computer” icon
(Windows 2000) or go to the Start Button
and select “My Computer” (Windows XP)
-> Control Panel -> System -> Hardware ->
Device Manager -> Imaging Device; when
you see “SQ930 USB 2.0 Video Camera”
that means that the camera is installed.
6. Uninstalling the USB Driver and Software
For Windows 2000/98/ME:
• Uninstalling Software
1. Click “Start” from the task bar and choose “Setting”.
2. Choose “Control Panel” and Double click “Add/Remove Programs”.
3. Select the program to be uninstalled “ ArcSoft Software Suite”.
4. Click on “Remove Program” and follow the on-screen instructions.
• Uninstalling the Cameraʼs Driver
1. Click “Start” from the task bar and choose “Setting”.
2. Choose “Control Panel” and Double click “Add/Remove Programs”.
3. Select the program to be uninstalled “SQ930 USB 2.0 Video Camera”.
4. Click on “Remove Program” and follow the on-screen instructions.
Page 8

8
For Windows XP:
• Uninstalling Software
1. Click “Start” from the task bar and choose “Control Panel”.
2. Double click “Add or Remove Programs”.
3. Select the program to be uninstalled “ ArcSoft Software Suite”.
4. Click on “Remove” and follow the on-screen instructions.
• Uninstall the Cameraʼs Driver
1. Click “Start” from the task bar and choose “Control Panel”.
2. Double click “Add or Remove Programs”.
3. Select the program to be uninstalled “SQ930 USB 2.0 Video Camera”.
4. Click on “Remove” and follow the on-screen instructions.
7. ArcSoft PhotoImpression 5
ArcSoft PhotoImpression 5 is a
complete digital image editing
application designed with real people in
mind. Easy-to-use “Getting Started”
guide, user-friendly UI, complete image
editing functionality, give users
wonderful experience to organizing,
viewing, enhancing, editing, printing
and sharing photos.
Page 9

9
Click “Start” -> “Program”-> “ArcSoft Software Suite” -> “PhotoImpression
5” to launch PhotoImpression 5 or Double click the PhotoImpression 5 icon
on the desktop and you will see a window as the screen shot shown on the
previous page.
Select the picture source. For example: 1. Click “Folder” acquiring
photos from your computer. 2. Select the file path. 3. You can start editing
them.
1. Get Photo - Choose how to view or acquire photos.
2. Enhance - Crop, brighten, rotate, re-size and modify photos.
3. Create - Add clip art, special effects, frames and more.
4. Project - Make calendars, photo books and greeting cards.
5. Print - Print multiple images per page and multiple pages at one time.
6. Send - Email photos or upload them to online photo sharing accounts.
Note: For more detailed information, please refer to the Help of the program.
Browse Panel
Page 10

10
8. ArcSoft VideoImpression 2
ArcSoft VideoImpression 2 creates
home movies and slide shows by
com bining existing videos, still images,
exciting scene transitions, and multiple
audio tracks. Though simple to use, the
program provides intense and broad
video editing and export options perfect
for owners of digital still cameras,
desktop, digital video cameras, and
camcorders.
Click “Start” -> “Program” -> “ArcSoftware Suite” -> “VideoImpression 2”
to launch VideoImpression 2 or double click the VideoImpression 2 icon on
the desktop and you will see a window as the screenshot above.
Open a Project - Let you browse the project files in the VideoImpression
system folder. By “Project”, we mean to say a file that contains all of the
settings and each individual component on the Storyboard. When you save
your work as a project, you can go back and swap components, add and
remove them, alter audio, etc.
Page 11

11
Create a Video - Create a new video project. You can retrieve media
materials from the device connected or choose media files from the system
folder. You can choose video materials from your photo album as well.
Create a Slide Show - Create a slide show project. You can retrieve media
materials from the device connected or choose media files from the system
folder. You can choose slide show materials from your photo album as well.
If the box “Always show this wizard when VideoImpression starts”, at the
bottom of the wizard is checked, the wizard will appear each time you run
the program. If youʼd like to skip the wizard the next time, uncheck the box.
Select the item you desire and the picture and videos you need then you
enter the editing interface as below.
You can use the six steps in the Function Menu to create video clips and
slide shows.
Browse Panel
Page 12

12
1. Media - Select the videos and images that will comprise your final movie
or slide show.
2. Edit - Modify video and image colour and adjust the duration of each
movie component. Only available for video projects.
3. Effects - Add neat special effect transitions between each component, or
apply a pre-made theme.
4. Text - place animated text on any movie component. Only available for
video projects.
5. Narrate - Record audio directly from the program and add it to your
movie.
6. Produce - Combine all components to create your final video; save it in a
variety of ways or email it to friends.
The Storyboard - The backbone of the creation process, itʼs where you
assemble your movie.
The Player - Preview and modify your movies in this area.
Working with Albums - Albums let you organize your media for easy
access.
Note: For more detailed information, please refer to the Help of the program.
Page 13

13
9. Internet Video Conference
To run a video conference with another person, you and the person must
have the computer station configured with a webcam, microphone, speakers
and have access to the Internet.
You have to download video conference software, purchased or free, basic
software as I-phone or Microsoft NetMeeting.
For example: to download Windows NetMeeting, go to www.microsoft.com
and search for NetMeeting and follow downloading procedure.
Starting NetMeeting, you have to follow the simple set up procedure on the
computer screen, enter your personal information and adjust the microphone
volume. Here are the simple steps to receive and send a video.
Receive a Video:
1. Call the person you want to see/hear.
2. On the Tools menu, choose Video, then click Receive.
Send Video:
1. Call the person you want to see/hear.
2. You can click the Start Video button directly under the screen or
you can also click the Tools menu, choose Video, then Send.
Page 14

14
Note: As the video starts, the Start/Stop Video button will switch to Stop Video.
If you want to stop the video, click the Start/Stop Video button again.
10. Specifications
Image Sensor 1/4” colour progressive CMOS,
640 x 480 pixels, 10bit RGB raw data
Lens Specification F2.8, f=4.9mm, View Angle 52°
Focus Range: Manual focus, 10cm to infinity
Operating System: TWAIN /VFW / Directly Show Driver,
Windows 98 SE / ME / 2000 / XP
Video Capture Res. 640x480, 352x288, 320x240, 174x144,
160x120
Snap Shot Button: Hardware
PC Interface USB Port 2.0 (Universal Serial Bus)
Power Powered from USB port
Flicker Control 50Hz and 60Hz
Video Format AVI
Still Image Capture Res. Up to 640x480
Colour Balance Auto
Exposure Control Auto
Frame Rate (Max.) 640x480@30fps, 320x240@30fps,
160x120@30fps
Page 15

15
11. Headset General Specifications
Speaker Section
Drive Unit
F
15mm Mylar Speaker
Impedance 32 ± 15% at 1KHz
Sensitivity 106.3 ± 3dB
Frequency Response 20 ~20KHz
Rated Power Input 5mW
Max. Power Input 10mW
Microphone Section
Transducer Condenser Microphone
Sensitivity -62dB ± 3dB
Impedance Low
Directivity Omni-directional
Cord: 1.2M (4ʼ) with two 3.5mm plugs
Headset Operation Instructions
1. Insert the two plugs to a computer sound card at rear to the corresponding
symbol. Normally, pink for microphone, green for speaker.
2. Adjust headset to fit left or right and clip on to ear.
3. Adjust the microphone close to your mouth, then start using.
Page 16

16
The FCC Wants You To Know
This equipment has been tested and found to comply with the limits for a Class
B digital device, pursuant to Part 15 of the FCC Rules. These limits are designed
to provide reasonable protection against harmful interference in a residential
installation.
This equipment generates, uses, and can radiate radio frequency energy and,
if not installed or used in accordance with the instructions, may cause harmful
interference to radio communications. However, there is no guarantee that
interference will not occur in a particular installation.
If this equipment does cause harmful interference to radio or television reception,
which can be determined by turning the equipment off and on, the user is
encouraged to try to correct the interference by one or more of the following
measures: 1) reorient or relocate the receiving antenna; 2) increase the
separation between the equipment and the receiver; 3) connect the equipment to
an outlet on a circuit different from that to which the receiver is connected;
4) consult the dealer or an experienced radio/TV technician for additional
suggestions.
Any changes or modifications not expressly approved by the party responsible
for compliance could void the user’s authority to operate the equipment. Where
shielded interface cables have been provided with the product or specified
additional components or accessories elsewhere defined to be used with the
installation of the product, they must be used in order to ensure compliance with
FCC regulation.
Canadian DOC statement
DOC Class B Compliance - This Class B digital apparatus complies with
Canadian ICES-003.
Page 17

17
Who is Providing This Warranty?
• Orbyx Electronics, LLC (“Orbyx”), as the distributor of this NexxtechTM product (your “Product”).
What Does This Warranty Cover?
• This warranty covers defects in materials or workmanship in your Product under normal use and conditions.
What is the Period of Coverage?
• This warranty covers your Product for 90 days from the original purchase date.
Who Is Covered?
• This warranty covers the original consumer purchaser. Coverage terminates if you sell or otherwise transfer your Product.
What Will We Do To Correct Problems?
• We will repair your Product or replace your Product with a new or reconditioned equivalent product, at our option.
How Do You Get Service?
• Call Orbyx TOLL FREE at 1-866-363-3059 for instructions for obtaining warranty service from Orbyxʼs authorized service providers.
• Or, return your Product directly to the retail store from which you purchased the Product.
• When you obtain service for your Product, you must provide a purchase receipt (or other proof of the original purchase date) and a description of
the defect(s).
What Does This Warranty Not Cover?
• This warranty DOES NOT COVER:
• damage due to misuse, abuse, alteration, unauthorized repair, or accident (such as improper electrical current);
• damage due to “acts of God” (such as lightning) or other contingencies beyond our control;
• cosmetic damage;
• externally generated static, signal reception or antenna problems not caused by your Product; or batteries.
• This warranty also DOES NOT COVER, and in no case will we be liable for, any incidental damages (such as transportation costs to and from an
authorized service provider, or loss of time) or consequential damages (such as costs of repairing or replacing other property which is damaged, including tapes, discs, speakers not included with your Product or other accessories, or external electrical systems) resulting from the use of your Product.
Some states do not allow the exclusion or limitation of incidental or consequential damages, so the above limitation or exclusion may not apply to you.
• Defacing the serial number, or using your Product for commercial or institutional purposes, voids this warranty.
Are There Other Warranties?
• There are no express warranties other than those expressed herein. Neither the sales personnel nor any other person is authorized to make any other
warranties or to extend the duration of any warranties.
• ANY IMPLIED WARRANTIES, INCLUDING ANY IMPLIED WARRANTY OF MERCHANTABILITY (AN UNWRITTEN WARRANTY
THAT A PRODUCT IS FIT FOR ORDINARY USE), ARE LIMITED TO 90 DAYS. Some states do not allow limitations on how long an implied warranty lasts, so the above limitation may not apply to you.
How Does State Law Apply?
• This warranty gives you specific legal rights, and you may also have other rights which vary from state to state.
LIMITED WARRANTY
Page 18

18
LIMITED WARRANTY
Limited Warranty/Garantie Limitée
U.S.A & Canada
© 2005 ORBYX Electronics. All Rights Reserved.
ORBYX ELECTRONICS WARRANTY
ORBYX Electronics warrants that this product will be free from defects in materials and workmanship for a period of ninety (90) days from the date of
purchase. Within this period, simply take the product and your proof of purchase to any ORBYX Electronics store or dealer and the product will be repaired
without charge for parts and labour. ORBYX Electronics reserves the right to charge for transportation. Any product which has been subject to misuse or
accidental damage is excluded from this warranty.
This warranty is only applicable to a product purchased through ORBYX Electronicsʼ company owned stores and dealers and to a product that is presented for
repair in a country where ORBYX Electronics offers the product for sale. While this warranty does not confer any legal rights other than those set out above,
you may have additional statutory rights which will vary under the laws of the various countries, states, province and other governmental entities in which
ORBYX Electronics operates. This warranty is subject to all statutory rights you may have in the country of purchase.
Distributed exclusively in the U.S. by
Orbyx Electronics, LLC
501 South Cheryl Lane,Walnut, CA 91789
Imported in Canada for/Importé au Canada pour
Orbyx Electronics,Concord, Canada, L4K 4M3
Manufactured in China
For product support please contact www.orbyxelectronics.com or 1-866-363-3059
 Loading...