

Page 1
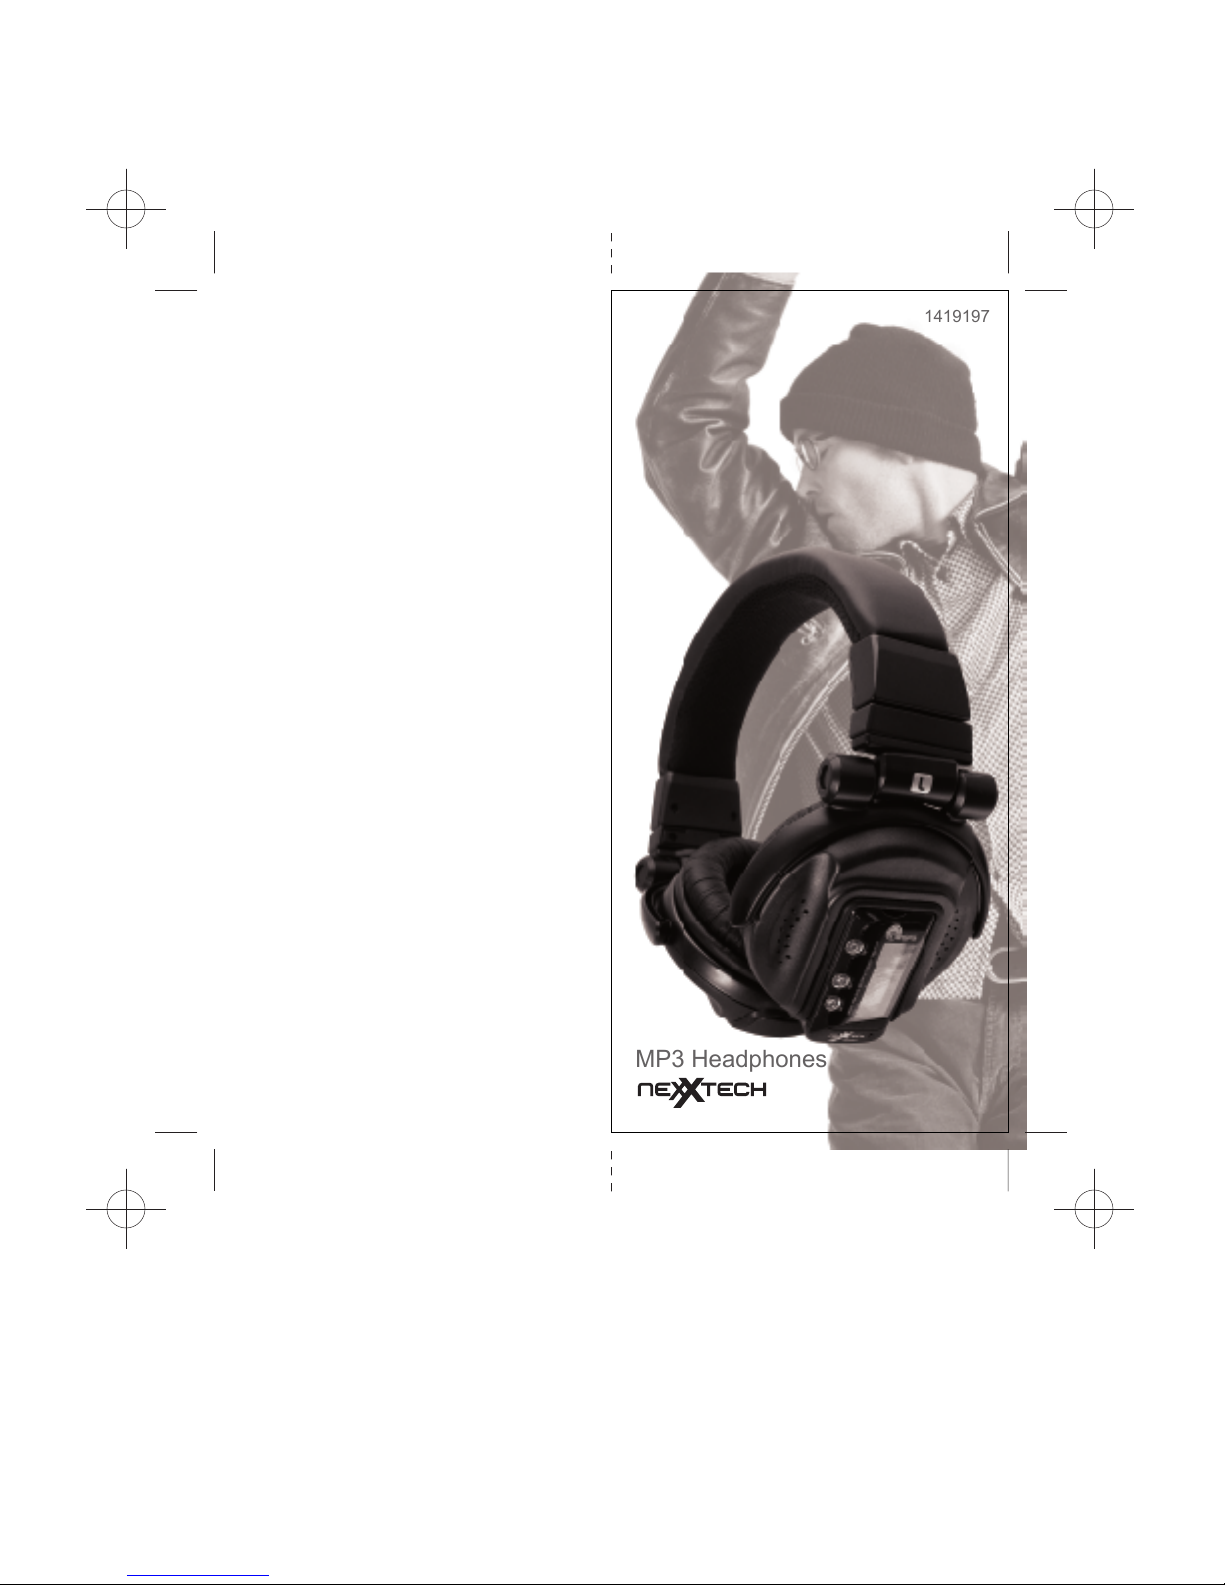
MP3 Headphones
1419197
Page 2
LIMITED WARRANTY
Who is Providing This Warranty?
• Orbyx Electronics, LLC (“Orbyx), as the distributor of this Nexxtech product (your “Product”).
What Does This Warranty Cover?
• This warranty covers defects in materials or workmanship in your Product under normal
use and conditions.
What is the Period of Coverage?
• This warranty covers your Product for 12 months from the original purchase date.
Who Is Covered?
• This warranty covers the original consumer purchaser. Coverage terminates if you sell
or otherwise transfer your Product.
What Will We Do To Correct Problems?
• We will repair your Product or replace your Product with a new or reconditioned
equivalent product, at our option.
How Do You Get Service?
• Call Orbyx TOLL FREE at 1-866-363-3059 for instructions for obtaining warranty
service from Orbyx’s authorized service providers.
• Or, return your Product directly to the retail store from which you purchased the Product.
• When you obtain service for your Product, you must provide a purchase receipt (or
other proof of the original purchase date) and a description of the defect(s).
What Does This Warranty Not Cover?
• This warranty DOES NOT COVER:
• damage due to misuse, abuse, alteration, unauthorized repair, or accident (such as
improper electrical current);
• damage due to “acts of God” (such as lightning) or other contingencies beyond our control;
• cosmetic damage;
• externally generated static, signal reception or antenna problems not caused by your
Product; or batteries.
• This warranty also DOES NOT COVER, and in no case will we be liable for, any
incidental damages (such as transportation costs to and from an authorized service
provider, or loss of time) or consequential damages (such as costs of repairing or
replacing other property which is damaged, including tapes, discs, speakers not included
with your Product or other accessories, or external electrical systems) resulting from the
use of your Product. Some states do not allow the exclusion or limitation of incidental or
consequential damages, so the above limitation or exclusion may not apply to you.
• Defacing the serial number, or using your Product for commercial or institutional
purposes, voids this warranty.
Are There Other Warranties?
• There are no express warranties other than those expressed herein. Neither the sales
personnel nor any other person is authorized to make any other warranties or to extend
the duration of any warranties.
• ANY IMPLIED WARRANTIES, INCLUDING ANY IMPLIED WARRANTY OF
MERCHANTABILITY (AN UNWRITTEN WARRANTY THAT A PRODUCT IS FIT FOR
ORDINARY USE), ARE LIMITED TO 90 DAYS. Some states do not allow limitations on
how long an implied warranty lasts, so the above limitation may not apply to you.
How Does State Law Apply?
• This warranty gives you specific legal rights, and you may also have other rights which
vary from state to state.
LIMITED WARRANTY
ORBYX ELECTRONICS WARRANTY
ORBYX Electronics warrants that this product will be free from defects in materials and
workmanship for a period of one (1) year from the date of purchase. Within this period,
simply take the product and your proof of purchase to any ORBYX Electronics store or
dealer and the product will be repaired without charge for parts and labour. ORBYX
Electronics reserves the right to charge for transportation. Any product which has been
subject to misuse or accidental damage is excluded from this warranty.
This warranty is only applicable to a product purchased through ORBYX Electronics'
company owned stores and dealers and to a product that is presented for repair in a
country where ORBYX Electronics offers the product for sale. While this warranty does
not confer any legal rights other than those set o ut above, you may have
additional statutory r ights which will vary u nder the law s of the various
countries, states, province and other governmental entities in which ORBYX
Electronics operates. This warranty is subject to all statutory rights you may
have in the country of purchase.
21
Page 3

2
3-4
5
6
7-8
9-11
12
13
14
15
16
17-19
20
21
Cautionary Notes
Warning:
Changes or modifications to this unit not expressly approved
by the party responsible for compliance could void the user's
authority to operate the equipment.
The FCC Wants You to Know
This equipment has been tested and found to comply with the
limits for a Class B digital device, pursuant to Part 15 of the
FCC Rules. These limits are designed to provide reasonable
protection against harmful interference in a residential
installation. This equipment generates, uses and can radiate
radio frequency energy and, if not installed and used in
accordance with the instructions, may cause harmful
interference to radio communications.
However, there is no guarantee that interference will not occur
in a particular installation. If this equipment does cause
harmful interference to radio or television reception, which can
be determined by turning the equipment off and on, the user is
encouraged to try to correct the interference by one or more of
the following measures:
• Reorient or relocate the receiving antenna.
• Increase the separation between the equipment and
receiver.
• Connect the equipment into an outlet on a circuit different
from that to which the receiver is connected.
• Contact your local electronic store for help.
FCC Information
This device complies with Part 15 of the FCC Rules.
Operation is subject to the following two conditions:
(1) this device may not cause harmful interference, and
(2) this device must accept any interference received,
including interference that may cause undesired operation.
Distributed exclusively in the U.S. by
Orbyx Electronics, LLC
501 South Cheryl Lane,
Walnut, CA 91789
Manufactured in China
For parts, service, and general inquiries please call 1-866-363-3059
or visit us on the web at www.orbyxelectronics.com
Limited Warranty/Garantie Limitée
U.S.A & Canada
© 2004 ORBYX Electronics. All Rights Reserved.
Imported in Canada for/Importé
au Canada pour
Orbyx Electronics,
Concord, Canada, L4K 4M3
Table of Contents
Intoduction.........................................................
Component List.............................................
Appearance........................................................
Important............................................................
Reformat the MP3..........................................
Setup and Use.............................................
Download music to MP3.................................
Using DJ Headphone......................................
Using DJ Headphone
to other devices..............................................
Using Neck Strap Earphones........................
Start up LCD Screen.......................................
Operation...................................................
Cautionary Notes............................................
Warranty...........................................................
This User's Guide is published by Nexxtech without any
warranty. Improvements and changes to this User's Guide
necessitated by typographical errors, inaccuracies of current
information, or improvements to programs and/or equipment,
may be made by Nexxtech at any time and without notice.
20 1
Page 4
Introduction
This MP3 headphone is an audio product
which integrates digital music with the
usage of DJ style headphones. It can stand
alone as an over-the-head DJ headphone
or be used as a portable mp3 player for
outdoor activities. "Plug" together it
becomes a "cordless" audio player with
quality sound headphones. It can also be
used as a recording device for meeting
notes or interview recording.
Options: Press mode switch
to start menu selection. Then
push jog switch down to
select menu options.
1. Music
There are no options to select
in this setting.
2. Voice REC
In standby mode, push jog
switch to record voice. Push
jog once and then push Mode
to Record. To record push jog
again and push again to stop.
To delete the file, choose 2.
Delete Rec File, push and hold
jog switch for 3 seconds.
Choose 3. Return, to operate
other features.
3. Language
Push jog switch in to select 4.1
English, 4.2 Traditional
Chinese, 4.3 Simplified
Chinese, 4.4 Return.
4. Memory
Push jog switch in to view
available memory.
5. Back Light
Push jog switch in to select 5.1
Off, 5.2 5 seconds, 5.3 10
seconds, 5.4 15 seconds, 5.5
20 seconds, 5.6 Return
6. Contrast
Push jog switch in to see
contrast setting. Push jog
switch up to decrease contrast,
down to increase contrast.
7, Return
Push jog switch in to return to
display mode.
1419197 MP3 HEADPHONES
Operation
2 19
Page 5

1. MP3 Player module
2. Battery box/module holder
3. Adjustable DJ headphones
Setting MP3 mode items:
Press mode switch to start
menu selection. Then push
jog switch down to select
menu options.
1. A-B (While song is playing)
2. Repeat
Push jog switch in to select
Repeat and/or push in again to
access 2.1 Repeat All. Push jog
switch down to select 2.2
Repeat One, 2.3 Normal, 2.4
Random or 2.5 Return.
3. EQ
Push jog switch in to select: EQ
then push jog switch down to
select 3.1 Normal, 3.2 Jazz, 3.3
Classic, 3.4 Rock, 3.5 Pop, or
3.6 Return.
4. Preview
5. Return
Returns screen to MP3 display.
2. Push jog switch in, A will flash
1. Press Mode switch to A-B
Mode (While song is playing)
3. Press again to save start point,
B will flash
4. Select song for B by pressing
mode switch down and press
jog again. A & B are set and
display returns to original A-B
display.
Push jog switch in to select.
Plays all songs in order for 10
seconds then stops. To reset
to your preference go back to
"Repeat" setting in the MP
mode.
Component ListOperation
18 3
Page 6

OperationComponent List
4. AUX audio jack connection
cable
5. Neck Strap Earphones
MP3 Mode: Powers up in Standby Mode
6. Windows 98 driver installation CD
R
Volume Buttons: Adjustable
in any mode
Press left button
Press right button
Hold Button
Slide button Left
Slide button Right
NOTE: Must unlock to power
on unit.:Mode Button:
Press once to enter Menu
Press Jog switch down
Press & hold 3 seconds to
change mode:
Press Jog switch down
Action
Jog Switch:
Press 1 time: Play/Pause
Move switch up
Move switch up & Hold
Move switch down
Move switch down & hold
Press & hold 3 seconds:
Power off
Standby Mode: Playing Mode
Play or pause current music Play or pause current music
Stop song Go to next song
Stop song Go to previous song
Switch off player Switch off player
Rewind song
Fast forward song
to select menu item
1. A-B 1. A-B
2. Repeat 2. Repeat
3. EQ 3. EQ
4. Preview 4. Preview
5. Return 5. Return
to select menu item
1. Music 1. Music
2. Voice REC 2. Voice REC
4. Memory 4. Memory
5. Back Light 5. Back Light
6. Contrast 6. Contrast
7. Return 7. Return
Lock settings
Unlock settings
Lower volume
Raise volume
Press Jog switch down
to select menu item
Press Jog switch down
to select menu item
3. Language (default English)
4 17
Page 7

AppearanceStartup LCD Screen
LCD Display
Play/Stop/Pause display
Jog
Switch
Mode
Cable
Slot
USB
Song Title
Vol.
Vol.
Hold Switch
Battery
16 5
Page 8

Important
1. Do not remove the MP3 player from the
USB port while files are downloading as this
may damage the file system.
2. Wait for the "Safely remove hardware"
message to appear in the Windows
system tray before removing the MP3
player.
3. If the file system on the MP3 player becomes
corrupted please try to reformat the MP3
player as in P.7-P.8 .
4. Do not expose the MP3 module to excessive
moisture or heat.
5. Do not drop the player.
6. Remove batteries when not using module for
extended time.
7. Setting the hold switch "on" will protect your
selected settings. Set the hold switch "off" to
change settings.
8. The MP3 console will turn off automatically
when it is idle for 5 minutes.
Using Neck Strap Earphones: Insert one "AA" battery
(not included) into the battery box and slide the MP3
module into place. Attach the earphone necklet type
cable.
Using Neck Strap
Earphones
6 15
Page 9

Using DJ Headphone
A Format Removable Disk window opens;
select "Quick Format". Then click "Start".
Right Click "Removable Disk.Then Choose "Format"
to Other Device
Using DJ Headphone with other audio devices: Insert
cable into the 3/16 inch (2.5mm) line-in plug on left ear
phone and the 1/8 inch (3.5mm) end into your audio
device. Remove the MP3 console from the left ear pad and
the batteries from the right ear pad. Removing the
batteries will lessen the weight of the earphones.
Reformat the MP3
14 7
Page 10

Using DJ HeadphoneReformat the MP3
A warning window opens, select "OK".
The MP3 console will then be reformatted. Wait for the
"Safe to remove mass storage device from the system"
message to appear in the system tray before removing
the device.
Using DJ Headphone: Insert two "AAA"batteries (not included)
into the slot on the right ear pad. Slide the MP3 module into the
slot on the left ear pad.
8 13
Page 11

Download Music to MP3 Setup and Use
Note: The player is preset to work with Windows 2000, ME
and XP. If you are using a PC running Windows 98 please
use the CD provided and follow the instructions on the
screen. The player appears in My Computer or Explorer as
a removable disk or device.
R
R
Installation of the driver for Windows 98:
- Connect the MP3 console USB plug into the computer
USB port.
- Insert the CD into the CD drive.
- Follow the instructions on the screen making the selections
shown on Step 1 through 6 below.
Step 1.
Download your selected music following the steps
below:
- Plug in the MP3 console to the computer.
- Click My Computer and locate the removable disk or device,
double click to open the device window.
- Browse the hard drive to find and click to open your Song folder.
- Drag songs from the Song folder to the removable disk folder as
illustrated:
- Wait for the System Tray display telling you it is safe to remove
hardware before removing the MP3 console.
12 9
Page 12

Setup and Use Setup and Use
Step 2.
Step 3.
Step 5.
Step 6.
Step 4.
Wait for the "Safe to remove hardware" message to appear
in the system tray.
10 11
 Loading...