

Page 1
1
POWER SUPPLY:
Connect the supplied adapter to the side of the unit in the slot marked “DC 5V IN”. Plug
the two-prong end of the power cord to an AC100-240V outlet. If you have difficulty
inserting the plug, turn it over and reinsert it. If the unit will not be used for a long time,
disconnect the plug from the outlet.
NOTE:
Before plugging the power cord into an AC outlet, make sure that all the connections
have been made.
CAUTION: These servicing instructions are for use by qualified service personnel only.
To reduce the risk of electric shock, do not perform any servicing other than that
contained in the operating instructions unless you are qualified to do so.
Refer to service manual for servicing instructions. To reduce the risk of fire or electric
shock, do not expose this apparatus to rain or moisture.
CAUTION: TO REDUCE THE RISK OF ELECTRIC SHOCK, DO NO
T
REMOVE COVER (OR BACK). NO USE-SERVICEABLE PARTS INSIDE.
REFER SERVICING TO QUALIFIED SERVICE PERSONNEL.
The lightning flash with arrowhead symbol, within an equilateral triangle, is
intended to alert the user to the presence of uninsulated “dangerous voltage”
within the product’s enclosure that may be of sufficient magnitude to constitute
a risk of electric to
p
ersons.
The exclamation point within an equilateral triangle is intended to alert the use
r
to the presence of important operating and maintenance (servicing)
instructions in the literature accompanying the appliance.
WARNING: TO REDUCE THE RISK OF FIRE OR ELECTRIC SHOCK,
DO NOT EXPOSE THIS APPLIANCE TO RAIN OF MOISTURE.
Important
Saf
ety
Instructions
Page 2

2
NOTES
1) Read these instructions.
2) Keep these instructions.
3) Heed all warnings.
4) Follow all instructions.
5) Do not use this apparatus near water.
6) Clean only with a damp cloth.
7) Do not block any of the ventilation openings. Install in accordance with the
manufacturer's instructions.
8) Do not install near any heat sources such as radiators, heat registers, stoves, or other
apparatus (including amplifiers) that produce heat.
9) Do not defeat the safety purpose of the polarized or grounding-type plug. A polarized plug
has two blades with one wider than the other. A grounding type plug has two blades and
a third grounding prong. The wide blade or the third prong is provided for your safety.
When the provided plug does not fit into your outlet, consult an electrician for
replacement of the obsolete outlet.
10) Protect the power cord from being walked on or pinched particularly at plugs,
convenience receptacles, and the point where they exit from the apparatus.
11) Only use attachments/accessories specified by the manufacturer.
12) Use only with a cart, stand, tripod, bracket, or table specified by the
manufacturer, or sold with the apparatus . When a cart is used, us e caution
when moving the cart/apparatus combination to avoid injury from tip-over.
13) Unplug this apparatus during lightning storms or when unused for long periods of time.
14) Refer all servicing to qualified service personnel. Servicing is required when the
apparatus has been dam ag ed i n an y w ay, such as po w er-supply co rd or p lug i s dam aged,
liquid has been spilled or objects have fallen into the apparatus, the apparatus has been
exposed to rain or moisture, does not operate normally, or has been dropped.
15) Apparatus shall not be exposed to drippi ng or splashing and no objects filled with liquids,
such as vases, shall be placed on the apparatus.
Important
Saf
ety
Instructions
Page 3

3
Warning
Failure to avoid the following potentially hazardous situations may result in injury or
property damage.
The unit is designed to provide you with route suggestions. It does not reflect road
closures or road conditions, traffic congestion, weather conditions, or other factors that
may affect safety or timing while driving.
Use the unit only as a navigational aid. Do not attempt to use the unit for any purpose
requiring precise measurement of direction, distance, location, or topography. This
product should not be used to determine ground proximity for aircraft navigation.
CAUTION:
Danger of explosion if battery is incorrectly replaced. Replace only with the same or
equivalent type.
The batteries (or batteries installed) shall not be exposed to excessive heat such as
sunshine, fire or the like.
Underwriters Laboratories Inc. (“UL”) has not tested the performance or reliability of the
Global Positioning System (“GPS”) hardware, operating software or other aspects of this
product. UL has only tested for fire, shock or casualty hazards as outlined in UL’s
Standard(s) for Safety [Note-Consider referencing specific UL standard].
UL Certification does not cover the performance or reliability of the GPS hardware and
GPS operating software.
UL MAKES NO REPRESENTATIONS, WARRANTIES OR CERTIFICATIONS
WHATSOEVER REGARDING THE PERFORMANCE OR RELIABILITY OF ANY GPS
RELATED FUNCTIONS OF THIS PRODUCT.
This device complies with part 15 of the FCC Rules. Operation is subject to the following
two conditions:
(1) This device may not cause harmful interference, and
(2) This device must accept any interference received, including interference that may
cause undesired operation.
Cleaning of touch screen
If touch screen has fingerprints or dust on it, lightly wipe the touch screen with dry soft
cloth (or similar).
Never use record cleaning sprays, benzene, thinner, static electricity prevention liquids
or any other solvents to clean your touch screen.
Important
Saf
ety
Instructions
Page 4
4
Navigation Function
Other Special Functions
Navigation Function: The unit is designed to pro vide you with route suggestions. It supports voice
navi
g
ation.
Power Adapter Switch: Automaticall
y
adapts to voltage requirements in U.S and
other countries.
SD Card and USB Input: The unit is
designed with SD card and USB ports and
can be connected to SD card or other USB
device for file loading.
Flash Storage: Built in Flash Storage can
store map data.
Support file formats: Supports MP3
Format files playback.
Features
Page 5
5
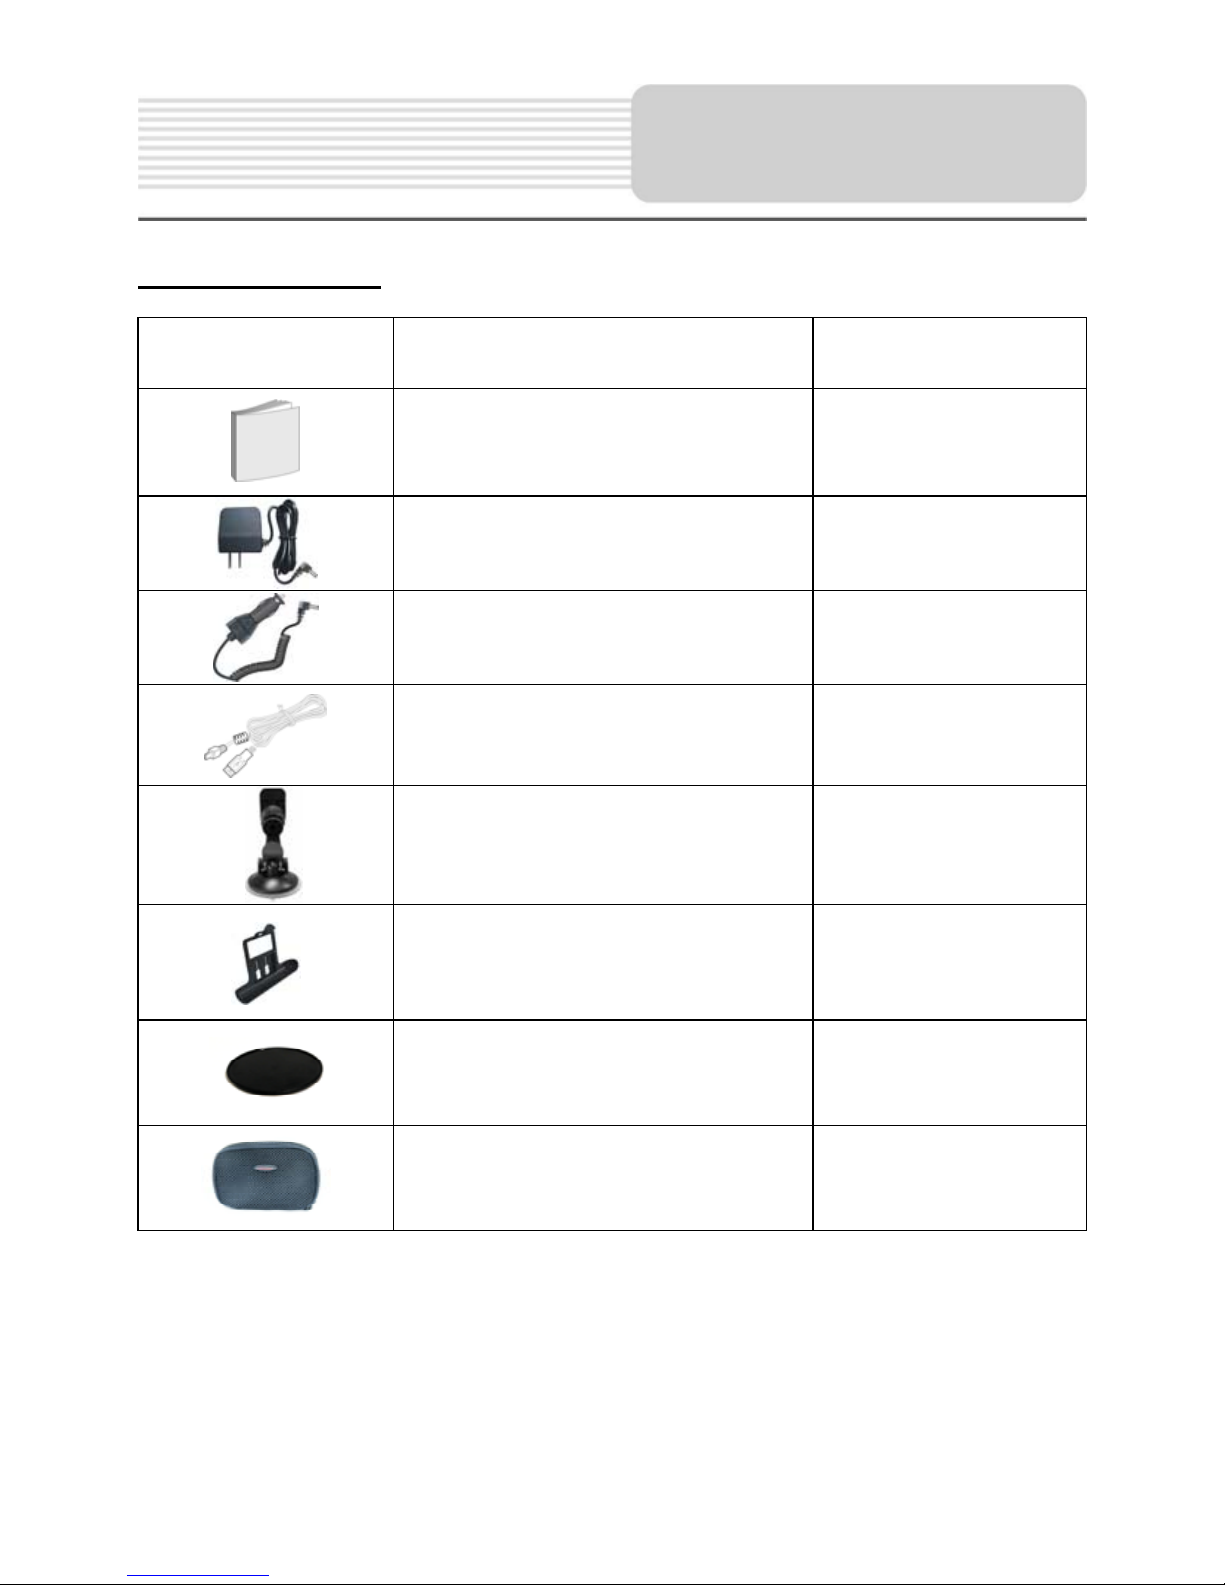
Accessories List
ITEM NAME QTY
Owner’s Manual 2
Power Adaptor 1
Car Adaptor 1
USB Cable 1
Windshield mount bracket 1
Mount cradle 1
Dashboard mount disk 1
Pouch 1
NOTE
Accessories and their part number are subject to modification without prior notice due to
improvements.
Accessories
Page 6

6
……………………………………….……..1
……………………………………………...4
……………………………………………...5
……………………………………………...7
……………………………………….……..9
………………………………………....….11
………………………………………..…..13
………………………………………..…..17
………………………………………....…19
………………………………………..…..20
………………………………………..…..21
Important Safety Instructions
Features
System Connections
Power Supply Preparation
Troubleshooting
General Setup
Specifications
A
ccessories
View of Main Unit
Playing Music
Use of the Mount Accessories
Contents
Page 7
7
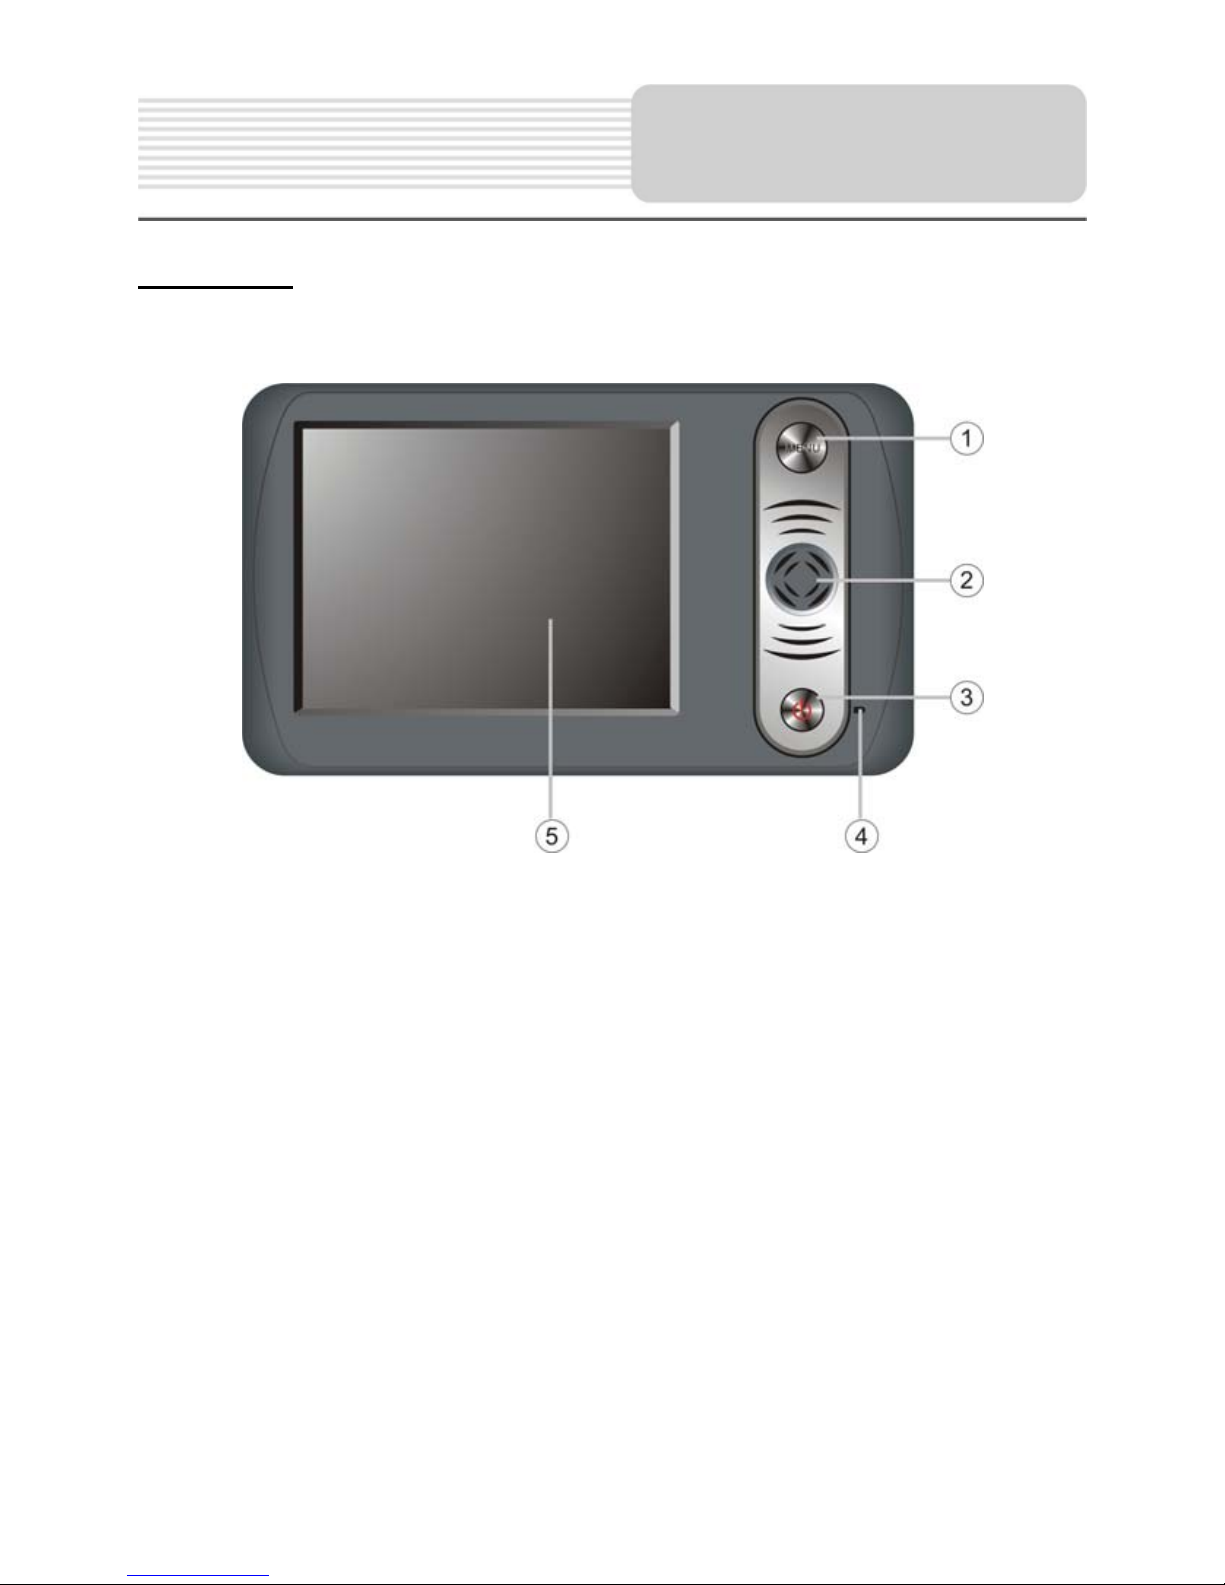
Front View
1. MENU button
Press to enter the main menu.
2. Speakers
3. POWER button
Press to enter or exit the standby mode.
4. Charge Indicator
When charging the battery, it is red; when the battery is fully charged, it turns green.
5. LCD Screen
View of Main Unit
Page 8

8
Side View
Rear View
1. ON/OFF switch
Used to switch power on or off.
2. GPS Antenna
Receiving GPS signals.
1. Card Port
Insert the SD/MMC card into the port.
2. USB port
1. Volume Control
Used to adjust the volume of the headphone
and speaker.
2. Headphone Jack
Used to connect headphones for private
listening. When the headphones are
connected to this jack, the speaker will be
turned off automatically.
3. DC 5V Input Jack
Used to connect to the supplied car adapter.
View of Main Unit
Page 9
9
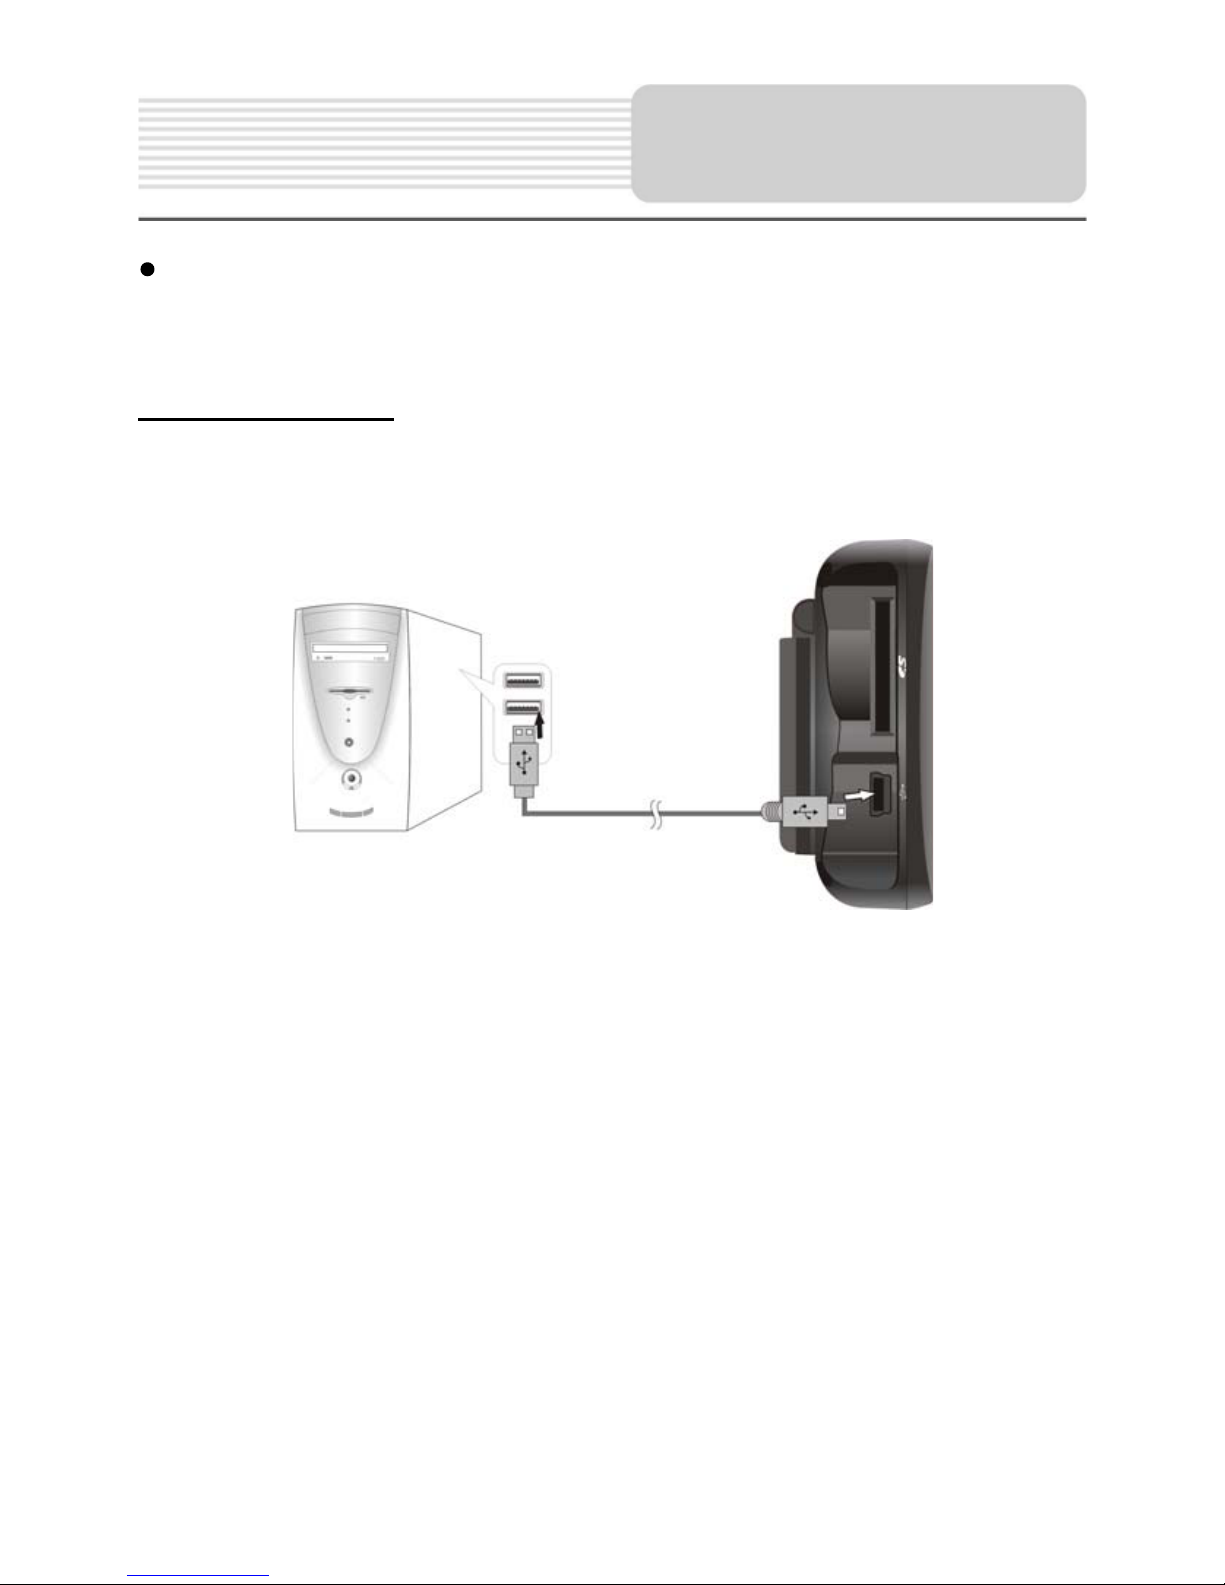
Always ensure that the unit and any other external device connected to the unit are
switched off and unplugged from the power supply before you attempt to connect
the unit to any external device.
Connecting to PC
The unit is designed with a USB port which allows you to connect the unit to PC for map
updating. See the below figure for details:
System requirements:
-Windows 98SE, ME, 2000 and XP
(Driver required for Windows 98SE)
-DVD Rom Drive ( for map upgrade purposes)
-Intel Pentium II 233 Mhz
-64 MB RAM
-50 MB available hard drive space
-Available serial port and/or USB Port
-256-color display adapter and monitor
(16 bit color required)
System Connections
Page 10

10
Inserting SD Card
The unit is designed with SD/MMC Card jack which allows you to insert the SD/MMC
card into the unit as shown below:
Connecting to Headphones
Connect the headphones to the right side of the unit for private listening.
When headphone is connected, the speakers will automatically turn off.
Note: Excessively loud volume could damage your hearing. So turn down the volume
before you connect the headphones, and then raise the volume to comfortable level.
System Connections
Page 11
11
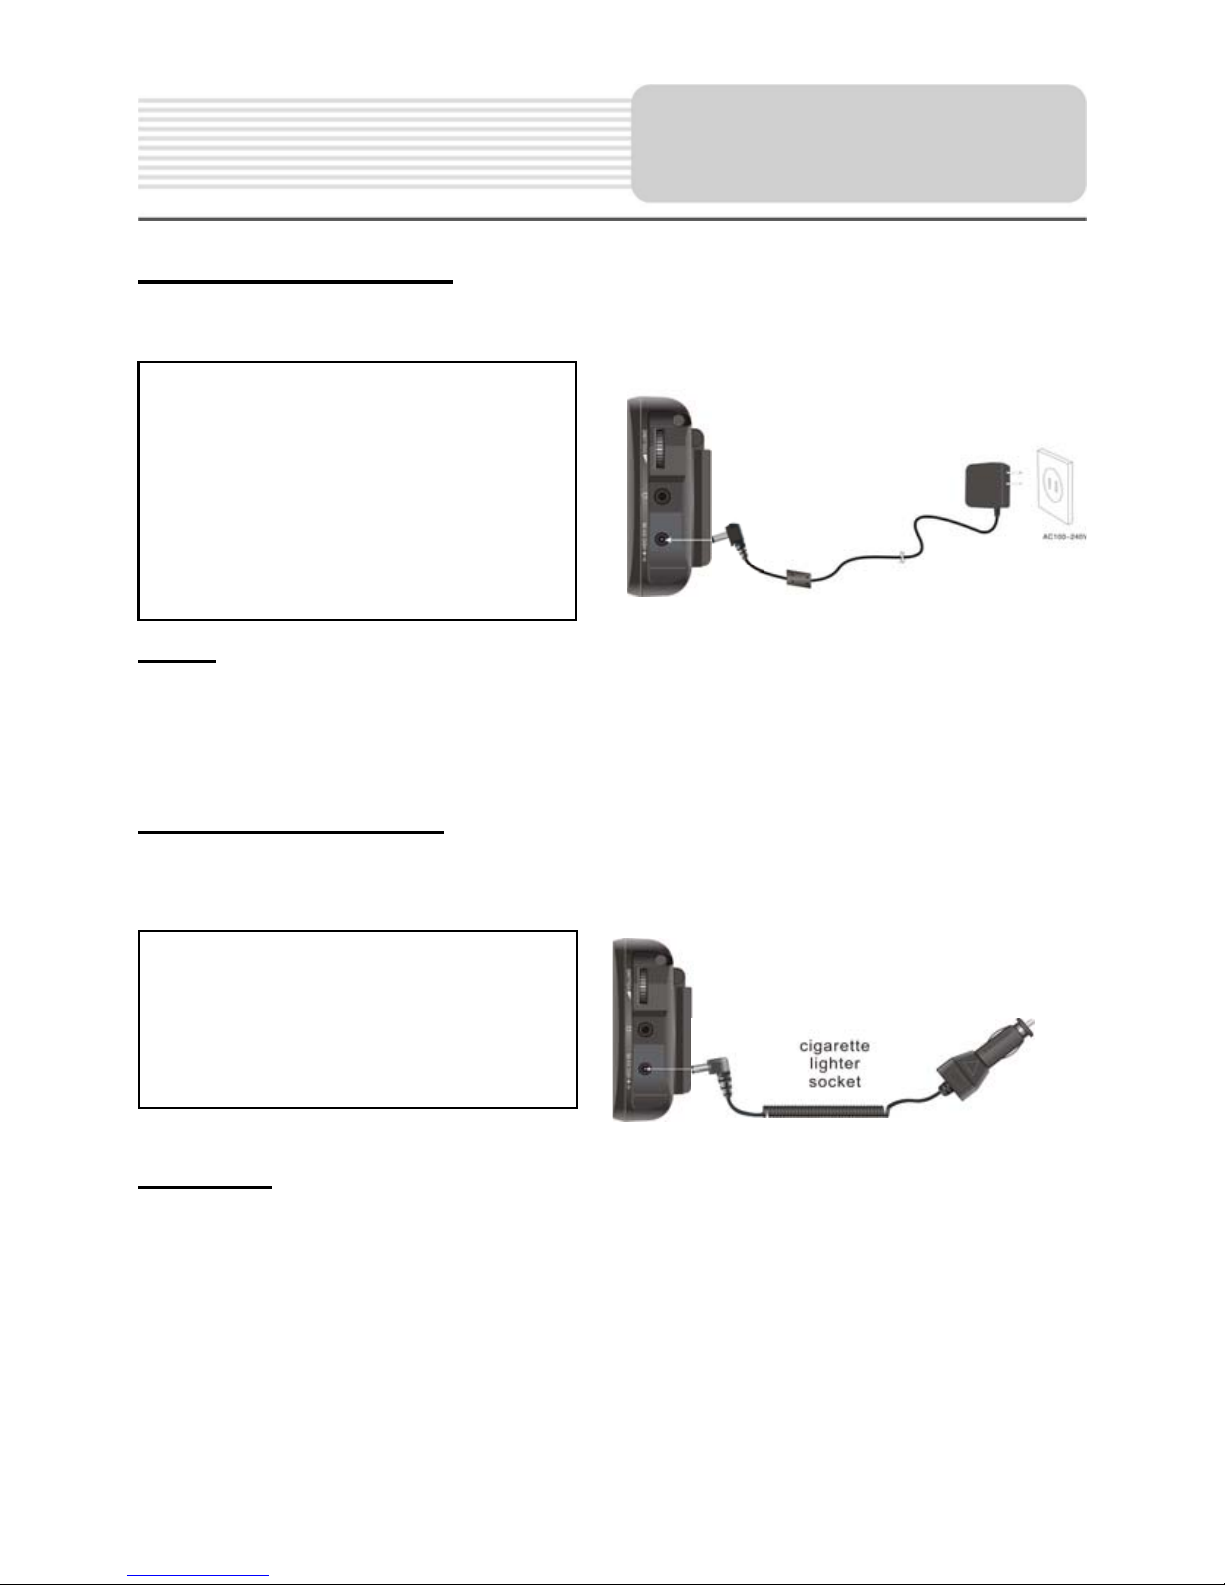
Using the AC Adaptor
The player is supplied with an AC adaptor for powering the unit and charging the battery.
Note:
Turn unit's power off before unplugging.
In the case of using the adaptor, the LCD screen will be brighter than with the
rechargeable battery.
Using of Car Adaptor
The player is supplied with a Car Adaptor for powering the unit while in a vehicle.
Attention
Place the unit in a proper position for viewing.
Disconnect the player from the Car Adaptor when starting the vehicle.
Your portable GPS player comes with a built-in rechargeable battery. Please see details
in the following segment.
Connect the Car Adaptor Powe
r
Plug to the unit’s power jack and
plug the other end to the vehicle’s
5V accessory/ cigarette socket, as
shown on the right figure.
1. Connect AC adaptor to the
right side of the player in the
j
ack marked DC 5V IN, as
shown on the right.
2. Plug the two-prong end of the
power cord into a grounded
electrical outlet. The powe
r
indicator lights red.
Power Supply
Pre
p
aration
Page 12

12
About Rechargeable Battery
Your portable GPS player comes with a built-in rechargeable battery. Charge the battery
fully before initial use. Charging time is normally about 3.5 hours. A fully charged battery
delivers about 3 hours of use.
Working conditions and precautions for the rechargeable battery
New batteries should be fully charged before initial use.
Battery should only be used and charged when temperatures are between
32°-100°F.
Maintain well-ventilated conditions around the product to avoid overheating. Don’t
put the product on a bed, sofa or anything that may block ventilation to the product.
When the battery is weak, an indication menu will appear on the LCD screen and
about five minutes later, the player will power OFF automatically.
When charging the battery, the charge indicator is red; when finishing charging, it
turns green.
Charging the Battery Pack
The battery must be charged by using the supplied adaptor.
Power Supply
Pre
p
aration
Page 13

13
General Setup
When turn on the unit, the screen will display the main menu later as shown below:
In the main menu, there are three items for selecting. Touch the corresponding item to
enter.
Tap
to enter navigation mode. T ap to enter the settings menu. T ap to enter
the MP3 player.
Settings Menu
Tap to enter the settings menu, the screen will display as below:
In the menu, tap
to return to the main setup menu.
General Setup
Page 14

14
Language
Tap
in the settings menu to enter Language settings menu for language selecting,
as shown below:
Tap the buttons to select language. Then tap D to confirm or tap U to cancel.
Backlight
Tap
in the settings menu to enter Backlight settings menu for backlight adjusting, as
shown below:
Tap the first group buttons to adjust the backlight level.
Tap the second group buttons to adjust the sleep time. There are 6 choices for sleep
time (--/5/10/30/60/120).
--: The system will keep backlight always on and will not enter sleep mode.
5: The system will keep backlight on for 5 minutes and then enter sleep mode.
10: The system will keep backlight on for 10 minutes and then enter sleep mode.
30: The system will keep backlight on for 30 minutes and then enter sleep mode.
60: The system will keep backlight on for 1 hour and then enter sleep mode.
120: The system will keep backlight on for 2 hours and then enter sleep mode.
After setting, tap D to confirm or tap U to cancel.
General Setup
Page 15
15
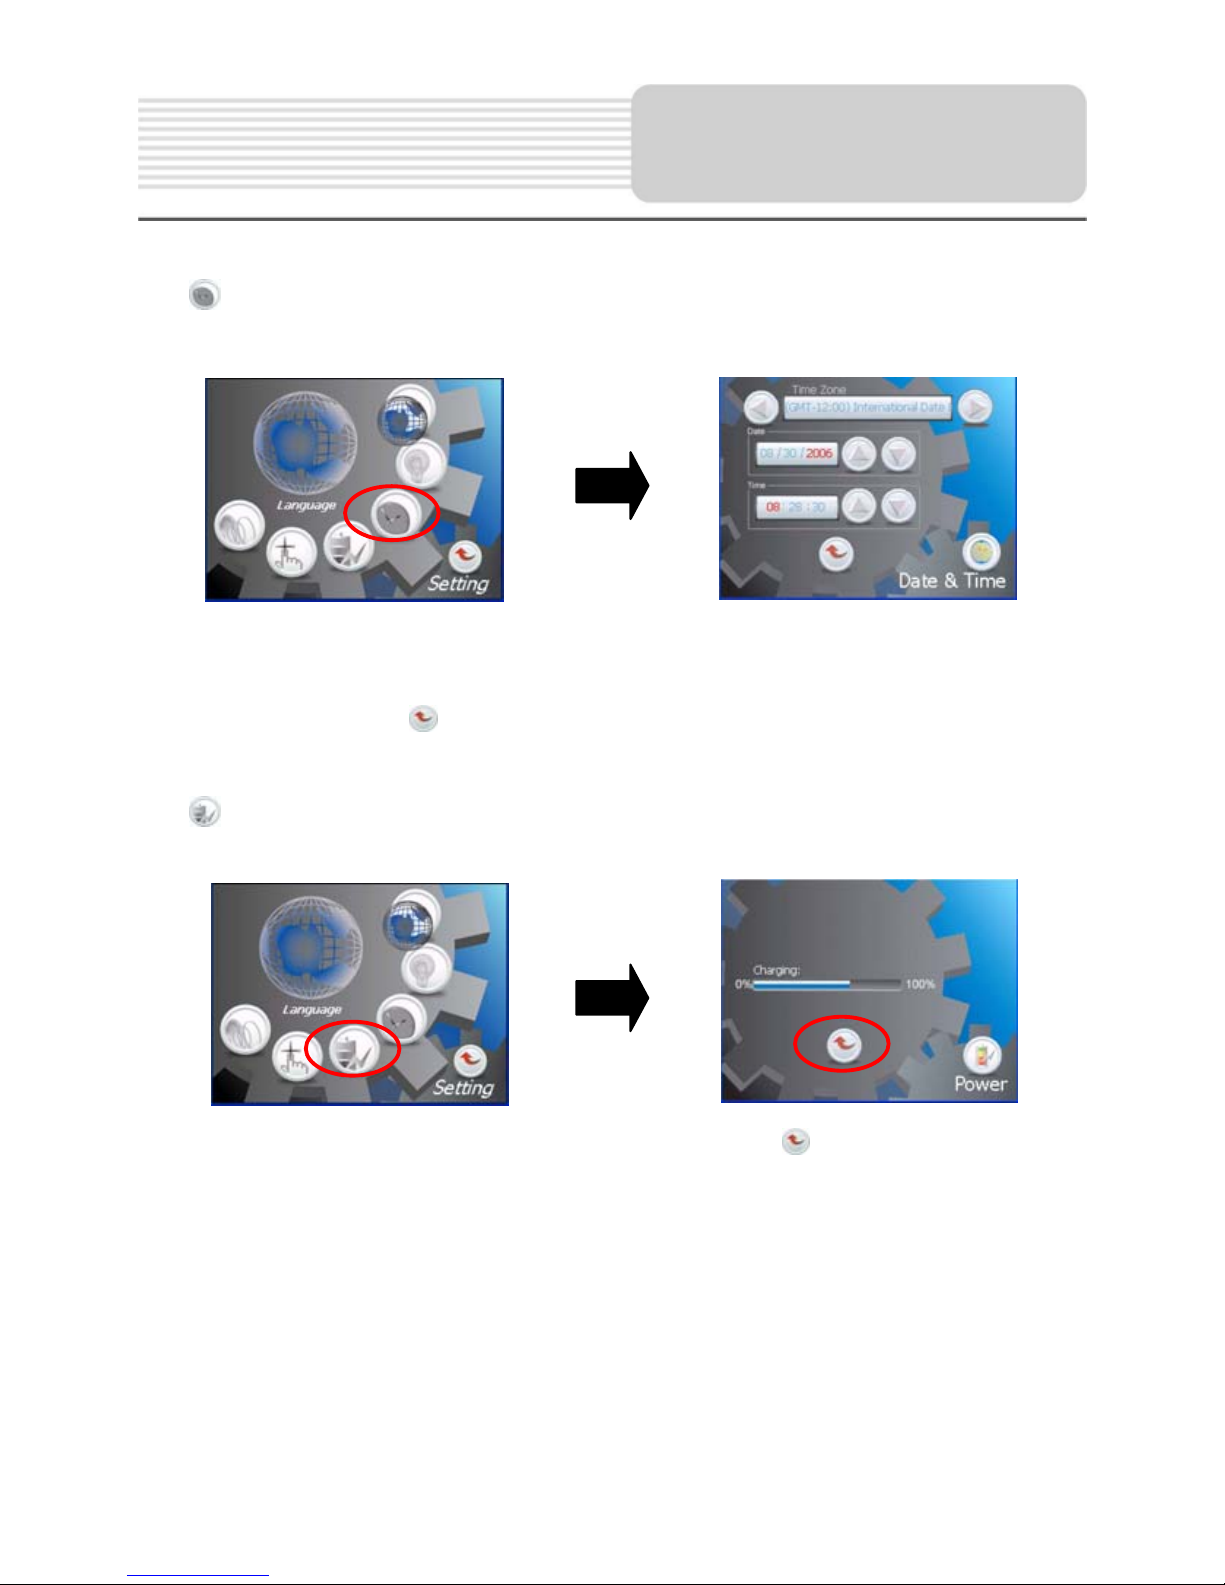
Date & Time
Tap
in the settings menu to enter Date & Time settings menu for changing t o the
current time zone, as shown below:
Tap the buttons to select the proper Time Zone. Tap the buttons of Date group
to change the corresponding date and tap the buttons of Time group to change the
corresponding time. Tap
to return.
Power
Tap
in the settings menu to enter Power menu for the current battery status, as
shown below:
The power menu will display the current battery status. Tap
to return.
General Setup
Page 16
16
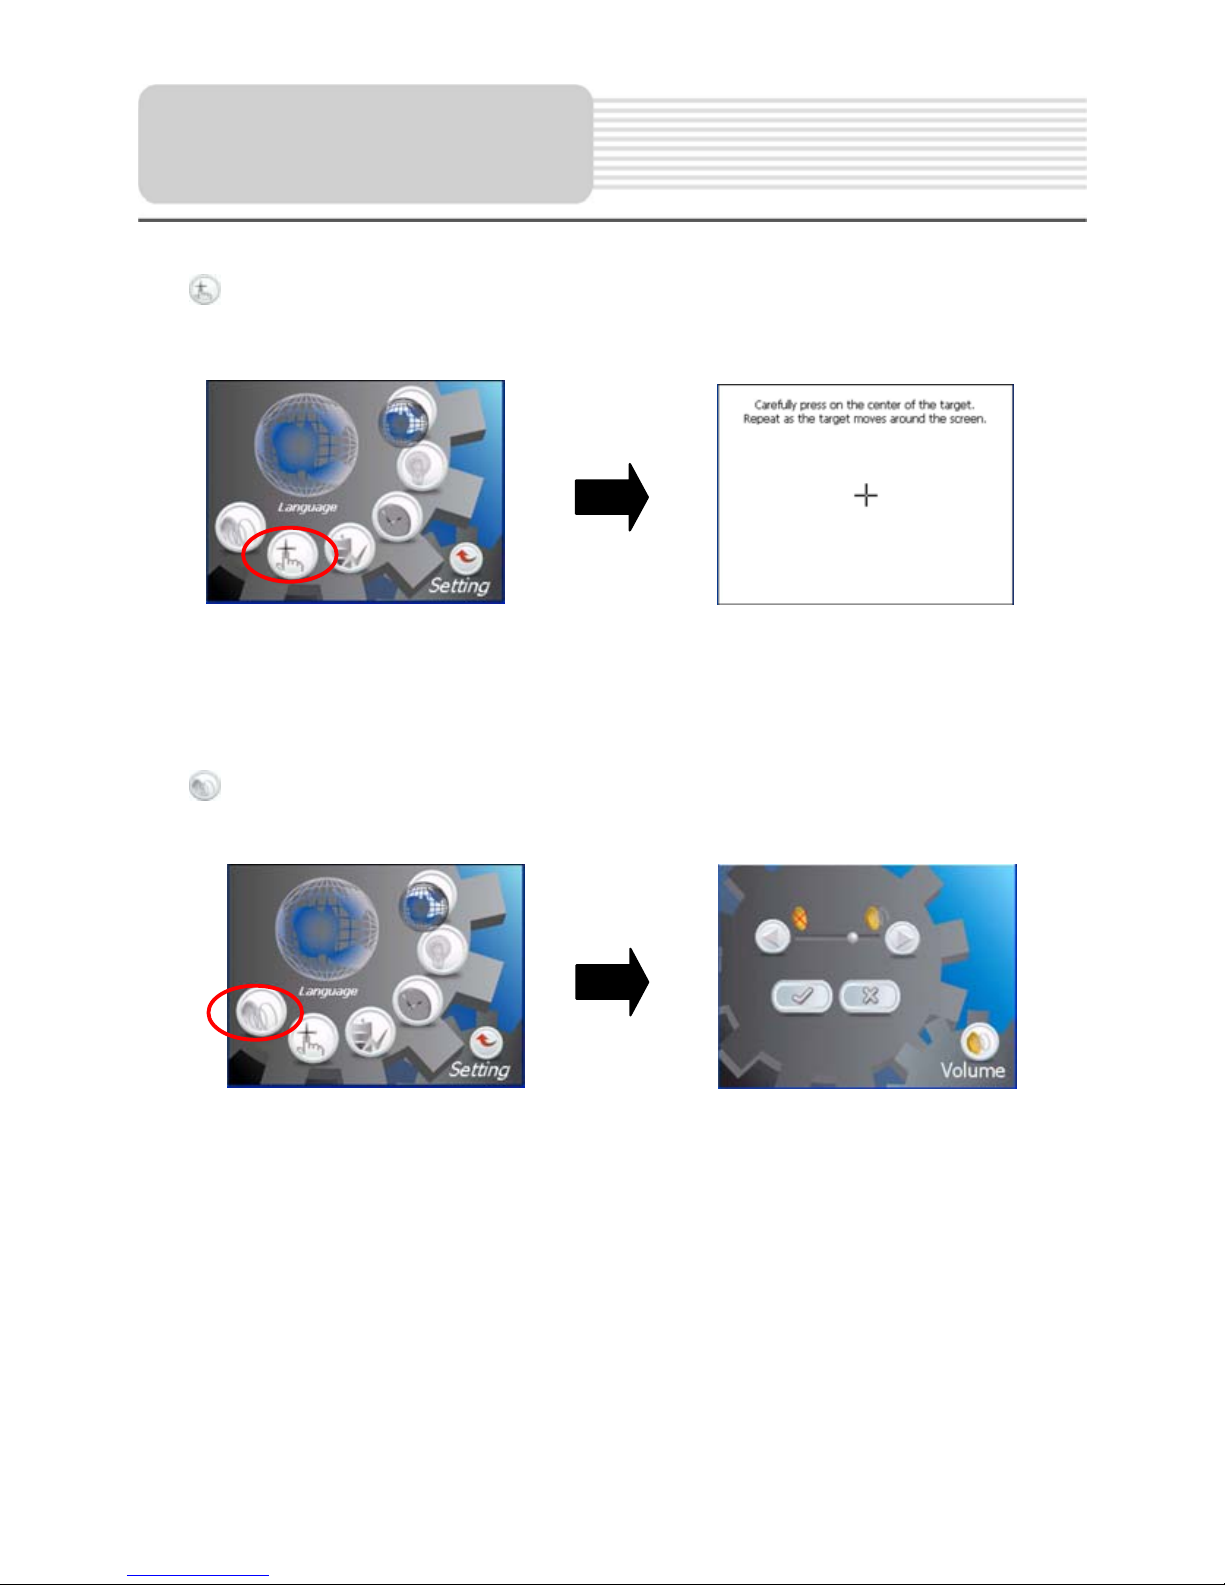
Screen
Tap
in the settings menu to enter Screen menu for calibrating the sensitivity of the
unit, the screen will display as below:
Tap the center of “+” as it moves around the screen. If you touch the center of “+” every
time, it will disappear and tap the screen to return to the settings menu.
Note: If “+” doesn’t disappear, you should calibrate again.
Volume
Tap
in the settings menu to enter Vo lu m e settings menu for volume adjusting, as
shown below:
Tap the buttons to adjust the volume. Then tap D to confirm or tap U to cancel.
General Setup
Page 17
17
The unit is designed with SD/MMC card slot. You can insert the SD/MMC card with MP3
files. It only supports MP3 format files playback.
Note: Do not store MP3 format files in the Flash storage, for the flash storag e is
used to store map data, any attempt to open the Flash storage may result in the
map data missing and lost.
Take the following steps to play:
Loading MP3 format files:
1. Insert the SD/MMC card with MP3 files.
2. Turn on the unit.
A note regarding the MP3 function:
The unit has the ability to play your favorite MP3 music files. This is accomplished by
using the unit’s SD card slot, located on the left side, next to the USB port:
MP3 files should previously reside on the users SD card.
MP3 files can be imported to the users SD card on a PC, using a variety of
programs such as Windows Media Player.
This process should be performed independent of the navigation unit.
Do not attempt to use the unit to read and burn MP3 files from an external source.
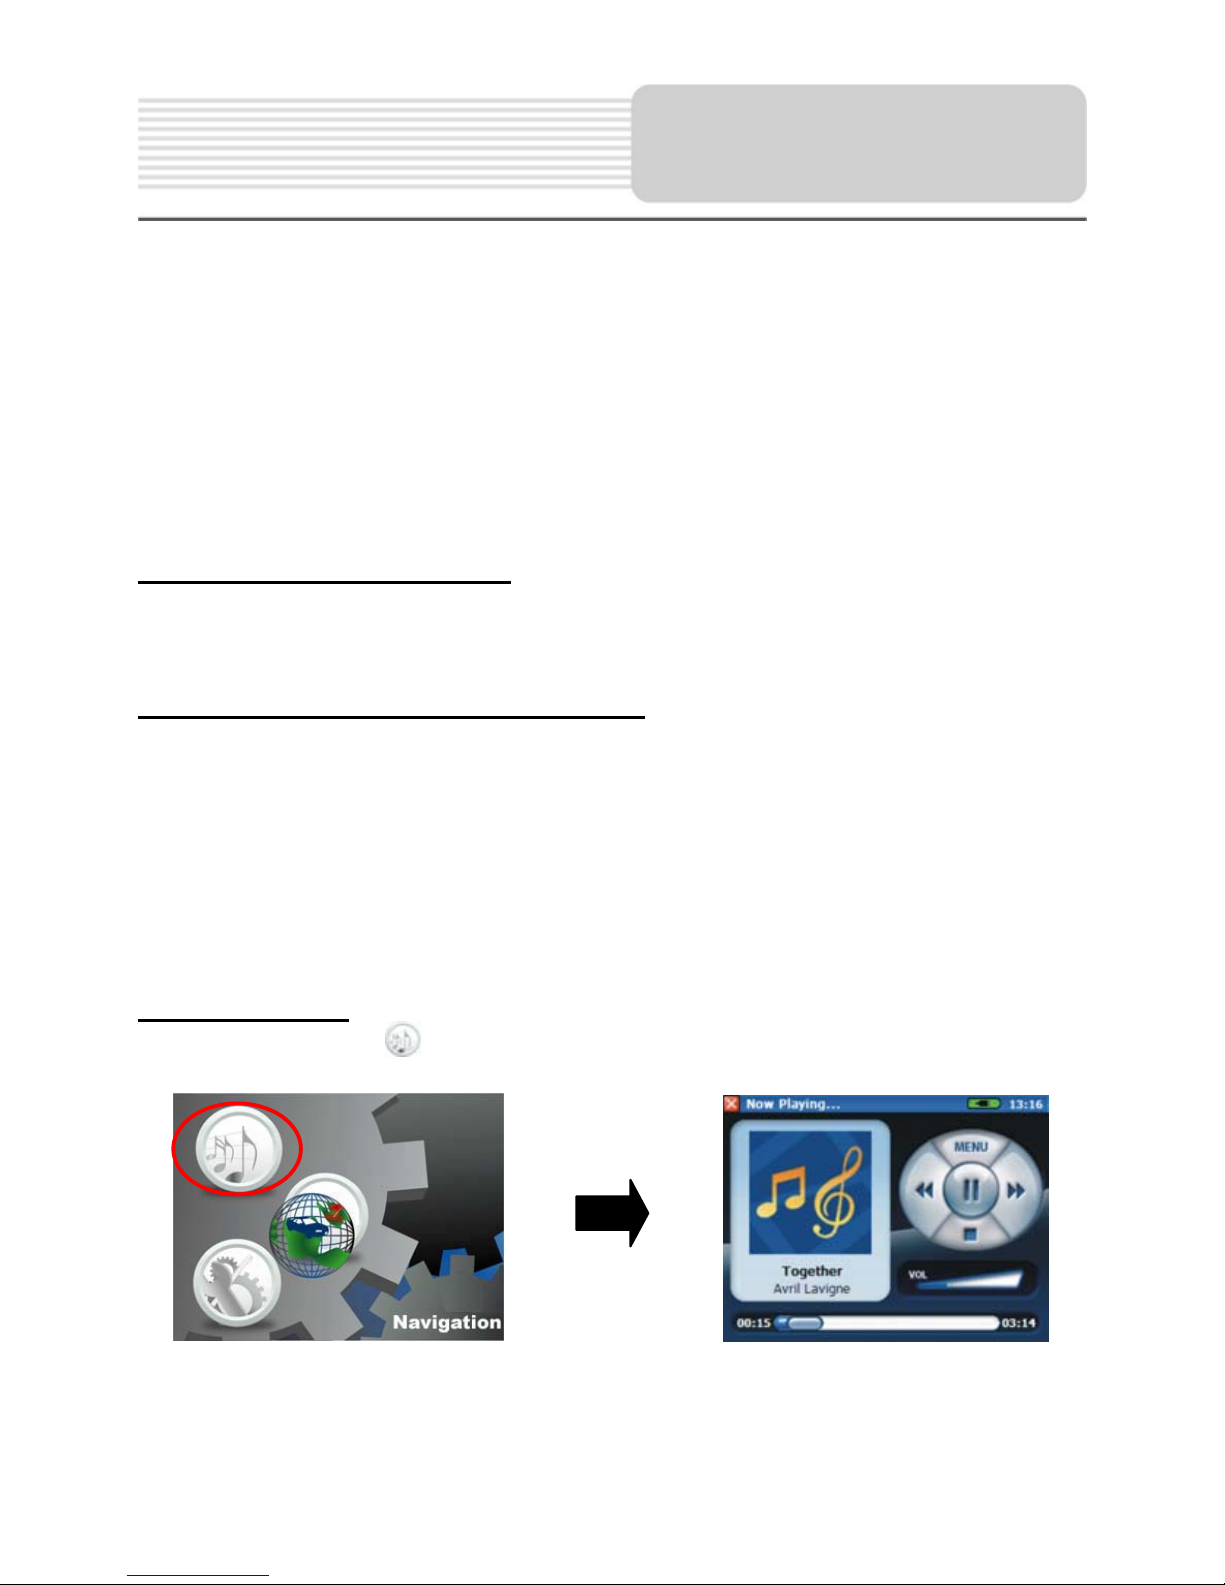
Playing Music.
In the main menu, tap to enter the playback menu, as shown below:
In the MP3 player, press the MENU button on the front panel to exit.
Playing Music
Page 18
18
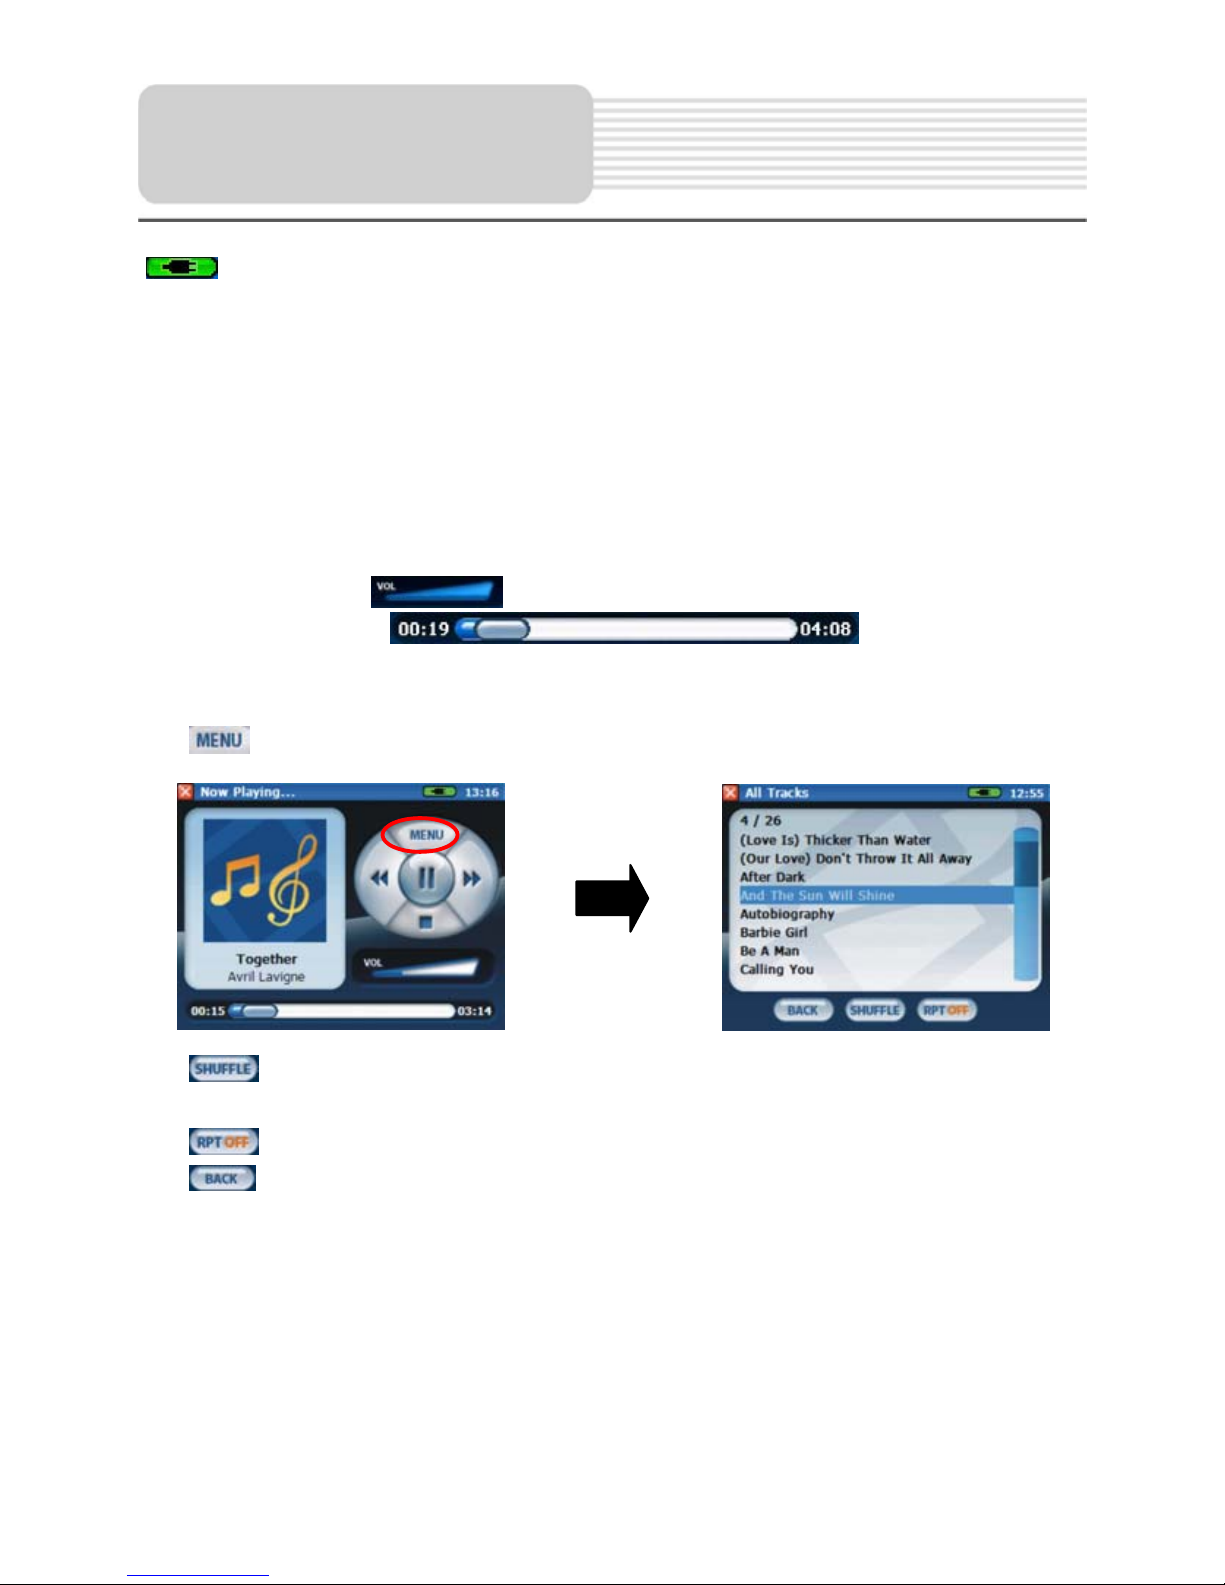
“
” displays the battery status.
Tap to begin to play the music.
During playback, tap to pause the playback and the mark will change to , tap it
again to resume.
During playback, tap to stop the playback and tap to play from the beginning of the
track.
During playback, tap to go to the beginning of the current track; tap twice to go to
the previous track.
During playback, tap to go to the next track.
During playback, tap
to adjust the volume.
During playback, tap
to select the track
time.
Tap
to enter the menu as shown below:
Tap
to activate or close this function. When this function is activated, the player
will play the music in random order.
Tap
to cycle through the repeat modes: track, all or off.
Tap
to return to the previous menu.
Playing Music
Page 19

19
When using the unit in vehicle, you can use the supplied mount accessories (mount
bracket, mount cradle and dashboard mount disk) to mount the uni t in the vehicle. Take
the following steps to operate:
1. To mount the bracket to the vehicle:
To mount to windshield:
1) Lift the suction cup lever.
2) Press the suction cup to the windshield.
3) Press down the suction cup lever.
To mount to dashboard, you can use the included adhesive disk:
1) Choose a clean, dry spot on your dashboard
2) Peel off protection liner from the back of the disk.
3) Attach the disk to your dashboard.
4) You can according to the steps to mount to windshield to mount the
bracket to the adhesive disk.
2. To mount the unit to the bracket and cradle:
1. See Fig. 1 to slide the mount cradle onto the end of the mount bracket.
2. See Fig. 2. According to the arrow 1 to set the bottom edge of the unit onto the
mount cradle. Then push the tap at the top of the mount cradle in arrow 2 direction
to mount the unit to the mount cradle. To remove the unit, push the tap at the top of
the mount cradle in arrow 2 opposite direction.
Use of the Mount
Accessories
Page 20
20
Take steps described in the tables below to solve simple problems before contacting
customer service.
If you suspect something wrong with this unit, immediately turn the power off and
disconnect the power connector from the unit. Never try to repair the unit yourself
because it is dangerous to do so.
Other possibilities:
Static or other external interference may cause the unit function abnormall y. In order to
recover normal status, please unplug the power supply cord and then plug it into the
outlet again to reset the unit. If the problems still exist, please cut off the power supply
and consult your service center or the qualified technician.
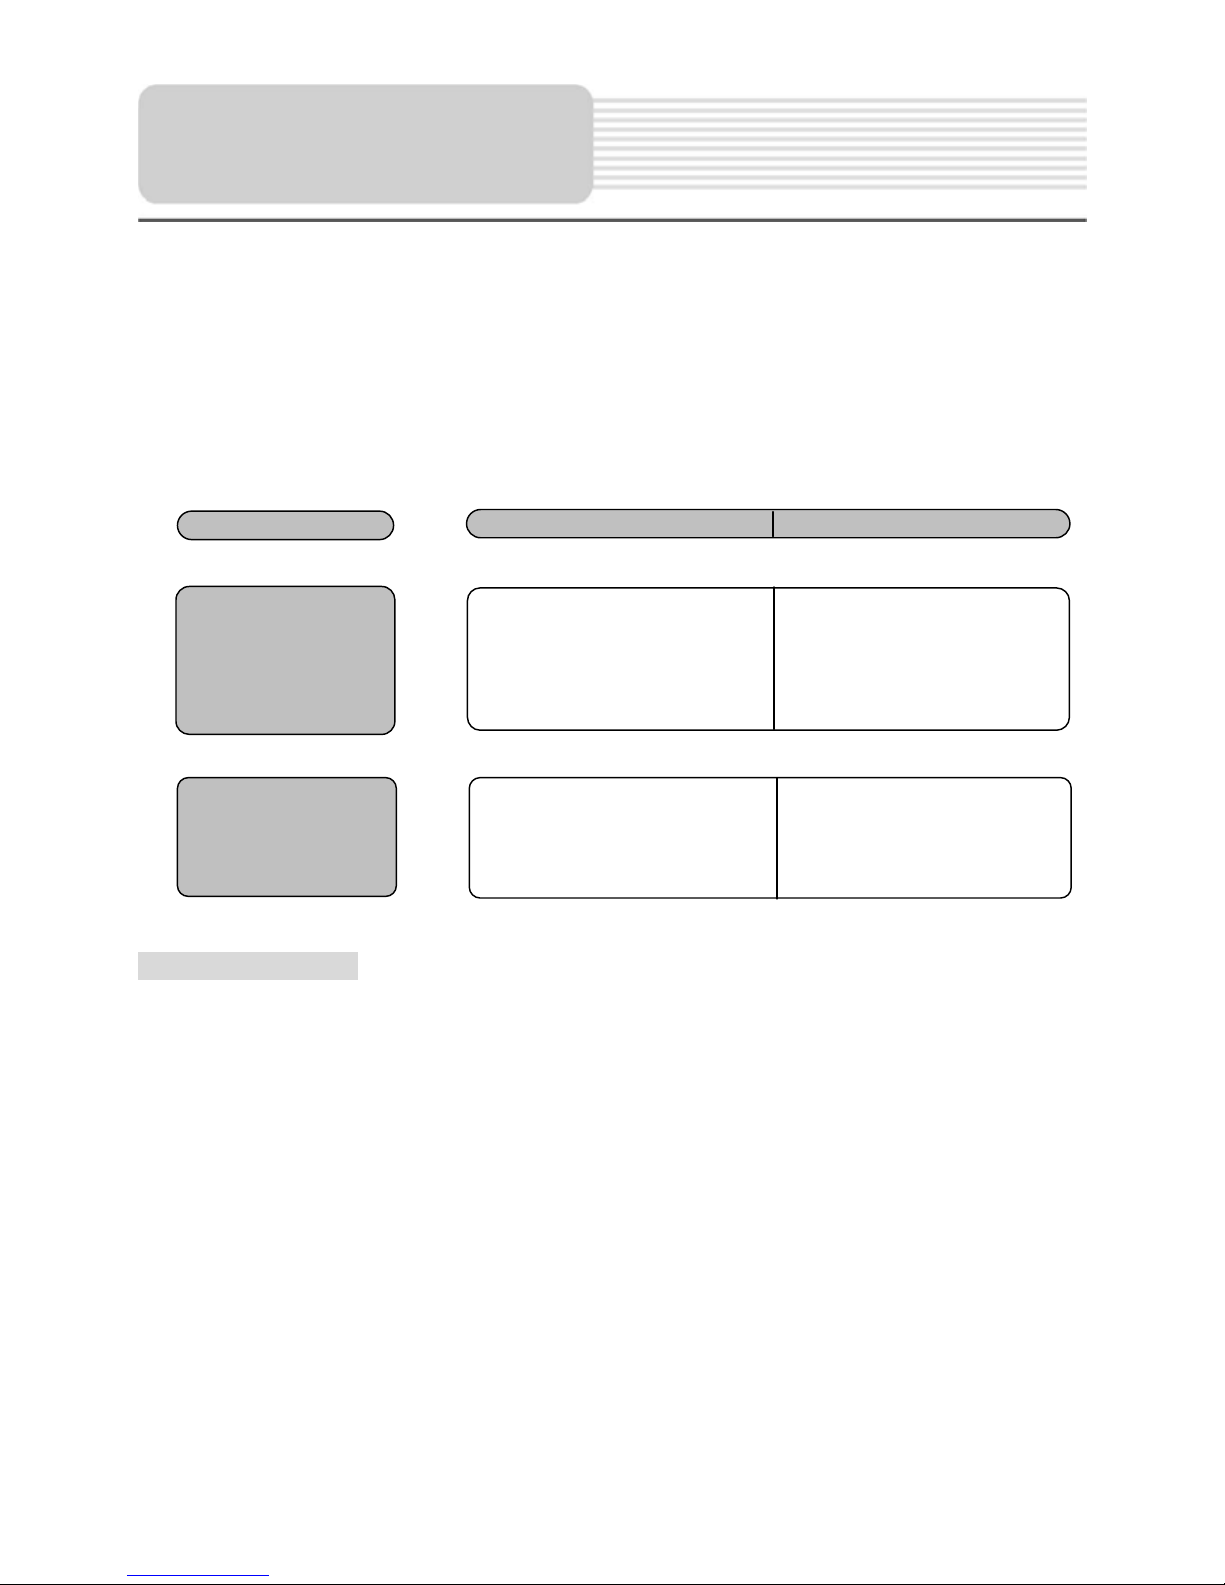
PROBLEM
POSSIBLE CAUSE
POSSIBLE SOLUTION
There is no sound
The volume may be turned
down.
Turn up the volume.
There is no picture.
The brightness may be
turned down.
A
djust the brightness of the
LCD.
Troubleshooting
Page 21

21
DESIGN AND SPECIFICATIONS ARE SUBJECT TO CHANGE WITHOUT NOTICE
TFT screen size 3.5 inches
Frequency Response
20Hz~20kHz
Audio Signal-to-noise Rate
≥65dB
Audio distortion or noise
≤-20dB (1kHz)
Channel Separation
≥70dB (1kHz)
Dynamic Range
≥80dB (1kHz)
Power
AC 100-240V ~ 50/60Hz
Power Consumption < 8W
Dimensions 129mmX75mmX32mm (L*W*D)
Weight About 0.25kg
Specifications
Page 22

26
© 2008 Nextar (Hong Kong) Limited. Nextar is a trademark and service mark of Nextar
(Hong Kong) Limited. All other brand names, trademarks and service marks are property
of their owners.
Nextar may find it necessary to modify, amend or otherwise change or update this
manual.
We may reserve the right to do this at any time, without any prior notice.
All specifications and features are subject to change without notice.
www.nextar.com
Or write us at:
Nextar Inc.
1661 Fairplex Dr.
La Verne, CA91750
USA
 Loading...