

Page 1
Page 2

TABLE OF CONTENTS
Introduction.........................................................................................................................................................................................................................1
Important Safety Precautions............................................................................................................................................................................................2
Features ..............................................................................................................................................................................................................................3
Location of Controls...........................................................................................................................................................................................................4
Getting Started....................................................................................................................................................................................................................6
Playing Photos....................................................................................................................................................................................................................6
Overview of display..........................................................................................................................................................................................................6
Viewing thumbnails..........................................................................................................................................................................................................7
Browsing a single photo...................................................................................................................................................................................................7
Running a slideshow........................................................................................................................................................................................................8
Managing Files....................................................................................................................................................................................................................8
Question/Troubleshooting...............................................................................................................................................................................................10
Specification ..................................................................................................................................................................................................................... 11
FCC Compliance...............................................................................................................................................................................................................12
-i-
Page 3

Introduction
Congratulations on your purchase of this Digital Photo Frame.
Before operating this unit, please read this manual thoroughly and keep it for future reference.
This manual will help you use all of the exiting features to make your Digital Photo Frame view more enjoyable.
The Digital Photo Frame is compatible with most popular memory card types on the market, including SD, MMC and MS, which enables you
to view the digital photo directly from your camera’s memory card.
This manual contains important safety information and correct operation instructions. Read the manual carefully before you use the Photo
Frame in order to avoid any confusion.
-1-
Page 4

Important Safety Precautions
Always follow these basic safety precautions when using your Digital Photo Key Chain. This will reduce the risk of product damage and
personal injury.
y Warning: To reduce the risk of electric shock, do not remove the cover or back. There are no user-serviceable parts inside. Refer
serving to qualified personnel.
y Warning: To prevent fire or electric shock hazard, do not expose the unit to rain to moisture.
y Keep the Digital Photo Frame away from direct sunlight and heat source such as radiators or stoves.
y Do not block the ventilation openings. Slots and openings on the unit are provided for ventilation. The openings should never be
blocked by placing your Digital Photo Frame on a cushion, sofa or other similar surface.
y Do not place the Digital Photo Frame on unstable card, stand, tripod, bracket or table. The unit may fall, resulting in possible
damage or injury.
y Never place heavy or sharp objects on the LCD panel or frame.
y Only use the power adapter included with the Digital Photo Frame. Using any other adapter will void your warranty.
y Protect the power cord from being walked on or pinched particularly at plugs, receptacles and the point where the cord attached to
the Digital Photo Frame.
y Unplug the power from the outlet when the unit is not in use.
-2-
Page 5

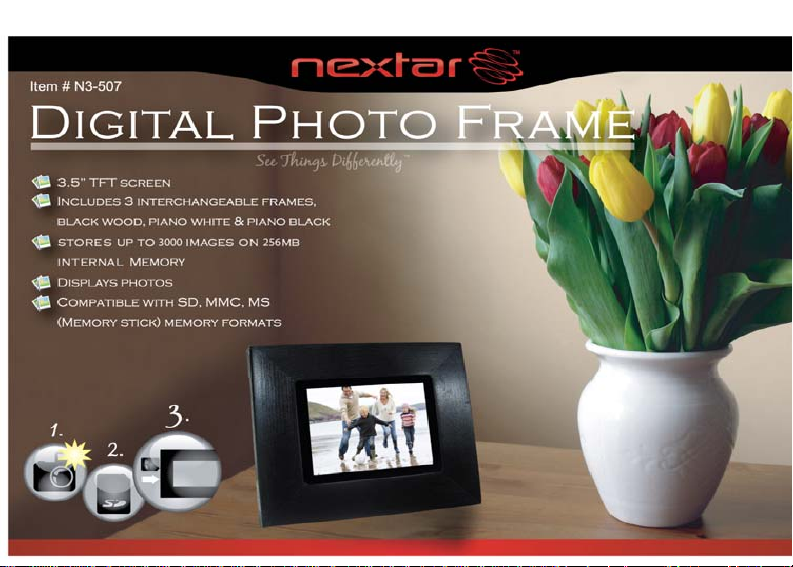
Features
y Shows sharp photos on a 3.5 inch LCD display
y Compatible with SD, MMC and MS memory cards
y Display photos from memory cards
y Renders in a smooth and clear resolution of 320x240 pixels
y 256M SLC Nand Flash memory stores up to 3000 photos
y Offers a variety of display features, including slide show mode and manual mode
-3-
Page 6

Location of Controls
Front View Top View
1. LCD display screen
2.
3. - Press to move the cursor down in thumbnails mode; or select next photo in single view mode; or move the cursor left in the
4. – Press to move the cursor up in thumbnails mode; or select previous photo in single view mode; or move the cursor right in the
5. - Press to return to the previous screen. Press and hold to display the firmware version.
6. - Press to confirm the selection or zoom in the photo. Press and hold to rotate the photo.
- Press once to start slide show; or move the cursor right in thumbnail mode. Press and hold to turn on or turn off the screen.
menu.
menu.
-4-
Page 7

Left Side View Right Side View
7. USB Port - Connects to a computer through a USB cable or to an electronic socket through the power adaptor.
8. Memory Card Slot - Used for inserting an SD/MMC/MS card.
9. Magnetic Stand - This adjustable arm supports the unit on a stable top or other flat surface.
-5-
Page 8

Getting Started
1. Install the magnetic stand for tabletop display or prepare a mount on the wall.
2. Power on the unit by either:
y Connecting it to an electronic socket through the provided power adapter
y Connecting it to a computer through the provided USB cable.
3. If there are photos in the internal memory of the frame, follow the steps below to view a slide show; If there are no photos in the
internal memory, please insert a memory card into the card slot on the right side of the unit (with the card’s metallic contacts facing
towards the display screen).
4. Press the [©] and [ª] button to select Play Photos on the main screen and press the [
] button to enter the photo view mode.
Playing Photos
Overview of display
While viewing the photos, you can press the buttons on the back of unit to
display the photos in thumbnails mode, slideshow mode or single show
mode.
Note: To turn off the display screen and enter power saving mode, press and
hold the [
] button.
-6-
Page 9

Viewing thumbnails
1. Press the [©] and [ª] button to select Play Photos on the main screen, and press the [ ] button. The photos appear on the
screen as thumbnails (3 rows x 3 columns).
2. To navigate through the thumbnails, press the [ ], [©] and [ª] buttons.
3. To view a single photo, select it and press the [ ] button.
4. To return to the main screen, press the [ ] button.
Note: If a memory card (SD/MMC/MS) is inserted into the card slot, the photos on the memory card will be displayed on the screen in
thumbnails. If not, the photos on the Nand Flash of the Digital Photo Frame are displayed.
Browsing a single photo
1. In thumbnail mode, select a photo you want to display, and press the [ ] button. Or in Slide Show mode, press the [ ] button.
y To display the previous or next photo, press the [©] and [ª] button.
y To rotate the photo 90°counter-clockwise, press and hold the [ ] button.
y To zoom in the photo to 2X/3X/4X, press the [ ] but ton repeatedly. When the photo is magnified, press the [ ], [©],
[ª] and [
] button to roam on the photo.
2. To start slide show from the current photo, press the [ ] button.
3. To return to the main screen, press the [ ] but ton.
-7-
Page 10

Running a slideshow
While browsing a single photo, press the [ ] button to start slideshow from the current photo.
y To set the interval between slides, press the [ ] button repeatedly. Each time the [ ] button is pressed, the interval
settings are changed as follows: TIME 3S, TIME 5S, TIME 10S, TIME 1M, TIME 10M, TIME 30M.
y To stop slideshow and return to the thumbnail mode, press the [ ] button.
Managing Files
There is a Nand Flash with 256M memory of the Digital Photo Frame. You can copy the photos from the memory card to the Nand Flash, or
delete the photos on the Nand Flash.
Press the [©] and [ª] button to select Manage Files on the main screen, and press the [ ] button. The File Manage menu appears.
To copy photos one by one
1. Press the [©] and [ª] button to select Copy One, and press the [ ] button. The photos on the memory card appear on the
screen in thumbnails.
2. Press the [ ], [©] and [ª] buttons to select a photo you want to copy and press the [ ] button. Wait for the processing is
completed until the “SAVE OK” message appears.
3. To copy more photos one by one, repeat the step 2.
-8-
Page 11

To copy all photos once
Press the [©] and [ª] button to select Copy All, and press the [ ] button. Wait for the Digital Photo Frame to complete the processing
until “All OK” message appears.
To delete all photos
Press the [©] and [ª] button to select Delete All, and press the [
deleted.
To delete phot os one by one
1. Press the [©] and [ª] button to select Delete One, and press the [
in thumbnails.
2. Press the [ ], [©] and [ª] buttons to select a photo you want to delete and press the [ ] button.
3. To delete more photos one by one, repeat the step 2.
] button. All photos on the Nand Flash of Digital Photo Frame are
] button. The photos on the Nand Flash appear on the screen
-9-
Page 12

Question/Troubleshooting
If you have problems in operating your Digital Photo Frame, try to using the following guidance to solve the problem before sending it to the
service center. Even if the problem persists, do not disassemble the unit; just refer the problem to your dealer or service center.
1. What kind of photos does this unit support?
y The Frame will display digital Photos that are stored in the JPEG format, which is the standard format for nearly all digital cameras.
Some cameras allow photos to be stored as TIFF or RAW files as well as JPEG, but only the JPEG format is compatible with the
Frame.
2. What should I do if the system does not respond when the unit is turned on?
y Make sure the unit is properly connected to a power source. If so, turn the unit off, reconnect the power and turn it on again.
3. Why is the memory card not recognized?
y The memory card might be inserted improperly or not pushed in all the way. If the card is inserted in the right direction and is still not
recognized, turn off the unit, remove and reinsert the card, and start again.
-10-
Page 13

Specification
Digital TFT LCD
Display
SLC Nand Flash
Power Supply
Supported peripheral
devices
Supported photo format
Operating temperature
Dimension
Weight
This manual was correct and complete at the time of printing. However, specifications and updates can occur at any time without any prior
notice. No part of this manual may be copied, republished, reproduced, transmitted, or distributed in any way without the prior written
consent of Nextar, Inc. Any unauthorized distribution of this manual is expressly forbidden.
Panel size: 3.5 inches
Resolution: 320*240 pixels
256M
Input: 100~240V AC, 50/60Hz
Output: 5V 0.5A DC
SD™ (Secure Digital Card), MMC™ (MultiMedia Card), MS™ (Memory Stick)
JPEG
℃
~ 35℃
5
115* 99* 20mm
170 g
-11-
Page 14

FCC Compliance
This device complies with Part 15 of the FCC Rules. Operation is subjected to the following two conditions: (1) This device may not cause
harmful interference, and (2) this device must accept any interference received, including interference that may cause undesired operation.
Note:This equipment has been tested and found to comply with the limits for a Class B digital device, pursuant to Part 15 of the FCC Rules.
These limits are designed to provide reasonable protection against harmful interference in a residential installation. This equipment
generates uses and can radiate radio frequency energy and, if not installed and used in accordance with the instructions, may cause harmful
interference to radio communications. However, there is no guarantee that interference will not occur in a particular installation. If this
equipment does cause harmful interference to radio or television reception, which can be determined by turning the equipment off and on,
the user is encouraged to try to correct the interference by one or more of the following measures:
1.Reorient or relocate the receiving antenna. 2. Increase the separation between the equipment and receiver. Connect the equipment into an
outlet on a circuit different from that to which the receiver is connected. 3. Consult the dealer or an experienced radio/TV technician for help.
-12-
Page 15

Nextar™ is a trademark of Nextar (Hong Kong) Limited
Nextar may find it necessary to modify, amend or otherwise change or update this manual. We reserve the right to do this at any time,
without any prior notice. All specifications and features are subject to change without notice. All screen shots shown are simulated and
may not represent the actual screen on production units sold to consumers.
For instruction manuals, updated drivers or other information, be sure to visit our website at:
www.Nextar.com
Or write us at:
©Nextar,INC.AND ITS AFFILIATES
1661 FAIRPLEX DRIVE.
LA VERNE, CA 91750. USA
All products distributed by Nextar,Inc.unless otherwise indicated
Made in China
© 2005 Nextar (Hong Kong) Limited. Nextar (Hong Kong) Limited claims trademark rights in Nextar
and trademarks are the property of their registered owners.
TM
. All other brand names, product names
-13-
 Loading...