

Page 1
Page 2

.................................................................................................................................................. 1 Instructions
................................................................................................................................................. 2 Precautions
................................................................................................................................................. 5 Introduction
Operation in
Table of Contents
.................................................................................................................................. 4 System requirements
............................................................................................. 4 System Requirement of MP3 Player:
......................................................................................................................................... 5 Features
...................................................................................................................... 6 Charging the Battery
........................................................................................................ 7 Connection and Downloading
.............................................................................................................................. 7 Connect to PC
.......................................................................................................................... 7 Downloading files
........................................................................................................... 8 Downloading DRM10 Files
.............................................................................................................. 12 Remove from USB Port
......................................................................................................................................... 14 Basic Operation
......................................................................................................................................... 14 Buttons
.................................................................................................................... 15 Power On/Off Player
........................................................................................................................... 15 Reset the Player
............................................................................................................... 15 Operation in Main Menu
I
Page 3

16 Submen………………………………………………………………………………………………….
...................................................................................................................... 17 How to Use the MP3 Player
.................................................................................................... 17 Operation in Music/Voice Mode
.............................................................................................................19 Operation in Movie mode
............................................................................................................. 20 Operation in Photo Mode
........................................................................................................... 20 Operation in E-Book Mode
............................................................................................................ 21 Operation in Delete Mode
............................................................................... 22 Operation in Voice Record/FM Record Mode
................................................................................................................................23 Setting Up the Player
.................................................................................................................................... 23 USB Mode
............................................................................................................................................. 23 Ti me
........................................................................................................................................... 23 Power
..................................................................................................................................... 24 Language
......................................................................................................................................... 24 Display
.......................................................................................................................................... 24 Record
...................................................................................................................................... 24 Sys Tools
..................................................................................................................................... 25 Hold Time
....................................................................................................................................................25 Warnings
II
Page 4

.................................................................................................................................. 25 Low Battery
.......................................................................................................................................... 25 No File
.................................................................................................................................. 25 Key Locked
................................................................................................................................... 26 Device Full
........................................................................................................................................ 26 Troubleshooting
............................................................................................................................ 27 Technical Specifications
III
Page 5

Instructions
(1) We try to ensure the correctness and completeness of this manual, but mistakes and omissions may
still exist.
(2) Our company is not responsible for any data loss caused by malpractice of software, wrong repair or
other accident, or any other indirect loss which may occur.
(3) Revision to the software or hardware or user’s manual is not subject to further notification, and our
company reserves the final interpretation right to this manual.
(4) Do not press on the surface of the screen or use the buttons with undue force, so as to avoid damage
to the player.
1
Page 6
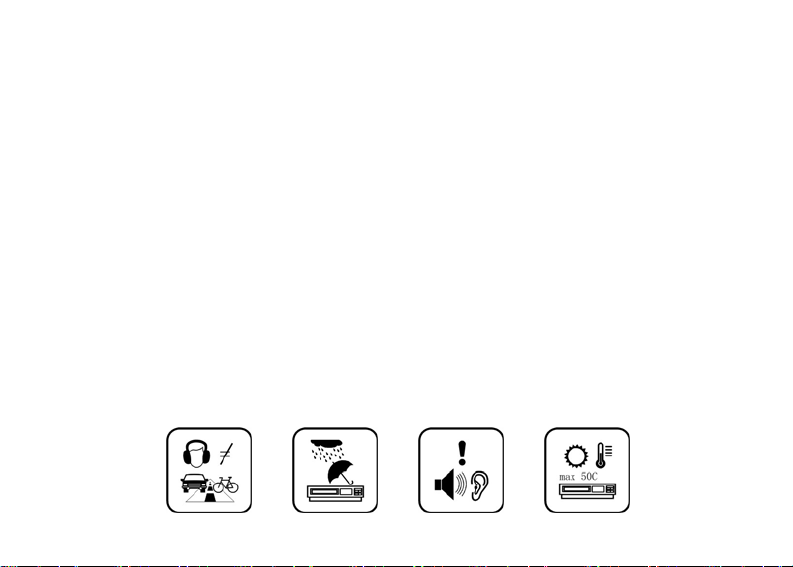
Precautions
(1) Do not use this player when driving, riding or operating any other vehicles as it may lead to traffic
accidents. Also avoid walking on the road while listening with high volume. Please pay special
attention or stop using the player in places with potential hazards.
(2) Before powering off the player, please plug in the earphone. This will help to prevent damage to the
earphone as well as the player. Turn off the player when you are not using it.
(3) Keep the player clean. Do not place it near a heat source or in direct sunlight. Keep it out of dusty, or
damp places.
(4) If the surface of the player becomes dusty, clean it with a soft, slightly dampened cloth. Do not use
alcohol or diluted detergent.
(5) Do not use the player in extremely dry conditions so as to avoid electrostatic discharge.
(6) Please make sure that the player will not be disconnected during formatting or uploading and
downloading so as to avoid program mistakes.
(7) When the player is used as mobile disk, make sure to read and write files using correct methods.
Misuse may lead to the loss of data, for which the company cannot be held responsible.
(8) As the software provided by the original equipment manufacturer has the optimum flash storage
speed, all players with memory less than 128MB cannot be formatted as FAT-32 in the operating
system.
2
Page 7

Attention: Because of the different memory calculating methods and the fact that the player software is
stored in the device’s flash memory, there is some difference between the player’s stated capacity and its
actual capacity. The actual capacity of the flash memory can be somewhat less than the stated memory
capacity. This is normal. Because the firmware takes up a certain amount of space in the device’s flash
memory, and depending on the size of the memory, the player will have different flash memory capacity.
Please refer the table below for more details.
512MB 488MB~512MB 417MB~511MB
Stated
capacity
128MB 122MB~128MB 69MB~127MB
256MB 244MB~256MB 185MB~255MB
1GB 953MB~1000MB 858MB~999MB
2GB 1907MB~2000MB 1765MB~1999MB
4GB 3815MB~4000MB 3577MB~3999MB
Real capacity range
Free capacity range after
firmware is installed
3
Page 8

System requirements
System Requirement of MP3 Player:
Microsoft ® Windows 98SE/2000/ME/XP
CPU series with Pentium 200MHZ or above
USB port
120MB hard disk free space
CD-ROM driver
4
Page 9

Introduction
Features
(1) Supports formats such as MP3 WMA WAV MTV JPEG BMP TXT.
(2) Movie format: MTV.
(3) Photo preview: JEPG BMP;
(4) E-book: .TXT
(5) Voice record/ FM record
(6) ID3 tag/Lyrics display
(7) 1.8” TFT color display
(8) Rechargeable battery(310HA)
(9) Support DRM10
5
Page 10

Charging the Battery
This product uses a built-in rechargeable Lithium-ion battery. You can connect the MP3 player to your PC
or use the USB adapter (if any) to charge the battery.
A battery icon will be displayed in the upper right corner of the screen. The following pictures indicate
the charging status of the battery:
(1) When the battery is charging, the icon will switch between an empty battery to a full one to indicate
the process: . Æ
(2) When the battery is finished, and is fully charged, the icon will look as follows:
(3) The player will automatically shut off when the battery is dead and needs to be recharged. In this case,
all settings will be saved.
(4) Power saving mode: user can define the time off mode, such as stop off, sleep off, or backlight off to
save power.
Note: The MP3 player only accepts the standard USB 2.0 output voltage and current to charge the built-in
Lithium-ion battery. USB provides 5 Volts and up to 500 mA of current. If the charging voltage and current
are outside of this range, it will damage the battery and the MP3 player, and the warranty will be voided.
Please verify the output voltage and current of the USB port on your PC or USB adapter before charging
this player. If you find that the screen of the player is blinking when using the USB wall adapter, please use
the PC USB port to charge the player instead of the USB wall adapter.
6
Page 11

Connection and Downloading
Connect to PC
Plug the attached USB cable into your PC and connect the other end to the MP3 player.
Press Play/ to switch the USB mode between MSC mode and MTP mode.
Downloading files
When you have connected the player to your PC, select the desired files then right-click and select Copy.
You can now paste them into the player by right-clicking on the player and selecting Paste.
7
Page 12

Downloading DRM10 Files
(1) Choose the desired WMA files with DRM.
8
Page 13

(2) Right-click and select Add to sync list.
(3) In the open window, select Sync option.
9
Page 14

(4) In the Sync window, choose the desired WMA files with DRM, then right-click and select Removable
disk.
10
Page 15

(5) Click Start sync to transfer the WMA files with DRM to player.
11
Page 16

Remove from USB Port
(1) Double-click the eject icon to safely disconnect your
player from the PC.
(2) In the Safely Remove Hardware dialog, click
Stop.
12
Page 17

(3) In the Stop a Hardware
device dialog, click OK.
(4) When the screen displays the Safe to Remove Hardware balloon in the bottom right corner, the
player can be safely disconnected from PC.
13
Page 18

Basic Operation
Buttons
15Play/button 7 FUNC button
2 V+ button 8 RESET
3 V- button 9 Microphone
4 Previous button 10 Earphone jack
Next button 11 USB port
6 Power button
14
Page 19

Power On/Off Player
) Press and hold the Power button for about 2 seconds to turn on the player when the player is off,
(1
) Press and hold the Power button for about 2 seconds to turn off the player when the player is on.
(2
eset the Player
R
With a pen, press and hold the
RESET button to reset the player; the player will shut itself off.
Operation in Main Menu
A. Press Previous or Next to navigate between the m
B. Press Play/to c
15
onfirm the selection.
enu options.
Page 20

Operation in Submenu
A. Press V+ or V- to navigate between the options.
B. Press Previous to return to the parent menu.
. Press Next to enter to the submenu and confirm a selection.
C
. Press and hold the Pl ter the Main menu.
D ay/button to en
16
Page 21

How to Use the MP3 Player
Operation in Music/Voice Mode
17
Play mode
Vol ume
Spectrum
Sample rate
Code time
Music mode interface
Key lock
Battery
ID3/Lyric
File type
EQ
Track number/Total tracks
State indicate
Current mode
Track duration
Page 22

Play mode
Key lock
Vol ume
File name
Spectrum
Bit rate
Sample rate
Code time
Voice mode interface
Battery
File type
EQ
Track number/Total files
State indicate
Current mode
File duration
18
Page 23

A. Press Play/ to change m
to exit FM mode and open th
. Press V+/V- to adjust the volume. Press and hold V+/V- to adjust the volume quickly.
B
. Press Previous/Next to choose stations which have been saved in the Preset mode or to adjust the
C
frequency in the Manual mode. Press and hold Previous/Next to choo ations quickly in the
Preset mode or change to auto scan in the Manual mode.
. Press the Power button to enter to the FM Record mode.
D
. Press FUNC to enter its submenu.
E
peration in Movie mode
O
ode between the Preset and Manual mode. Press and hold Play/
e main menu.
se st
A. Press Play/to pause or resume playback. Press and hold Play/ to stop the player and open
the main menu.
F. Press V+/V- to adjust the volume. Press and hold V+/V- to adjust the volume quickly.
B. Press Previous/Next to skip to previous/next movie. Press and hold Previous/Next to fast
backwards or forwards.
C. menu.
Press the Power button to stop the movie and enter its sub
19
Page 24

Operation in Photo Mode
A. Press and hold Play/ to open the main menu.
Press V+/V- to skB. ip to the previous/next photo.
C. Press Previous/Next to enter its submenu which shows the folder contents.
D. Press the Power button to enter its submenu which shows the folder contents.
E. submenu which contains slide show and manual scan.
Press FUNC to enter its
Operation in E-Book Mode
A. Press V+/V- to turn over the E-book by
B. Press Previous/Next to turn over the E-book by pa
C. Press and hold Play/ to open the main me
D. Press the Power button to enter its submenu.
row.
nu.
ge.
20
Page 25

Operation in Delete Mode
Press FUNC to open delete dialog like rights in delete
submenu.
A. Press V+/V- to choose “Yes” or “No”.
B. ess Previous to return to the Delete submen Pr u.
C. Press Next to confirm your selection.
D. Press and hold Play/ to open the main menu.
21
Page 26

Operation in Voic Record/FM Recorde Mode
A. Press Play/ to pause or resume recording.
B. Press the Power button to stop recording.
Vol ume
Bit rate
Sample rate
Time code
Key lock
Battery
File name
File type
Current mode
State indicate
22
Page 27

Setting Up the Player
ou can set up your player via the settings menu, where you can change your settings for things such as
Y
SB Mode, Time, Power, Language, Display, Record, Sys Tools, Hold time, etc.
U
USB Mode
here are two options to select from: MSC mode, MTP mode.
T
Time
here are two options to select from: Adjust, Time Zone.
T
djust allows you to set the current time, and Time Zone lets you select the time zone you are in.
A
Power
There are two options to select from: Auto off, A
Auto off means that the player will automatically turn itself off when it has been idle for several minutes.
Always on means that the player will always remain on.
lways on.
23
Page 28

Language
There are seven languages to select from: English, French, German, Italian, Spanish, Portuguese and
Dutch.
Displa
There are two options to select from: Brightness, Backlight.
Brightness allows you to adjust the brightness of your screen.
Backlight a
attempting to save battery power.
y
llows you to turn on and off your backlight. Turning the backlight off is useful when you are
Record
This field can set the quality of recording files.
Sys Tools
re five options to select from: Delete, Format, Reset, Sys Info, and Delete Lic.
There a
24
Page 29

Hold Time
There are six options to select from: 10 sec, 30 sec, 1 min, 5
min, Off.
Warnings
Low Batter
Low battery will be displayed on the screen to remind you when you need to charge the player.
No File
No File will be displayed on the screen if there is no corresponding file in the player.
Key Locked
the key locked function is activated, pressing the buttons will have no effect.
If
o unlock the player, press and hold Play/for about 2 seconds.
T
25
y
Page 30

Device Full
When the player me
mory is full, Device full will be displayed on the screen.
Troubleshooting
If there is no picture displayed after the player is connected to your PC but is unable
storage disk or cannot be powered on after the battery is fully charged, please refer to
update the software
(1) Download th
implement the Setup.exe files in the folder to complete the installation.
(2) Press and hold V- and then plug in the USB cable.
(3) Implement the newly updated software by clicking on Start Software Upgrade and then releasing the
V- button.
(4) The software upgrade may format the player, so before upgrading the player’s software, remember to
copy all files on the player to your PC first.
) If the software upgrade program cannot detect the player, please unplug the USB cable and repeat
(5
steps (2) and (3) until the player is detected and the software upgrade is completed.
in the player.
e most updated software from the attached CD (if any) or from the website (if any) and
to be used as a
the following steps to
26
Page 31

Technical Specifications
MP3 bit rate 32Kbps~320Kbps Screen 1.8” TFT color display
Music format MP3 WMA WAV Battery Rechargeable
battery(310HA)
Photo format JEPG BMP Battery life 8 hours
Movie format MTV USB port USB2.0 High speed
E-book format TXT Frequency response 20Hz~20KHz
Recorded format WAV Distortion <0.05%
Maximum record 8hours(128M,8KHZ) Output power 5mW *2
duration
Dynamic current <70m A File-saving conditions Humidity <90%, Normal
temperature
Power off current <0.38 m A Working environment Humidity <85%,-10~40℃
dimension 77*40*11.5mm S/N >85
Weight 35g Dynamic range >80db()
27
Page 32

Th i s d e v i ce c o m p l i es w i t h p a r t 15 s u b p a r t B of t h e F C C R u le s . O p e r at i o n i s
su b j e c t t o th e f o l l o wi n g t w o c o nd i t i o n s:
(1 ) T h i s d e vi c e m a y n o t ca u s e h a r mf u l i n t e rf e r e n c e, a n d
(2 ) T h i s d e vi c e m u s t a cc e p t a n y i nt e r f e r en c e r e c e iv e d . i n c lu d i n g
in t e r f e re n c e t h a t ma y c a u s e u nd e s i r e d op e r a t i on .
Modifications not approved by the party responsible for compliance cound void
user's authority to operate the equipment.
Page 33

 Loading...