

Page 1
9721 Smart Phone
User Manual
Contents
i
Page 2

Start using your phone
To Make a call
.....................................................................................................................................
Manage your Contacts
........................................................................................................
..........................................................................................................
To Send/Receive Messages
Set-up your Email Accounts
Using the Internet
The Common Tools
Using the Camera
The Gallery
The Music
..............................................................................................................................................
...................................................................................................................................................
Maps and location
Wireless communication
Setting your phone
.......................................................................................................................
.....................................................................................................................
.........................................................................................................................
........................................................................................................................
...................................................................................................
....................................................................................................................
..........................................................................................
.........................................................................................
1
9
10
11
12
13
14
15
16
17
18
19
21
ii
Page 3
Start using your phone
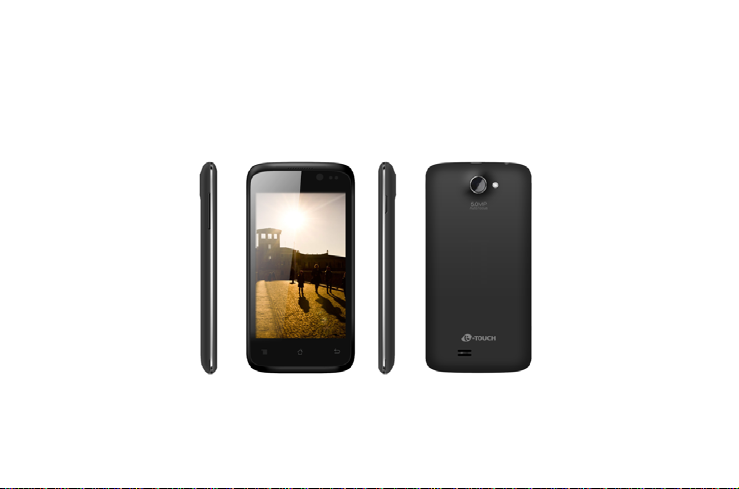
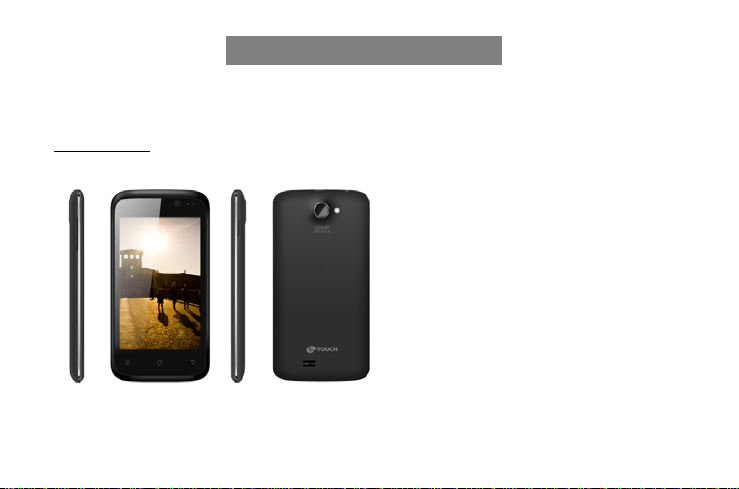
This section provides an overview of the smart phone, including the locations of the connectors and
controls and phone specifications.
Phone Layout
1
Page 4
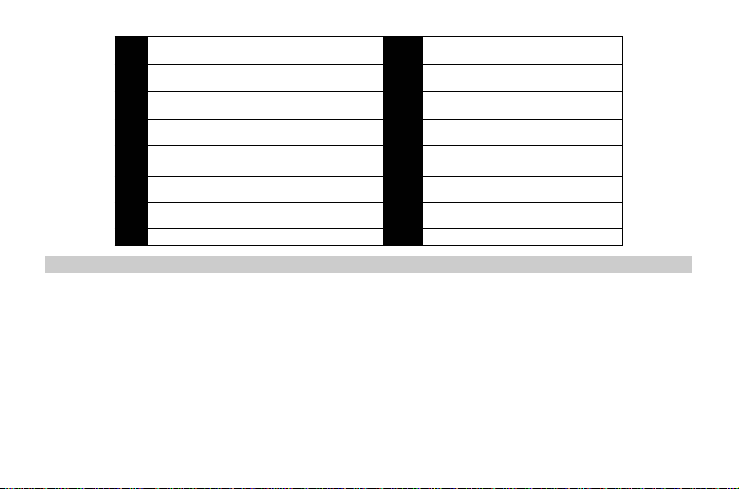
1 HOME 9 2megapixelcamera
2 BACK (Return) 10 Volume up
3 Microphone 11 Volume down
4 Multi-touch screen 12 Micro-USB port
5 MENU 13 Speaker
6 Receiver 14 Power button
7 3.5mm headset jack
Installing the SIM cards
Your Subscriber/Universal Identity Module (SIM) card identifies you to the wireless network. Your
phone will not work without the SIM card.
To install a SIM card, do the following:
1. Detach your SIM card.
2. Open the battery cover on the back of your phone.
3. Lift the battery up and out of your phone.
4. Align the SIM Cards metal contactors with those of the phone.
2
Page 5

Inserting the battery
Open the battery cover on the back of your phone.
1.
Align the battery's contact points with those of the phone and gently press the battery down into
2.
place.
Replace the battery cover clicking it back into position.
3.
Charging the battery
1. Connect the charger to your phone, and plug it into a socket.
2. The battery indicator in the corner of the screen will scroll to show you it’s charging.
3. When fully charged, the battery indicator will stop scrolling.
4. Disconnect the charger from your mobile, and unplug it.
Inserting the Storage card
Remove the back cover.
1.
Insert the Micro-SD card into the slot with its gold contacts facing down and push it into its
2.
place.
Turning on your phone
Once you’ve installed your battery, you can turn on your phone and start using it. To turn on your
phone Press the POWER button.
Turning off your phone
Unlock your phone if the Lock screen is displayed.
3
Page 6

Press and hold the POWER button for a few seconds.
When the Phone options menu appears, tap Power off.
Home
Home screens
Home screens display the status of your phone and provide you with access to applications. By default,
the main Home screen is displayed whenever you turn on your phone or press the Home button.
Extended Home screen
There are five Home screens. Tap a blank area on the screen and slide your finger left or right
horizontally to view the other Home screens.
You can customize the five Home screens to meet your personal preferences. For example, you can
add or remove widgets or applications shortcuts, change the wallpaper and so on.
4
Page 7
Phone status and notifications
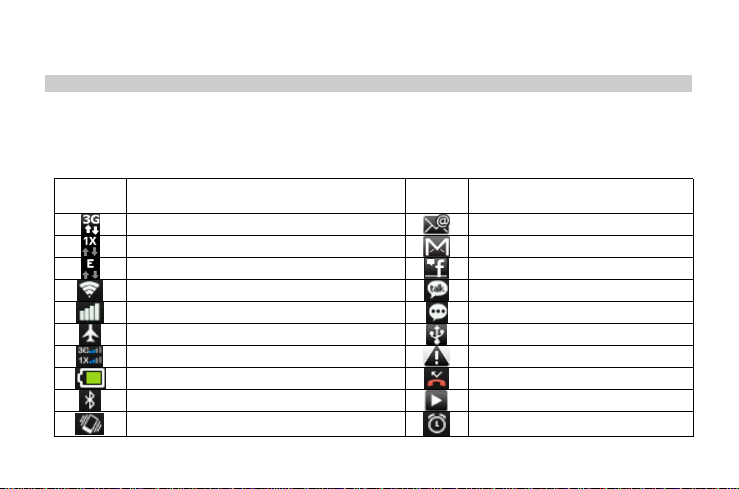
Phone status icons and notification icons
These are the icons that may appear on the phone and notification area of the status bar:
Phone Description
3G data is connected and active New Email message
1x data is connected in idle status New Gmail message
GSM EDGE data service is connected New Facebook message
Wireless connection Wi-Fi is on New Gtalk message
GSM Signal strength New SMS
Flight mode USB mode is connected
WCDMA-1X/3G signal strength General warning notification
Battery level Missed call
Bluetooth is on Music is playing
Vibration mode is activated Alarm is set to on
Notif
y
Description
5
Page 8
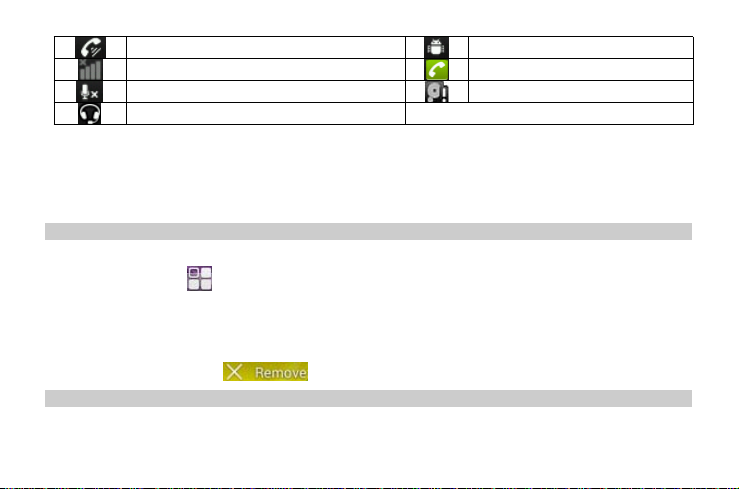
Speaker is on USB debugging mode connected
No signal Call in progress
Microphone is muted Memory is full
Cord headset is connected
Opening the Notifications panel
When a new notification icon displays in the status bar, press and hold the status bar, then slide your
finger downward to open the Notifications panel.
Personalize your phone
Adding icons on your Home screen
1. Press HOME
.
2. Long press the icon on the main interface until it’s enlarged and the mobile phone vibrates.
Delete icons from the main interface
1. Long press the icon on the main interface until it’s removable.
2. Drag the icon into
to delete it.
Wallpaper
You can change the wallpaper by one of the following:
6
Page 9

Press MENU
1.
Or Long press “Home screen” to open the menu “Add to Home Screen”, then choose Wallpapers
2.
,andthentapWallpapers.
You can choose the wallpaper you want from:
Gallery
•
Live wallpapers
•
Wallpapers
•
Video Wallpapers
•
and Select the wallpaper and press “Set wallpaper” to complete.
Copying files to and from the Storage card
1. Connect the phone to your computer using the supplied USB cable.
2. When the Connect to PC dialog box appears, tap strorage, and then tap Done.
3. On your computer, the connected phone is recognized as a removable disk. Navigate to this
removable disk and copy the files.
7
Page 10

To Make a call
You can dial either through the WCDMA or GSM network. You can tap to make call using WCDMA
SIM card or tap
1. Press HOME
2. Choose the required number then tap Call icon of SIM1 or SIM2.
You can make a conference call based on network support for this service by:
Tap add call
•
conference, then press dial icon,
When the second party answer tap “Merge calls”
•
Now you can speak a conference call with all parties.
•
To answer a call, tap the green answer
horizontally to the right to answer the incoming call. To reject a call, tap
the red reject
reject the incoming call. To mute the ringing sound without rejecting the call, Press any VOLUME button.
to make call using the GSM SIM card.
, and then tap the phone icon .
fom in-call options, then enter the second party number you want to add to
.
icon and slide your finger
icon and slide your finger horizontally to the left to
8
Page 11

Manage your Contacts
To view the contacts on your phone do one of the following:
Press the HOME
•
Press the Home key and tap first key
•
Add a new contacts
1. Press HOME
2. On the contact screen, tap menu then select New contact.
3. Select where to save the Contact.
4. Enter the contact information in the fields provided.then tap Done
, and tap Contacts .
, then choose in the top of the screen.
, and then tap Contacts .
To Send/Receive Messages
Press HOME ,andthentapApplications > Messages .
9
Page 12

Red point indicates unread messages in the list.
g
g
g
•
• Tap to open the messa
Messages are listed as threads, each thread shows the messages history of each
•
eandreadthecontent.
sender/receiver.
Sending text and multimedia messages
Sendin
On the All messages screen, tap
atextmessage
on the top of the screen. Or press menu,
then select compose to write a new message.
Fill in one or more recipients then send the messa
ebyWorG.
To receive delivery reports and know when a text message is received, in the
All messages screen, press MENU and then tap Settings. In the SMS settings
section, select the Delivery reports check box.
For sending Multimedia message, you can add a subject line to the new
message by pressing MENU and then tapping Add subject.
To attach file, Press MENU and then tap Attach.TapSend.Pleasemakesure
of the data connection type that will be used for sending the MMS from the
Settings->Wireless & Networks – Mobile Networks.
10
Page 13

Set-up your Email Accounts
1. Press HOME , then tap the applications button.
2. Tap Email icon
your Email has already an account, then after opening the email application press options then
accounts then add account.TapNext.
3. Slide open the display to reveal the keyboard.
4. Type your e-mail address and password to your e-mail account, tap Next to finish setup
automatically and go to your Inbox. For maually setting, please select manual and follow the
instructions.
Send Email messages
While your email application is opened showing your inbox, press the Menu key.
Tap Compose, the keyboard will be displayed. Type a name or e-mail address in the To field.
If you want to add Cc or Bcc addresses, tap +Cc/Bcc.
Type the subject and message. You can attach picture, from the Menu. then tap Send.
Gmail Setup
Your phone can receive messages from your Gmail account by signing in to your phone, you are
automatically set up by signing to your Gmail account to get the different services by Google, such as
syncing your account and contacts, Google play, Gtalk, ..etc. You will be able also to receive your e-
. The Email setup screen appears guiding you through the setup process. If
11
Page 14

mail messages, and there are no additional steps needed to set up Gmail on your phone.
12
Page 15

Using the Internet
Your SMART PHONE phone provides you interent connectivity for the variety of applications and
service. The following are some of the important applications that are used to connect to the internet,
you will find those applications listed on your Applications menu, Press HOME
applications
1- Web Browsing
2- Android Market (Play Store)
3- Social Networks:
button to open it:
: You will find the Web Browser in your applications menu for browsing
Internet web pages.
: Download thousands of applications, games, and media files
from Google play store.
a. Facebook
b. YouTube
c. Google Talk
d. Wechat wiexin
,thentapthe
13
Page 16

The Common Tools
Ag
Alarm clock
To add an alarm, press
To turn on an alarm, tap the check box.
Calendar
Your calendar events can be viewed in different ways:
Tap >
When you tap an event, more details appear.
tap + to enter a new event details.
Calculator
Your calculator has basic and advanced views. To change views, press
Menu > Advance panel/Basic panel. To clear results, press clear button.
Viewing documents
You can browse and edit your different documents such as word file, Excel, PDF, and power point by
using the different available applications for the Android operating system.
enda, Day, Week,orMonth.
>CLOCK >Add alarm, then enter alarm details.
14
Page 17

Using the Camera
Camera Basics
Be sure to plug in your microSD card before you use your phone’s camera.
To open the camera in photo mode and take photos, press HOME
Camera icon
Taking a photo
On the Viewfinder screen, tap the options as follow:
Exposure: Increase or decrease the amount of aperture time.
Zoom: Before taking the photo, you can zoom in first on your subject.
Capturing a video
.
, applications and then tap
On the Viewfinder screen, tap the
to make a video.
15
Page 18

The Gallery
To open the Gallery, press HOME , applications and then tap
Gallery icon
Simply tap an album to view the photos and/or videos in that album.
Viewing photos and videos
After selecting an album, you can browse the photos and videos of that
album either in filmstrip or grid view. Tap a photo to view in full screen.
Watching video
The screen automatically switches to landscape mode when you play a video. Use the onscreen
controls to play, pause, or stop the video. The video is displayed in full screen size.
.
16
Page 19

The Music
V
g
g
You need to copy music files to your storagecardfirsttousetheMusic
application to play music.
To open the Music, press HOME
Music icon
Your music is organized into four categories: Artists, Albums, Songs,and
Playlists.
the phone will play the following music file formats:
Access and play music
In the music application screen,Tap Songs.Youcanalsotap Artists,
Albums,orPlaylists.Tap the song to play.
Add songs to new play list
1. In the Music application screen, Tap Son
2. Tap and hold the son
3. Tap New, the keyboard will open.
.
• MP3,M4A,WAV,AMR,MIDI,OGG
, applications and then tap
orbis
s.
that you want to add to the play list, tapAdd to playlist.
17
Page 20

4. Type the name for the play list.
g
g
g
5. Tap Save.
Maps and location
Using Google Maps
Google Maps lets you track your current location, view real-time traffic
situations (depends on the serviec availability), and receive detailed
directions to your destination.
You need an active mobile data or Wi-Fi connection to use Goo
•
Viewing locations
Turning on location services
BeforeyouopenGoo
interest, you must enable location sources.
1- Press HOME
access.
2- Select Use wireless networks, Use GPS satellites, or both.
Finding your location
• Press HOME
On the Goo
•
le Maps and find your location or search for places of
,applications and then tap Settings > Location
,applications and then tap Maps .
le Maps screen, press MENU
le Maps.
18
Page 21

tap My Location, then Your location will be shown on the map as a blinking blue dot
g
g
k
•
according to the results coming from the .
Wireless communication
Wi-Fi Connection
Your phone can connect to Wi-Fi ntworks. To connect:
1. Press HOME
2. Tap Settin
3. Tap Wi-Fi to turn it on.
4. Tap Wi-Fi settin
5. Tap the Wi-Fi network that you want to connect to.
6. Tap Connect. If the networ
to enter the network lock key.
,applications .
s.
s. Your phone scans for the available Wi-Fi networks.
is secured, then you will be required
19
Page 22

Bluetooth®
Your phone comes with Bluetooth technology, which is a wireless technology
that enables a data connection between your phone and other Bluetooth
wireless devices such as phones, computers and headsets. Prepare a Bluetooth
wireless headset to pair your phone with a Bluetooth headset, make sure that
your headset is fully charged and that you put the headset into pairing mode.
See your Bluetooth headset’s manual for more information.
Turn on the Bluetooth feature and pair with a headset
Tap the status bar at the top of the home screen and drag it down. Tap the
Bluetooth icon to turn on the bluetooth function.
1. Press HOME
,applications .
2. Tap Settings.
3. Tap Bluetooth to turn it on.
5. Tap Bluetooth settings. Your phone scans for available Bluetooth devices.
6. Tap the headset to select it.
7. Slide open the display to reveal the keyboard and type the PIN if required.
8. Tap oK.
20
Page 23

Setting your phone
The various settings available help you to personalize and optimize your phone.
The following table lists the main menu items on the Android Settings screen.
item Description
Dual SIM Settings Close the connection with the SIM Cards.
Wireless & networks Configure and manage connections to networks and devices through
Wi-Fi, Bluetooth, and mobile networks.
Call Settings Configure the call settings in both WCDMA and GSM network such as
voicemail, call forwarding and so on.
Sound Configure the volume level and type; configure ringtones and alarms.
Display Configure brightness and other screen settings.
Location & security Configure how you want the phone to determine your location and
how you want to share your location with Google and others.
Applications View details about the applications installed on your phone, manage
application data, close applications, and set whether you want to
permit the installation of applications that you obtain from Web sites
and e-mail.
Accounts Add, remove, and manage your Google Accounts and other accounts.
Reset Back up data or reset your phone.
Storage Monitor the used and available space on your phone internal storage.
Language & input Select the language that you want to work with on your phone and
21
Page 24

Accessibility Enable or disable accessibility technologies.
configure the input method.
Date & time Set date and time.
About phone View information about your phone.
To access any item, do the following:
1. From the main Home screen, tap the Android Settings icon, or tap the applications icon and then
tap Settings . The Android Settings screen opens.
2. Tap an item from the main menu. The submenu for the item is displayed.
22
Page 25

Warning
Specific Absorption Rate (SAR) information SAR tests are conducted using standard
operating positions accepted by the FCC with the phone transmitting at its highest
certified power level in all tested frequency bands, although the SAR is determined
at the highest certified power level, the actual SAR level of the phone while
operating can be well below the maximum value, in
general, the closer you are to a wireless base station
antenna, the lower the power output. Before a new model phone is a available for
sale to the public, it must be tested and certified to the FCC that it does not
exceed the exposure limit established by the FCC, Tests for each phone are
performed in positions and locations (e.g. at the ear and worn on the body)as
required
by the FCC. For body worn operation, this model phone has been tested and
meets the FCC RF exposure guidelines when used with an accessory designated for
this product or when used with an accessory that contains no metal and that
positions the handset a minimum of 1.5 cm from the body.
23
Page 26

This device complies with part 15 of the FCC Rules.
Operation is subject to the following two conditions: (1)
This device may not cause harmful interference, and (2)
this device must accept any interference received,
including interference that may cause undesired operation.
Any Changes or modifications not expressly approved by
the party responsible for compliance could void the user’s
authority to operate the equipment.
Note: This equipment has been tested and found to
24
Page 27

comply with the limits for a Class B digital device, pursuant
to part 15 of the FCC Rules. These limits are designed to
provide reasonable protection against harmful
interference in a residential installation. This equipment
generates uses and can radiate radio frequency energy and, if not installed and
used in accordance with the
instructions, may cause harmful interference to radio
communications. However, there is no guarantee that
interference will not occur in a particular installation. If this
equipment does cause harmful interference to radio or
television reception, which can be determined by turning
25
Page 28

the equipment off and on, the user is encouraged to try to
correct the interference by one or more of the following
measures:
‐‐Reorient or relocate the receiving antenna.
‐‐Increase the separation between the equipment and
receiver.
‐‐
Connect the equipment into an outlet on a circuit
different from that to which the receiver is connected.
‐‐
Consult the dealer or an experienced radio/TV technician for help.
26
 Loading...