

Page 1

1
Welcome!!
Thank you for choosing C640 mobile phone! Please
read this manual carefully before you use your mobile phone.
For efficient use of your mobile phone,
we recommend you to read the Safety and General
Information chapter in advance.
* Please read before using the mobile phone
Page 2

Group edit 29
Turbo set 30
Memory status 30
My number 31
My profile 31
Call logs 32
Dialed call 32
Answered call 32
Missed call 33
Call time 33
Camera 34
Shooting 34
Album 37
Photo editor 39
Setting 40
Memory 41
Setting 42
Sound 42
Display 44
Phone set 46
Security set 49
Network set 52
Net account 56
Data folder 59
Download 59
Photo 60
Video 61
Avatar 62
3
TTable of contents
able of contents
Safety and general information 6
Package contents 8
About your phone 9
Phone overview 9
Key definition 10
Status icon 12
Installing and Removing SIM card 14
Installing SIM card 14
Removing SIM card 14
Installing and Removing battery 15
Installing the battery 15
Removing the battery 15
Basic Function 16
Power on / off 16
About PIN/PUK 17
Making a call 19
Receiving a call 20
Missed a call 20
In call menu 21
Sub LCD 24
Quick access in idle mode 24
Storing a number 25
Main Menu 26
Selecting main menu item 26
Phone book 27
Phone book 27
2
TTable of contents
able of contents
Page 3

Reference information 90
Battery 90
About the battery 90
Charging the battery 90
Caution 91
Battery time 92
Entering text 93
General text input guideline 93
Changing the text input mode 94
English input 95
Number input 96
Symbol input 96
Data format 97
Troubleshooting 99
Technical information 100
5
TTable of contents
able of contents
Pictures 62
Melodies 63
Scheduler 64
Schedule 64
To do 65
Memo 66
Anniversary 66
Entertainment 68
Game 68
Avatar 69
Utilities 70
Alarm 70
Calculator 70
World time 71
Stopwatch 71
Currency 72
STK 73
Internet SVC 74
Message 77
SMS 77
MMS 84
4
TTable of contents
able of contents
Page 4

7
6
Safety and General Information
Safety and General Information
Please read these simple guidelines and safety instructions
carefully before using the phone.
[Driving]
Please do not use a phone while driving. If you want to use
your phone, please use a hands-free kit or please park the car
first.
[Hospital]
Please turn off the phone when you are in hospital. Mobile
phones can cause possible interference to medical devices
such as hearing aids or pacemaker.
[Aircraft]
Please turn off the phone when you are in an aircraft.
It is prohibited to use phone in the aircraft.
[Blasting Area]
Please turn off the phone when you are near a blasting area.
[Battery and accessory]
Use only approved battery and accessories.
[When refuelling]
Do not use the phone at refuelling point(service station) or
near fuel or chemicals.
Safety and General Information
Safety and General Information
[Disassembly]
Do not disassemble your phone or any of its accessories.
Only certified service center can disassemble and repair your
phone.
[Children]
Keep all accessories or batteries out of the reach of small
children or babies. Please instruct children the proper ways of
handling phone during usage. Shock circuit or breakdown may
occur and may cause severe danger to user due to improper
usage.
[Battery]
Do not apply extreme shock to battery. It is dangerous to
disassemble a battery or to apply extreme shock to the battery
via nail or heavy metal objects.
Dispose of used batteries in accordance with local regulations.
Always recycle. Do not dispose of batteries in a fire.
Page 5

9
8
Package contents
Package contents
About
About YY
our Phone
our Phone
Transceiver Battery
Charger
* The above photos depicts the closest actual representation
of the products.
Package contents
User Manual
Phone overview
Earpiece
Main Display
Left Softkey
SEND
Volume Key
Mic.
END
Right Softkey
OK
Navigation
Key
Numeric Key
(0~9)
Camera key
Page 6

11
10
About
About YY
our Phone
our Phone
About
About YY
our Phone
our Phone
Key definition
Key Function
Key Function
[Navigation Key : Up]
In menu mode : Scrolls the menu up.
In idle mode : Access to Call log directly
[ Navigation Key : Down]
In menu mode : Scroll down the menu
In idle mode : Access to STK directly
[ Navigation Key : Left]
In menu mode : Scrolls the menu up
In idle mode : Access to Calendar directly
[ Navigation Key : Right]
Edit mode : Moves the cursor right
In Menu mode : Scrolls the menu Right
Idle mode : Access to Phone book directly
[OK Key]
In menu mode : Selects the main menu.
In idle mode : Connects to WAP directly.
[ Function Key : * ]
When pressed and held while entering a phone
number , it enters a pause
[Function Key : # ]
When pressed and held in idle mode, it enters
phone mode menu.
[SEND Key]
Makes or answers a call
In idle mode: Access the Call list
[END Key]
End an active call.
Hold the key down, switch phone On or Off.
[Soft Key : Left]
In menu mode : Performs the various functions
according to the viewing menu.
In idle mode : Connects to main menu.
[Soft Key : Right]
In Menu mode: Performs the various functions
according to the viewing menu
In Idle mode: Connects to Message
[Side volume key]
During a call : Adjusts earpiece volume
In menu mode : Scrolls through the menu
In idle mode : Adjusts the keytone volume
[ Numeric Key]
Input 0~9 number in idle mode
[Digit key 1] : When pressed and held in idle
mode, quickly accesses voice mail server.
[Digit key 9] : When pressed and held in idle
mode, quickly accesses emergency Call
Page 7

13
About
About YY
our Phone
our Phone
12
About
About YY
our Phone
our Phone
Status icon
Icon Function
[Signal Strength Indicator]
Indicates the strength of the network signal
[In Use]
Appears when a call is progressing
[No Use]
Appears when the network signal is not received
[Bell]
Appears when you set the Bell type
[Call Forward]
Appears when the Call forward feature is activated
[Vibrator]
Appears when you set the menu of Vibration type
[Vibrator then bell]
Appears when you set the menu of 'vibrator then bell'
[Meeting mode]
Appears when you set the 'Meeting mode'
[Street mode]
Appears when you set the 'Street mode'
[Concert mode]
Appears when you set the 'Concert mode'
Icon Function
[Message]
Appears when you have new or unread messages
[Voice Message]
Appears when you have new or unchecked voice
messages
[MMS Message]
Appears when you have new or unchecked
multimedia messages
[Alarm]
Appears when you set the Alarm and on
[Roam]
Indicates that you are roaming on another network
[Data]
Indicates that the phone is receiving the data
[GPRS]
Appears when you are connected to the GPRS
network
[Car mode]
Appears when you set the 'Car mode'
[Battery meter]
Indicates the level of battery charged
[WAP Push Message]
Appears when you have new or unchecked WAP
push message
Page 8
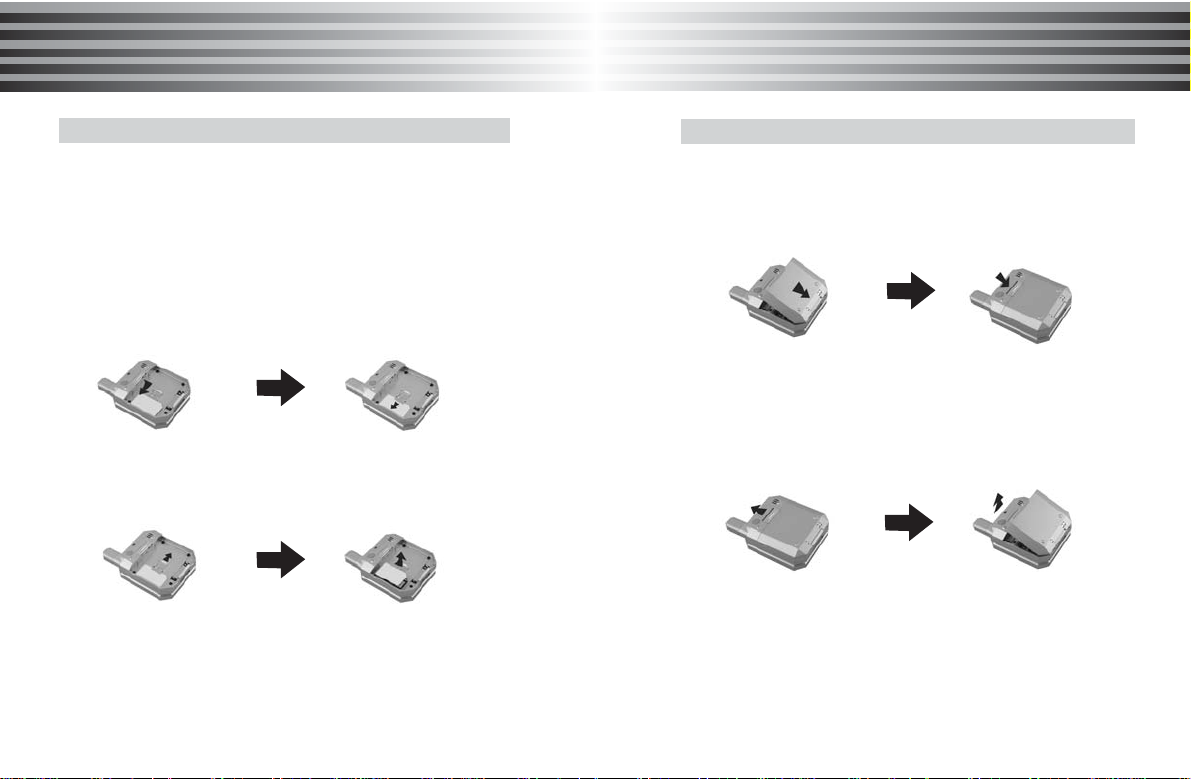
SIM (Subscriber Identity Module) is a "Smart Card" that holds
user phone number, service details, and memory for Phone
Book numbers and messages. You can use your SIM in any
GSM phone and will be charged for the calls.
1. Installing SIM card
1. Power off the phone first.
2. Pull out the battery.
3. Insert the SIM card.
4. Slide the latch over the SIM card to lock it in place.
2. Removing SIM card
1. Slide the latch to the right.
2. Remove your SIM card from the phone.
* Protect your SIM card from scratches, water, dirt and
static electricity.
* Careful!
If you disregard the matters which above mentioned, it could
be erase information which stored on the your IM card.
15
14
About
About YY
our Phone
our Phone
About
About YY
our Phone
our Phone
Installing and Removing SIM card
Installing and Removing battery
1. Installing the battery
Insert the battery into the battery compartment at a slant
angle and press the top of the battery until the battery locks
in the place.
2. Removing the battery
Slide up the battery latch and then pull out the battery from
the phone.
Page 9

17
16
About
About YY
our Phone
our Phone
1. Power on
Press [END] key for a while.
* If PIN is activated, please enter 'PIN code'.
If 'Lock' is activated, please enter password.
Initial password is set to '0000'
If security of SIM card is enabled, the phone requests
the PIN code every time when the phone is turned on.
2. Power off
Press and hold [END].
¡Ø Making an emergency call
Your phone supports the international emergency number.
This means that these numbers can normally be used
to make an emergency call in any country with or without a
SIM card inserted, if a GSM network is within range.
(Some network operators may require that a SIM card is
inserted, and in some cases that the PIN has been entered
as well )
* To make an emergency call, proceed as follows.
If the phone is not on, switch it on.
- With SIM card inserted : Dials the emergency call number
- Without SIM card inserted : Press [SOS] or dials the
emergency call number directly.
Power on/off
Basic Function
Basic Function
1. PIN (Personal Identification Number)
It is a personal code (4 to 8 digits) provided by your
network operator in order to prevent other people from
using your SIM card.
It is usually supplied with the SIM card. The PIN is usually
requested each time when the phone is switched on.
If you enter an incorrect PIN three times consecutively,
the SIM card is blocked and cannot be used until you
unblock it by entering the PUK.
2. PIN2
It is a code composed of 4 to 8 digits and is supplied with
some SIM cards to access specific function such as setting
the charge detail display and access other additional
functions.
If you enter an incorrect PIN2 three times consecutively, the
SIM card is blocked and you cannot access the functions
until you unblock it by entering the PUK2.
3. PUK (PIN Unblocking Key)
It is composed of 8 digits and used to unblock a SIM card.
The PUK may be supplied with the SIM card.
If you forget the code, please contact your service provider.
If you enter an incorrect PUK ten times consecutively, the
SIM card becomes invalid.
Please contact your service provider for a new card.
About PIN/PUK
Page 10

19
18
Basic Function
Basic Function
Basic Function
Basic Function
4. PUK2
It is composed of 8 digits and is supplied with some SIM
cards to unlock PIN2.
If you forget the code, please contact your service provider.
If you enter an incorrect PUK2 ten times consecutively, you
will not be able to access the additional functions provided
by PIN2. Please contact your service provider for a new card.
5. Change PIN or PIN2 code
Your can change the PIN or PIN2 code to any 4 to 8 digits
number.
6. Set PIN Check
This feature asks for the PIN code whenever the phone is
powered on.
Note: If you enter the wrong PIN code three times
consecutively, the SIM card is automatically blocked.
7. PUK/PUK2 Code
The PUK and PUK2 codes are 8-digit codes that usually
provided by your service provider along with the SIM card.
Their purpose is to unlock SIM cards after wrong PIN has
been entered repeatedly.
1. Using Digit Keys
Enter the phone number in Idle mode, then press [SEND].
2. Using Turbo Dial
Press and hold a location number in Idle mode to connect
a call to the corresponding number of the appropriate
location.
If the location number is '2', press and hold [2].
If the location number is '21', press [2] and press and hold [1].
* It is possible to use Turbo dial numbers stored in your
SIM card. You can switch Turbo dial settings between
Phone entry and SIM entry.
Please see details for Turbo set in phone book.
3. Using Phone Book entry
Search for a number in the phone book, then press [SEND]
to make a call.
* Use Redialing : If the connection of the call fails, your
Phone will redial the number automatically.
Press [END] to abandon Auto-calling attempt.
(if Redial is set to 'On')
Making a call
Page 11

21
Basic Function
Basic Function
20
Basic Function
Basic Function
When you receive a call, the phone rings or vibrates and
displays an incoming call notice.
Flip open to receive the call. (if [Folder open] is selected)
When the flip is opened and the phone rings, press any key
to answer. (if [Anykey press] is selected)
* Except [END] key
* You cannot received calls when PIN is locked.
* Please enter your PIN number to unlock your phone,
before receiving your phone.
If you are unable to answer a call, the number of missed call
is displayed.
1. Time and number (if CLI is supported) is displayed.
2. The latest call information appears on the display.
Receiving a call
Missed a call
In call menu
You can access different menus during a call. Press [Menu]
(left softkey) during a call to connect some of the In-call menu.
Menu selection depends on the state of the call, the type and
setting of your SIM card and subscription to these services.
I. Phone book
This option displays the Phone book menu.
1. Press [Menu], then move to "Phone Book".
2. Press [OK].
3. Scroll to the desired item and press [OK].
All the phone book functions are displayed.
(see "Phone book" on Main Menu)
II. Message
This option displays the Message menu.
1. Press [Menu], then move to "Message".
2. Press [OK].
3. Select the desired item and press [OK].
III. Mute On/Off
You can mute any active call. Muting means that you can
hear the other person's voice but he/she cannot hear your
voice.
During a call, press [Menu], then scroll to 'Mute on'.
Press [OK]. 'Mute' icon appears on screen.
To unmute the call, press 'Mute Off' and press [OK].
'Mute' icon disappears.
Page 12

Basic Function
Basic Function
22
Basic Function
Basic Function
IV. Hold
You can put a current call on hold and accept an incoming
call, or start a second call.
1. During a call, press [ANS].
2. Select "Hold & Ans", then press [OK] .
To return to the first call, press "Switch".
* During a call, press [right soft key], then popup menu
appears. It shows "End on call / End held call / End all"
options. You can select the following items:
End on call : End a call you put on hold.
End held call : End the current active call.
End all : End all connected calls.
If supported by service provider, more people can take part
in a call.
1. When there is an incoming call, press [SEND] to enter into
Answer mode.(select "Reject" to reject the incoming call)
2. Press [Menu], it has 'Drop & Answer / Hold & Answer/
Reject' menus.
Select 'Hold & Answer', the screen will display both
'In call' and 'Held call'.
3. Press [Menu], then Select "Join".
4. The phone displays active call indicator with the new
active call.
V. Hold & Switch
Switches between the active call and the held call.
1. When there is an incoming call, press [SEND] to enter
into Answer mode.
(If you selects 'Reject', the call will be rejected and the
phone will return to Idle mode.)
2. Press [Menu] to display 'Drop & Answer / Hold & Answer
/ Reject' menus.
Select 'Hold & Answer', then the screen displays both
'Active call' and 'Held call'.
3. Press "Switch" to switch between the active call and the
held call.
* Reject waiting call
You can reject an incoming call by pressing "Reject".
- During a call, press "Reject" to display the pop-up menu.
- Move to the desired item and press [OK].
VI. Split
Allow you to talk privately with one of the persons in a
conference call.
1. During a conference call, select "Menu".
2. Press "Navigation key" to move to the desired call, then
press [OK].
* To end a connected or held call etc.. press right softkey
to select 'End a call' option.
For ending a call, press [Menu] to select the desired
item, then press [OK].
* It has "End on call / End held call / End all call' options.
23
Page 13

25
Basic Function
Basic Function
24
Basic Function
Basic Function
When there is a new message or an incoming call, you can
see caller number on sub LCD.
When the flip is closed, press the side key to turn the sub lcd
light on.
After backlight is turned on, press upper or lower volume key
to toggle different clock types.
Sub LCD
Quick access in idle mode
In Idle mode, you can access designated menu by pressing
designated navigation key.
Go to 'Data folder'
Go to 'STK'
Go to 'Phone book'
Go to 'Calendar'
Go to 'WAP'
Storing number
You can store phone numbers in your phone or SIM card.
It is possible to store up to 300 phone number entries in your
phone book.
* The total number of entries in your SIM card are dependent
on your SIM card capability.
1. Enter a number in idle mode
2. Press [STO]
3. Select [SIM] or [Phone]
4. Press [OK]
5. Enter content and then press [STO]
* Also, you can store phone numbers through the
'New Entry' of "Phone book" or 'Store' of "Call list" .
Page 14

27
Main Menu
Main Menu
26
Main Menu
Main Menu
Selecting main menu item
Press [Main].
You may select the following 9 menus with navigation keys:
1. Phone book 2. Call log 3. Camera
4. Setting 5. Data folder 6. Scheduler
7. Entertainment 5. Utilities 9. STK
You may also select the desired menu by pressing the
corresponding number of the desired menu.
Once you select the menu, then press [OK] key.
Phone book
You can store phone numbers and names in the memory of
your SIM card or your phone.
You can store up to 300 numbers in your phone.
SIM card memory size depends on your SIM card capability.
I. Access to Phone book
By main menu
(1) Press [Main] in the idle mode.
(2) Scroll to [1.Phone book] by pressing the navigation
key, then press [OK]. (Or press digit 1)
By shortcut
Press the [Right side navigation key] in idle mode.
II. Storing Number
1. Through the Phone book menu
(1) Press [Main] in the idle mode.
(2) Scroll to [1.Phone book] by pressing the navigation key,
then press [OK]. (Or press digit 1)
(3) Scroll to [1.Phone book] by pressing up or down
navigation key, then press [OK]. (Or press digit 1)
(4) Press [Menu] then select [1.New entry].
(5) Select the storage memory to be store either SIM or
Phone, then press [Save].
(6) Enters content of each categories, then press [Save].
Phone Book
Page 15

29
Main Menu
Main Menu
28
Main Menu
Main Menu
2. Through the idle mode
(1) Enter the number in the idle mode to be stored.
(2) Press the [Save].
(3) Select the storage memory to be store either SIM or
Phone, then press [Save].
(4) Enter contents and then press [Save].
* Phone book detail
(1) Name : Enters the name
(2) Location : Enters the location
(3) Picture / Avatar : Changes the Picture or Avatar.
(4) Number(Home / Cellular / Office / Other):
Enters the contact numbers
(5) E-mail : Enters the e-mail address
(6) Group : Selects the group type. (General / Family /
Work / Friend / Group1 / Group2 / Group3)
(7) Bell : Selects the desired ring tone when there is an
incoming call.
(8) Anniversary : Enters the anniversary date
(e.g. birthday, wedding anniversary. etc.)
* About the [Menu]
(The following options are available)
(1) New entry : Adds the new entry
(2) Send a MSG. : Sends the message(SMS, EMS) to
selected number. (*Refer to the [9.Message])
(3) Send a MMS : Sends the message(MMS) to selected
number. (*Refer to the [9.Message])
(4) Copy to SIM (or Phone) : Copies the selected number
from any of both memories. (SIM card or Phone)
Group edit
(5) Delete : Deletes the selected number.
(6) Delete all : Deletes all entry which is displayed in the
selected group.
(7) Find by name : Searches the entries by name.
(8) Find by number : Searches the entries by number.
You can arrange names and phone numbers saved in the
phone book into groups.
For each group, you can set the specific ring tone when
receiving a call. Basically, 7groups are provided. 4 groups of
them (General, Family, Work, Friend) have fixed group names
while the group names of the other 3 groups can be changed.
1. Press [Main] in the idle mode.
2. Scroll to [1.Phone book] by pressing the navigation key,
then press [OK]. (Or press digit 1)
3. Scroll to [2.Group edit] by pressing up or down navigation
key, then press [OK]. (Or press digit 2 )
4. Selects the desired group to edit, then press [Edit].
* About the [Edit]
(The following options are available)
(1) Rename : With this menu you can edit group name.
(It does not displayed in the General, Family, Friend,
Work group mode)
(2) Group bell : With this menu you can edit the ring tone
of the group when you receive a call from a person in
the group.
Page 16

31
Main Menu
Main Menu
30
Main Menu
Main Menu
Turbo set
In the idle mode, simply by pressing the assigned number key,
you can make a call easily . Also you can set the location of
your SIM or Phone as the default memory for using turbo dial.
1. Press [Main] in the idle mode.
2. Scroll to [1.Phone book] by pressing navigation key, then
press [OK]. (Or press digit 1 )
3. Scroll to [3.Turbo Set] by pressing up or down navigation
key, then press [OK]. (Or press digit 3 )
4. Selects the [SIM] or [Phone]
* When you use the memory from 001 to 009 :
Press and hold the last digit key.
* When you use the memory from 010~300 :
Press the assigned number, provided that you have to
press and hold the last key
You can check how many entries are stored in your SIM card
and phone's memory. If [Memory is full!] message appears,
you cannot save any more entry until you have delete other
item
1. Press [Main] in the idle mode.
2. Scroll to [1.Phone book] by pressing navigation key, then
press [OK]. (Or press digit 1 )
3. Scroll to [4.Memory status] by pressing up or down
navigation key, then press [OK]. (Or press digit 4 )
Memory status
My profile
My number
You can see phone number which stored in your SIM card,
also you can edit your own name.
1. Press [Main] in the idle mode.
2. Scroll to [1.Phone book] by pressing navigation key, then
press [OK]. (Or press digit 1 )
3. Scroll to [5. My number] by pressing up or down navigation
key, then press [OK]. (Or press digit 5)
4. Select the number press [OK], then you can save your own
number with editing name.
You can enter your personal information in My profile.
1. Press [Main] in the idle mode.
2. Scroll to [1.Phone book] by pressing navigation key, then
press [OK]. (Or press digit 1 )
3. Scroll to [6.My profile] by pressing up or down navigation
key, then press [OK]. (Or press digit 6 )
* My profile detail
(1) Name : Enters the name
(2) Picture / Avatar : Changes the picture or avatar
(3) Job title : Enters the job title
(4) Address : Enters the address
(5) Home : Enters the home number
(6) Cellular : Enters the cellular phone number
(7) Office : Enters the office phone number
(8) Other : Enters the other number
(9) E-mail : Enters the e-mail address
(10) Birthday : Enteres the birthday
Page 17

33
Main Menu
Main Menu
32
Main Menu
Main Menu
You can check the record of missed, answered and dialed calls
only if the network supports CLI(Calling Line Identification) within
the service area. In the Idle mode, you can access the this
menu by pressing [SEND]key then call list will appear.
1. Dialed call
This menu lets you view the last 30 dialed call numbers
In the Idle mode, press [SEND]key then dialed call list will
appear. The name, photo(or Avatar) if you saved, displays
together with the date and time when the call was made.
1. Press [Main] in the idle mode.
2. Scroll to [2.Call logs] by pressing navigation key, then
press [OK]. (Or press digit 2 )
3. Scroll to [1.Dialed call] by pressing up or down navigation
key, then press [OK]. (Or press digit 1 )
2. Answered call
This menu lets you view the last 30 answered call numbers.
The name, photo(or Avatar) if you saved, displays together
with the date and time when the call was made.
1. Press [Main] in the idle mode.
2. Scroll to [2.Call logs] by pressing navigation key, then
press [OK]. (Or press digit 2 )
3. Scroll to [2.Answered call] by pressing up or down
navigation key, then press [OK]. (Or press digit 2 )
3. Missed call
This menu lets you view the last 30 missed call numbers.
The name, photo(or Avatar) if you saved, displays together
with the date and time when the call was made.
1. Press [Main] in the idle mode.
2. Scroll to [2.Call logs] by pressing navigation key, then
press [OK]. (Or press digit 2 )
3. Scroll to [3.Missed call] by pressing up or down
navigation key, then press [OK]. (Or press digit 3 )
* About the [Edit]
(The following options are available)
(1) Save : Saves the selected number.
(2) Delete : Deletes the selected item after confirmation.
(3) Delete all : Deletes the entire Dialed call list after confirmation.
4. Call time
This menu lets you view the timers for calls made and
received.
1. Press [Main] in the idle mode.
2. Scroll to [2.Call logs] by pressing navigation key, then
press [OK]. (Or press digit 2 )
3. Scroll to [4.Call time] by pressing up or down
navigation key, then press [OK]. (Or press digit 4 )
* Total Call time : Shows the total length of all calls made
call since the timer was last reset.
* Last Call time : Shows the length of the last call.
* Pressing "Reset" will reset all the call timers.
Call logs
Page 18

35
Main Menu
Main Menu
34
Main Menu
Main Menu
Camera
You can take pictures and send them to other people via MMS
or e-mail attachment. You can also use a picture as background
image, or save it together with a contact in phone book so that
the picture appears when that person calls. Pictures can be
saved in JPEG format.
Shooting
In this menu, you can take pictures and record a video clip.
1. Press [Main] in idle mode.
2. Scroll to [3.Camer] by pressing navigation key, then
press [OK]. (Or press digit 3 )
3. Scroll to [1.Shooting] by pressing up or down navigation
key, then press [OK]. (Or press digit 1)
4. Scroll to desired item, then press [OK].
1. Photo shot
This feature enables you to take a picture and save it
* About the [Menu]
(The following options are available)
(1) Self timer : When you take a self-portrait, it automatically
takes a photo after specified time.
Camera operates automatically.
* 5 sec / 7 sec / 9 sec / 12 sec / 15sec
(2) Mode :Changes the mode.
* Auto / Sunny / Cloudy / Fluorescent / Tungsten
(3) Size : Selects the image resolution.
* Resolution : 64x96 / 160x120 / 176x144 / 320x240 /
640x480
(4) Quality : Selects the image quality.
* High / Mid / Low
2. Serial shot
This feature enables you to take serial shots.
* About the [Menu]
(The following options are available)
(1) Serial count: Selects the number of serial shot.
* 3 times / 5 times / 7 times / 9 times
(2) Self timer : When you take a self-portrait, it automatically
takes a photo after specified time.
Camera operates automatically.
* 5 sec / 7 sec / 9 sec / 12 sec / 15 sec
(3) Mode : Changes the mode.
* Auto / Sunny / Cloudy / Fluorescent / Tungsten
(4) Size: Selects the image resolution.
* Resolution : 64x96 / 160x120 / 176x144 / 320x240 /
640x480
Page 19
37
36
(5) Quality : Selects the image quality.
* High / Mid / Low
** Frame function is not supported during serial shot
3. Video shot
You can store moving picture up to 10 seconds.
Default record resolution is preset to "160x120".
* About the [Menu]
(The following options are available)
(1) Self timer : When you take a self-portrait, you can select
the shooting time and the camera will operate automatically.
* 5 sec / 7 sec / 9 sec / 12 sec / 15 sec
(2) Mode : Changes the mode.
* Auto / Sunny / Cloudy / Fluorescent / Tungsten
(3) Size: Selects the image resolution.
* Resolution : 64x96 / 160x120 / 176x144
(4) Quality: Selects the image quality.
* High / Mid / Low
** Frame function is not supported during video shot
* Preview mode detail
Move through the each item using the joy stick to the up or
down side, then adjust the level pressing to the left or right
side.
Main Menu
Main Menu
Main Menu
Main Menu
(1) Zoom : Adjusts the zoom level by using joy stick to the
left or right side.
Right side : Zoom in
Left side : Zoom out
(2) Brightness : Adjusts the brightness level by using joy stick
to the left or right side.
Right side : Makes the display more brighter.
Left side : Makes the display more darker.
(3) Effect : Selects the desired effect by using joy stick
to the left or right side.
(4) Frame : Changes the desired frame by using joy stick
to the left or right side.
This feature enables you to manage your photos and images.
1. Press [Main] in idle mode.
2. Scroll to [3.Camer] by pressing navigation key, then
press [OK]. (Or press digit 3 )
3. Scroll to [2.Album] by pressing up or down navigation
key, then press [OK]. (Or press digit 2)
4. Scroll to desired item, then press [OK].
1. Photo Album
You can review or delete stored photos. You can also
change the photo name.
Album
Page 20

You can make various effects for the stored or new photos.
When you enter into photo editor, menu bar is in active state
while toolbar is inactive state.
1. Press [Main] in idle mode.
2. Scroll to [3.Camer] by pressing navigation key, then
press [OK]. (Or press digit 3 )
3. Scroll to [3.Photo editor] by pressing up or down navigation
key, then press [OK]. (Or press digit 3)
* Photo editor detail
* Photo Open : It goes to [Photo album], then you can
select desired photo.
* Photo Shot : It goes to camera preview mode, then you
can taking a photo.
* Photo Toolbar : It goes to [photo toolbar] items.
* Photo Exit : It goes back to previous menu.
* Frame : Applies the frame on a picture. You can change
the frame using upper or lower soft key.
* Filter : Applies the filter on a picture. You can change
filter using upper or lower soft key.
(Normal / Mono / Sepia / Moon / Fog / Negative)
* Text : Enters the text on the picture
** The 1~4 menu appears vertically on the right side , and
the 5~7 menu appears on the underside
39
* About the [Menu]
(The following options are available)
(1) Album view : Shows the photos as thumbnail images.
Large view : Shows the photos as large images.
(2) List view : Goes back to list mode.
(This menu only appears in the photo view status)
(3) Send a MMS : Sends a photo as a MMS to other people.
(4) Save to idle : Sets a photo as idle screen.
(5) Photo editor : Sends the selected photo to Photo editor
to edit picture.
(6) Rename : You can change the name of the photo.
(7) Delete : Deletes the selected photo.
(8) Delete all : Deletes all of the photos saved in the phone.
(9) Information : Shows the information of stored photo
about file name, format, size, etc.
2. Video Album
You can review, delete and change the file name of the
stored video files.
* About the [Menu]
(The following options are available)
(1) Rename: You can change the name of the file.
(2) Delete : Deletes the video file.
(3) Delete all : Deletes all the video files saved in the phone.
(4) Information : Shows the information of stored video files
such as file name,format, size, etc.
38
Main Menu
Main Menu
Main Menu
Main Menu
Photo editor
Page 21

5. Display mode
With this menu, you can select the display mode.
On is selected, it will display the photo information with
icon on the photo screen.
If 'On' is selected, it will display the photo information
with icon on the photo screen.
6. Lock album
With this menu, you can lock the album. If you want to
show the album in lock mode, you have to enter the
password.
You can check how much space is left. If [Memory is full!]
message appears, you cannot save any more pictures until
you have deleted other items from the phone memory.
1. Press [Main] in idle mode.
2. Scroll to [3.Camer] by pressing navigation key, then
press [OK]. (Or press digit 3 )
3. Scroll to [5.Memory] by pressing up or down navigation
key, then press [OK]. (Or press digit 5)
41
You can choose to adjust various phone settings, shutter sound,
image quality and size, etc. to suit your own requirements.
1. Press [Main] in idle mode.
2. Scroll to [3.Camer] by pressing navigation key, then
press [OK]. (Or press digit 3 )
3. Scroll to [4.Setting] by pressing up or down navigation
key, then press [OK]. (Or press digit 4)
4. Scroll to desired item, then press [OK].
1. Shutter sound
With this menu, you can select the shutter sound.
* Shutter 1 / Shutter 2 / Shutter 3
2. Image size
With this menu, you can select the image resolution.
* Resolutions are : 64x96 / 160x120 / 176x144 / 320x240 /
640x480
3. Quality
With this menu, you can select the image quality.
* High / Mid / Low
4. Serial count
With this menu, you can select the number of serial shot.
* 3 times / 5 times / 7 times / 9 times
40
Setting
Main Menu
Main Menu
Main Menu
Main Menu
Memory
Page 22
43
42
Main Menu
Main Menu
Main Menu
Main Menu
Sound
Setting
You can use the sound settings feature to customize various
settings.
1. Press [Main] in idle mode.
2. Scroll to [4.Setting] by pressing navigation key, then
press [OK]. (Or press digit 4 )
3. Scroll to [1.Sound] by pressing up or down navigation
key, then press [OK]. (Or press digit 1)
1. Ring tone
With this menu, you can change the ring tone when a call
is received. When ring tone is scrolled, the ring tone is
played.
2. Adjust volume
With this menu, you can adjust the volume from one to five
levels using up or down navigation key. You can adjust
volume of Keypad / Earpiece / Bell volume.
3. Ringer type
With this menu, you can change the ringer type when a
call or message is received.
Incoming calls or message
Bell The ringing tone is played
Vibrator The phone vibrates without ringing
Vib. -> Bell Phone first vibrates and then start ringing
Vib. + Bell Phone vibrates and rings simultaneously
Sliding bell Phone ring becomes louder
4. Alert tone
With this menu, you can set the alert tone
Alert Tone Type Description
Connection Alert tone rings when a call is connected
Out of SVC Alert tone rings when the phone is out of range
1 min Alert Alert tone rings before 10 seconds when call
time reaches 1 minute
Confirm Alert tone rings when an item is confirmed
Power on Alert tone rings when the phone is powered on
Power off Alert tone rings when the phone is powered off
Page 23

Main Menu
Main Menu
Main Menu
Main Menu
5. Key tone
With this menu, you can change the key tone when pressing
keys on the keypad. You can select one of Water, Drum,
DTMF Tone or English as the key tone.
* If you select the Water or Drum, the battery consumption
will be increased than you select the DTMF tone
f means keys do not make any sound.
* Of
6. Message tone
With this menu, you can select different alert tones for
incoming messages.
* Msg. Tone 1 / Msg. Tone 2 / Msg. Tone 3 / Msg. Tone 4 /
Msg. Tone 5 / Off
Display
You can set the display value according to the phone status.
1. Press [Main] in idle mode.
2. Scroll to [4.Setting] by pressing navigation key, then
press [OK]. (Or press digit 4 )
3. Scroll to [2.Display] by pressing up or down navigation
key, then press [OK]. (Or press digit 2)
4. Scroll to desired item, then press [OK].
1. Set graphic
With this menu, you can change the wall paper graphics
using up or down navigation key to scroll the images.
Press the left or right navigation key to switch between the
Main LCD or the Sub LCD.
2. Backlight
With this menu, you can set the backlight time for main LCD
or Keypad. It helps to reduce the battery power consumption.
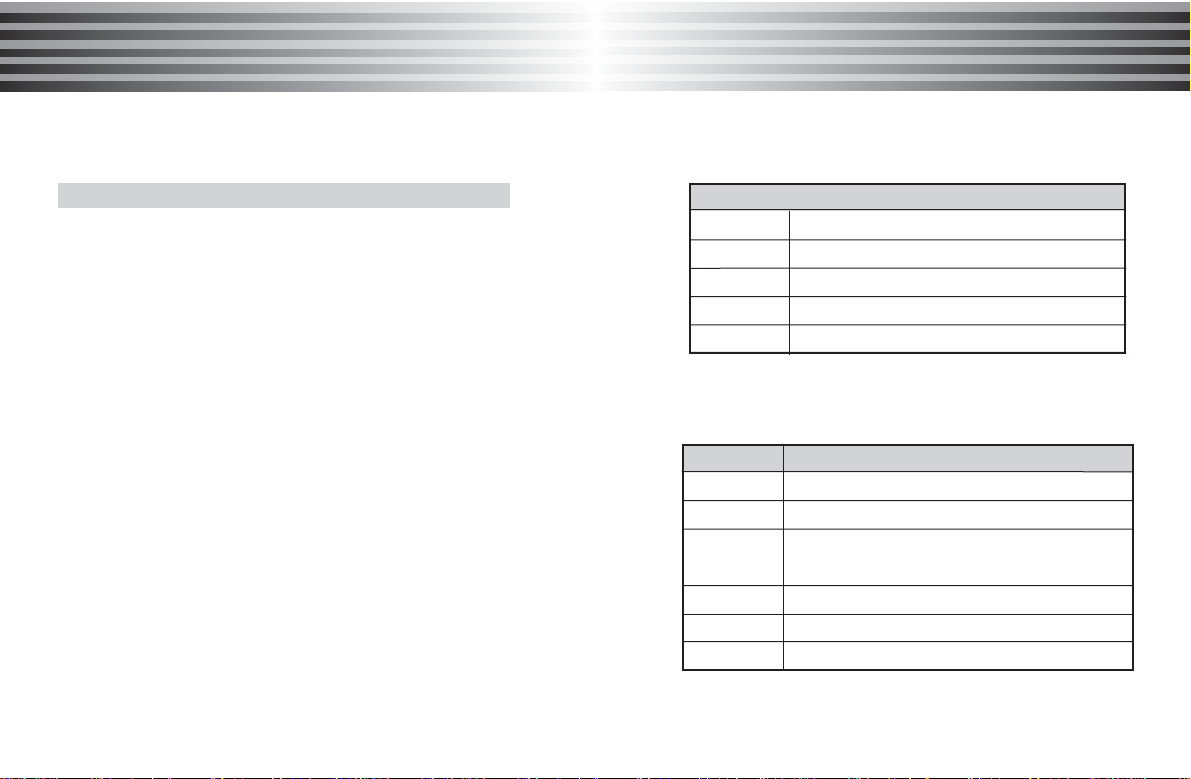
(1) LCD
This menu provides 3 modes.
* Normal mode / Save mode 1/ Save mode 2
LCD Backlight status
*
Dim mode
for 20sec
Backlight
goes out
Backlight
goes out
Backlight
goes out
Normal mode
Save mode 1
Save mode 2
(2) Keypad
With this menu, you can set the keypad backlight time.
It helps to reduce the battery power consumption.
For 5 sec / For 10 sec / Always off
* Keypad backlight sensor
If sensor operates, keypad backl
adjusted itself according
Backlight on
for 10 sec
Backlight on
for 10 sec
Dim mode
for 20 sec
44
45
Page 24
47
Main Menu
Main Menu
46
Main Menu
Main Menu
Phone set
Incoming call
Message tone
Key tone
Alarm
Auto redial
Backlight
Normal
Bell
Bell
On
Bell
Meeting
Vibrator
Vibrator
Off
Vibrator
Street
Vib. +Bell
Vib. +Bell
On
Vib. +Bell
Concert
Vibrator
Vibrator
Off
Vibrator
Save mode2
Car
Bell
Bell
On
Bell
On
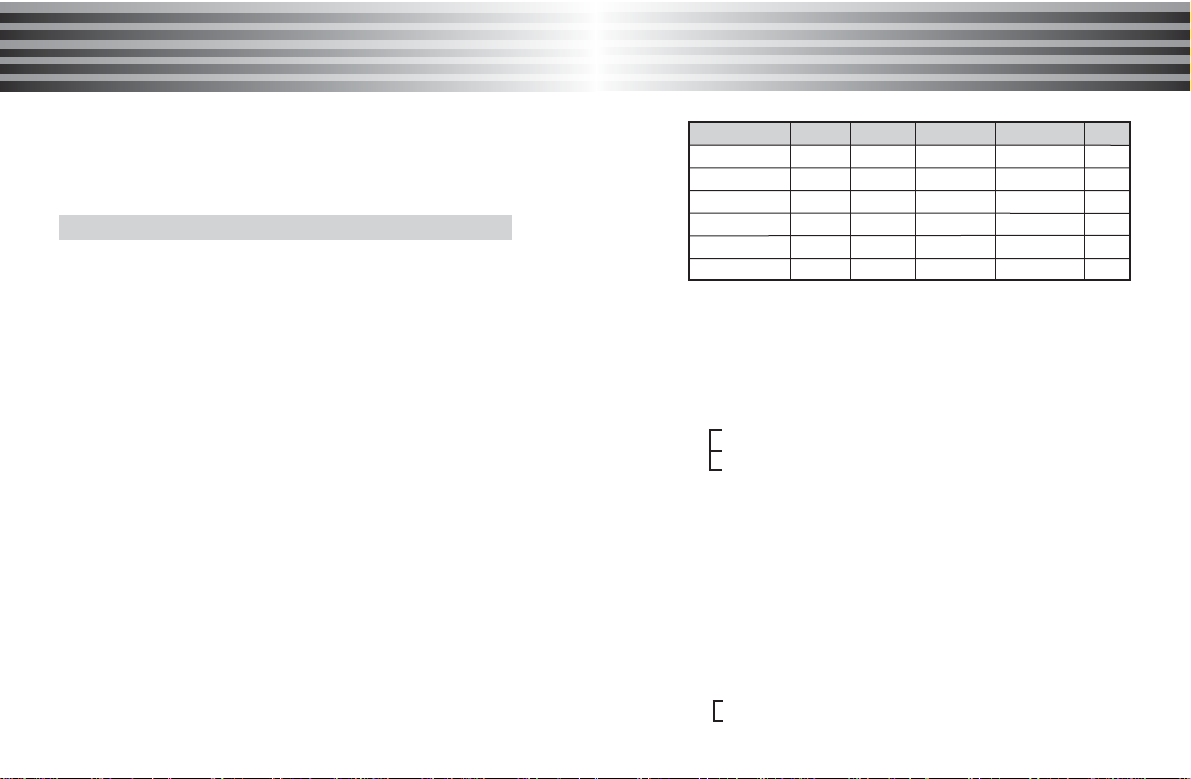
* In idle mode, press [#] for a while, the 'Phone mode' appears.
3. Time & Date
With this menu, you can change the current time and date
(1) Select mode : Changes the display mode
Home : Displays the time and date of Home
Dual : Displays the time and date both of Home and Local
None : Does not display time and date.
(2)Time & Date : You can set the time zone for your area
and other area.
Home / Region
4. Time format
With this menu, you can change the time and date format.
(1) Time format
This option is used to decide the format in which the
time will appear on the idle mode.
24 hours
12 hours
3. Idle banner
You can edit the idle banner and move the banner position
using the navigation key.
This menu illustrates different phone settings to suit your
preferences.
1. Press [Main] in idle mode.
2. Scroll to [4.Setting] by pressing navigation key, then
press [OK]. (Or press digit 4 )
3. Scroll to [3.Phone set] by pressing up or down navigation
key, then press [OK]. (Or press digit 3)
4. Scroll to desired item, then press [OK].
1. Language
With this menu, you can select a display language. When
you select [Auto], the language is automatically selected
according to the language of the SIM card used
2. Phone mode
With this menu, you can customize the ringer type for
various events and environments. The default mode is
preset to Normal mode and it does not customize.
But the other mode change the following phone modes:
Page 25

49
(2) Date format
This option is used to determine how the current date is
displayed on the idle mode.
YYYY / MM / DD
MM / DD / YYYY
DD / MM / YYYY
5. Answer option
With this menu, you can change the way of answering a call.
(1)Folder open : Answer the incoming call by opening the
flip. If the flip is already opened, press [SEND] to
answer the call.
(2)Anykey press : Answer the incoming call by pressing
any key, except [END] and the [Right soft] key.
(3)Send key answer: Only answer the incoming call by
pressing [SEND].
6. Auto redial
If you fail to connect a call, with this menu you can make
up to redial a phone number after unsuccessful call
(1) On : Phone number is redialed automatically.
(2) Off : Phone number is not redialed.
7. Data mode
This menu allows you to enable or disable the data mode.
48
8. GPRS Set
With this menu you can set the GPRS network.
(1) Auto : Searches GPRS network automatically anywhere.
(2) Manual : Searches GPRS network in the place where
GPRS network in existence.
This feature locks your phone to prevent an unauthorized
person from using it.
1. Press [Main] in idle mode.
2. Scroll to [4.Setting] by pressing navigation key, then
press [OK]. (Or press digit 4 )
3. Scroll to [4.Secruity set] by pressing up or down navigation
key, then press [OK]. (Or press digit 4)
4. Scroll to desired item, then press [OK].
1. Phone lock
This feature enables you to prevent an unauthorized
person from using your phone. When the phone is in
lock status, you have to enter the 4-digit phone password.
The password is set to '0000' by default.
To change the phone password, refer to the 'Change PWD'
menu option.
(1)Lock Now
After entering the correct security code, the phone will
lock after going into the idle state. If you want to disable
this phone lock, you should enter the right security code.
Main Menu
Main Menu
Main Menu
Main Menu
Security set
Page 26

51
Main Menu
Main Menu
50
Main Menu
Main Menu
If you power off in the phone lock state, when the phone
is next powered on, the phone is the lock state
(2) Auto Lock
Enable : When you switch on the phone, you are required
to enter the phone password when using the
same SIM card.
Disable : When you switch on the phone, you are not
required to enter the phone password.
* If SIM is changed, your phone will request security code
only when you change your SIM card.
2. SIM PIN
(1) PIN check
When this feature is enabled, you have to enter your PIN
each time when you power on the phone. Any person who
does not have your PIN cannot use your SIM card without
approval.
Enable : You have to enter the PIN each time when you
power on the phone.
Disable : The phone connects directly to the network
when you power on the phone.
(2) Change PIN 1
This feature enables you to change the current PIN to a
new one, provided that the PIN Check feature is enabled.
To change PIN 1, PIN should be enable on "PIN check" .
You have to enter the current PIN before entering a new
one. You can change your PIN 1 (4~8 digits) codes.
Once you have entered a new PIN, you are asked to
confirm it by entering it again.
(3) Change PIN 2
This feature enables you to change current PIN 2 to a
new one. You have to enter the current PIN 2 before
entering a new one. Once you have entered a new PIN 2
you are asked to confirm it by entering it again.
* If you enter the code incorrectly, 'Invalid code' appears.
If you enter wrong code three times consecutively, the
PIN code is blocked. To unblock the PIN code, you
should enter the 'PUK' code.
3. Master reset
This feature resets all the phone settings to factory default
values.
* If you enter the password incorrectly, 'Invalid code' will
appear. You should try to enter the correct one again.
If correct password is entered, phone settings will be
set to factory default and the phone will be restarted.
4. Master clear
This feature formats the file system and deletes all the
saved data such as phone book entries, call history list, etc.
* If you enter the password incorrectly , 'Invalid password.
Try again' will appear. You should try again to enter the
correct one. If the correct password is entered, the phone
will display 'Waiting...' message and the master clear
operation is in progress. After the master clear operation
has finished, the phone will be restarted.
Page 27
53
Main Menu
Main Menu
52
Main Menu
Main Menu
5. Change PWD(Change password)
This feature enables you to change the current phone
password to be a new one. You have to enter the current
password before entering a new one. The default password
is set to "0000"
* FDN (Fixed Dial Number)
(SIM dependent)
You can restrict your outgoing calls to selected phone
numbers, if this function is supported by your SIM card.
You can set the following submenu by PIN2 code.
The PIN2 code is required.
Enable : You can restrict your outgoing calls to
selected phone number.
Disable : You can call without restricting phone number.
Various features are provided for you to set up the network
services. Before using the network services, you have to
subscribe them through your service provider and obtain user
instructions from your service provider.
1. Call divert
You can direct your incoming calls to another number.
Contack your service provider for more information.
1. Press [Main] in idle mode.
2. Scroll to [4.Setting] by pressing navigation key, then
press [OK]. (Or press digit 4 )
3. Scroll to [5.Network set] by pressing up or down
navigation key, then press [OK]. (Or press digit 5)
4. Scroll to [1.Call divert] by pressing up or down
navigation key, then press [OK]. (Or press digit 1)
5. Scroll to desired item, then press [OK].
Divert always : All calls are diverted.
On busy: Calls are diverted if are currently on another call.
No reply: Calls are diverted if you have not answered
the call.
Unreachable : Calls are diverted if are not in an area
covered by your service provider.
Cancel : All call diverting options are cancelled.
2. Call barring
This service allows you to restrict outgoing calls and
incoming calls.
1. Press [Main] in idle mode.
2. Scroll to [4.Setting] by pressing navigation key, then
press [OK]. (Or press digit 4 )
3. Scroll to [5.Network set] by pressing up or down
navigation key, then press [OK]. (Or press digit 5)
4. Scroll to [2.Call barring] by pressing up or down
navigation key, then press [OK]. (Or press digit 2)
5. Scroll to desired item, then press [OK].
Network set
Page 28

55
54
Main Menu
Main Menu
Main Menu
Main Menu
All outgoing : All calls cannot be made.
Int'l Call (International Call) :
- International calls cannot be made.
Int'lExpHome (International Except Home) :
- When you are abroad, calls can be made only to
numbers within the current country and to your home
country, which is the country where your home network
provider is located.
All incoming : All calls cannot be received.
In.AtAbroad (International At Abroad) :
- Calls cannot be received when you use your phone
outside of your home service area.
Cancel all : All call barring settings are deactivated.
Change PWD : User can change the call barring password.
3. Call waiting
This service enables you to be informed when you receive
a second call during an ongoing call.
1. Press [Main] in idle mode.
2. Scroll to [4.Setting] by pressing navigation key, then
press [OK]. (Or press digit 4 )
3. Scroll to [5.Network set] by pressing up or down
navigation key, then press [OK]. (Or press digit 5)
4. Scroll to [3.Call waiting] by pressing up or down
navigation key, then press [OK]. (Or press digit 3)
5. Scroll to desired item, then press [OK].
Enable : Activating the corresponding service.
Disable : Deactivating the corresponding service.
Check status : Checking the status of the service.
4. Caller ID
This network service allows whether to display your phone
number on the other person's phone or not. But some
networks do not support this feature.
1. Press [Main] in idle mode.
2. Scroll to [4.Setting] by pressing navigation key, then
press [OK]. (Or press digit 4 )
3. Scroll to [5.Network set] by pressing up or down
navigation key, then press [OK]. (Or press digit 5)
4. Scroll to [4.Caller ID] by pressing up or down
navigation key, then press [OK]. (Or press digit 4)
5. Scroll to desired item, then press [OK].
Default : This menu is set by network supports
Hide number: Your number will not be displayed on the
other person's phone.
Send number: Your number is sent each time when you
make a call.
5. Netowrk setup
1. Press [Main] in idle mode.
2. Scroll to [4.Setting] by pressing navigation key, then
press [OK]. (Or press digit 4 )
3. Scroll to [5.Network set] by pressing up or down
navigation key, then press [OK]. (Or press digit 5)
4. Scroll to [5.Network setup] by pressing up or down
navigation key, then press [OK]. (Or press digit 5)
5. Scroll to desired item, then press [OK].
Page 29

57
Main Menu
Main Menu
56
Main Menu
Main Menu
(1) Select mode :
User can select available network.
(Auto select / Manual select)
Please be careful that the phone may not operate
properly if you change the network set up.
(2) Preferred NET (Preferred network) :
Add
Add from available : Add preferred network from
available network.
Add from known : Add preferred Network from
known network.
Display
: It shows the network which it prefers
(3) Known NET (Known network) :
You can select a network in the known network lists.
Your can save the network settings in Net account in order for
you to access the WAP and MMS services. Some settings are
not mandatory. Please consult your network operator or service
provider for more information.
After inserting your SIM card into your phone, your phone will
automatically detect and assign the corresponding network
settings into your phone according to your SIM Card. If your
network operator is not on the list of Net Account, please enter
or modify the settings of WAP and MMS according to the
following:
Net account
1. Press [Main] in idle mode.
2. Scroll to [4.Setting] by pressing navigation key, then
press [OK]. (Or press digit 4 )
3. Scroll to [5.Network set] by pressing up or down
navigation key, then press [OK]. (Or press digit 5)
4. Scroll to [6.Net account] by pressing up or down
navigation key, then press [OK]. (Or press digit 6)
5. Scroll to desired item, then press [OK].
1. WAP
(1) Profile name : Displays the Operator's name.
(2) Homepage : Inputs the URL. It is different for each
service provider.
(3) Gateway : Gateway address in "xxx.xxx.xxx.xxx" format.
(4) Port : Gateway port
(5) Conn type : You can select a data connection type -
HTTP, WSP CL, WSP CO (Default is "WSP CO").
(6) Bearer type : Your can select a bearer type :
GSM-GPRS or GSM-CSD.
(7) GSM-GPRS : APN (the address of the external data
network that you want to connect to, either an IP address
or a text string), User ID, Password, Linger time.
(8) GSM -CSD : Dial number, user ID, Password, Linger time.
Page 30

59
2. MMS
(1) Profile name : Displays the Operator's name.
(2) MMSC : Input a URL of multimedia messaging center.
(3) Gateway : Gateway address in "xxx.xxx.xxx.xxx" format.
(4) Port : Gateway port
(5) Conn type : You can select a data connection type -
HTTP, WSP CL, WSP CO (Default is "WSP CO").
(6) Bearer type : Your can select a bearer type :
GSM-CSD or GSM-GPRS.
(7) GSM-GPRS : APN (the address of the external data
network that you want to connect to, either an IP address
or a text string), User ID, Password, Linger time.
(8) GSM -CSD : Dial number, user ID, Password, Linger time.
* APN :
The address of the external data network that you want to
connect to, either an IP address or a text string
58
Main Menu
Main Menu
Main Menu
Main Menu
Download
In this menu, you can view the list of download items from the
server (Picture, Photo, Bell & Melody, etc.).
Each item is indicated with a specific icon. When the memory
is full, a warning message is displayed.
By shortcut
Press the [Up side navigation key] in idle mode.
This folder is used to store the image contents that you have
received or downloaded through the WAP browser.
1. Press [Main] in idle mode.
2. Scroll to [5.Data folder] by pressing navigation key, then
press [OK]. (Or press digit 5 )
3. Scroll to [1.Download] by pressing up or down
navigation key, then press [OK]. (Or press digit 1)
4. Scroll to desired item, then press [OK].
(1) Image : This feature allows you to view the image
received from other sources, such as the WAP sites or
multimedia message
(2) Sound : This feature allows you to listen to the melodies
received from other sources, such as the WAP sites or
multimedia message
(3) Others : This feature allows you to use the other contents
received from other sources, such as the WAP sites or
multimedia message
Data folder
Page 31

61
60
Main Menu
Main Menu
Main Menu
Main Menu
* About the [Menu]
(The following options are available)
(1) Send a MMS : Sends a photo as a MMS to other people.
(2) Save to ilde(or ring tone) : Set a item as idle screen.
( Or set a item as ring tone)
(3) Save to power on : You can save the selected item to
the image for power on.
(4) Save to power off : You can save the selected item to
the image for power off.
(5) Rename : Changes the name of the item.
(6) Detail : Shows the detail information of selected item
about title, format or size.
(7) Delete : Deletes the selected item.
(8) Delete all : Deletes all of the items saved in the phone.
This folder allows you to view the taken pictures.
1. Press [Main] in idle mode.
2. Scroll to [5.Data folder] by pressing navigation key, then
press [OK]. (Or press digit 5 )
3. Scroll to [2.Photo] by pressing up or down
navigation key, then press [OK]. (Or press digit 2)
* About the [Menu]
(The following options are available)
(1) Large view : Shows the photos as large images.
Album view : Shows the photos as thumbnail images.
In this mode, use up or down navigation key to scroll
through the photos .
(2) List view : Return to list mode.
Photo
(This menu only appears in the photo view status)
(3)Send a MMS : Sends a photo as a MMS to other people.
(4) Save to idle : Sets a photo as idle screen.
(5) Save to power on : You can save the selected item to
the image for power on.
(6) Save to power off : You can save the selected item to
the image for power off.
(7) Photo editor : Sends the selected photo to Photo editor
to edit picture.
(8) Rename : You can change the name of the photo.
(9) Delete : Deletes the selected photo.
(10) Delete all : Deletes all of the photos saved in the phone.
(11) Information : Shows the information of stored photo
about title, format or size etc.
This folder allows you to view the taken video files.
1. Press [Main] in idle mode.
2. Scroll to [5.Data folder] by pressing navigation key, then
press [OK]. (Or press digit 5 )
3. Scroll to [3.Video] by pressing up or down
navigation key, then press [OK]. (Or press digit 3)
* About the [Menu]
(The following options are available)
(1) Rename : You can change the name of the video file.
(2) Delete : Deletes the selected photo.
(3) Delete all : Deletes all of the photos saved in the phone.
(4) Information : Shows the information of stored photo
about title, format or size etc.
Video
Page 32

63
62
Main Menu
Main Menu
Main Menu
Main Menu
This folder allows you to view the stored avatars
1. Press [Main] in idle mode.
2. Scroll to [5.Data folder] by pressing navigation key, then
press [OK]. (Or press digit 5 )
3. Scroll to [4.Avatar] by pressing up or down
navigation key, then press [OK]. (Or press digit 4)
* About the [Menu]
(The following options are available)
(1) Send a MMS : Sends a avatar as a MMS to other people.
(2) Save to idle : Sets a avatar as idle screen.
(3) Delete : Deletes the selected photo.
(4) Delete all : Deletes all of the photos saved in the avatar.
(5) Rename : You can change the name of the avatar.
This folder allows you to view the stored pictures
1. Press [Main] in idle mode.
2. Scroll to [5.Data folder] by pressing navigation key, then
press [OK]. (Or press digit 5 )
3. Scroll to [5.Picture] by pressing up or down
navigation key, then press [OK]. (Or press digit 5)
* About the [Menu]
(The following options are available)
(1) Display : Displays a picture as idle screen.
(2) Rename : You can change the name of the picture.
Avatar
Picture
(3) Send a MMS : Sends a picture as a MMS to other people.
(4) Wall : Sets a picture as idle screen.
(5) Delete : Deletes the selected picture.
(6) Delete all : Deletes all of the photos saved in the pictures
This folder allows you to listen the melodies.
1. Press [Main] in idle mode.
2. Scroll to [5.Data folder] by pressing navigation key, then
press [OK]. (Or press digit 5 )
3. Scroll to [6.Melody] by pressing up or down
navigation key, then press [OK]. (Or press digit 6)
* About the [Menu]
(The following options are available)
(1) Send a MMS : Sends a avatar as a MMS to other people.
(2) Save to idle : Sets a avatar as idle screen.
(3) Delete : Deletes the selected photo.
(4) Delete all : Deletes all of the photos saved in the avatar.
(5) Rename : You can change the name of the avatar.
Melody
Page 33
65
64
Main Menu
Main Menu
Main Menu
Main Menu
This feature enables you to view the calendar and manage
your schedule, etc.
When you enter this menu, a calendar appears. Asquare
cursor is located on the current date, you can move to another
date using navigation key. If there is a stored schedule, it shows
a square outline.
1. Press [Main] in idle mode.
2. Scroll to [6.Scheduler ] by pressing navigation key, then
press [OK]. (Or press digit 6 )
3. Scroll to [ 1.Schedule] by pressing up or down
navigation key, then press [OK]. (Or press digit 1)
* Entering Schedule
(1) Enter the schedule
(1) To edit the text for schedule, press[Edit], and to save the
(1) schedule, press[Save]. To add the new entry on the same
(1) day, press[Add] of menu. You can enter 32 characters.
(2) Enter alarm
(1) If you want to set an alarm for the schedule, enter an
(1) alarm time here.
(3) Reminder time
(1) Select 'On time, Before 1H(1hour), Before 1 D(Day), Off'
(1) using the joy stick.
(4) Alert Ring tone
(1) If you want to change the alert ring tone, press [Chng]
(1) and select your desired ring tone.
Schedule
Scheduler
* About the [Menu]
(The following options are available)
Add: Enables to enter a new schedule.
Delete: Deletes the selected schedule after confirmation.
** On the calendar screen, you can delete all schedules
from the selected date
You can save a note for a task that you have to do, select a
priority level for the note and mark it as done when you have
completed it. You can enter up to 32 English characters.
1. Press [Main] in idle mode.
2. Scroll to [6.Scheduler ] by pressing navigation key, then
press [OK]. (Or press digit 6 )
3. Scroll to [ 2.To do] by pressing up or down navigation
key, then press [OK]. (Or press digit 2)
4. Enter each of items , then press [Save].
* T
o do detail
To do contents : To edit the text for to do, press[Edit],
and to save the to do, press [Done].
Due date : Enters the due date
Priority : Selects the High, Normal or Low priority by
pressing the navigation key.
Status : To mark the status of task, press [Sel]
To do
Page 34

67
Main Menu
Main Menu
66
Main Menu
Main Menu
You can store a short memo.
1. Press [Main] in idle mode.
2. Scroll to [6.Scheduler ] by pressing navigation key, then
press [OK]. (Or press digit 6 )
3. Scroll to [3.Memo] by pressing up or down navigation
key, then press [OK]. (Or press digit 3)
4. Enter memo, then press [OK].
You can enter up to 80 English characters.
* About the [Menu]
(The following options are available)
Add : Enables you to enter a new memo.
Delete : Deletes the selected memo.
Delete all : Deletes all the memo.
You can store the anniversaries to be remembered, such as
wedding anniversaries,birthdays or other special days.
1. Press [Main] in idle mode.
2. Scroll to [6.Scheduler ] by pressing navigation key, then
press [OK]. (Or press digit 6 )
3. Scroll to [ 4.Anniversary] by pressing up or down navigation
key, then press [OK]. (Or press digit 4)
4. Enters anniversary contents, then press [OK].
If the data exists on a selected date, it will appear in the
stored anniversary list. If the data does not exist, it will
enter into anniversary input mode.
Memo
Anniversary
If you try to add an Anniversary on the same day, press
[Menu] and then select 'Add'.
*
Anniversary detail
(1) Name : Enters the name
(2) Solar/Lunar : Selects the lunar or solar.
(3) Date : Enters the anniversary date.
(4) Time : Enters the reminder time
(5) Event : Selects the 'Anniversary, Birthday or Engagement'.
(6) Reminder time : Selects the 'On time, Before 1D(Day),
Before 2D(day) or Off'.
(7) Alert Ring : Changes the alert ring tone, press [Chng].
* About the [Menu]
(The following options are available)
Add: Enables you to enter a new anniversary.
Delete : Deletes the selected anniversary after confirmation
Delete all : Deletes all the anniversaries after confirmation
Phone is automatically powered on and off according to set
time.
1. Press [Main] in idle mode.
2. Scroll to [6.Scheduler ] by pressing navigation key, then
press [OK]. (Or press digit 6 )
3. Scroll to [5.Auto On/Off] by pressing up or down navigation
key, then press [OK]. (Or press digit 5)
Auto On / Off
Page 35

69
Main Menu
Main Menu
68
Main Menu
Main Menu
Entertainment
Game
You can enjoy two games with your phone.
1. Cargador
1. Press [Main] in idle mode.
2. Scroll to [7.Entertainment ] by pressing navigation key,
then press [OK]. (Or press digit 7 )
3. Scroll to [1.Game] by pressing up or down navigation
key, then press [OK]. (Or press digit 1)
4. Scroll to [1.Cargador] by pressing up or down navigation
key, then press [OK]. (Or press digit 1 )
Start : Continues the last game that you executed before.
Go to Level : Enters the level that you like to play, then
press [OK]. Atotal of 80 steps is provided.
Help : Shows the key map and the simple game guide.
* Using the side keys, you can adjust the game sound
while you are playing the game.
2. Blackjack
1. Press [Main] in idle mode.
2. Scroll to [7.Entertainment ] by pressing navigation key,
then press [OK]. (Or press digit 7 )
3. Scroll to [1.Game] by pressing up or down navigation
key, then press [OK]. (Or press digit 1)
4. Scroll to [2.Blackjack] by pressing up or down navigation
key, then press [OK]. (Or press digit 2 )
Start : Starts the game.
Help : Shows the key map and the simple game guide.
Press 1, 2, 3 to bet. (Press 1 : 10$, Press 2 : 20$,
Press 3: 50 $). Press [OK]: HIT
* Using the side key, you can adjust the game sound while
you are playing the game.
You can set the avatar to suit your preference and set it as
wallpaper.
1. Press [Main] in idle mode.
2. Scroll to [7.Entertainment ] by pressing navigation key,
then press [OK]. (Or press digit 7 )
3. Scroll to [2.Avatar] by pressing up or down navigation
key, then press [OK]. (Or press digit 2)
* Making an
Avatar
(1) Enter Avatar.
(2) Select item by using Left/Right navigation key.
(Hair / Face / Eyes / Mouth / Jacket / Pants / Extra)
(3) Select sub-item by using upper/lower navigation key.
(4) Press [Save].
(5) Enter name, then press [OK].
Avatar
Page 36

71
70
Main Menu
Main Menu
Main Menu
Main Menu
The alarm will ring at the time set by you.
1. Press [Main] in idle mode.
2. Scroll to [8.Utilities ] by pressing navigation key,
then press [OK]. (Or press digit 8 )
3. Scroll to [1.Alarm] by pressing up or down navigation
key, then press [OK]. (Or press digit 1)
* Entering alarm
(1) Select period : Select the 'Off, One time, Mon~Fri or
Everyday'. If you select 'Off', you are not required to input
alarm time and set alarm bell.
(2) Input alarm time.
(3) Set alarm bell: If you want to change the alarm bell,
press [Chng].
You can perform simple calculation such as addition,
subtraction, multiplication and division.
1. Press [Main] in idle mode.
2. Scroll to [8.Utilities ] by pressing navigation key,
then press [OK]. (Or press digit 8 )
3. Scroll to [2.Calculator] by pressing up or down navigation
key, then press [OK]. (Or press digit 2)
Alarm
Calculator
Utilities
This feature allows you to check the current time in major cities
around the world. Scroll through the cities using the Left/Right
navigation key. The city name is displayed as title area.
1. Press [Main] in idle mode.
2. Scroll to [8.Utilities ] by pressing navigation key,
then press [OK]. (Or press digit 8 )
3. Scroll to [3.World time] by pressing up or down navigation
key, then press [OK]. (Or press digit 3)
You can use stopwatch function with this phone.
The accuracy can reach to 0.1 seconds.
1. Press [Main] in idle mode.
2. Scroll to [8.Utilities ] by pressing navigation key,
then press [OK]. (Or press digit 8 )
3. Scroll to [4.Stopwatch] by pressing up or down navigation
key, then press [OK]. (Or press digit 4)
* Stopwatch detail
Start : Start to countdown timer.
Stop : Stop of countdown timer.
Reset : Reset the time without saving it.
World time
Stopwatch
Page 37

73
Main Menu
Main Menu
72
Main Menu
Main Menu
You can calculate the exchange rates.
1. Press [Main] in idle mode.
2. Scroll to [8.Utilities] then press [OK].(or press digit 8)
3. Scroll to [5.Currency] then press [OK].(or press digit 5)
* Currency detail
(1) Select a combination of currencies to convert.
(2) Enter the currency and exchange rate, so then Press [OK].
(3) Result appears in the bottom.
Currency
STK features are provided by your service provider. If your
SIM card supports STK feature, you will see the STK menu.
Please contact your service provider for details of STK.
By main menu
(1) Press [Main] in the idle mode.
(2) Scroll to [9. STK] using Left/Right navigation key,
then press [OK].(or press digit 9 )
By shortcut
Press the [Down side navigation key] in idle mode.
STK
Page 38

Your phone includes a bulit-in WAP browser, allows you to
access various WAP(Wireless Application Protocal) services
Such as news, sports, travel, weather report and entertainment.
* Access to Internet SVC(Service)
By shortcut
Press the [Center navigation key] in the idle mode to access
internet service directly.
1. Homepage(TELCEL)
The address of the homepage is entered in WAP profiles.
Once connected, the homepage is displayed.
* About the [Menu]
(The following options are available)
(1) PROFILE1
(2) Recent Pages
(3) Refresh
(4) Bookmarks
(5) Enter Address
(6) Save as...
(7) Save as home
(8) Push Message
(9) Settings
75
Main Menu
Main Menu
74
Main Menu
Main Menu
Internet SVC
2. Bookmarks
The list of bookmarks can have 10 entries in maximum.
3. Recent pages
Shows the latest visited WAP pages.
4. Enter address
Please enter the WAP address that you would like to access.
5. Settings
In this menu, you can make settings for the WAP servers of
different network operators, and select the server that you
would like to use when connecting to the Internet.
(1) Option
Refresh : Chooses the mode of "Refresh" or not.
Show Images : This feature allows whether to show the
images when you are receiving a object
or not .(Never / Ask / Always)
Play Movies : This feature allows whether to show the
movies when you are receiving a object
or not .(Never / Ask / Always)
Play Sounds : This feature allows whether to listen the
sounds when you are receiving a object
or not .(Never / Ask / Always)
Load Objects : This feature allows whether to receive the
object when you are browsing or not
(Never / Ask / Always)
Page 39

(2) Cache
The information or services you have accessed are
stored in the cache of your phone. Acache is a buffer
memory, which is used to store data temporary.
Cache Mode : This feature allows whether to use the
cache function or not
Clear Cache : This feature allows you to clear information
stored in the cache
(3) Cookies
You can set the phone to allow or prevent receiving
cookies. Acookie is data that a WAP site saves in your
phone's browser cache memory.
Enable Cookies : This feature allows whether to use the
cookie function or not
Clear Cookies : This feature allows you to clear information
stored in the cache
(4) Clear recent pages : You can delete recent pages that
you have accessed.
77
76
Main Menu
Main Menu
Main Menu
Main Menu
This menu allows you to create, send, read and save messages
with the SMS(Short Message Service), EMS(Enhanced Message
Service : message including simple image, animation or melody),
MMS(Multimedia Message Service).
* This message service may not be available on all networks.
Contack your service provider for more information.
You can use this SMS(Short message service) feature to send,
receive and edit short text message. In addition, your phone
supports the EMS(Enhanced Message Service), it enables you
to make short message consisting of simple pictures, melodies
and animations .
1. New message
With this menu you can write a message and insert EMS
options.
1. Press [ ] in the idle mode.
2. Scroll to [1.SMS] by pressing up or down navigation key,
then press [OK]. (Or press digit 1 )
3. Scroll to [1.New message] then press [OK].
(or press digit 1)
Message
SMS
Page 40
79
78
Message
Message
Message
Message
* Entering New message
(1) To :
- Press the [Edit] then inputs the phone number of
recipient.
* You can use the [PHBook] to search the recipient's
number from the phonebook.
You can send a message to 5 recipients simultaneously.
(2) Text :
- Press the [Edit] then write the message.
* About the [Menu]
(The following options are available)
(1) Input method : You can use this menu to select input
text mode.
(2) Language : You can change the input languages.
(3) Insert Media : You can contain multimedia contents
when you create the message.
(4) Exit : Return to previous screen.
(3) After you complete the message, press [Send] and
select one of the following options.
* About the [Send]
(The following options are available)
Send Only : Sends the message.
Save and Send : Saves the message, and send it.
Save Only : Saves the message so that it can be sent later
2. Inbox
With this menu you can read messages. When you have
received the message, new message icon appears together
with beeps. (except meeting and concert modes)
1. Press [ ] in the idle mode.
2. Scroll to [1.SMS] by pressing up or down navigation key,
then press [OK]. (Or press digit 1 )
3. Scroll to [2.Inbox ] then press [OK].(or press digit 2)
The latest incoming message is displayed on top of the
inbox. When the callback number is displayed, press [SEND]
to connect a call.
* About the [Menu]
(The following options are available)
1) Reply : You can reply the message to sender.
2) Forward : You can forward the message to new recipients.
3) Copy to SIM(Phone) : Enables you to copy message to
the phone or vice versa.
4) Delete : Deletes selected message.
5) Delete all : Deletes all the messages saved in inbox
after confirmation.
6) Cut address : You can extract phone number, URL and
email address from the contents so that you can use
them to save the number, go to URL ro save email
address, respectively.
Page 41
81
80
Message
Message
Message
Message
* About the [Menu]
(The following options are available)
(1) Forward : Forwards a received message to other recipient.
(2) Delete : Deletes the selected message.
(3) Delete all : Deletes all the messages from inbox.
(4) Cut address : You can extract phone number, URL and
email address from the contents so that you can use
them to save the number, go to URL ro save email
address, respectively.
5. Quick text
There are preset messages in the list. With this messages,
you can edit the preset message or create new message.
1. Press [ ] in the idle mode.
2. Scroll to [1.SMS] by pressing up or down navigation key,
then press [OK]. (Or press digit 1 )
3. Scroll to [5.Quick text] then press [OK]. (or press digit 5)
* About the [Menu]
(The following options are available)
(1) Edit : Enables you to edit the selected preset message.
(2) Send : Enables you to send the selected preset message
6. Voice mail
With this menu, you can access your voice mailbox quickly.
The voice mail message icon will be displayed on the
screen if there is a voice mail.
3. Outbox
With this menu you can view the saved messages that you
have already sent (If you choose "Save and Send" in New
Message menu) or just saved without sending (if you choose
"Save only")
1. Press [ ] in the idle mode.
2. Scroll to [1.SMS] by pressing up or down navigation key,
then press [OK]. (Or press digit 1 )
3. Scroll to [3.Outbox ] then press [OK]. (or press digit 3)
* About the [Menu]
(The following options are available)
(1) Forward : Forwards a received message to other recipient.
(2) Copy to SIM(Phone) : Enables you to copy message
to the phone or vice versa.
(3) Delete : Deletes the selected message.
(4) Delete all : Deletes all the messages from inbox.
(5) Cut address :You can extract phone number, URL and
email address from the contents so that you can use
them to save the number, go to URL ro save email
address, respectively.
4. Draft
With this menu you can view the messages saved as draft
that are not sent.
1. Press [ ] in the idle mode.
2. Scroll to [1.SMS] by pressing up or down navigation key,
then press [OK]. (Or press digit 1 )
3. Scroll to [4.Draft ] then press [OK]. (or press digit 4)
Page 42
83
82
Message
Message
Message
Message
1. Press [ ] in the idle mode.
2. Scroll to [1.SMS] by pressing up or down navigation key,
then press [OK]. (Or press digit 1 )
3. Scroll to [6.Voice mail] then press [OK]. (or press digit 6)
* About the [Menu]
(The following options are available)
1) Number : Please enter Voice center number.
2) Listen : Press [OK] to connect to voice center.
7. Broadcast
With this menu, you can receive the broadcast messages
on general information such as weather or traffic, etc. .
For more information about topics, please contact your
service provider.
1. Press [ ] in the idle mode.
2. Scroll to [1.SMS] by pressing up or down navigation key,
then press [OK]. (Or press digit 1 )
3. Scroll to [7.Broadcast] then press [OK]. (or press digit 7)
* About the [Menu]
(The following options are available)
(1) Inbox : You can read all the received broadcast
messages.
(2) Option : Selects whether to receive the broadcast
messages or not
(3) Set language : Selects your preferred language to be
display of broadcast message.
(4) Channel list : Indicates the channel from which you
wish to receive broadcast message
8. Setting
With this menu, you can set up SMS message.
1. Press [ ] in the idle mode.
2. Scroll to [1.SMS] by pressing up or down navigation key,
then press [OK]. (Or press digit 1 )
3. Scroll to [7.Broadcast] then press [OK]. (or press digit 7)
(1) Service center :
Enables you to store or change the number of your
SMS center required when sending messages
You must obtain the number from your service provider.
(2) Expire period :
Enables you to set the length of the time for which your
messages are stored at the message center while
attempts are made to deliver them .
Selects the period in which the service center tries to
deliver the message.
1 hour, 6 hours, 12 hours, 24 hours, 72 hours,
1 week, Maximum
(3) Message type :
Enables you to set the default message type - Text,
Voice, E-mail and Fax. The network can convert the
message into the selected format.
(4) Status report :
Enables you to activate or deactivate the report function.
When this function is On, the network will inform you
whether or not your message has been delivered .
(5) Alert period :
Enables you to select the period of alert type when
incoming message
One time, Every 2 min, Off
Page 43
85
Message
Message
84
Message
Message
9. Memory status
You can check the status of your phone and SIM card
memory. If [Memory is full!] message appears, you cannot
save any more item until you have deleted other item.
MMS
You can use this MMS feature to send and receive messages
containing multimedia contents (image, sound).
1. Multimedia
With this menu you can write a message and insert MMS
options.
1. Press [ ] in the idle mode.
2. Scroll to [2.MMS] by pressing up or down navigation key,
then press [OK]. (Or press digit 2)
3. Scroll to [1.Multimedia] then press [OK]. (or press digit 1)
* Entering MSG editor
(1) To[ ] : Enters the phone number or Email address of
recipient. Press the [Edit] then input the phone
number of recipient.
(2) Cc[ ] : To send the message to another mobile phone,
enter the phone number or Email address of
recipient. Press the [Edit] then inputs the phone
number of recipient.
* You can use the [Phone book] to search the recipient's
number from the phonebook.
(3) Subject[ ] : Writes a title.
(4) Options[ ] : You can set the following features,
- Validity period : Selects the validity period to 1 Hour,
12 Hours, 1 Day, 1 Week or Max.
- Read report : Enables you to request for a report that the
recipient reads the message.
- Delivery report : Enables you to request for report of the
message delivery status.
- Priority : Selects the 'Low, Normal or High'.
(5) Edit content[ ] : You can edit the content type.
- Split-Text&Image : Inserts an image after entering the text
- Split-Image&Text : Inputs a text after inserting an image
2. Inbox
When a new multimedia message comes in, the display
shows the text notification along with the Subject of the
message.
1. Press [ ] in the idle mode.
2. Scroll to [2.MMS] by pressing up or down navigation key,
then press [OK]. (Or press digit 2)
3. Scroll to [2.Inbox] then press [OK]. (or press digit 2)
* About the [Menu]
(The following options are available)
(1) View : Enables you to view the received message.
(2) Reply : You can reply a message to sender.
(3) Reply to all : You can reply a message to all senders
and recipients.
(4) Forward : You can forward the received message to
others.
Page 44

87
Message
Message
86
Message
Message
4. Drafts
The unsent message is stored in Drafts Box. It has some
sub menu such as view, send, delete and change.
1. Press [ ] in the idle mode.
2. Scroll to [2.MMS] by pressing up or down navigation key,
then press [OK]. (Or press digit 2)
3. Scroll to [4.Draft] then press [OK]. (or press digit 4)
* About the [Menu]
(The following options are available)
(1) View : Enables you to view the message.
(2) Edit message : enables you to edit message.
(3) Delete : Deletes the selected message.
(4) Delete all : Deletes all message.
(5) Send : Sends the selected message.
(6) Refresh : Refreshes the selected message.
(7) Back : Goes to previous screen.
5. Sent
When you access this menu option, the list of the MMS
messages that you have already sent successfully will
display.
1. Press [ ] in the idle mode.
2. Scroll to [2.MMS] by pressing up or down navigation key,
then press [OK]. (Or press digit 2)
3. Scroll to [5.Sent] then press [OK]. (or press digit 5)
(5) Delete : Deletes the selected message.
(6) Delete all : Deletes all message.
(7) Refresh : Refreshes the selected message.
(8) Back : Returns to previous screen
3. Outbox
In this menu saves any messages that you have already
sent (If you choose "Save and Send" in New Message menu)
or just saved without sending (if you choose "Save only").
1. Press [ ] in the idle mode.
2. Scroll to [2.MMS] by pressing up or down navigation key,
then press [OK]. (Or press digit 2)
3. Scroll to [3.Outbox] then press [OK]. (or press digit 3)
* About the [Menu]
(The following options are available)
(1) View : Enables you to view the message.
(2) Edit message : Enables you to edit the message.
(3) Delete : Deletes the selected message.
(4) Delete all : Deletes all message.
(5) Send : Sends the selected message.
(6) Refresh : Refreshes the selected message.
(7) Back : Goes to previous screen.
Page 45
89
Message
Message
88
Message
Message
(4) Priority : Set the priority of message. Low, Normal or High.
(5) Auto save
(6) Slide duration
2. Retrieval Mode : You can select the mode between
Delayed and Immediate.
3. Filters : You can set the received message type:
'Immediate limit, Treat as delayed, Max size' .
* USSD Service
USSD is a GSM service that user requests services by
entering a service code(specific short digit or characters)
at the handset.
If you need more details, please contact your service
provider because the service code differs.
6. Templates
You can use it to edit the preset messages which contains
picture and or MIDI sound.
1. Press [ ] in the idle mode.
2. Scroll to [2.MMS] by pressing up or down navigation key,
then press [OK]. (Or press digit 2)
3. Scroll to [ 6.Templates] then press [OK]. (or press digit 6)
7. Settings
You can change the default multimedia message settings.
The following options are available.
1. Press [ ] in the idle mode.
2. Scroll to [2.MMS] by pressing up or down navigation key,
then press [OK]. (Or press digit 2)
3. Scroll to [7.Setting] then press [OK]. (or press digit 7)
* Settings detail
1. Sending
You can set the sending status of validity period, read
report,delivery report, etc.
(1) Validity period :
Sets the length of the time for your message will be saved
at the message center while attempts are made to deliver
them. Set on the 1 Hour, 12 Hours, 1 Day, 1 Week, Max
(2) Read report : When this option sets to ON, your recipient's
phone sends a reply to let you know when your message
was read by him/her.
(3) Delivery report : When this option sets to On, the network
informs you whether or not your message has been
delivered
Page 46
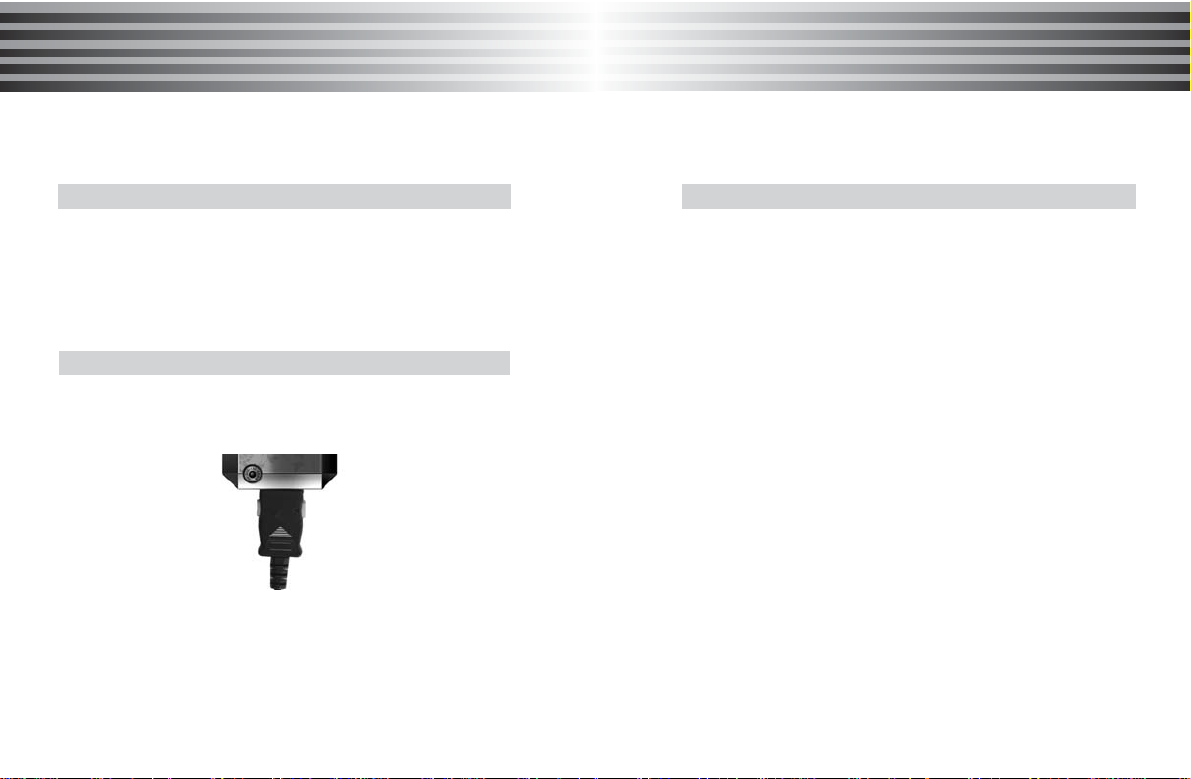
91
Reference Information
Reference Information
90
Reference Information
Reference Information
The battery pack is not fully charged when purchased.
Fully charge it for 8 hours the first time before using.
Use only batteries approved by the phone manufacturer.
Recharge battery only with the chargers approved by the
manufacturer.
Unplug the charger when not in use.
1. Connect the power plug to the wall socket outlet.
2. Insert the power cable jack into the connector at the lower
part of the phone.
* Tips
- When the battery is almost empty, you will hear 'Beep'
sounds.
- It may take additional charging time if the phone is
powered on.
Battery
About the battery
Charging the Battery
Caution!
- Never use any charger or battery that is damaged in any way.
- Use the battery only for its intended purpose.
- Use only batteries approved by the phone manufacturer and
recharge your battery only with the chargers approved by the
manufacturer. If you use the non-approved batteries, it may
cause fire or explosion. Unplug the charger when not in use .
- Do not leave the battery in hot or cold places, such as in a
closed car in summer or winter conditions, as you will reduce
the capacity and lifetime of the battery.
Also do not leave the battery in microwave, pressure pot.
If the battery is heated in the closed space, it may cause fire,
smoke or broken. Always try to keep the battery between
-10~55¡É
- Do not apply extreme shock to the battery. It is dangerous
to disassemble a battery or to apply extreme shock to the
battery via nail or heavy metal objects.
- Keep all accessories or batteries out of reach of small children
or babies. Please instruct children the proper ways of han-
dling
phone during usage. Shock circuit and breakdown may occur
and cause severe danger to user due to improper usage.
Page 47

93
92
1. Battery operating time (standby and talk time) is an
estimated value from normal field condition (DRX=5).
Therefore the battery performance depends on many
factors including network configuration, signal strength,
battery age and condition, the temperature and backlight
status.
2. If the phone is in 'no service area', the standby time will
become shorter.
3. Receiving call requires the same amount of electric
current as much as that of making a call.
1. Charging Time(Power Off Status)
Description Standard(650mAh)
Time 2 hours
2. Battery Time
Description Standard(650mAh)
Talk Time (min) 100 ~ 120 min
Standby Time (hours) 60 ~ 100 hours
Reference Information
Reference Information
Battery Time
Reference Information
Reference Information
Entering Text
You can enter characters by using the phone's keypad.
Using this feature you can store a name in the phone book,
creating idle banner and scheduling events.
Text input mode indicator
Character input status
Cursor indicates
insertion position
Softkeys
area
Text input
area
Press the [Menu] to access the menu items.
Character selection
area
Page 48

95
94
Reference Information
Reference Information
Reference Information
Reference Information
Possible input mode are eZi, abc, 123 and Symbol
mode.
(2) Language
Using this menu, you can change the input languages.
Please select the language that you would like to choose.
* The supported language may be different by countries.
(3) Insert Media
Using this menu, you can contain multimedia contents
when you create the message.
Possible items are Picture, Melody, Sound and Animation
(4) Exit
Return to previous screen.
1. Predictive English (eZi mode)
Word input : Press 2-9 one time to input letter at the key.
Symbol Input : Press[0] to select all support symbol when no
word is input.
Press Key[left / right] or [ + ]key to navigate (move highlight
forward or back).
Press[ * ] or Key Down to confirm the highlight word.
Press[Clear](Right Softkey) to delete current preview input
letter.
Space input : key[ * ]
Changing the text input mode
General text input guideline
Press [CLR] key
- Press the key : To delete one letter at a time.
- Press and hold down the key : To deletes the all characters
in text area
Press [*] key
- Word is entered : To select the word you entered.
- No word is entered : To insert a space
Press [END] key : Go to idle screen.
Press [1] key
: To enter the punctuation marks.
Press [Side key]
: To change input method.
Press [#] key
- Press the key : Changes the up case and lower case.
- Press and hold down the key : On the text input mode, it
changes the text a line
i) By pressing [Input Method] from [Menu]
ii) By pressing [Side key], you can change the mode
* About the [Menu]
(The following options are available)
(1) Input method
Using this menu, you can select input text mode.
English input
Page 49
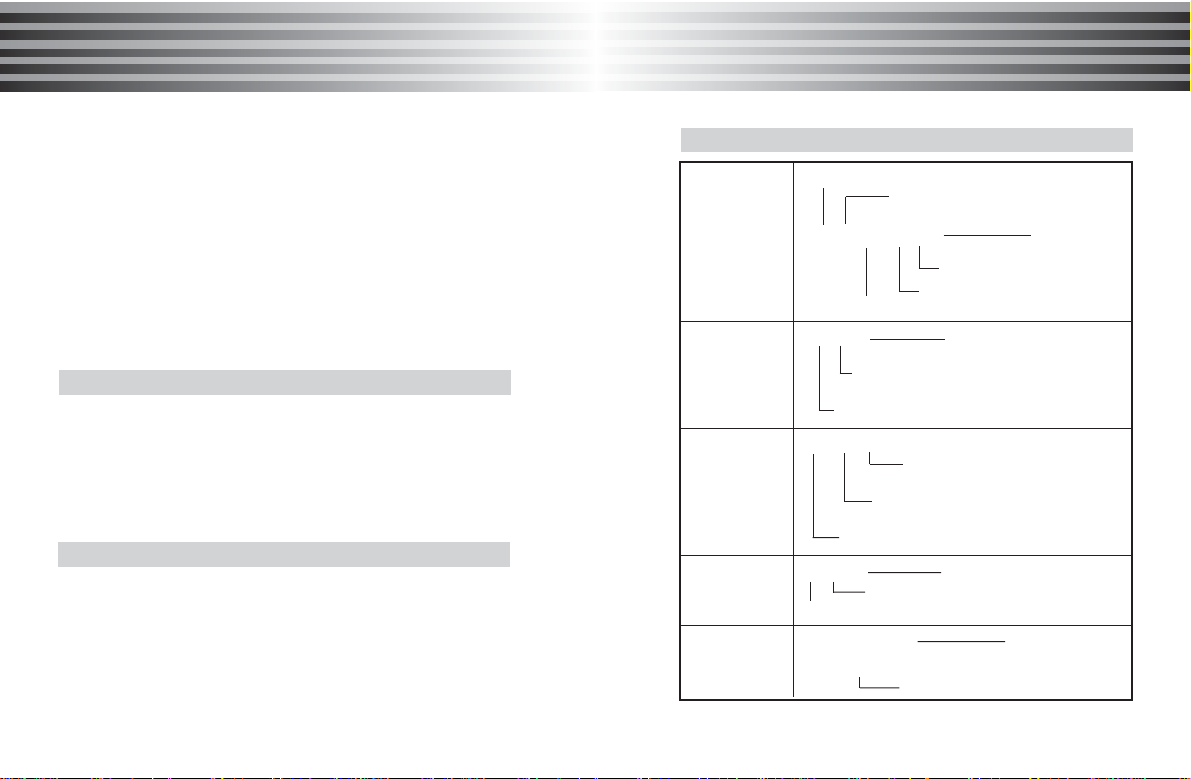
97
Reference Information
Reference Information
96
Reference Information
Reference Information
2. Normal English (abc mode)
Letters input: press 2-9 one or more times to select letter.
Example : Input 'a' should press[2] once, input 'y' should
press[9] three times.
Symbol Input : press [1] to select mark symbol,
Press[0] to select context symbol.
Space input : key[ * ]
Changing uppercase and lowercase: key[ # ]
This feature type numbers using one keystroke per number.
Input number : Press 0~9 keypad
Space Input : key ('*')
The 123 mode indicator is displayed at the top of the screen.
This feature enable(s you to insert symbols in a text message.
This feature enables you to insert symbols in a text message.
- Use the navigation keys to scroll to the desired symbol.
- Press [1~8]key to select one of them.
- Press [ * ] to confirm the first candidate.
Symbol input (SYM mode)
Number input (123 mode)
Data Format
Idle Mode
Schedule /
Anniversary
/ Alarm
Month:1~9,10,11,12
Day(DD) :1~9,10,31
12/25(Su) 10:30A A:AM/ P:PM
Min(MM):00~09,10~59
Hour(HH):0~9,10,11,12
A day of the week
00:00am am:AM / pm:PM
Min : Enter Min from 00 to 59
Hour : Enter hour from 01 to 12
Anniversary
/ To do
0000/00/00
Day :Enter Day from 01 to 12
Month :Enter Month from 01 to 12
Year :Enter 1890 to 2040
Stopwatch
00:00:00 Millisecond
Second
Minute
World Time
Maxico City City name
08/13(We) 02:14A
Mo~Su
Page 50

99
98
Reference Information
Reference Information
Reference Information
Reference Information
Troubleshooting
Check these questions first if you experience problems with
your phone :
Q : I press the Power / End key, but nothing happened.
A : Be sure to press and hold ¡®END¡¯(the END/Power key)
until the display appears. You will hear an audible alert.
If nothing happens, check the battery pack.
Q : The display says "Insert SIM Card" or "Check SIM
Card" even through I have inserted my SIM card in
the hone.
A : The SIM card may be incorrectly inserted. Check the SIM
card to make sure that it is inserted properly. Be sure to
turn your phone off and turn it on again after your re-insert
the SIM card.
Q : The display says "Locked" . How do I unlock my
phone?
A : Try entering the 4 digit lock code 0000.
Q : The display says "SIM Blocked". How do I unblock
my SIM card?
A : Call your service provider to obtain the PIN unblocking
key(PUK) code.
Q : My phone does not ring.
A : If you see "Silent / Vibrator icon" in the display, then the
ringer is turned off. Also, the ringer may be set to "Silent"
even through your phone is set to a ring alert profile.
Q : I cannot send/receive calls.
A : Make sure that you have a phone network signal.
Avoid electrical or radio interference, and obstructions
such as bridges, parking garages, or tall buildings.
Your phone also may have the "Call Barring" feature
turned on. If you know the password, you can change
this setting in the network setup menu.
Also check and make sure your SIM card is installed and
working properly.
Q : My battery didn¡¯t last as long as I expected.
What can I do to extend battery life?
A : Your battery¡¯s performance is affected by charging
frequency, feature use, temperature changes and other
factors.
Q : I tried to place a call and heard an alternating high/low
tone.
A : Your call did not reach the wireless system.
You may have dialed the number too soon after turning
the phone on. Wait until the display shows the name of
your service provider before making a call.
Page 51
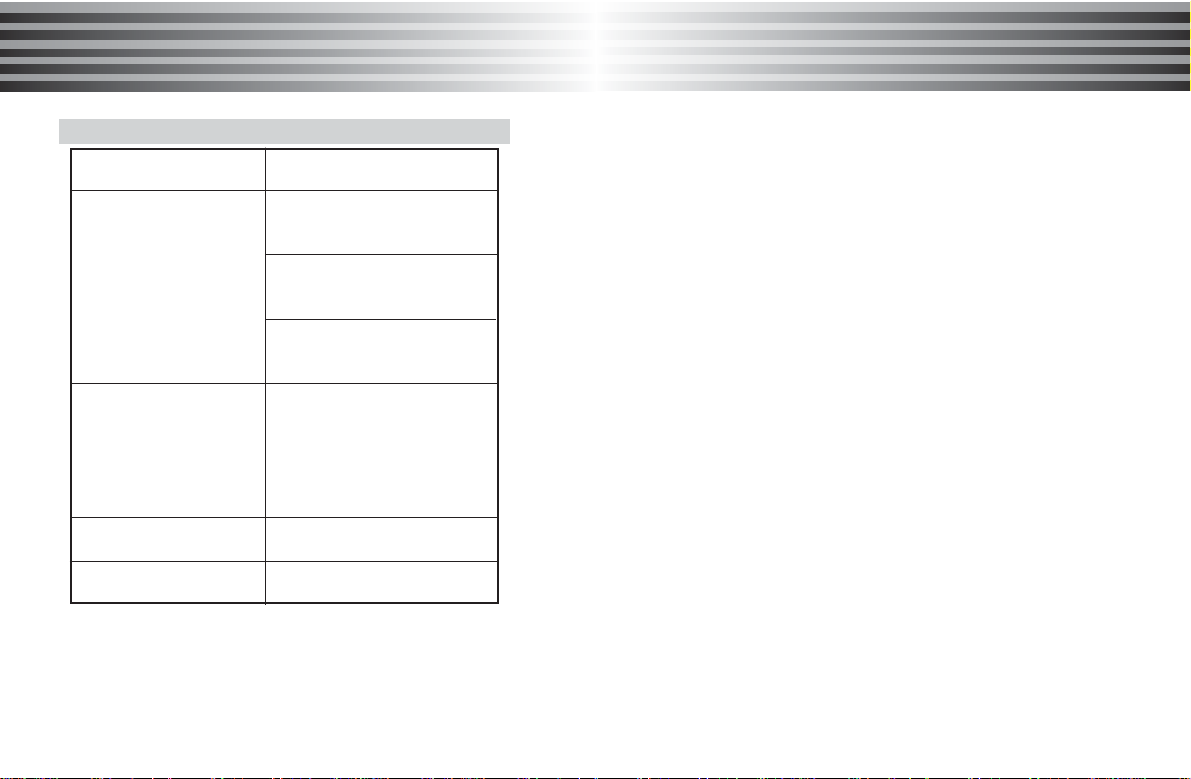
101
100
Reference Information
Reference Information
Reference Information
Reference Information
Technical information
GSM 850/1800/1900
Supported Systems
52 x 57 x 23 mm
Size
76 g(approx.)
Weight
* GSM : Global Systems for Mobile Communications
* DCS : Digital Cellular System
* PCS : Personal Communication Service
Telcel has tried its best to ensure the accuracy of the contents on this printing
material yet it does not accept liability for any error.
Telcel reserves all the rights to change the product specifications without prior
notice.
GSM 850:
824 to 849 MHz(TX)
869 to 894 MHz(RX)
DCS 1800:
1710 to 1785 MHz(TX)
1805 to 1880 MHz(RX)
Operating Frequency
Range
GSM 850 :
33dBm(2Watt) Nominal
DCS 1800 :
30dBm(1Watt) Nominal
PCS 1900 :
30dBm(1Watt) Nominal
Max.Transmitting Power
PCS 1900:
1850 to 1910 MHz(TX)
1930 to 1990 MHz(RX)
Page 52

Safety Information
1 . SAFETY INFORMATION FOR FIXED WIRELESS TERMINALS
.POTE NTIALLY EXPLOSIVE ATMOSPHERES
Turn your phone OFF when in any area with a potentially explosive atmosphere and obey all signs and instructions.
Sparks in such areas could cauls e an explosion or fire resulting in bodily injury or even death.
INTERFERENCE TO MEDICAL DIVICES
Certain electronic equipment may be shielded against RF signal from you wireless phone. (pacemakers, Hearing Aids,
and so on) Turn your phone OFF in health c are
facilities when any regulations posted in these areas instruct you to do so. RF signals may affect improperly installed or
inadequately shielded electronic system in motor vehicles.
.EXPOSURE TO RF ENERGY
Use only the supplied or an approved replacement antenna. Do not touch the antenna unnecessarily when the phone is
in use. Do not move the antenna close to, or couching any exposed part of the body when making a call.
Page 53

U.S.A.
U.S.FEDERAL COMMUNICATIONS COMMISSION
RADIO FREQUENCY INTERFERENCE STATEMENT
INFORMATION TO THE USER
NOTE : This equipment has been tested and found to comply with the limits for a Class B digital device pursuant to Part 15 of the
FCC Rules. These limits are designed to provide reasonable protection against harmful Interference in a residential installation
This equipment generates, uses, and can radiate radio frequency energy and, if Not installed and used in accordance with the
instructions, may cause harmful Interference to radio communications. However, there is no guarantee that interference will not
occur in a particular Installation. If this equipment does cause harmful interference to radio or television reception, which can be
determined by turning the equipment off and on, the user is encouraged to try to correct the interference by one or more of the
following measures:
*- Reorient or relocate the receiving antenna.
Increase the separation between the equipment and receiver.
*- Connect the equipment into an outlet of a circuit different from that to which the receiver is
connected.
*- Consult the dealer or an experienced radio/TV technician for assistance.
Changes or modification not expressly approved by the party responsible for Compliance could void the user’s authority to
operate the equipment. Connecting of peripherals requires the use of grounded shielded signal cables.
Page 54

FCC Compliance Information
This device complies with Part 15 of FCC Rules.
Operation is subject to the following two conditions:
(1) This device may not cause harmful interference, and
(2) This device must accept any interference received.
Including interference that may cause undesired operation.
SAFETY INFORMATION FOR RF EXPOSURE
Body worn operation
This device was tested for typical body-worn operations with the back of the phone kept 15 mm. from the body. To
maintain compliance with FCC RF exposure requirements, use only belt-clips, holsters or similar accessories that
maintain a 15 mm. separation distance between the user’s body and the back of the phone, including the antenna. The
use of belt-clips, holsters and similar accessories should not contain metallic components in its assembly. The use of
accessories that do not satisfy these requirements may not comply with FCC RF exposure requirements, and should
be avoided.
Page 55

SAR INFORMATION
THIS MODEL PHONE MEETS THE GOVERNMENT’S
REQUIREMENTS FOR EXPOSURE TO RADIO WAVES.
Your wireless phone is a radio transmitter and receiver. It is designed and manufactured not to exceed the emission limits for exposure to
radiofrequency (RF) energy set by the Federal Communications Commission of the U.S. Government. These limits are part of
comprehensive guidelines and establish permitted levels of RF energy for the general population. The guidelines are based on standards
that were developed by independent scientific organizations through periodic and thorough evaluation of scientific studies. The standards
include a substantial safety margin designed to assure the safety of all persons, regardless of age and health. The exposure standard for
wireless mobile phones employs a unit of measurement known as the Specific Absorption Rate, or SAR. The SAR limit set by the FCC is
1.6 W/kg. *
Tests for SAR are conducted with the phone transmitting at its highest certified power level in all tested frequency bands. Although the
SAR is determined at the highest certified power level, the actual SAR level of the phone while operating can be well below the maximum
value. This is because the phone is designed to operate at multiple power levels so as to use only the power required to reach the
network. In general, the closer you are to a wireless base station antenna, the lower the power output. Before a phone model is available
for sale to the public, it must be tested and certified to the FCC that it does not exceed the limit established by the government adopted
requirement for safe exposure. The tests are performed in positions and locations (e.g., at the ear and worn on the body) as required by
the FCC for each model. The highest SAR value for this model phone when tested for use at the ear is 1.23 W/Kg
body , as described in this user guide, is 0.391 W/Kg
accessories and FCC requirements). While there may be differences between the SAR levels of various phones and at various positions,
they all meet the government requirement for safe exposure. The FCC has granted an Equipment Authorization for this model phone with
all reported SAR levels evaluated as in compliance with the FCC RF exposure guidelines. SAR information on this model phone is on file
with the FCC and can be found under the Display Grant section of http://www.fcc.gov/ oet/fccid after searching on FCC ID: R5WNGTC640.
Additional information on Specific Absorption Rates (SAR) can be found on the Cellular Telecommunications Industry Asso-ciation (CTIA)
web-site at http://www.wow-com.com
watts/kg (W/kg) averaged over one gram of tissue. The standard incorporates a sub-stantial margin of safety to give additional protection
for the public and to account for any variations in measurements.
. * In the United States and Canada, the SAR limit for mobile phones used by the public is 1.6
. (Body-worn measurements differ among phone models, depending upon available
and when worn on the
 Loading...