

Newer Technology Universal Drive Adapter User Manual
Universal Drive Adapter
User Guide
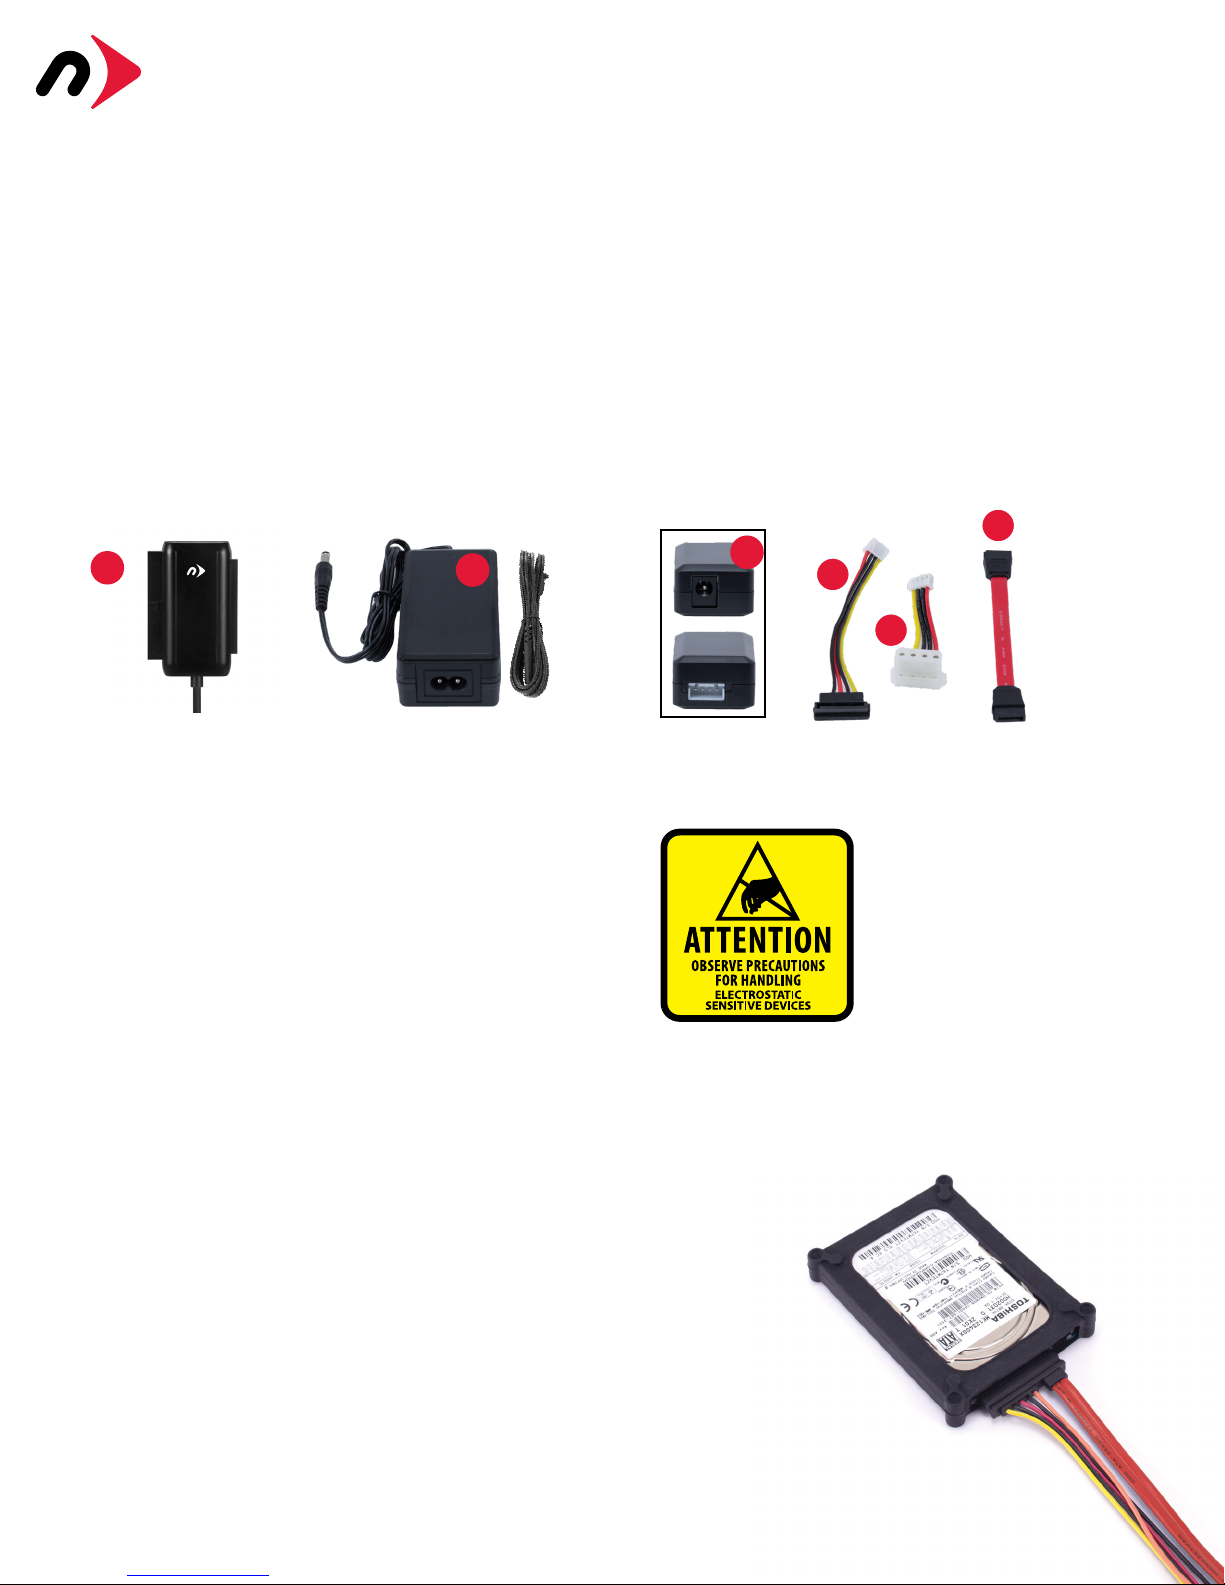
Package Contents:
A. Universal Drive Adapter with captive USB 3.1 Gen 1 cable
B. Power supply and cable
C. Power converter
D. SATA power cable (converter to drive)
E. 4-pin power cable (converter to drive)
F. SATA data cable
Note: items not shown to scale.
A
B
F
C
D
E
Compatible Drives
• 2.5 inch and 3.5 inch IDE/ATA hard drives, and 5.25 inch ATAPI
optical drives.
• 2.5 inch and 3.5 inch SATA hard drives, and 5.25 inch SATA optical
drives. NOTE: Only compatible with full-height 5.25 inch optical
drives. Not compatible with slimline (i.e. laptop) optical drives.
Connections
USB 3.1 Gen 1:
Connect the Universal Drive Adapter to your computer using the
captive cable. (Backward compatible with USB 2.0 and USB 1.1)
40-pin ATA:
Use this connector on the Universal Drive Adapter to attach 3.5
inch IDE/ATA hard drives and 5.25 inch ATAPI optical drives.
44-pin ATA:
Use this connector on the Universal Drive Adapter to attach 2.5
inch IDE/ATA hard drives.
SATA:
Use these cables to attach all drives that use a SATA connection.
LED
On the front of the Universal Drive Adapter there are two
multifunction LED indicators, showing both power and drive
activity. Each LED will display solid blue when the Universal Drive
Adapter is plugged into your USB port and drawing power. Each
LED will flash when data is being transferred through the Universal
Drive Adapter.
The NewerTech Universal Drive
Adapter is designed to be used on a
temporary basis. This adapter does
not have an enclosure to protect the
drive from damage due to electrostatic
discharge. We recommend placing
the drive on a static-free work surface
when using it with the Universal Drive
Adapter. Another option is to use a
NewerTech ProtectaDrive, pictured below. By encapsulating your
drive with this protective sleeve you can help protect it from
impact, short circuits, and static electricity. NOTE: the cable shown
is not part of the Universal Drive Adapter kit and is not included
with the ProtectaDrive; it is shown for illustrative purposes.
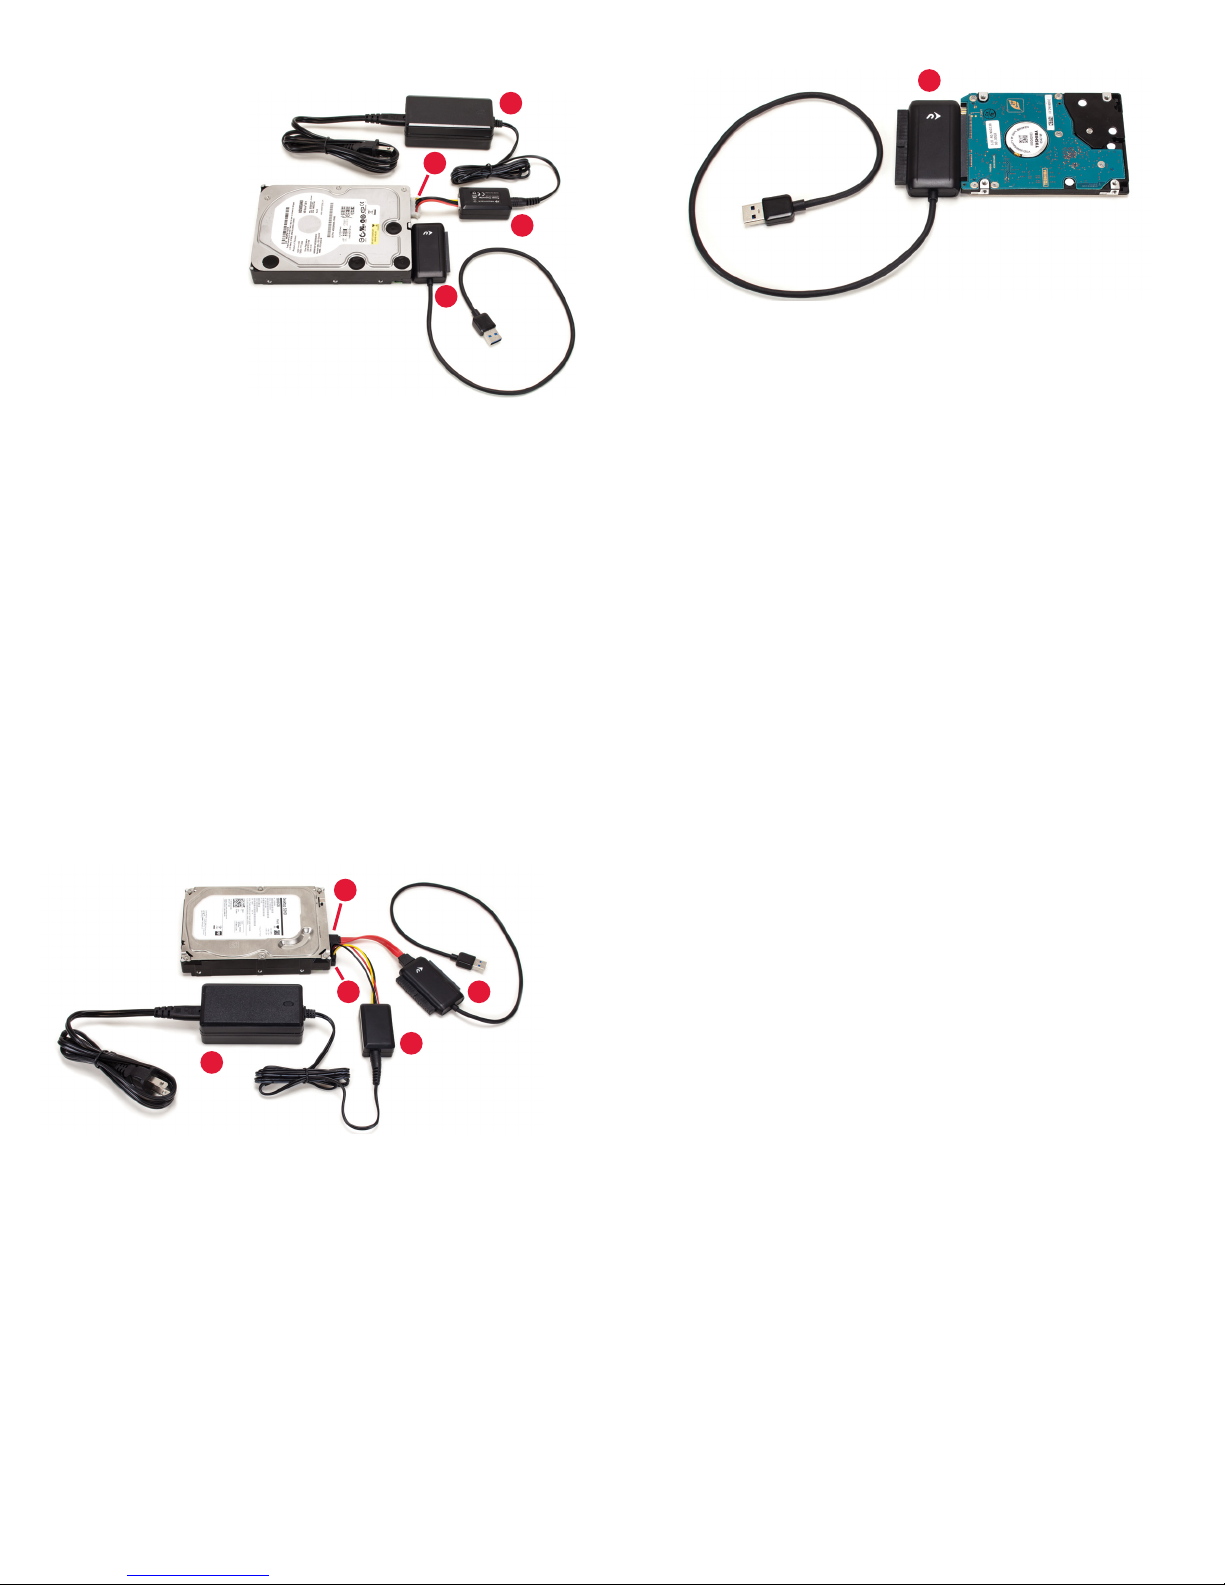
3.5" and 5.25" IDE/ATA/ATAPI Drives
1. Set the drive to
‘Master’ or ‘Single Drive’
mode by placing one
or more jumper blocks
on different pins at
the rear of the drive.
Jumper settings vary
by manufacturer and
often are displayed
on the drive label or
on the manufacturer’s
web site.
2. Use the 4-pin power cable (item E) to connect the drive and the
power converter (item C), then connect the converter to the
power supply (item B).
3. Connect the drive to the 40-pin ATA connector on the Universal
Drive Adapter (item A). This connector is keyed to prevent
devices from being plugged in upside-down. If you have trouble
connecting your drive, make sure it is oriented correctly.
4. Plug the power cord into the power supply (item B), and then
connect the power supply to an AC outlet.
5. Connect the captive USB 3.1 Gen 1 cable on the Universal Drive
Adapter (item A) to any USB Standard-A port on your computer.
Allow up to 30 seconds for your drive to mount as an external
USB device.
E
A
B
C
2.5" IDE/ATA Drives
A
1. Connect your drive to the 44-pin ATA connector on the
Universal Drive Adapter (item A). Note that the connector is
keyed; if you have trouble connecting your drive, check to make
sure it is oriented correctly.
2. Connect the captive USB 3.1 Gen 1 cable on the Universal Drive
Adapter to any USB Standard-A port on your computer. Allow
up to 30 seconds for your drive to mount as an external USB
device.
NOTE: 2.5 inch IDE/ATA drives connected to the Universal Drive
Adapter receive power through the USB cable. If your drive is
not receiving enough power, try connecting the Universal Drive
Adapter to a different USB port on your computer.
SATA Drives
F
D
C
B
1. Use the SATA power cable (item D) to connect the drive to the
power converter (item C), then connect the converter to the
power supply (item B).
2. Use the SATA data cable (item F) to connect the drive to the
Universal Drive Adapter (item A). The plugs on the cable
are keyed so that they can be connected using only one
orientation. If either plug does not fit on first attempt, make sure
the key matches the connector on the device(s).
3. Connect the captive USB 3.1 Gen 1 cable on the Universal Drive
Adapter (item A) to any USB Standard-A port on your computer
using the captive cable. Allow up to 30 seconds for your drive to
mount as an external USB device.
A
Troubleshooting
Begin troubleshooting by verifying that the drive is receiving power.
For the configurations that use the power supply, make sure it is
connected to a power source. If the power supply is connected
to a power strip, make sure that the power switch on the strip is
powered on. Next verify that both ends of all necessary cables are
properly connected as shown in this guide.
If the Universal Drive Adapter is still not working properly, try
connecting to a different USB port on your computer. You can
also connect to a different computer. If problems persist, contact
technical support:
8am - 8pm (CT) Monday - Friday
9am - 4pm (CT) Saturday
(800) 275-4576 (North America only)
+1 (815) 308-7001 (International)
Live chat is available during normal business hours.
www.newertech.com/support
Email our support team at:
www.newertech.com/support
© 2017 Newer Technology, Inc. All Rights Reserved. Newer Technology, NewerTech and the n
boomerang logo are trademarks of New Concepts Development Corporation, registered in the
U.S. Patent and Trademark Office. Other marks may be the trademark or registered trademark
property of their owners. NWTMANU3NVSPATA R3 07/25 /17
 Loading...