

New England Arbors VA84258 User Manual
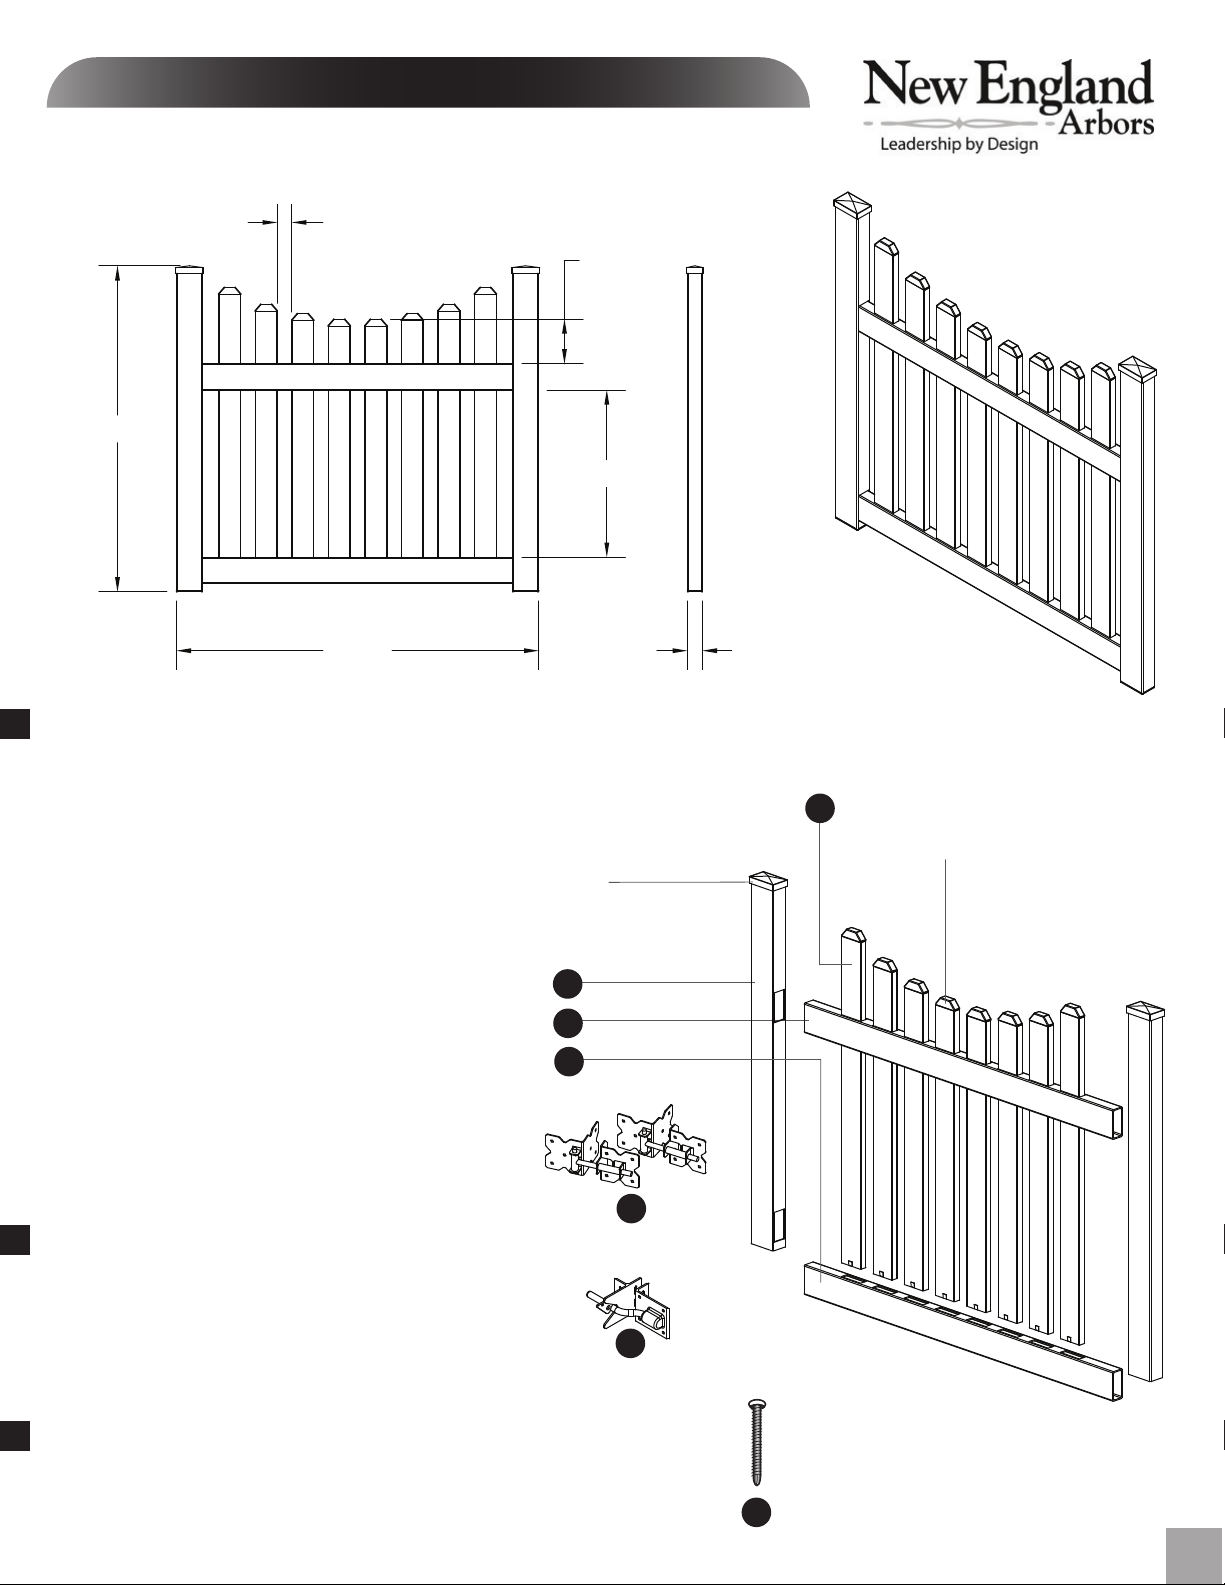
43 3/4”
Click on the image below to active the
interactive 3D model.
A S S E M B LY I N S T RUCTIONS
Cottage Picket Gate
1 7/8”
6”
22 1/2”
48 1/2”
Please read through before starting assembly.
Check Box for These Contents (1 Box)
In the event of missing or defective parts please call our customer service dept. at
1. Posts (2) 2” x 3 1/2“ x 43”
2. Top Rail (1) 1 1/2“ x 3 1/2” x 48 1/4”
3. Bottom Rail (1) 1 1/2“ x 3 1/2” x 48 1/4”
4. Pickets (2) 7/8“ x 3” x 38 1/2“
Pickets (2) 7/8“ x 3” x 36 1/4“
Pickets (2) 7/8“ x 3” x 35“
Pickets (2) 7/8“ x 3” x 34 1/4“
5. Steel Hinge Set (1)
6. Steel Latch Gate Set (1)
Hardware Kit (Includes):
7. Self-tapping stainless Screws (16) 5/8”
(*) Gate will fit:
Nantucket Legacy, Nantucket Deluxe, Fairfield Deluxe,
Fairfield, Westchester, Newport.
(*) If gate is to be installed on a Yorkshire arbor, the top
and bottom rails will need to be trimmed by 1/2“ (1/4” off
each end)
Post cap comes
installed
1
2
3
Tools You Will Need
• Cordless Drill with #2 Phillips bit and 1/8” drill bit.
• 3/8” Socket Wrench
• Phillip Screwdriver
• 11/16” Or adjustable wrench
• Tape measure and pencil
• Square
• Level
General Information
• Read Instructions through carefully before beginning assembly.
• When handling components, place on a non-abrasive surface
(I.e. Shipping box) to avoid scratching.
• We recommend an area approx 5’x 5’ for unobstructed handling.
2”
5
Not to Scale
6
Not to Scale
1 800 282 9346, ext #20 (Mon. to Fri. 8:00 AM to 4:00 PM EST).
4
Picket cap comes
installed
7
Not to Scale
Ver 2/Sep 2009
1
Cottage Picket Gate Installation
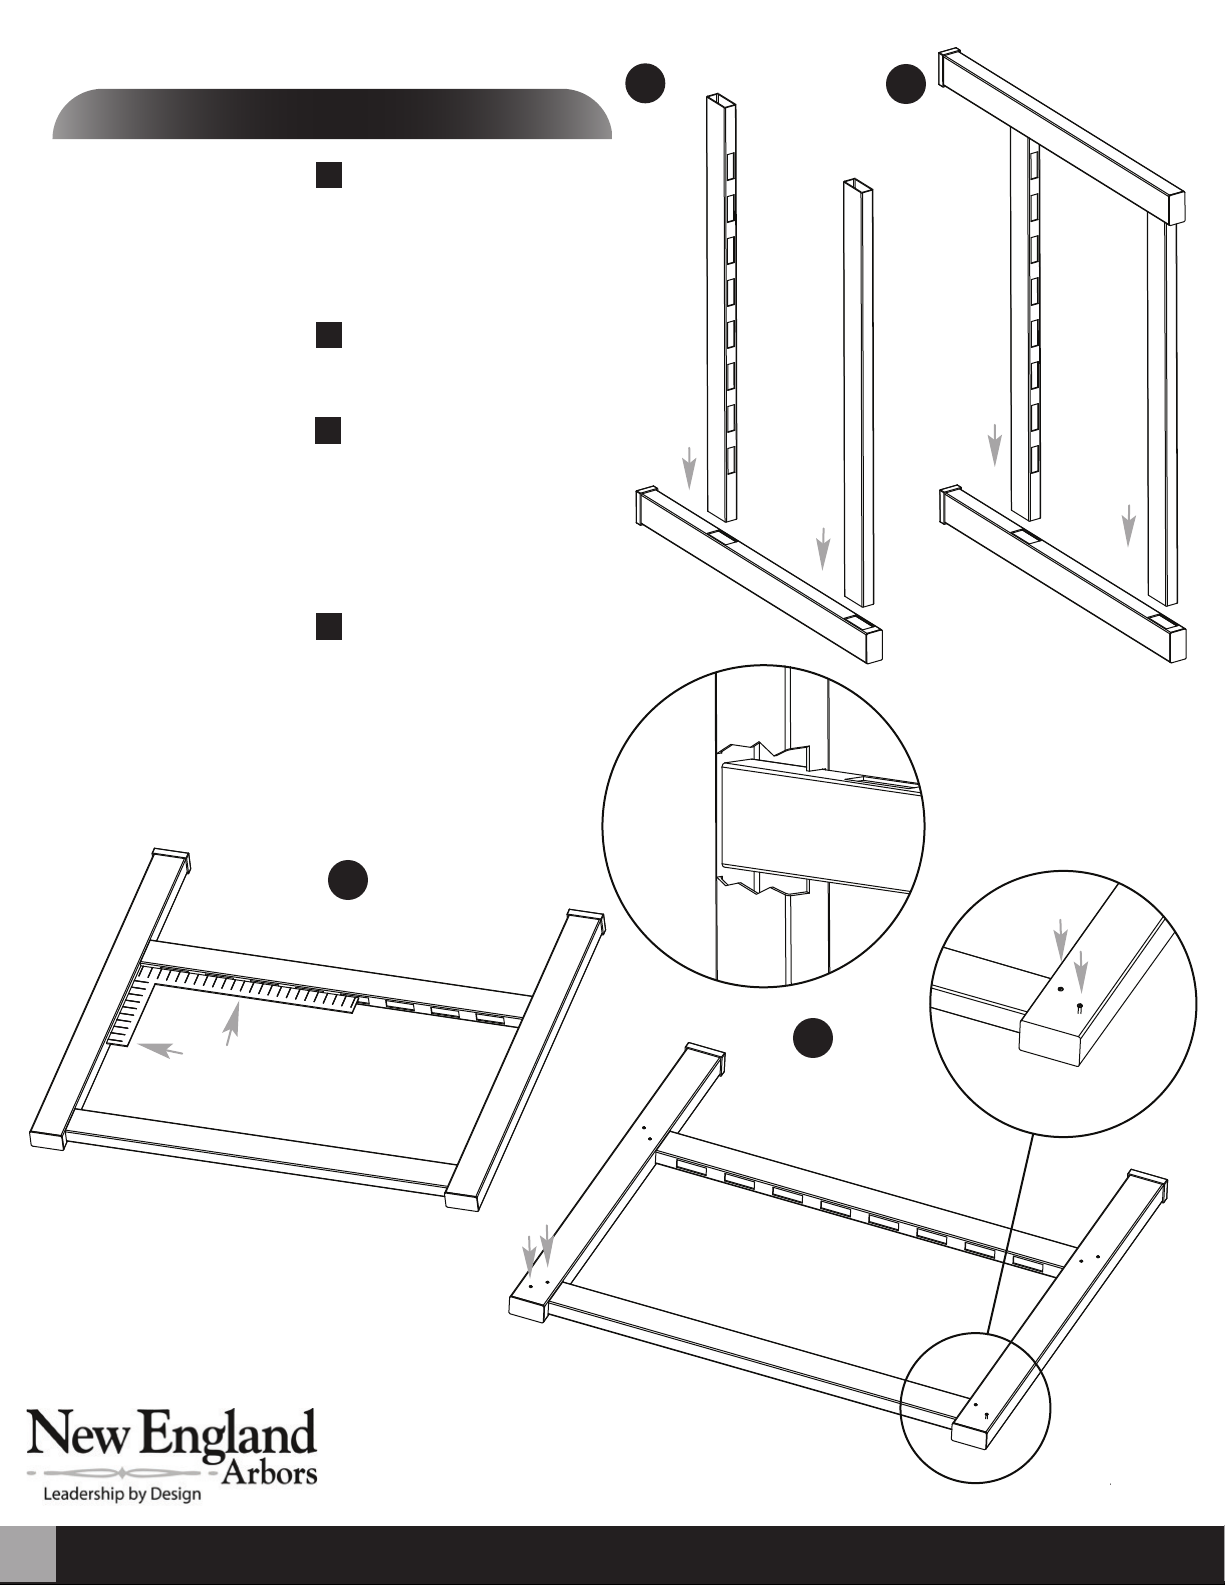
STEP ONE
A
Lay out one of the posts on its side, with holes facing up, and insert the
two rails. The bottom rail (holes routed one side only) goes into the
hole that is closest to the end of the post. Now insert the top rail into
the other hole.
B
Hold the rails into the post and now insert the rails into the other post
C
Lay the assembly down on a flat surface and use a square to check the
inside corners. Make sure that each rail is bottomed out inside the
posts. Note: If you have purchased the Yorkshire Arbor, you will need to
trim 1/4" off of the end of each of the rails in order to make the gate
smaller to fit the narrower opening.
D
A
Top Rail
B
Bottom Rail
Install 2 screws into each of the four places where the rail goes into the
post. Install screws on diagonal (as shown). Note: Screws are self
tapping but if you have any difficulty getting them started, pre-drill a
small pilot hole first (no larger then 1/16")
C
Square
Make sure
rails are
bottomed
out inside
the posts.
D
2
www.newenglandarbors.com
1915 Dove St., Port Huron MI USA 48060
Toll Free Phone: 1 800 282 9346 Toll Free Fax: 1 877 464 9286
 Loading...