

New England Arbors VA84242 User Manual
ASSEMBLY INSTRUCTIONS
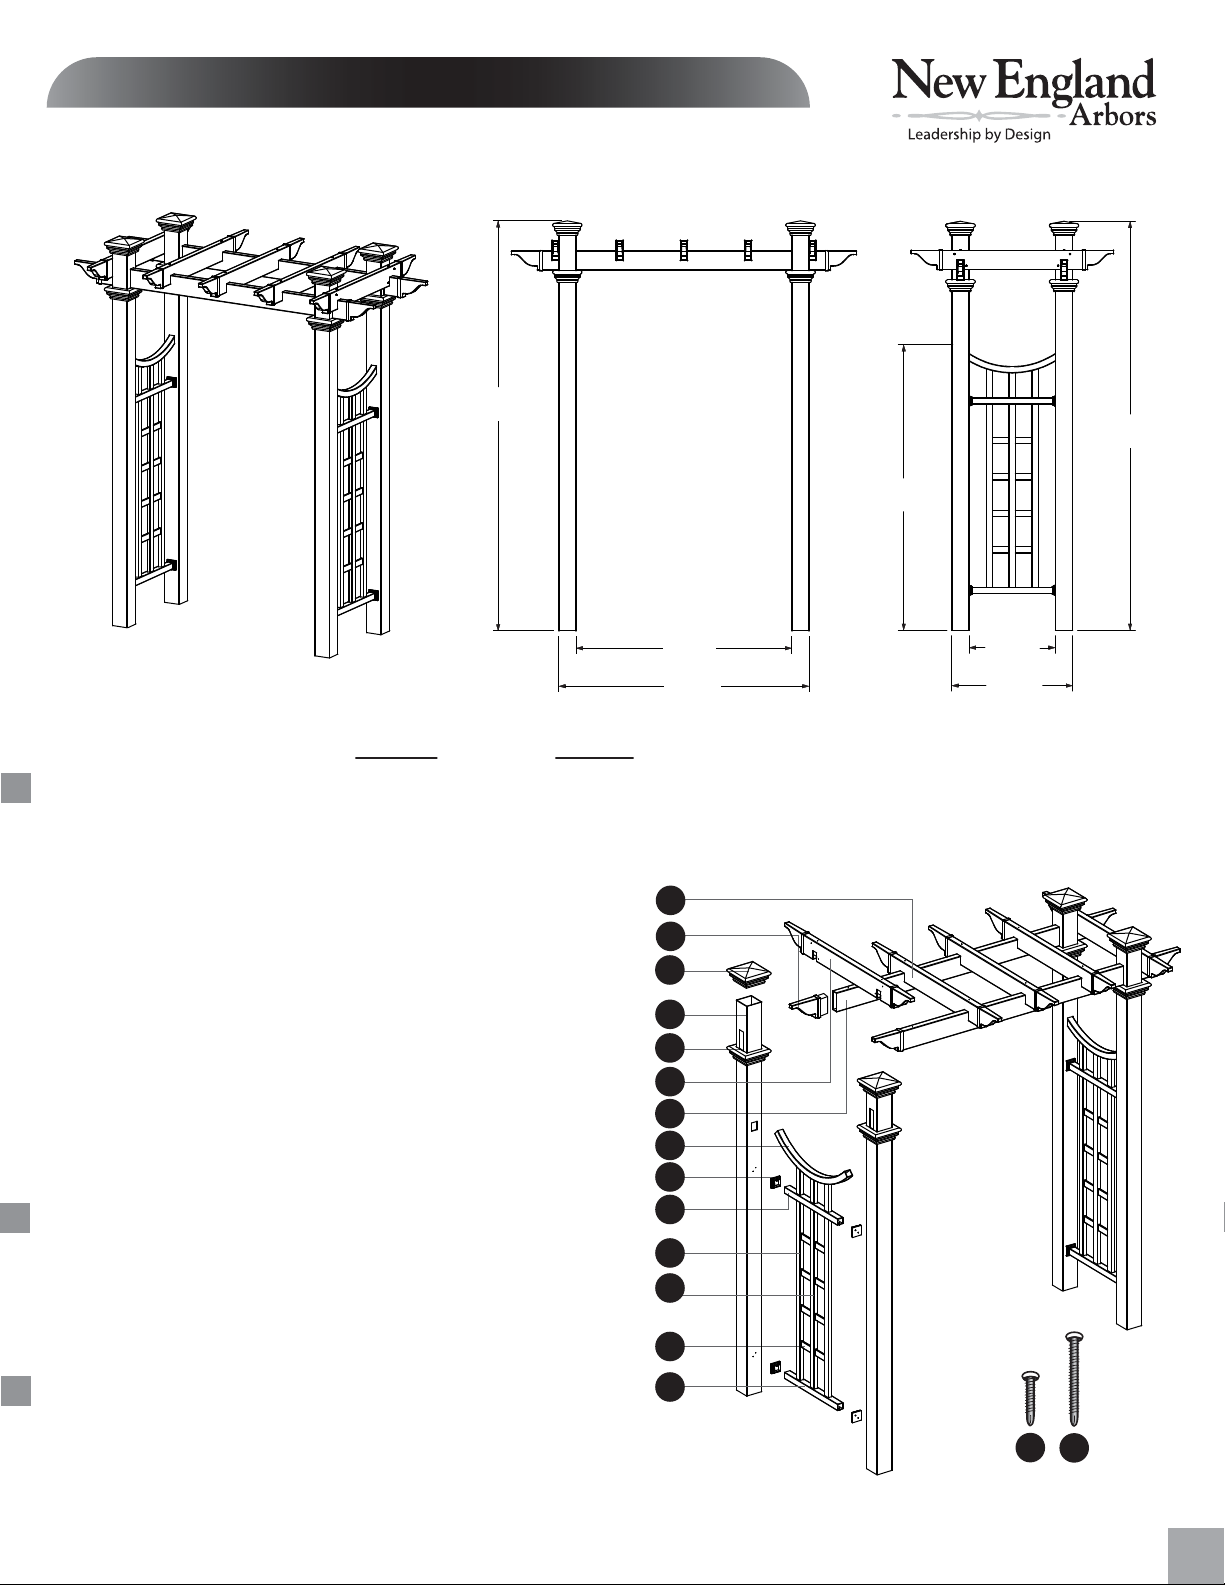
The Fairfield Deluxe Arbor
92.4 in.
235 cm.
Please read through before starting assembly.
50.0 in.
127 cm.
58.0 in.
147 cm.
www.newenglandarbors.com
92.4 in.
235 cm.
66.0 in.
168 cm.
20.0 in.
51 cm.
28.0 in.
71 cm.
IMPORTANT: CHECK THE INSIDE OF YOUR POSTS FOR ALL MATERIALS.
Check Box for These Contents
In the event of missing or defective parts please call our customer service dept. at
1. Middle Rafters (3)
2. Pergola End Caps (4)
3. Post Caps (4)
4. Posts (4)
5. Post Trims (4)
6. End Rafters (2)
7. Carrying Beams (2)
8.
Side Panel Curved Top-Rails
Sur-Fit Bracket for Side Panel Horizontals
9.
10. Side Panel Horizontal Mid-Rails (2)
11. Side Panel Outside Vertical Spindles (Longer) (4)
12. Side Panel Middle Vertical Spindles (Shorter) (2)
13. Side Panel Horizontal Short Spindles (8)
14. Side Panel Horizontal Bottom Rails (2)
15.
#8 x 1
#8 x
16.
4” x4” x 90.5"
1/2 in. (3.8 cm.)
3 in. (7.6 cm.)
1 1/2” x 4 1/2” x 33.5"
1 1/2” x 4 1/2” x 33.5”
1 1/2” x 4 1/2” x 66.5"
(2)
Stainless Steel Screws
Stainless Steel Screws
(8)
1 1/2” x 1 1/2” x 19.75"
7/8” x 1 1/2” x 52.75”
7/8” x 1 1/2” x 52.125”
1/4” x 1 1/2” x 11.85"
1 1/2” x 1 1/2” x 19.75"
(for Sur-Fit Brackets) (24)
(for Rafters) (18)
Tools You Will Need
• Hammer
• Tape Measure
• Level
• Stool or Short Ladder
• Shovel or Auger
• Cordless Drill
General Information
•
Read Instructions through carefully before beginning assembly.
• When assembling components, place on a non-abrasive surface
(i.e. shipping box) to avoid scratching.
• We recommend an area approx 10’x 8’ for unobstructed assembling.
• You should not need to use excessive force when assembling components.
1 800 282 9346, ext #20 (Mon. to Fri. 8:00 AM to 4:00 PM EST).
1
2
3
4
5
6
7
8
9
10
11
12
13
14
15
16
(Not to scale)
Ver 3/Nov 2008
1
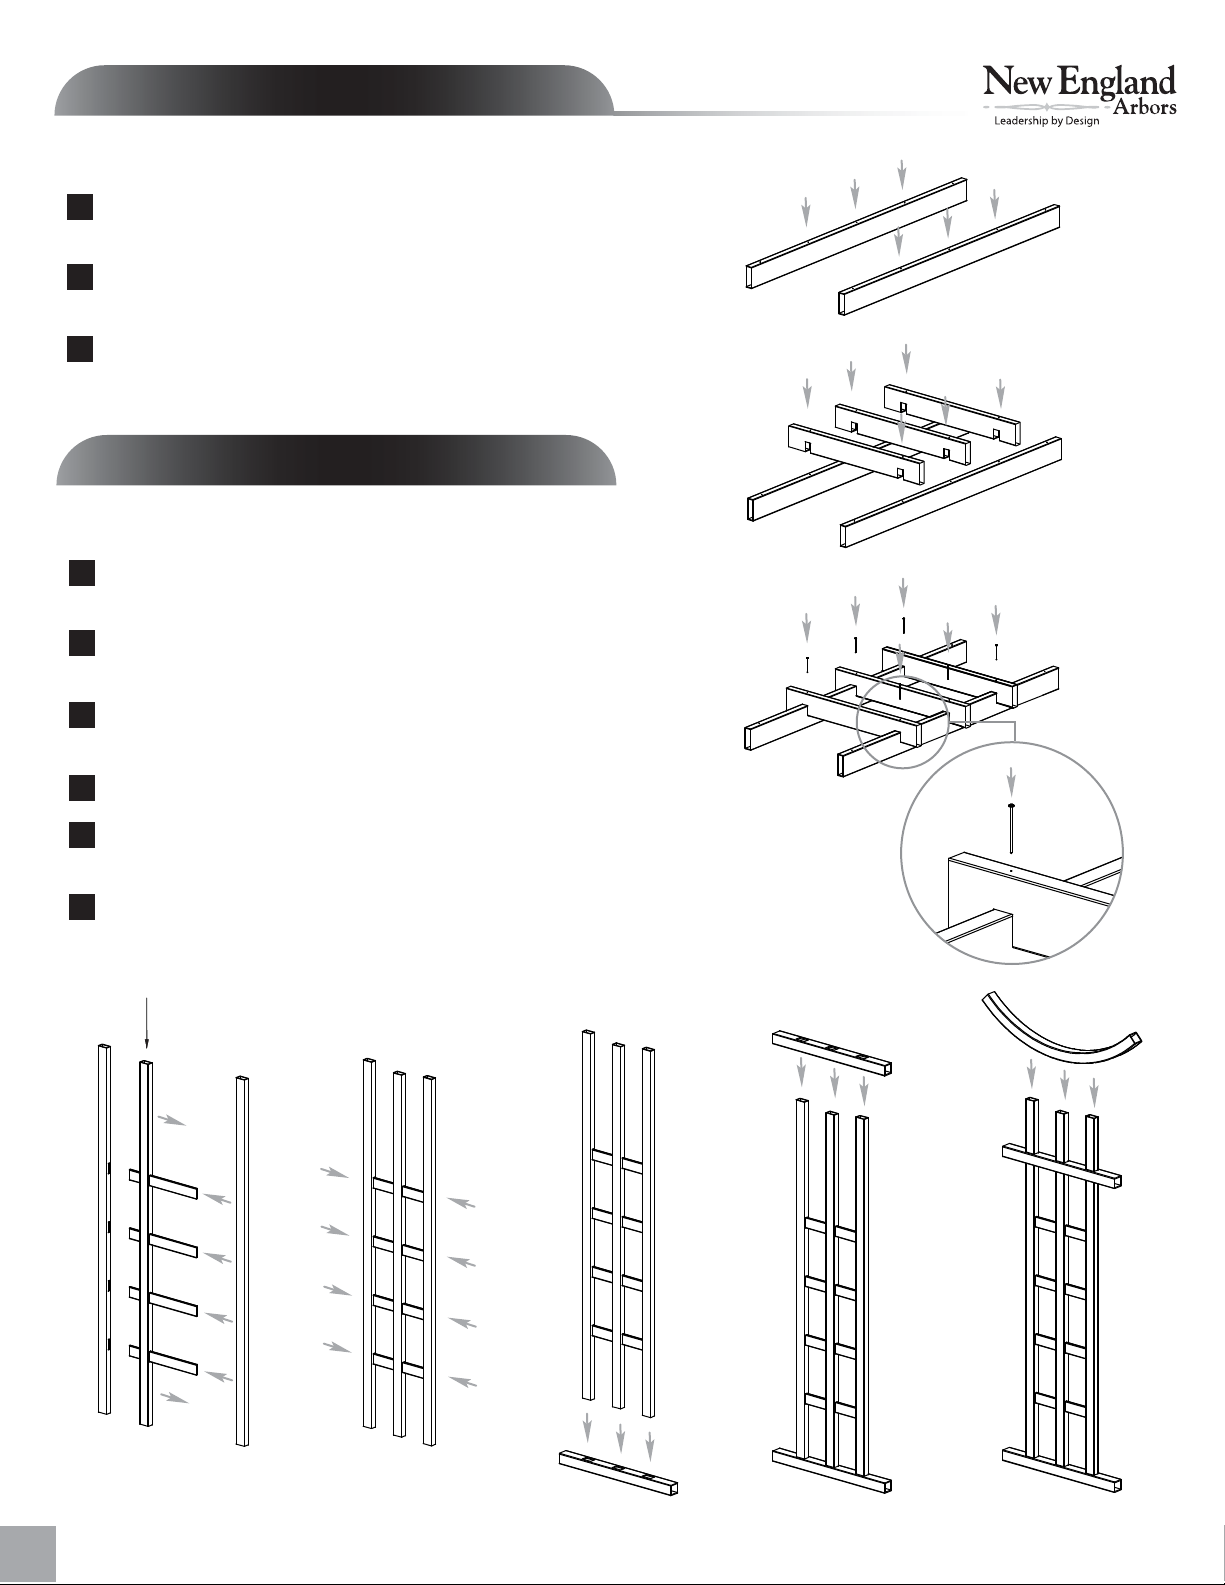
STEP ONE
Assemble the Pergola Top
Lay out the two carrying beams as illustrated with pre-
1
drilled holes facing up.
Position the three middle rafters over the respective pre-
2
drilled holes on the carrying beams as illustrated.
Using the 3” screws fasten the three middle rafters to the
3
carrying beams.
STEP TWO
www.newenglandarbors.com
1
Assemble the Side Panels
Insert the short horizontal spindles into the middle vertical
1
spindle (holes on both sides).
Slide the two outside vertical spindles into position as illustrated
2
(holes on one side).
Layout the bottom rail and insert the vertical spindles as
3
illustrated.
Slide horizontal mid-rail over the vertical spindles as illustrated.
4
Slide the horizontal curved rail down over the vertical
5
spindles as illustrated to complete one side panel.
Repeat for other side panel.
6
Note: Middle Spindle is slightly shorter than Side Vertical Spindles.
2
3
2
1
2
The Fairfield Deluxe Arbor
3
4
5
 Loading...