

New England Arbors VA68122 User Manual
ASSEMBLY INSTRUCTIONS
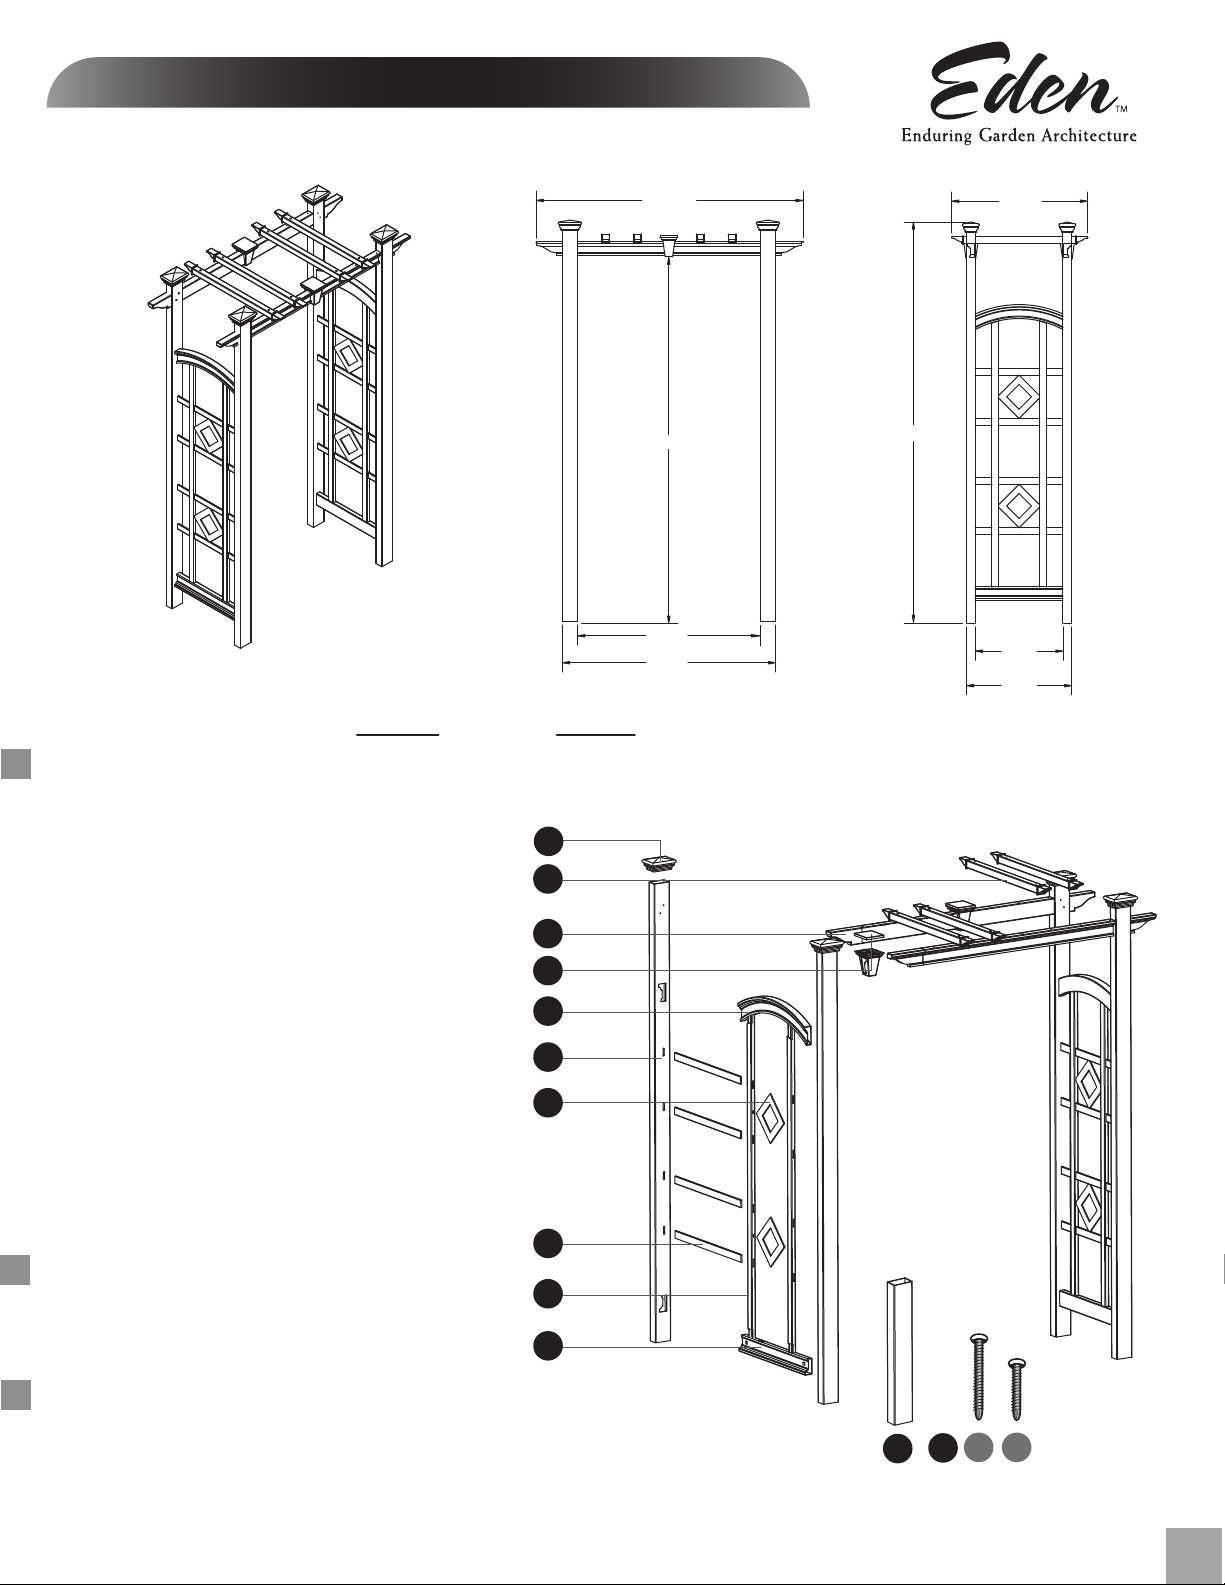
The Monaco Arbor
60.78 in
82.93 in
42 in
49 in
Please read through before starting assembly.
IMPORTANT: CHECK THE INSIDE OF YOUR POSTS FOR ALL MATERIALS.
www.edenarbors.com
30.95
91.38 in
20 in
24 in
Check Box for These Contents
In the event of missing or defective parts please call our customer service dept. at
1. Post Caps (4)
2. Pergola Rafters (4)
3. Pergola Beams (2)
4. Keystones & Lids (2)
5. Side Panel Arched Top Rails (2)
6. Posts (4)
7. Side Panel Diamonds (4)
8. Side Panel Horizontal Mid-Rails (8)
9. Side Panel Vertical Spindles (4)
10. Side Panel Horizontal Bottom Rails (2)
11. Ground Anchoring Stakes (4)
12. Hardware (in plastic bag)
a) 2 1/2” Self-Auguring Stainless Steel Screws
(8 for Pergola Rafters)
b) 1 1/2” Self-Auguring Stainless Steel Screws
(12 - for Posts & Keystone)
(8 - for Ground Anchoring Stakes)
1
2
3
4
5
6
7
8
1 800 282 9346, ext #20 (Mon. to Fri. 8:00 AM to 4:00 PM EST).
Tools You Will Need
• Cordless Drill
• Hammer
• Tape Measure
• Level
• Stool or Short Ladder
• Shovel
9
10
General Information
• Read Instructions through carefully before beginning assembly.
• When assembling components, place on a non-abrasive surface (i.e. shipping box) to
avoid scratching.
• We recommend an area approx 10’x 8’ for unobstructed assembling.
• You should not need to use excessive force when assembling components.
11
12
Not to Scale
a
b
Ver 2/sep 2011
1
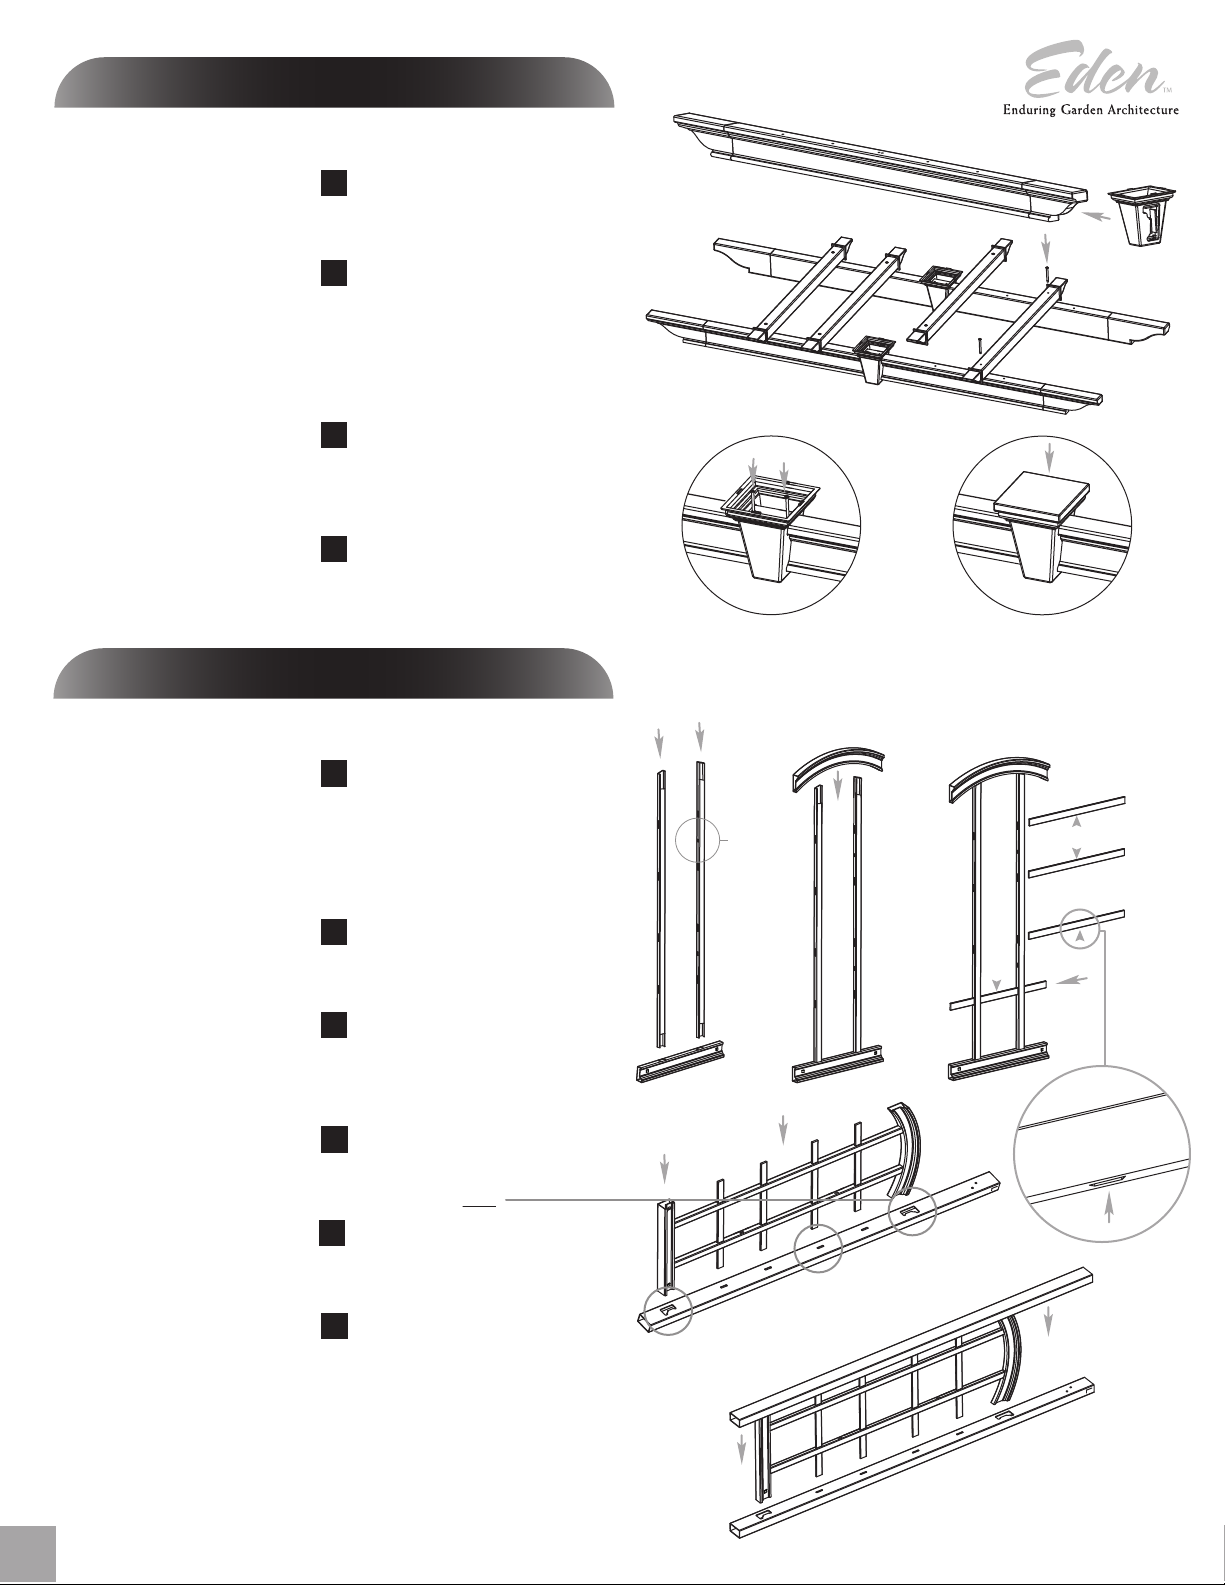
STEP ONE
Assemble the Pergola Top
1
Slide the keystone body over the pergola beam to about the mid
point.
Repeat for other pergola beam.
2
Install the four pre-drilled pergola rafters using 2 1/2” self augering
screws starting with the one furthest from the keystone (rafter
locations are marked with pre-drilled holes on the pergola
beams to give you guidance for spacing). Ensure that the pergola
beams are oriented properly as per illustration.
3
Identify the mid-point on the pergola beam and position keystone.
To prevent the keystone from shifting position, install two screws
into the beam on either side of the inside of the keystone.
4
Install the lid on the keystone. Ensure lid is locked into place
by pushing firmly down.
STEP T WO
www.edenarbors.com
1
2
3
NOTE: Some of the horizontal rails have locking tabs located
at both ends. Once inserted and pushed into the routered
holes, they will lock into place.
4
Assemble the Side Panels
1
Layout the horizontal bottom rail and insert the two long
vertical spindles. Ensure the routed holes on the spindles are
orientated correctly to eventually receive diamonds (see Figure 1)
The spindles are identified inside the notch at the top with either
the letter L for Left or R for Right.
2
Install the arched top rail over the ends of the vertical splindles
ensuring the architectural detail faces out (same as bottom rail).
3
Insert the four horizontal rails ensuring that the routed holes on
the spindles are positioned to eventually accept the diamonds
(see Figure 2).
Set out one post and complete the side panel by inserting it into
the post. Start with the bent top rail first.
5
Lay out the second post with holes facing upwards and insert
the completed panel and connected post.
4
R
L
Fig. 1
1
5
Insert 2nd
L
2
R
Insert 1st
Holes
3
Fig. 2
R
2
6
Repeat for other side panel to complete both side panels.
Th e Monaco Arbor
Insert 3rd
6
 Loading...