

New England Arbors VA42025 User Manual
O P TIO N A L
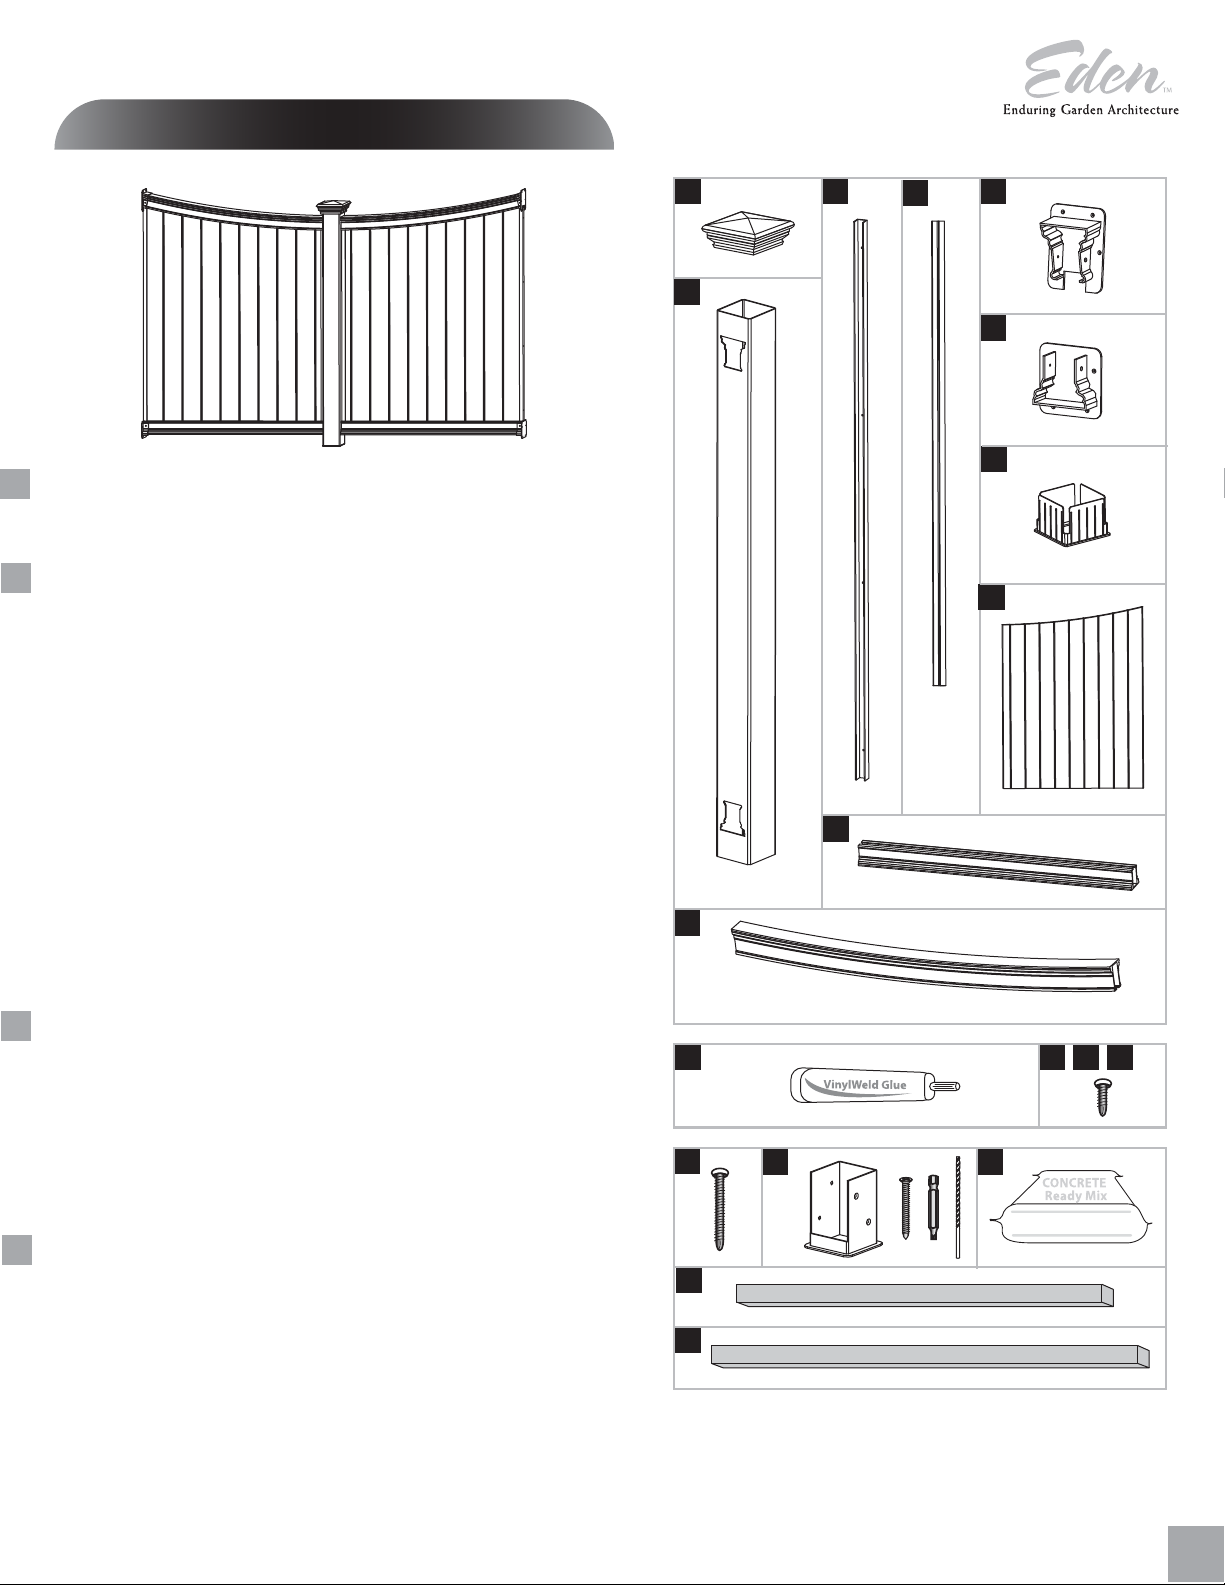
Privacy Fence Panel Materials List
(S old Separ at ely )
Number of Shipping Boxes
The Privacy Fence Panel is shipped in two boxes.
Check Boxes for These Contents
In the event of missing or defective parts please call our customer service
dept. at
1 800 282 9346, ext #20 (Mon. to Fri. 8:00 AM to 4:00 PM EST).
1. Post Cap (1)
2. Post (1)
3.
U-Channel Long
4.
U-Channel Short
Post Brackets for Arched Top Rail
5.
6.
Post Brackets for Bottom Rail
7.
4”x4” Internal Wood Post Guide
8.
Various Height Privacy Fence Board Panel
9. Bottom Rails (2)
10.
Arched Top Rails
(2)
(2)
(2)
(2)
(2)
(10)
(2)
1
2
10
www.edenarbors.com
3
4
5
6
7
8
9
Hardware (in plastic bag)
A. Vinyl Weld Glue (1)
B.
5/8” Self Auguring Stainless Steel Screws for Bottom Rail Brackets
C.
5/8” Self Auguring Stainless Steel Screws for Top Rail Brackets
D.
5/8“ Self Auguring Stainless Steel Screws for U-Channel
E.
1 1/2” Self Auguring Stainless Steel Screws for Middle Post
(12)
(14)
(4)
Extra Materials You will Need (Purchase Separately)
If Mounting Pergola on Concrete or Wood Deck
F. Bolt Down Posts Bracket Including Mounting Hardware (Kit of 1)
G.
4x4x67 1/2” Pressure-Treated Wood Posts (1)
If Mounting Pergola in Ground
H.
Concrete Ready Mix (4) (purchase at local building center)
I.
4x4x8 Pressure-Treated Wood Post (1)
(purchase at local building center)
(purchase at local building center)
(12)
A
E
F
H
B
CONCRETE - Ready Mix
C
D
G
I
Not to Scale
The Privacy Fence Panel
15

Privacy Fence Panel
Assembly & Installation
S T E P ON E
Install the Middle Post
1
Measure and mark out the location of the wood 4x4 post using
string or chalk line. Center of 4x4 wood post should be located
between two pergola columns.
Please Note:
Follow the same applicable post instruction method as illustrated
on pages 7 or 8 of this instruction guide.
2
Using the vinyl weld glue insert the One Way 4”x4” Internal
Wood Post Guide in the bottom of the post. This step is only
applicable if your wood 4x4 post are embedded into the ground.
If your pergola is going to be installed on wood or concrete
surface, please dispose of this piece.
1
String Line
Center of Post
55“
55“
Wood 4x4 Post
3
Using the vinyl weld glue insert the One-Way 4”x4” Internal
Wood Post Guide at the top of the post.
4
Guide the vinyl post over the wood post. The wood post
should stop about 67 1/2" above the ground or concrete patio.
This should allow the wood post to extend thru the One-Way
4x4 Internal Wood Post Guide at the top.
STEP T WO
Install Fence
1
Install post bracket on one end of the bottom rail using
screws provided.
2
Slide the opposite end of the bottom rail into the routed
hole on the post.
67 12“
2
3
4
1
2
16
3
Using a level mark the position of the bracket on the opposite
post and screw bracket into place.
(continued on following page...)
3
The Privacy Fence Panel
 Loading...