

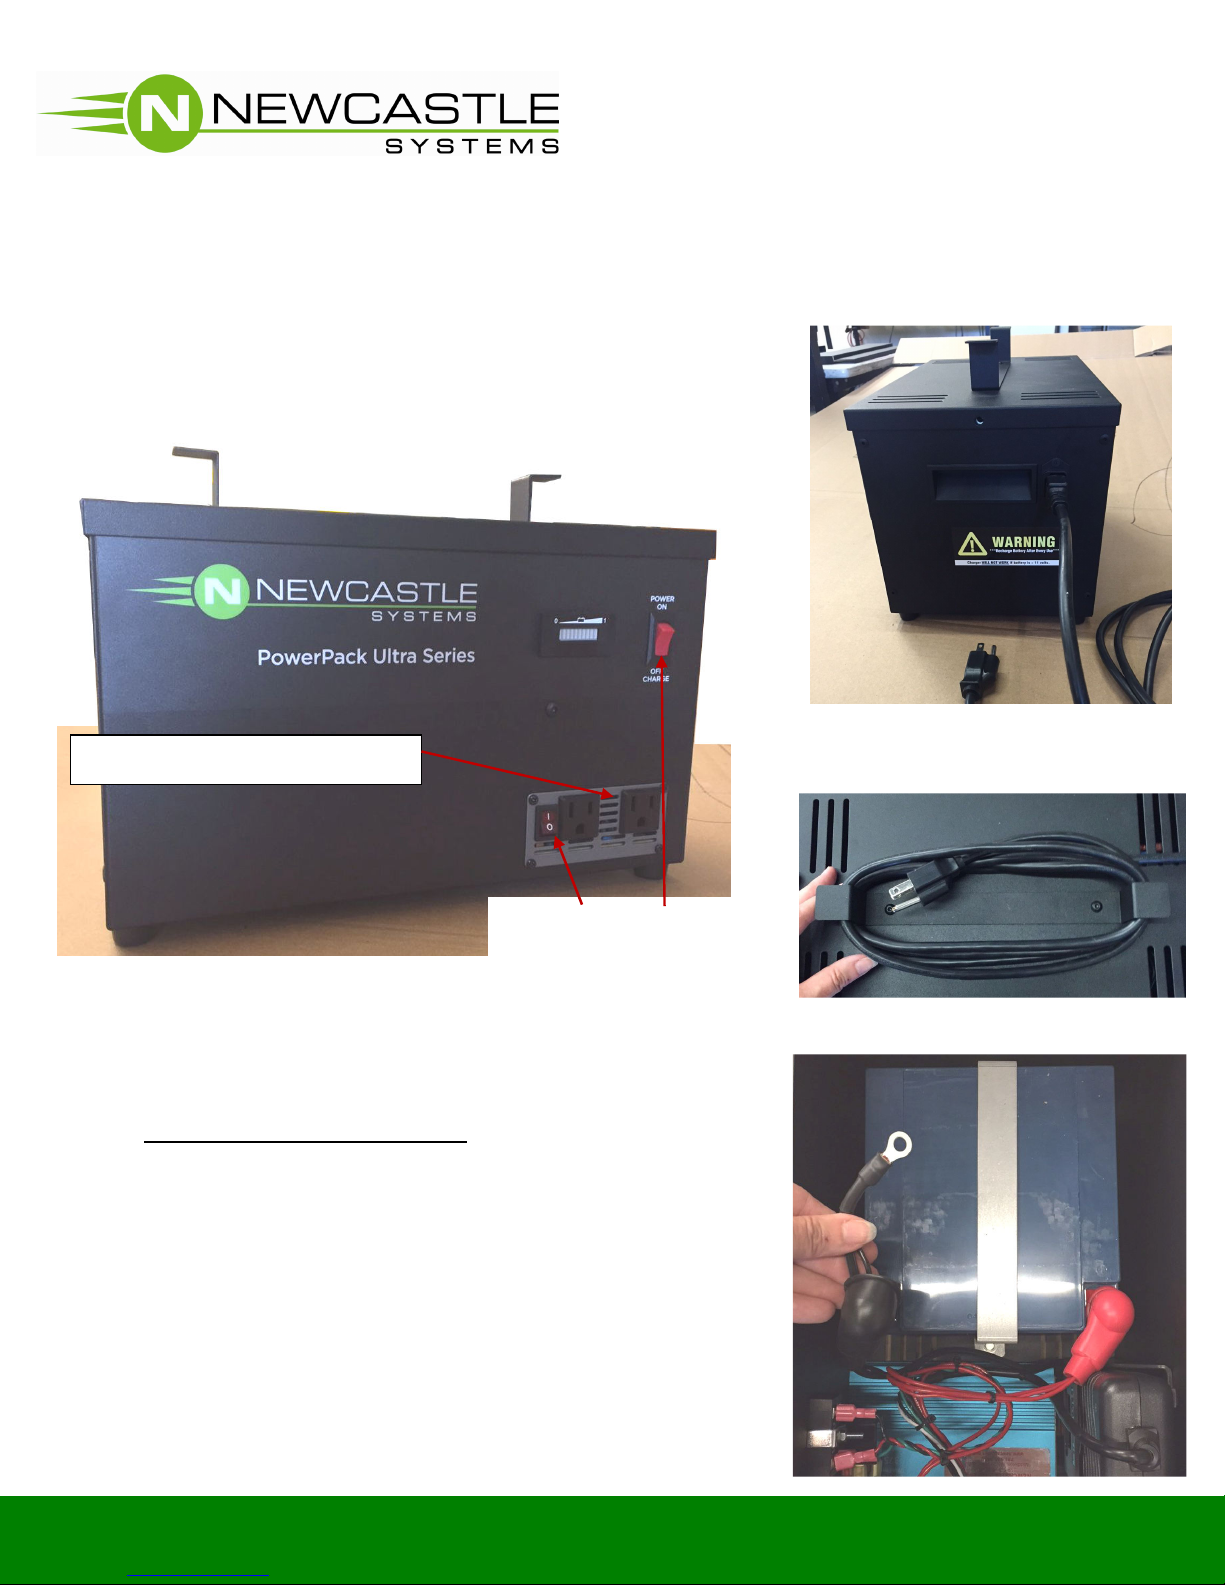
Location of the two
power switches
Power c
ord for charging the unit
;
1.
Assembly Instructions for
PowerPack Ultra 2.6 Portable Power System
The PowerPack 2.6 Portable Power System will be received in 1 piece.
• There are (2) power switches on the PP2.6
• There are (2) power outlets to plug in your equipment
• There is (1) power cord (included) for charging the PP2.6
• Nut, bolt and washers for battery connection included
Your equipment power outlets
Tools Included: 5/32 Allen wrench
Tools Required: (2) adjustable wrenches
To connect the battery for use:
1. Open the top cover using the 5/32 allen wrench
provided.
2. Slide back the black boot on the (-) black cable
(as shown on the right )
Cord can be coiled neatly on top of unit
(it plugs into side of unit)
1.
3
.
2
.
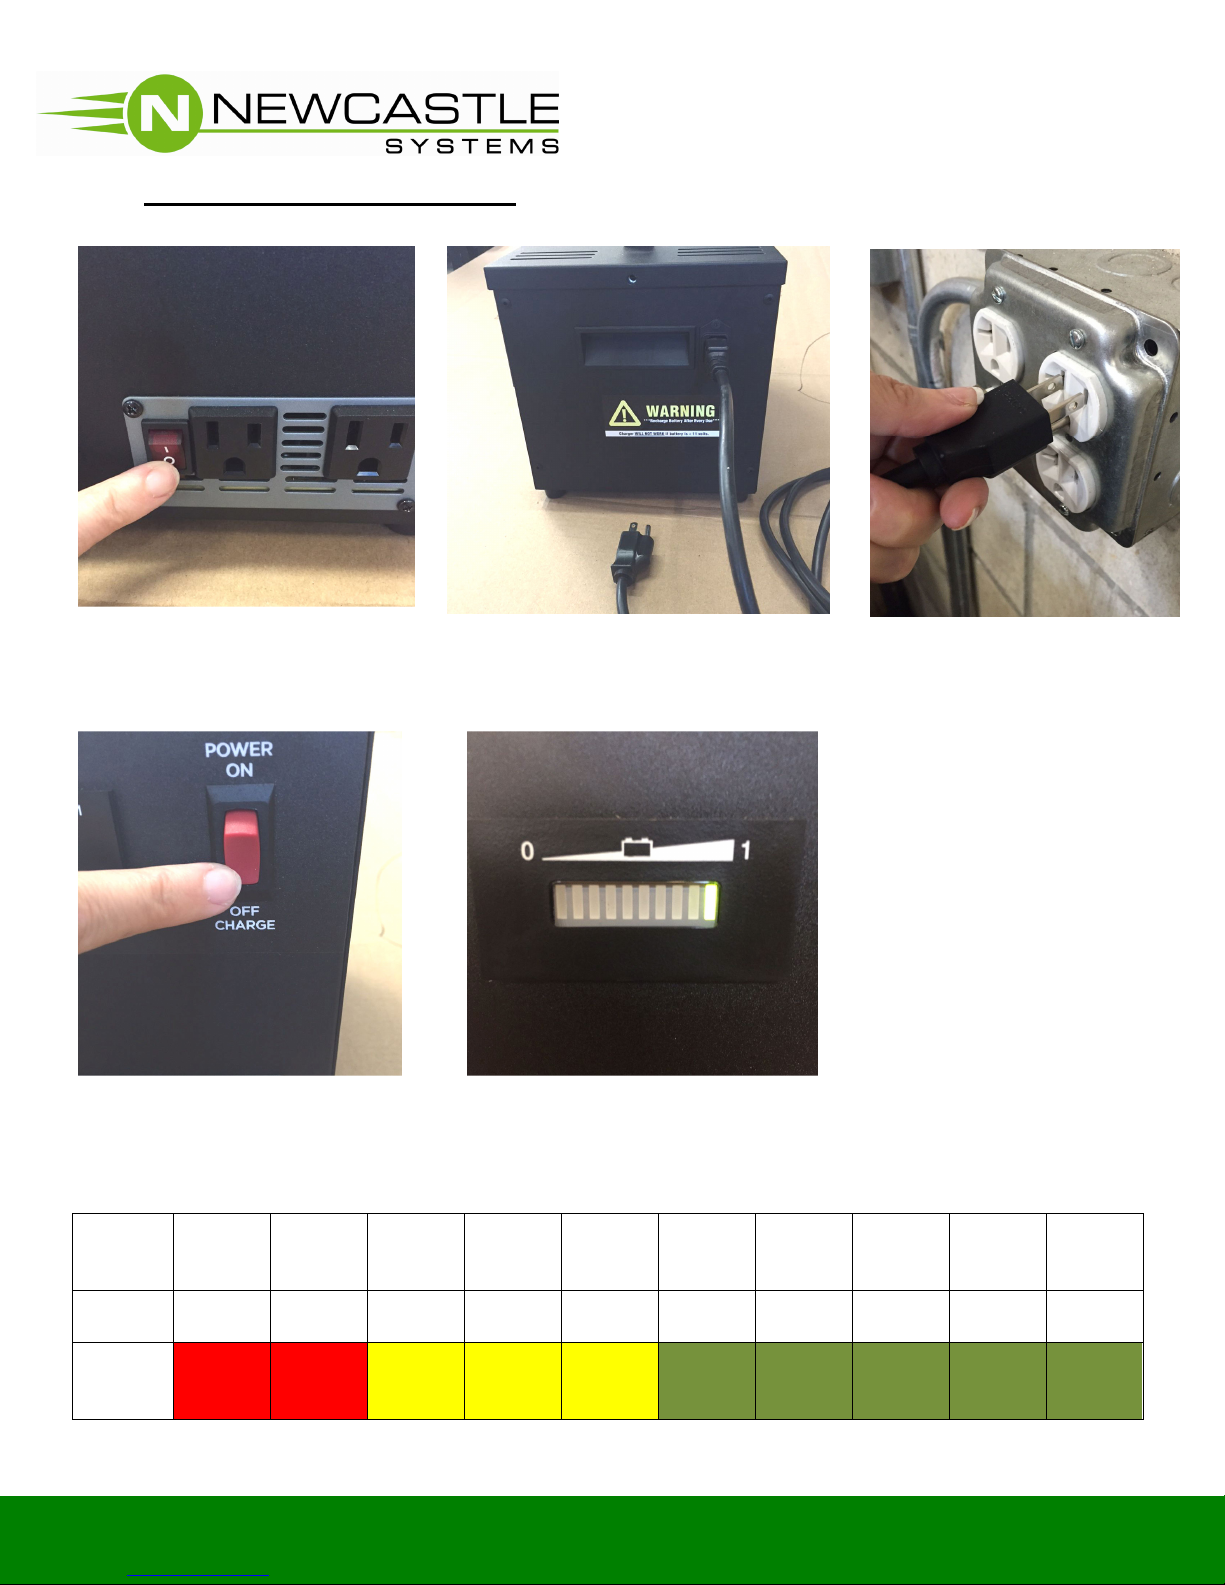
To use the PP2.6 to power your equipment:
Plug your equipment
into the power outlet.
4. Turn your equipment on.
Should at anytime you hear a loud high pitch buzzing/beeping noise, shut down the
PP2.6 and charge (instructions on next page). This is the audible alarm to let you know
2.
the battery voltage is low.
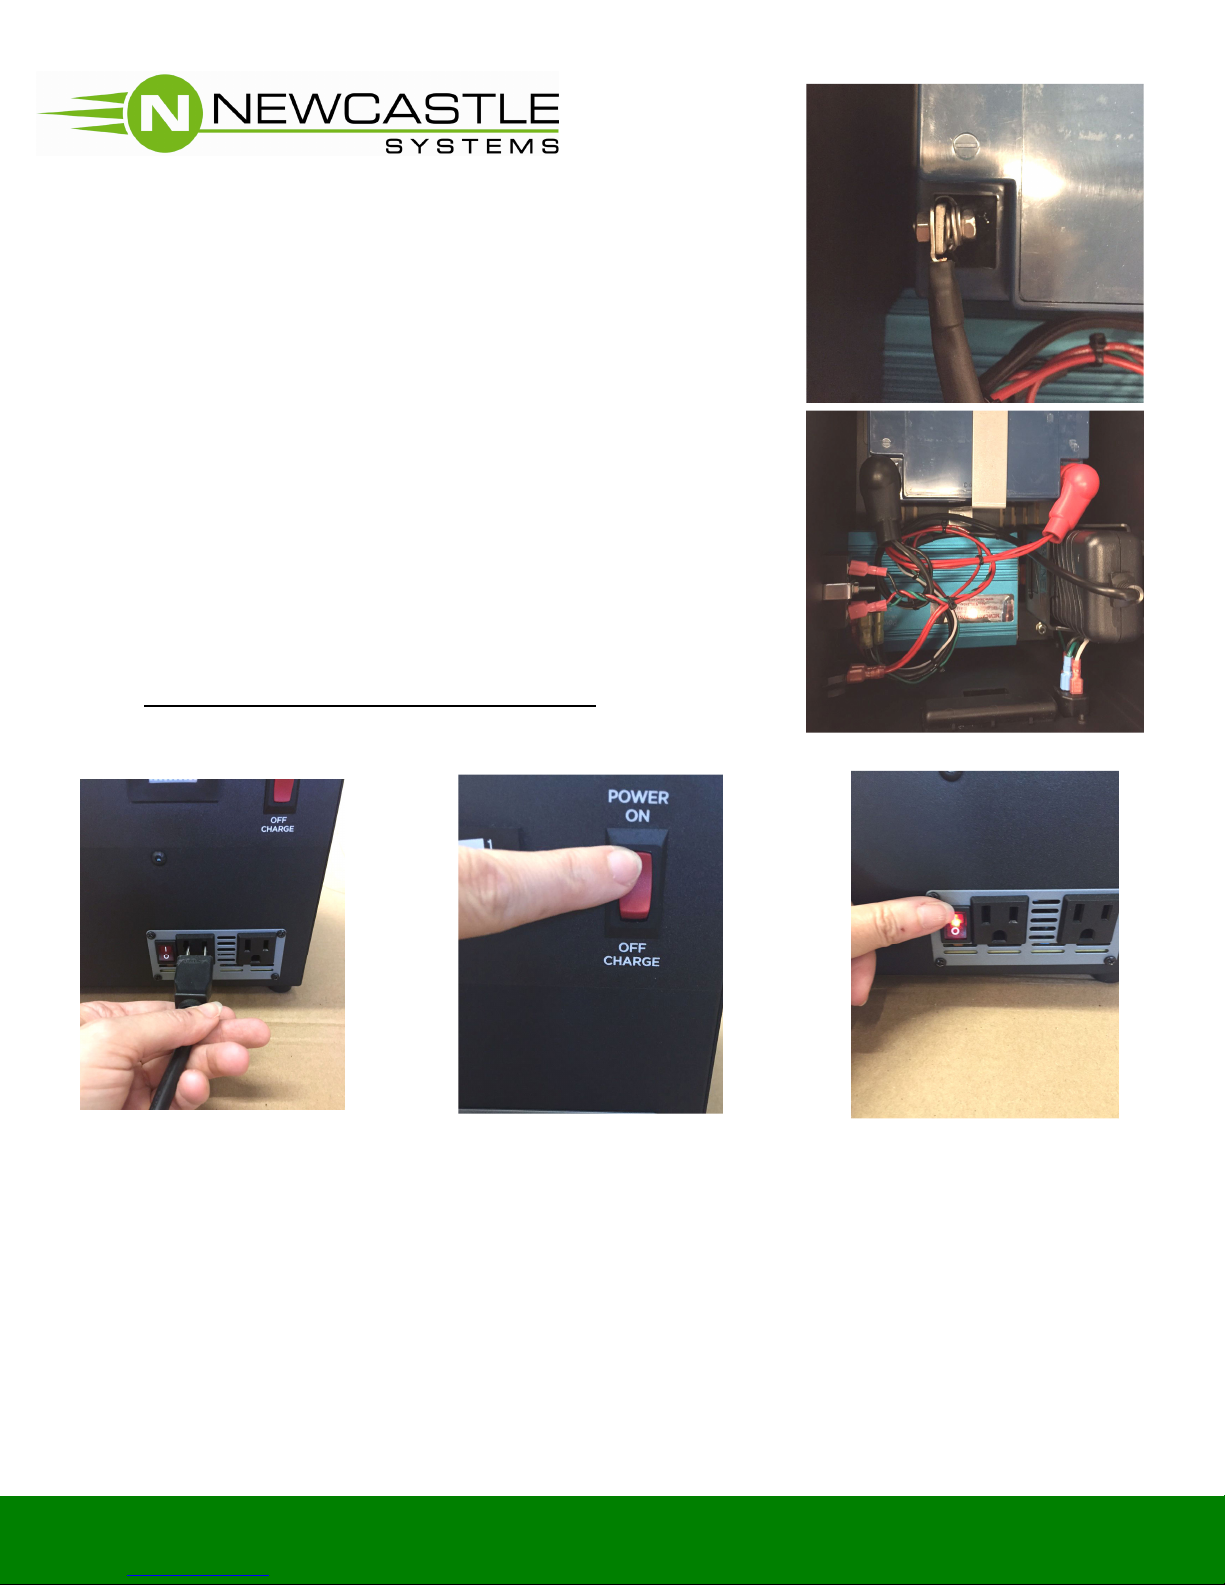
3. Connect the black cable to the negative on the battery.
(You will need (2) adjustable wrenches). Use 1 wrench
to hold the bolt while tightening the nut with the other
wrench. (Nut, bolt and washers provided).
4. Make sure connection is tight (as shown on the right )
5. Slide black boot up to cover connection.
(as shown on the right )
6. Put top cover back on and secure with 5/32 allen wrench.
.
Turn the top solid red switch
to power on.
Turn the bottom power
switch to on; (-) pressed in.
The switch should light up.
1 2 3 4 5 6 7 8 9
2.
out.
3.
4.
5.
shown above.
6.
To charge the PP2.6 after each use: 1. Turn your equipment off.
Turn the bottom power
switch off; (0) pressed in.
Power switch light will go
Plug the female end of charging
power cord to the side of the unit as
shown above.
Turn the solid red power
switch to power off/charge as
The unit is fully charged when
the far right LED is lit (as shown).
LED Battery Meter Light Indicators:
Plug the charging cord to
your wall outlet.
**Be sure to charge the
PP2.6 after every use as
damage to the
battery can occur**
Voltage
11.2
11.4
11.5
Light#
Color
3.
Red
Blinks
Red
Blinks
Yellow Yellow Yellow Green Green Green Green Green
11.7
11.8
12.0
12.1
12.3
12.4
12.6
10
Revised: 9/2/2015
 Loading...