

Page 1
Page 2
Page 3

Important Safe Guards And Precautions
1. Please use the adapter attached in the accessory.
2.Do not remove the rear panel of this product. If in need of service
please call a qualified technician.
3、Do not expose this product to direct sunlight, heat or humid
conditions.
4、Keep away from strong light while using this product so as to obtain
the clearest and the most colorful picture.
5、Avoid heavy impact or drop onto the ground.
6、Do not use chemical solutions to clean this unit. Please simply wipe
with a clean soft cloth to keep the brightness of the surface.
CONTANTS
1.CONTROLS -------------------------2.REMOTE CONTROLLER (MONITOR) ------------------3.INSTRUCTION OF MANU--------------------------4.OPERATION--------------------------5.PARAMETER-------------------------6.ACCESSORIES ------------------------------
7.TROUBLESHOOTING-----------------------
Page 4
CONTROLS
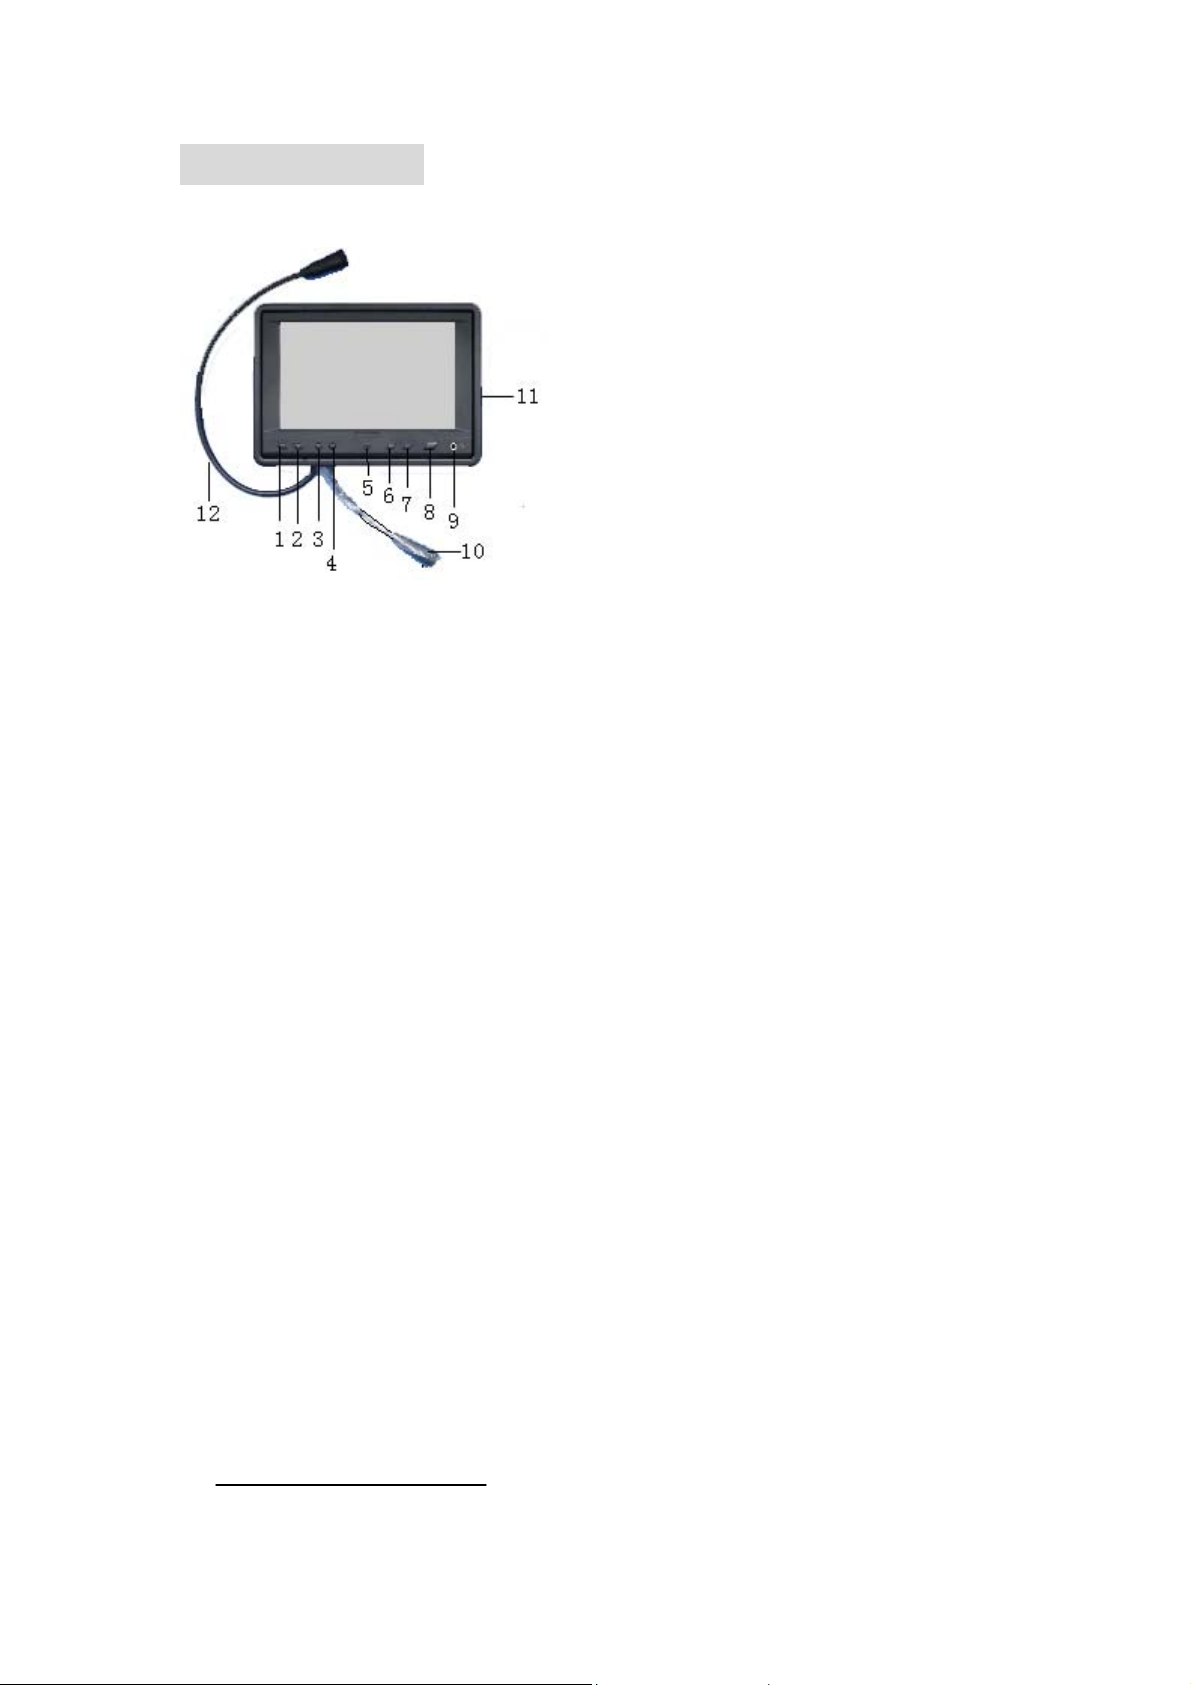
① Volume down
② Volume up
③ "<" BUTTON: Program selection key or used to select function in OSD
④ ">" BUTTON: Program selection key or used to select function in OSD
⑤ IR sensor for remote control
⑥ Display MENU key
⑦ PC,AV switch
⑧ POWER on/off
⑨ Earphone jack
⑩ 10-pin VGA cable
□ Frame
□ 9-pin A V cable
Page 5
REMOTE CONTROLLER
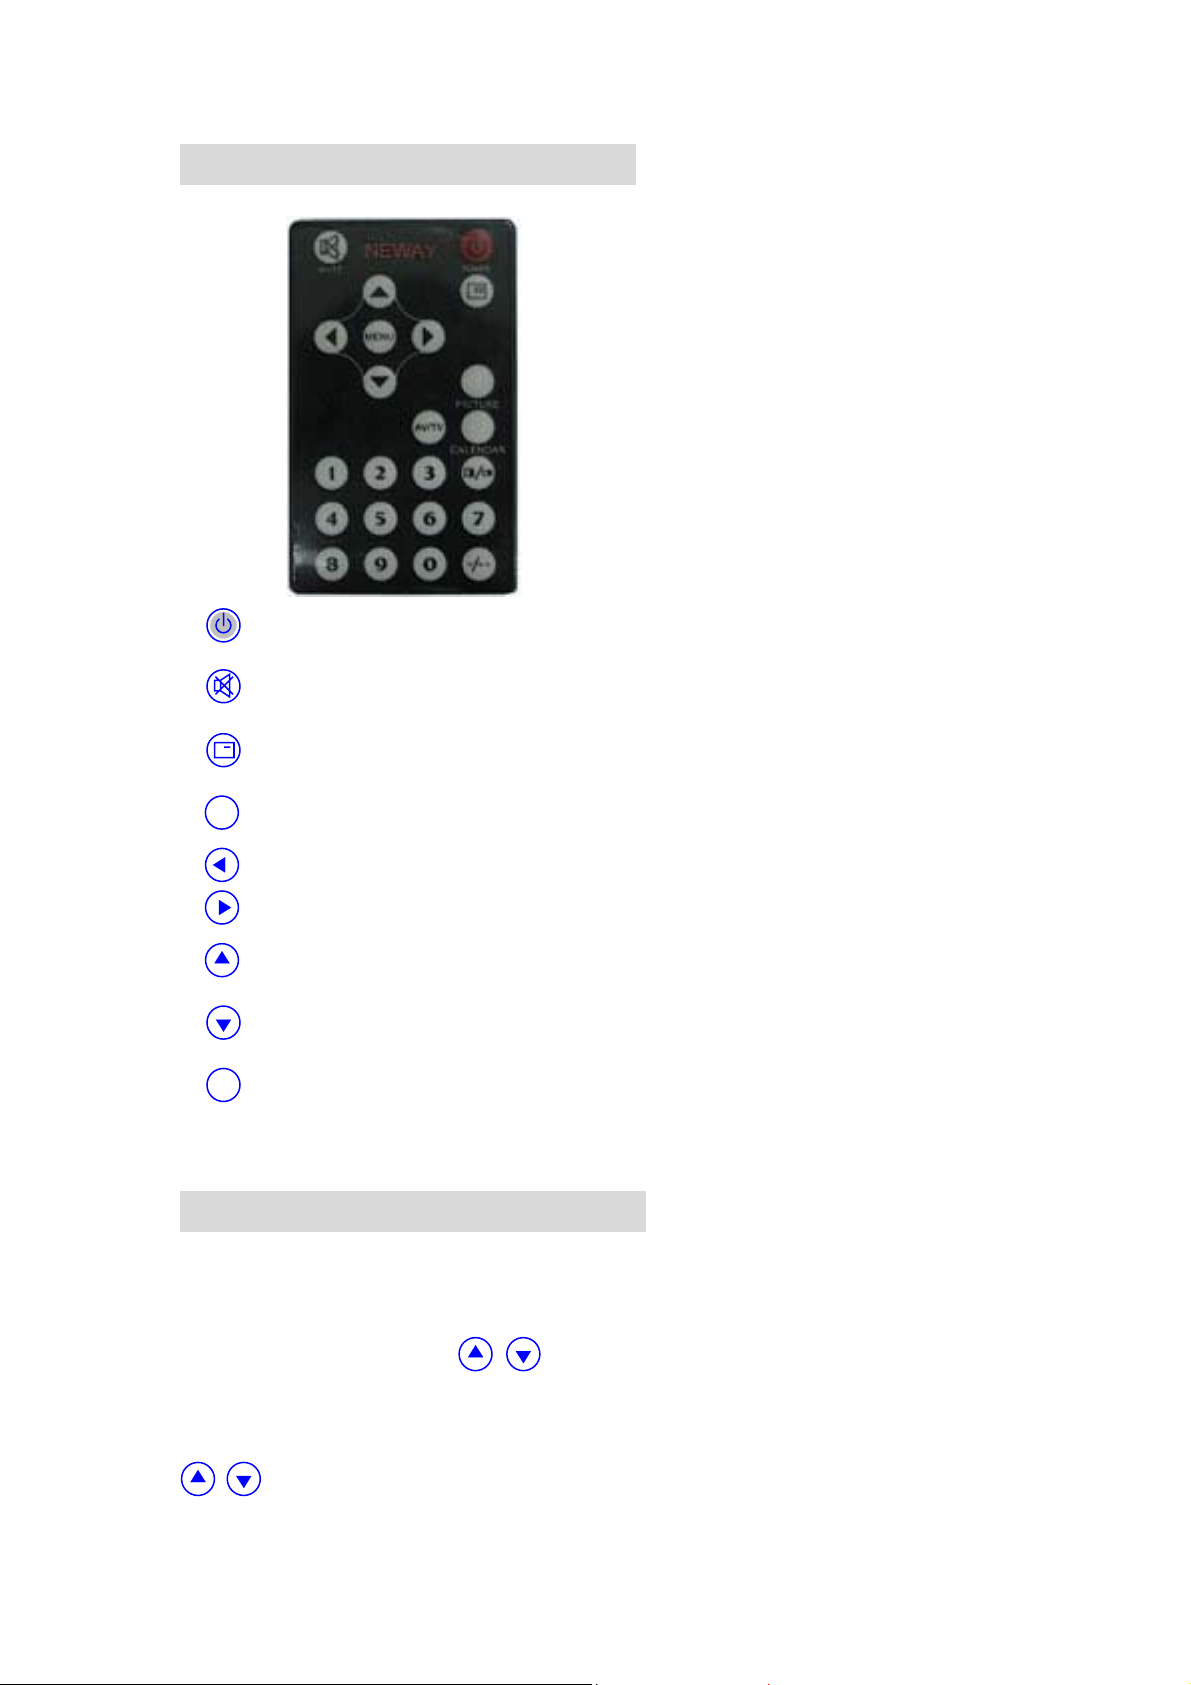
: ON/OFF BUTTON
: MUTE
: DISPLAY INPUT MODE
MENU
: ACTIVATING OSD MENU
: Volume key or using to adjust the number of selected function in OSD
: Volume key or using to adjust the number of selected function in OSD
: Program selection key or using to select function in OSD
: Program selection key or using to select function in OSD
AV/TV
: INPUT MODE SWITCH
INSTRUCTION OF MANU
After connecting power, press the button "menu"on the unit or remote
controller, the "main menu"will appear on the screen, by press "</>"
button on the unit or " / "on the remote controller to choose the
subject demanded, confirm it by press"menu"again, then adjust the number
of selected function in OSD by press "</>"button on the unit or "
/ "on the remote controller.
Page 6
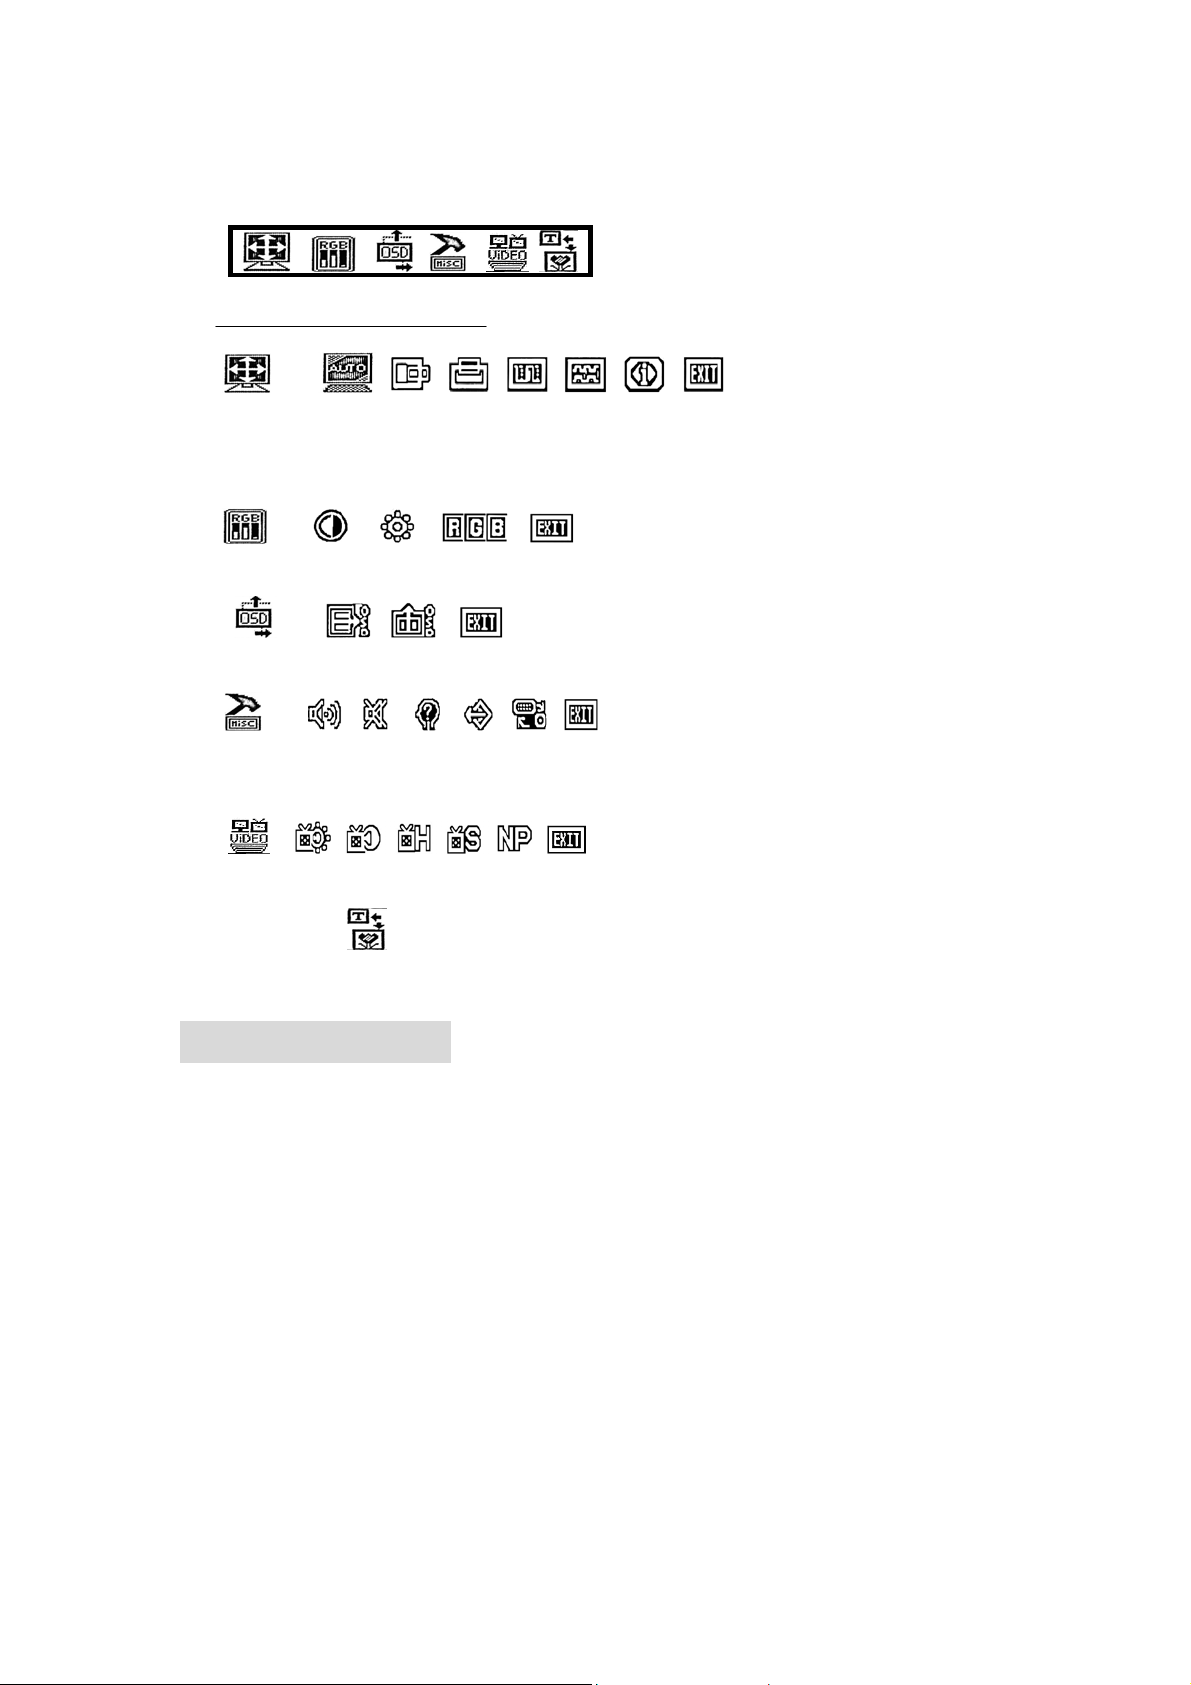
1.Main Manu:
2. Secondary Manu:
→
Image station adjustments (IN line): automatic 、horizontal、vertical、
phase、frequency and current input message、exit.
→
Image adjustments(in line): contrast、Brightness、RGB、Exit.
→
OSD adjustments (IN line): horizontal、vertical、Exit.
→
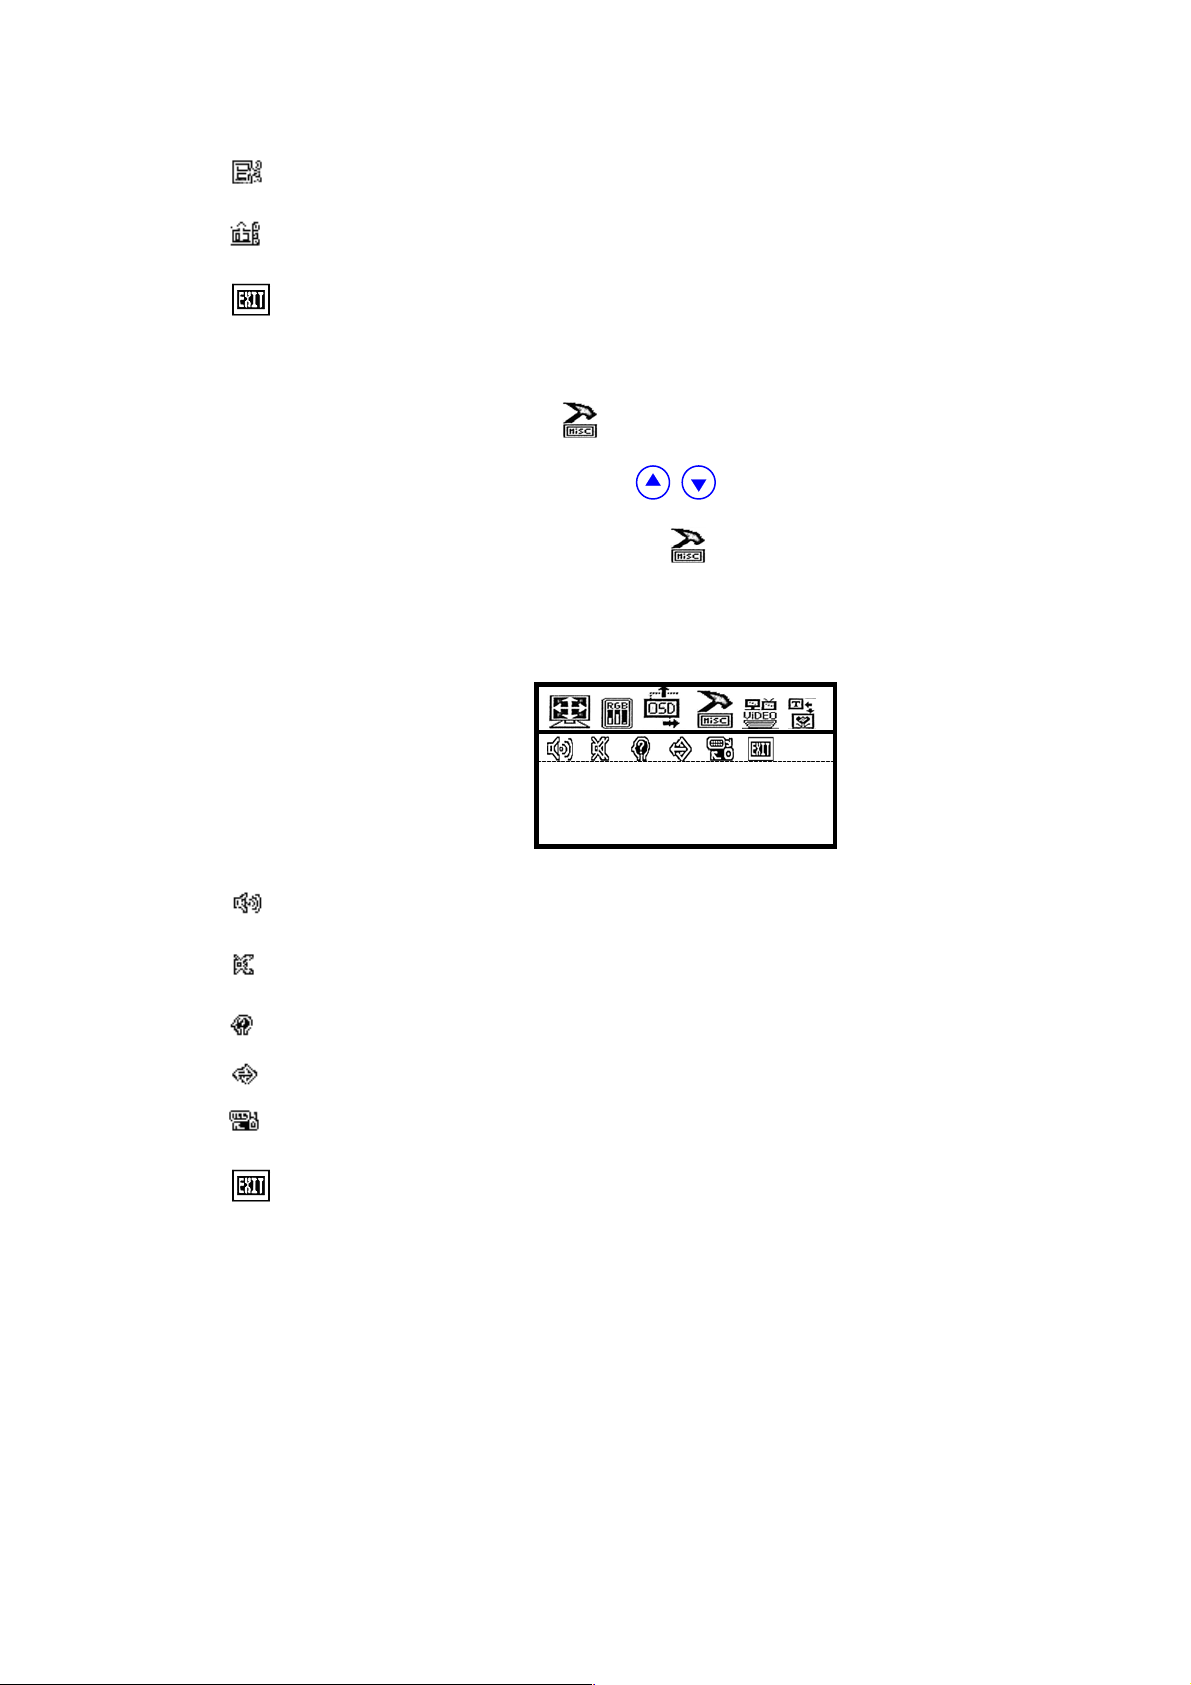
Other parameter(IN line): Volume、Mute、Language、default setting、input
selection、exit.
→
Video (IN line): Brightness、contrast、color、color system、Exit
退出菜单
Exit the main menu
OPERATION
1.Matched cable connection method
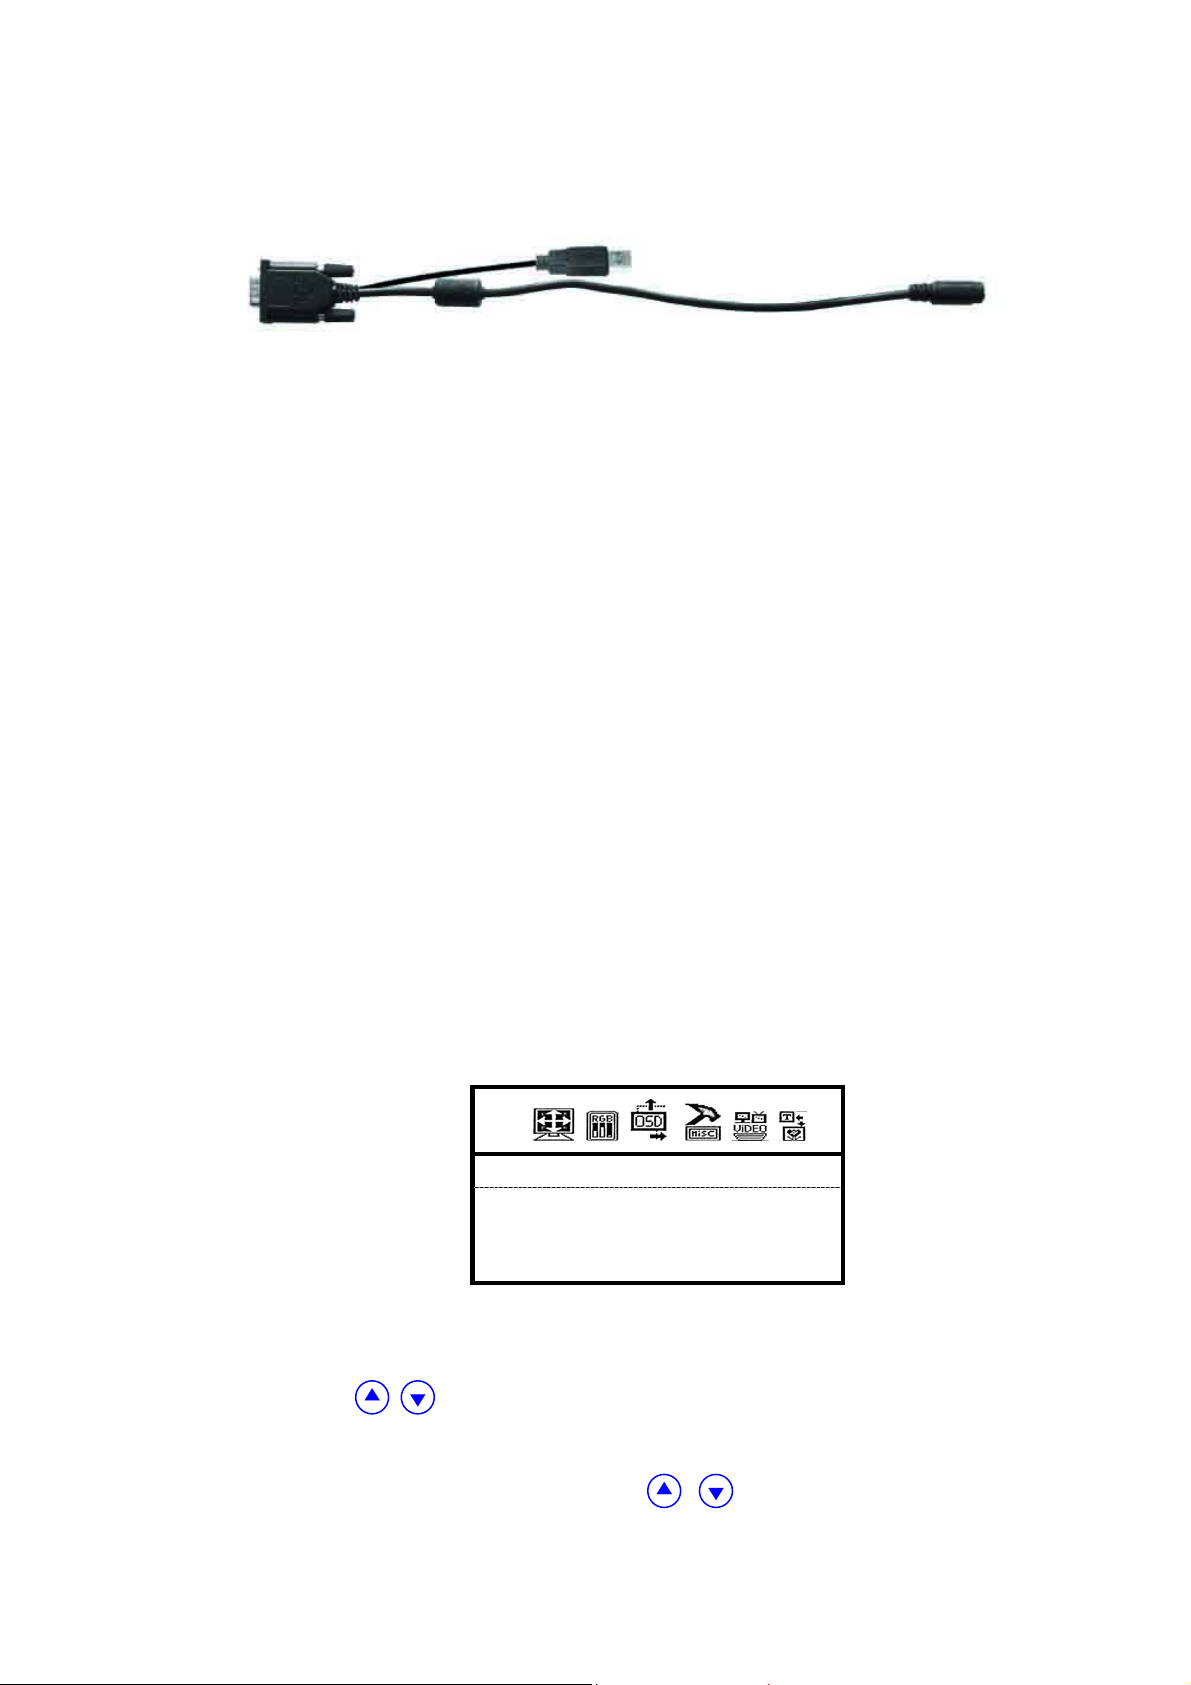
Matched cable 1
① Nine poles Jack of series 1 is connected to the nine poles jack of
series 2 (note the right direction of arrowhead).
②Yellow RCA jack:Video signal 1 input
③Red RCA Jack: Video signal 2 input
④White RCA Jack: Audio signal input
⑤Black Jack: DC 12V Power input (the inner is “+”, the outer is“-”)
When you use the unit, Please adopt matched AC adapter, if not, please
Page 7
note that the power consumption should be exceed 15W.
Matched cable 2
①Black 10 poles Jack is connected to the nine poles jack of monitor(note
the right direction of arrowhead).
②VGA input jack2 is connected to the jack of car computer which supply
VGA signal.
③USB jack is connect to the USB port of car computer to active the
touch-screen function
④Black Jack: DC 12V Power input (the inner is “+”, the outer is“-”)
When you use the unit, Please adopt matched AC adapter, if not, please
note that the power consumption should be exceed 15W.
2.Menu Operation
After connecting the power, the TV will be at standby state. Press "pow"
button on the unit or "power" button on the remote controller, the TV begins to
work. Press the same buttons again, the TV will return to its standby state.
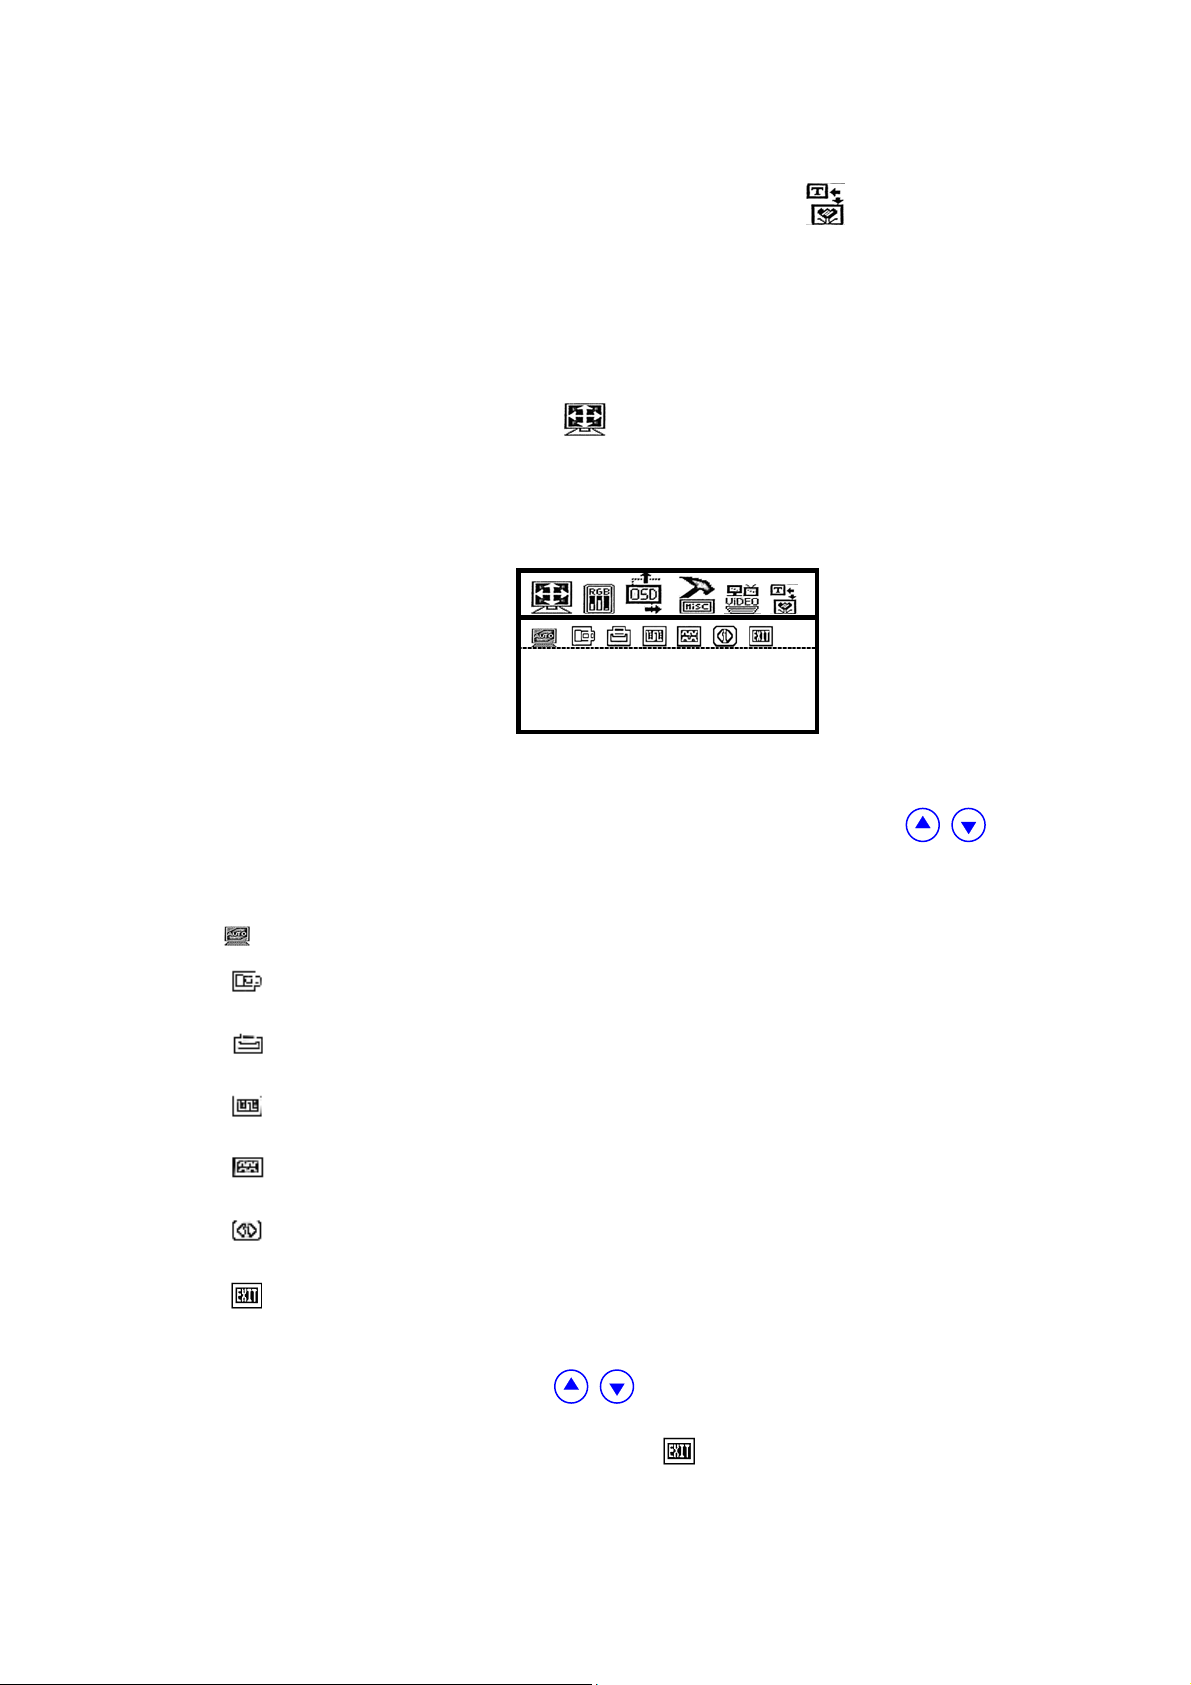
2~1 The menu operation in PC MODE
When the unit works, by press "AV"button the unit will enter VGA
mode, then press "menu"button, the screen will display OSD menu as
following image:
Secondly, select the subject you need to adjust by press"</>"button
VGA MONITOR
on the unit or "
button to confirm. At the time, you may adjust the number of selected function
by press "+/ -"on the unit or "
/ "on the remote controller,following press "menu"
/ " button on the remote
Page 8
controller.
If you want to exit the OSD menu, please select the in main menu,
later press "menu"button to confirm. If no further perform, the main menu
will disappear after 10 seconds.
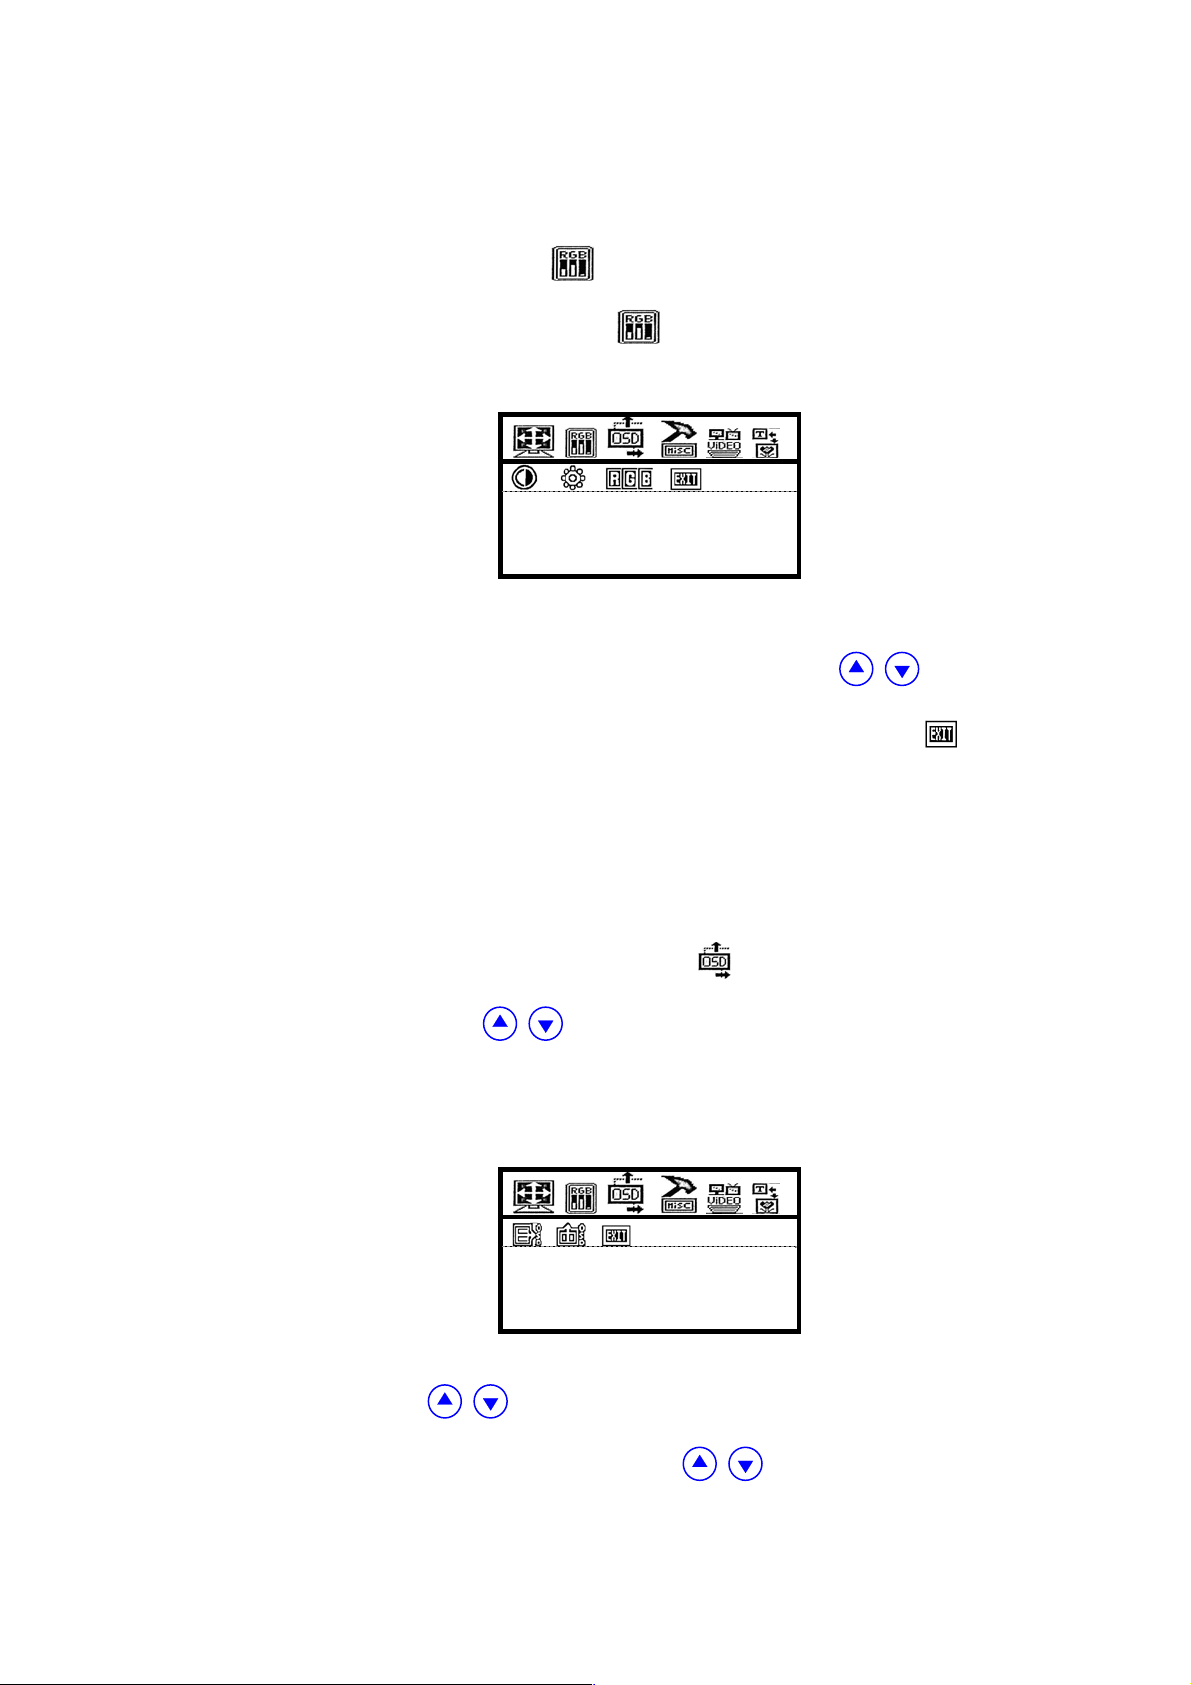
①. image station adjustments
In main menu, please select function,then confirm by press "
menu"button, later the screen will display it next layer menu as following
image:
AUTOMATIC
In the next layer menu, there are seven functions as following image, you
may select freely them by press "</>"button on the unit or " / "
on the remote controller.
:Adjust image station in screen automatically
:Adjust image station in horizontal direction
:Adjust image station in vertical direction
:Adjust the begin point and end point of image station.
:Adjust the range of image station.
:Display present input information
:Exit the next layer menu
When you selected a subject demanded, you may adjust the number by
press "+/ -"on the unit or " / "button on the remote controller . If
you want to exit the menu, please select ,then confirm it by press "
menu".
Page 9
②. Image effect adjustments
In main menu, please select ,then press"menu"to confirm, later
the unit will enter the next layer menu of as following image:
IMAGE ADJUSTMENT
Secondly you may select the function such as contract, brightness, RGB
to adjust the number by press "+/ -"on the unit or " / "button
on the remote controller. If you want to exit the menu, please select ,then
confirm it by press "menu".
③. OSD adjustments
The OSD adjustments is used to adjust the station of OSD menu in screen,
when you need to adjust it, firstly please select in main menu by "</
>"button on the unit or "
/ "on the remote controller, then confirm it
by " menu"button, later the screen will display related information as
following image:
At this time, you may select any function to adjust by "</>"
OSD ADJUST
button on the unit or "
/ "on the remote controller,then adjust them as
your demand by "+/ -"on the unit or " / "button on the remote
controller.
Page 10
:Adjust OSD station in horizontal direction
:Adjust OSD station in vertical direction
:Exit present menu
④. Other parameter( it is valid in AV Mode)
IN main menu, please select
,then press" menu" to confirm by
press "</>"button on the unit or " / "on the remote controller,
later the unit will enter the next layer menu of
as following image:
:
OTHER PARAMETER
:Adjust volume
:NO use
:OSD menu English/Chinese optional
:Get over the default setting
:AV1/AV2/VGA optional
退出:Exit present manu
2~2 The menu operation in AV MODE
When the unit works, by press "AV"button the unit will enter AV1
or AV2 mode, then press "menu"button, the screen will display
OSD menu as following image:
Page 11
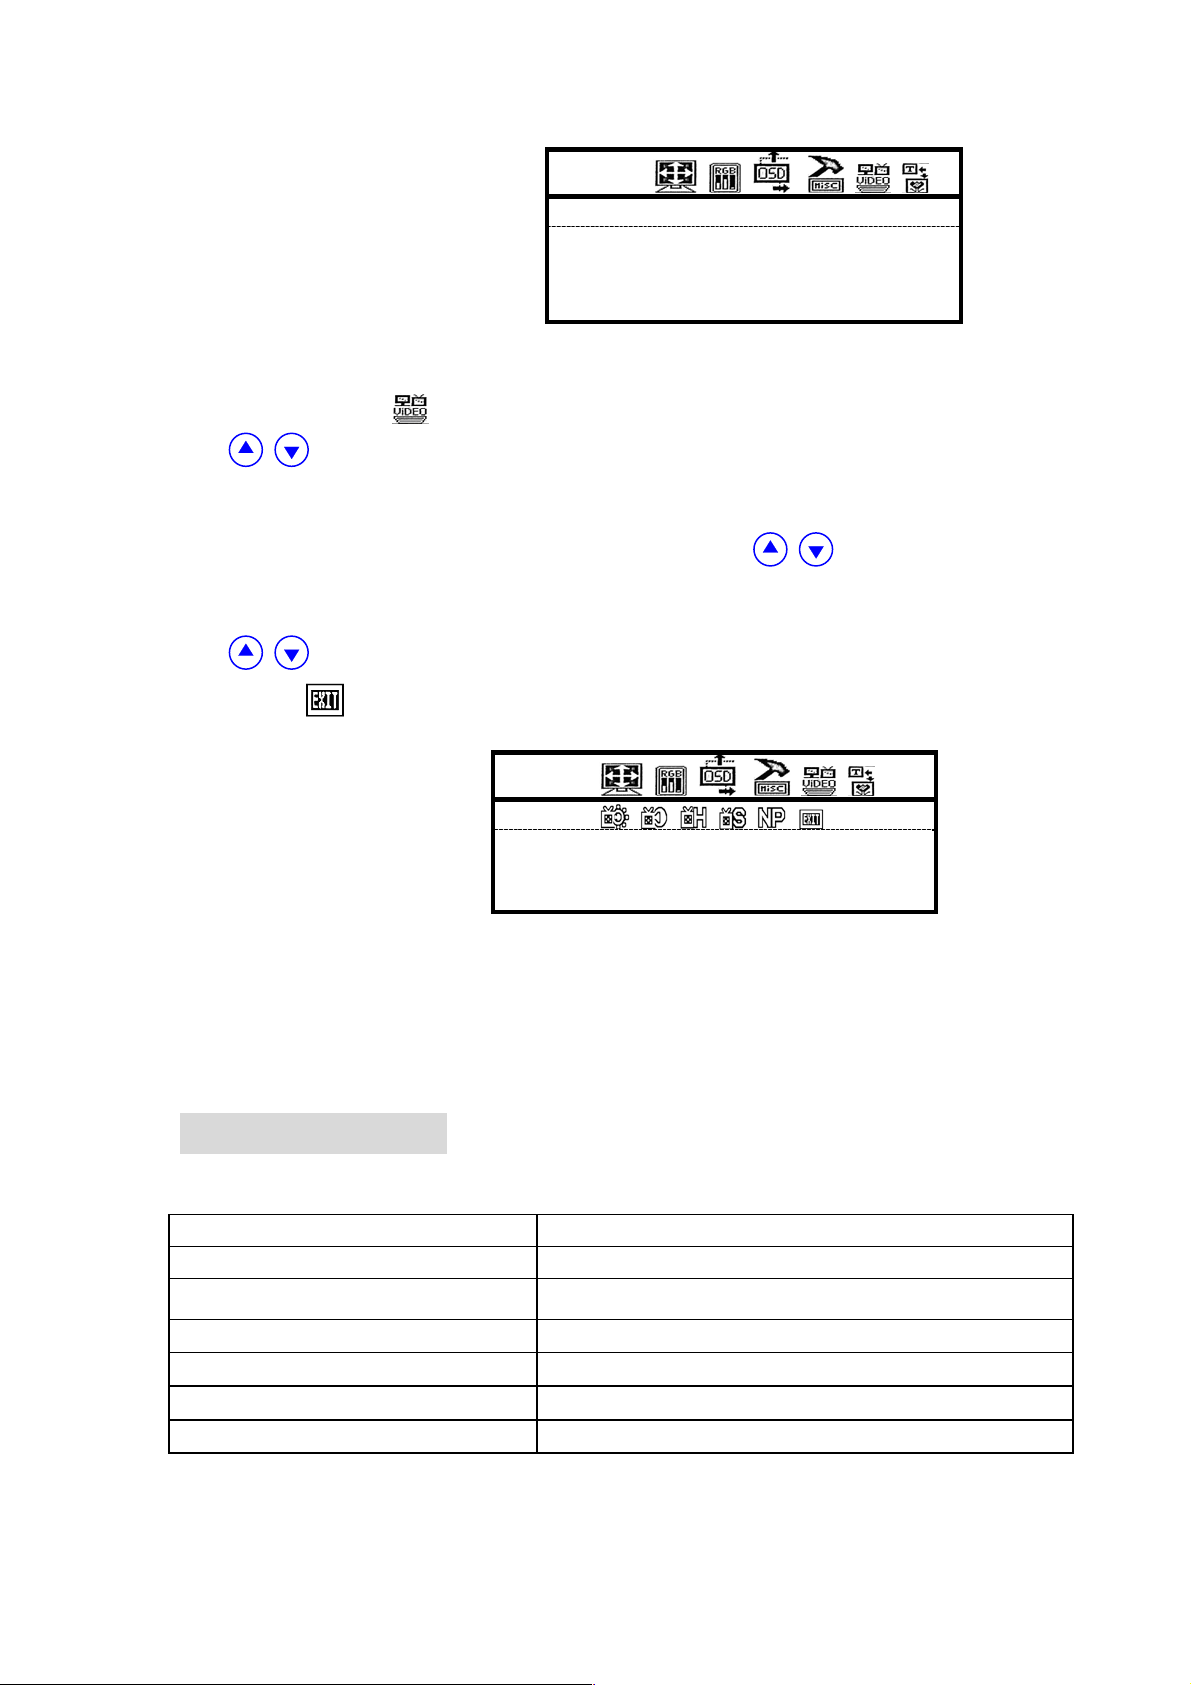
To select function by"</>"button on the unit or ""
/ ""on the remote controller, confirm it by press"menu", then
you will enter the next layer menu, If any demand, you may adjust the
image effect by select the next menu. To active these functions, firstly
select one by"</>"button on the unit or " / "on the remote
controller, secondly
you may adjust the number by press "+/ -"on the unit or "
/ "button on the remote controller to finish your perform. If you
select ,it will go back the main menu.
Note: The adjustment method of volume, language in AV mode as
same as it in VGA mode.
VIDEO
BRIGHTNESS
PARAMETER
Display panel TFT LCD 177mm (7-inch) 1152000 Pixels
Max Resolution 800*480 (VGA)
Average Brightness 400cd/m2
Viewing Angle 130°/105°(Horizontal/Vertical)
Color system PAL-4.43; NTSC-3.58
Input voltage DC10.8V-13.8V
Input Signal PC. AV. AV2
Page 12
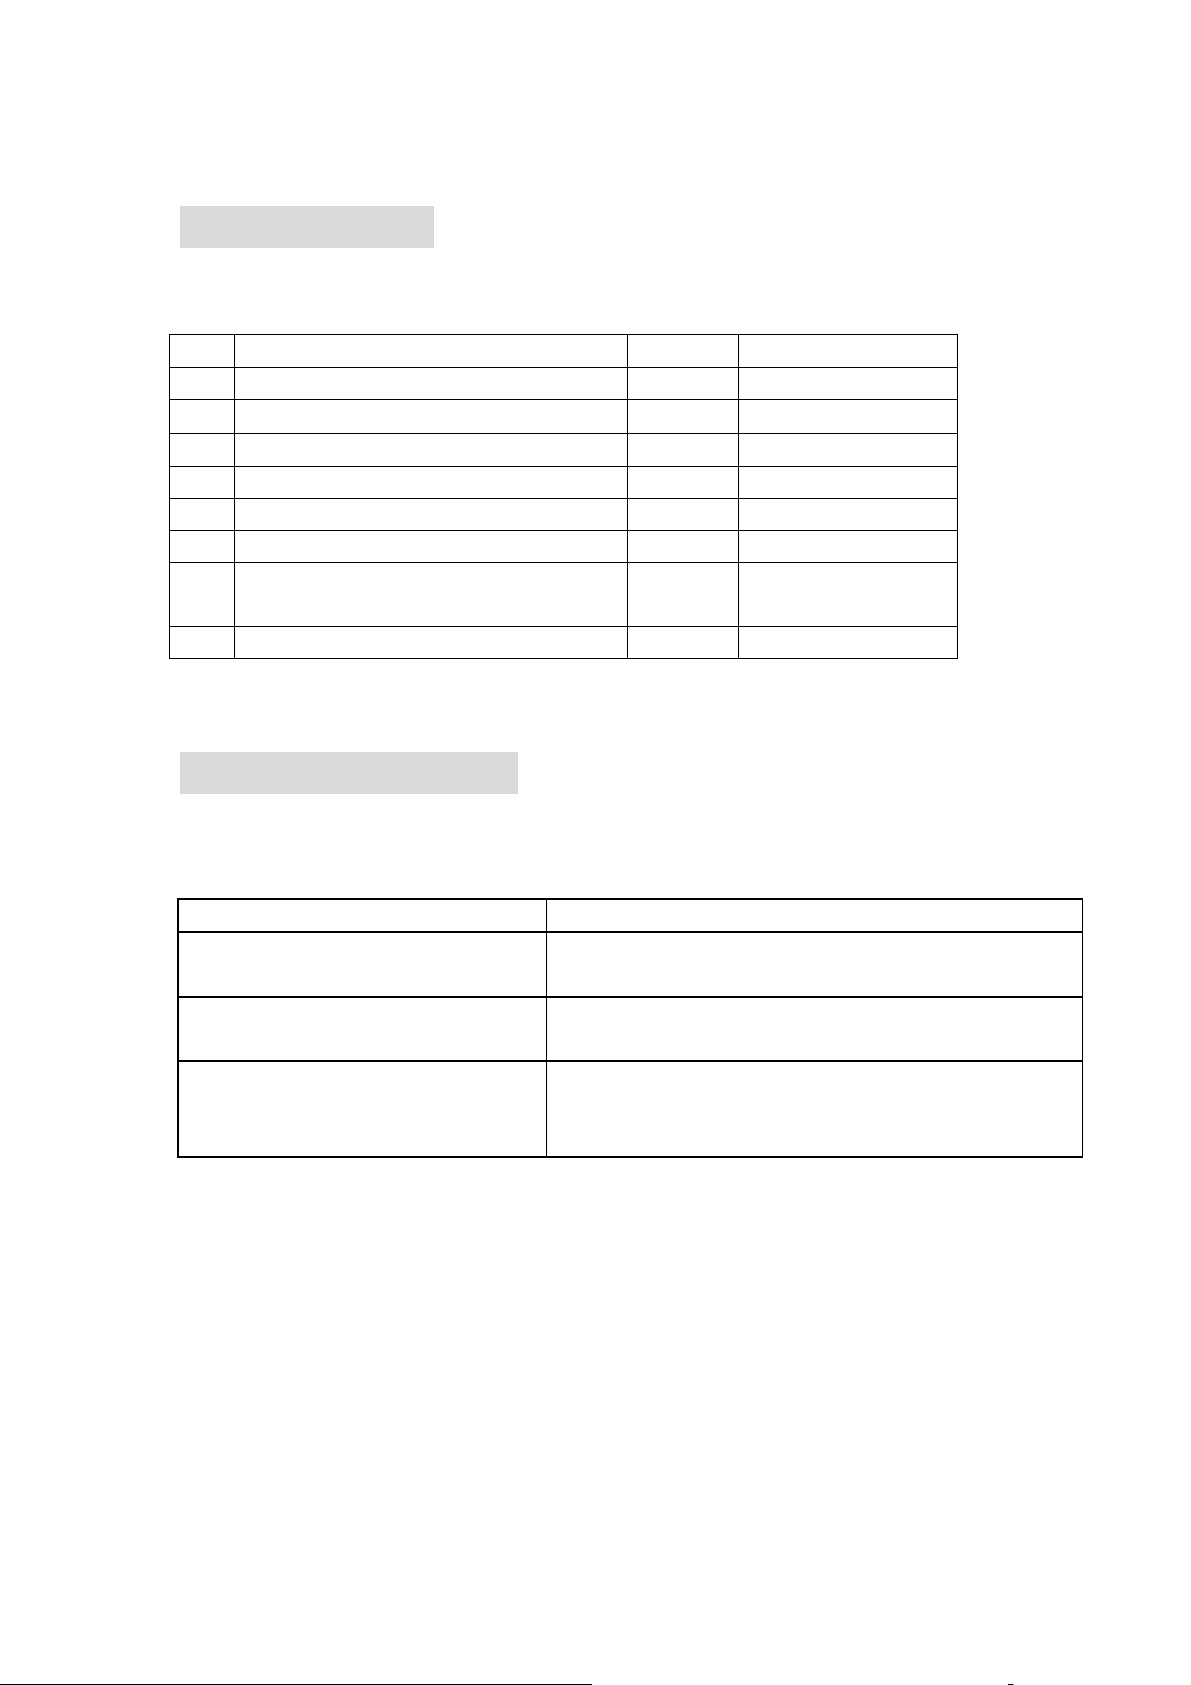
Accessories
no Items Qty Remark
1 TFT LCD Monitor 1piece
2 Remote controller 1piece
3 AV cable 1piece VIDEO & AUDIO
4 VGA SIGNAL CABLE with 9 holes 1piece VGA 、USB
5 Home AC 1piece Optional
6 Product stand 1piece Optional
7 Drive disk ( MATCHEH WITH
TOUCH FUNCTION)
8 Instruction manual 1piece
1piece Optional
Trouble Shooting
1、 In A/V Mode
Case (condition) Countermeasures
Black & white picture The color saturation contrast and brightness are
not proper, adjust "image mode"
No picture Check power input and connections (if the
working indicator light is on)
Remote controller doesn't work,
check if the battery is installed
properly
2、 UNDER THE PC MODE:
① Image unstable
*Press "◄" and retain for one second for automatic adjustment.
*Follow the menu instruction to adjust manually.
*choose correct refresh rate and different aspect ratio.
②Run a short image color check
See if the VGA wire is connected properly, if any pin in VGA jack is bent
or broken, please change it.
Low battery Romote signal is interfered by some
obstructions
Page 13

No image appears ③
*When the red light is on, press the "power" button again, the word "no
signal" will appear on the screen. Please turn on your PC at this moment. If
"over range" appears, please reset the refresh rate.
*When the red lamp is on, press any key of the pc or press power button
of the display.
*When the indicator light is off, please check the power connection.
No clear image, dithered picture④
Please choose the proper resolution and refresh rate.
If there are still some problems, please refer to the distributor.⑤
.
■ REMARK:
*If the image is interrupted accidentally, that is because frequency
of VGA card is not a standard one.
*It is a normal condition that there might be some bright lines appear
on the screen soon after you switch off the monitor.
*In order to prolong the overall working life of the unit, it's recommended
to use the PC power management function.
 Loading...