

Page 1
Page 2
Page 3

DEAR CUSTOMERS
Thank you for purchasing the full-channel liquid crystal display TV. This
2
product employs new integrate circuits (I
putting out with its low power consumption, emits no radiation,and other advantage
characteristics. This product is shaped with modern style and is easy to be carried with. The
color LCD TV set is the most suitable display for cable monitor system, car VCD and GPS
system for motorcars and ships. You will certainly benefit from this monitor in lots was ;to
name some of then : comfort ,safety, space-saving.
We hope that you will have the enjoyment of your new mini color TV set.
To ensure the best use of the unit, please read this handbook carefully beforehand.
C Bus) and high quality TFT LCD modules. It is
NOTICE
1. Please use the adapter attached in the accessory.
2.Do not remove the rear panel of this product. If in need of service
please call a qualified technician.
3、Do not expose this product to direct sunlight, heat or humid
conditions.
4、Keep away from strong light while using this product so as to obtain
the clearest and the most colorful picture.
5、Avoid heavy impact or drop onto the ground.
6、Do not use chemical solutions to clean this unit. Please simply wipe
with a clean soft cloth to keep the brightness of the surface.
Page 4
1.FIGURE ---------------------------------2.REMOTE CONTROLLER --------
FIGURE
CONTANTS
3.MATCHED CABLE---------------------
4. OPERATION --------------------------
5. ACCESSORIES -----------------------6.PARAMETER -------------------------7.TROUBLESHOOTING-----------------
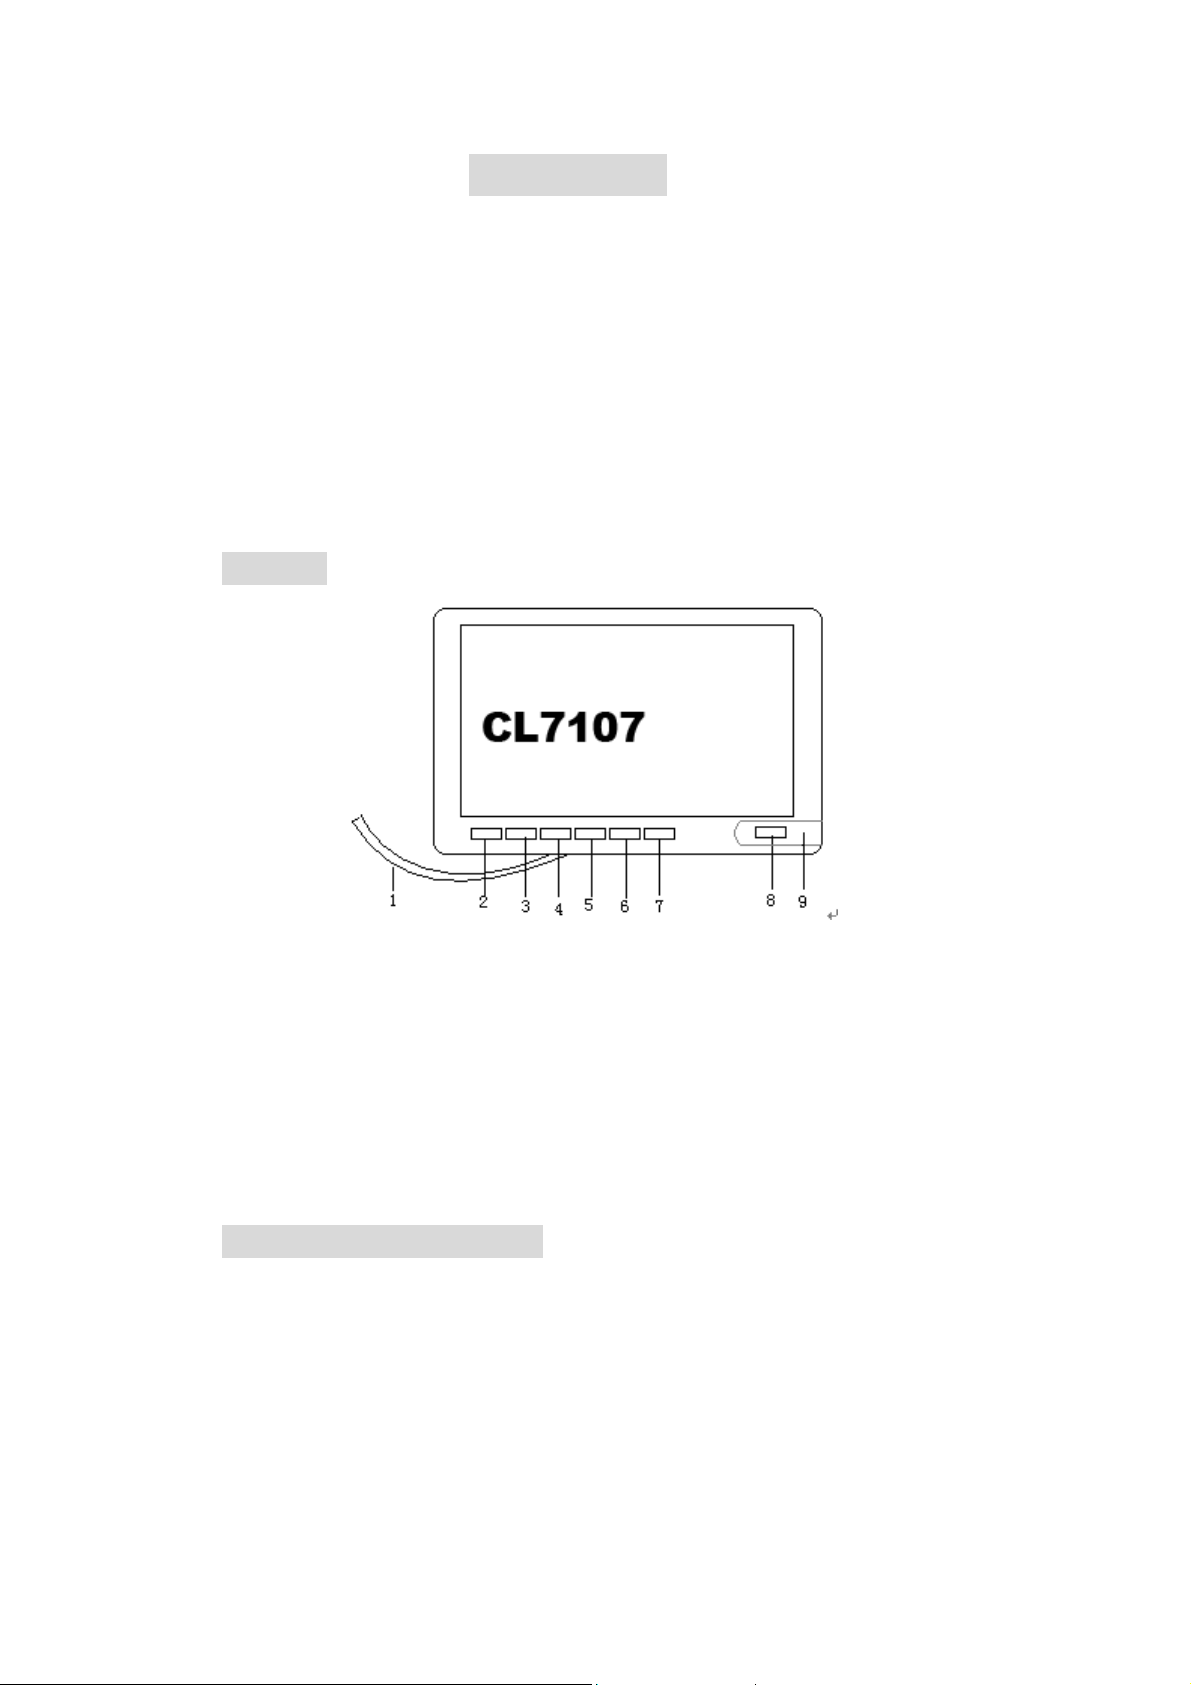
1. 9-pin AV cable
2. MENU: To activate OSD menu
3. VOL- : Volume decrease or to adjust the setting value of the function
4. VOL+: Volume increase or to adjust the setting value of the function
5. A/V : AV1,AV2 switch
6. L/R : Invert image left and right
7. U/D : Invert image up and down
8. POWER: Power on/off
9. Infrared receiving window~~~
REMOTE CONTROLLER
Page 5
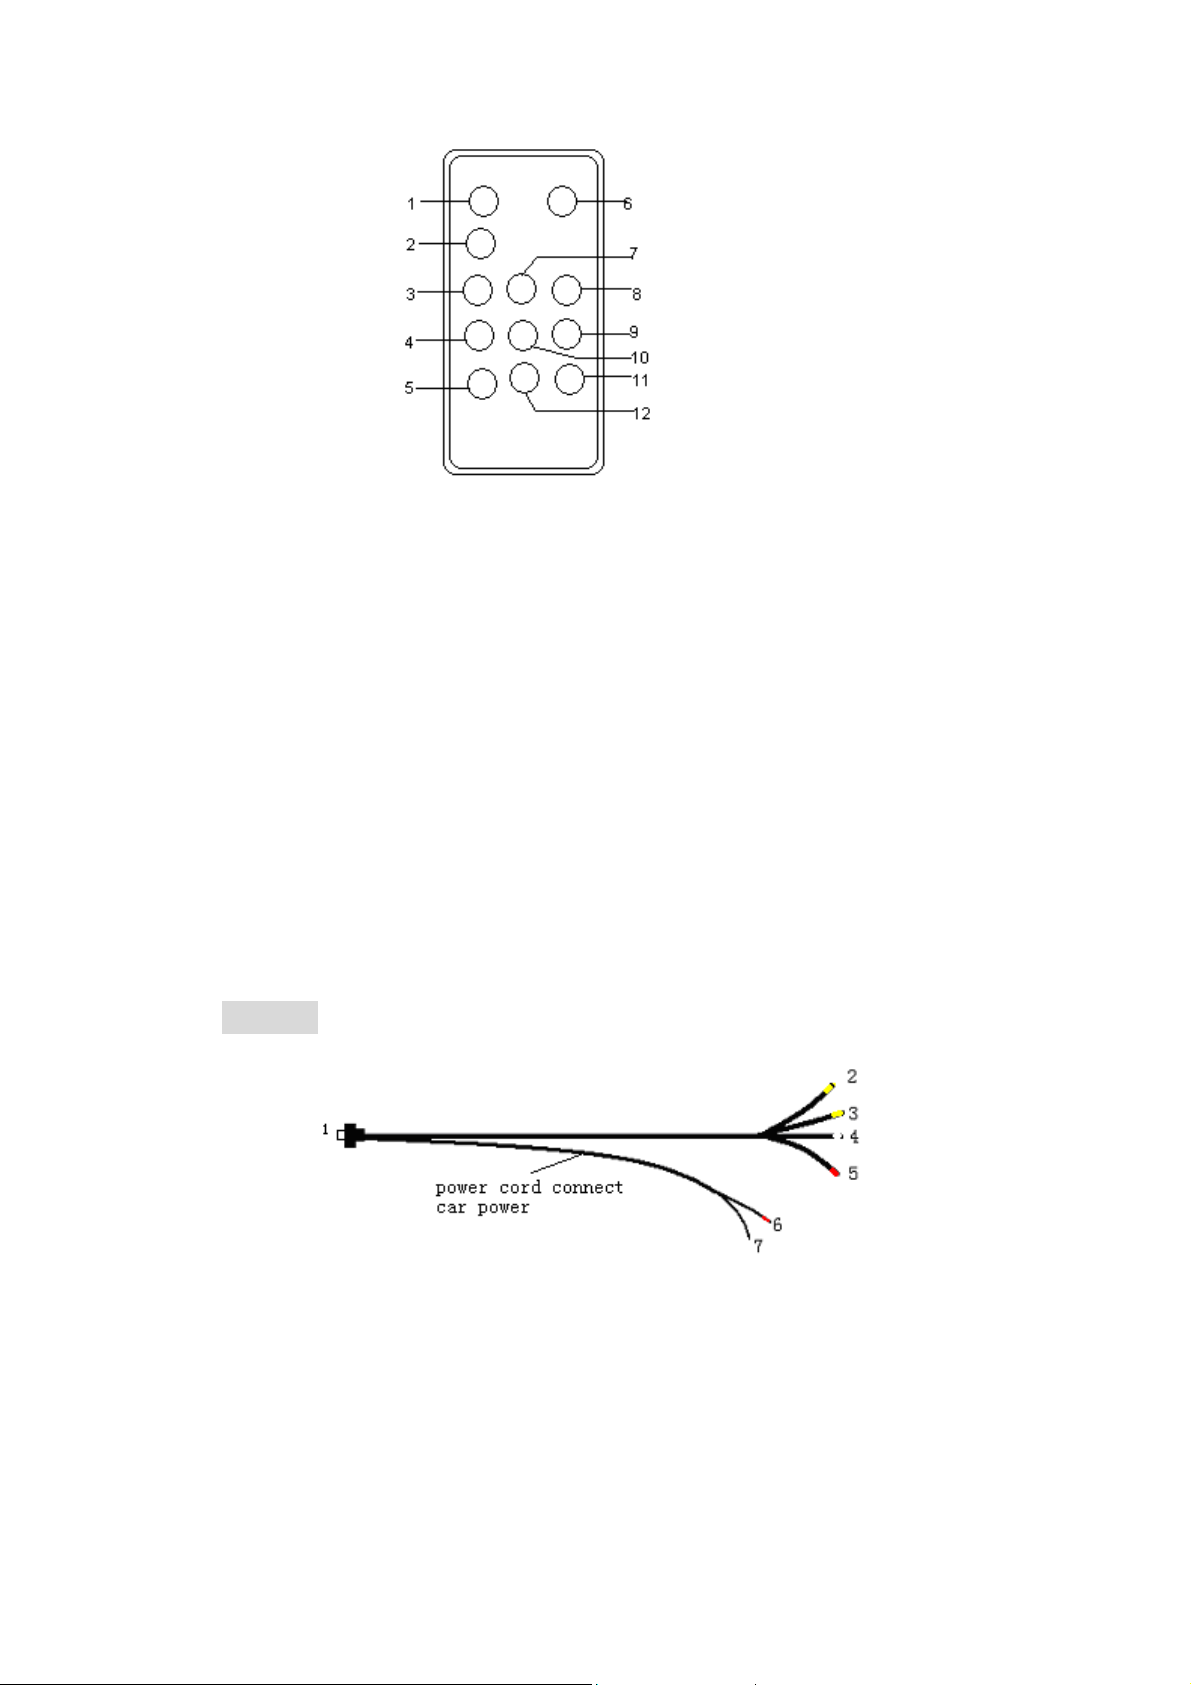
1. MUTE
2. DISPLAY SCALE SWITCH
3. AV SWITCH
4. < :Volume down or to adjust the setting value of function
5. To witch display mode
6. Power on / off
7. ^ : To select function on OSD menu
8. L/R: To switch image left and right
9. >: Volume up or to adjust the setting value of function
10. To activate OSD menu
11. To switch picture system: soft , standard, vivid.
12. To select function on OSD menu
CABLE
1.9-pin signal cable 2. Yellow video1 signal input jack
3. Yellow video2 signal input jack 4. White left volume input jack
5. Red right volume input jack 6. Red is anode
7. Black is ground
Page 6
OPERATON
Attention : When installing the unit ,make sure the 9-pin plug of the A/V
cable enclosed aim at the 9-pin A/V signal input jack of the unit and insert.
Then the other ends of the cable should be connected to the correspond signal
(Yellow for video1 and video2 signal ;White is for left volume, Red is for right
volume; “6”of cable is connect car power, the”7”of cable is ground). The input
voltage should be between DC11v-13v. Ensure to use output power is larger
than 10w, or it will not work properly!
1. A V1/AV2
After connecting the power, the monitor will be at standby state. Press “POW” button of
the unit or “Pow” on the remote controller, the monitor begins to work, and press the same button
again, the monitor return to standby state .When the unit is working you can press AV to switch
inputted signal between AV1 and AV2.
2. volume
You can turn down or turn up volume by pressing - / + on the unit or press < / > on the
remote controller.
3. picture
It is applied to adjusting brightness, contrast ,color of the image on OSD menu. Note ,if
there is not further operation the menu will disappear in 10 seconds .Press MENU once to activate
the PICTURE item ,it will appear as picture .Press ^ or v on the remote controller to select the
function such as BRIGHT, CONTRAST , COLOR then press < or > to adjust the value of
function .Or you can press FUNC on the unit to activate BRIGHT CONTRAST COLOR in turn
then press – or + (vol-/vol+) to adjust the value.
function then use < / > to adjust . Select CLOCK for instance you can press </> to set the initial
time. Then press ^/ V to select TIME ON or TIME OFF .TIME OFF is use to set the time you
want the unit turn off automatically .If you set CLOCK AT 14:00 and set the TIME OFF at 14:30
the unit will turn off in 30 minutes. TIME ON is to set the time you want the unit to turn on
automatically. Alarm clock is also designed in the unit to alert you at the given time. Select
ALARM to set the time by pressing < / > , the unit will be blue screen and the current time after
timing.
4. timer
Press MENU a second time it will activate TIMER item . Press ^/V to select the
PICTURE
BRIGHTNESS 32
CONTRAST 40
COLOR 32
TIMER
TIME -- /-ON -- / -OFF --/ -ALARM --/-CH-TIME --/-POS. 0
Page 7
CH-TIME means to set the time of predetermined channel to turn on automatically, after
setting the time press < / > to set the channel number you demanded at POS .
5. function
Press three times to activate the FUNCTION .as picture.
BLUE SCREEN : When you set the BLUE SCREEN on, it means it will be blue screen
when there is no signal. Press ^ / v to select BLUE SCREEN then press </> to set it on.
COLOR: You can set the color system automatically by carry out the COLOR AUTO .
INPUT: It is to show the present signal inputted.
X-TURN: Carry out X-TUURN ON to invert image left and right
Y-TURN: Carry out Y-TUURN ON to invert image up and down
LANG: Press </> to choose the language of the menu after selected it .Such as English
Chinese.
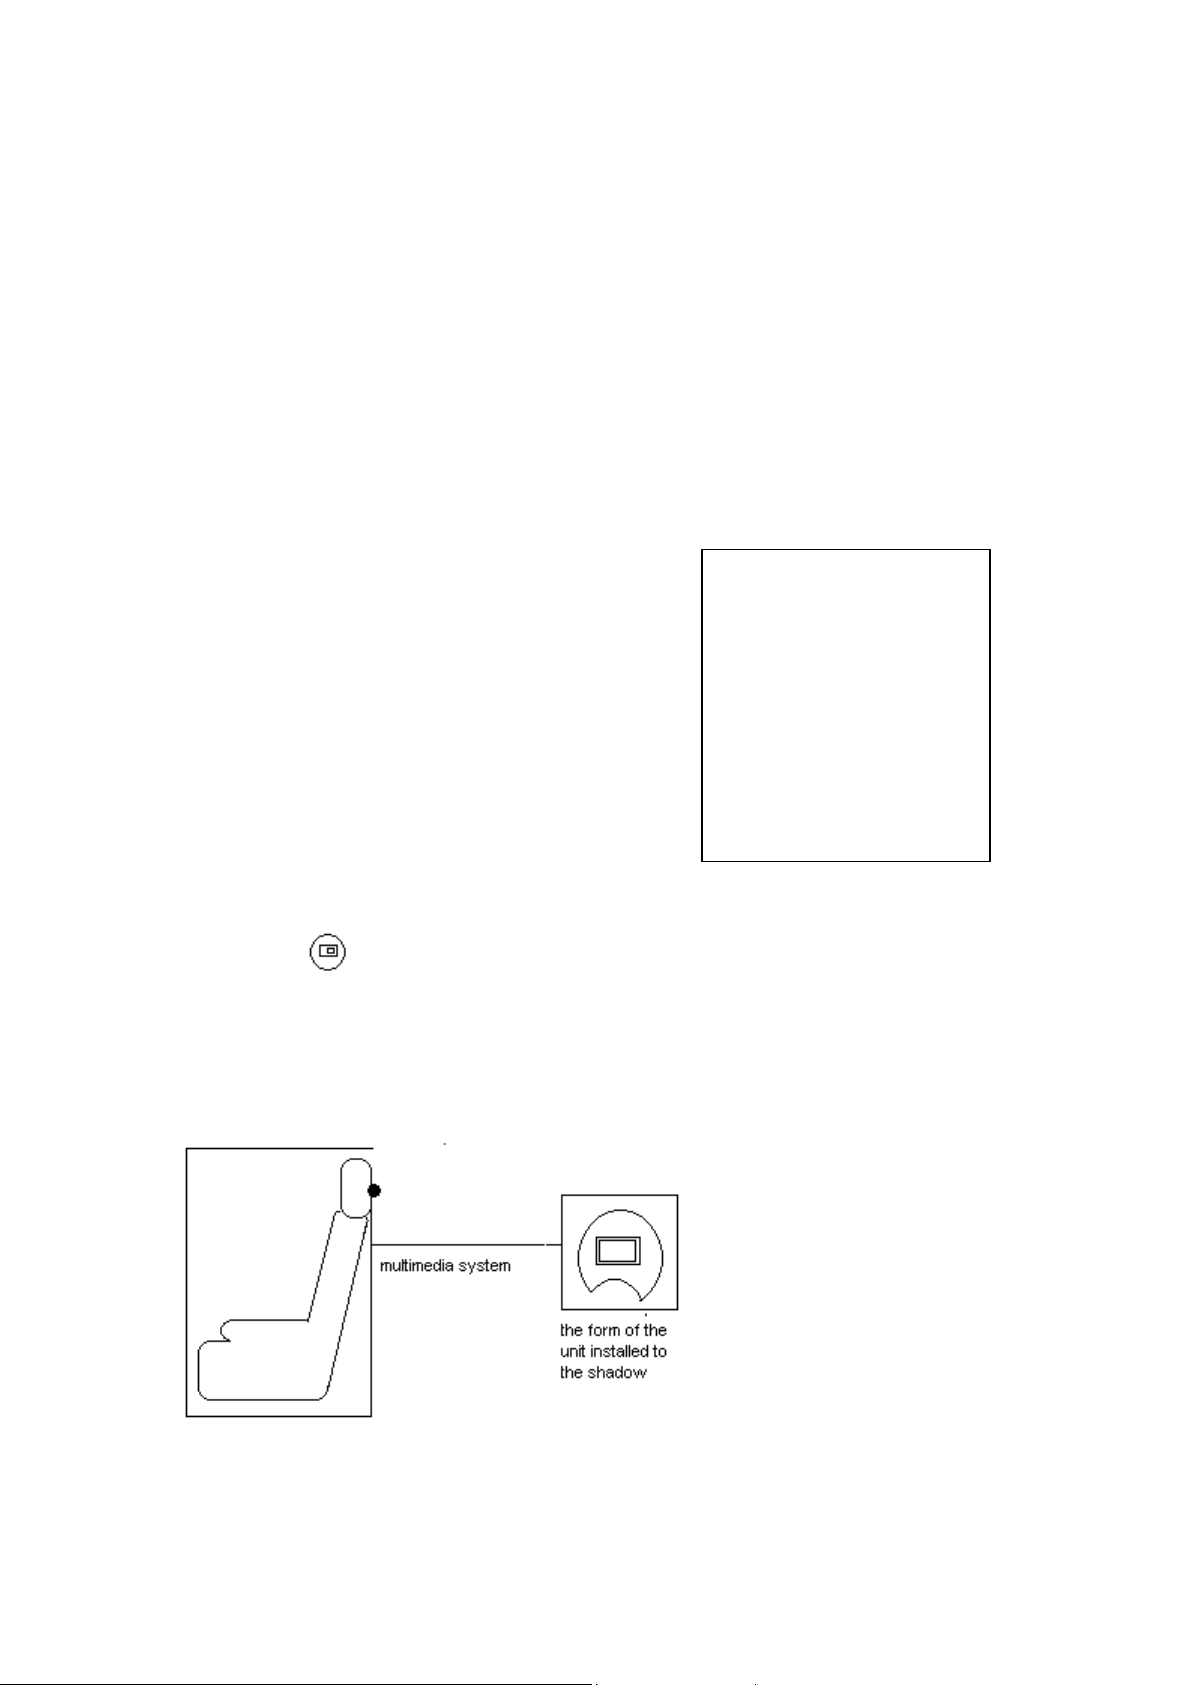
It is approved to invert image up and down or left and right just as mentioned above .You
FUNCTION
BLUE SCREEN ON
AUTO SHUT ON
SOUND D/K
COLOR AUTO
INPUT
X-TURN ON
Y-TURN OFF
LANG CHIN/ENG
also can press
6. installation
on the remote controller to switch the display scale between 16:9 and 4:3.
Page 8
ACCESSORIES
Remote controller 1piecer
A/V cable 1piece
Bracket 1piece
Operation manual 1copy
AC adapter 1 piece (optional)
Wireless earphone 1 piece(optional)
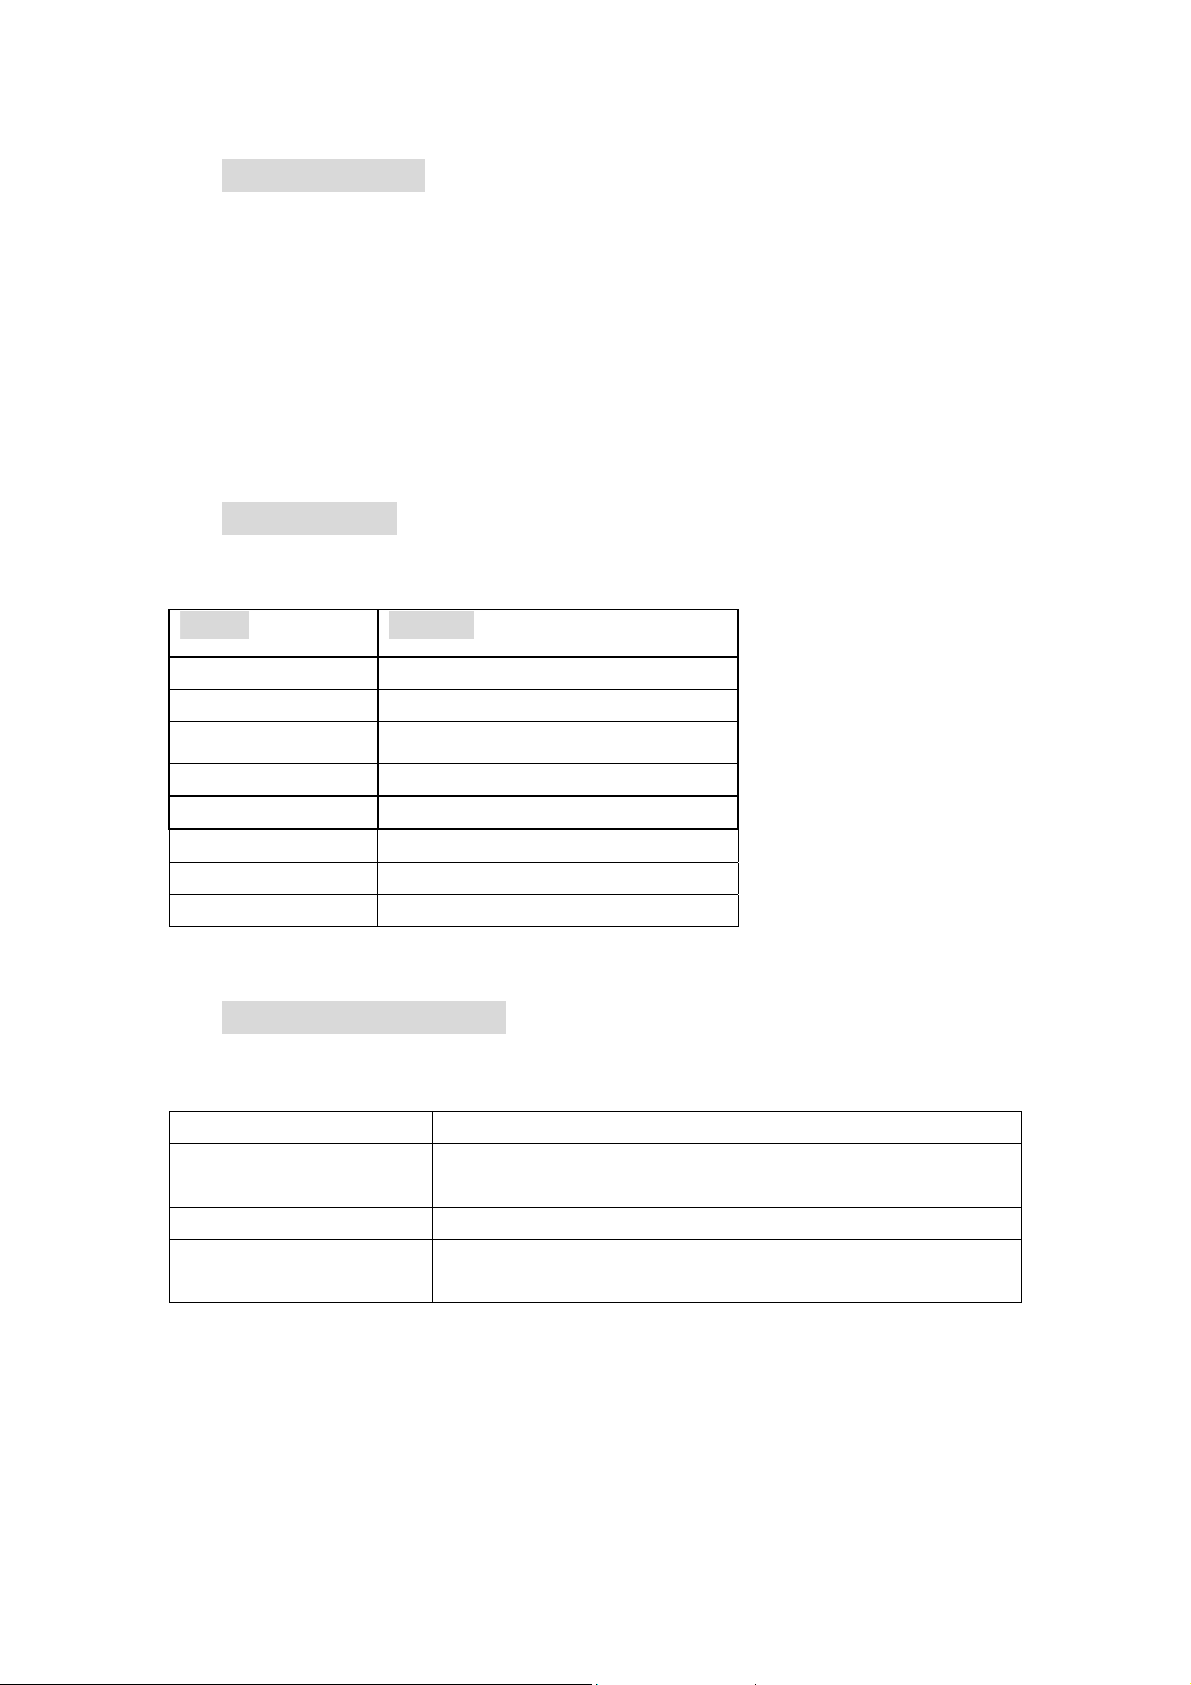
PARAMETER
Model CL7107
Display panel 7’’TFT LCD 178mm (16:9)
Resolution 336960pixels (480*234)
Brightness 300cd/m2
Viewing Angle 30/10(U/D),45/45(L/R)
Color system PAL-4.43; NTSC-3.58
Contrast 150:1
Size 200*144*29(mm)
Weight 500g
TROUBLESHOOTING
CASE COUNTERMEAUSE
Only black &white picture The color saturation contrast and brightness are not proper ,adjust
PICTURE
No picture To check power inputted and connection
Remote controller doesn’t
work
To check if the battery is out , installed properly Remote signal is
interfered by some obstruction.
 Loading...